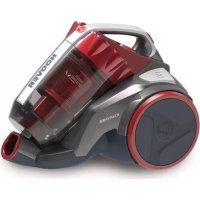
USER MANUAL Khross KS50PET 011 HOOVER
INSTRUCTIONS FOR SAFE USE
This appliance should only be used for domestic cleaning, as described in this user guide. Please ensure that this guide is fully understood before operating the appliance.
Do not leave the appliance plugged in. Always switch off and remove the plug from the socket after use, or before cleaning the appliance or any maintenance task.
This appliance can be used by children aged from 8 years and above and persons with reduced physical, sensory or mental capabilities or lack of experience and knowledge if they have been given supervision or instruction concerning use of the appliance in a safe way and understand the hazards involved. Children shall not play with the appliance. Cleaning and user maintenance shall not be made by children without supervision.
If the power cord is damaged stop using the appliance immediately. To avoid a safety hazard, an authorised HOOVER service engineer must replace the power cord.
Keep hands, feet, loose clothing and hair away from rotating brushes.
Use only attachments, consumables or spares recommended or supplied by HOOVER.
Static electricity: Some carpets can cause a small build up of static electricity. Any static discharge is not hazardous to health.
Do not use your appliance out of doors or on any wet surface or for wet pick up.
Do not pick up hard or sharp objects, matches, hot ashes, cigarette ends or other similar items.
GB
Do not spray with or pick up flammable liquids, cleaning fluids, aerosols or their vapours.
Do not run over the power cord when using your appliance or remove the plug by pulling on the power cord.
Do not continue to use your appliance if it appears faulty.
HOOVER service: To ensure the continued safe and efficient operation of this appliance we recommend that any servicing or repairs are only carried out by an authorised HOOVER service engineer.
Do not stand on or wrap the cord around arms or legs when using your appliance.
Do not use the appliance to clean animals or people.
Do not position the appliance above you when cleaning the stairs.
The Environment
The symbol on this appliance indicates that this appliance may not be treated as household waste. Instead it must be handed over to the applicable collection point for the recycling of electrical and electronic equipment. Disposal must be carried out in accordance with local environmental regulations for waste disposal. For more detailed information about treatment, recovery and recycling of this appliance, please contact your local city office, your household and waste disposal service or the shop where you purchased the appliance.


This appliance complies with the European Directives 2014/35/EU, 2014/30/EU and 2011/65/EU.
CANDY HOOVER GROUP S.r.l. Via Privata Eden Fumagalli, 20861 Brugherio (MB) Italy
GETTING TO KNOW YOUR CLEANER
A. Cord Reel Pedal B. Exhaust Filter Cover C. Exhaust Filter D. Parking Slot E. On/Off Pedal F. Dust Bin Release Button G. Dust Container Assembly H. Main Body I. Hose J. Suction Regulator K. Hose Handle L. Telescopic Tube M. Telescopic Tube Adjuster N. Floor Type Selector Pedal O. & O1. Carpet and Floor Nozzle (GP) O2. Carpet Nozzle (CA) O3. Hard Floor Nozzle (HF) P. Dust container flap Q. Dust container flap release button B. Dust Container S. Multi-cyclone separation unit T. Pre-motor filter U. Dust container cover V. 2 in 1 Accessory W. Pet Hair Remover Mini Turbo Nozzle X. Allergen Remover Mini Turbo Nozzle Y. Parquet Nozzle*
ASSEMBLING YOUR CLEANER
Remove all components from the packaging.
- Connect the hose to the cleaner main body, ensuring it clips and locks into position. To release: simply press the button on the hose end and pull. [1]
- Connect the hose handle to the upper end of the extension tube [2], or accessories if required.
- Connect the lower end of the extension tube to the Carpet & Floor nozzle** [3] or accessories if required.
USING YOUR CLEANER
- Extract the power cord and plug it into the power supply. Do not pull the cord beyond the red marker. [4]
- Adjust the telescopic tube to the desired height by moving the telescopic tube adjuster up and raising or lowering the handle to the most comfortable cleaning position. [5]
*Certain Models Only** Certain models only, nozzles may vary according to model.
- Carpet and Floor Nozzle** - Press the floor type selector on the nozzle [6] to select the ideal cleaning mode for the floor type.
Hard Floor - Brushes are lowered to protect the floor.
Carpet - Brushes are raised for deeper cleaning.
Carpet & Floor Nozzle**: [7]
- Hard floors Cleaning: Press the pedal on the nozzle to Hard Floor mode and adjust the slider on the nozzle to ALL FLOORS. In this position, brushes, wheels, and wiper blade are lowered to protect hard floors. [7a]
- Standard Carpet & Rugs Cleaning: Press the pedal on the nozzle to Carpet mode and adjust the slider on the nozzle to ALL FLOORS. In this position, brushes and wiper blade are raised while wheels are lowered to allow perfect ease of movement on such surfaces. [7b]
- Deep Carpet Cleaning: Press the pedal on the nozzle to Carpet mode and adjust the slider on the nozzle to DEEP CARPET CLEANING. In this position, brushes, wheels, and wiper blade are raised for deeper cleaning of your carpet. [7c]
WARNING: It is recommended to avoid potential scratching of wooden floors that the pedal is not set on hard floor mode and the slider on deep carpet cleaning.
- Switch the cleaner on by pressing the on/off pedal on the cleaner main body. [8]
- Adjust the suction regulator on the handle to the desired level. [9]
- Switch off at the end of use by pressing the on/off pedal. Unplug and press the cord reel pedal to wind the power cord back into the cleaner. [10]
PARKING AND STORAGE SECTION
The tube and the nozzle can be parked on the back of the cleaner for storage or temporary storage while in use.
ACCESSORIES AND NOZZLES
To obtain the best performance and efficiency it is recommended that the correct nozzles are used for the main cleaning operations. These nozzles are indicated in the diagrams by the letters GP, HF or CA.
A nozzle type GP can be used to clean both carpet and hard floor.
A nozzle type HF is suitable for use only on hard floor.
A nozzle of type CA is suitable for use only on carpet.
The other nozzles are accessories for specialist cleaning tasks and are recommended for occasional use only.
All accessories can be fitted to the end of the hose handle or to the end of the telescopic tube.
2 in 1 tool - Combines several functions into one tool:
Dusting Brush - For bookshelves, frames, keyboards and other delicate areas.
Crevice Tool - For corners and hard to reach areas.
Parquet Nozzle* - For parquet floors and other delicate floors.
Pet Hair Remover Mini Turbo Nozzle - Use the mini turbo nozzle on stairs or for deep cleaning on textile surfaces and other hard to clean areas. Particularly suitable for pet hairs removal.
Allergen Remover Mini Turbo Nozzle* - Use the mini turbo nozzle on stairs or for deep cleaning on textile surfaces and other hard to clean areas. Particularly suitable for allergen removal.
IMPORTANT: Do not use the Mini Turbo nozzles on rugs with long fringes, animal hides and carpet pile deeper than 15mm. Do not keep the nozzle stationary while the brush is rotating.
CLEANER MAINTENANCE
Emptying the Dust Container
When the dust reaches the max level indicator in the container, empty the dust container.
IMPORTANT: To maintain optimum performance, do not allow the dust to sit higher than the max level.
- Turn off the cleaner by pressing the on/off pedal and unplug the power cable. [8]
- Press the dust container release button and remove the dust container assembly from the cleaner. [12]
- Hold the dust container with one hand and press the dust container empty button to empty the dust. [13]
- Close the dust container flap and refit it to the main body.
Cleaning the Washable Filters
The cleaner is fitted with a pre-motor filter and an exhaust filter. To maintain optimum cleaning performance, regularly remove the filters and tap them against the side of the dust container to release dust. The filters should be washed every 5 cassette empties or when the filters have excessive dust level.
IMPORTANT: All bagless cleaners require regular filter cleaning. Failure to clean your filters may result in air blockage, overheating, and product failure. This may invalidate your guarantee.
IMPORTANT: Regularly check and maintain the filters.
IMPORTANT: Always ensure the filters are fully dry before use.
To access the pre-motor filter:
- Remove the dust container from the cleaner by pressing the dust container release button. [12]
- Hold the dust container with one hand and remove the dust container cover by rotating anti-clockwise with the other hand. [14]
- Remove the pre-motor filter assembly from dust container assembly. [15]
- Gently tap and wash the pre-motor filter. Do not use hot water or detergents. Remove excess water from the filter and leave to dry fully before re-using. [20,21]
- Reassemble the pre-motor filter assembly once fully dry and refit to the cleaner.
To access the exhaust filter:
- Unclip the exhaust filter cover from the rear of the cleaner main body. [18]
- Remove the exhaust filter from the rear of the cleaner. [19]
- Gently tap and wash the filter using warm water. Do not use hot water or detergents. Remove excess water from the filter and leave to dry fully before re-using. [20,21]
- Refit the exhaust filter to the rear of the cleaner once fully dry and refit the exhaust filter cover.
IMPORTANT: Do not use the product without the filter pack fitted.
*Certain Models Only
** Certain models only, nozzles may vary according to model
Cleaning the dust container / separation unit
This cleaner uses a separation system unique to Hoover. If necessary, the separation unit can be disassembled from the dust container and cleaned.
- Press the dust container release button and remove the dust container assembly from the cleaner. [12]
- Hold the dust container with one hand and remove the dust container cover by rotating it anti-clockwise with the other hand. [14]
- Remove the pre-motor filter assembly from the dust container assembly. Then remove the multi-cyclone separation unit from the dust container by pulling it. [15,16]
- If necessary, use a cloth to remove excessive dust from the multi-cyclone separation unit surface. [17]
- If necessary, rinse the dust container with lukewarm water. Wash internal surfaces of the dust container with water only. DO NOT use soap or detergents to wash the internals of the dust container.
- Reassemble the internal and the pre-motor filter to the dust container.
- Reassemble the dust container cover to the dust container. Refit the dust container to the cleaner main body.
Removing a blockage
- Check if the dust container is full. If so, refer to 'Emptying the dust container'.
- If the dust container is empty but suction is still low:
A. Do the filters need cleaning? If so, refer to 'Cleaning the washable filters'. B. Check if there is any other blockage in the system - Use a rod or pole to remove any blockage from the extension tube or flexible hose. C. Check if pre-motor filter is fitted. D. Check if the separation unit needs to be cleaned. Refer to 'Cleaning the separation unit'.
USER CHECKLIST
Should you have a problem with the product, complete this simple user checklist before calling your local Hoover service.
- Is there a working electricity supply to the cleaner? Please check with another electrical appliance.
- Is the dust container over-filled? Please refer to 'Cleaner Maintenance'.
- Is the filter blocked? Please refer to 'Cleaner Maintenance'.
- Is the hose or nozzle blocked? Please refer to 'Removing a blockage from the system'.
- Has the cleaner overheated? If so, it will take approximately 30 minutes to automatically reset.
Hoover spares and Consumables
Always replace parts with genuine Hoover spares. These are available from your local Hoover dealer or direct from Hoover. When ordering parts always quote your model number.
Hoover Service
Should you require service at any time, please contact your local Hoover Service Office.
Quality
Hoover's factories have been independently assessed for quality. Our products are made using a quality system which meets the requirements of ISO 9001.
Your Guarantee
The guarantee conditions for this appliance are as defined by our representative in the country in which it is sold. Details regarding these conditions can be obtained from the dealer from whom the appliance was purchased. The bill of sale or receipt must be produced when making any claim under the terms of this guarantee.
Subject to change without notice.
SAFETY INSTRUCTIONS FOR USE
PARKING AND STORAGE SECTION
Do not vacuum up hair or sharp objects, matches, hot ash, cigarette butts, or other similar objects.
Carpet - The brushes are raised for deep cleaning.
MAINTENANCE OF THE VACUUM CLEANER
Emptying the dust container
When the dust reaches the maximum level indicator in the container, the dust container must be emptied.
IMPORTANT: To maintain optimal performance, do not let the dust level rise above the maximum level.
The carpet brushes are pulled up for deeper cleaning.
End of section
The symbols on the product indicate that the product must not be treated as household waste. Instead, the product must be handed over to a designated collection point for recycling of electrical and electronic equipment. The disposal must be carried out in accordance with local regulations for environmentally sound disposal and recycling. For more detailed information on treatment, recovery, and recycling of this product, please contact your local city office, the household waste disposal service, or the shop where you purchased the product.

This product complies with European directives 2014/35/EC, 2014/30/EC, and 2011/65/EC.
CANDY HOOVER GROUP s.r.l. Via Privata Eden Fumagalli, 20861 Brugherio (MB) Istanbul
CONNECTING TO THE VACUUM CLEANER
A. Pedal for cable winding B. Dust bag compartment cover C. Exhaust filter D. Remote control E. On/Off pedal F. Release button for the dust bag compartment G. Dust bag compartment H. Main body of the vacuum cleaner I. Hose J. Suction power regulator K. Hose handle L. Telescopic tube M. Telescopic tube regulator N. Pedal for selecting floor type O. &O1. Floor nozzle (GP)** O2. Carpet nozzle (CA)* O3. Hard floor nozzle (HF) P. Dust bag compartment cover Q. Release button for the dust container R. Dust container S. Multi-cyclone separator T. Motor filter U. Dust bag compartment cover V. Accessories 2-in-1 W. Mini turbo nozzle for upholstery X. Mini turbo nozzle for pet hair Y. Parquet nozzle*
CONNECTING THE VACUUM CLEANER
Remove all components from the packaging.
1. Connect the hose to the main body of the vacuum cleaner, pushing it until it clicks into place. To release it: simply press the button at the end of the hose and pull. [1] 2. Connect the handle and hose to the upper end of the telescopic tube [2] and accessories, if necessary. 3. Connect the other end of the telescopic tube to the floor nozzle [3] and accessories, if necessary.
USING THE VACUUM CLEANER
- Pull out the power cord to the required length. Do not pull the cord beyond the red marking. [4]
- Adjust the telescopic tube to the desired height by sliding the regulator and moving the tube up or down until the handle reaches the most comfortable position for cleaning. [5]
- Floor nozzle** - Press the selector for floor type [6], select the appropriate cleaning mode for the floor type.
Hard floor - brushes are lowered for hard floors. Carpet - brushes are raised for deeper cleaning.
Carpet nozzle**: [7]
- Cleaning hard floors: Press the pedal of the nozzle to the hard floor mode and adjust the side brushes to the desired position. In this mode, the brushes, wheels, and bristles are lowered to protect hard floors. [7a]
- Cleaning standard carpets and rugs: Press the pedal of the nozzle to the carpet mode and adjust the side brushes to the desired position. In this mode, the brushes are raised to allow the vacuum cleaner to move easily over carpets. [7b]
- Deep cleaning of carpets: Press the pedal of the nozzle to the carpet mode and adjust the side brushes to the deep cleaning position. In this position, the brushes, wheels, and bristles are raised for deeper cleaning of carpets. [7c]
PNEpyPKEKHEME: Pnpopnpucae Ja 364baute noteHuaNHO OpaackBaHe Ha bpeBHe NnoDGE, KoraTo naeTbHe E noCTaBe H pexkMa 3a TBpJa noOBA NaCTIIKA cnaJIepBT Ha bIbKO KaIOCTBaHe HA KNIMM.
- Bknocheta npaxocmykaKaTATA KOHATnCHETe neda BKn./M3Kn. Bbpyk KOPnyca i. [8] HactpoiTe perynatop 3a 3acmykBaHe Ha dpbkkata do keJahOHO HBO.[9]
- ɪnknohete, kʊrato πρκnloHte, kato hattchete nepa Bkr./Makr.ɪzknHcHete ot KOHTA tən NaNTChete nepa Ha nopKaTa 3a Ka6ena, 3a Da HabHete 3axpaHbaɪŋa Ka6en o6pTaHo 8 npaxOcMykAukata. [10]
OTDAIEHEH3A NAPKUPAHEN CBXPAHEHNE
TpbaTnHaKpaHnKbMOrat Da Ce npaKaTaO3JaHtAe TpaHa Ha npaxocMyKaKaTa 3a CbxaPahBaHe HmBpeMeHHo np6puHne no BpeMe Ha ynoTpe6a. [11]
BG
PINHAADLEXHOCTN HAKPAHNIU
3a noctTnHa He haH-do6pa pa6ota n efeKTNBHOCT ce npenopbUba H3non3BaHeTo Ha npabHHn Hakpainu 3a OHOBnHne O noocHTBaHe. Tae HApKanHHnCe noocOoBHa HuaIparPamnE cO bkyBnEg GP, HF nII HA. HakpainnTN GPM OMOe da Hcno3n03Ba 3a noocTBAHe KaKTO Ha KINMM, Taka n Ha TBpDn NOOBOH NactWNI. HakpainnTN Hf e noXdoJAA 3a nNO3BaHe camo Bpxy TBpDn NOOBN HAcpainnTN C A e noXdoJAA 3a nIO1N3BaHe camo Bpxy KINMM.
Dyrrgite Nakpaimnca npinahdNkOCTN 3ne pinaaHn 3aadnn 3naonctBaHe n ce npenobuBnat cama 03 yanptoe npnr neo6bdoMOnCT.
BCHNnPnHAnIEKHOCTMOrA Da ce NcTbA8Ha KpA Ha DpbJckata Ha MapKyua HnHa Kpan Ha TneLEeKnOHNHATA rTpBa.
HhtpymeT 2 B 1-CbyeTaba HAKONKO yHKUNB EeHN HhctpyMeHT: [V]
Yerka 3a npax - 3a nonnun, pAMK, KnaBnatpy n dpyr nnakTHN o6nactn.
HCTpymEn 3a Tecn Mecta-3a bnn n npdyno doctbnn noBnactn.
HakpaimHK 3a napket*-3a napket IN npyRn dnnkathn nooBn hactnIKN. [Y]
MnHn Typ6o HkpaHmK npOTNB KOCmN OT domaHn NIO6mUu*- N3non3BaTe
MINI ironing board for ironing on a table for high pressure on
textile surfaces against each other for smoothing. Especially
suitable for ironing clothes from home. [W]
MINI ironing board against allergies* - Use the MINI ironing board on a table for high pressure ironing of textile surfaces against each other for smoothing. Especially suitable for ironing clothes. [IMPORTANT: Do not use the MINI ironing board on top of other with animal hair or with clothes over 15mm. Do not iron the board, until it is completely dry.
CLEANING AND MAINTENANCE
Emptying the dust container
When the dust reaches the maximum level indicator, empty the container.
IMPORTANT: For optimal performance, do not allow the dust to exceed the maximum level.
1. Turn off the vacuum cleaner, press the on/off button and unplug the power cord.[8] 2. Press the button to release the dust container and remove it from the vacuum cleaner. [12] 3. Hold the dust container with one hand and press the button to release the dust container, to empty the dust.[13] 4. Close the dust container and place it back into the vacuum cleaner.
Cleaning the filters
The vacuum cleaner is equipped with a motor protection filter.
*Only for models **Only for models, the ironing board may be
For optimal cleaning efficiency, clean the filters and empty the dust container regularly. The filters should be cleaned after every 5 uses of the appliance or when the dust level is high. IMPORTANT: Every vacuuming without a filter requires cleaning of the filters. Failure to clean the filters may lead to reduced air flow, overheating and malfunction of the appliance. This may void the warranty.
IMPORTANT: Regularly check and maintain the filters. IMPORTANT: Do not use the appliance without the filters being completely dry.
To reach the filter before the motor:
- Press the button to release the dust compartment and remove it from the vacuum cleaner.[12]
- Hold the dust compartment firmly and pull it away from the vacuum cleaner, turning it counterclockwise and pulling the arrows in the opposite direction.[14]
- Pull the filter out of the motor protector and out of the dust compartment. [15] 4. Carefully inspect the filter. Do not use hot water or detergents. Rinse the filter under running water and let it air dry completely before reinstalling it. [20,21]
- Place the filter back into the motor protector, after it has dried completely, and then insert it back into the dust compartment.
To access the inlet filter:
- Press the latch on the inlet filter from the rear side of the main body of the vacuum cleaner.[18]
- Pull the inlet filter out from the rear side of the vacuum cleaner.[19] 3. Carefully inspect and rinse the filter with cold water. Do not use hot water or detergents. Rinse the filter under running water and let it air dry completely before reinstalling it.[20,21]
- Place the inlet filter back into the rear side of the vacuum cleaner, after it has dried completely, and press the latch to secure the inlet filter.
IMPORTANT: Do not use the appliance without the filter pack installed.
Cleaning the dust compartment / separator block
Your vacuum cleaner uses a separator system, exclusive to Hoover. If necessary, the separator block can be removed from the dust compartment and cleaned.
- Press the button to release the dust compartment and remove it from the vacuum cleaner. [12]
- Hold the dust compartment firmly and pull it away from the vacuum cleaner, turning it counterclockwise and pulling the arrows in the opposite direction.[14]
- Pull the filter out of the motor protector and out of the dust compartment. Then remove the multi-cyclone separator block from the dust compartment by turning it.[15,16]
- 5. If necessary, rinse the dust container with cold water. Wipe the interior surfaces of the dust compartment only with a dry cloth; do not use detergents or cleaning agents on the interior of the dust compartment.
- Remove the inner filter and pre-motor filter from the separation unit. 7. Remove the dust container from the separation unit. Place the separation unit in the dishwasher.
Removing a blockage
- Check if the dust container is full. If so refer to 'Emptying the dust container'.
- If the dust container is empty but suction is still low:
A. Do the filters need cleaning? If so refer to 'Cleaning the washable filters'. B. Check if there is any other blockage in the system - Use a rod or pole to remove any blockage from the extension tube or flexible hose. C. Check if pre-motor filter is fitted. D. Check if the separation unit needs to be cleaned. Refer to 'Cleaning the separation unit'.
CLEARING BLOCKAGES
- Check if the separation unit is full. If so, refer to "Emptying the separation unit." 2. If the separation unit is empty but suction is still weak: A. Do the filters need cleaning? If so, refer to "Cleaning the washable filters." B. Check for any other blockage in the system - Use a rod or pole to remove any blockage from the tube or flexible hose. C. Check if the pre-motor filter is fitted. D. Check if the separation unit needs cleaning. Refer to "Cleaning the separation unit".
CONSUMER CHECKLIST
In case of problems with the appliance, check the consumer checklist below before contacting Hoover service. -Is the appliance plugged in? Check with another electrical outlet. -Is the dust container full? If so, refer to "Emptying the dust container". -Are the filters clogged? If so, refer to "Cleaning the filters". -Is the hose or nozzle blocked? If so, refer to "Clearing blockages". -Is the appliance overheating? If so, it may switch off automatically for about 30 minutes.
IMPORTANT INFORMATION
Hoover spare parts and consumables
Always use genuine Hoover spare parts and consumables. They are available from your Hoover dealer or directly from Hoover. When
ordering parts, please quote your model number.
CepBus Hoover
If you need service, please contact your local Hoover service center.
Quality
Hoover factories have a strict quality assessment. Our products are manufactured according to a quality system that meets the requirements of ISO 9001.
Your warranty
The warranty conditions for this appliance are in accordance with the regulations in the country where it is sold. You can find out the details of these conditions from the seller from whom you purchased the appliance. In case of claims, the warranty conditions must be presented to the sales or authorized service point. Unauthorized modification is not covered.