DSC121 - Slicer MAKITA - Free user manual and instructions
Find the device manual for free DSC121 MAKITA in PDF.

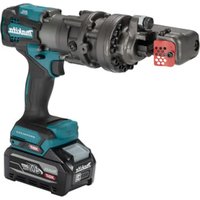
| Product Type | Cordless Threaded Rod Cutter |
| Brand | Makita |
| Model | DSC121 |
| Cutting Capacities | M8, M10, M12, W5/16, W3/8, W1/2 |
| Cutting Speed | Approximately 3 seconds per cut |
| Dimensions (L x W x H) | 212 mm x 323 mm x 260 mm (with handle) |
| Net Weight | 6.0 kg (BL1860B battery included) |
| Rated Voltage | 18 V DC |
| Compatible Batteries | BL1830B, BL1840B, BL1850B, BL1860B (Lithium-ion) |
| Compatible Chargers | DC18RC, DC18RD, DC18RE, DC18SD, DC18SE, DC18SF |
| Sound Pressure Level | 85 dB(A) |
| Sound Power Level | 96 dB(A) |
| Vibration Emission | ≤ 2.5 m/s² |
| Protection System | Overload, overheating, full discharge |
| Intended Use | Cutting threaded rods |
| Maintenance | Hydraulic oil filling, replacement of dies |
| Required Safety Equipment | Safety glasses, gloves, hearing protector |
| Available Spare Parts | Dies (H and R), batteries, chargers |
| Warranty | Makita manufacturer's warranty |
Frequently Asked Questions - DSC121 MAKITA
User questions about DSC121 MAKITA
0 question about this device. Answer the ones you know or ask your own.
Ask a new question about this device
Download the instructions for your Slicer in PDF format for free! Find your manual DSC121 - MAKITA and take your electronic device back in hand. On this page are published all the documents necessary for the use of your device. DSC121 by MAKITA.
USER MANUAL DSC121 MAKITA
| Model: DSC121 | |
| Cutting capacities M8, M10, M12, W5/16, W3/8, W1/2 | |
| Cutting speed Approximately 3 seconds | |
| Dimensions (L x W x H) (with handle) | 212 mm x 323 mm x 260 mm |
| Rated voltage D.C. 18 V | |
| Net weight (with BL1860B battery cartridge, without balance stand) | 6.0 kg |
- Due to our continuing program of research and development, the specifications herein are subject to change without notice.
- Specifications may differ from country to country.
Weight, with battery cartridge, according to EPTA-Procedure 01/2014
Applicable battery cartridge and charger
| Battery cartridge BL1830B / BL1840B / BL1850B / BL1860B | |
| Charger DC18RC / DC18RD / DC18RE / DC18SD / DC18SE / DC18SF | 8SF |
- Some of the battery cartridges and chargers listed above may not be available depending on your region of residence.
WARNING: Only use the battery cartridges and chargers listed above. Use of any other battery cartridges and chargers may cause injury and/or fire.
Symbols
The followings show the symbols used for the equipment. Be sure that you understand their meaning before use.

Read instruction manual.

Ni-MH Li-ion
Only for EU countries Do not dispose of electric equipment or battery pack together with household waste material! In observance of the European Directives, on Waste Electric and Electronic Equipment and Batteries and Accumulators and Waste Batteries and Accumators and their implementation in accordance with national laws, electric equipment and batteries and battery pack(s) that have reached the end of their life must be collected separately and returned to an environmentally compatible recycling facility.
Intended use
The tool is intended for cutting threaded rods.
Noise
The typical A-weighted noise level determined according to EN 60745-1:
NOTE: The declared noise emission value(s) has been measured in accordance with a standard test method and may be used for comparing one tool with another.
NOTE: The declared noise emission value(s) may also be used in a preliminary assessment of exposure.
WARNING: Wear ear protection.
WARNING: The noise emission during actual use of the power tool can differ from the declared value(s) depending on the ways in which the tool is used especially what kind of workpiece is processed.
WARNING: Be sure to identify safety measures to protect the operator that are based on an estimation of exposure in the actual conditions of use (taking account of all parts of the operating cycle such as the times when the tool is switched off and when it is running idle in addition to the trigger time).
Vibration
The vibration total value (tri-axial vector sum) determined according to EN 60745-1:
Vibration emission (a_h):2.5m / s^2 or less
Uncertainty (K): 1.5m / s^2
NOTE: The declared vibration total value(s) has been measured in accordance with a standard test method and may be used for comparing one tool with another.
NOTE: The declared vibration total value(s) may also be used in a preliminary assessment of exposure.
WARNING: The vibration emission during actual use of the power tool can differ from the declared value(s) depending on the ways in which the tool is used especially what kind of workpiece is processed.
WARNING: Be sure to identify safety measures to protect the operator that are based on an estimation of exposure in the actual conditions of use (taking account of all parts of the operating cycle such as the times when the tool is switched off and when it is running idle in addition to the trigger time).
EC Declaration of Conformity
For European countries only
The EC declaration of conformity is included as Annex A to this instruction manual.
SAFETYWARNINGS
General power tool safety warnings
WARNING: Read all safety warnings, instructions, illustrations and specifications provided with this power tool. Failure to follow all instructions listed below may result in electric shock, fire and/or serious injury.
Save all warnings and instructions for future reference.
The term "power tool" in the warnings refers to your mains-operated (corded) power tool or battery-operated (cordless) power tool.
Work area safety
- Keep work area clean and well lit. Cluttered or dark areas invite accidents.
- Do not operate power tools in explosive atmospheres, such as in the presence of flammable liquids, gases or dust. Power tools create sparks which may ignite the dust or fumes.
- Keep children and bystanders away while operating a power tool. Distractions can cause you to lose control.
Electrical safety
- Power tool plugs must match the outlet. Never modify the plug in any way. Do not use any adapter plugs with earthed (grounded) power tools. Unmodified plugs and matching outlets will reduce risk of electric shock.
- Avoid body contact with earthed or grounded surfaces, such as pipes, radiators, ranges and refrigerators. There is an increased risk of electric shock if your body is earthed or grounded.
-
Do not expose power tools to rain or wet conditions. Water entering a power tool will increase the risk of electric shock.
-
Do not abuse the cord. Never use the cord for carrying, pulling or unplugging the power tool. Keep cord away from heat, oil, sharp edges or moving parts. Damaged or entangled cords increase the risk of electric shock.
- When operating a power tool outdoors, use an extension cord suitable for outdoor use. Use of a cord suitable for outdoor use reduces the risk of electric shock.
- If operating a power tool in a damp location is unavoidable, use a residual current device (RCD) protected supply. Use of an RCD reduces the risk of electric shock.
- Power tools can produce electromagnetic fields (EMF) that are not harmful to the user. However, users of pacemakers and other similar medical devices should contact the maker of their device and/or doctor for advice before operating this power tool.
Personal safety
- Stay alert, watch what you are doing and use common sense when operating a power tool. Do not use a power tool while you are tired or under the influence of drugs, alcohol or medication. A moment of inattention while operating power tools may result in serious personal injury.
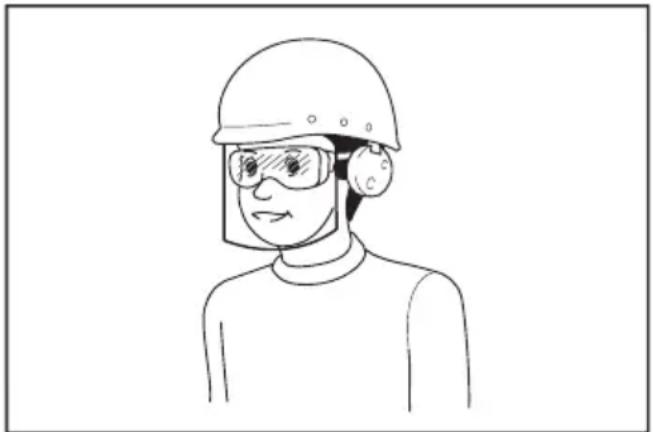
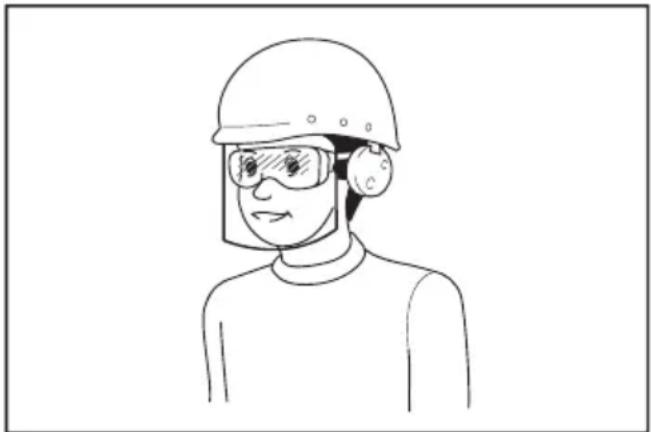
- Use personal protective equipment. Always wear eye protection. Protective equipment such as a dust mask, non-skid safety shoes, hard hat or hearing protection used for appropriate conditions will reduce personal injuries.
- Prevent unintentional starting. Ensure the switch is in the off-position before connecting to power source and/or battery pack, picking up or carrying the tool. Carrying power tools with your finger on the switch or energising power tools that have the switch on invites accidents.
- Remove any adjusting key or wrench before turning the power tool on. A wrench or a key left attached to a rotating part of the power tool may result in personal injury.
- Do not overreach. Keep proper footing and balance at all times. This enables better control of the power tool in unexpected situations.
- Dress properly. Do not wear loose clothing or jewellery. Keep your hair and clothing away from moving parts. Loose clothes, jewellery or long hair can be caught in moving parts.
- If devices are provided for the connection of dust extraction and collection facilities, ensure these are connected and properly used. Use of dust collection can reduce dust-related hazards.
- Do not let familiarity gained from frequent use of tools allow you to become complacent and ignore tool safety principles. A careless action can cause severe injury within a fraction of a second.
- Always wear protective goggles to protect your eyes from injury when using power tools. The goggles must comply with ANSI Z87.1 in the USA, EN 166 in Europe, or AS/NZS 1336 in Australia/New Zealand. In Australia/New Zealand, it is legally required to wear a face shield to protect your face, too.
It is an employer's responsibility to enforce the use of appropriate safety protective equipments by the tool operators and by other persons in the immediate working area.
Power tool use and care
- Do not force the power tool. Use the correct power tool for your application. The correct power tool will do the job better and safer at the rate for which it was designed.
- Do not use the power tool if the switch does not turn it on and off. Any power tool that cannot be controlled with the switch is dangerous and must be repaired.
- Disconnect the plug from the power source and/or remove the battery pack, if detachable, from the power tool before making any adjustments, changing accessories, or storing power tools. Such preventive safety measures reduce the risk of starting the power tool accidentally.
- Store idle power tools out of the reach of children and do not allow persons unfamiliar with the power tool or these instructions to operate the power tool. Power tools are dangerous in the hands of untrained users.
- Maintain power tools and accessories. Check for misalignment or binding of moving parts, breakage of parts and any other condition that may affect the power tool's operation. If damaged, have the power tool repaired before use. Many accidents are caused by poorly maintained power tools.
- Keep cutting tools sharp and clean. Properly maintained cutting tools with sharp cutting edges are less likely to bind and are easier to control.
- Use the power tool, accessories and tool bits etc. in accordance with these instructions, taking into account the working conditions and the work to be performed. Use of the power tool for operations different from those intended could result in a hazardous situation.
- Keep handles and grasping surfaces dry, clean and free from oil and grease. Slippery handles and grasping surfaces do not allow for safe handling and control of the tool in unexpected situations.
- When using the tool, do not wear cloth work gloves which may be entangled. The entanglement of cloth work gloves in the moving parts may result in personal injury.
Battery tool use and care
- Recharge only with the charger specified by the manufacturer. A charger that is suitable for one type of battery pack may create a risk of fire when used with another battery pack.
- Use power tools only with specifically designated battery packs. Use of any other battery packs may create a risk of injury and fire.
- When battery pack is not in use, keep it away from other metal objects, like paper clips, coins, keys, nails, screws or other small metal objects, that can make a connection from one terminal to another. Shorting the battery terminals together may cause burns or a fire.
- Under abusive conditions, liquid may be ejected from the battery; avoid contact. If contact accidentally occurs, flush with water. If liquid contacts eyes, additionally seek medical help. Liquid ejected from the battery may cause irritation or burns.
- Do not use a battery pack or tool that is damaged or modified. Damaged or modified batteries may exhibit unpredictable behaviour resulting in fire, explosion or risk of injury.
- Do not expose a battery pack or tool to fire or excessive temperature. Exposure to fire or temperature above 130^ may cause explosion.
- Follow all charging instructions and do not charge the battery pack or tool outside the temperature range specified in the instructions. Charging improperly or at temperatures outside the specified range may damage the battery and increase the risk of fire.
Service
- Have your power tool serviced by a qualified repair person using only identical replacement parts. This will ensure that the safety of the power tool is maintained.
- Never service damaged battery packs. Service of battery packs should only be performed by the manufacturer or authorized service providers.
- Follow instruction for lubricating and changing accessories.
Cordless threaded rod cutter safety warnings
- Hold the tool firmly.
- Secure the workpiece firmly.
- Keep your face and hands away from moving parts. During cutting, the fraction of the threaded rod may fly off.
- Always wear gloves when handling threaded rods. Edges and chips of the workpiece are sharp.
- Do not put the tool on the chips of the workpiece. Otherwise it can cause damage and trouble on the tool.
- Always be sure you have a firm footing. Be sure no one is below when using the tool in high locations.
-
Do not touch the cutting edge or the workpiece immediately after operation; they may be extremely hot and could burn your skin.
-
Avoid cutting electrical wires. It can cause serious accident by electric shock.
- Always hold the threaded rod during and after cutting to prevent the cut threaded rod from falling off. A cut threaded rod may cause serious personal injury if fallen off from a high location.
- Keep a safe distance between your body and the moving parts. Do not operate the tool if the working area is too narrow to keep a safe distance.
- Never leave the tool on a high location or a potentially unstable surface.
SAVE THESE INSTRUCTIONS.
WARNING: DO NOT let comfort or familiarity with product (gained from repeated use) replace strict adherence to safety rules for the subject product.
MISUSE or failure to follow the safety rules stated in this instruction manual may cause serious personal injury.
Important safety instructions for battery cartridge
- Before using battery cartridge, read all instructions and cautionary markings on (1) battery charger, (2) battery, and (3) product using battery.
- Do not disassemble battery cartridge.
- If operating time has become excessively shorter, stop operating immediately. It may result in a risk of overheating, possible burns and even an explosion.
- If electrolyte gets into your eyes, rinse them out with clear water and seek medical attention right away. It may result in loss of your eyesight.
- Do not short the battery cartridge:
(1) Do not touch the terminals with any conductive material.
(2) Avoid storing battery cartridge in a container with other metal objects such as nails, coins, etc.
(3) Do not expose battery cartridge to water or rain.
A battery short can cause a large current flow, overheating, possible burns and even a breakdown.
- Do not store the tool and battery cartridge in locations where the temperature may reach or exceed 50^ (122^) .
- Do not incinerate the battery cartridge even if it is severely damaged or is completely worn out. The battery cartridge can explode in a fire.
- Be careful not to drop or strike battery.
- Do not use a damaged battery.
- The contained lithium-ion batteries are subject to the Dangerous Goods Legislation requirements.
For commercial transports e.g. by third parties, forwarding agents, special requirement on packaging and labeling must be observed.
For preparation of the item being shipped, consulting an expert for hazardous material is required.
Please also observe possibly more detailed national regulations.
Tape or mask off open contacts and pack up the battery in such a manner that it cannot move around in the packaging.
- Follow your local regulations relating to disposal of battery.
- Use the batteries only with the products specified by Makita. Installing the batteries to non-compliant products may result in a fire, excessive heat, explosion, or leak of electrolyte.
SAVE THESE INSTRUCTIONS.
CAUTION: Only use genuine Makita batteries.
Use of non-genuine Makita batteries, or batteries that have been altered, may result in the battery bursting causing fires, personal injury and damage. It will also void the Makita warranty for the Makita tool and charger.
Tips for maintaining maximum battery life
- Charge the battery cartridge before completely discharged. Always stop tool operation and charge the battery cartridge when you notice less tool power.
- Never recharge a fully charged battery cartridge. Overcharging shortens the battery service life.
- Charge the battery cartridge with room temperature at 10^ - 40^ (50°F - 104°F). Let a hot battery cartridge cool down before charging it.
- Charge the battery cartridge if you do not use it for a long period (more than six months).
PARTS DESCRIPTION
Fig.1
| 1 | Cutting die H | 2 | Cutting die R | 3 | Return bulb knob | 4 | Handle |
| 5 | Battery cartridge | 6 | Cutter head | 7 | Balance stand | 8 | Pump |
| 9 | Motor -- | -- | -- |
Cutting die type
| Type Cutter head (Cutting die H) Cutter rod (Cutting die R) | ||
| M8 M8H M8R | ||
| M10 M10H M10R | ||
| M12 M12H M12R | ||
| W5/16 W5/16H W5/16R | ||
| W3/8 W3/8H W3/8R | ||
| W1/2 W1/2H W1/2R | ||
FUNCTIONAL DESCRIPTION
CAUTION: Always be sure that the tool is switched off and the battery cartridge is removed before adjusting or checking function on the tool.
Installing or removing battery cartridge
CAUTION: Always switch off the tool before installing or removing of the battery cartridge.
CAUTION: Hold the tool and the battery cartridge firmly when installing or removing battery cartridge. Failure to hold the tool and the battery cartridge firmly may cause them to slip off your hands and result in damage to the tool and battery cartridge and a personal injury.
To remove the battery cartridge, slide it from the tool while sliding the button on the front of the cartridge.
To install the battery cartridge, align the tongue on the battery cartridge with the groove in the housing and slip it into place. Insert it all the way until it locks in place with a little click. If you can see the red indicator on the upper side of the button, it is not locked completely.
CAUTION: Always install the battery cartridge fully until the red indicator cannot be seen. If not, it may accidentally fall out of the tool, causing injury to you or someone around you.
CAUTION: Do not install the battery cartridge forcibly. If the cartridge does not slide in easily, it is not being inserted correctly.
Tool / battery protection system
The tool is equipped with a tool/battery protection system. This system automatically cuts off power to the motor to extend tool and battery life. The tool will automatically stop during operation if the tool or battery is placed under one of the following conditions.
Overload protection
When the tool/battery is operated in a manner that causes it to draw an abnormally high current, the tool automatically stops. In this situation, turn the tool off and stop the application that caused the tool to become overloaded. Then turn the tool on to restart.
Overheat protection
When the tool/battery is overheated, the tool stops automatically, and the battery indicator blink about 60 seconds. In this situation, let the tool cool down before turning the tool on again.

Fig.2: 1. Red indicator 2. Button 3. Battery cartridge
Overdischarge protection
When the battery capacity becomes low, the tool stops automatically. If the product does not operate even when the switches are operated, remove the batteries from the tool and charge the batteries.
Releasing protection lock
When the protection system works repeatedly, the tool is locked and the battery indicator shows the following state.

In this situation, the tool does not start even if turning the tool off and on. To release the protection lock, remove the battery, set it to the battery charger and wait until the charging finishes.
Indicating the remaining battery capacity
Only for battery cartridges with the indicator
Fig.3: 1. Indicator lamps 2. Check button
Press the check button on the battery cartridge to indicate the remaining battery capacity. The indicator lamps light up for a few seconds.
| Indicator lamps Remaining | capacity | ||
| Lighted Off | Blinking | ||
| 75% to 100% | |||
| 50% to 75% | |||
| 25% to 50% | |||
| 0% to 25% | |||
| Charge the battery. | |||
| The battery may have malfunctioned. | |||
NOTE: Depending on the conditions of use and the ambient temperature, the indication may differ slightly from the actual capacity.
Indicating the remaining battery capacity
When you pull the switch trigger, the LED display shows the remaining battery capacity. The remaining battery capacity is shown as the following table.
Fig.4: 1. Battery indicator
| Battery indicator status Remaining | battery capacity | |
| On | Off | |
| 50% to 100% | ||
| 20% to 50% | ||
| 0% to 20% | ||
NOTE: The LED display goes off approximately one minute after releasing the switch trigger.
NOTE: When the LED display lights up and the tool stops even with a recharged battery cartridge, cool down the battery cartridge fully. If the status will not change, stop using and have the tool repaired by a Makita local service center.
Switch action
CAUTION: Before installing the battery cartridge into the tool, always check to see that the switch trigger actuates properly and returns to the "OFF" position when released.
To unlock the switch trigger, push the lock lever from A side. To lock the switch trigger, push the lock lever from B side. Always lock the switch trigger when not in use.
To start the cutting operation, pull the switch trigger. The cutter rod will move toward the cutter head. Continuing to hold the switch trigger down brings the cutter rod to the full forward stroke position. After releasing the switch trigger, the cutter rod will automatically return to the start position.
Fig.5: 1. Switch trigger 2. Lock lever
Using the balance stand
CAUTION: Always remove the balance stand when working while holding the threaded rod cutter by hand.
NOTICE: Since the balance stand is made of rubber and only meant to function as a stand, do not bend it by putting unnecessary pressure on it. It may get bent, making it unusable.
- Install the balance stand on the leveler sack cover.
- Position the flat surface of the balance stand to be level with the ground.
Fig.6: 1. Leveler sack cover 2. Balance stand
ASSEMBLY
CAUTION: Always be sure that the tool is switched off and the battery cartridge is removed before carrying out any work on the tool.
Removing and installing the cutting dies
NOTICE: Always check the following when replacing the cutting dies:
The size of the threaded rod to be cut matches the size of cutting dies. (The size is engraved on the cutting dies)
The cutting die H and cutting die R are installed in the correct position. Be sure to install the cutting die H (engraving ex. W 3/8 H) to the cutter head and the cutting die R (engraving ex. W 3/8 R) to the cutter rod. Always use one pair of cutting dies.
Wrong installation results in breakage of the cutting dies and the tool.
Fig.7: 1. Cutter head 2. Head bolt 3. Cutting die H 4. Rod bolt 5. Cutting die R 6. Cutter rod
- Remove the head bolt and rod bolt from cutting die H and cutting die R using the supplied hex wrench.
-
Remove any dirt or foreign debris from the cutting die installation points.
-
Select a pair of cutting dies that matches the size of the threaded rod and attach cutting die H to the cutter head, and cutting die R to the cutter rod. After the cutting dies are installed, securely tighten the head bolt and rod bolt.
NOTICE: There should be a bit of play to the securely tightened cutting die H and cutting die R. If there is no play, remove the cutting dies and clean off any dirt or debris from cutting die installation points. Cutting while the cutting die H and cutting die R are installed in dirty or clogged fittings may result in chipping or damage of cutting dies.
OPERATION
WARNING: The following types of cutting may result in cutting dies or components breaking and flying off. Since this causes serious accidents, they must never be performed.
Cutting materials outside the cutting capacity (see SPECIFICATIONS).
Cutting with cutting dies that do not match the size of the threaded rod.
Cutting materials (round or square, etc) other than threaded rods.
CAUTION: When cutting, check the size of the threaded rod and always use cutting dies that match that size. If the sizes do not match, breakage or damage to the cutting dies and breakdown of the tool may occur.
▶ Fig.8: 1. Cutter head 2. Threaded rod 3. Cutting die H (fixed die on the cutter head) 4. Cutting die R (moving die on cutter rod)
- Align the threads of the threaded rod to be cut with the grooves of cutting die H on the cutter head.
NOTICE: Failure to align the threads of the threaded rod with the grooves on cutting die H may result in chipping or damage of the cutting die.
- Pull the switch trigger. The cutter rod moves forward and cuts the threaded rod.
- After the cutting is complete, continue to hold the switch trigger down. The cutter rod is brought to the full forward stroke position.
- Release the switch trigger. The cutter rod will automatically return to the start position.
NOTICE: Replace deformed or chipped cutting dies immediately. Deformed or chipped cutting dies create burrs. Also, they cause an excessive load on the tool and may cause tool breakage.
NOTICE: Do not cut threaded rods too short. Cutting to a length shorter than the thickness of the cutting dies (13 mm (33 / 64^ ) ) may chip or damage the cutting dies.
Fig.9: 1. Cutting die H 2. Threaded rod 3. Cutting die R 4. Thickness of the cutting die (13 mm (33 / 64^ ) ) 5. Cut length (13 mm (33 / 64^ ) or more)
NOTE: A cut threaded rod should fit into a nut without any trouble. However, depending on the material or precision (grade) of the threaded rod, it may be necessary to remove burs from the starting points of the threads with a file, etc. in order to fit the rod into a nut.
Quitting the cutting in the middle
If you want to stop the cutter rod mid-stroke and return it to the start position, turn the return bulb knob counterclockwise (1/2 turn) and loosen it. The cutter rod will return to the start position.
Fig.10: 1. Return bulb
Turn the return bulb knob clockwise to tighten it again to cut as normal.
NOTICE: Do not turn the return bulb knob any further than necessary. Turning the return bulb more than 1-1/2 times counter-clockwise may cause an oil leak. Use caution, as low oil can cause the tool to malfunction.
MAINTENANCE
CAUTION: Always be sure that the tool is switched off and the battery cartridge is removed before attempting to perform inspection or maintenance.
NOTICE: Never use gasoline, benzine, thinner, alcohol or the like. Discoloration, deformation or cracks may result.
To maintain product SAFETY and RELIABILITY, repairs, any other maintenance or adjustment should be performed by Makita Authorized or Factory Service Centers, always using Makita replacement parts.
Refilling the oil when oil is low
Place the tool on the floor with the oil port facing up. Always confirm that the tool is completely shut off with the cutter rod in start position.
Loosen and remove the bolt on the oil port. If the oil is low, refill to the maximum limit of the oil port with the designated hydraulic oil, and then tighten the bolt. If oil overflows, immediately wipe off any excess oil.
NOTE: Use only Makita Hydraulic Oil or JX Nikko Nisseki Energy Super Highland #46 oil. Do not use any other type of oil in this tool. Doing so may cause deterioration of gaskets and other parts, resulting in breakdown.
OPTIONAL ACCESSORIES
CAUTION: These accessories or attachments are recommended for use with your Makita tool specified in this manual. The use of any other accessories or attachments might present a risk of injury to persons. Only use accessory or attachment for its stated purpose.
If you need any assistance for more details regarding these accessories, ask your local Makita Service Center.
Cutting dies
- Makita genuine battery and charger
NOTE: Some items in the list may be included in the tool package as standard accessories. They may differ from country to country.
ACCESSIONS EN OPTION
VEILIGHEIDSWAARSCHUWINGEN
Fig.4: 1.Accu-indicator
| Toestand van accu-indicator Restere | rende acculading | |
| Aan | Uit | |
| 50% tot 100% | ||
| 20% tot 50% | ||
| 0% tot 20% | ||
OPTIONELE ACCESSOIRES
Móvo yia xwpe ts Eupwnns
H EK TepiIaIaIavTai Ws a t A OTo TAPov EYxEipio oOnyiwv.
Aoalεia oTo xwpo εpyaia
- Na δiatnpeite To χwpo εpyαiας καθαρο κai Kaλa φωτισμενο. Ε τε ακαταστατους ἡ σκοτεΙνούς χωρούς προκαλούνται atuxηματα.
- Mn ΘETETa nλEKTPiKa εpyαεia σλeIToupyia ΕKPNKTIKEc aTMOOφaIPeG, oTWC TAPOUσia EΦAeKTWv UYPw, aEPIw N OKovns. Ta nλEKTPiKa εpyαεia δnμIoupyoUv OTIVθnpes Ttou μTIOpei va TpokaléσoUv avαλεη nC σΚovns n TOW aTμwv.
- Na aToupaKpUvETa TnaiIdia kai Touc m n exoVTEc EpyaOia otav xeipieote eva nAektpiok epyaleio.Eav aTooTnOei n npooxnoac, mtopei va xaoTe tov eEyxo.
HAEKPTPIKn OoΦaAeia
- Ta φic Tou nλeKtpiKou εpyaLéiou πpétEi va taipiaZouv σtnv πpiα. Mny tpoTOnTOieite TOTe TO φic με OTIOVθnTOTE pOTo. Mn xPnoIPO-TOIEITE PooapuoyeiC Ε YEiWéva nλeKtpiKa εpyaLéia. Ta φic Tou δev exouv tpoTOnTOinθEi KAI OI πpiεc Tou taipiaZouv oTa φic μεiWvouv To Kivduvo TpokAnong nλeKtpoiAnxiac.
- ATOpeuyETnV ETTaH Tou Owpatoc ME YEIW-MEVEc EITIAPAEIECS, OTWc OWANVEc KALOPIEP, FOUPVOUC KAI YUYEA. YIAPXei auNevoc KIVUvo TPOKAnOns NAKTPOTANxiac EAV TO Owma oac EIVAI YEIWUEVO.
- Mny ekTeTe Ta nAekTpiKa epyaia Otn Bpoxn ng upec ouvthke. Eav ioeAeivpo o KATIOI nAekTpiKo epyaia, auqavetai o kivduvoC TPOkAnoc nAekTporanxiac.
- Mny kakopetaxeipieote To nAektpiko Kaawio. Mn xpoioutoie TOTe TO nAektpko Kaawio yia va mtaepete n va TpaBnEte TO nAektpko epyaleio, aaaa oute ia va byaTeTo qic tou nAektpkoU epyaleiou ano tv npia. Na dia-tnpite TO nAektpko Kaawio kakpi aTTO thepoTnta, ta adia, ta aixmuavv tkeiEvka ta Kivoueva epn. Ta Aektpika kaawia Tou exouv utoei bacec kai ta pIayeva naekpikka kalwia auavov tv Kivouvo Tpokanoc nAekptottnia
- Otav xieipieote kantoio nlektpiko epyaleio eEwtepiokc xwpouc, va xpnoiopoTIOeite Tpoektaon nlektipko Kaawbiou (maalavteca) kataaan yia Ewtepikn xpon. Eav xpnoiopoTIOeTE nlektipko Kaawdo KAATAAALNO yia EwTe- pikn xpon, meiwetai o kivduvo c ia npokn nlektpoTAAIgac.
- Eav ev iivai duvato va atofoeuxei n aeitoupyia evoc nektpikou epyaieiou eepoc uypaia, xpoiopoioote nektpikn npoxn TPOOTATEUETAI aTO OOUKEUN npapevovtos peuatoC (RCD). H xpon RCD 1 1 tov kivduvo nektpoTTnxiac.
- Ta nλεκτρικα εργαλεία μπορουν va παράγουν nλεκτρομαγνητικα πεδία (EMF) ta ΑΤΟΙΑ δεν εἰναι βλαβερα για τοχρόση. Ωισόσο, σι χρήσες βηματόθων και αλλων παρόροιων iατροεχνολογικων συακεύων θα πρέπειν επικοινωνισουν με TOV KATAOKΕUαθή TŋC ΣΟΑΚΕΝCs Touc ἡ/ KAI TOV YIATPO Touc για συμβουλες, ΠΡΙV θεόουν auto TO nλεκτρικό εργαλείο Ελειουργία.
PpOoWtIKn aσφaεia
- Otav xeipieote katoio nektpiko epyaleio, va eiogote OE tOIOIOTnA, VA TPOeXETI KAVETE KAI VA xpnoiOIOIEte Koivn loyikn. Mn xepite katoio nektpiko epyaleio otav eiaote Koupaoevoi oue otav piokeote uno tvv Etnpeia vapkwiKwov ouiwv, akool n apakwv. Mia otiyun atpooeigac katn diapkeia Xepioou twv nektpikwv epyaleiwu npoei va Tpokaiaeoi oopapo TPOOWTIKo Tpaumatioo.
- Na xpoiiooieite atoik o eonlioo npo- staoia. Na opate navta npoataia paiwv. Eav xpnoiopoioeite to owoTo npoataeutiko eonlioo, otwC npoawTIDA kata tnc okovns, avtioaogntika Tnoutoi aaaaleiac, kpavoC n TPOOATEUTKO akongc, avaloya me tic ouvneKcS, 0e1wE i o kivouoc Tpokanons TpooWNIkwv Tpaupatouw.
- Na aTPOeuyET nV aEaNTn EepyoToinon Tou epyaieou. Beaiwtheite oTI OiaKOTTTG pI- OKetai OTNV aVEepyn Theon TPIV Ouvdeete Tnv nEktpiKn TapoXn Nkai TApia, Onkwvete n Mepet EApETe NkETPIA epyaia ME TO daxTuO aC oTO diaKOTTN h eav EepyoTIOIEte NkETPIKa epyaia OTAV OiaKO- TTNS eivai OTNV Eepyn Theon, MTopei va TpokAn- BoUV atuxmuata.
- Na aTOnaKpUvETuXov puOmuOevo KLeiDiy yAaIKO KLeiDITPIV TETETo NkEKTPIKO EpyA AELIO eAitoupyia.Eva KLeiDITou Exei μeive I IPOOKoAAnevo OE KAITOIO TEPIATpeoEvO epoc Tou nAeKTPIOU EpyAeiou MTOpei va IPOKAeoi I IPOOWTIKO Tpaumatioo.
- Mny TeVTwveote UInepBoIiKa. Na otkeote TnVTOE Otaepa KAI IOoppoTneva. EToI, 0a ExETe KaLutepo ELeyxo Tou NAEKTPIKOU EpyaAeiou OE aTPOsVEc KATAOTaeic.
- Na vtuveote kataaanla. Mn φopate φapbiα pouxa n koogunata. Kpatate ta paalia kai ta pouxa oac gakpiä aTRO kivouμeva εpη. Ytápyxéi kivduvoç va εμπλakovuTa gapdiα pouxa, ta koogunata n ta gakpiαaλia σε kivouμeva εpη.
- Eav TApexovTai OoKeues Yia Tn OuvDeon
diataeewv Eaywyns Kai oulloyng Kcokvns,va
Bepaiwveote otai autec eivai ouvdepevecs Kai
XpnoiIOIOuVTai owta.Hou loyn oKovnc
mTopei va eioi tov kivduvo Tou oxeticetai u
tn Okovn. - Mny aiaopoeite kai ayvoite Tc apxcs aopa- 15iac Tou epyaieiou loyw Tns Egoikeiwns Tou atokntoate an to n ouxvn xpnoT wv epya- 15iow. Mia aippoektn evpeyia utopevi a poka- 15eoi oobap tpaumatoe vtoC kaaumatwv evoc deutepoAETTOU.
- Na φopáte πávτa προσtateutiká yuaia yia va προσtateuéTE ta maia oac aTó tpaumatioμo otav xpnoiopoTOIEITE nεktpika εpyaieia. Ta προσtateutiká yuaia πpétnei va oumuopwovtau μe to πpótuTO ANSI Z87.1 σTIC HNA, to πpótuTO EN 166 Σηv Eupwπn ᵷ to πpótuTO AS/NZS 1336 Σηv Auσtpaiia/Nεa Znλavδia. Σηv Auσtpaiia/Nεa Znλavδia, aTnaiteITAI aTRO to vómo va φopáte kai πpooWπiδa yia tny πρoσtaia tou πpωwTou oac.
O epyodntc exeT Nv eBuvn va EtniIaAei Tn xpionkataaannou npootateutikou eoattiaou aopaaieiac ato toux epiotcs Tou epyaeiou kai ato aaataoau Tou piokovtai otnv ameon tepioxn epyaosic.
Xpnoi kaipovtida nAekptikou epyaaeiou
- Mny aokite Tieon oTo nAekptiko epyaleio. Na XpnoioutoieTe To OwTo nAekptiko epyaleio yia Tnv Eapauynoac. Me To owTo nAekptiko epyaleio 0a TpayuatoTIOINOeTe Tnv epyaia KaUtepa Kai aOpaale- OTEpa, OTo baOmuYia Tov OTIOI exEoxediaotei.
- Mn xponoiotoiie To nAekptiok epyaleio evo diaKOTNG dev TO eVeyOIOIE KAI DEV to aTVEpyoTOIE. KaTe nAekptiok epyaleio Tou EV mTopeite va eEyEeTE ME To diaKOTN Aetoupyia c Eivai ETIKIVUVO KAITPETI VA ETIOKEuaotei.
- Na aTOOuvDEE To QIc aTNO TNY TPOPO- 0oia c /kai va byaTe TNV KaoTea PnataP1wv, av eivai ouvdeeveN, aTIO TO nAektpiKO epyaleio piv kavete OTIOEONOTE puthetaic n aaayec EapntmuWv KAI pIV aTIOhKeUETe Ta nAekptika epyaleia. TeToia TPOALNTIKA mETpa aOgpaliaac meiwovuTv KIVduvo TuXiaac EvpyoToinon tsou NAEKPTIKOU epyaleiou.
- Na aTOnθnkeuTe Ta aBpav nλeKtpiKa εpyaieia μakpiα aTó TAIδia kai va μnv αφνεte atopα Ttou δev yywipizouv To nλeKtpiKo εpyaieio kai autεs tic obnyies va xεipicovtaI to nλeKtpiKo εpyaieio. Ta nλeKtpiKa εpyaieia aTOTAEUV KIV-duvo στa xερia aveiðikeutuv xεipiotwv.
- Na ouvtnpite Ta nEeKtpiKa epyaleia Ka ta EAp- tmuata. Na eEyxete av evai eUbypaumuiopeva Owotá ta KIVoumeva mepn,av eTIOBiciTea n EeU- 0epn kivnon touc,av exouv otaoei katroia eaptni- pata, aAka kalk aAan kataoan Tou uTnopei va eTnpaeoi Tn aeitoupyia tou nEeKtpiOu epyaaeiou.AV TO nEeKtpiKO epyaleio UTOOTei BAlbn,va 0pvvtige VA eTIOKeuaotei PIV TO xPNOIOToin- oTE. NlA atuxnpata TpokaIoovta anto nEeKtpiKa epyaleia Tou dEv exouv ouvtnpneoi wotá.
- Na δiatnpéite Ta KOTTIKA εpyaλεia aixμnpa Kaαθapá. Ta KOTTIKA εpyaλεia Tnou exouv ouvtnpηθει σωτα εivai liyótepo πθavó va εμπλakouv kaTIO EUKOLO VA ελεγxθouv.
-
Na xpnoiouoieTo nEeKtpko epyaaleio, ta Eaaptnata KaTicmuTeC Tou epyaaleiou, kT. ouuwoaueautcTGosnyies,aaabavovtac UTOUINsouvOkeepyaoiaKa TIVEPyaoia TPOITeVA EKTEAEOTei.Eavxpoioutoie To nEeKtpko epyaaleioiaeitoupyie diapopetikc ATOAUECYIA TIOAIECTPooipctai,PTopei va TPOkAne KAtoia EtIKivovn kataotaon.
-
Na diatnpeite TIG aabe cai TIG eTIPaveies xeipolaaewv teyves, kthetape, xwpis adi kai ypao. OIOAiothnpec aabe cai ETIAPAVEIES xeipolaawd ev EITIPTIOUV TOV aopanxepiao kai EAEyxo Tou Epyaaleiou e avantavexc kataotaeic.
- Otav xpnoiopoioite To epyaieio, m np opate Tava vayia epyaia c Tou uTopei va emkauv. H epiokn twv ravivw yavtwv epyaoia c meo st KIVoueva eepn TOpei va exouv wc atoteloeu a TpoosnKtpaumoi.
Xpnoi kai povtiδa μπatapiwv
- Na επαναφοριζετε Πιταρίες Μόνο με το φοριστή του καθοριζεται πό τον καταοκευαούπή. ἐνας φοριστής του εἰναι καταλληλος γlia μia συγκεριμένην μιταρία μιθερεν αδημιουργασει κίνδυνο πιρκayiacό ταν χρομιστοίειαι με μia αλλη μιταρία.
- Na xpoiopoioite nektpika epyaia mvo e Eikka katopevec mntapiec.Hxpon kaθe aanns mntatapiac mtopei va ouiupynoivou tpaumaiou n npkayiac.
- OtaV xpnoiopoioieitai n kooetama tataipivv, biatnpnoTe Tn maKpia aTRO aaAaMaetaaAikacavtkeiEvva,OTWc ouvdtnpes, Kepmuata, KELiDi, KaPia, BiEcs n aaaaMikpa eTAAIAkca AvtiKeiEvva, TEa OToia MTopei va DnHoupynTheoiuvsOtro To evav akpoektn otov allov. To paxukkuwma twv akpoektwv ts mTaTAPiacuTopei va TpokaeeI Eykaumata n TupKayia.
- YIIO OUVNKEC KATAXPONCS, MTOpEi VA EEXAe i Uypo aTNO TNV MTAATAPia. Na aTPOEUYET Nv ETTaPn. EAV OUMBEI EINAPn KATA ABOc, EKTLAUVETE ME VEPo. EAV TO UYPO EPeOI OE EINAPn ME TA MATIA, AVaCnTNOTE KAI IATPIK BOnEIA.To Uypo TOU EAYETAI ANTO NV MTATAPIA MTOpEi VA TIPOKA- LESEI EPEOIOH EYKAUmaTa.
- Mn xnpoiopoioite Mi Kaotetaatapiw n epyaio Tou exi Kataotpapei npoTIOinOeOI. OI kateopauvec npoTOniuevsc mTatapiec mtopei va napouiazouv atpobAETTN oUHTepipopa Ttou exei aTOTeEoqa TUPKayia, ekpnNn Kivduvo tpaumatoou.
- Mny EkTeTc Tnv Kaaet a mataipwv n to Epyaλeio e npkayia n utepoia k uynn thepokpia.Hekean stnv npkayia n otn epuokpəia avw twv 130 ^ mtope va pokaeeE ekpnIg.
- Akolouhnte oles Tc obnyieg opiongs kai mnv ooptioe Tnv kaetaa n to epyaleio ektoC tou thepokpaiaakou eupous Tou kaopipietai otic onyies. H avthetav n optian n npoption aeepukpaies kctoc tou kaopioevou eupous mtopei va tpokaolei zmu atnv mtaupia kai va aufoiv tokayiac.
Σερβις
| Batarya kartuș BL1830B / BL1840B / BL1850B / BL1860B | |
| Şar aleti DC18RC / DC18RD / DC18RE / DC18SD / DC18SE / DC18SF |
| Tip Kesme kafasi (Kesici kalıp H) Kesme rodu (Kesici kalıp R) | ||
| M8 M8H M8R | ||
| M10 M10H | M10R | |
| M12 M12H | M12R | |
| W5/16 | W5/16H | W5/16R |
| W3/8 | W3/8H | W3/8R |
| W1/2 | W1/2H | W1/2R |