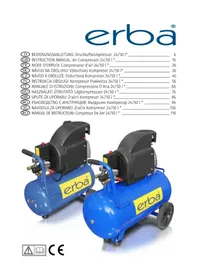
17015 - Compressor Erba - Free user manual and instructions
Find the device manual for free 17015 Erba in PDF.
| Product Type | Air Compressor |
| Brand | Erba |
| Model | 17015 |
| Rated Voltage | 230 V ~ 50 Hz |
| Motor Power | 1500 W (2 PS) |
| Motor Speed | 2850 rpm |
| Max. Operating Pressure | 8 bar |
| Tank Volume | 50 L |
| Air Consumption | 210 L/min |
| Sound Power Level (LwA) | 93 dB(A) ± 3 dB |
| Sound Pressure Level (LpA) | 71 dB(A) ± 3 dB |
| Protection Rating | IP20 |
| Weight | 33.5 kg |
| Recommended Oil Type | SAE 15W/40 or similar |
| First Oil Change | After 100 operating hours |
| Oil Change Interval | Every 500 hours |
| Air Filter Cleaning | Every 300 hours |
| Main Functions | Generation of compressed air for pneumatic tools |
| Maintenance | Oil drain, filter cleaning, condensate drainage |
| Safety | Safety valve, overload switch, thermal protection |
| Spare Parts | Air filter, gaskets, valves, oil cap |
| Warranty | 6 months |
| Compliance | CE, RoHS, Machinery Directive 2006/42/EC |
Frequently Asked Questions - 17015 Erba
User questions about 17015 Erba
0 question about this device. Answer the ones you know or ask your own.
Ask a new question about this device
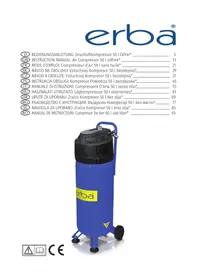
Download the instructions for your Compressor in PDF format for free! Find your manual 17015 - Erba and take your electronic device back in hand. On this page are published all the documents necessary for the use of your device. 17015 by Erba.
USER MANUAL 17015 Erba
For and on behalf of ERBA GmbH (authorized signature)
Dominik Schilling
- Safety instructions 17
2.Product description 19 - Designated use 19
- Restrictions of use 19
- Technical data 19
- Noise emission values 19
- Important information for initial operation 20
- Operation instructions 21
- Service and replacement parts 23
- Warranty 24
- Disposal 24
- Legal information 24
13.Declaration of conformity 25
1. SAFETY INSTRUCTIONS
Read this material before using this product. Failure to do so can result in serious injury. KEEP THIS MANUAL. When giving this machine to third parties, always include this manual. We do not accept any liabilities for accidents or damages that result from misuse. Removal/Alteration of any safety devices or of the machine in general will result in the loss of warranty. The buyer assumes all risk and liability arising out of his or her repairs/alterations to the original product or replacement parts thereto, or arising out of his or her installation of replacement parts thereto.
Always keep your work area well lit, clean and free of obstacles.
Do not use the product in the vicinity of ignition sources.
- Keep children away from your work area.
- Avoid contact with grounded surfaces (eg. pipes, radiators, etc.) to avoid the risk of electric shock.
Do not use the product in moist or wet areas.
- Never carry the product on its electric cord. Do not pull the cord to unplug the product. Check the cord for any damage on a regular basis.
When using the product outdoors, always use suitable outdoor-extension cords/outlets.
Always use propper personal protection equipment (eye-protection, gloves, etc.).
Make sure the product is turned off when plugging in the cable.
- Do not wear loose clothing, jewellery or any other accessory that might get caught in the machine. If you have long hair, wear a hair-net.
Always disconnect the powercord when doing maintenance work, cleaning or changing the mixer.
Never leave the product unattended when children are present.
Check the product for any sign of damage each time before you use it.
- Do not attempt to repair the product when it is damaged! Repair work must only be done by authorized, qualified service technicians.
The compressor has a starting power of 2ps/1500W and therefore It is necessary to use a 16A time delay fuse. Try to avoid extension cords whenever possible and use air hose extensions instead.
The free release of air from the tank can be dangerous and should only be done by authorized personnel.
■ When unused, the compressor should be stored in a dry, locked room out of reach for children
- Keep the compressor clean.
When removing the air couplings keep a firm grip to avoid the air hose snapping back.
Safety instructions for color spraying
■ Do not use paint or solvents with an ignition point below 55^ . Do not heat up paint or solvents!
■ When working with harmful substances always use personal protective equipment. Read the instructions on safety measures provided by the producer of said substances.
■ When working with atomized paint it is forbidden to smoke, use open fire or other ignition sources. Atomized paint is highly flammable.
■ Do not consume food or drinks in the work area. Paint fumes are toxic.
The work area (room) must be larger than 30m^2 and well ventilated.
Don't spray upwind.
Always follow federal laws and regulations concerning the use and disposal of hazardous substances.
■ Do not use mineral spirits, butyl alcohol or methylene chloride in combination with PVC air hoses (reduced lifespan).
Safety instructions for working with compressed air and dust guns
Compressor and pipes reach high temperatures during operation. Do not touch!
Make sure the air consumed by the compressor is void of any hazardous substances to avoid fire or explosions.
Always use personal protective equipment (safety goggles) when working with dust guns.
■ Never aim dust guns directly at people. Do not use a dust gun to clean yourself or other people.
Safety instructions for operating pressure equipment
Whoever operates pressure equipment must keep the appliances in good condition, supervised and immediately carry out all necessary steps to repair and maintain the equipment in accordance with the latest safety standards.
Pressure equipment must not be operated when damaged.
Pressure tanks must be inspected on a regular basis for any damage or rust. Contact a service technician if you find any damage.
2.PRODUCT DESCRIPTION
- Air intake filter
- Pressure tank
3.Wheel - Oil gauge
- Safety valve
- Pressure regulator
- Working pressure valve
- Gauge (working pressure)
-
Pressure switch
-
Handle
- On/off switch
- Oil plug
- Gauge (tank pressure)
- Oil release screw
- Tank pressure valve
- Stand
- Drain valve
- Overload switch
3. DESIGNATED USE
The compressor is used to generate compressed air to operate air powered tools. Any other use is prohibited. The buyer accepts all liabilities, legal and otherwise, for any damage or injury resulting from improper use of the product (i.e. any other use than the above stated designated use).
4. RESTRICTIONS
Please note, that this product is not designed for commercial or industrial use. We accept no liability or warranty claims should the product be used in industrial and/or commercial operations.
5. TECHNICAL DATA
| Rated power: | 230 V ~ 50 Hz |
| Engine power: | 2 PS/1500 W |
| Engine rpm: | 2850 rpm |
| Working pressure: | max. 8 bar |
| Tank volume (17004/17015): | 24 / 50 l |
| Air consumption: | 210 l/min. |
| Sound power level LwA: | 93 dB (A) ± 3 dB |
| Sound pressure level LpA: | 71 dB (A) ± 3 dB |
| IP Class: | IP 20 |
| Weight (17004/17015): | 25,7 / 33,5 kg |
6. NOISE EMISSION VALUES
See technical data.
7. IMPORTANT INFORMATION FOR INITIAL OPERATION
Check the product for transport any damage. Notify the carrier if you find any transport damage.
Check the oil level of the compressor before useage. (Image K)
Position the compressor as close to the working area as possible to avoid long air hoses and extension cords.
Intake air must be dry and clean.
After filling the air tank the compressor engine must cool down for 2-5 minutes to avoid overheating.
Mounting the wheels (3)
The enclosed wheels have to be mounted according to images C and D.
Mounting the stand (16)
The enclosed rubber stands have to be mounted according to image E.
Mounting the air filter (1)
Remove the transport plug using a flat screwdriver or a similar tool (image F). Screw the air filter to the compressor as shown in image G.
Mounting the oil plug (12)
Remove the transport plug using a flat screwdriver or a similar tool (image H). Put the oil plug firmly into the opening.
8. OPERATION INSTRUCTIONS
On/off switch (11)
Pulling the red on/off switch up will start the compressor engine. Pushing it down will stop the engine. (image B)
Quick coupling (7)
Connect:
Put the plug of your hose directly into the coupling until you hear a clicking sound.
Disconnect:
Pull back the sleeve of the quick coupling and pull out the plug.
Adjusting the pressure
Use the pressure regulator (6) to adjust the pressure on the gauge (8). This will regulate the pressure coming out of the working pressure valve (7).
The second gauge (13) displays the pressure in the tank. The tank pressure comes out of the tank pressure valve (15).
Pressure valve (9)
The pressure valve is adjusted by the factory. It will start the engine at aprox. 6 bar and shut it off at aprox. 8 bar.
Overload switch (18)
To prevent overheating the overload switch (image O) will engage automatically. If that happens, let the compressor cool down for a few minutes before pushing the switch back in.
Troubleshooting:
Compressor engine does not work
Cause: No power present.
Solution: Check cables, plugs, fuses and outlets.
Cause: Power level too low.
Solution: Avoid using long extension cords. If you have to use extension cords, make sure they are sufficiently thick (at least 2.5mm 2).
Cause: Ambient temperature too low.
Solution: Do not operate below 5^ .
Cause: Engine overheating.
Solution: Let the engine cool down. Do not operate above 40^ ambient temperature.
Compressor engine working, but no pressure
Cause: Tank pressure valve leaky.
Solution: Replace valve.
Cause: Seals leaky.
Solution: Check seals and let a certified technician replace them.
Cause: Drain valve leaky.
Solution: Tighten the screw by hand. Check the seal on the valve and replace it if necessary.
Compressor engine working, gauge display pressure, tools not operating
Cause: Hose connections leaky.
Solution: Check hoses and tools and replace if necessary.
Cause: Working pressure valve leaky.
Solution: Check valve and replace if necessary.
Cause: Pressure regulator set too low.
Solution: Increase pressure with the pressure regulator or use the tank pressure valve.
9. SERVICE AND REPLACEMENT PARTS
Condensed water
Condensed water can be drained using the drain valve (17) on the bottom of the tank (image 14). The condensed water inside the tank contains oil and has to be disposed of accordingly.
Safety valve
The safety valve is set to the max. allowed tank pressure. It is forbidden to alter this valve in any way. To ensure a perfect operation of the valve it has to be moved every now and then. Pull the ring until you hear the air venting from the valve. Then let go of the ring.
Check oil levels
The correct oil level is indicated on the oil gauge (4). It has to be between the red indicator and the top of the gauge.
Oil replacement
Recommended oil: SAE 15W/40 or similar. The first oil replacement should be done after 100 working hours. After that, the interval is 500 working hours. Switch off the engine and disconnect the power and vent any remaining pressure. Remove the screw from the oil drain (image J). Collect the oil in a suitable container and avoid any oil spills. You may need to tilt the compressor slightly to drain all the oil. Dispose of the oil in accordance with federal laws and regulations.
Once all oil has been drained screw the drain shut again. Fill fresh oil into the opening (12) until it reaches the max. oil level (image K). Seal the opening with the oil plug (12).
Cleaning of the intake air filter
The filter needs to be cleaned every 300 working hours. Cogged air filters will significantly reduce the power of the compressor. First remove the air filter from the compressor. Then unscrew the cap of the filter and remove the sponge from inside the filterhousing. Shake or blow off (max. 3 bar) all dust. Reassemble the filter and put it back on the compressor.
10. WARRANTY
We grant a 6 month warranty on all products. Keep your sales document (receipt, sales slip, etc). Without your sales document we can not accept any claims. Our warranty covers all production or material errors. Not covered by our warranty are:
- Normal wear as caused by proper use of the product.
- Expendable parts (bearings, brushes, cables, plugs, accessories, etc.)
- Defects resulting from improper use (i.e. other use as indicated in „designated use”), accidents, modifications made to the product and/or its safety-mechanisms.
- Defects resulting from inadequate maintenance/cleaning
- Defects caused by third (unauthorized) parties
- Products that have not been submitted to the manufacturer/reseller in their original condition (eg. disassembled, altered, etc.)
- Defects (of any kind) that have occurred after the warranty period has expired.
11. DISPOSAL
Our products are packed in order to prevent damage during transport. Packing materials are valuable resources and therefore can and should be recycled. The product itself consists of various materials (metals, oils, plastic, etc.) and should be disposed with care and in accordance with your federal and local disposal regulations.
12. LEGAL INFORMATION
All rights reserved. This manual is copyrighted. Reproduction in and form (digital, print, etc.) is strictly prohibited without the written permission of ERBA GmbH.
DECLARATION OF CONFORMITY
Models:
17004 Air Compressor V - 210/8/24
17015 Air Compressort V - 210/8/50
ERBA GmbH, Talpagasse 6, 1230 Wien, hereby states, that the mentioned model meet the following CE/RoHS quality standards, approvals and relevant safety requirements:
Machinery Directive: 2006/42/EC
EMC Directive: 2014/30/EC
Outdoor Directive: 2000/14/EC + 2005/88/EC
ROHS: 2002/95/EC
- EN 60204-1:2006+A1:09
- EN 1012-1:2010
- AfPS GS 2014:01 PAK
- EN 61000-6-1:2007
- EN 61000-6-3:2007/A1:2011
- EN 61000-3-2:2014
- EN 61000-3-3:2013

For and on behalf of ERBA GmbH (authorized signature)
Dominik Schilling
Technical coordinator
ERBA GmbH, Talpagasse 6, 1230 Wien, Austria
Table des matieres
Recherche
Directive CEM: 2014/30/CE
ROHS: 2002/95/EC
- EN 60204-1:2006+A1:09
- EN 1012-1:2010
- AfPS GS 2014:01 PAK
- EN 61000-6-1:2007
- EN 61000-6-3:2007/A1:2011
- EN 61000-3-2:2014
- EN 61000-3-3:2013
Vienne, 01.12.2016
6. HODNOTY EMISİ HLUKU
Viz technické udaje
Strana 49
7. DÜLEZITÉ INFORMACE PRO UVEDENİ DO PROVOZU
1.BxoJraU Bb3NyWeH HnIITbp
10.Дрьжka
-
Pe3epBoap noД haIraHe
-
Kliou 3a BkIIOUBaHe/ɪn3KlIOUBaHe
-
Konejo
12.Пpo6ka 3a macno
4.ИЗмерпелзamaçлOTO
13.ИЗмерптел(hалганеHa peзервoga)
5.3auntehBentn
-
BnHT 3a n3nyckaHe Ha MacNoTo
-
PerynaTop Ha HanaRaHeTo
-
BeHTnI 3a HaIraHaHe Ha pe3epBoapa
-
BeHTnI 3a pa60THo HajraHe
-
Stojka
8.Измерпел (pa6oTHO haIraHae)
-
Kla na 3a n3ToUbaHe
-
ПпевкlioчВаTeн 3a НягаHe
18.певкlioуВаTeн 3a пeТОВapВaHe
3. ПЕДHA3HAUHNE
KoMnpecopbT ce n3noI3Ba 3a reHepnpaHe Ha cBcTeH Bb3dyx 3a pa6Ota C INHCTpyMeHTN, 3axpaHBaHI C Bb3dyx. N3noI3BaHeTo 3a KaKBInTO I da 6nIO npyIe 3a6paHeNo. KyuBaHT PoEma BCra KA OTROBOPHOCT, npaBHn I npyra, 3a NOBpeIN IIN HapAHBAHn, Bb3HNKHaII ON He npaBnIHNO nO13BaHe Ha npOkyTA (T.e., BCaKaBO dpYr OJn3BaHe, oCBeH NocOueHOTo No-rope npedHa3NaueHne).
4. ORPAHIVEHM
MOnr, HMaIte npEiBnD, ye To3n InpOyKT He e npEiHa3HaueH 3a yNoTpe6a C TbprOBCKn nn IpnOMnIeHn Zeenn. Hne He NoeMaMe OTROBOpHoc n NsKaHn 3a rapaHcNIOHNO o6CnyXBaHe, aKO npOyKtBt 6bDe n3PON3BaH C TbprOBCKn n/nnn IpOMnIeHn Zeenn.
5. TEXHmueCKn DAHHN
| Homonhalna мошист: | 230 V ~ 50 Hz |
| Мошист на мотopa: | 2 PS / 1500 W |
| ОворOTи на мотopa: | 2850 o6./mн. |
| РавOTно налганe: | мakc. 8 bara |
| Обem на peзерboaра (17004/17015): | 24 / 50 l |
| Консумацnia на Вьздун: | 210 l/mн. |
| НиBO на сида на звука (LwA): | 93 dB (A) ± 3 dB |
| НиBO на звуково налганe (LpA): | 71 dB (A) ± 3 dB |
| IP клас: | IP 20 |
| Тerillo (17004/17015): | 25,7 / 33,5 kg |
6. CTO'HOCTN HA L'YMMOB N EMVCN
BnKTeTexHnuecknTe daHHN.
7. BAXKA INHΦOPMALIЯ 3A ПьРBOHAJIHA PABOTA
■Поберете подукta 3a порди OTТраHCNoptupaHeTo.УвEDOMeTe ДocTaBUnka,akO OTKpneTe NOBpeDN OTТраHCNoptupaHeTo.
■Пюверете НИВОТо Ha MacIoTO Ha KOMпecopa, пеши Дa Го ИЗПОЛ3ВаTe. (Изобразенье К)
■ NocTabete KOMnpecopa MaKcImMaHNo 6n3o Do pa60ThaTa 0bnaCT, 3a Da n36eHHeTe Dblrnte Bb3dUshn MapkyuN yDblxHtEnHnTe Ka6eHn.
BxoJyT Bb3DyX Tp8Ba Da e cyx n uNCT.
Cnei HanbIbAHe Ha B3dUshnpye3epBoap, MOTOpbT Ha KOMnPecopa Tp6Ba Da ce oxlaNi MeJy 2 n 5 MInHyTn, 3a da ce n36erHe nperepaBHe.
OTCTpaHЯBaHe Ha Hen3npaBHOCTM:
MotopbHa Komnpecopa He pa60tN
PeuHHe: He pa6oTeTe npD 5^
Причuna:МOTOPТпргЯВa.
PeueHne: OcTaBeTe MoToPa Da ce oxlaAn. He pa6oTe Te npn OkolHa TempepaTpa Ha4 40^
MotopbHa Komnpecopa pa60Tu, Ho Hama HaIraHe
Причина: Има Teу OT BeHTиla 3a HaJIraHe Ha pe3epBoapa.
PeuHne: CmeHeTe BeHTnla.