
H4F306SDH1 - Freezer HAIER - Free user manual and instructions
Find the device manual for free H4F306SDH1 HAIER in PDF.
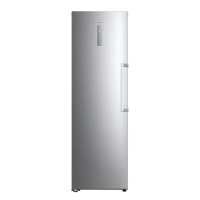



| Product Type | 1-door Freezer |
| Brand | Haier |
| Model | H4F306SDH1 |
| Dimensions (H x W x D) | 190 x 60 x 74.2 cm |
| Power Supply | 220-240 V ~/50 Hz, 1.5 A |
| Energy Class | D |
| Freezer Volume | 301 L |
| Power Failure Autonomy | 12 h |
| Freezing Capacity | 20 kg/24h |
| Refrigerant | R600a (isobutane) |
| Main Functions | Super Freeze, ECO Mode, ABT Pro (antibacterial), Wi-Fi, power failure memory, door open and high temperature alarms |
| Defrosting | Automatic |
| Noise Level | 36 dB(A) |
| Reversible Door | Yes (right or left) |
| Care and Cleaning | Clean with a mild detergent and a soft cloth; do not use sharp objects |
| Spare Parts and Repairability | Available (see warranty); repairs by a qualified professional |
Frequently Asked Questions - H4F306SDH1 HAIER
User questions about H4F306SDH1 HAIER
0 question about this device. Answer the ones you know or ask your own.
Ask a new question about this device
Download the instructions for your Freezer in PDF format for free! Find your manual H4F306SDH1 - HAIER and take your electronic device back in hand. On this page are published all the documents necessary for the use of your device. H4F306SDH1 by HAIER.
USER MANUAL H4F306SDH1 HAIER
Thank you for purchasing a Haier Product.
Please read these instructions carefully before using this appliance. The instructions contain important information which will help you get the best out of the appliance and ensure safe and proper installation, use and maintenance.
Keep this manual in a convenient place so you can always refer to it for the safe and proper use of the appliance.
If you sell the appliance, give it away, or leave it behind when you move house, make sure you also pass this manual so that the new owner can become familiar with the appliance and safety warnings.

Legend
General information and tips

Warning - Important Safety information

Environmental information
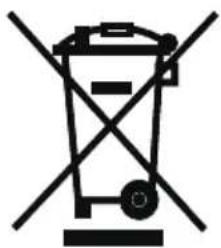
Disposal
Help protect the environment and human health. Put the packaging in applicable containers to recycle it. Help to recycle waste of electrical and electronic appliances. Do not dispose appliances marked with this symbol with the household waste. Return the product to your local recycling facility or contact your municipal office.

Warning!
Risk of injury or suffocation!
Refrigerants and gases must be disposed of professionally. Ensure that the tubing of the refrigerant circuit is not damaged before being properly disposed of. Disconnect the appliance from the mains supply. Cut off the mains cable and dispose of it. Remove the door, the door catch and seals, to prevent children and pets from getting closed in the appliance.
1 - Safety 4 2 - Intended Use 8 3 - Product Description 9 4 - Control panel 10 5 - Use 11 6 - Energy saving 14 7 - Equipment 14 8 - Care and Cleaning 15 9 - Troubleshooting 17 10 - Installation 20 11 - Technical Data 24 12 - Customer Service 25
1 - Safety
Before switching on the appliance for the first time, read the following safety hints!

WARNING!
Before first use
~ Make sure there is no transport damage. ~ Remove all packaging and keep out of children's reach.
Installation
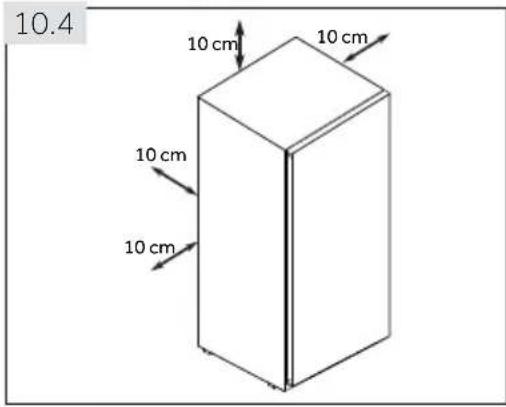
~ Wait at least six hours before installing the appliance in order to ensure the refrigerant circuit is fully efficient. ~ Handle the appliance always with at least two persons because it is heavy. ~ The appliance should be placed in a well-ventilated place. Ensure a space of at least 10 cm above and around the appliance. ~ Do not cover air vent openings. ~ Never place the appliance in a damp area or location where it might be splashed with water. Clean and dry water splashes and stains with a soft clean cloth. ~ Do not install the appliance in direct sunlight or in the near of heat sources (e.g. stoves, heaters). ~ Install and level the appliance in an area suitable for its size and use. ~ Keep ventilation openings in the appliance or in the in-built structure clear of obstruction. ~ Make sure that the electrical information on the rating plate agrees with the power supply. If it does not, contact an electrician. ~ The appliance is operated by a 220-240 VAC/50 Hz power supply. Abnormal voltage fluctuation may cause the appliance to fail to start, or damage to the temperature control or compressor, or there may be an abnormal noise when operating. In such case, an automatic regulator shall be mounted. ~ Use a separate earthed socket for the power supply which is easily accessible during cleaning. The appliance must be earthed. ~ Only for UK: The appliance's power cable is fitted with 3-cord (grounding) plug that fits a standard 3-cord (grounded) socket. Never cut off or dismount the third pin (grounding). After the appliance is installed, the plug should be accessible. ~ Do not use multi-plug adapters and extension cables. ~ Ensure that the power cable is not trapped by the freezer. Do not step on the power cable. ~ Do not damage the refrigerant circuit.

WARNING!
Daily use
~ This appliance can be used by children aged from 8 years and above and persons with reduced physical, sensory or mental capabilities or lack of experience and knowledge if they have been given supervision or instruction concerning use of the appliance in a safe way and understand the hazards involved. Keep away children under 3 years of age from the appliance unless they are constantly supervised. Children shall not play with the appliance. If cool gas or other inflammable gas is leaking in the vicinity of the appliance, turn off the valve of the leaking gas, open the doors and windows and do not unplug a plug in the power cable of the freezer or any other appliance. ~ The freezing function works at ambient temperature as low as -15°C. works at -15°C ambient room temperature when set at maximum power, at -24°C. with water) on top of the freezer, to avoid personal injury caused by falling or electric shock caused by contact with water.
Do not place unstable articles (heavy objects, containers filled with liquid) on the appliance.
- Open and close the doors only with the handles. The gap between the doors and between the doors and the cabinet is very narrow. Do not extend your hands in these areas to avoid pinching your fingers. Open or close the freezer doors only when there are no children standing within the range of door movement.
- Do not store or use inflammable, explosive or corrosive materials in the appliance or in the vicinity.
- Do not store medicines, bacteria or chemical agents in the appliance. This appliance is a household appliance. It is not recommended to store materials that require strict temperatures. On refrigerating mode without a 4-star compartment: this refrigerating appliance is not suitable for freezing foodstuffs; on freezing mode with a 4-star compartment: this freezing appliance is not suitable for refrigerating foodstuffs.
- Never store liquids in bottles or cans (besides high percentage spirits) especially carbonated beverages in the freezer, as these will burst during freezing. Check the condition of food if a warming in the freezer has taken place. Do not set unnecessarily low temperature in the freezer compartment. Attention: Bottles can burst.
1 - Safety
WARNING!
Daily use
- Do not touch frozen goods with wet hands (wear gloves). Especially do not eat ice lollies immediately after removal from the freezer compartment. There is the risk to freeze or the formation of frost blisters. First aid: keep immediately under running cold water. Do not pull away! Do not touch the inside surface of the freezer when in operation, especially with wet hands. Your hands may freeze onto the surface. Unplug the appliance in the event of a power interruption or before cleaning. Allow at least 5 minutes before restarting the appliance, as frequent starting may damage the compressor.
- Do not use electrical devices inside the food storage compartments of the appliance, unless they are of the type recommended by the manufacturer. If the illuminating lamps is damaged, it must be replaced by the manufacturer or by the qualified person at the specified maintenance provider.
Maintenance/cleaning
Make sure children are supervised if they carry out cleaning and maintenance.
Disconnect the appliance from the electrical supply before undertaking any routine maintenance. Allow at least 5 minutes before restarting the appliance, as frequent starting may damage the compressor.
Hold the plug, not the cable, when unplugging the appliance.
Do not scrape off frost and ice with sharp objects. Do not use sprays, electric heaters like heater, hair dryer, steam cleaners or other sources of heat in order to avoid damage to the plastic parts.
Do not use mechanical devices or other means to accelerate the defrosting process, other than those recommended by the manufacturer.
Do not spray or flush the appliance during cleaning.
Do not use water spray or steam to clean the appliance.
If the supply cord is damaged, it must be replaced by the manufacturer, its service agent or similarly qualified persons in order to avoid a hazard.
Do not try to repair, disassemble or modify the appliance by yourself. In case of repair please contact our customer service.
Refrigerant gas information

WARNING!
The appliance contains the flammable refrigerant ISOBUTHANE (R600a). Make sure the refrigerant circuit is not damaged during transportation or installation. Leaking refrigerant may cause eye injuries or ignite. If a damage has occurred, keep away open fire sources, thoroughly ventilate the room, do not plug or unplug the power cords of the appliance or any other appliance. Inform the customer service.
In case of eyes get into contact with the refrigerant, rinse immediately it under running water and call immediately the eye specialist.

WARNING!
Take care to avoid causing a fire by igniting flammable material. WARNING: When positioning the appliance, ensure the supply cord is not trapped or damaged. WARNING: Do not locate multiple portable socket-outlets or portable power supplies at the rear of the appliance. Do not store explosive substances such as aerosol cans with a flammable propellant in this appliance. For flammable refrigerants used in the freezer, please be careful when installing, handling, serving and recycling the appliance. Please contact the service agent to dispose the appliance because the flammable blowing gas was used.
2 - Intended use
2.1 Intended Use
This appliance is intended to be used in household and similar applications such as
- staff kitchen areas in shops, offices and other working environments;
- farm houses and by clients in hotels, motels and other residential type environments;
- bed and breakfast type environments;
- catering and similar non-retail applications.
This appliance is intended for freezing food. It has been designed exclusively for use in dry interior households. It is not intended for commercial or industrial use. On demand, this appliance can be used as a fresh food compartment.
Changes or modifications to the device are not allowed. Unintended use may cause hazards and loss of warranty claims.
2.2 Accessories
Check the accessories and literature in accordance with this list:
2.2
Energy label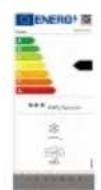
Quick Guide
User manual, Warranty card
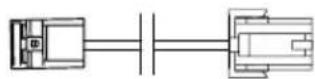
Door extension cord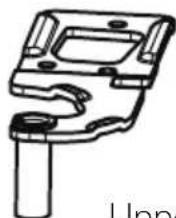
Upper left hinge for door reversibility, Upper left hinge cover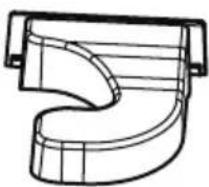
Axis covers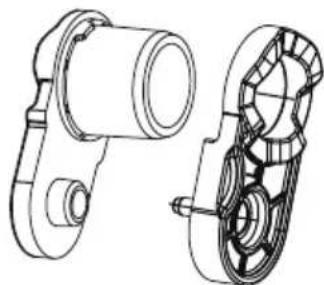

Notice: Differences
Due to technical changes and different models, some of the illustrations in this manual may differ from your model.
Picture of appliance (Fig. 3)
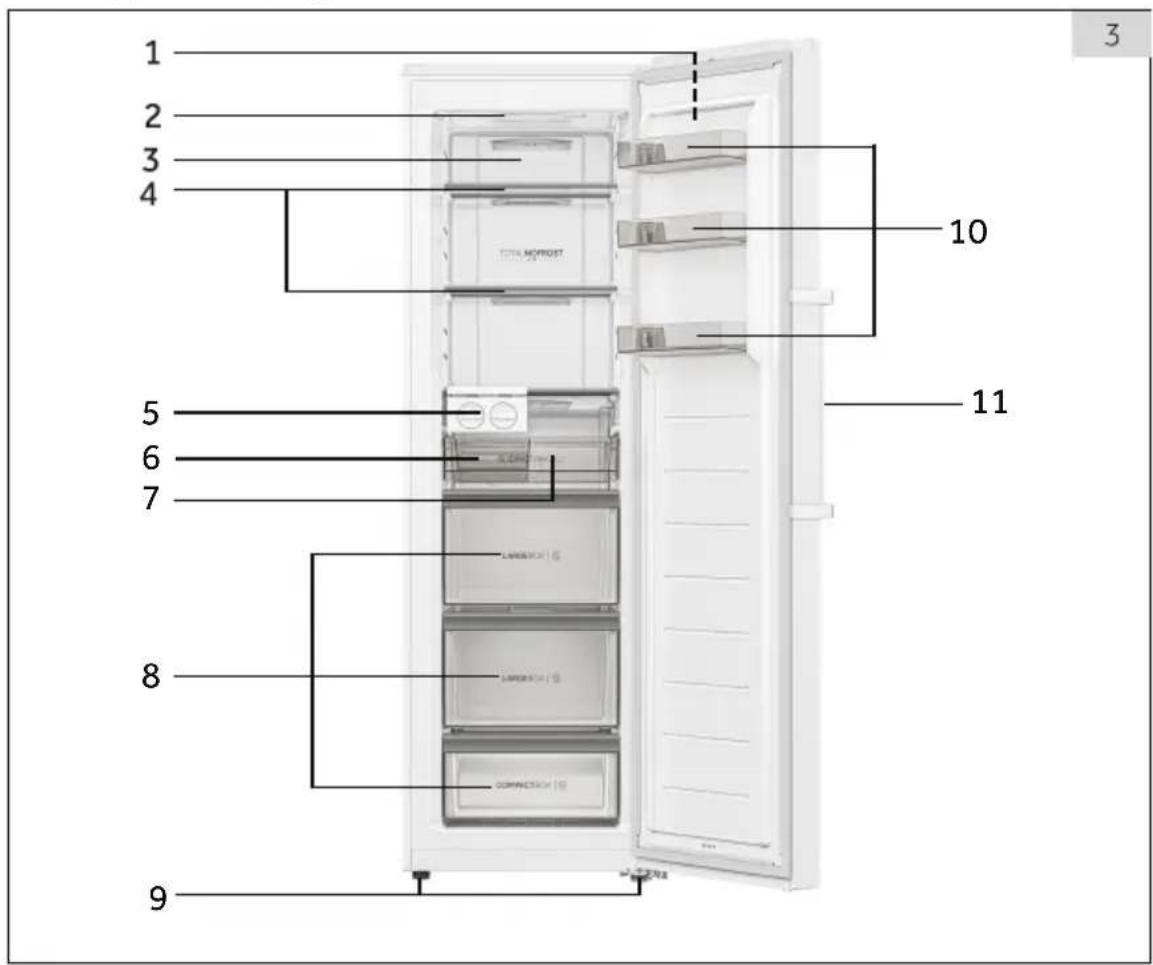
1 Control panel
7 Sliding tray
2 LED light
8 Drawers
3 Air duct
9 Adjustable feet
4 Glass shelves
10 Removable door racks
5 Ice maker assembly
11 Door handle
6 Ice receiver
Note: This product contains a light source of energy efficiency class <G>
Note: Components 5/6/7 available for H4F306/272/226*A/C/DH1/BE.
H4F272/226*EH1/K has four drawers, without components.
5/6/7. H4F226 without components 10
4 - Control panel
Control panel (Fig. 4)
A - (Temperature decrease)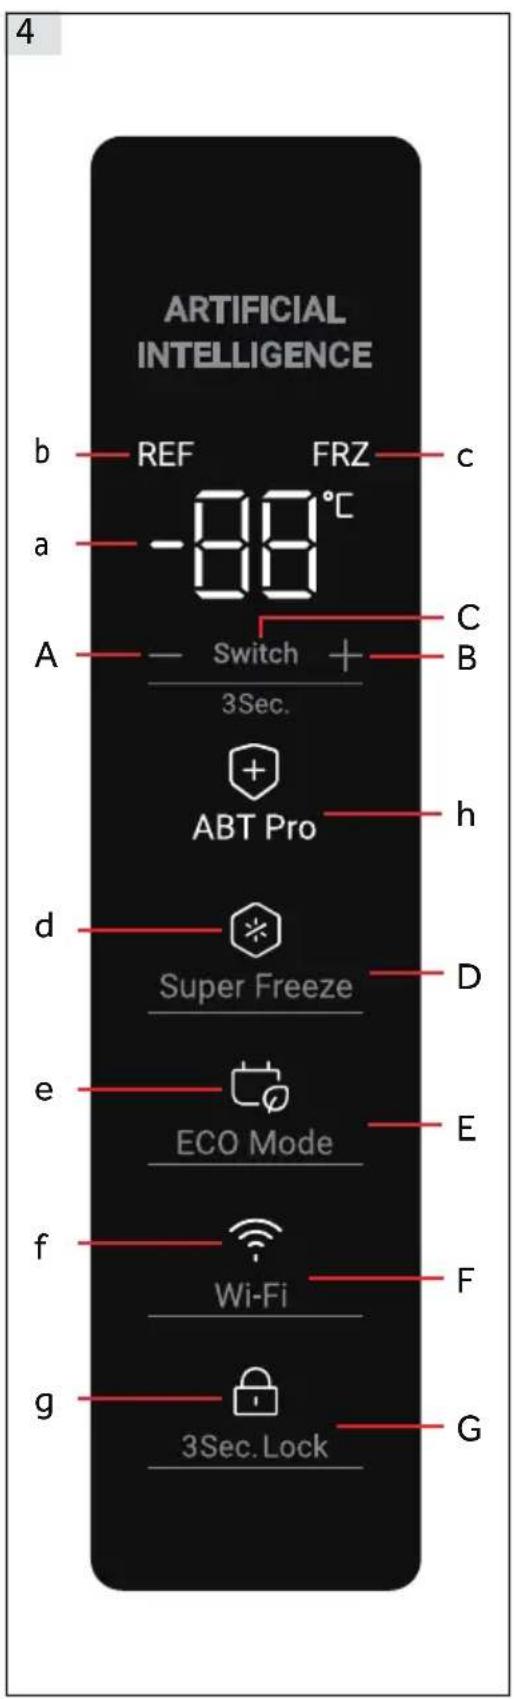
C Instaswitch B + (Temperature increase) D Super Freeze mode E ECO Mode F Wi-Fi G 3 Sec. Lock
5.1 Before first use
Remove all packaging materials, keep them out of children's reach and dispose of them in an environmentally friendly manner. Clean the inside and outside of the appliance with water and a mild detergent before putting any food in it. After the appliance has been levelled and cleaned, wait for at least 6 hours before connecting it to the power supply. See Section INSTALLATION. Precool the compartment for 2 hours at high settings before loading with food. To do so, please set the temperature to lower than -20 °C.
5.2 Switching the appliance on/off
The appliance is in operation as soon as it is connected to the power supply.
The freezer temperature is automatically set to -18 °C. This is the recommended setting and the ideal temperature for frozen goods. If desired, you can change the temperatures manually. Please see ADJUSTING THE TEMPERATURE.
Indicators (a-g) will flash once consecutively. If the door is closed, the display switches off after 30 seconds. The panel lock might be active.

Notice: Presettings
The appliance is preset to the recommended temperature of -18 °C. Under normal ambient conditions you don't need to set a temperature. When the appliance is switched on after being disconnected from the main power supply, it may take up to 12 hours for the correct temperature to be reached.
Empty the appliance before switching off. To switch off the appliance, pull the power cord out of the power socket.
5.3 Standby mode of display
When the door is closed, the display screen turns off automatically 30 seconds after no operation. The display locks automatically. It lights up automatically when touching any button or opening the door.
5.4 Display lock and unlock
Automatic locking
The display is automatically locked after about 30 seconds without operation.
Manual locking
When the display is unlocked, press "3 Sec. Lock" (G) and hold for 3 seconds. After a beep, the "3 Sec. Lock" indicator lights up, and the display is locked. When the display is locked, press "3 Sec. Lock" (G) and hold for 3 seconds. After a beep, the "3 Sec. Lock" indicator turns off, and the display is unlocked.

Notice: Display lock
When the display is locked, functions such as temperature setting or super freeze are disabled. When the above operation is attempted, the "3 Sec. Lock" indicator will blink 3 times to remind that the display is locked.
5.5 Freeze/Refrigerate mode switch
When the display is unlocked, by pressing "Switch" (C) for 3 seconds, the freezer can switch between Freeze and Refrigerate modes. In Freeze mode, the default setting is -18°C, the indicator "REF" (b) is off, and the indicator "FRZ" (c) is on. In Refrigerate mode, the default setting is 4°C, the indicator "REF" (b) is on, and the indicator "FRZ" (c) is off.
There is a big difference in temperature between Freeze and Refrigerate modes for different food storage. Prior to making any mode change, please make sure to change the food inside the freezer, so that food will not be damaged because of mode change.
5.6 Temperature setting
Freeze mode range: -16°C to -24°C
Refrigerate mode range: 2°C to 8°C.
When the display is unlocked and the freezer is not in Super Freeze or ECO mode, touching the - (A) and + (B) buttons allows you to set different temperatures, which will be shown flashing on the indicator (a). This process is accompanied by beeps. After 5 seconds without touching the buttons, the indicator (a) will stop flashing and display the temperature that was set before the adjustment. The set temperature is displayed once the cooling effect is achieved.
5.7 Super Freeze mode (D)
Super Freeze mode is optimal for preserving food nutrition, as it can freeze food in less time. Before placing a large amount of food in the freezer, activate the Super Freeze function to achieve a lower temperature and ensure better freezing results.
When the display is unlocked and the freezer is in Freeze mode, touching the "Super Freeze mode" (D) button will highlight the "Super Freeze" indicator (d), and the freezer will operate in Super Freeze mode. To deactivate it manually, repeat the same steps, and the "Super Freeze" indicator (d) will dim. If not deactivated manually, the mode will automatically turn off after 50 hours. If you have a large amount of food to freeze at once, it is recommended to activate this function 24 hours before placing the food inside. The function will stop automatically after 50 hours or can be stopped manually. Power consumption will increase while this function is active.

Notice: Super Freeze
If the set temperature before entering Super Freeze mode is ≥ -18°C, the freezer will exit Super Freeze mode and return to the -18°C setting. If the set temperature before entering Super Freeze mode is < -18°C, the freezer will exit Super Freeze mode and return to the original set temperature. In Super Freeze mode, the temperature cannot be adjusted. If you attempt to adjust it, the Super Freeze indicator will blink for a while to remind you that the freezer is in Super Freeze mode. Super Freeze mode can only be set when the freezer is in Freeze mode. In Refrigerate mode, the Super Freeze indicator is off and Super Freeze mode cannot be set. For models H4F226WDH1/H4F226WEH1/K, it is recommended to turn on "Super Freeze" 30 hours before placing a large amount of food inside.
5.8 ECO mode (E)
In ECO mode, energy saving is achieved. The temperature will be automatically set to -16°C in Freeze mode or 8°C in Refrigerate mode.
When the display is unlocked, touching the "ECO Mode" (E) button will highlight the "ECO Mode" indicator (e), and the freezer will operate in ECO mode. To deactivate ECO mode manually, repeat the same steps, and the "ECO Mode" indicator (e) will dim.
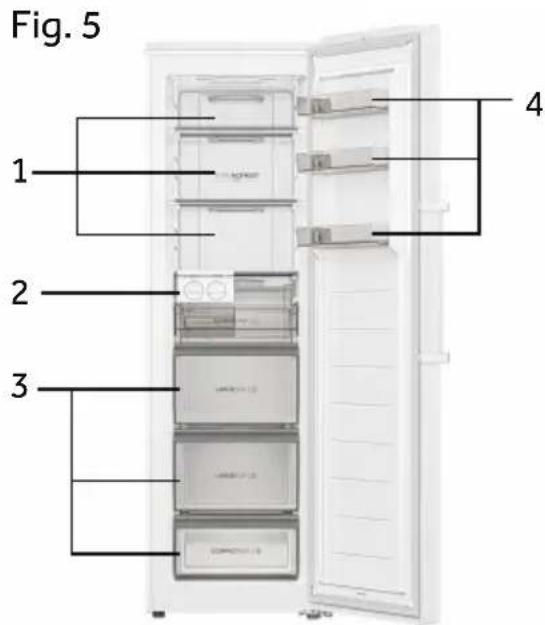
Different foods should be placed in different areas according to their properties (Fig. 5).
1. Pickled foods, canned food, fruit, vegetables, salad, etc. 2. Ice maker components. 3. Meat products, snack foods, etc. 4. Eggs, canned food, spices, drinks, and bottled foods, etc.
In refrigerating mode without a 4-star compartment: this refrigerating appliance is not suitable for freezing foodstuffs; in freezing mode with a 4-star compartment, this freezing appliance is not suitable for refrigerating foodstuffs.
Food can be stored in the freezer at a temperature of at least -18°C for 2 to 12 months, depending on
its properties (e.g., meat: 3-12 months, vegetables: 6-12 months).
In order to avoid expiration of storage periods, please note the freezing date, time limit and name of the food on the packaging according to the storage periods of different foods.
5.9 ABT Pro (only for H4F306*A/C/DH1/BE)
The freezer is equipped with an Antibacterial module, which runs autonomously after power-on, and users do not need to operate. The indicator (h) lightens up showing that the module is running.
5.10 Power-off memory
This freezer has power-off memory, settings before power-off will be memorized. When power is back on, freezer will return to settings before power-off and continue to function.
Display lock is not memorized, after power back on, display is unlocked.
5.11 Door open alarm
When freezer is kept open for more than 1 minute, alarm tone is sounded. The alarm tone will be sounded every 30 seconds if door is kept open. The alarm will stop until door is closed or after 7 minutes from door opening. The alarm tone stops and freezer light goes off.
5.12 High temperature alarm
The freezer is equipped with high temperature alarm. In Freeze mode, if "HH" is flashing displayed on indicator (a) with alarm tone sounded, touch any button, the alarm tone stops, that means temperature in the freezer is too high. Please check if freezer door is tightly closed or if large amount of warm food is put inside the freezer. After a period, "HH" will disappear. If not, and the alarm tone come back, please contact aftersales service.
5.13 Error indication
This freezer is equipped with error indication. When an error is encountered, display will show flashing codes for different errors. In this situation, the freezer could still freeze but user should contact after sales service as soon as possible for optimal control of the freezer.
5.14 Wi-Fi
After the refrigerator is connected to Wi-Fi, it can be remotely controlled through a mobile app. (Please refer to the configuration page for specific configuration methods)
6 - Energy saving tips

Energy saving tips
Make sure the appliance is properly ventilated (see INSTALLATION). Do not install the appliance in direct sunlight or near heat sources (e.g., stoves, heaters). Avoid unnecessarily low temperature in the appliance. The energy consumption increases the lower the temperature in the appliance is set. Allow warm food to cool down before placing it in the appliance. Open the appliance door as little and as briefly as possible. Make sure the door always closes correctly and is not obstructed by food. Keep door seals clean. Defrost frozen food in a fridge. Clean the rear of the appliance regularly. Dust increases energy consumption. The most energy-saving configuration requires drawer, food box, and shelves to be positioned in the appliance as in the factory-fresh condition, and food to be placed without blocking the air outlet of the duct.
7 - Equipment
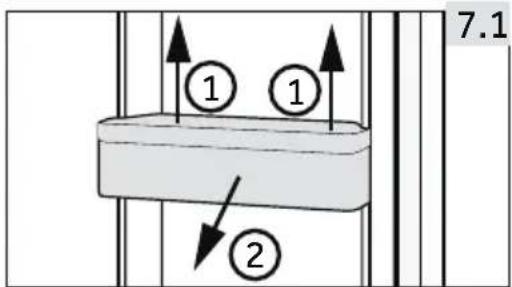
7.1 Removable door racks
The door rack can be removed for cleaning:
Place hands on each side of the rack, lift it upwards (1) and pull it out (2) (Fig. 7.1).
To insert the door rack, carry out the above steps in reverse order.
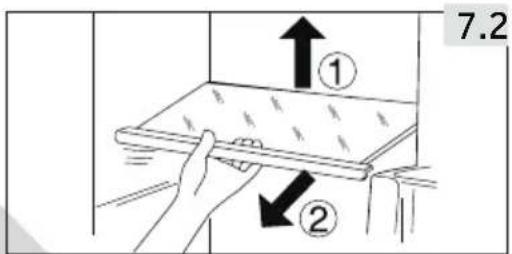
7.2 Glass shelves
- To take out a shelf, first remove it by lifting its hind edge (1) and pulling it out (2) (Fig. 7.2).
- To reinstall it, place it on the lugs on both sides and push it to the most rearward position until the rear of the shelf is fixed inside the slots in the sides.
WARNING!
Disconnect the appliance from the power supply before cleaning.
8.1 General
Clean the appliance when only little or no food is stored.

WARNING!
~ Do not clean the appliance with hard brushes, wire brushes, detergent powder, petrol, amyl acetate, acetone and similar organic solutions, acid or alkaline solutions. Please clean with special freezer detergent to avoid damage. ~ Do not spray or flush the appliance during cleaning. Do not scrape off frost and ice with sharp objects. ~ Do not use sprays, electric heaters like heater, hair dryer, steam cleaners or other sources of heat in order to avoid damage to the plastic parts. ~ Do not clean the cold glass shelves with hot water. Sudden temperature change may cause the glass to break. ~ Do not touch the inside surface of the freezer storage compartment, especially with wet hands, as your hands may freeze onto the surface. ~ In case of heating check the condition of frozen goods. ~ Do not try to repair the appliance by yourself. In case of repair please contact our customer service.
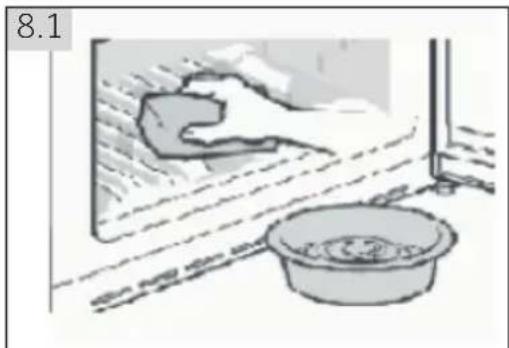
~ Always keep the door gasket clean. Clean the inside and housing of the appliance with a soft cloth or sponge dampened in warm water and neutral detergent (Fig. 8.1). ~ Rinse and dry with soft cloth. ~ Do not clean any of the parts of the appliance in a dishwasher. ~ Clean the accessory only with warm water and mild neutral detergent.
8- Care and Cleaning
The user manual includes instructions for the using and operation of multiple models. Please refer to the instructions for the purchased models.
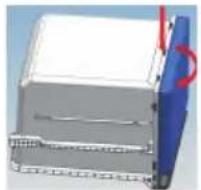
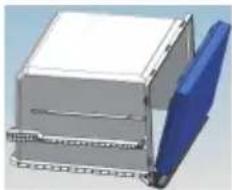
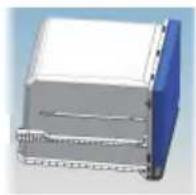
Drawer cleaning steps
1.Remove the front cover of drawer:
2.Cleaning of drawer body:
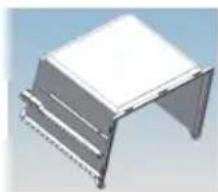
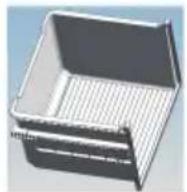
- Cleaning of drawer cover:
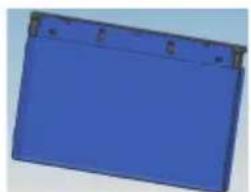
- Assembly after cleaning:
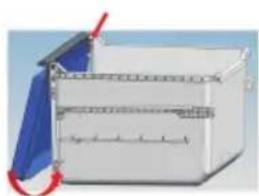
Ice maker cleaning
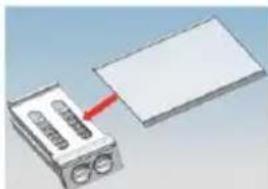
- Remove the ice maker and glass shelf
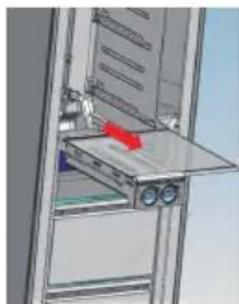
2.Remove the ice maker from the shelf in the left and right directions
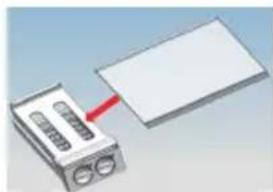
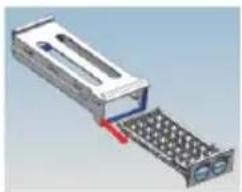
3.Pull the ice box out of the frame:
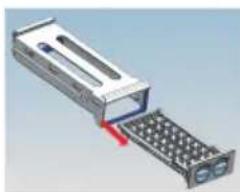
4.Cleaning of ice box:
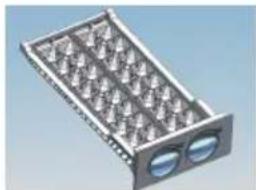
- Assembly after cleaning:
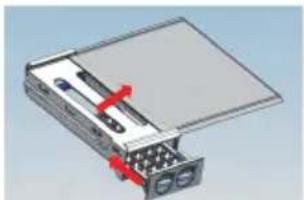
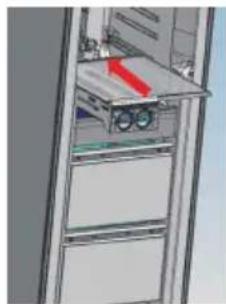
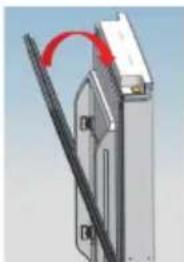
Door seal cleaning
- Door seal strip remove
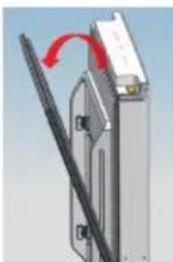
- Door seal cleaning
3. Installation after cleaning
8- Care and Cleaning
8.2 Non-use for a long period
If the appliance is not used for an extended period of time:
~ Take out the food. ~ Unplug the power cord. ~ Clean the appliance as described above. ~ Keep the door and freezer drawers open to prevent the creation of bad odours inside.
Remove the door of the appliance (open the door and hold it before removing the screws) to avoid children entering into the appliance and getting locked in.

Notice: Switch off
To ensure the service life of the appliance, turn it off only if strictly necessary.
8.3 Moving the appliance
- Remove all food and unplug the appliance.
- Secure shelves and other moveable parts in the freezer with adhesive tape.
- Close the door and secure it with tape.
- Do not tilt the freezer more than 45 degrees to avoid damaging the refrigerating system.
- Wrap the feet of the freezer to avoid scratching the floor. Never move the freezer forcefully.

WARNING!
Do not lift the appliance by its handles. Never place the appliance horizontally on the ground.
Many occurring problems could be solved by yourself without specific expertise. In case of a problem please check all shown possibilities and follow below instructions before you contact an after sales service. See CUSTOMER SERVICE.
WARNING!
Before maintenance, deactivate the appliance and disconnect the mains plug from the mains socket. Electrical equipment should be serviced only by qualified electrical experts, because improper repairs can cause considerable consequential damages. A damaged supply should only be replaced by the manufacturer, its service agent or similarly qualified persons in order to avoid a hazard.
The acoustic alarm can be switched off by pressing any button.
9.1 Troubleshooting
| Problem Possible Cause Possible Solution | ||
| The compressor does not work. | ·Mains plug is not connected in the mains socket. | ·Connect the mains plug. |
| The appliance runs frequently or for a too long period of time. | ·The indoor or outdoor temperature is too high. ·The appliance has been off power for a period of time. ·The door of the appliance is not tightly closed. ·The door has been opened too frequently or for too long. ·The temperature setting is too low. ·The door gasket is dirty, worn, cracked or mis-matched. ·The required air circulation is not guaranteed. ·The interior is covered in ice. | ·In this case, it is normal for the appliance to run longer. ·Normally, it takes 8 to 12 hours for the appliance to cool down completely. ·Close the door and ensure the appliance is located on a level ground and there is no food or container jarring the door. ·Do not open the door too frequently. ·Set the temperature higher until a satisfactory temperature is obtained. It takes 24 hours for the temperature to become stable. ·Clean the door gasket or replace them by the customer service. ·Ensure adequate ventilation. ·Defrost the appliance. |
| The appliance makes abnormal sounds. | ·The appliance is not located on level ground. ·The appliance touches an object close to it. ·The appliance stands on a wooden floor or near wooden walls. | ·Level the appliance. ·Remove objects around the appliance. ·Wood amplifies the sound. Set the appliance somewhere else. |
9 - Troubleshooting
| Problem Possible Cause | Possible Solution | |
| The appliance makes a clicking sound | ·This is normal. It is caused by the refrigeration unit switching on or off. | ·- |
| A slight sound is to be heard similar to that of flowing water. | ·This is normal. - | · |
| The appliance makes a motor sound | ·The refrigeration unit has just turned itself on. This is normal | ·- |
| It is not cold enough inside the appliance. | ·The temperature is set too high. ·Goods that are too warm have been stored. ·Too much food has been stored at a time. ·The goods are too close to each other. ·The door is not tightly closed. ·The door has been opened too frequently or for too long. | ·Reset the temperature. ·Always cool down goods before storing them. ·Always store small quantities of food. ·Leave a gap between several foods allowing air flowing. ·Close the door. ·Do not open the door too frequently. |
| It is too cold inside the appliance. | ·The temperature is set too low. ·The Fast-freezing function is activated or has been running too long. | ·Reset the temperature. ·Switch off the Fast-freezing function. |
| Moisture accumulates on the surface of the appliance. | ·The climate is too warm and too damp. | ·This is normal in damp climate and will change when the humidity decreases. Wipe dry with a cloth. |
| Strong ice and frost in the freezer compartment. | ·The goods were not adequately packaged. ·The door is not tightly closed. ·The door has been opened too frequently or for too long. ·The door gasket is dirty, worn, cracked or mis-matched. ·Something on the inside prevents the door from closing properly. | ·Always pack the goods well. ·Close the door. ·Do not open the door too frequently. ·Clean the door gasket or replace them by the customer service. ·Reposition the shelves, door racks, or internal containers to allow the door to close. |
| The cooling system does not work. | ·Mains plug is not connected to the mains socket. ·The power supply is not intact. | ·Connect the mains plug. ·Check the electrical supply to the room. Call the local electricity company! |
Problem Possible Cause Possible Solution
| The sides of the cabinet and door strip get warm. | ·This is normal. | ·- |
| You hear an alarm signal. | ·The door is open ·The temperature inside product is too high | ·Close the door or silence the alarm manually. |
| The door is difficult to open. | ·Once the appliance runs, it has an internal vacuum. | ·Open the door seal gently to let air enter the appliacne. |
| The door can't be closed properly. It always leaves a gap. | ·Because of the appliances's low temperature, the door seal can easily get hard and deformed. | ·Use a hair dryer or put a hot towel on the spot where the gasket is deformed. When the gasket is soft once again, close the door and compress it tightly. |
Minimum guarantee is: 2 years for EU Countries, 3 years for Turkey, 1 year for UK, 1 year for Russia, 3 years for Sweden, 2 years for Serbia, 5 years for Norway, 1 year for Morocco, 6 months for Algeria, Tunisia no legal warranty required.
Thermostats, temperature sensors, printed circuit boards and light sources are available for a minimum period of seven years after placing the last unit of the model on the market.
Door handles, door hinges, trays and baskets for a minimum period of seven years and door gaskets for a minimum period of 10 year, after placing the last unit of the model on the market.
9.2 Power Interruption
In the event of a power cut, food should remain safely cold for about 18 hours. Follow these tips during a prolonged power interruption, especially in summer:
Open the door as few times as possible. Do not put additional food into the freezer during a power interruption. If prior notice of a power interruption is given and the interruption duration is longer than 15 hours, make some ice and put it in a container in the top of the freezer compartment. As temperature in the freezer will rise during a power interruption or other failure, the storage period and edible quality of food will be reduced. Any food that defrosts should be either consumed, or cooked and refrozen (where suitable) soon afterwards in order to prevent health risks.

Notice: Memory function during power interruption
After restoration of power the appliance continues with the settings that were set before the power failure.
10 - Installation
10.1 Unpacking

WARNING!
~ The appliance is heavy. Always handle with at least two persons. - Keep all packaging materials out of children reach and dispose them in an environmentally friendly manner.
Take the appliance out of the packaging. ~ Remove all packaging materials.
10.2 Environmental conditions
The room temperature should always be between 18°C and 43°C, since it can influence the temperature inside the appliance and its energy consumption. Do not install the appliance near other heat-emitting appliances (ovens, refrigerators) without isolation.
10.3 Space requirements
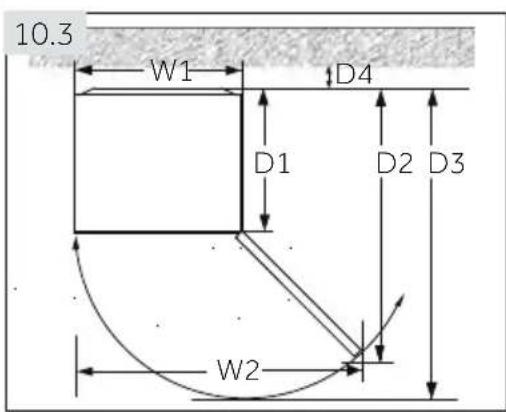
Required space to open the door (Fig. 10.3):
| Width Depth in mm in mm | Distance to wall in mm | Model identifier | ||||
| W1 | W2 | D1 | D2 | D3 | D4 | |
| 595 | 964 | 603 | 1148.5 | 1231.5 | 100 | H4F272/226*EH1/K |
| 595 | 964 | 608 | 1153.5 | 1236.5 | 100 | H4F306/272/226*A/C/DH1/BE |
This appliance is not intended to be used as a built-in appliance.
10.4 Ventilation cross-section
To achieve sufficient ventilation of the appliance for safety reasons, the information of the required ventilation cross sections must be observed (Fig. 10.4).
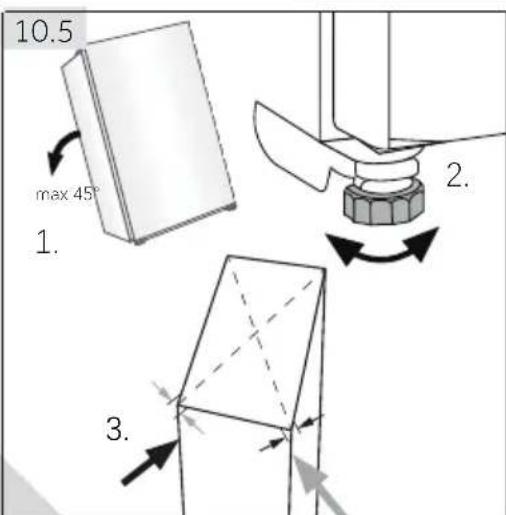
10.5 Aligning the appliance
The appliance should be placed on a flat and solid surface. If the appliance is placed on a pedestal, strong and fire-resistant materials must be used. Never use the foam packing material as a pedestal.
- Tilt the appliance slightly backwards (Fig. 10.5).
- Set the feet to the desired level.
- The stability can be checked by alternately bumping on the diagonals. The slight swaying should be the same in both directions. Otherwise the frame can warp; possible leaking door seals are the result. A low tendency to the rear eases the closing of the door.
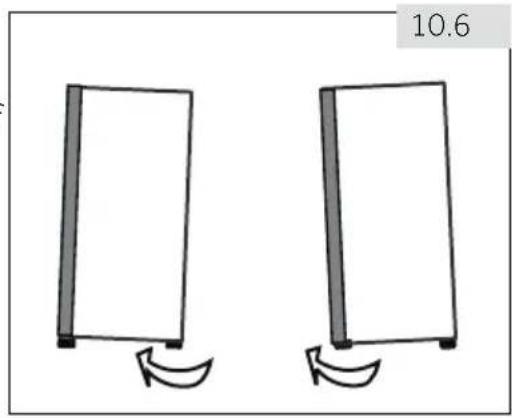
10.6 Using adjustable feet
If the freezer is unstable, the feet can be adjusted: Rotate the adjustable feet according to the direction of arrow (Fig. 10.6) to turn them up or down:
~ Turning the feet clockwise raises the appliance. ~ Turning the feet counterclockwise lowers it.
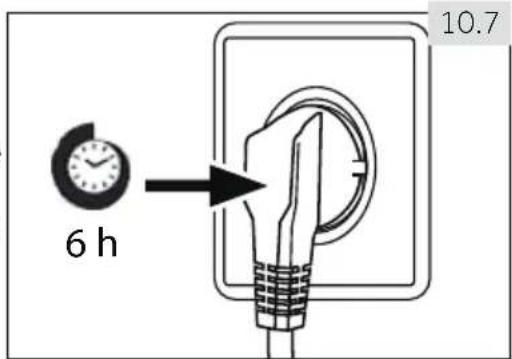
10.7 Waiting time
The maintenance-free lubrication oil is located in the capsule of the compressor. This oil can get through the closed pipe system during slanting transport. Before connecting the appliance to the power supply you have to wait 6 hours (Fig. 10.7) so that the oil runs back into the capsule.
10.8 Electrical connection
Before each connection check if:
~ power supply, socket and fusing are appropriate to the rating plate. ~ the power socket is earthed and no multi-plug or extension. the power plug and socket are strictly according.
Connect the plug to a properly installed household socket.

WARNING!
To avoid risks, a damaged power cord must be replaced by the customer service (see warranty card).
10 - Installation
10.9 Door Reversibility
Before connecting the appliance to the power supply, you should check whether the door swing must be changed from right (as delivered) to left, if this is required by the installation location and usability.

WARNING!
~ The appliance is heavy. You need two persons to carry out the door reversibility. Before any operation, first unplug the appliance from the mains. ~ Do not tilt the appliance more than 45 degrees to prevent damage to the cooling system.
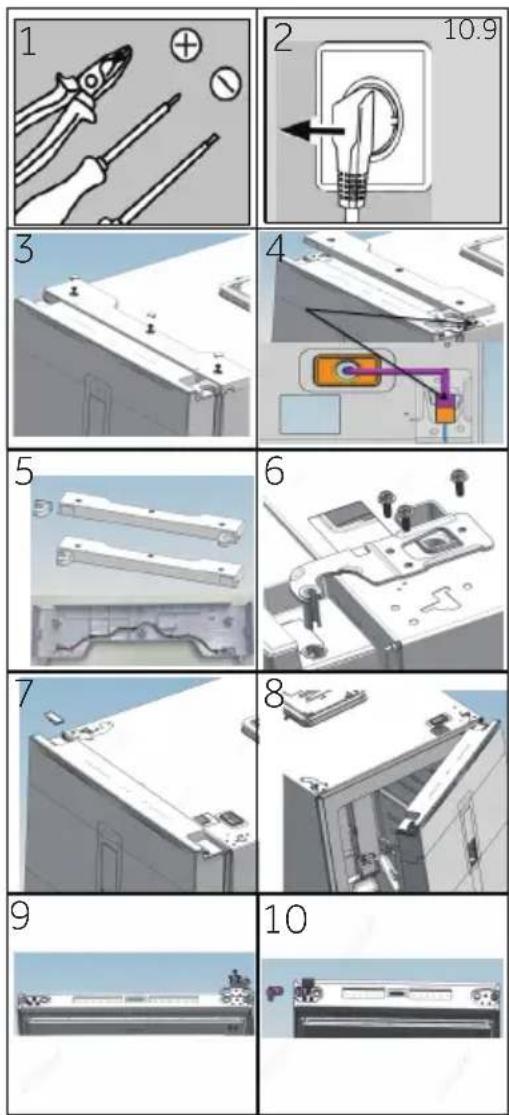
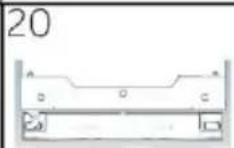
Assembly steps (Fig. 10.9):
- Provide necessary tools.
- Unplug the appliance.
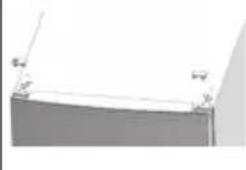
- Remove the screw hole cover, bolts, and hinge cover.
- Unplug the connection cable.
- Take the upper left hinge cover and door extension cord out of the gift bag, as shown in the figure, replace the hinge cover and install the extension cord into the wiring slot of the hinge cover.
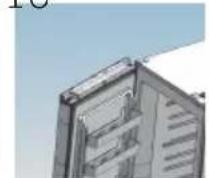
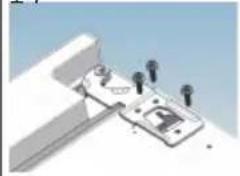
- Remove screws and hinge.
- Remove cover on door. Remove axe cover on door
- Open and remove the door.
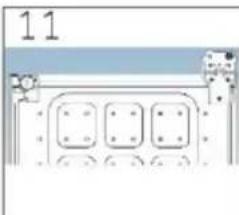
- Turn the door upside down, remove 3 screws on the bottom of the door. Remove 3 screws, door stopper and lifting shaft sleeve on the bottom of the door
- Take the lifting shaft sleeve out of the gift bag. Fix the lifting stop, door stop, and 3 screws on the left side of the door
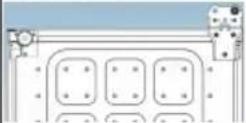
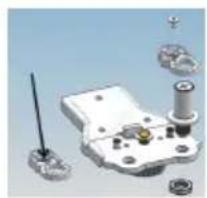
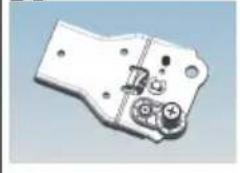
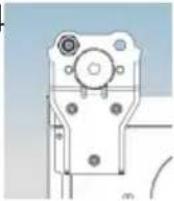
1920
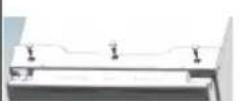
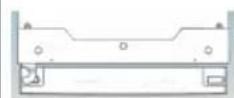
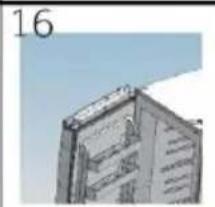
- Tilt slightly backwards the cabinet, remove 3 screws and then the lower hinge.
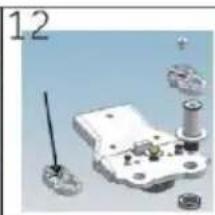
- Take lifting shaft sleeve out of the gift bag. Remove 2 bolts, remove the lifting shaft sleeve and lifting shaft 13.Install the lifting shaft sleeve and lifting shaft in the left hole and secure 2 bolts.(Adding lubricating oil to the shaft) 14.Fix the hinge to the opposite position of the cabinet with 3 screws.
- On opposite side of the door, pull out left side connection cable and put it through the axe cover from step 5, mount axe cover. Mount the hole cover on the right side.
- Mount the door.
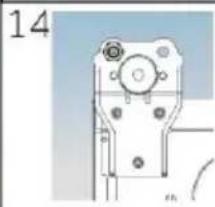
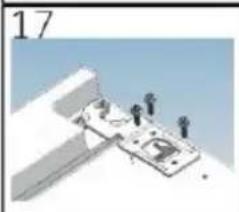
- Fix upper right upper hinge with 3 screws. (Add lubricating oil to the upper hinge before installation)
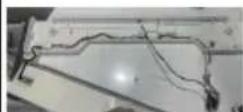
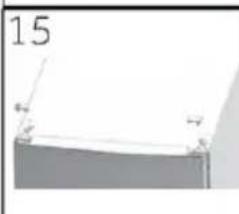
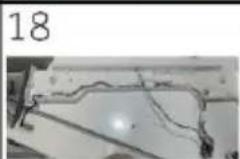
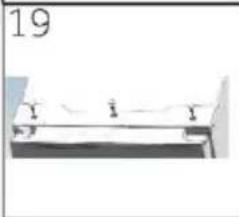
- Connect the wiring harness as shown in the figure 19.Install the assembled hinge cover in step 5, secure the three screws and screw hole covers
- Finished.
10.10 Ice Maker
2
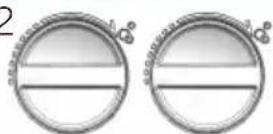
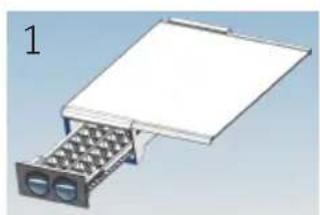
1.Pull the ice maker to the position as shown in Fig. 1. 2. Pour fresh drinking water into each ice tray according to the scale mark inside the measuring cup, do not exceed the scale mark. 3.Push the ice maker back. 4. After becomes ice, rotate the knob by hand. Then ice blocks will fall into the ice storage bin automatically. Remove the drawer and fetch the ice cubes 2.
i
Notice: Ice maker can move position according to user habits.
- The formation of ice will make it difficult to turn the knob. You can rotate it back and forth several times to remove the ice, and avoid damaging the parts.
- For ice-makers not intended to be connected to the water supply. (WARNING: Fill with potable water only)
- It is recommended to place the ice maker on each side to achieve faster treatment speed.
11 - Technical Data
11.1 Procedural regulation EU No. 2019/2016
| Trade mark | Haier | |||||||
| Model identifier | H4F306-AH1 | H4F306-CH1 | H4F306-DH1H4F306-DH1BE | H4F272-CH1 | H4F272-DH1H4F272-DH1BE | H4F272-EH1H4F272-EH1K | H4F226-DH1 | H4F226-EH1H4F226-EH1K |
| Category of the model | Upright freezer | |||||||
| Energy efficiency class A C D D E E D E | ||||||||
| Annual energy consumption (kWh/year) | 105 | 163 204 | 158 197 | 247 184 | 230 | |||
| Storage volume cooling(L) | not applicable | |||||||
| Storage volume freezing(L)**** | 301 | 276 | 226 | |||||
| Star rating | **** | |||||||
| Temperature of other compartments>14℃ | not applicable | |||||||
| Frostfree system | yes | |||||||
| Power cut safe(h) | 12 | 12 | 12 | 10 | 10 | 10 | 10 | 10 |
| Freezing capacity(kq/24h) | 20 | 20 | 20 | 20 | 20 | 16 | 17 | 14 |
| Climate class This appliance is intended to be used at an ambient temperature between 10℃ Cand 43℃ 1) | SN-T | |||||||
| Maximum noise level (dB) | 36 | 37 | 36 | 37 | ||||
| Construction type | freestanding | |||||||
1) Based on standard test results for 24 hours. Actual energy consumption will depend on how the appliance is used and where it is located. For specification details, please consult the rating plate and energy label inside the product. This appliance is intended to be used at an ambient temperature indicated below:
11.2 Additional Technical Data
| SN + 10°C~+32°C |
| N + 16°C~+32°C |
| ST + 16°C~+38°C |
| T + 16°C~+43°C |
| Voltage / Frequency | 220-240V ~/ 50Hz |
| Rated current (A) H4F306/272/226*A/C/DH1/BE | 1.5 |
| Rated current (A) H4F272/226*EH1/K | 0.8 |
| Coolant | R600a |
| Dimensions (H/W/D in cm) H4F306*A/C/DH1/BE | 190/60/74.2 |
| Dimensions (H/W/D in cm) H4F272*C/DH1/BE | 177.5/60/74.2 |
| Dimensions (H/W/D in cm) H4F272*EH1/K | 177.5/60/73.7 |
| Dimensions (H/W/D in cm) H4F226*DH1 | 153.5/60/74.2 |
| Dimensions (H/W/D in cm) H4F226*EH1/K | 153.5/60/73.7 |
| Light power/Light voltage | 1.5W/ DC 12V |
11.3 Standards and directives

This product meets the requirements of all applicable EC directives with the corresponding harmonised standards, which provide for CE marking.
We recommend our Haier Customer Service and the use of original spare parts.
If you have a problem with your appliance, please first check section TROUBLESHOOTING.
If you cannot find a solution there, please contact
~ your local dealer or the Service & Support area at www.haier.com where you can find telephone numbers and FAQs and where you can activate the service claim.
To contact our Service, ensure that you have the following data available.
The information can be found on the rating plate.
Model
Serial No.
Also check the Warranty Card supplied with the product in case of warranty.
For general business enquiries please find below our addresses in Europe:
| European Haier addresses | |||
| Country* | Postal address | Country* | Postal address |
| Italy | Haier Europe Trading SRL Via De Cristoforis, 12 21100 Varese ITALY | France | Haier France SAS 3-5 rue des Graviers 92200 Neuilly sur Seine FRANCE |
| Spain Portugal | Haier Iberia SL Pg. Garcia Faria, 49-51 08019 Barcelona SPAIN | Belgium-FR Belgium-NL Netherlands Luxembourg | Haier Benelux SA Anderlecht Route de Lennik 451 BELGIUM |
| Germany Austria | Haier Deutschland GmbH Hewlett-Packard-Str. 4 D-61352 Bad Homburg GERMANY | Poland Czechia Hungary Greece Romania Russia | Haier Poland Sp. zo.o. Al. Jerozolimskie 181B 02-222 Warszawa POLAND |
| United Kingdom | Haier Appliances UK Co.Ltd. One Crown Square Church Street East Woking, Surrey, GU21 6HR UK | ||
*For more information please refer to www.haier.com

Haier
User Manual for Refrigerator
Vertical Freezer
H4F306*AH1
H4F306*CH1
H4F306*DH1
H4F306*DH1BE
H4F272*CH1
H4F272*DH1
H4F272*DH1BE
H4F272*EH1
H4F272*EH1K
H4F226*DH1
H4F226*EH1
H4F226*EH1K
*-LBeTOBnKOd
Do not use the appliance.
Make sure the power cord is not pinched. Do not pull the power cord. Do not damage the cooling circuit.
WARNING!
Daily use
This appliance can be used by children aged 8 years and above and persons with reduced physical, sensory or mental capabilities or lack of experience and knowledge if they have been given supervision or instruction concerning use of the appliance in a safe way and understand the hazards involved. Children aged 3 to 8 years are allowed to load and unload refrigerating appliances. Children shall not play with the appliance. Cleaning and user maintenance shall not be made by children unless they are older than 8 and supervised. Keep all packaging away from children to avoid risk of suffocation. If the supply cord is damaged, it must be replaced by the manufacturer, its service agent or similarly qualified persons in order to avoid a hazard. Do not store explosive substances such as aerosol cans with a flammable propellant in this appliance. The freezing function works at ambient temperatures down to -15°C. It works at ambient temperatures down to -15°C when set to maximum power, and at -24°C. Do not place unstable items (heavy objects, sharp objects, containers with water) on top of the freezer, to avoid injury from falling or electric shock in contact with water. Open and close the door only with the handle. The gap between the door and the cabinet is very tight. Do not put your fingers in these areas to avoid pinching. Open or close the freezer door only when there is no obstruction to the movement of the door. Do not store or use flammable, explosive or corrosive materials inside or near the appliance. Do not store medicines, bacteria or chemical agents in the appliance. This is a household appliance. Do not attempt to store materials that require strict temperature control. Cooling time without compartment with 4 stars: This refrigerating appliance is not suitable for freezing foodstuffs; freezing time with compartment with 4 stars: This freezing appliance is not suitable for cooling foodstuffs. Never store liquids in bottles or cans in the freezer (except high-alcohol spirits), especially
carbonated drinks, as they may burst during freezing.
Check the condition of the food if the freezer has been switched off. Do not set excessively low temperatures in the freezer compartment. Note: The drawers may crack.

WARNING!
Daily use
Do not store products with wet hands (wear gloves). Never pull the power cord to unplug the appliance. There is a risk of injury or electric shock. Warning: Always place a container of water under the ice maker. Do not use force! Do not touch the interior surface of the freezer while it is operating, especially with wet hands. The surface can be damaged. Disconnect the appliance from the power supply in case of malfunction or during cleaning. Wait at least 5 minutes before restarting the appliance, as frequent starting may damage the compressor. Do not use electrical appliances inside the freezer compartment for storage or preservation of food, unless they are of the type recommended by the manufacturer. If the light bulbs are damaged, they must be replaced by the manufacturer or a qualified service agent.
Maintenance/Cleaning
If cleaning or maintenance is performed by the user, ensure they are under supervision. Disconnect the appliance from the power supply before performing any type of maintenance. Wait at least 5 minutes before restarting the appliance, as frequent starting may damage the compressor. When disconnecting the appliance, pull the plug, not the cord. Do not scrape off frost or ice with sharp objects. Do not use sprays, electric heaters, steam cleaners, or other sources of heat to avoid damaging the plastic parts.
Do not use mechanical devices or other means to accelerate the defrosting process, other than those recommended by the manufacturer. Do not spray or rinse the appliance during cleaning. Do not use a water jet or hose to clean the appliance. If the power cord is damaged, it must be replaced by the manufacturer, its service agent, or similarly qualified persons to avoid a hazard. Do not attempt to repair, disassemble, or modify the appliance yourself. If repair is needed, contact the customer service department.
Normal operation sounds

WARNING!
The refrigerant is isobutane (R600a). Ensure that the refrigerant circuit is not damaged during transport or installation. Leaking refrigerant can cause eye injury or ignition. If damage is detected, keep away from open flames, ventilate the room well, do not plug in or unplug the appliance's power cord or that of other appliances. Contact the customer service department. In case of refrigerant leakage, rinse your eyes with clean water and contact a doctor immediately.

WARNING!
Do not place the device near flammable materials. WARNING: When positioning the device, make sure that the cables are not pinched or damaged. WARNING: Do not place portable multiple socket outlets or portable power supplies at the back of the device. Do not store explosive substances such as aerosol cans with flammable gas in this device. The use of flammable agents in the freezer can be dangerous. Be careful when installing, handling, servicing, and disposing of the device. Contact a service representative to dispose of the device, as it contains flammable gas.
5.3 Standby mode of the display
When the door is closed, the display turns off automatically after 30 seconds of inactivity. The display turns off automatically. The light turns on automatically when the door is opened or when a button is pressed.
5.4 Turning the display on and off
Automatic turn-off
The display turns off automatically after about 30 seconds of inactivity.
Manual turn-off
When the display is on, press and hold the "Turn off for 3 sec." (G) button for 3 seconds. After a beep signal, the "Turn off for 3 sec." (G) indicator lights up and the display turns off. When the display is off, press and hold the "Turn off for 3 sec." (G) button for 3 seconds. After a beep signal, the "Turn off for 3 sec." (G) indicator does not light up, and the display turns on.
Note: Turning off the display
When the display is turned off, functions such as temperature setting and "Super Freeze" are deactivated. When you perform any of the above operations, the indicator for turning off for 3 sec. will light up for 3 seconds to remind you that the display is off.
5.5 Switching between freezing and cooling modes
When the display is off, the freezer can switch between freezing and cooling modes by pressing "Switch" (C) for 3 seconds. In freezing mode, the default setting is -18°C, the "REF" (b) indicator is off, and the "FRZ" (c) indicator is on. In cooling mode, the default setting is 4°C, the "REF" (b) indicator is on, and the "FRZ" (c) indicator is off.
There is a big difference in temperature between freezing and cooling modes, so do not store different foods together. Before changing the mode, make sure to remove the food from the freezer to avoid spoilage due to the mode change.
5.6 Temperature setting
Freezing mode range: -16°C to -24°C;
Temperature setting for cooling mode: 2°C to 8°C
When the appliance is switched on, before setting the temperature, the indicator (a) will show the current temperature inside the appliance. After setting the temperature, the indicator (a) will display the set temperature for 5 seconds, then return to showing the actual temperature. The set temperature is displayed after the cooling effect is achieved.
5.7 Super Freeze mode (D)
The "Super Freeze" mode is optimal for preserving the nutritional value of food, as it can freeze food in a shorter time. Before placing fresh food in the freezer, activate the "Super Freeze" function to ensure a lower temperature and better freezing results. When the appliance is switched on and the freezer is in freezing mode, pressing the "Super Freeze" button (D) will light up the "Super Freeze" indicator (d) and the freezer will operate in "Super Freeze" mode. To deactivate this mode, press the button again until the "Super Freeze" indicator (d) dims. If not deactivated manually, the mode will turn off automatically after 5 hours. If you have a large quantity of food to freeze, it is recommended to activate the function 24 hours before placing the food. The function will turn off automatically after 5 hours. Energy consumption will increase while this function is active.

Note: Super Freeze
When the set temperature in freezing mode is ≥ -18°C, the freezer will operate and return to -18°C. If the set temperature is < -18°C, the freezer will operate and return to the original set temperature. During "Super Freeze" mode, the temperature cannot be adjusted. If you attempt to adjust it, the "Super Freeze" indicator will blink for a while to remind you that the freezer is in "Super Freeze" mode. ▶ Super Freeze mode can only be set when the freezer is in freezing mode. The cooling mode indicator for "Super Freeze" is off, and "Super Freeze" mode cannot be set. Model H4F226WDH1/H4F226WEH1/K recommends activating "Super Freeze" 30 hours before placing large quantities of food.
5.8 ECO mode (E)
In ECO mode, energy saving is achieved. The temperature automatically becomes -16°C in freezing mode or 8°C in cooling mode.
When the appliance is switched on, pressing the "ECO mode" button (E) will light up the "ECO mode" indicator (e) and the appliance will operate in "ECO mode". To deactivate "ECO mode", press the button again and the "ECO mode" indicator (e) will dim.
Fig. 5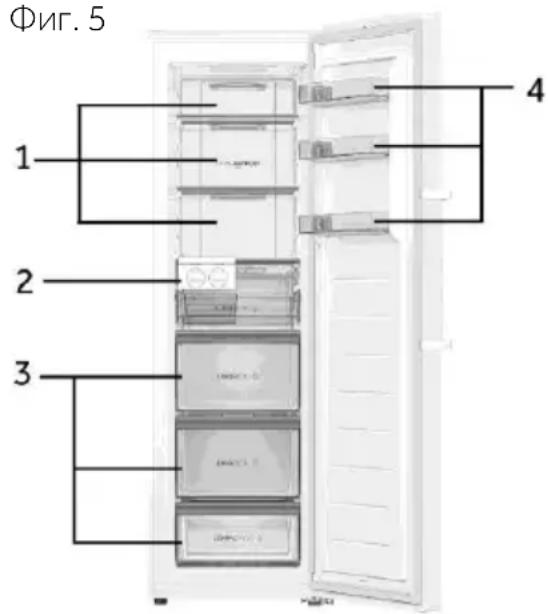
Different foods should be placed in different zones according to their properties (Fig. 5).
1. Fruits, vegetables, preserves, pickles, salads, etc. 2. Components for machines for ice cream. 3. Meat products, semi-finished products, etc. 4. Eggs, preserves, seasonings, drinks, bottled preserves.
Cooling time without a 4-star compartment: this level is not suitable for freezing fresh food; freezing time with a 4-star compartment: this level is not suitable for cooling fresh food.
Food can be stored in the freezer at temperatures from -18°C for a period of 2 to 12 months, depending on the characteristics of the food (e.g., meat: 3-12 months, vegetables: 6-12 months).
To avoid exceeding the storage periods, pay attention to the freezing date, the period, and the name of the food on the packaging. Observe the storage periods for different foods.
10.9 Reversing the doors
Before connecting the device to the power supply, you must check that the direction of the door opening must be changed (as delivered) if required by the installation location and practicality.

WARNING!
The device is heavy. Two people are needed to perform the door reversal. Before any operation, first disconnect the device from the power supply. Do not tilt the device more than 45° to prevent damage to the cooling system.
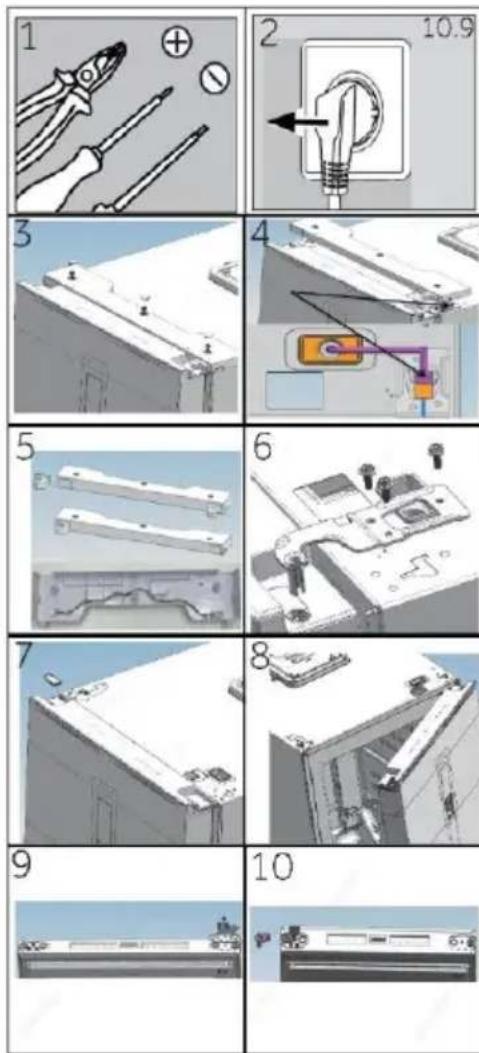
Hinges for assembly (fig.10.9):
1. Prepare the necessary tools. 2. Disconnect the device from the power supply.
- Remove the cap of the screw hole, insert the cap into the hinge.
- Disconnect the power cable. 5. Remove the hinge from the upper door and pull the cable from the door through the lower hinge, as shown in the figure. Replace the hinge and install the extension cable in the cable guide on the hinge.
- Remove the screws and the hinge.
- Remove the hinge from the door. Remove the hinge from the door.
- Open the door. 9. Remove the door. Remove the three screws from the lower part of the door. Remove the three screws, the door stop, and the hinge from the lower part of the door. 10. Remove the hinge from the lower part of the door. Fix the door stop, the door stopper, and the three screws from the left side of the door.

- Remove the three screws and then remove the entire plate. 12. Remove the lifting sleeve from the lower part of the gearbox. Remove 2 bolts, remove the lifting sleeve and the lifting mechanism.
- Install the lifting sleeve and the lifting mechanism on the left side and secure with 2 bolts. (Add lubricating oil to the shaft)
- Secure the plate on the opposite side of the camera with 3 screws.
- From the opposite side of the door, route the connecting cable from both sides through the opening in the frame from joint 5, install the frame. Install the frame and the opening on the right side.
- Install the door. 17. Fix the upper hinge with the upper plate with 3 screws. (Add lubricating oil to the upper plate before installation)
- Connect the cable harness as shown in figure 19. Install the harness on the plates from joint 5, secure the three screws and the caps on the screw openings.
- Ready.
10.10 Ice Maker

2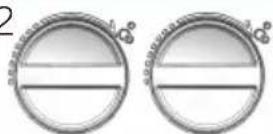
1. Remove the ice maker from its position as shown in fig. 1. 2. Fill the water tank with drinking water up to the mark indicated on the scale inside the measuring cup; do not exceed the mark. 3. Press the ice maker back. 4. Once it becomes ice, turn the handle. After that, the ice will automatically fall into the ice container. Remove the ice container and take the ice cubes.

Note: The ice maker can be placed in different positions according to the user's needs.
- Ice formation may be delayed at the end of the cycle. You can turn it back and forth a few times to remove the ice and avoid damaging the parts. 2. Ice makers that are not designed for connection to the water supply. (WARNING: Fill only with drinking water) 3. Avoid placing the ice maker near any heat source, and use a faster processing speed.
11.1 Product functions according to regulation (EC) No 2019/2016
| Тьровская марka | Haier | |||||||
| Иденифikатор на мodyда | H4F306*AH1 | H4F306*CH1 | H4F306*DH1 H4F306*DH1BE | H4F272*CH1 | H4F272*DH1 H4F272*DH1BE | H4F272*EH1 H4F272*EH1K | H4F226*DH1 | H4F226*EH1 H4F226*EH1K |
| Кaterория на мodyда | Вертыкален Фризер | |||||||
| Клас на[eнергий[eфektivвост] | A C D D D E D E | |||||||
| I徜ино по引爆енье на[eнергий (kWh/юдна)1) | 105 | 163 204 | 158 197 2 | 247 184 230 | ||||
| О[bem за[sbхсанейп на[xlaшилathа ча(r)]***] | He eПриложимо | |||||||
| О[bem за[sbхсанейп на[fprizер纳ота ча(r)]****] | 276 226301 | |||||||
| О[benka с[bc з[bezдini] | ***** | |||||||
| Temпегатура на[dpyгитe о[tdeленья>14°C] | He eПриложимо | |||||||
| Система[bεз скрж] | Да | |||||||
| [bezорочист[pri prekbsсвае на зхсаньанeto(h)] | 12 12 | 12 10 10 | 10 10 10 | |||||
| Каразител на:[замразявае (kr/24ч) | 20 20 | 20 20 20 | 16 17 14 | |||||
| КлIMатиен[klasc уразьт[e预дизаиз havенз[aɪз prelim�вае пri Temperapatура на okолнatable среadingу 10°C и 43°C. | SN-T | |||||||
| В[bzduшни:[шухови:[e'mиси(db(A) re] | pW) | 36 | 37 36 | 37 | ||||
| Ти[n konchestруksия | СвобODио STОЯц | |||||||
1) Based on the standard test results for 24 hours. The actual energy consumption will depend on the way the device is used and its location. For details on the specification, power, and the energy label data inside the product, refer to the tables. The device is intended for use at an ambient temperature as specified below:
11.2 Additional technical data
Control panel (fig. 4)
A - (temperature decrease)
D Super Freeze mode E ECO mode F Wi-Fi G 3 Sec. Lock C Instaswitch switch B + (temperature increase)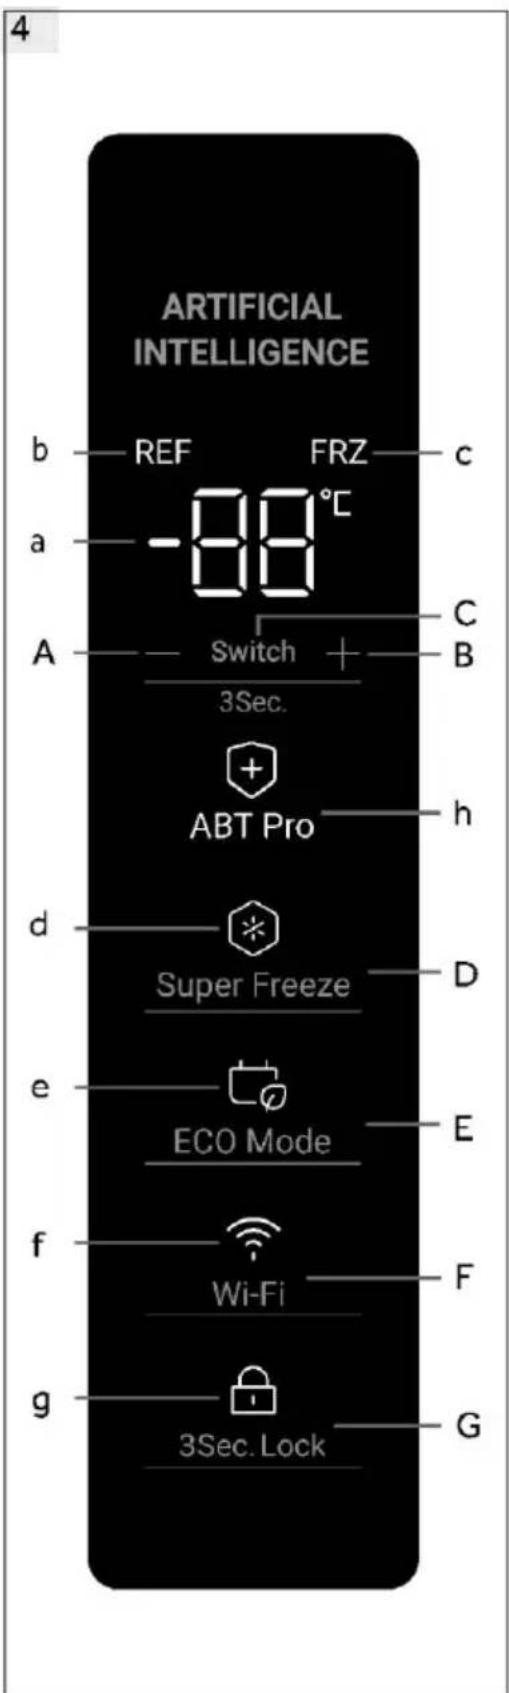
1 Marine foods, canned goods, fruits, vegetables, salads, etc.
Control panel (fig. 4)
A - (temperature decrease)
D Super Freeze mode E ECO mode F Wi-Fi G 3 Sec. Lock C Instaswitch B + (temperature increase)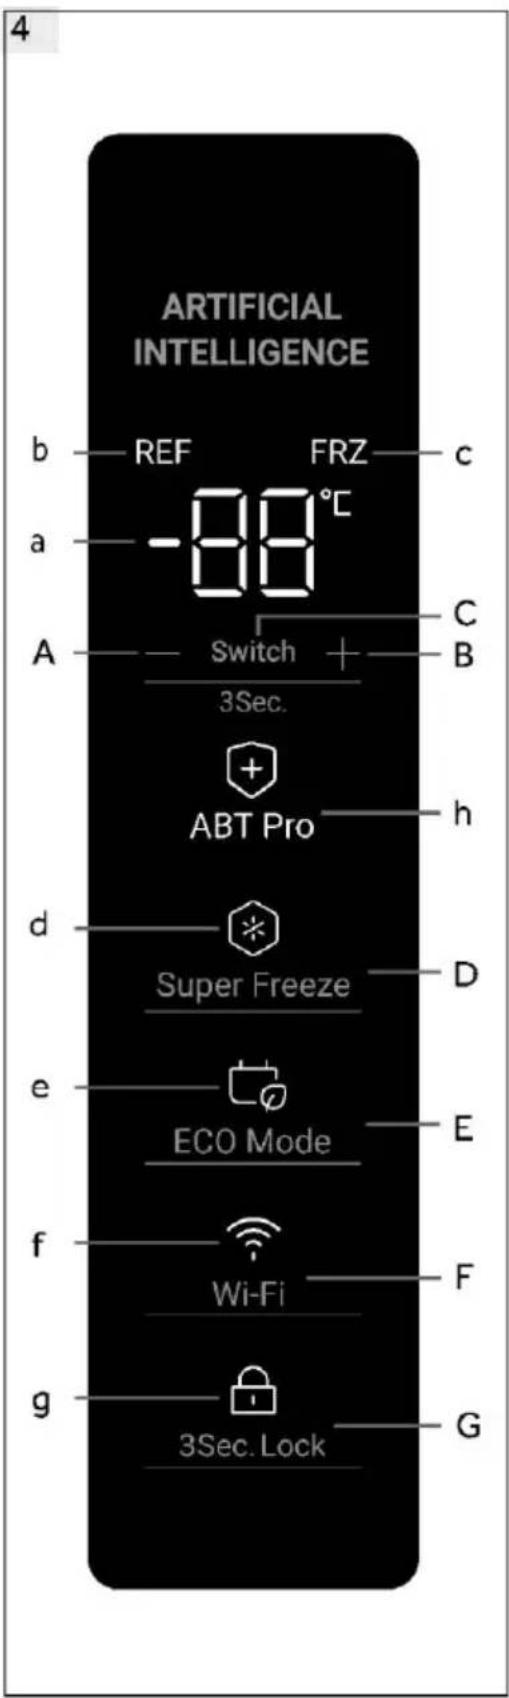
5.1 Before first use
11.3 Standard directives

H4F272/226*EH1/K has four compartments, without components
5/6/7. H4F226 without components 10
- Remove the ice maker shelves in the left and right directions
- Pull the ice container out of the frame:
11.3 Standards and directives

- THANK YOU FOR PURCHASING A HAIER PRODUCT
- LEGEND
- DISPOSAL
- WARNING
- RISK OF INJURY OR SUFFOCATION
- SAFETY
- BEFORE FIRST USE
- INSTALLATION
- DAILY USE
- MAINTENANCE/CLEANING
- REFRIGERANT GAS INFORMATION
- INTENDED USE
- ACCESSORIES
- NOTICE: DIFFERENCES
- PICTURE OF APPLIANCE (FIG. 3)
- CONTROL PANEL
- CONTROL PANEL (FIG. 4)
- SWITCHING THE APPLIANCE ON/OFF
- NOTICE: PRESETTINGS
- STANDBY MODE OF DISPLAY
- DISPLAY LOCK AND UNLOCK
- AUTOMATIC LOCKING
- MANUAL LOCKING
- NOTICE: DISPLAY LOCK
- FREEZE/REFRIGERATE MODE SWITCH
- TEMPERATURE SETTING
- SUPER FREEZE MODE (D)
- NOTICE: SUPER FREEZE
- ECO MODE (E)
- ABT PRO (ONLY FOR H4F306*A/C/DH1/BE)
- POWER-OFF MEMORY
- DOOR OPEN ALARM
- HIGH TEMPERATURE ALARM
- ERROR INDICATION
- WI-FI
- ENERGY SAVING TIPS
- EQUIPMENT
- REMOVABLE DOOR RACKS
- GLASS SHELVES
- GENERAL
- CARE AND CLEANING
- DRAWER CLEANING STEPS
- ICE MAKER CLEANING
- DOOR SEAL CLEANING
- NON-USE FOR A LONG PERIOD
- NOTICE: SWITCH OFF
- MOVING THE APPLIANCE
- TROUBLESHOOTING
- POWER INTERRUPTION
- UNPACKING
- ENVIRONMENTAL CONDITIONS
- SPACE REQUIREMENTS
- VENTILATION CROSS-SECTION
- ALIGNING THE APPLIANCE
- USING ADJUSTABLE FEET
- WAITING TIME
- ELECTRICAL CONNECTION
- BEFORE EACH CONNECTION CHECK IF
- DOOR REVERSIBILITY
- ASSEMBLY STEPS (FIG. 10.9)
- ICE MAKER
- I
- TECHNICAL DATA
- STANDARDS AND DIRECTIVES
- USER MANUAL FOR REFRIGERATOR
- VERTICAL FREEZER
- NORMAL OPERATION SOUNDS
- STANDBY MODE OF THE DISPLAY
- TURNING THE DISPLAY ON AND OFF
- AUTOMATIC TURN-OFF
- MANUAL TURN-OFF
- NOTE: TURNING OFF THE DISPLAY
- SWITCHING BETWEEN FREEZING AND COOLING MODES
- NOTE: SUPER FREEZE
- REVERSING THE DOORS
- STANDARD DIRECTIVES
Brand : HAIER
Model : H4F306SDH1
Category : Freezer