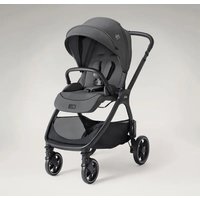
USER MANUAL iPivot Grow Joie
enhanced child restraint
GB Instruction Manual
natural_image
Icon depicting a person sitting on a chair next to an icon of a person with a letter 'i' (no text or symbols present)
ECE R129/03: i-Size

natural_image
Line drawing of a baby car seat with no text or symbols

text_image
1
CLICK

text_image
2
2
1

natural_image
Diagram of a human head with a highlighted anatomical structure and an arrow indicating upward motion (no text or symbols)

natural_image
Illustration of a hand pressing down on a small object in a car seat (no text or symbols)

natural_image
Simple line drawing of a child holding a long rod, no text or symbols present

natural_image
Illustration of a person viewed from behind holding a long rod, with a red band indicating the shoulder (no text or symbols)

natural_image
Illustration of a baby car seat with two steps showing body positioning and rotation (no text or symbols)

text_image
10

natural_image
Line drawing of a person seated in a chair with a dashed line indicating measurement or alignment (no text or symbols)

natural_image
Illustration of a hand pressing down on a pink object with an arrow indicating motion (no text or symbols)

natural_image
Illustration of a baby car climbing stairs with a yellow arrow indicating motion (no text or symbols)

text_image
12
2
1

text_image
13
CLICK
1 ✓ ✗
2 ✓ ✗
3 ↑

natural_image
Line drawing of a baby car seat with a highlighted section and arrow (no text or symbols)

text_image
18
2
1
1.00

text_image
14
2
1

text_image
1 ✓ ✗
2
3

text_image
19

natural_image
Line drawing of a car seat with arrows indicating seat positions (no text or symbols)

text_image
15
2
↑1

natural_image
Line drawing of a car seat with a highlighted orange arrow indicating the seatbelt (no text or symbols present)

text_image
21
CLICK

natural_image
Illustration of a baby car seat being lifted by a hand, showing the seat and seat positioning (no text or symbols)

text_image
23
CLICK

natural_image
Line drawing of a baby car seat with an arrow indicating direction (no text or symbols)

text_image
29

natural_image
Anatomical illustration of a car's internal structure with an arrow indicating a specific area (no text or labels present)

natural_image
Line drawing of a baby car seat with a highlighted section and number 25 (no text or symbols on the diagram itself)

text_image
30
2
1
✓
X

text_image
31
11
12
CLICK

text_image
26
2
1

text_image
27

text_image
2
1
✓ X

text_image
32
2 1

text_image
33

natural_image
Line drawing of a car seatbelt with an upward arrow indicating motion (no text or symbols)

text_image
37
2
1

natural_image
Line drawing of a car seat with seatbelt and seat, no text or symbols present

natural_image
Diagram of a car seat assembly showing top and side views with no text or symbols

text_image
363
1
3
2
3

text_image
39
1
2 Optional to use
✓ X
3 ✓ X

text_image
40
41

natural_image
Line drawing of a car seat with two highlighted seats (no text or symbols)

natural_image
Simple line drawing of a mechanical component with an arrow indicating rotation (no text or symbols)

natural_image
Line drawing of a baby car seat with a yellow arrow indicating the seat area (no text or symbols)

natural_image
Line drawing of a car seatbelt with an arrow indicating direction (no text or symbols)

natural_image
Line drawing of a car seat with a folded seat and seatbelt, no text or symbols present

natural_image
Diagram of a mechanical component with a highlighted section and arrow indicating direction (no text or symbols)

natural_image
Diagram of a baby boom with a highlighted section and arrow indicating motion (no text or symbols)

natural_image
Simple line drawing of a toilet with a handle and outlet, no text or symbols present
GB
Welcome to Joie™
You have purchased a high quality, fully certified child safety child restraint. This product is suitable for the use of children with height up to 135cm.
Carefully read this Instruction Manual and follow the installing steps because this is the ONLY way to protect your child from serious injury or death in case of an accident, and to provide comfort to your child while using this product.
Keep this instruction manual for future reference.
Please confirm
To use this Joie enhanced child restraint with the i-Size ISOFIX connections according to the UN Regulation No.129, your child must meet the following requirements.
Rear Facing: Child height 40cm-105cm/ Child weight≤19kg;
Forward Facing: Child age ≥ 15m/ Child height 76cm-105cm/ Child weight ≤ 19kg;
Booster: Child height 100cm-135cm;
Please read all the instructions in this manual before installing and using the product.
! IMPORTANT: KEEP FOR FUTURE REFERENCE. PLEASE READ CAREFULLY.
Please keep the instruction manual in the storage compartment at the back of the seat as right figure.
For warranty information, please visit our website at joiebaby.com

natural_image
Simple line drawing of a person flying with an open book on their back, against a solid orange background (no text or symbols)
Parts List
Please make sure there are no missing parts. Please contact the retailer if anything is missing.
1 Head Support
2 Seat Pad
3 Buckle
4 Adjustment Webbing
5 Load Leg
6 Recline Adjustment Button
7 Swivel Lock-off
8 Rotation Button
9 Shoulder Harness Covers
10 Infant Insert
11 Head Support Adjustment Lever
12 ISOFIX Adjuster Button
13 Load Leg Adjustment Button
14 ISOFIX Connector
15 ISOFIX Attachments Guides
16 Side Impact Protection
*must use on door side only

text_image
Diagram of a car seat with numbered labels pointing to different seat positions and components.


text_image
11
12
13
14
WARNING
! BE informed that the rigid items and plastic parts of an enhanced child restraint system shall be located and installed so that they are not liable to become trapped by a movable seat or in a door of the vehicle during everyday use of the vehicle.
! DO NOT use the rearward facing enhanced child restraint systems in seating positions where there is an active frontal airbag installed.
! To use this enhanced child restraint according to the UN Regulation No.129, your child must meet the following requirements.
! Rear Facing Mode: Child height 40cm-105cm/ max. 19kg;
Forward Facing Mode: Child height 76cm-105cm/max. 19kg;
Booster Mode: Child height 100cm-135cm;
IMPORTANT - DO NOT USE FORWARD FACING BEFORE THE CHILD'S AGE EXCEEDS 15 MONTHS (Refer to instructions).
! The enhanced child restraint may not fit in all approved vehicles.
! Any straps holding the enhanced child restraint to the vehicle should be tight, that any support-leg should be in contact with the vehicle floor, that any straps restraining the child should be adjusted to the child's body, and that straps should not be twisted.
WARNING
! After your child is placed in this enhanced child restraint, the safety belt must be used correctly. Ensure that any lap strap is worn low down, so that the pelvis is firmly engaged, shall be stressed.
This enhanced child restraint should be replaced when it has been subject to violent stresses in an accident. An accident can cause damage to it that you cannot see.
! Consider the danger of making any alterations or additions to the device without approval of the adequate authority, and the danger of not following closely to the installation instructions provided by the enhanced child restraint manufacturer.
! Please keep this enhanced child restraint away from sunlight, otherwise it may be too hot for child's skin. Always touch the enhanced child restraint before placing child in it.
! DO NOT leave your child unattended in the enhanced child restraint system.
Any luggage or other objects liable to cause injuries in the event of a collision shall be properly secured.
The enhanced child restraint system shall NOT BE USED without the soft goods.
The soft goods should not be replaced with any other than the one recommended by the manufacturer, because the soft goods constitutes an integral part of the restraint performance.
WARNING
! Please check if this enhanced child restraint can be installed properly in your vehicle before you purchase it.
NO enhanced child restraint can guarantee full protection from injury in an accident. However, proper use of this enhanced child restraint will reduce the risk of serious injury or death to your child.
! DO NOT install this enhanced child restraint without following the instructions in this manual or you may put your child at serious risk of injury or death.
! DO NOT use this enhanced child restraint if it has damaged or missing parts.
! DO NOT have your child in large/oversized clothes because this may prevent your child from being, properly and securely fastened by the shoulder harness straps and the crotch strap between the legs.
Emergency
In case of emergency or accidents, it is most important to have your child taken care of with first aid and medical treatment immediately.
For installation with ISOFIX system
- This is an “i-Size” Enhanced Child Restraint System. It is approved according to UN Regulation No.129, for use in, i-Size compatible vehicle seating positions as indicated by vehicle manufacturers in the vehicle users’ manual.
- If in doubt, consult either the Enhanced Child Restraint System manufacturer or the retailer.
For installation with 3-point belt
For installation with 3-point belt + ISOFIX system
- This is an i-Size booster seat Enhanced Child Restraint System. It is approved according to UN Regulation No.129, for use primarily in "i-Size seating positions" as indicated by vehicle manufacturers in the vehicle user's manual.
- If in doubt, consult either the Enhanced Child Restraint System manufacturer or the retailer.
Materials Plastics, metal, fabrics
Patent No. Patents pending
Choose Your Installation Installa
| ECE R129 | Child's Size | Installation Mode | Figure for Installation | Reference Age | Seat Position |
| 40cm-105cm/ ≤ 19kg | Rear Facing |  | Approx 4 years | Position 1-5 |
| 76cm-105cm/ ≤ 19kg | Forward Facing |  | 15 months to approx 4 years | Position 1-5 |
| 100cm-135cm | Booster |  | 3.5 years to 10 years | Position 1-5 |
Concerns

natural_image
Illustration of a car seat with two red dots and a yellow checkmark on the side (no text or symbols)

natural_image
Interior view of a car seatbelt with a yellow checkmark indicating a location (no text or symbols present)


natural_image
Line drawing of a car interior showing driver seat and passenger seat (no text or symbols)
Use Side Impact Protection
see images 1 - 2
- The enhanced child restraint is delivered with removable side impact protection. This side impact protection MUST be used on the door side of the vehicle. Installation shown in 1.
- Press the release button to remove side impact protection.
- Please keep it properly when not in use.
Height Adjustment for Head Support and Shoulder Harnesses
see images 3 - 7
Please adjust the head support and check if the shoulder harnesses are at the correct height according to 3 & 4 & 5 & 6 & 7
When used in rear facing mode, the shoulder harness height must be even with or just below the top of child's shoulders.
When used in forward facing mode, the shoulder harness height must be even with or just above the top of child's shoulders.
! When used in booster mode, the shoulder belt guides must be even with child's shoulders. 5
To adjust the headrest heights, press the adjustment lever first then pull or push down the head support until it clicks into one of the 14 positions. 6 & 7
The shoulder space expands as the head support height is adjusted to the positions from 11th to 14th.
Recline Adjustment
see images 8 - 9
Press the recline adjustment button to adjust the enhanced child restraint to the desired position. 8 & 9
There are 5 recline positions that can be used for rear facing, forward facing, and booster modes.
Base Installation
see images 10 - 15
-
Insert ISOFIX guides to assist with installation. 10
-
Press the ISOFIX adjuster button to extend the ISOFIX. 12-1 12-2
- Make sure that both ISOFIX connectors are securely attached to their ISOFIX anchor points. The colors of the indicators on both ISOFIX connectors should be completely green. 13-1
! Press the ISOFIX adjustment buttons again while pushing the seat back until it comes in contact with the vehicle seat backrest.
4. After attaching the ISOFIX, pull the load leg downward to floor. When the load leg indicator shows green, the load leg is installed correctly. 13-2
5. Squeeze the load leg releasing button, then adjust the load leg length. 13-3
! Always make sure the support leg has direct contact with the floor and is in locked position even when the child is not in it.
Removing the seat
- To remove from the vehicle press the ISOFIX adjuster button and pull the base back from the seat. Then press and release the connectors from the vehicle's ISOFIX. 14-1 14-2
- To prevent damage during transit, press the ISOFIX adjuster button 15 -1 and fold the connector completely. 15 -2
Using in the rear facing mode (Child height 40cm-105cm/Child weight ≤19kg/infant - 4 years old)
see images 16 - 23
! Install the enhanced child restraint on the rear vehicle seat and then put the child in the enhanced child restraint.
Press the rotating button to rotate for easier side loading/unloading of the child, then rotate the seat to the rear facing position. 16 & 17
! Press the rotating button on either side to rotate the enhanced child restraint.
Securing Child
- To lengthen the shoulder harness belts, press the harness adjustment button while pulling out the shoulder harnesses to loosen. 18
- Unlock the buckle of the harnesses by pressing the red button. ^19
- Fix the buckles on both sides of the seat, marked as ^20 , to make placing the child in rear-facing mode more convenient.
Use Infant Insert

We recommend using the full infant insert while the baby is under 60cm and can be used until they outgrow the infant insert. The infant insert increases side impact protection.
- Place the child into the enhanced child restraint and pass both arms through the harnesses.
- Engage the buckle. Please refer to
- Pull down the adjustment webbing and adjust it to the proper length to make sure your child is properly secured. 22
! Always keep child secured in harness and properly tightened by removing any slack.
! Make sure the space between the child and the shoulder harness straps is about the thickness of one hand.
When the seat is rotated in place and properly engaged, rotation button will show green; otherwise it will show red.
! Always make sure the seat is in locked position (rearward facing / forward facing) even when the child is not in it.
Using in the forward facing mode (Child height 76cm-105cm/Child weight ≤slant 19kg/15 months - 4 years old)
see images 24 - 31
! Install the enhanced child restraint on the rear vehicle seat, and then place the child in the enhanced child restraint.
Press the rotation button to rotate for easier side loading/unloading of the child, then rotate the seat to the forward facing position. 24 & 25
! Press the rotation button on either side to rotate the enhanced child restraint.
Securing Child
- To lengthen the shoulder harness belts, press the harness adjustment button while pulling out the shoulder harnesses to loosen. 26
- Unlock the buckle of the harnesses by pressing the red button.
Remove the infant insert when in forward facing mode. 28
3. Place the buckle tongues against the magnetic area on the outer side of the enhanced child restraint so that the tongues are held in place.
4. Place the child into the enhanced child restraint and pass both arms through the harnesses.
5. Engage the buckle.
6. Pull down the adjustment webbing and adjust it to the proper length to make sure your child is properly secured.
7. Press the swivel lock off button ⚫ -1 while you rotate the seat to the forward facing mode. ⚫ -2
When the seat is rotated in place and properly engaged, rotation button will show green, otherwise it will show red.
! Always make sure the seat is in locked position (rearward facing / forward facing) even when the child is not in it.
! The ISOFIX connectors must be attached and locked onto the ISOFIX anchor points. 31 -1
! The load leg must be installed correctly with green indicator. ^31 -2
Always keep child secured in harness and properly tightened by removing any slack.
! DO NOT use forward facing mode until your child's height is at least 76cm AND 15 months old.
Using in the booster mode (Child height 100cm-135cm/3.5 - 10 years old)
see images 32 - 39
! Install the enhanced child restraint on the rear vehicle seat, and then place the child in the enhanced child restraint.
! Remove the infant insert when booster mode.
Securing Child
- Unlock the buckle of the harnesses by pressing the red button. 33
- Remove the crotch belt cover and keep it properly. 34
- Tuck the crotch strap, shoulder strap with covers away in the compartments. 35 & 36 & 37
- Adjust the headrest so the bottom of the headrest is level with the child's shoulders.
- Buckle up with the vehicle belt.
! Shoulder belt must pass through shoulder belt guide. 39 -1
! The colors of the indicators on both ISOFIX attachments connectors should be completely green.
! The installation with ISOFIX connectors in booster mode is optional. If ISOFIX connectors are used, make sure the indicator colors on
both connectors are completely green when attached to the anchor points. 39-2
! The enhanced child restraint can not be used if the vehicle safety belt buckle (female buckle end) is too long to anchor the enhanced child restraint securely. 😊-3
Detach Soft Goods
see images 40 - 49
Press the red button to disengage the buckle. 40
Follow steps 41 - 49 to detach soft goods.
To re-attach the soft goods please repeat the above steps in the reverse order.
Care and Maintenance
! Please store the infant insert somewhere out of the child's reach.
! Please wash the soft goods with cold water under 30°C.
! Do not iron the soft goods.
! Do not bleach or dry clean the soft goods.
! Do not use undiluted detergents gasoline or other organic solvent to wash the enhanced child restraint or base. It may cause damage to the enhanced child restraint.
! Do not twist the soft goods to dry with great force. It may leave the soft goods with wrinkles.
! Please hang dry the soft goods in the shade.
! Please remove the enhanced child restraint from the vehicle seat if it will not be in use for a long period of time.

FR
natural_image
Simple line drawing of a person flying with a flagpost (no text or symbols)
Liste des pièces
text_image
Technical diagram of a car seat with numbered labels pointing to different seat positions

natural_image
Interior view of a car seat with a yellow checkmark indicating a location (no text or symbols present)

natural_image
Interior view of a car seatbelt with a yellow checkmark indicating a location (no text or symbols on the belt)


natural_image
Side view line drawing of a car showing passenger seat and passenger seat (no text or symbols)
natural_image
Simple line drawing of a person flying with an open book on their back, against a solid orange background (no text or symbols)
Teileliste
text_image
Technical diagram of a car seat with numbered labels pointing to different components

text_image
Technical diagram of a car seat with numbered labels pointing to specific components
WARNUNG
natural_image
Interior view of a car seat with a yellow checkmark indicating a location (no text or symbols present)

natural_image
Interior view of a car seatbelt with a yellow checkmark indicating a location (no text or symbols on the belt)


natural_image
Line drawing of a car showing the interior and exterior view of a seatbelt (no text or symbols)
natural_image
Simple line drawing of a person flying with a flagpost (no text or symbols)
Onderdelenlijst
text_image
Technical diagram of a car seat with numbered labels pointing to different components

natural_image
Interior view of a car seat with red markers and a yellow checkmark (no text or symbols)

natural_image
Interior view of a car seatbelt with a yellow checkmark indicating a location (no text or symbols on the belt)


natural_image
Side view line drawing of a car with two seats and seatbelt (no text or symbols)
natural_image
Simple line drawing of a person sitting on a chair with an open book icon above, against a solid orange background (no text or symbols)
Elenco parti
text_image
Diagram of car seat components with numbered labels pointing to different seat areas

natural_image
Interior view of a car seat with red markers and a yellow checkmark (no text or symbols)

natural_image
Interior view of a car seatbelt with a yellow checkmark indicating a location (no text or symbols on the belt)


natural_image
Side view line drawing of a car with two seats and seatbelt (no text or symbols)
natural_image
Simple line drawing of a person flying with an open book on their back, against a solid orange background (no text or symbols)
Lista de piezas
text_image
Diagram of car seat components with numbered labels pointing to different parts of the seat.

natural_image
Interior view of a car seat with a yellow checkmark indicating a location (no text or symbols present)

natural_image
Interior view of a car seatbelt with a yellow checkmark indicating a location (no text or symbols on the belt)


natural_image
Line drawing of a car showing interior compartments and seat (no text or symbols)
natural_image
Simple line drawing of a person flying with a flagpost (no text or symbols)
Lista de componentes
text_image
Diagram of a car seat with numbered labels pointing to different compartments or parts.

text_image
Technical diagram of a car seat with numbered components and an inset detail labeled 11
AVISO
natural_image
Interior view of a car seat with a yellow checkmark indicating a location (no text or symbols present)

natural_image
Illustration of a car seatbelt with a yellow checkmark indicating a location (no text or symbols present)


natural_image
Line drawing of a car showing the interior and exterior view of a seatbelt (no text or symbols)
natural_image
Simple line drawing of a person sitting on a chair with a flagpole (no text or symbols)
Lista części
text_image
Technical diagram of a car seat with numbered labels pointing to different components

text_image
Technical diagram of a car seat with numbered components and a magnified inset showing labeled parts 11, 12, and 13.
OSTRZEŻENIE
natural_image
Interior view of a car seat with a yellow checkmark indicating a location (no text or symbols present)

natural_image
Interior view of a car seatbelt with a yellow checkmark indicating a location (no text or symbols present)


natural_image
Line drawing of a car showing interior compartments and seat (no text or symbols)
natural_image
Simple line drawing of a person sitting on a chair with a flagpole (no text or symbols)
Seznam dílů
text_image
Technical diagram of a car seat with numbered labels pointing to different components


text_image
Technical diagram of a car seat with numbered labels pointing to specific compartments or parts.
VAROVÁNÍ
natural_image
Interior view of a car seat with a yellow checkmark indicating a location (no text or symbols present)

natural_image
Interior view of a car seatbelt with a yellow checkmark indicating a location (no text or symbols on the belt)


natural_image
Line drawing of a car showing interior compartments and seat (no text or symbols)
natural_image
Simple line drawing of a person sitting on a chair with a flagpole (no text or symbols)
text_image
Technical diagram of a car seat with numbered labels pointing to different components


text_image
Technical diagram of a car seat with numbered components and labeled parts
VÝSTRAHA
natural_image
Interior view of a car seat with a yellow checkmark indicating a location (no text or symbols present)

natural_image
Interior view of a car seatbelt with a yellow checkmark indicating a location (no text or symbols on the belt)


natural_image
Line drawing of a car showing the interior and exterior view of a seatbelt (no text or symbols)
natural_image
Simple line drawing of a person sitting on a chair with a flagpole (no text or symbols)
Seznam delov
Prepričajte se, da noben del ne manjka. Če kar koli manjka, se obrnite na prodajalca.
1 Opora za glavo
2 Sedežna blazina
3 Sponka
4 Prilagoditveni trak
5 Podporna noga
6 Gumb za nastavitev naklona
7 Vrtljivi zaklepni gumb
8 Gumb za obračanje
9 Prevleki za ramenska pasova

text_image
Technical diagram of a car seat with numbered labels pointing to different components

text_image
Technical diagram of a car seat with numbered labels pointing to specific compartments or parts.
OPOZORILO
natural_image
Interior view of a car seat with a yellow checkmark indicating a location (no text or symbols present)

natural_image
Interior view of a car seatbelt with a yellow checkmark indicating a location (no text or symbols on the belt)


natural_image
Line drawing of a car showing interior compartments and seat (no text or symbols)
natural_image
Simple line drawing of a person sitting in a chair with a book icon above, against a solid orange background (no text or symbols)
text_image
Diagram of car seat components with numbered labels pointing to different sections

text_image
Technical diagram of a car seat with numbered labels pointing to specific compartments or parts.
ПРЕДУПРЕЖДЕНИЯ
natural_image
Interior view of a car seat with red buttons and a yellow checkmark (no text or symbols)

natural_image
Interior view of a car seatbelt with a yellow checkmark indicating a location (no text or symbols on the belt)


natural_image
Side view line drawing of a car with two people seated inside, showing seatbelt and dashboard (no text or symbols)
natural_image
Simple line drawing of a person sitting in a chair with a book icon above, against a solid orange background (no text or symbols)
Liste over dele
Kontroller, at der ikke mangler nogen dele. Kontakt venligst din forhandler, hvis noget mangler.
text_image
Technical diagram of a car seat with numbered labels pointing to different components


text_image
Technical diagram of a car seat with numbered labels pointing to specific compartments or parts.
ADVARSEL
natural_image
Interior view of a car seat with a yellow checkmark indicating a location (no text or symbols present)

natural_image
Interior view of a car seatbelt with a yellow checkmark indicating a location (no text or symbols on the belt)


natural_image
Line drawing of a car showing interior compartments and seat (no text or symbols)
Brug sideskærmen
Se billederne 1 - 2
natural_image
Simple line drawing of a person sitting on a chair with a book icon above (no text or symbols)
Alkatrészek listája
text_image
Technical diagram of a car seat with numbered labels pointing to different components


text_image
11
12
13
14
FIGYELEM
natural_image
Interior view of a car seat with a yellow checkmark indicating a location (no text or symbols present)

natural_image
Illustration of a car seatbelt with a yellow checkmark indicating a location (no text or symbols present)


natural_image
Line drawing of a car showing interior compartments and seat (no text or symbols)
natural_image
Simple line drawing of a person reading a book with a pointer (no text or symbols)
Lista componentelor
text_image
Technical diagram of a car seat with numbered labels pointing to different components


text_image
Technical diagram of a car seat with numbered labels pointing to specific components
AVERTISMENT
natural_image
Interior view of a car seat with a yellow checkmark indicating a location (no text or symbols present)

natural_image
Interior view of a car seatbelt with a yellow checkmark indicating a location (no text or symbols on the belt)


natural_image
Line drawing of a car showing interior compartments and seat (no text or symbols)
text_image
Technical diagram of a car seat with numbered labels pointing to different components

text_image
Technical diagram of a car seat with numbered labels pointing to specific compartments or parts.
ΠΡΟΕΙΔΟΠΟΙΗΣΗ
natural_image
Interior view of a car seat with a yellow checkmark indicating a location (no text or symbols present)

natural_image
Interior view of a car seatbelt with a yellow checkmark indicating a location (no text or symbols on the belt)


natural_image
Side view line drawing of a car with two seats and seatbelt (no text or symbols)
natural_image
Simple line drawing of a person sitting in a chair with a book icon above, against a solid orange background (no text or symbols)
Parça Listesi
text_image
Diagram of a car seat with numbered labels pointing to different seat positions and components


text_image
Technical diagram of a car seat with numbered labels pointing to specific compartments or parts.
UYARI
natural_image
Interior view of a car seat with red buttons and a yellow checkmark (no text or symbols)

natural_image
Interior view of a car seatbelt with a yellow checkmark indicating a location (no text or symbols on the belt)


natural_image
Side view line drawing of a car with two people seated inside, showing seatbelt and dashboard (no text or symbols)
text_image
Diagram of a car seat with numbered labels pointing to different compartments or parts.


text_image
Technical diagram of a car seat with numbered labels pointing to specific compartments or parts.
natural_image
Simple line drawing of a person reading a book with a pointer (no text or symbols)
تحذير
natural_image
Interior view of a car seatbelt with a yellow checkmark indicating a location (no text or symbols present)

natural_image
Interior view of a vehicle seat with red markers and a yellow checkmark (no text or symbols)

natural_image
Side-view line drawing of a sedan showing the interior and exterior view of the seat (no text or symbols)


natural_image
Simple line drawing of a person sitting in a chair with a book icon above (no text or symbols)
Popis dijelova
text_image
Diagram of car seat components with numbered labels pointing to different parts

10 Umetak za bebu
11 Ručkica za podešavanje naslona za glavu
12 Gumb za podešavanje ISOFIX priključka
13 Gumb za podešavanje potpornog nogara
14 ISOFIX priključak
15 Vodilice ISOFIX priključka
16 Zaštita od bočnog udarca
*mora se koristiti samo na strani bočnih vrata

text_image
Technical diagram of a car seat with numbered labels pointing to specific compartments or parts.
UPOZORENJE
natural_image
Interior view of a car seat with a yellow checkmark indicating a location (no text or symbols present)

natural_image
Illustration of a car seatbelt with a yellow checkmark indicating a location (no text or symbols present)


natural_image
Line drawing of a car showing interior compartments and seat (no text or symbols)
Upotreba zaštite od bočnog udarca
natural_image
Simple line drawing of a person sitting in a chair with a book on top, against a solid orange background (no text or symbols)
Lista över delar
text_image
Diagram of a car seat with numbered labels pointing to different seat positions and components.


text_image
Technical diagram of a car seat with numbered labels pointing to specific compartments or parts.
WARNING
natural_image
Interior view of a car seat with a yellow checkmark indicating a location (no text or symbols present)

natural_image
Interior view of a car seatbelt with a yellow checkmark indicating a location (no text or symbols on the belt)


natural_image
Line drawing of a car showing interior compartments and seat (no text or symbols)
natural_image
Simple line drawing of a person sitting on a chair with a flagpole (no text or symbols)
Deleliste
text_image
Diagram of a car seat with numbered labels pointing to different seat positions and components.


text_image
Technical diagram of a car seat with numbered labels pointing to specific compartments or parts.
ADVARSEL
natural_image
Interior view of a car seat with a yellow checkmark indicating a location (no text or symbols present)

natural_image
Interior view of a car seatbelt with a yellow checkmark indicating a location (no text or symbols on the belt)


natural_image
Line drawing of a car showing interior compartments and seat (no text or symbols)
natural_image
Simple line drawing of a car with a flagpole and a pointer, no text or symbols present
Osaluettelo
text_image
Diagram of a car seat with numbered labels pointing to different seat positions and components.


text_image
Technical diagram of a car seat with numbered labels pointing to specific compartments or parts.
VAROITUS
natural_image
Interior view of a car seat with a yellow checkmark indicating a location (no text or symbols present)

natural_image
Interior view of a car seatbelt with a yellow checkmark indicating a location (no text or symbols on the belt)


natural_image
Side view line drawing of a car with two people seated inside, showing seatbelt and dashboard (no text or symbols)
Allison Baby UK Ltd,
Venture Point, Towers Business Park
Rugeley, Staffordshire, WS15 1UZ
NUNA International B.V.
Van der Valk Boumanweg 178 C,
2352 JD Leiderdorp, The Netherlands