ZWM 3478 - Kitchen appliance CLATRONIC - Free user manual and instructions
Find the device manual for free ZWM 3478 CLATRONIC in PDF.
| Product type | Cotton candy machine |
| Brand | Clatronic |
| Model | ZWM 3478 |
| Power supply | 230 V, 50 Hz |
| Power consumption | 500 W |
| Net weight | 1.55 kg |
| Bowl material | Plastic (polypropylene) |
| Sugar spinner capacity | Approximately one measuring spoon (sugar) |
| Number of sticks provided | 10 |
| Included accessories | Base, bowl, splash guard, connecting ring, sugar spinner, measuring spoon, wooden sticks |
| Main functions | Preheating, sugar spinner rotation, sugar filament production |
| Safety instructions | Hot surface, do not immerse, do not use with external timer |
| Maintenance and cleaning | Bowl and sugar spinner dishwasher safe; wipe base with a damp cloth |
| Warranty | 24 months |
| Spare parts | Sugar spinner, bowl, splash guard, connecting ring, wooden sticks |
| Repairability | Do not repair yourself; contact a qualified technician |
| Recommended sugar type | Ordinary or flavored granulated sugar (not jam sugar) |
Frequently Asked Questions - ZWM 3478 CLATRONIC
User questions about ZWM 3478 CLATRONIC
0 question about this device. Answer the ones you know or ask your own.
Ask a new question about this device
Download the instructions for your Kitchen appliance in PDF format for free! Find your manual ZWM 3478 - CLATRONIC and take your electronic device back in hand. On this page are published all the documents necessary for the use of your device. ZWM 3478 by CLATRONIC.
USER MANUAL ZWM 3478 CLATRONIC
Thank you for choosing our product. We hope you will enjoy using the appliance.
Symbols in these Instructions for Use
Important information for your safety is specially marked. It is essential to comply with these instructions in order to avoid accidents and prevent damage to the machine:

WARNING:
This warns you of dangers to your health and indicates possible injury risks.

CAUTION:
This refers to possible hazards to the machine or other objects.

OTE:
This highlights tips and information.
General Safety Instructions
Read the operating instructions carefully before putting the appliance into operation and keep the instructions including the warranty, the receipt and, if possible, the box with the internal packing. If you give this device to other people, please also pass on the operating instructions.
- The appliance is designed exclusively for private use and for the envisaged purpose. This appliance is not fit for commercial use. Do not use it outdoors. Keep it away from sources of heat, direct sunlight, humidity (never dip it into any liquid) and sharp edges. Do not use the appliance with wet hands. If the appliance is humid or wet, unplug it immediately.
- When cleaning or putting it away, switch off the appliance and always pull out the plug from the socket (pull the plug itself, not the lead) if the appliance is not being used and remove the attached accessories.
- Do not operate the machine without supervision. If you leave the room you should always turn the device off. Remove the plug from the socket.
- The device and the mains lead have to be checked regularly for signs of damage. If damage is found the device must not be used.
- Use only original spare parts.
- In order to ensure your children's safety, please keep all packaging (plastic bags, boxes, polystyrene etc.) out of their reach.

WARNING!
Caution! Do not allow small children to play with the foil as there is a danger of suffocation!
- Pay careful attention to the following "Special Safety Instructions".
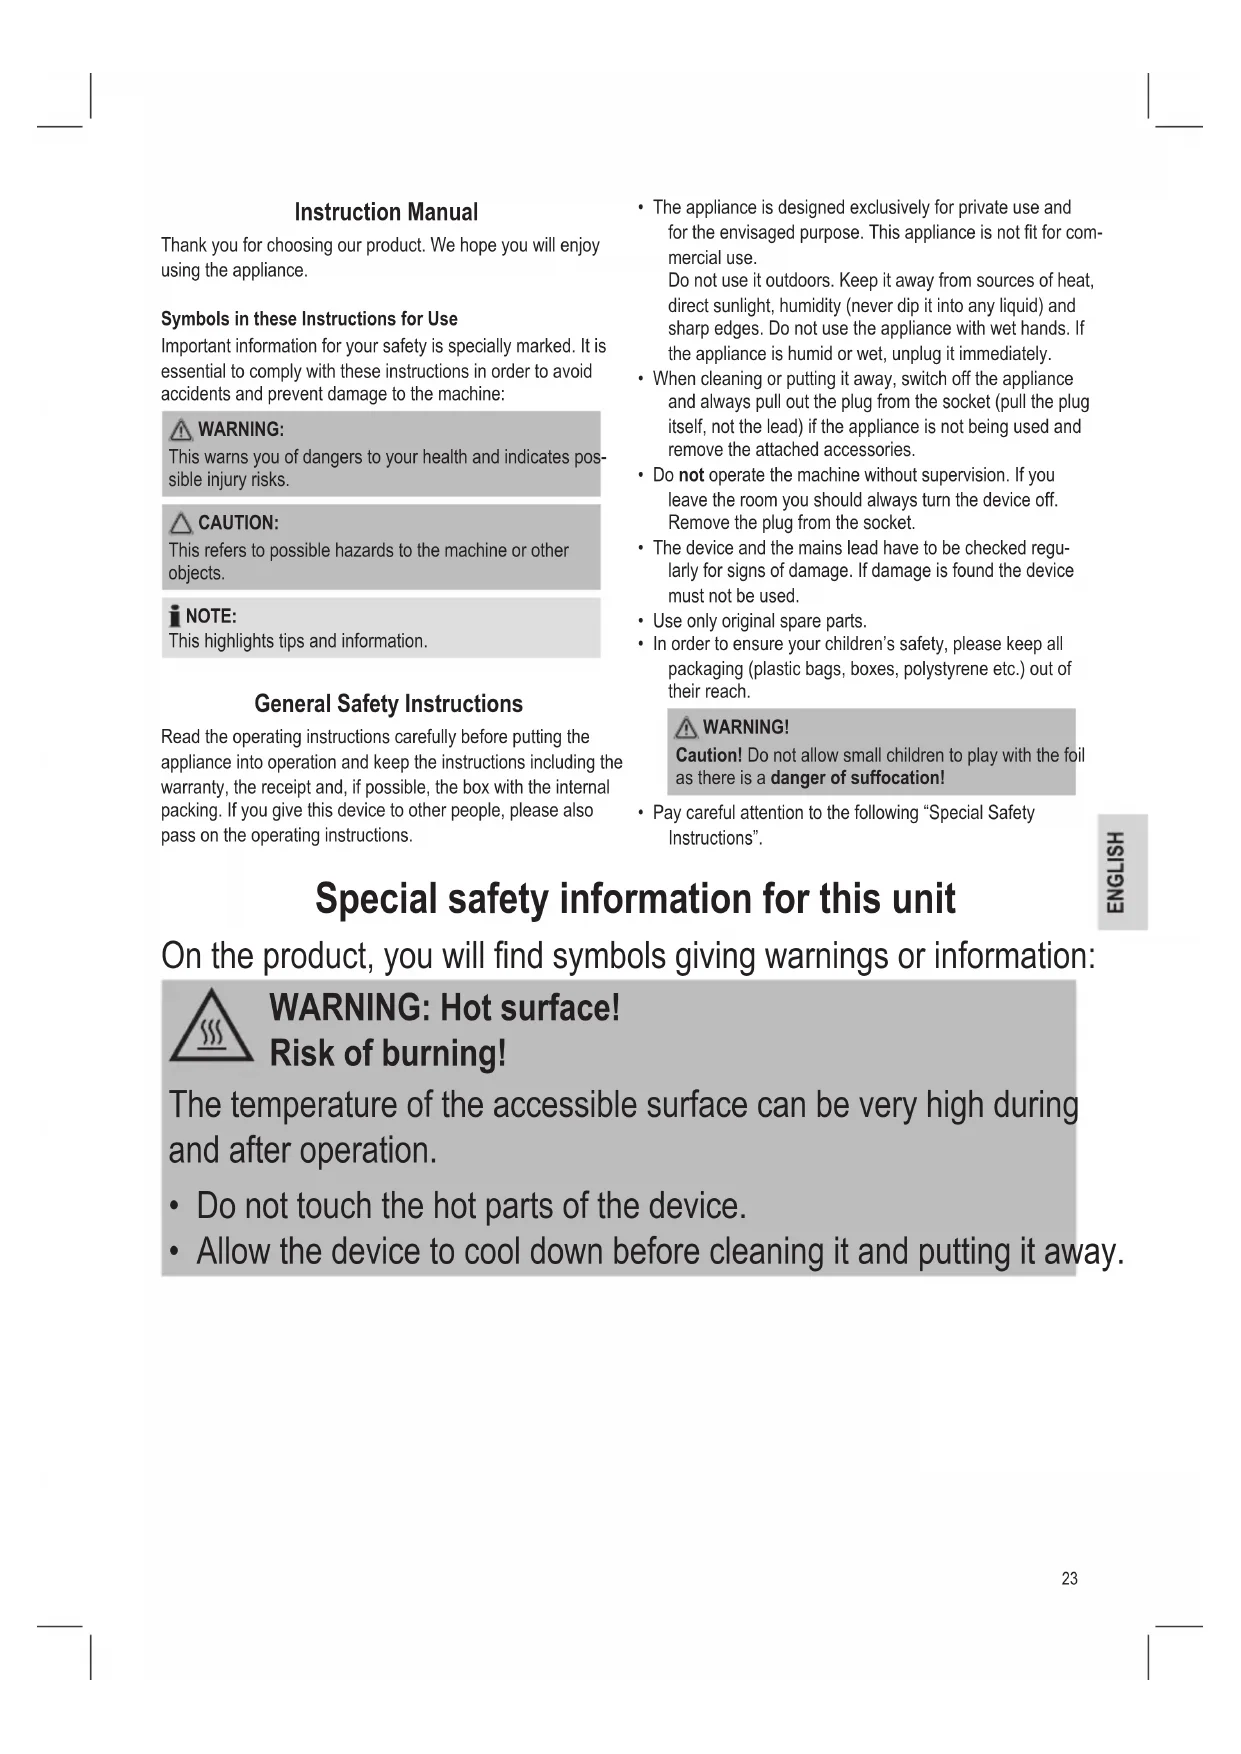
Special safety information for this unit
On the product, you will find symbols giving warnings or information:

WARNING: Hot surface!
Risk of burning!
The temperature of the accessible surface can be very high during and after operation.
- Do not touch the hot parts of the device.
- Allow the device to cool down before cleaning it and putting it away.

WARNING:
- Do not operate the device with an external timer or separate remote control system.
- Prior to assembling the equipment, the appliance must be switched off and disconnected from the mains!
- Do not try to repair the appliance on your own. Always contact an authorized technician. To avoid the exposure to danger, always have a faulty cable be replaced only by the manufacturer, by our customer service or by a qualified person and with a cable of the same type.

CAUTION:
- Place the appliance onto an even surface.
-
Only use the appliance in fully assembled condition.
-
This appliance can be used by children aged from 8 years and above and persons with reduced physical, sensory or mental capabilities or lack of experience and knowledge if they have been given supervision or instruction concerning use of the appliance in a safe way and understand the hazards involved.
Children shall not play with the appliance. - Cleaning and user maintenance shall not be made by children unless they are older 8 years and supervised.
- Keep the appliance and its cord out of reach of children less than 8 years.
Supplied parts
1 Base unit
1 Drip pan
1 Transparent splash guard
1 Connecting ring
1 Sugar bowl
1 Measuring spoon
10 Wooden sticks
Unpacking the appliance
- Take the appliance out of its packaging.
- Remove all the packaging material such as plastic foil, filling material, cable ties and cardboard packaging.
- Check that all parts are supplied in the box.
- Please check the appliance for any transport damage to prevent hazards.
NOTE:
There may still be dust or production residues on the appliance. We recommend that you clean the appliance as described under "Cleaning".
Assembly
Make sure that the switch is in the "Off" (O) position and that the appliance is disconnected from the mains.
Sugar bowl
- Insert the shaft of the sugar bowl onto the shaft in the appliance. The slit of the top shaft has to be fitted over the pins of the bottom shaft.
Pan attachment
- Set the drip pan onto the base unit.
- Place the transparent splash guard onto the drip pan.
- Fasten both parts with the connecting ring.
Instructions for use
Before initial use
There is a protective layer on the heating element. To remove it, operate the appliance for about 10 minutes without any sugar.
i NOTE:
Any smoke or smells produced during this procedure are normal. Please ensure sufficient ventilation.
Electrical connection
- Check whether the mains voltage that you want to use matches the one of the device. You will find the information about this on the type plate.
- Insert the plug in a duly installed protective contact socket.
Using the unit
Preparation
iNOTE:
- You may either use common household sugar or flavored sugar, which you can purchase from retail stores.
- Jam sugar cannot be used.
- You can buy "meat skewers" in place of wooden sticks in the household departments of department stores.
Get the wooden sticks and the sugar ready for use.
Usage
- Turn the appliance on with the switch. Operate it for about 5 minutes without any sugar to preheat it.
- Turn the appliance off at the switch. Wait until the sugar bowl has come to a stop.
- Fill the measuring spoon with the sugar. Pour the sugar into the center of the sugar bowl.
- Turn the appliance on with the switch. The sugar bowl will rotate.
- After a few minutes, the appliance will start to spin sugar threads. Catch the sugar threads with the wooden stick. To do so, first hold the wooden stick upright. Now twist the wooden stick around itself and around the sugar bowl in the drip tray at the same time.
- As soon as you have collected some cotton candy, hold the wooden stick horizontally above the sugar bowl and continue to turn it until there are no more sugar threads.
iNOTE:
- Do not touch the hot sugar bowl with the collected cotton candy. The cotton candy on the wooden stick would melt.
- One full measuring spoon of sugar is enough to make approx. 3 wooden sticks with small wads of cotton candy.
-
If there is enough cotton candy on the wooden stick, restart the process with the next wooden stick. You do not have to switch off the appliance to do so.
-
If no more sugar threads are being spun, the sugar in the sugar bowl has been used up. Switch off the device with the switch (O).
#
WARNING: Risk of burning!
- Do not touch the sugar bowl! It will become very hot during use.
- Wait until the appliance has cooled completely.
NOTE:
Caramel will form in the sugar bowl during use. This is completely normal and does not indicate a fault on the appliance.
Cleaning

WARNING:
Always pull out the plug from the mains socket before cleaning and wait until the unit has cooled down.
- Do not immerse the device in water! It could result in an electric shock or fire.

CAUTION:
- Do not use any wire brush or other abrasive objects.
- Do not use any acidic or abrasive detergents.
Tray attachment and sugar bowl
- Remove the drip tray, the splash guard and the connecting ring from the base unit.
- Pull the sugar bowl off the shaft of the appliance.
- Clean these parts in hot water by adding some washing-up detergent. Then dry the parts well.
i NOTE:
You may also clean these parts in the dishwasher.
Base unit

WARNING:
Please ensure that no water gets inside the appliance!
Clean the housing after use with a slightly damp cloth.
Technical Data
Model: ZWM 3478
Power supply: 230 V, 50 Hz
Power consumption: 500 W
Protection class:
Net weight: approx. 1.55 kg
The right to make technical and design modifications in the course of continuous product development remains reserved.
This device has been tested according to all relevant current CE guidelines, such as electromagnetic compatibility and low voltage directives, and has been constructed in accordance with the latest safety regulations.
Disposal
Meaning of the "Dustbin" Symbol
Protect our environment: do not dispose of electrical equipment in the domestic waste.
Please return any electrical equipment that you will no longer use to the collection points provided for their disposal.
This helps avoid the potential effects of incorrect disposal on the environment and human health.
This will contribute to the recycling and other forms of reutilisation of electrical and electronic equipment.
Information concerning where the equipment can be disposed of can be obtained from your local authority.
Instrukcja obslugi
CTC Clatronic Sp. z o.o
P03nakyBaHHn npncToPO
- BnmiTb npucTpri 3 ynaKyBaHHa.
- 3HIMITb BeCb nakyBaBnH MaTepian: nonimepy nnibKy, HANOBHIOBAuI, 3aTnCKaI dN KabeJIo I KapTOHHI Kopo6Kn.
3.Пелеверг,ЧИ NOCTABNEHO BCI eJIeMeHTN.
4.ДЯункненн Hebe3nekn nepebiTe,Ne He 6yNo noKoDKeH O npicTpi Ni dac TpaHCnOpTyBaHH.
I P N I M I T K A.
Ha npictpoi moke 6ytn nni a6o biXoDn Bnpo6HnTBA. MpekomeHnyeMo nouNCTTu npicpti, k ONcaHO B po3dini "HnueHHA."
36npaHH
IpebeipTe, u npemukau kNbneHHnpe6yBaB nnoKeHHi "BmK." (O) i nn pncptpi BID'ednaHO biD po3eTkn.
Uawa dna ukykp
BCTABTe BAn YaSi IJn LyuKpy Ha BaI Ha npicTpo. IIpopi3 Ha BepXHbOMy BaJI MaC 3axOHTN Ha BnCTyTI Ha HIXKHbOMy BaJI.
ItoKdnaKpanenb
- BctaHOBITb IOTOK dIy KANEb Ha Kopnyc.
- BctaHobitb npo3opn 3axnCT BiD 6pni3ok Ha loTOK dIg kpanelb.
- 3akpinitb obuDbvi actHn KilbIeM IJIa 3'edHaHHa.
Ihctpykuii 0oO BnKOpncTaHHa
Ipeep nepuIM BnKOpncTaHHM
Ha harpibaHbHomy enemeHTi c3axnche nokpnTTa. 0o6 noro 3HATn, yBIMKHITb npCTpi np6n3HO ha 10 xBNINH 6e zkypy.
I PUMITKA.
LInKOM HopMaJIbHO, ⅢO nID Yac po6OTn npuJaDy BUNHKaTmme kINCb Dm Nc3anax. 3a6e3neYte DOCTaTHIO BEHTnIaIIO.
EneKtpnue HeiKnIOeHH
1.ПepekoHaITecA,ио HanpyraЖИВЛeHЯ,яу ПlaHуETbCBAKOpIcTObYBaTи,BiДNoBⅡaE Hanpy3iЖИВЛeHЯ npIpa-ny.Lci IHHopMaJЯ Bka3aHa Ha nacnOptHi Ta6JIuUci npIpaNy.
- BCTABTE BUNKy B HANEXKHM YHOM BCTAHOBJIeHy PO3ETKY 3axnCHNMOKTAKTOM.
KopncTyBaHH npnlaDom
Пд罗товka
ITPIMITKA.
- Moxha BnKOpNCToBbATn a6o 3BnuaHm cykop, a6o apomatn3OBaHm cykop, doCTyHm y npOdaJy.
- He cnii BnKOpncToBvBaTn yuKOp dIy BapeHHa.
3aMCTbpeB'HNXnpanuOKyBiDiniNobyTOBHXTOBa-piBMOKHa npnd6aTuWamnpn DnaM'ca.
PnirroTyIe depeB'hi naniuKi i cykop.
BnKOpncTAnH
- 3a donomoroH nepeMnkaa yBIMKHTb npncTpi. 06 p03i- rpiN npncTpi, daIte NOMy nonpaObaTu 6e3 uKypy npoTAROM 5 XBUNIH.
- 3a donomoroio nepemikkaa BmKHiB npicpti. 3aekai-Te, donoku yaaa dna cykpy He nepectane oebpTaTncb.
- Habepitb uykop MipHOIO JIOxKOIO. Bucnnte uykop no ceHTpy yawi dna uykpy.
- 3a donomoroo nepemnkaay ybIMKHITb npncpti. aaaa da nykpy noue o6epTaTncb.
- Ype3 KjIbKa XBUNINH pInCTPII PO3NoCHe rHepyBaTn UyKPOBI HHTKN JOBITb HNTKN DEpeB'HNIM NAPNUCKAMN.DJIa CbOro cnePuy TpImaIte DepeB'Hy nAPNUKY BEPTNKaJIbHO.ToDI ODNochAO KpyTaN DEpeB'HOIO nAPNUKOIO,BeDITb HEIO DOBkOJaAùSi IJNcUKy.
6.ЯкTiNbKn Bn 36epeTe Tpoxu uKpOBoi BAtN, noBepHItb DepeB'AnHy nannuKy rOpun3oHTaIbHo NaJ qAWeIO dIra Ukypy i npodobkyyte oBeptatn II,doNOKn He 3akInhTbcra UkyPObBa HHTka.
I PIMITKA.
He TopkaTecra rapyoi yawi dny kyky i3 6paHOU LykpoBOBaTOH.LyKPOBa Bata Ha depeB'AHn naJNCHMOKE nonnaBNTnC.
- Ondiei noBHOI MIPHOI NOKKn UcKpy DoCTaTHbO dnn np6n.3 DepeB'HNx naHnOK UcKpOBoI BAtn.
- KaHo Ha DepeB'HiI naNHy IocTaTHbO uKpOBoi BAtn, Bi3bMitb IHy DepeB'Hy naNHy.ДЯ zuBOrO He NOTPi6HO BMNKaTn npICTpri.
7.ЯкpoIuKpOBI HnTockn 6InbWe He yTBOpIOToBcA,Ze O3Ha-yaE,io cykop BnKOpncTaHO.3a DonOMoTO nepemNKaay BnMKHiTb npNCptpi (0).
IIOPEPEDKEHHa.He6e3neka OTPMaHHa onikib!
He TopkaTecyauiIpy!PiJ YacBnKOpNCTaHHBOHa CnIbHO HarpIbAc.
-Дайтпристю NOBHCIO OXOJOHHTN.
ITPIMITKA.
Piic po60tn pncToPO y aawi dIy cykpy yTBOpOeTbc4 kapaMeB. Lc HopMaIbHO i He Bka3ye Ha HecnpaBHicTb npn-ctpo.
UH

NONEPENXEHNA
- PpeI qHcHnM 3aBxDn BtTpyTe BnKy 3 pO3eTKn KINBHeHH Ta YekaiTe, NOKn PpNlAod OCTnHe.
He 3aHypoTe npnnd y Body! Lc moKe npn3BecTn do ypaKeHH eNktpnHm CTpyMOM NIOXKeXi.

YBAGA.
He KopncTyIeTceA DpoTHOU UITKOIO uHIM a6pa3MBHHM npedmetam.
HeKOpuCryTyeTecraKOJHIMM KUCNOTHMn Yn a6pa3NBHN MmHmM 3ac06aMn.
ItoKiUaHaJnUkyKpy
- 3HIMITb IOTOK dIg KpaneJIb, 3axnCT BiD 6pI30K iKiIbIe DnIa 3'EDHaHHN 3 OCHOBn.
- Bmmtb yauy dny cykpy 3 bany npnctroko.
3.ПочсьтeteцячactnHny rapauiy BOdi,IdoaBmMIOUCh 3aci6.Добpe BnCyuTbчactnHn.

ПРМITKA.
Li yactHnTAKOX MOxHa MHTu y NocyDOMmHi MaunHi.
Kopnyc

PONEPENKHHN.
YneBHTbcra, 10 BCEpeHnHy npctpoH He notpanna Boda!
IIO 3aKiHHeHHI KOpNCTyBaHHa BnTepiTb KopNyc TpoXn 3BOnOKeHOHO TKaHHHO.
TexhiHn npaMeTpN
MoeIb: ZWM 3478
IopaHnJxuBneHHa: 230B,50T
Cnoxubaha noTyxhHicTb: 500BT
Ipryna eJektpo6e3neuHocTi:
Bara HETTO: npn6J.1,55 K
IpaBoHaTexHniHi 3MiHN Ta 3MiHN y Dn3aHi 36epiraetbcra npoDobK npocecy po3pO6Kn npOdykTy.
LcI npncptpi ceptnphiikobao HbiNObiHNO do diohox HopM PC, HapnKlad Hopm eJektpomarHITHO cymicHOCTi Hn3bKOHa npyrn, i cKoHcTpyuOBaHO BiNObiHNO do octaHHix xapaKTepcntk i3 texhki6e3neKn.
PykoBoDCTBO no 3KcnnyaTaun
Cnacn6o 3a BbI6op Hauero npOdykta. Haneemc, OH Bam noHpaBntc.
Cnmbolbl npmeHemble B daHHOM pykoBocCTBe noIb-3OBaTeJIa
BaxhIe peKOMHeHaun InI o6ecneHnBaWei 6e3onac-HocTN Oo3NaueHbI NOOC6EHOMy.ObraTeNbHO CneDuYte 3TmpeKOMHeHaunM,TO6bl PpeOTbPaTb HeCCHbI CNy-ay nINI pONMKy N3deJIn:

PENDEYNIPEXXHEHNE:
IpeDynpexkdaet o6 onaChocTn IIN 3doOpOBbN BO3MOXHOM pncke noluyehn TpaBMbl.

BHIMAHHE:
Yka3bBaet Ha BO3MOxHHyO ONaCHOCTb IINI3JeINN INpyrnx OKpykaIOUxN PpeIMeTOB.

ПОНМЕЧАЙ:
DaetcoBebu INHOpMaunIO.
06uye yka3aHnno TeXnke 6e3onacHOCTn
IpeepnHaayanom 3KcNpyaTauin np6opbaHmMaTeBnO npouHTaTae npnaFaeMyIO HCTpykUIO NO 3KcNpyaTaUIN COxpaHnTe ee B HadeXHom MeCTe, BMeCTe C rapaHTnHBIM TaHOHOM, KaccOBbIM YekOM IN, NO BO3MOxHocTN, KAPTOHNO KOPo6KOcCynakOBouhIM MaepnAnOM. Ecn Daete KOMy-Ni6o NonoNB-30BaTbcn np6obpOM, O6ra3aTeNbHO daITe BnpndaHy daHHyo IHCTpykUIO NO 3KcNpyaTaUIN.
- P0nb3yIeTcB np6bOp mToIbKO qacThbIM o6pa3oM nNo Ha3HaueHIO. Pn6Op He npedHa3Haeh dJa KOMpeCCKO NOJb3OBAHn. He noIb3yIeTcB np6bOp mO od OTKpbItbIM He6om. PpeDoxpaHnTe np6Op OT Xapbl, pPmblx CoJIHeHbIX LyueN, BnaxKHOCTn (HN B KOem Cnyae He NOrpykaite Ero BBOdy) n YdapOB 06 octpbl. He npKacaiTecB K np6OpBynXhBMn pykAmn. Ecnn np6Op yBnaxKnIcR nnn HA-MOK, TyT Je BbIbTe BNkky n3 po3eKn.
- Pocne 3KcnpnyatauM, MoTaxpe npHaIeJxHocte, uCTKe nII NIOLOMKe np6Opa Bcerda BbHMmaTe BnIKy n3 po3ETKn (TAnHTe 3a BNkY, a He 3a Ka6enb).
He octabJrte BkIIOUeHHbIe 3NeKTpOpnp6Opbl 6e3 np-CMOTpa.BbIXoJa n3 NOMeUeHnB CBeTa BbIKIOuAaTe np-6Op.BbIHbTe wTekep n3 po3eTKn. - Pn6bop n Ka6eIb cTeBOrO nHTaHnI Heo6xOIMo peryIyIpaH0 o6cneIOBaTb Ha hAIuYne CNeIOB NOBpeXdEHH. PnO 6hApUKeHHN NOBpeXdEHn IOnb3OBaTbCra Pn6bOpom 3aPpeJureTc.
- IcnoJb3yIte TOLbKO opuHnHaJIbHbIe 3aIuaCTN.
- V3 coo6paKeHn 6e0nacHOCTn dna deTe Hc octabnayTe Iexatb yNaKOBky (PiactNKOBbie MeuK, KapTOH, NeHOnnact n T.D.) 6e3 npncmOTpa.

PENDUNPEXDEHNEI
He no3B0nIe TeTAM nIpaTB c IONIaTHIeHOBOI PIIeHKO. OnacHocTb ydysb!
- PtoxanyiCTa, co6JIIOdaIte HNKeCNeJeHIOUe "CneuNaHbIe yKa3aHnI PO TexHnke 6e3oNaChOcTn".
CpeuaHbIe Tpe6oBaHn8 6e30nacHOCTn IJIa 3TOrO np6opa
Ha n3delen imeOTc cIMBOIbI, coedePxaune npedynpeXdeHn an daoune HOpMaun:

PoiKJIIOUeHHe K cETn
-
Поберьт, COOTBETCTByET Ли сеюе habрженье НOMHANbHOMу habрженью пибopa. Инфорmaцяо ob 3Tom codepЖNTcЯ Ha TINOBОТ Tabnueke.
-
BCTaBbTe ceTeByIO BnIKy B po3eTKy C hAnpJxKeHm cETN, OCHaUeHHyIO 3aUINTHbIMN KOHTaKTamN U yCTaHOBJIeHHyIO B COOTBeTCTBIMN C ppeDnMCaHnMn.
3Kcnnyataun/npaokpaobtbl
IoproToBka
I P N U M E Y A H N I:
- MoXHo IcIOnJIb3OBAt bI6o 06bIyHbI 6bITOBoi caxap, I6o apOMaTn3IPOBaHHbI caxap, KOTOpBI MOxHO npIobpeCTn B po3HNHbIX Mara3IHax.
CaxapIgIzxemaHcNIOb3OBAtB HeNb3a.
BMeTO DepeBHHbIX nAnOeK MoXHO KynITb "UaMnypbl BOTdEnax Xo3YNCtBeHHbIX TOBapOB yHNBepMaOB.
IepKnte HaroTOBe IedepeBHHbIe naIOUckn caxap.
3Kcnnyataua
- BkHIOHTe np6Op c nOmoBbBkHIOHTeJI. DaIte emy nopabotb B TeueHne 5 MmHyT 6e3 caxapa dI pyedBa-pntbHoro noDorpeBa.
- BbIKIIOHTe npB6op c nOmoIbIO BbIKIOHTaTeJI. IooJXINTE IO OCTAHOBKN YauN INr Caxapa.
- HanoJIHInTe caxapOM MepHyIOJoxKy. BbICbIbTe caxapB ueHTp qaun dnn caxapa.
- BkIIOUHTe npIbOp c nOmoIbIb BbIKIOUaTeJIy. YaIa dIra caxapa NaHET BpaIaTbcI.
- Yepe3 HeckoIbKO MInHyT npi6Op HauHet HaMaTbIBaTb HHTn caxapa. IOnMaIte HHTn caxapa DepeBraHHoN NaOChKo. IInr 3tOrO cHaUAna dePaxite DepeBraHHyO NaOChy BeptkAaNbHO. 3aTeM BpaAsIe DepeBraHHyO NaOChy BoKpyr ce6n OndHOBpeMeHHo N0 OkpyKHOCTn YaShn DnA caXapa B KaNNeyNoBnteJe.
- Korda Bby cobebete HeKoTOpoe KOJIuYeCTBO caxapHoB BaTbI, DePKeITe DepeBAAHHyI NaIOUky Ropn3OHTaJIbHO HaJ, YaWei dIy caxapa I npOIoJkaIte BpaAaTb ee Do TEX nop, NOKa caxapHbIe HHTI He 3aKOHaTcR.
IINPIMEYAHNIA:
He npikacaiTebc K ropuey qaue dIra caxapa co6paHno caxapHO BATOc. CaxapHa BA t Ha depeBraHHo IaIOUKe paCTaET.
- ODHNoIPOHNOH MepHOJ IIOKKn caxapa DoCTaTOH nIpynpiroTOBJeHHN OKOJI 3 DepeBbHbIX panoeK C He6oJIbShIMn 7apIKAMn caxapHO BaTBI.
- Ecni Ha daHHoI DepeBHHoI NaOuKe caxapHOI BaTbI DOCTaTOUHO, HauHInTe npoucc 3aHOBO CO CneDyUoSe IepeBHHoI NaOuKoI.ДЯ STOrO He Tpe6ByETc OTKnUoyAtb Pnp6Op.
- Ecnn caxapbHie HnTn 60nbIe He HamaTbIBaIOTcR,3NaHT, B yaaJe IJra caxapa 3akOHunCra caxap. OTKJIIOHTe npi-6op C nOMOuBbIKHouaTeJI (O).
IPEyIPEKDEHNE:Puckokora!
He npikacaiTebc K qaue dna caxapa! Bo Bpemr 3Kc- nnyataun OHa cTaHOBnTc OueHb ropaei.
- Pódojúnte, noka npi6op noHocTbO He octbIeT.
ITPIMMEUHNA:
Bo Bpem 3KcnnyatauB yaae dna caxapa o6pa3yeTc KapaMeIb. 3To COBepuenHO HopMaIbHo H He roBOpIT O HeNcnpabHocTN np6opa.
UcTka
IPEyPExkDEHNE:
- Papei uicTKoB BCERda BbIHMaIe Be BNkU 3 po3eTKn I KdTe noka np6op ocTbHET.
- He norpykaite np6op B BOy! 3To moKet npBecTn K nopaKeHHIO 3NeKtpuyeCKM TOKOM INI NOkapy.
BHIMAHHE:
He npimehnIte npoBOIOUHbIe 8ETKN ININ npedMeTbIC a6pa3NHBbIM NOKpbITnEM.
- He npimehnTe cnIbHbIe nIa 6pa3nBbIe MoIOuIe cpeCTBa.
PpncTabHOKkanneynobntenbHnaua dna caxapa
- Chmnte kaPneynobnte, orpaXdHeNe oT pa36pb3rNaHnHa u coeDHHTeNbHOe KOJIbUc 6a3OBoro 6noka.
- Chmmtte yaw dy nla caxapa c bala npnbopa.
- PpomoyTe 3Tn DeTaB N B ropuey Boe, D06aBB HEMHO MOUoIero CpeDCTBa. 3aTEM TuaTeNbHO npocuyuHTe ux.
IIPIMEYAHNA:
Takke MoXHO MbITb 3TN DeTaJIN B IocydomoEchON Ma-
Ba3OBbI 6JIOK
NPEyPExKDEHNE:
He donyckai Te nonaandn Bodb B npnbop!
IIO OKHuaHn pa6oTbI npOtpnte Kopnyc cnerKa BnaXhoI TpIkoN.
TexHnueckne daHHbIe
MoeB: ZWM 3478
3JIeKtpOnuTaHHe: 230B,50T
IopTe6JIeMaMoUHocTb: 500BaTT
Klacc 3aunTbI:
Bec HETTO: npimepno. 1,55 K
CoxpaHeNo npaBo Ha TexHnueckne N KOHCTpyKIOHOHbIe N3MeHHeNBA pamkax npoDoJIkaUoSeIcpeA p3pa6OKn npOdyKtA.
3To n3deneHne npoHIO BCE Heo6xOaMbIe n aKtYaJIbHbIe npOBepKn, npedncaHHbIe dIpeKTHBOI CE, K npIM. Ha 3JekTPOMaHTHyIO COBMeCTmOcTb I COOTBeTCTBNe Tpe6oBaHnRM K H3KOBJbTHOH TEXHKe, OHO 6bIIO TAKKE COKOHCTpyuPoBAHO I NOCTpoEHO C yUeTOM NocPeHNX Tpe6oBaHn IO TEXHKe 6e30NaCHOCTN.
Jill 111111111111111111111111
Clll plasimwJgJU Juaaagj.5cglj aoggl
(0)
12 = 0( p - k)
111 1
jLg4L Jbc 2g>g
A
aill Jd aill jao yu uall
aaggl aay yu SuLla Jauilg
aLgAs aousslls
+ = 2, · = - 1
:
a1b1s1g0sjg1c1w0a1wpaasx8
ab( 15g) a1 = 20 + 5b2b_3
swllc8gddasall
aalg aiaai jiljll no gaijgl aai j1
acll aag jug
jgl 2000 Ssw1 sIg 1.2
a20 a. 100 a100 100 100 100 100 100 100 100 100 100 100 100 100 100 100 100
1 1j>2X
12 = 12
jlll allwic g 2801 0a aai L
aclal
1Jg2Lslo gJg30p2c 5
111 1
a:ii:JI iLogloJI
ZWM 3478
50.230
500
a1 = 23,a2 = - 43,b1 = 56,b2 = - 34
L 1.55
gabill glw g aagaaag aeg cglg 1
Lil
JIO. AALI CIE JOLWg jolj 100, JALI 120 Ls JAAHILG 100g 100g
a0xwllg
plasw81 Lalei
j21 p1.1
aJg1Jg.1g1jx.Jun will aic Jc aol b
10
= 12lr
LJI JIOI L1 1000000000000000000000000000000000000000
a1 = 5 a2 = 9
g
1
.
1.2
a#
1
S OBC = S COD + S_ BOC
ailll l 10
1
13g 100
.1jJyIJIyIJIyIJIyIJIyIJIyIJIyIJIy
( 1 + x) - x < 1x 或 1x - 1 > 1x
plss
5 1
2g 与 lg + 1 = x - 1 无关
aigjx jhail clll plssuuljg11 juiw wagj .2
1.5mol 15c_g
sIcIg IwIg sJswI IaI JIJI aIeLo Lai 3
S = S1 + S2 + S_3
S_wol clog ygywg. Caled plssu wjg 4
g.
Lol.11j, p1.11.15 18c p1.11wJy Jll log
1 1 1 1 1 1 1 1 1 1 1 1 1 1 1 1 1 1
gJgJgJgJgJgJg
.
gell lcll Jic gol joo
12gXjai jaiwJswllsLg gao
- | x - 2| = 54
ak = 3k
JzgLgLwSswIe
1 1 1 1 1 1 1 1 1 1 1 1 1 1 1 1 1 1 1 1
waiiaolooalolsSawaoLgSi
JzLgL a a a 1gai y
.
JcIJI JzJgS 20 a15 a20 S gS 13
- ydi 10gell 20 a lloell 25
L
中
JgI 8
:
·s + 1 + 2 + 3 + ·s + 1 + 2 + ·s + 1 + 2
JolSLL 2023.12.12 2
8 8
g 1 g 1 g 1 g 1
4gj gJ jLgJ pJ 1
aaiol aayb jlg 1 psswlae 5 n g aol c
a.iα.àùl l²
JgLb
8 1gjglj jlg 1aLgog JlJb81 p
08.1c 21
8 8
S_ OBC = S_ COD + S_ BOC
1
"abiiill" paaa g jgSio gao loSjgl aibii
Ea
jglj Jn jnog "Jzai" (O) gaoil lciial 10
11 11
swllslcog
aaii" aaiiaaiaiaiaiie" o
LaeJJI J
jplnulu jol liio jie 1
plasunw11lcoLejg
IcblnU Lus aolgl clogleio glcLoLg 100000000000000000000000000000000000000000
jLg1:Li jLg1zio


gge ggl 10000000000000000000000000000000000000000000000000


g1jglg jaoaiao aolao oao 0g 11

Clogellg cial jlc gaii jaiy
oolei oolwgl oalej
Laeill jgj 1 Jaiu Juaill Laoi Jy. gll ggiail. 5ol jg, pniui Jlaig Jloai llis
p^a + 1 x^p - y^p.
Jaaoo
sLgSlln c alg aalj j 1
1


GARANTIE-KARTE
Garantiebewijs · Carte de garantie