
FW 3151 - Kitchen appliance CLATRONIC - Free user manual and instructions
Find the device manual for free FW 3151 CLATRONIC in PDF.


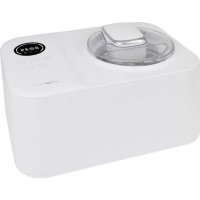
| Product type | Multifunction kitchen appliance |
| Brand | Clatronic |
| Model | FW 3151 |
| Power supply | 220-240 V ~ 50/60 Hz |
| Power | 800 W |
| Dimensions (L x D x H) | 30 x 20 x 30 cm |
| Weight | 5 kg |
| Bowl capacity | 3 L |
| Main functions | Blend, chop, knead, beat, slice, grate |
| Speeds | Multiple speeds with pulse function |
| Included accessories | Whisk, dough hook, chopping blade, grating disc |
| Bowl material | Stainless steel or tempered glass |
| Non-slip feet | Yes |
| Cord storage | Yes |
| Care and cleaning | Dishwasher-safe accessories; bowl and lid dishwasher safe |
| Safety | Safety lock if bowl or lid is not properly closed |
| Overload protection | Automatic shutdown in case of overheating |
| Spare parts and repairability | Bowl, lid, blades and accessories available as spare parts |
| General information | Versatile kitchen appliance for preparing doughs, sauces, vegetables, etc. |
Frequently Asked Questions - FW 3151 CLATRONIC
User questions about FW 3151 CLATRONIC
0 question about this device. Answer the ones you know or ask your own.
Ask a new question about this device
Download the instructions for your Kitchen appliance in PDF format for free! Find your manual FW 3151 - CLATRONIC and take your electronic device back in hand. On this page are published all the documents necessary for the use of your device. FW 3151 by CLATRONIC.
USER MANUAL FW 3151 CLATRONIC
D-47906 Kempen/Germany
7 Accessorio a + b Accessorio biscotti in 2
"Kebbe" pezzi
General Safety Instructions
Read the operating instructions very carefully before putting the appliance into operation and keep the instructions including the warranty, the receipt and, if possible, the box with the internal packing. If you give this appliance to other people, please also pass on the operating instructions.
- Only use the appliance for private purposes as intended.
This appliance is not fi t for commercial use. Do not use the appliance outdoors. Keep it away from sources of heat, direct sunlight, humidity (never dip it in any liquid) and sharp edges. Do not use the appliance with wet hands. If the appliance is humid or wet, unplug it immediately. - Switch off the appliance and always disconnect the plug from the power socket (pull on the plug, not on the cable) when the appliance is not in being used, before attaching accessories, cleaning or in case of malfunction.
- Do not use the appliance without supervision. Always turn the appliance off, when you leave the room. Pull the plug out of the socket.
- Regularly check the appliance and cable for damage. Do not use the appliance if it is damaged.
- Do not attempt to repair the appliance yourself, but refer repairs to an authorised specialist. To avoid danger, faulty power cords must only be replaced by the manufacturer, customer service or a similarly qualified person using an equivalent cable.
- Only use original accessories.
- Observe the following „Special Safety Instructions“.
Children and the infi rm
- Keep packaging out of the reach of children (plastic bag, cardboard box, polystyrene, etc.).

WARNING!
Do not allow small children to play with the foil. Danger of suffocation!
- In order to protect children or frail individuals from the hazards of electrical equipment, please ensure that this appliance is only used under supervision. This appliance is not a toy! Do not allow small children to play with it.
Symbols used in this operating manual
Important information for your safety is specially marked. It is essential to comply with these instructions in order to avoid accidents and prevent damage to the machine:

WARNING!
This could endanger your health and possibly injure you.

ATTENTION!
This might damage the unit or other objects.

NOTE:
You will find tips and information here.
Special safety instructions for this unit

WARNING!
- Switch off the appliance and pull the power supply plug out before you exchange accessories.
- Before changing accessories, wait until the knife has come to standstill.
-
Danger of injury! Handle the knife with the necessary care when taking out and cleaning it!
-
Do not break up hard items such as bones or shells.
- Do not manipulate safety switches.
- Do not touch moving parts.
- Only use the pusher for stuffing.

ATTENTION!
Do not use the appliance for longer than 10 continuous minutes.
Arrangement of control elements
1 Filling tray 9 Knife
2 Motor 10 Plug
3 Switch ON/0/R (On/Off/reverses) 11-13 Perforated discs 14 scroll
4 Safety switch „Forward/ reverse“ 15 scroll housing 16 Pusher
5 Screw 17 Connection scroll
6 Threaded hole housing
7 a + b Attachment Without illustration „Kebbe“
8 Sausage attachment 2-part cookie attachment
Intended use
This appliance serves
- Cut up foodstuff
- You can shape noodles or dough with different attachments.
It is exclusively intended for this purpose and may be only used appropriately.
It may only be used in the manner described in these operating instructions.
You may not use the appliance for commercial purposes. Use for any other purpose is considered improper and not for the intended purpose and can result in damage to property and personal injury.
Clatronic International GmbH is not liable for damages caused by non-intended use.
Assembly of the meat grinder
Please also observe our illustrations under "A".
- Insert the scroll housing into the mounting on the motor.
- Lock the scroll housing into position with the screw.
- Insert the scroll.
- Insert the knife with the sharpened edge outwards onto the shaft of the scroll.
- Select a perforated disc.
i NOTE:
- Slightly grease the perforated discs beforehand with vegetable fat.
-
The guides on the perforated disc are located in the recesses on the scroll housing.
-
Rotate the catch clockwise.
- You can now attach the fi lling tray with whatever you want to grind.
See below "Electrical connection".
Mounting of the "Kebbe" attachment
i NOTE:
Tubes of meat or dough paste can be made with the "Kebbe" attachment.
Please also observe our illustrations under "B".
First proceed as described in "Assembling the meat grinder" Item 1 to Item 3.
- Position the 2-piece Kebbe attachment on the shaft of the scroll.
i NOTE:
The guides on attachment (A) are located in the recesses on the scroll housing.
- Rotate the catch clockwise.
- You can now attach the filling tray with your meat or dough mixture.
See below "Electrical connection".
Assembly of the sausage attachment
Please also observe our illustrations under "C".
First proceed as described in "Assembling the meat grinder" Item 1 to Item 5.
- Position the sausage attachment on the scroll housing.
- Rotate the catch clockwise.
- You can now attach the fi lling tray with whatever you want to grind.
See below "Electrical connection/Application instructions".
Assembly of the cookie attachment
i NOTE:
You can shape different forms with this attachment after preparing a cookie dough. This is particularly suitable for so-called Spritzgebäck.
First proceed as described in "Assembling the meat grinder" Item 1 to Item 3.
- First, insert the disc onto the extension of the scroll shaft.
i NOTE:
The guides are located in the recesses on the scroll housing.
- Then mount the shaping disc.
- Rotate the catch clockwise.
- You can now attach the filling tray with your dough.
See below "Electrical connection/Application instructions".
Electrical connection
- Ensure that the function switch is set to "0" (Off).
- Connect the appliance to a correctly installed and earthed socket 230 V, 50 Hz.
The switches, the return
The appliance is equipped with a forward and return function. If the scroll should block, you can use the return function, in order to release it.
For your safety, the forward and return functions have been combined with two switches.
Forward: Move the safety switch (4) to "I" and the switch (3) to "ON". The appliance is in the "Forward" mode. Switching to the return mode is not possible.
Return: Move the safety switch (4) to "II" and the switch (3) to "R". The appliance is in the "Return" mode. Switching to the forward mode is not possible.
Switching off
Move the safety switch (3) to "0" and pull the power plug.
Application instructions
Making sausages
- You can use either natural or artificial intestines.
- If you have decided for natural intestines, soak them beforehand for some time in water.
• Make a knot at the end of the intestine. - Push the intestine over the sausage attachment.
- The sausage mass is pressed through the sausage attachment and the sausage intestine is filled.
- Make sure that the sausage intestine is filled "loosely", since otherwise the intestine could burst because the sausage expands when cooking and/or frying.
- After the first sausage has achieved the require length, press the sausage together at the end of the sausage attachment with your fingers.
- Until you have acquired routine, you can switch the appliance off after each sausage section.
- Twist the sausage once or twice around its own axis.
Cookie attachment
- Screw the cookie attachment on and adjust the required cookie shape.
- Put the dough on the filling tray and filler.
- Hold the dough strands at the outlet with your hand and cut off the required length.
Cleaning and maintenance
- Always pull the power supply plug before cleaning and wait until the appliance has cooled down.
- Do not use a wire brush or other abrasive items.
- Never use sharp or scouring cleaning materials.

WARNING!
Never immerse the motor assembly in water for cleaning. It could result in an electric shock or fire.
Motor assembly
- Only wipe the motor assembly with a damp cloth and dry with a dry cloth after.
Filling tray, scroll, scroll housing and all accessories

ATTENTION!
- Do not clean these parts in the dishwasher.
• The surfaces could become lacklustre.
• These parts can be cleaned by hand in the wash basin.
- Rinse with clear water and dry the parts.
Specifications
Model: FW 3151
Power supply: 220-240V, 50Hz
Power consumption: 550W
Protection class: II
Net weight: 3.65 kg
Declaration of Conformity
This appliance has been examined according to all appropriate current CE guidelines, e.g. electromagnetic compatibility and Low Voltage Directive and was designed according to the latest safety-relevant regulations. Subject to technical modifications!
Guarantee
The device supplied by our Company is covered by a 24-month guarantee starting on the date of purchase (receipt). During the life of the guarantee any fault of the appliance ascribable to material or manufacturing defects will be eliminated free of charge by repairing or, at our discretion, by replacing it. The guarantee service does not entail an extension of the life of the guarantee nor does it give rise to any new term of guarantee!
The sales receipt serves as proof of purchase for the guarantee. Without proof of purchase no free replacement or repair will be carried out.
If you wish to make a claim under the guarantee please return the entire appliance in the original packaging to your dealer together with the receipt.
Defects to consumables or parts subject to wearing as well as cleaning, maintenance or the replacement of said parts are not covered by the guarantee and hence are to be paid!
Any unauthorised tampering with the unit will invalidate the warranty.
This guarantee does not effect the legal claims of the buyer and is subject to the laws applicable in the country, where the appliance was first purchased by the final customer from an authorised dealer of the Clatronic International GmbH.
After the expiry of guarantee
After the expiry of the guarantee repairs can be carried by the competent dealer or repair service against the payment of the ensuing costs.
Meaning of the "Dustbin" symbol

Protect our environment: Do not dispose of electrical appliances together with domestic waste. Use the designated collection points for
disposing electrical appliances and deliver your electrical appliances, which you do not use anymore, to them.
This helps avoid the potential effects of incorrect disposal on the environment and human health.
This will contribute to the recycling and other forms of reutilisation of electrical and electronic equipment.
Information concerning where the equipment can be disposed of can be obtained from your local authority.
- General Safety Instructions
- Children and the infi rm
- WARNING!
- Symbols used in this operating manual
- ATTENTION!
- NOTE:
- Special safety instructions for this unit
- Arrangement of control elements
- Intended use
- Assembly of the meat grinder
- i NOTE:
- Mounting of the "Kebbe" attachment
- Assembly of the sausage attachment
- Assembly of the cookie attachment
- Electrical connection
- The switches, the return
- Switching off
- Application instructions
- Making sausages
- Cookie attachment
- Cleaning and maintenance
- Motor assembly
- Filling tray, scroll, scroll housing and all accessories
- Specifications
- Declaration of Conformity
- Guarantee
- After the expiry of guarantee
- Meaning of the "Dustbin" symbol
Brand : CLATRONIC
Model : FW 3151
Category : Kitchen appliance