Car Seat + Isofix - Car seat BabyGO - Free user manual and instructions
Find the device manual for free Car Seat + Isofix BabyGO in PDF.
| Product Type | Car seat for children |
| Brand | BabyGO |
| Model | Car Seat + Isofix |
| Weight groups | Group 0+ (0–13 kg) and Group 1 (9–18 kg) |
| Dimensions (L x W x H) | 576 x 493 x 628 mm |
| Net weight | 10.1 kg |
| Fixing system | ISOFIX anchorages + anti-rotation support leg |
| Rotation | 360° for easier child installation |
| Side protection | Side impact protection system |
| Support leg | Adjustable length support leg with green locking indicator |
| Harness | Height-adjustable 5-point harness with soft padding |
| Adjustable headrest | Yes, height-adjustable with the straps |
| Canopy | Removable, two positions (high and low) |
| Recline positions | 5 adjustable positions |
| Certification | ECE R44.04, semi-universal usage |
| Use | Rear-facing (0–13 kg) and forward-facing (9–18 kg) |
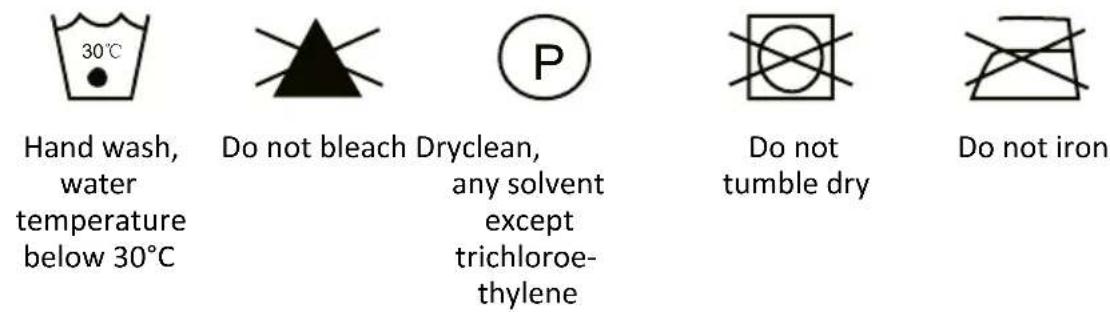
| Cover cleaning | Hand wash, water <30°C, no bleach, no machine drying |
| Important instructions | Do not use on a seat with active airbag; replace after an accident |
| Repairability | Contact the manufacturer for any spare parts; do not modify the product |
Frequently Asked Questions - Car Seat + Isofix BabyGO
User questions about Car Seat + Isofix BabyGO
0 question about this device. Answer the ones you know or ask your own.
Ask a new question about this device
Download the instructions for your Car seat in PDF format for free! Find your manual Car Seat + Isofix - BabyGO and take your electronic device back in hand. On this page are published all the documents necessary for the use of your device. Car Seat + Isofix by BabyGO.
USER MANUAL Car Seat + Isofix BabyGO
Child Car Seat Assembly Instruction
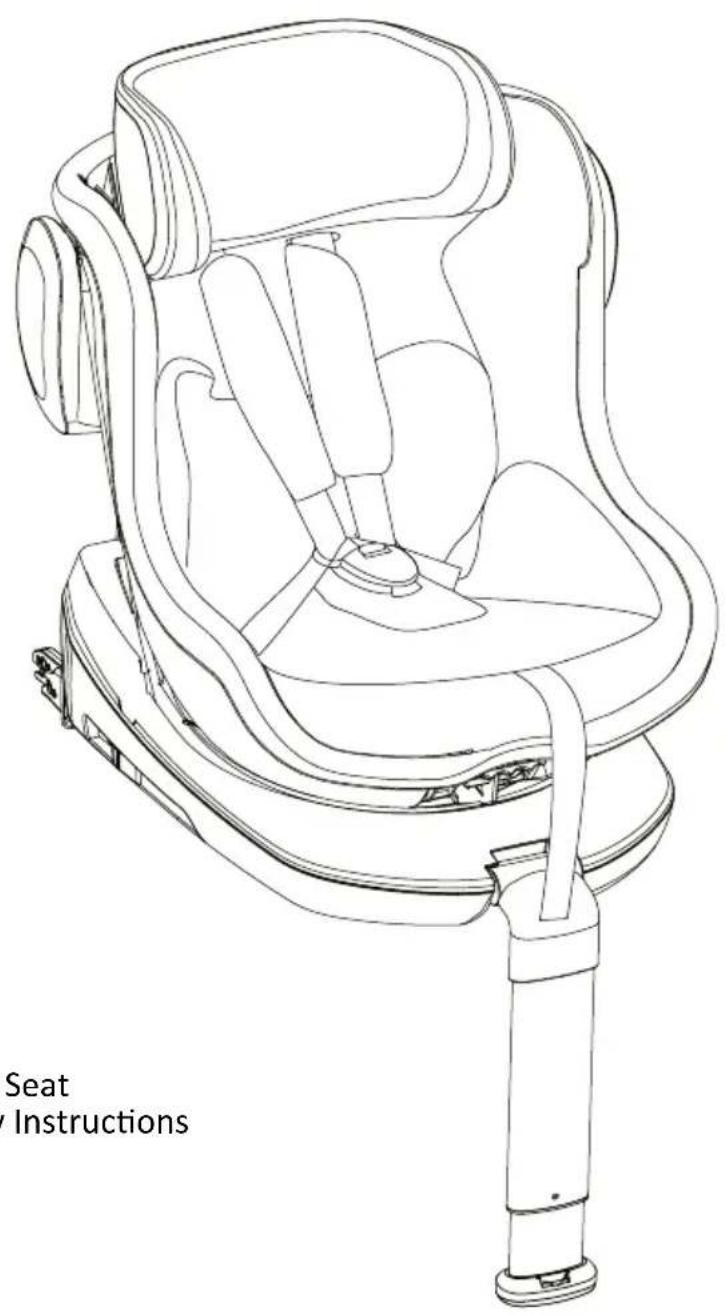
EN Child Car Seat Assembly Instructions
DEAR USER
This is an ISOFIX child restraint system. It is approved to Regulation ECE R44/04 series of amendments for general use in vehicles fitted with ISOFIX anchorages systems. (see vehicle type list)
It will fit vehicles with positions approved as ISOFIX positions (as detailed in the vehicle handbook), depending on the category of the child seat and of the fixture.
The mass group and the ISOFIX size class for which this device is intended is: Group 0+(0-13kg), Group 1(9-18kg); B1&D
This child restraint is classified for "Semi-universal" use and is suitable for fixing into the seat positions of following cars:
| Car model Front seats | Rear seats | |
| Outside Intermediate | ||
| Model 1 NO YES | NO | |
| Model 2 NO YES | NO | |
| Model 3 NO YES | NO | |
| *Seat positions in other cars may also be suitable to accept this chi restraint. If in doubt, consult either the child restraint manufacturer or the retailer. | ||
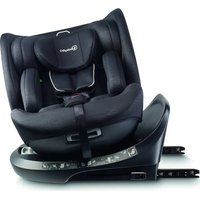
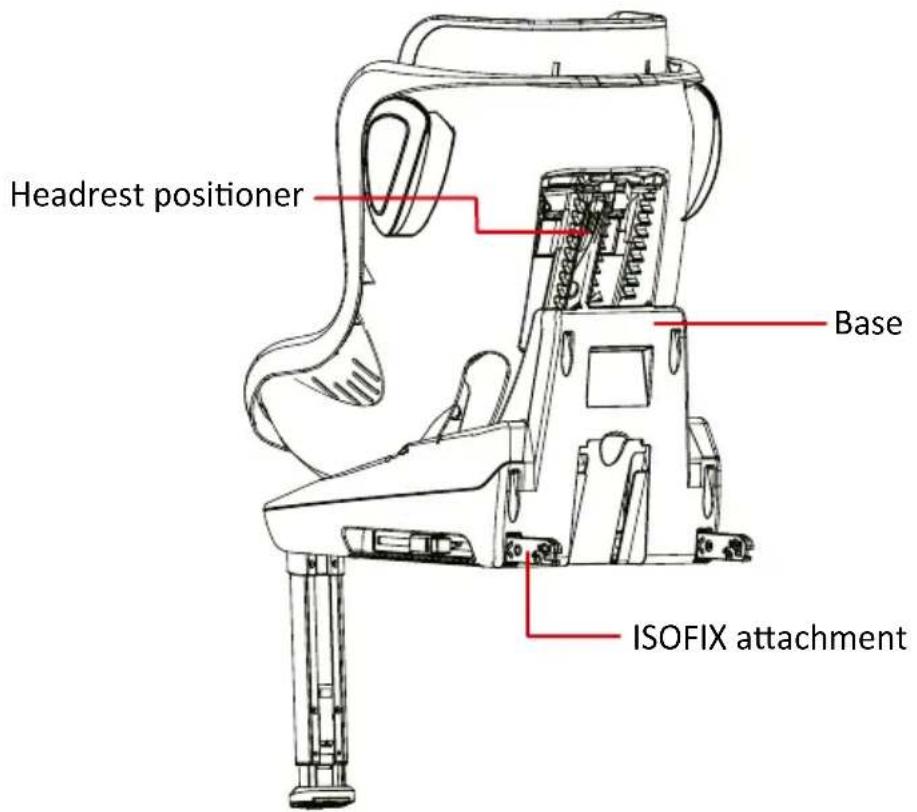
Instructions Safety note 1 PRODUCT OVERVIEW

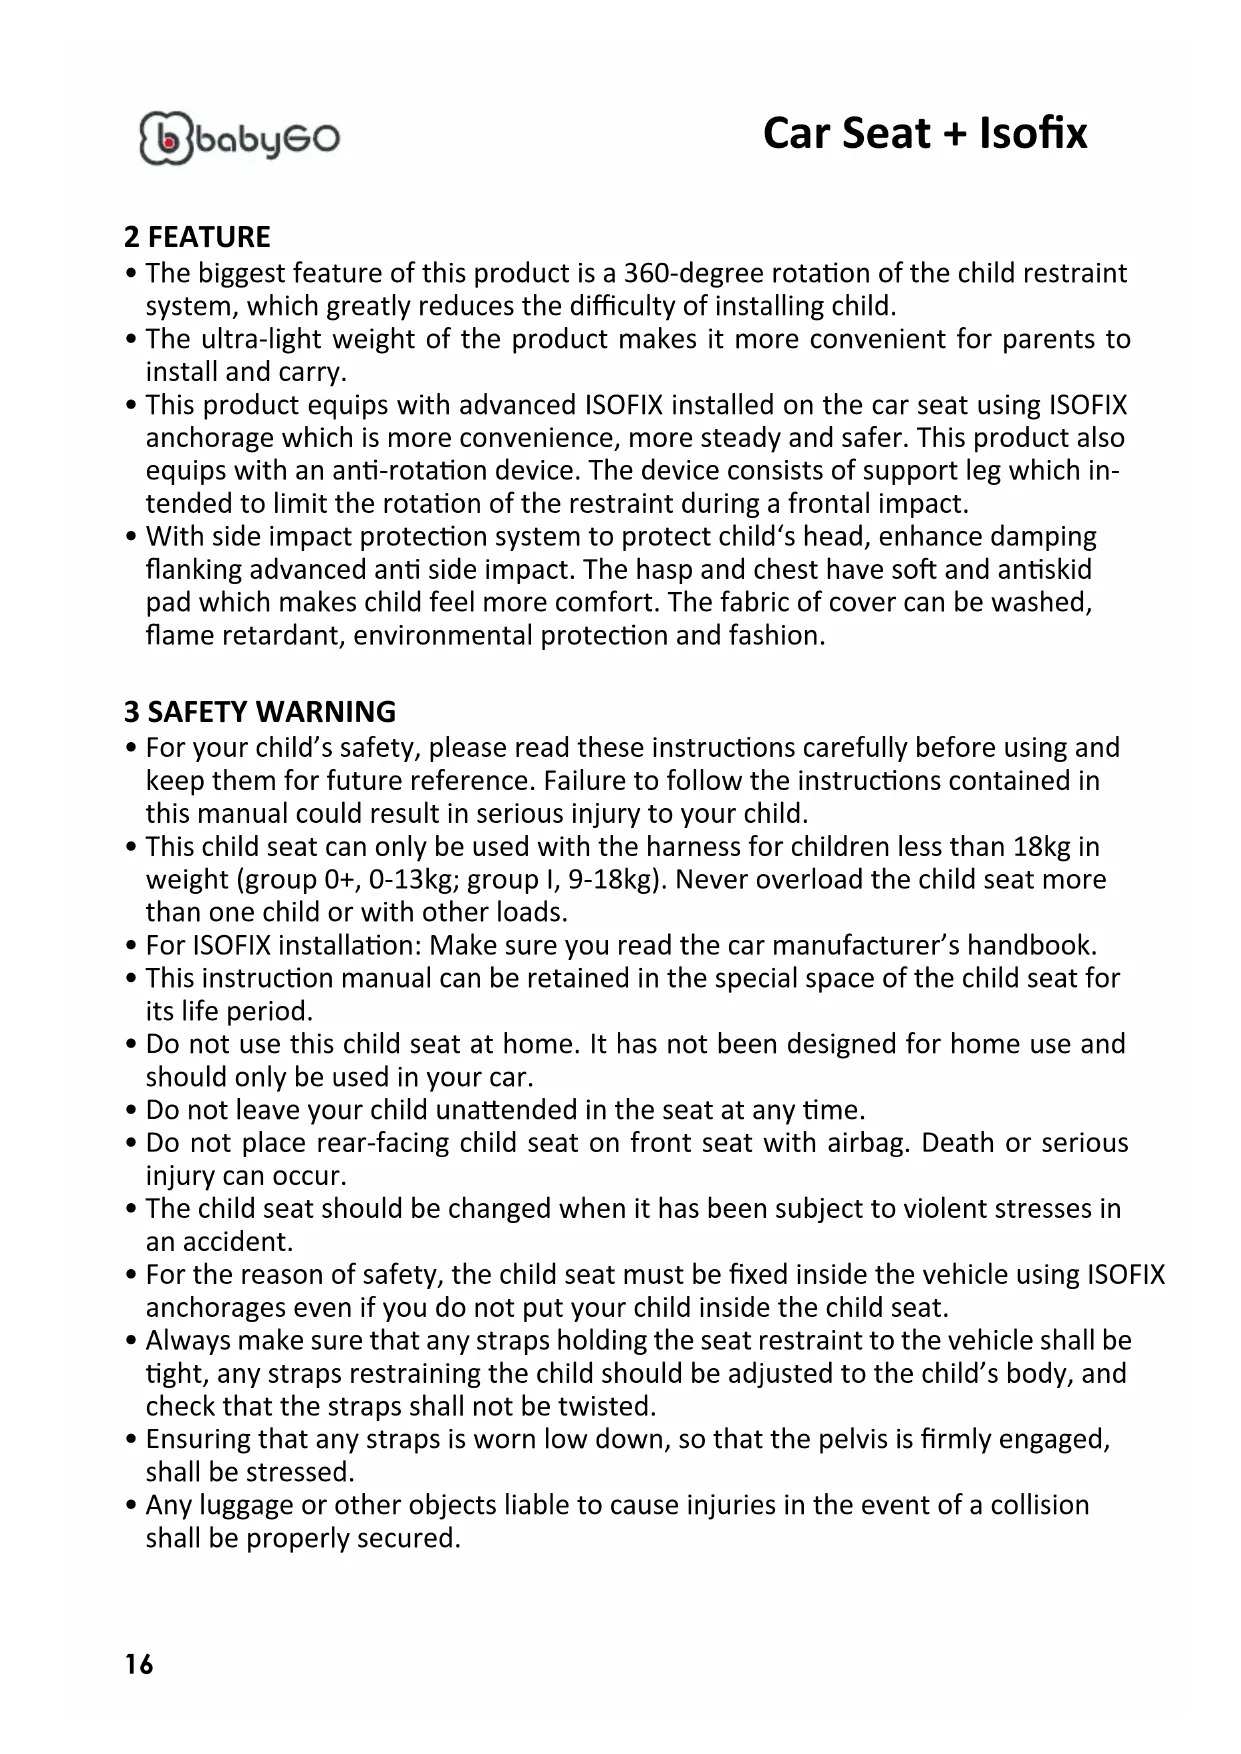
2 FEATURE
- The biggest feature of this product is a 360-degree rotation of the child restraint system, which greatly reduces the difficulty of installing child.
- The ultra-light weight of the product makes it more convenient for parents to install and carry.
- This product equips with advanced ISOFIX installed on the car seat using ISOFIX anchorage which is more convenience, more steady and safer. This product also equips with an anti-rotation device. The device consists of support leg which intended to limit the rotation of the restraint during a frontal impact.
- With side impact protection system to protect child's head, enhance damping flanking advanced anti side impact. The hasp and chest have soft and antiskid pad which makes child feel more comfort. The fabric of cover can be washed, flame retardant, environmental protection and fashion.
3 SAFETY WARNING
- For your child's safety, please read these instructions carefully before using and keep them for future reference. Failure to follow the instructions contained in this manual could result in serious injury to your child.
- This child seat can only be used with the harness for children less than 18kg in weight (group 0+, 0-13kg; group I, 9-18kg). Never overload the child seat more than one child or with other loads.
- For ISOFIX installation: Make sure you read the car manufacturer's handbook.
- This instruction manual can be retained in the special space of the child seat for its life period.
- Do not use this child seat at home. It has not been designed for home use and should only be used in your car.
- Do not leave your child unattended in the seat at any time.
- Do not place rear-facing child seat on front seat with airbag. Death or serious injury can occur.
- The child seat should be changed when it has been subject to violent stresses in an accident.
- For the reason of safety, the child seat must be fixed inside the vehicle using ISOFIX anchorages even if you do not put your child inside the child seat.
- Always make sure that any straps holding the seat restraint to the vehicle shall be tight, any straps restraining the child should be adjusted to the child's body, and check that the straps shall not be twisted.
- Ensuring that any straps is worn low down, so that the pelvis is firmly engaged, shall be stressed.
-
Any luggage or other objects liable to cause injuries in the event of a collision shall be properly secured.
-
The rigid items and plastic parts of a child restraint must be so located and installed that they are not liable, during everyday use of the vehicle to become trapped by a moveable seat or in a door of the vehicle.
- It is dangerous to make any alteration or additions to the device without the approval of the competent authority, and a danger of not following closely the installation instructions provided by the child restraint manufacturer.
- The child restraint must not be used without the cover.
- The seat cover should not be replaced with any other than the one recommended by the manufacturer, because the cover constitutes an integral part of the restraint performance.
- The child seat should be kept away from sunlight if the seat is not provided with a textile, otherwise it may be too hot for the child's skin.
- Never use a second-hand product, as you can never be certain what was happened to it.
4 USAGE
4.1 Installing position of the child seat in vehicle
When installed with ISOFIX anchorages and support leg, this type of child safety seat is suitable for fixing into the seat positions of the cars equipped with ISOFIX system that are fitted in accordance with ECE R14.
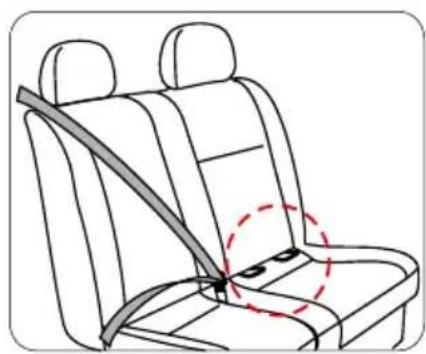

ISOFIX-anchorages
Not to use rearward-facing in seating positions where an active frontal airbag is installed.
? Only use on this seat if ISOFIX anchorages are fitted.
4.2 Usage of buckle
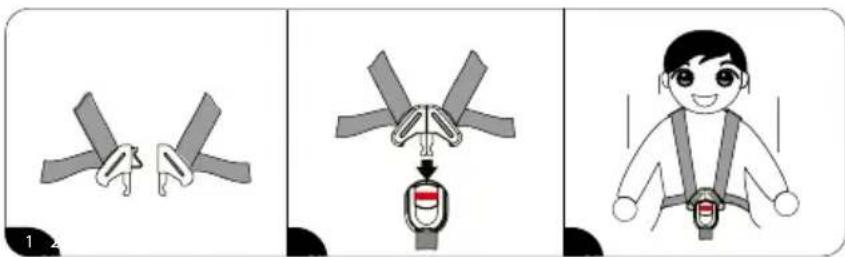
Step1: Insert the left and the right pieces of buckle together.
Step2: Insert the two pieces into the slot of the buckle at the same time. hearing "click" means the buckle gets stuck, pull the pieces of the buckle and check whether the buckle is locked correctly.
Step 3: If you want to release the safety belts, it need to press the red button, then the pieces pops up.
4.3 Adjust the length of harness
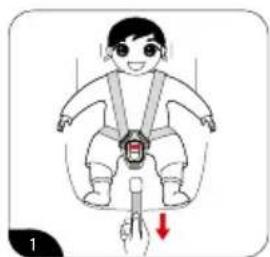
Picture1: Tighten the harness.
Pull the harness upwards to remove the slack from the lap sections of the harness then pull the front stretch belt until the harness is fully tightened. The harness should be adjusted as tightly as possible without causing discomfort to your child. A loose harness can be dangerous. Check the harness adjuster and tighten each time when the child is placed in the seat.
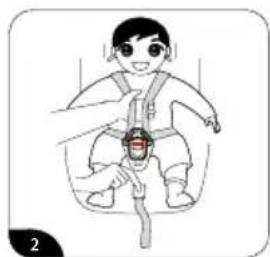
Picture 2:Loosen the harness.
The harness can be slackened by pressing the adjuster (under the seat cover) on the front of the seat. Press down the adjuster as you grip the two harness with your another hand. Pull the harness towards you to loosen the harness.
4.4 Adjust and check the height of headrest and shoulder strap 4.4.2 Check the height of headrest and shoulder strap
Right

Wrong

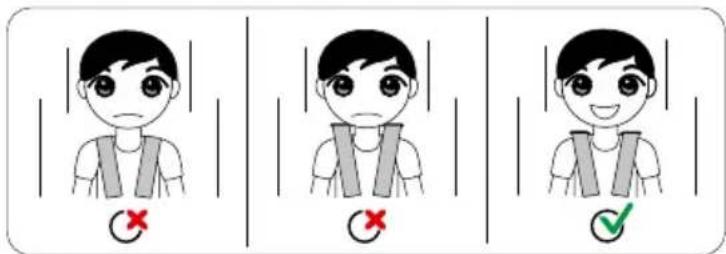
Always check whether the harness are at the correct height for your child. If not, repeat adjusting the height of headrest (see 4.4.1).
4.4.1 Adjust the height of headrest and shoulder strap

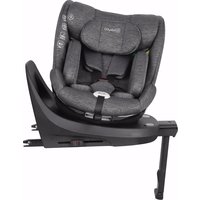
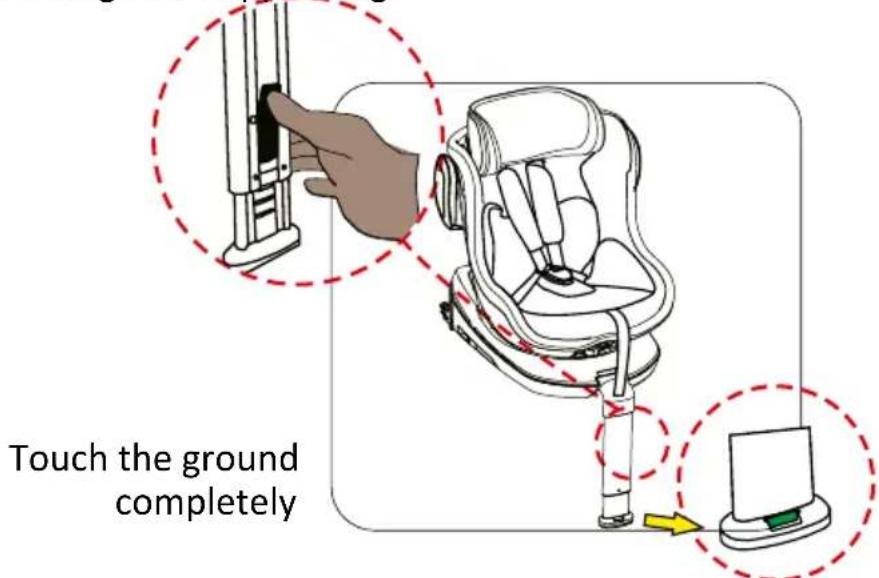
4.5 Adjust the length of support leg
Press the button and adjust the length of support leg to suitable for different height of car seat. Make sure the bottom of the support leg touches the ground completely and the supportleg status window shows green.
IMPORTANT:
Push the support leg counterclockwise before adjusting the length of support leg. When you hear a "click" means you have got the right angle of support leg. Then you can adjust the length of support leg.
4.6 Adjust the child seat to different incline position

pic.1
The child seat can be adjusted 5 different positions - position 1, 2, 3, 4, 5. Press the button of angle adjuster under the front of the seat, and then pull or push the seat forwards or backwards. Release the angle adjuster in the desired position and push it until you hear a "click".
The position sticker is shown in picture 2. Mark of blue is only for rearward-facing, and you can rotate the backrest for 180 degrees..
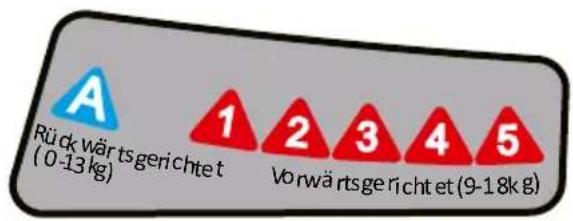
Rearward-facing (0-13kg) (blue)
Forward-facing (9-18kg) (red)
pic.2
4.7 Adjust the child seat to different rotating positions
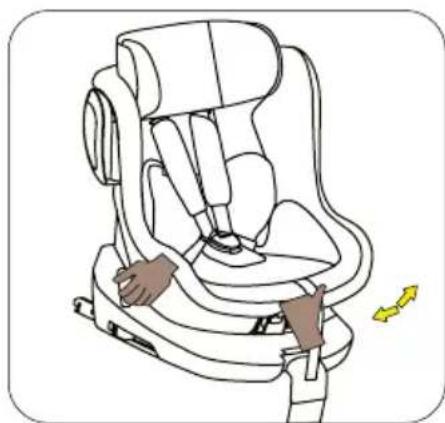
This child seat can be free to rotate 360 degrees. Clench the rotate adjuster until it press into the body of seat, then hold on the base in another hand. Now you can rotate the child seat. Be sure to hear a "click" when turning to the forward-facing or rearward-facing.
4.8 Installation and dismantling of the sunshade

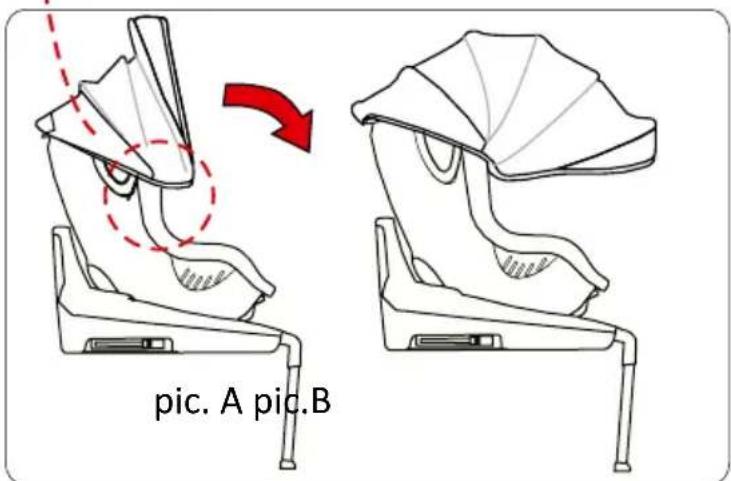
Installation:
1.Assemble the sunshade and set up the cover of sunshade. (Important: the perforation mode of the sunshade cover and sunshade holder is shown in picture 1.)
2. Insert the sunshade holder into the sunshade jack on both sides of the body. It is installed in place when you hear a "click". Picture A: Place the sunshade to the top position. Picture B: Place the sunshade to the bottom position.
Dismantling:
- Pull the sunshade holder out of the sunshade jack.
- Pull the connecting rod out of the sunshade holder. Then you can remove the sunshade cover.
5 INSTALLATION
5.1 Installation of the child restraint system

Step 1: Install ISOFIX guide sleeves to ISOFIX lower anchorages.
Step 2: Press down the red button to adjust ISOFIX attachment of both sides to the longest. Then put the ISOFIX attachments into guide sleeves, and insert them into ISOFIX anchorages. Make sure that you have heared a "click" and the ISOFIX latching indication shows GREEN. Next, you can push the child seat towards the car seat backrest until it is firmly pressed against the car seat backrest. If you want to release the ISOFIX attachments, just need to press the ISOFIX red button. Then adjust the support leg to touch the ground completely (see 4.5).
5.2 Installation of the child
| 1. Loosen the harness (see 4.3), and place the child on the child seat. 2. Adjust the height of headrest (see(4.4)). 3. Tighten the harness (see 4.3). | Group I (9-18kg) Group 0+ (0-13kg) | |
| Installation status Driving status | ||
| IMPORTANT: 1. Do not place the child seat in this position when the car is moving. 2. You should turn it to the driving status after installation of child. | IMPORTANT: Not to use forward-facing before the child's weight exceeds 9kg. | |
6 MAINTENANCE AND CLEANING
6.1 Daily maintenance
- In daily use, check periodically the child seat. The child seat should be replaced after an accident.
- Please keep this child seat in dry and ventilated place to avoid damp moldy.
- If the child seat becomes dusty, clean the seat belt and the plastic pieces by swiping them with a damp sponge and let it dry under ambiance.
- If food or drink drop accidentally on the buckle, disassemble the seat belt from the child seat and rinse it gently by warm water. Leave it dry under ambiance.
- For cleaning the entire child seat fabric cover, please refer to the 6.2 washing instruction.
6.2 Washing instruction
Never use any solvent, chemical detergent or lubricant on any part of your child seat.
6.3 Remove and assemble the fabric cover
- Tear the velcro of the shoulder straps and the backrest cover
- Unlock the buckle, and set it out of the cover hole.
- Remove the fabric cover of the child seat. To install the fabric cover, please operate follow the above instructions in a reverse order.
7 THE MAIN TECHNICAL PARAMETERS
Distance from front to back of the seat, 576mm
Distance from left to right of the seat, 493mm
Height of the seat, 628mm
Weight of the seat, 10.1kg