HHOB 300 HVG6K3B - Cooker HOOVER - Free user manual and instructions
Find the device manual for free HHOB 300 HVG6K3B HOOVER in PDF.
| Technical Specifications | Cooker type: Induction |
|---|---|
| Number of burners | 4 burners |
| Total power | 7400 W |
| Dimensions (W x D x H) | 60 x 60 x 85 cm |
| Weight | 50 kg |
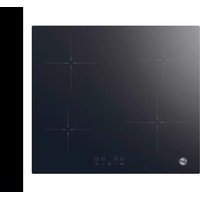
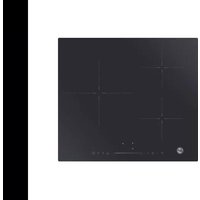
| Usage | Touch controls, LED display |
| Additional features | Timer, child safety lock, pot detection |
| Maintenance | Easy cleaning with vitroceramic surface |
| Repair | After-sales service available, spare parts accessible |
| Safety | Overheat safety system, safety lock |
| General information | Warranty: 2 years, color: black |
Frequently Asked Questions - HHOB 300 HVG6K3B HOOVER
User questions about HHOB 300 HVG6K3B HOOVER
0 question about this device. Answer the ones you know or ask your own.
Ask a new question about this device
Download the instructions for your Cooker in PDF format for free! Find your manual HHOB 300 HVG6K3B - HOOVER and take your electronic device back in hand. On this page are published all the documents necessary for the use of your device. HHOB 300 HVG6K3B by HOOVER.
USER MANUAL HHOB 300 HVG6K3B HOOVER
BAPOUHbIE NOBEPXHOCTN
HHTPYKUNIPOJIb3OBATEJI RU 31
NAVODILA ZA UPORABO
VGRADNJO IN PRIKLJU ITEVC SI 36
PIANI COTTURA
ISTRUZIONI PER L'USO IT 40
PLACAS
INSTRUÇ ES DE UTILIZAC OÖ 44
TÜZHELYLAPOK
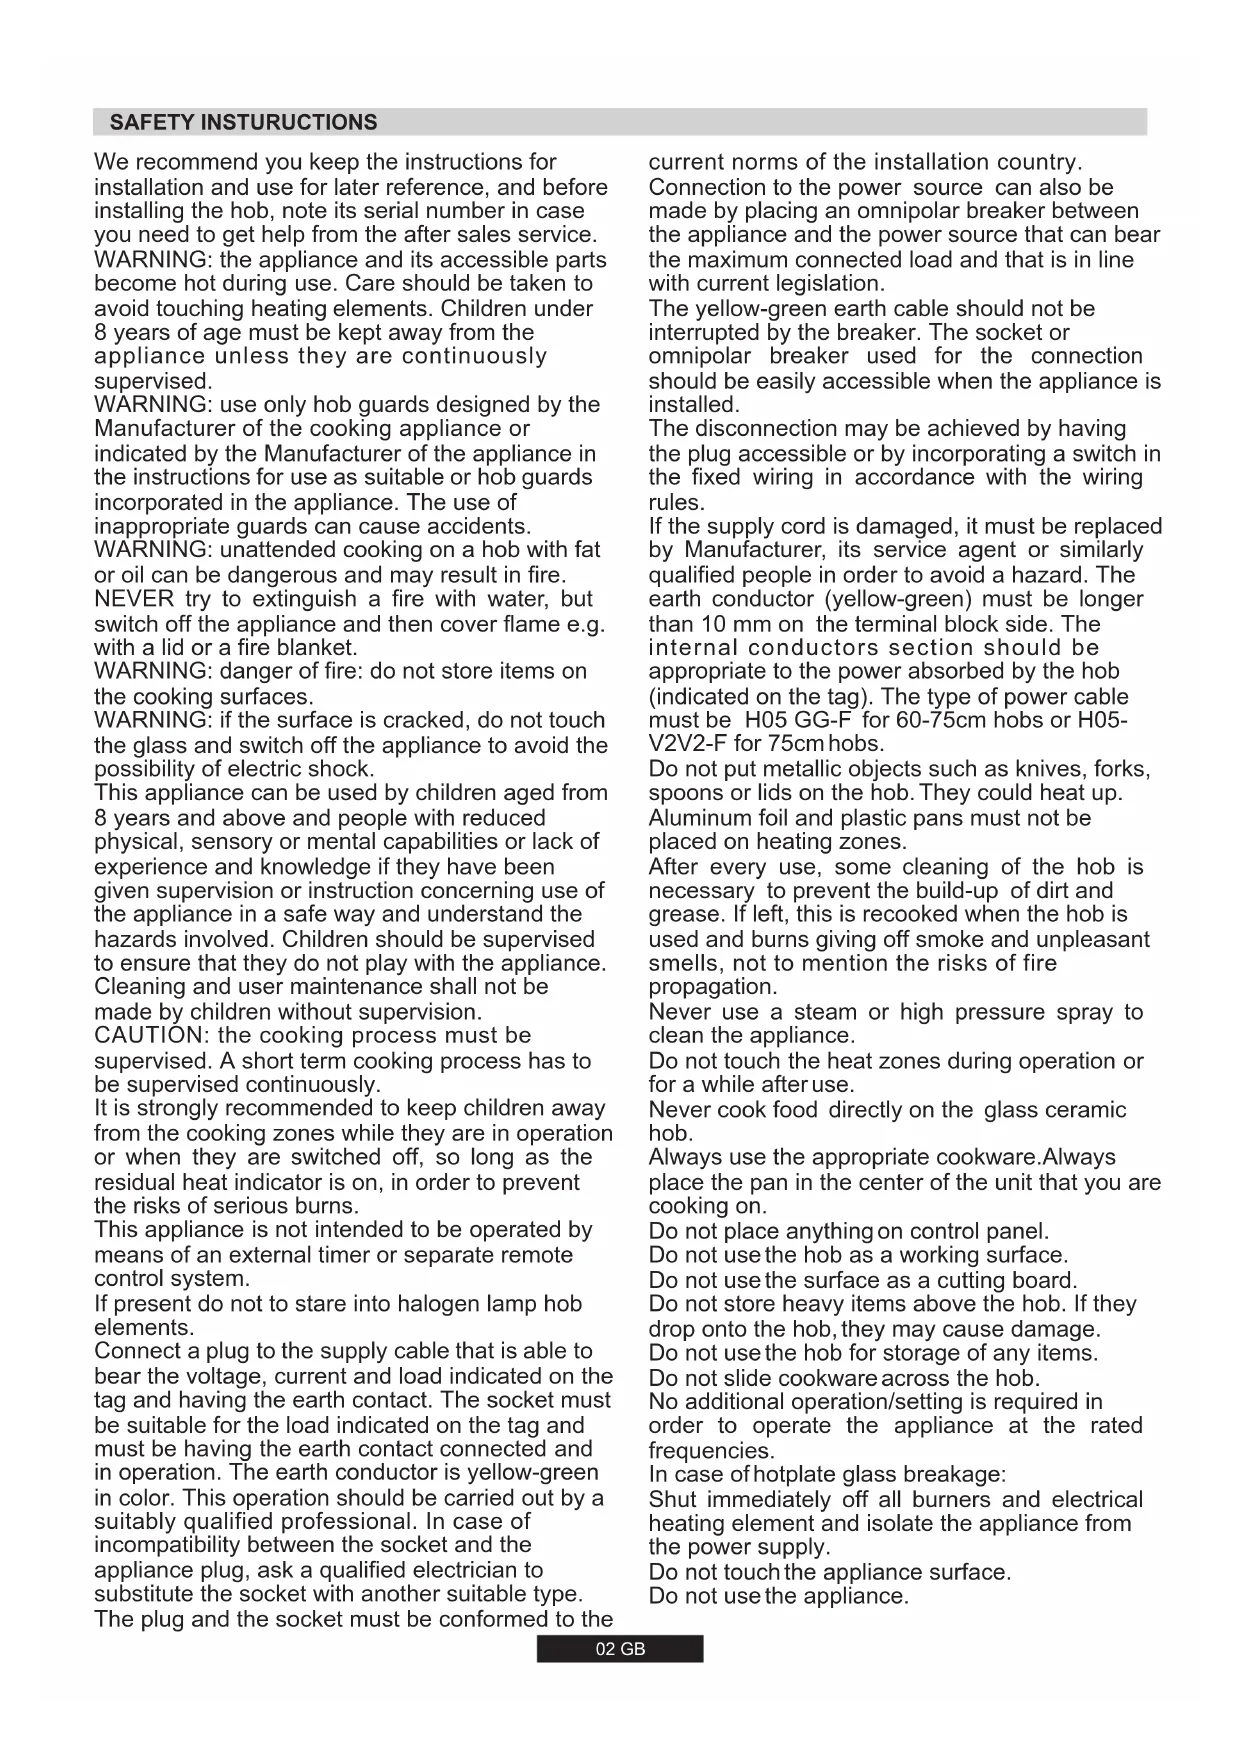
We recommend you keep the instructions for installation and use for later reference, and before installing the hob, note its serial number in case you need to get help from the after sales service. WARNING: the appliance and its accessible parts become hot during use. Care should be taken to avoid touching heating elements. Children under 8 years of age must be kept away from the appliance unless they are continuously supervised.
WARNING: use only hob guards designed by the Manufacturer of the cooking appliance or indicated by the Manufacturer of the appliance in the instructions for use as suitable or hob guards incorporated in the appliance. The use of inappropriate guards can cause accidents.
WARNING: unattended cooking on a hob with fat or oil can be dangerous and may result in fire.
NEVER try to extinguish a fire with water, but switch off the appliance and then cover flame e.g. with a lid or a fire blanket.
WARNING: danger of fire: do not store items on the cooking surfaces.
WARNING: if the surface is cracked, do not touch the glass and switch off the appliance to avoid the possibility of electric shock.
This appliance can be used by children aged from 8 years and above and people with reduced physical, sensory or mental capabilities or lack of experience and knowledge if they have been given supervision or instruction concerning use of the appliance in a safe way and understand the hazards involved. Children should be supervised to ensure that they do not play with the appliance. Cleaning and user maintenance shall not be made by children without supervision.
CAUTION: the cooking process must be supervised. A short term cooking process has to be supervised continuously.
It is strongly recommended to keep children away from the cooking zones while they are in operation or when they are switched off, so long as the residual heat indicator is on, in order to prevent the risks of serious burns.
This appliance is not intended to be operated by means of an external timer or separate remote control system.
If present do not to stare into halogen lamp hobelements.
Connect a plug to the supply cable that is able to bear the voltage, current and load indicated on the tag and having the earth contact. The socket must be suitable for the load indicated on the tag and must be having the earth contact connected and in operation. The earth conductor is yellow-green in color. This operation should be carried out by a suitably qualified professional. In case of incompatibility between the socket and the appliance plug, ask a qualified electrician to substitute the socket with another suitable type.
The plug and the socket must be conformed to the
current norms of the installation country.
Connection to the power source can also be made by placing an omnipolar breaker between the appliance and the power source that can bear the maximum connected load and that is in line with current legislation.
The yellow-green earth cable should not be interrupted by the breaker. The socket or omnipolar breaker used for the connection should be easily accessible when the appliance is installed.
The disconnection may be achieved by having the plug accessible or by incorporating a switch in the fixed wiring in accordance with the wiring rules.
If the supply cord is damaged, it must be replaced by Manufacturer, its service agent or similarly qualified people in order to avoid a hazard. The earth conductor (yellow-green) must be longer than 10mm on the terminal block side. The internal conductors section should be appropriate to the power absorbed by the hob (indicated on the tag). The type of power cable must be H05 GG-F for 60-75cm hobs or H05-V2V2-F for 75cm hobs.
Do not put metallic objects such as knives, forks, spoons or lids on the hob. They could heat up. Aluminum foil and plastic pans must not be placed on heating zones.
After every use, some cleaning of the hob is necessary to prevent the build-up of dirt and grease. If left, this is recooked when the hob is used and burns giving off smoke and unpleasant smells, not to mention the risks of fire propagation.
Never use a steam or high pressure spray to clean the appliance.
Do not touch the heat zones during operation or for a while after use.
Never cook food directly on the glass ceramic hob.
Always use the appropriate cookware. Always place the pan in the center of the unit that you are cooking on.
Do not place anything on control panel.
Do not use the hob as a working surface.
Do not use the surface as a cutting board.
Do not store heavy items above the hob. If they drop onto the hob, they may cause damage.
Do not use the hob for storage of any items.
Do not slide cookware across the hob.
No additional operation/setting is required in order to operate the appliance at the rated frequencies.
In case of hotplate glass breakage:
Shut immediately off all burners and electrical heating element and isolate the appliance from the power supply.
Do not touch the appliance surface.
Do not use the appliance.
1. INSTRUCTIONS FOR THE INSTALLER
INSTALLING A DOMESTIC APPLIANCE CAN BE A COMPLICATED OPERATION WHICH IF NOT CARRIED OUT CORRECTLY, CAN SERIOUSLY AFFECT CONSUMER SAFETY. IT IS FOR THIS REASON THAT THE TASK SHOULD BE UNDERTAKEN BY A PROFESSIONALLY QUALIFIED PERSON WHO WILL CARRY IT OUT IN ACCORDANCE WITH THE TECHNICAL REGULATIONS IN FORCE. IN THE EVENT THAT THIS ADVICE IS IgnoredAND THE INSTALLATION IS CARRIED OUT BYAN UNQUALIFIED PERSON, THE MANUFACTURER DECLINES ALL RESPONSIBILITY FOR ANY TECHNICALFAILURE OF THEPRODUCT WHTHER OR NOT ITRESULTS IN DAMAGETO GOODS ORINJURYTO INDIVIDUALS.
1.1 BUILDING IN
The hob may be installed in any worktop which is heat resistant to a temperature of 100^ , and has a thickness of 25 - 45mm . The dimensions of the insert to be cut out of the worktop are in shown in Figure 2.
When there is an accessible space between the built-in hob and the cavity below, a dividing wall made of insulating material should be inserted (wood or a similar material) (Figure 2).
If the Hob is fitted next to a cabinet on either side, the distance between the Hob and the cabinet must be at least 17cm (60cm) or 25 cm (75cm) (see Figure 2) while the distance between the hob and the rear wall must be at least 7.0 mm
The distance between the hob and any other unit or appliance above it (e.g.An extractor hood) must be no less than 70~cm . (Figure 4)
Metal objects in the drawer may reach high temperatures due to air recirculation. It is therefore recommended to use an intermediate wood panel.
Important - The diagram in figure 1 shows how the sealant should be applied.
The Hob unit is fitted by attaching the Fixing Clamps supplied, using the holes at the base of the unit.
When a 60 cm hob or a 75 cm hob is fitted over a built in oven, the latter must be fan cooled.
1.2. SUITABLE LOCATION
This appliance must be installed in accordance with the regulations in force and only used in a well ventilated space. Read the instructions before installing or using this appliance.
A gas-powered cooking appliance produces heat and humidity in the area in which it is installed. For this reason you should ensure good ventilation either by keeping all natural air passages open or by installing an extractor hood with an exhaust flue. Intensive and prolonged use of the appliance may require extra ventilation, such as the opening of a window or an increase in speed of the electric fan, if you have one.
If a hood can not be installed, an electric fan should be fitted to an outside wall or window to ensure that there is adequateventilation. The electric fan should be able to carry out a complete change of air in the kitchen 3-5 times every hour. The installer should follow the relevant national standards.
2. ELECTRICAL CONNECTION (FOR U.K. ONLY)
Warning - this appliance must be earthed
This appliance is designed for domestic use only. Connection to the main supply must be made by a competent electrician, ensuring that all current regulations concerning such installations are observed.
The appliance must only be connected to a suitably rated spur point, a 3 pin 13 amp plug/rod is not suitable. Adouble pole switch must be provided and the circuit must have appropriate fuse protection. Further details of the power requirement of the individual product will be found in the users' instruction and on the appliance rating plate. In the case of built-in product you are advised, should you wish to use a longer cable than the one supplied, that a suitably rated heat resistant type must be used.
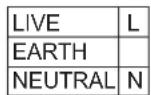
The wiring must be connected to the mains supplyasfollows: CONNECT TOSPURTERMINAL
Green &Yellow Wire Blue Wire
Earth Connection
Neutral Connection
Brown Wire
Note: We do not advocate the use of earth leakage devices with electric cooking appliances installed to spur points because of the «nuisance tripping» which may occur. You are again reminded that the appliance must be correctly earthed, the manufacturer declines any responsibility for any event occurring as a result of incorrect electrical installation.
2.1. ELECTRICAL CONNECTION
Check the data on the rating plate, located on the outside of the unit, to ensure that the supply and input voltage are suitable.
Before connection, check the earthing system.
By Law, this appliance must be earthed. If this regulation is not complied with, the Manufacturer will not be responsible for any damage caused to persons or property. If a plug is not already attached, fit a plug appropriate to the load indicated on the rating plate. The earth wire is coloured yellow/green. The plug should always be accessible.
Where the Hob is connected direct to the electricity supply, a circuit breaker must be fitted.
If the power supply cord is damaged this is to be replaced by a qualified engineer so as to prevent any potential risk.
The earth wire (green and yellow coloured) must be at least 10mm longer than the live and neutral wires.
The section of the cable used must be of the correct size in relation to the absorbed power of the hob.
Please check rating plate for the power details and ensure that the power supply cord is of the type 3 × 0.75 ~mm^2 H05 GG-F for 60-75cm hobs or H05-V2V2-F for 75cm hobs.
Mains Supply
Brown Wire
Green/Yellow Wire Blue Wire
Power Cable
If an appliance is not fitted with a supply cord and a plug, or with other means for disconnection from the supply mains having a contact separation in all poles that provide full disconnection under overvoltage category III conditions, the instructions shall state that means for disconnection must be incorporated in the fixed wiring in accordance with the wiring rules.
2.2. GAS CONNECTION
These instructions are for qualified personnel, installation of equipment must be in line with the relevant national standard. (For U.K. only: by law the gas installation\commissioning must be carried out by a "Gas Safe" installer)
All work must be carried out with the electricitysupplydisconnected.
The rating plate on the hob shows the type of gas with which it is designed to be used. Connection to the mains gas supply or gas cylinder should be carried out after having checked that it is regulated for the type of gas with which it will be supplied. If it is not correctly regulated see the instructions in the following paragraphs to change gas setting.
For liquid gas (cylinder gas) use pressure regulators which comply with the relevant national standards.
Use only pipes, washers and sealing washers which comply with the relevant national standards.
For some models a conic link is furnished to outfit for the installation in the countries where this type of link is obligatory; in picture 8 it is pointed out how to recognize the different types of links (CY = cylindrical, CO = conic). In every case the cylindrical part of the link has to be connected to the hob.
When connecting the hob to the gas supply via use offlexible hoses please ensure that the maximum distance covered by the hose does not exceed 2 metres.
The flexible tube shall be fitted in such a way that it cannot come into contact with a moveable part of the housing unit (e.g. a drawer) and does not pass through any space where it may become crushed/ kinked or damaged in any way.
To prevent any potential damage to the hob please carry out the installation following this sequence (picture 6):
1)As illustrated, assemble parts in sequence:
A: 1/2 MaleAdaptor Cylindrical
B:1/2 Seal
C: 1/2 Female GasAdaptor Conical-Cylindrical or Cylindrical-Cylindrical
2) Tighten the joints with the spanner, remembering to twist the pipes into position.
3)Attach fitting C to mains gas supply using rigid copper pipe or flexible steel pipe.
IMPORTANT: carry out a final check for leaks on the pipe connections using a soapy solution. NEVER USE A FLAME.
Also, make sure that the flexible pipe cannot come into contact with a moving part of the cabinet (eg.adrawer) and that it is not situated where it could be damaged.
Warning: If gas can be smelt in the vicinity of this appliance turn off the gas supply to the appliance and call the engineer directly. Do not search for a leak with a naked flame.
2.3.ADAPTING THE HOB TO DIFFERENT TYPES OF GAS
To adapt the Hob for use with different types of gas, carry out the following instructions:
- Remove the grids and burners
- Insert on hexagonal spanner (7 mm) into the burner support (Figure 7)
- Unscrew the injector and replace it with one suitable for the gas to be used (see gas type table)
2.4. REGULATING THE MINIMUM FLAME
After lighting the burners, turn the control knob to the minimum setting and then remove the knob (this can easily be removed by applying gentle pressure).
Using a small «Terminal» type screwdriver the regulating screw can be adjusted as in Figure 9. Turning the screw clockwise reduces the gas flow, whilst turning it anticlockwise increases the flow - Use this adjustment to obtain a flame of approximately 3 to 4mm in length and then replace the control knob.
When the gas supply available is LPG - the screw to set the idle flame must be turned (clockwise) to the end stop.
When you have carried out the new gas regulation, replace the old gas rating plate on your appliance with one (supplied with hob) suitable for the type of gas for which it has been regulated.
3. USE OF HOB - USER INSTRUCTIONS
This appliance must only be used for the purpose for which it is intended, domestic cooking, and any other use will be considered improper and could therefore be dangerous. The Manufacturer will not be responsible for any damage or loss resulting from improper use.
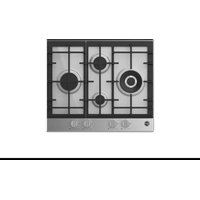
Before using burner, be sure, grid perimeters center the burner as below figure.
If you are using Cast Iron Grids; underneath the grid, position of it is stated. Be sure for the exact grid is used in correct position.
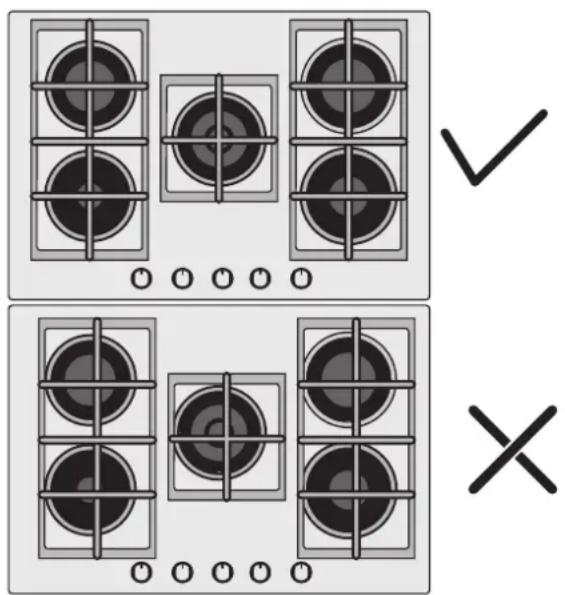
Prior to switching on the gas hob ensure that the burners and burner caps are correctly placed within their position.
This hob is fitted with electronic ignition to ignite the burner.
To ignite the burners carry out the following:
push in and turn the knob anticlockwise to the larger flame symbol and keep pushed 5 s after ignition.
The ignition system will continue to generate sparks as long as the control knob is being pressed
Warning: If there is no electricity on appliance to ignite the burner a match or a lighter should be used carrying out the following:
place a lighted match or lighter close to the burner
push in and turn the knob anticlockwise to the larger flame symbol and keep pushed 5 s after ignition.
Warning: In any case If after 5 s the burner has not lit, stop operating the device and wait at least 1 min before attempting a further ignition of the burner.
GENERALADVISE
For best results, use cooking vessels with a flat surface. The size of the surface should match the gas burner side as follows. TableA.
| Burner Type | Ø pan/pot (cm) | Power (kW) | G20 20 mbar (methane) | G30 28-30 mbar (LPG) |
| AUX Auxiliary | 10 - 18 | 1,00 | 95 l/h | 73 g/h |
| SR Semi Rapid | 12 - 22 | 1,75 | 167 l/h | 127 g/h |
| R Rapid | 16 - 26 | 2,70 | 257 l/h | 196 g/h |
| DC 4 kW Mono | 16 - 26 | 4,00 | 381 l/h | 291 g/h |
| DC 4,2 kW Mono | 16 - 26 | 4,20 NG 4,00 LPG | 400 l/h | 291 g/h |
| DC 4,5 kW Mono | 16 - 26 | 4,50 | 429 l/h | 327 g/h |
Table A
The gas burner should be regulated so that the flame does not overlap the base of the pan. Vessels with a concave or convex base should not be used.
WARNING: If a flame is accidentally extinguished, turn the knob to the off position and do not attempt to re-ignite if for at least 1 minute.
If over the years the gas taps become stiff to turn it is necessary to lubricate them.
Such operation must be carried out only by qualified Service Engineers.
4. MAINTENANCE AND CLEANING
Before cleaning the hob, ensure the appliance has cooled down. Remove the plug from the socket or (if connected directly) switch off the electricity supply.
Cleaning and user maintenance shall not be made by children without supervision
Never use abrasives, corrosive detergents, bleaching agents or acids. Avoid any acid or alkaline substances (lemon, juice, vinegar etc.) on the enamelled, varnished or stainless steel sections.
When cleaning the enamelled, varnished or chrome sections, use warm soapy water or a non caustic detergent. For stainless steel use an appropriate cleaning solution.
The burners can be cleaned with soapy water. To restore their original shine, use a household stainless steel cleaner. After cleaning, dry the burners and replace.
It is important the Burners are replaced correctly. Chromed grids and burners
Chromed grids and burners have a tendency to discolour with use. This does not jeopardize the functionality of the hob.
Our After Sales Service Centre can provide spare parts if required.
5. AFTERCARE
Before calling out a Service Engineer please check the following:
- that the plug is correctly inserted and fused;
- that the gas supply is not faulty.
If the fault cannot be detected:
Switch off the appliance and call the After Service Centre. DO NOT TAMPER WITH THE APPLIANCE.
6. PROTECTION OF THE ENVIRONMENT
This appliance is labelled in accordance with European Directive 2012/19/EU regarding electric and electronic appliances (WEEE). The WEEE contain both polluting substances (that can have a negative effect on the environment) and base elements (that can be reused). It is important that the WEEE undergo specific treatments to correctly remove and dispose of the pollutants and recover all
the materials. Individuals can play an important role in ensuring that the WEEE do not become an environmental problem; it is essential to follow a fewbasic rules:
-
The WEEE should not be treated as domestic waste;
-
The WEEE should be taken to dedicated collection areas managed by the town council or a registered company.
In many countries, domestic collections may be available for large WEEEs. When you buy a new appliance, the old one can be returned to the vendor who must accept it free of charge as a one-off, as long as the appliance is of an equivalent type and has the same functions as the purchased appliance.
SAVING AND RESPECTING THE ENVIRONMENT
Where possible use lid to cover the pan. Regulate the flame to not overlap the diameter of the pan.
7. DECLARATION OF COMPLIANCE
The appliance complies with European Directive 2009/142/EC (GAD) and starting from 21/04/2018 with Gas Appliances Regulation 2016/426 (GAR).
By placing the mark on the product, we are confirming compliance to all relevant European safety, health and environmental requirements which are applicable in legislation for this product.
Table 1
| Burner Plate | 4Gas - L1 - STD | 4Gas - L2 - Diamond | 4Gas - L3 - Big Rear | 4Gas - L4 - Big Front | 5Gas - L5 - Central | 5Gas - L6 - 4+1 |
| Burner | AUX/SR/2R | AUX/SR/2R | AUX/SR/R/DC | AUX/SR/R/DC | AUX/SR/2R/DC | AUX/SR/2R/DC |
| Type | PVUH60MF | PVUH60MF | PVUH60MF | PVUH60MF | PVUH75MF | PVUH75MF |
| FFD | YES | YES | YES | YES | YES | YES |
| AUX 1kW | 1 | 1 | 1 | 1 | 1 | 1 |
| SR 1,75 kW | 2 | 1 | 1 | 1 | 1 | 2 |
| R 2,7 kW | 1 | 2 | 1 | 1 | 2 | 1 |
| DC 4 kW Mono | - | - | 1 | - | - | - |
| DC 4,2 kW Mono | - | - | - | 1 | - | 1 |
| DC 4,5 kW Mono | - | - | - | - | 1 | - |
| Nominal Heat Input | 7,2kW | 8,15kW | 9,45kW | NG9,65kW LPG 9,45kW | 12,65kW | NG11,4kW LPG11,2kW |
| G20/20 mbar | 686 l/h | 776 l/h | 900 l/h | 920 l/h | 1204 l/h | 1085 l/h |
| G30/28-30 mbar | 524 g/h | 593 g/h | 688 g/h | 688 g/h | 920 g/h | 814 g/h |
| Installation Class | 3 | 3 | 3 | 3 | 3 | 3 |
| Voltage V/Frequency Hz | 220-240V 50/60Hz | 220-240V 50/60Hz | 220-240V 50/60Hz | 220-240V 50/60Hz | 220-240V 50/60Hz | 220-240V 50/60Hz |
| Electrical Input Power | 1 | 1 | 1 | 1 | 1 | 1 |
| Electric Ignition | YES | YES | YES | YES | YES | YES |
| Product Dimension | 595x505x42 | 595x505x42 | 595x505x42 | 595x505x42 | 745x505x42 | 745x505x42 |
CONSIGNES DE SECURITÉ
1.2 VHODNÉ MISTO INSTALACE
Tento spotbrebi musi by instalovan v souladu s platnymi prdepisy a pouzivat na dobre vetraned miste. Pred instalaci a pouzitim spotbrebi ci prctetePokynyk pouziti.
A:1/2 cylindricky adaptor,
B:1/2 tésnéni,
C:1/2 könicky cylindricky nebo cylindrickycylindricky adaptor plynu
2) Utahne spoje klestemi, umistete trubky do spravne pozice.
3) Pripevnete dil C k hlavnipripojce plynu pomoci pevné medenetrubky nebo ohebné ocelove trabky.
Tel: 039.2086.1 Fax: 039.2086.403
www.candy-group.com
Candy
GARANTI BELGESI
ANKASTRE OCAK
B cnlyae ero haJnHry, He peKOMeHdyetc CMOTpeTb Ha ranoreHHbI eJemeHTbl.
NoocoeHnHe BnKy K Hhpy nntAHn, cnoco6Homy BblepKaTb HanpJKeHne, TOK N Harpy3ky, yka3aHHbIe Ha TaBnUcKe DaHHbIX, n IMeOuEMy npOBoHNK 3a3EmHeHn. Po3EtKa DoNkHa 6bItb NoXoJaWei DnA Harpy3K, yka3aHHOH Na TabnUcKe, n DOJnxHa IMeTB NCnPabHBn KOHTaKT 3a3EmHeHn. IpobODoHNK 3a3EmHeHn RaJIaTeC JKeT0-3eJeHbIM. dAnHyIO ONepauuDOnKHe npOBoNTb CneuaNtCT, IMeOuMn COOTBeTCTByUQyU KBaINFNaCauHIO. B cnYuae HecOBMeCTmOCTn MExdy po3ETKO n BUnKO, NONpOCHe 3NeKtpnKa 3aMeHHTb po3ETKy Ha dpYryIO npneMnEMoro Ttna. BnKn i po3ETKa DoJxHbI
OTBeuAtb HOpMa, DeIcTByIOUm B CtpaHe MOHTaxa. IOnKJIIOUeHne K NCTOCHNY NITAHN TaKKe M OXXHO BblONHnTb NytEm yCTaHOBKn ABtOMaTHueCKOTo BblIKJIOUaTeJMy Mekdy npi6Opom N ICTOUYHKOM NITAHN, CNOCOBHbIM BblEepKaTb MaKcImaJIbHyIO NOkJIIOUeHHyIO HaPy3Ky N OTBeuaOuIm TpeoBaHnM DeIcTByIOUeero 3aKOHOdaTeJIbCTBa.
XeITo-3eHbI npOBoHNK 3a3emHe He DoJIkeH pa3MbikatbCBAIKHouaTeJEM. NcONb3yEmBie IncoEINHeHHPO3ETKa nIIABTOMaTNueckN BbIKHQUaTeJIb DOJKNHbI HAXOHTbcR B yIO6HO3He DocraeMOCTn np MoTtaxe np6opa.
IIN OTKNUOeyHn MOxHO JINBO pa3MeCTNTb PO3eTKy B 30He DocraeMoCTN, JINBO UCTaHOBNTb IpeKJIOUaTeNb Ha QNKcnpOBaHHOM IPOBODe corNaCHO npABuNAM yCTPOiCtBA 3JeKTPOyCTaHOBOK. B Cnyae NOBpeXeHn SHypa 3NeKTPoNITAHn, NOCJIeHN N OJKeH 6blT 3aMeHn IPOUN3BOJNTeJIem,ero CEPBUCHBIM AReHTOM INIIN LNCOM, BBICTyaIOUeM BC XOXeM KaueCTBE, BO IN36eKaHne PCKOB. 3a3mJIOUIN NPOOB (KeJTO-3eJIeHbI) DOJKeH 6blT DInNHHeE Ha 10 MM CO CTOPOBH KJIeMMHO KOLODKn. BHyTpEnHHeceHne IPOBOHNIKOB DOJIXHO COOTBETCTBOBaT MOUHOCTN, NOTpe6JIeEMOB BAPOUHO NaHEIbI (yka3aHa Ha Ta6NIue DaHHbIX). UHP NIITAHnI DOJIXeH bTIb TINA H05 GG-F dIy nPiINT DNAmETpOM 60-75 cm nIIIN H05-V2V2-F dIy nPiNT DNAmETpOM 75 cm.
3anpeaetc nomeaaTb Ha BapouHyo naHeIb MeaJIIneCKne PpeMTebl, TaKNe, KaK HOxN, BNJKN, IOKKN IIIN KpbIuKN, NCKOJbKy OHN MOryT HarpeBaTbcr.
He KnaDnTe Ha 30HbI HarpeBa anIOHMnHEByIO qOJbry I He CTaBbTe Ha HIX IIaCTMaCCOByIO Nocvdy.
Iocne KaKdoRo nCNoB3OBAHnHeo6xOdmo npOBOnTb OuNCTKy BapOCHo N aHeJI C TeM, YTO6bHa He He ocTabaInncb Tpr3b N KINP. B IpOTNBHom cnyae npn CneDyIOUeM BKIOUeHEN BapOCHo NaHeJI MOrTy BblJeJrTbcra DbIM N HEnpNtHbI 3anax.Kpome TorO,3TO MOKeT npNBecTn K NOXApy. 3anpe7aetcNcNOJB3OBAbT nap IIN CTpyn NOD BBICOKIM DaBNeHEm DnO uNCTKn N3DeJIYn.
3anpeaetc npikacatbck 30HAM HarpBa BO Bpempa60TbI N HeKOTOpoe BpemnocJe 3aBepuHnpa60TbI.
HnKOrJa He rTOBbTe NmUy HEnOcpeDCTBeHNO HaCTeKnOkepaMueeCKoBapOuHOn NaHeJN.
Bcerda nCnoJb3yUte dIra 3TO rIO NOxOJaUyHO Nocdy.
Bcerda nOmeuAte Nocdy no ceHTpy
HaRpeBaTeJbHOro 3JIeMeHrTa, Ha KOTOpOM Bbi
rotOBnte NiSy. He nOmeuaTe Ha naHeJIb
ynpabHeHnKaKne-Jn60 PpeMTebl.
He nCnoJb3yIte BapOHyIO naHeJIb B KaueCTBe pa6oey noBepxHocTn.
He nCnoJIb3yIte NOBepxHocTb BapOCHo IaHEJI N KaueCTBe pa3deNoCHo Iockn.
He xpaHnTe HaB BapOuHoi nAneIbIO TjKeJIbIE npEmdTb.I B cnyae naeHnO hN MOryT NOBpeDITb BapOHy o naHb.
He nCnoJb3yIte BapOHyIO naHEnb B KaYeCTBe MeCTaCKnaInpOBaHnI npEdMeTOB.
HeDbnraIte nocdy no BapouHno naHeJI.
ДяЗкпунаци npибopa c HOMHHaNbHbIMU ЧаctOTamн He TpebyOTcRdoNoJIHnTeJbHbIe ДeИCTBЯ/HaCTpoIKN.
B cnyuae pa36nBaHnra CTeKna BapOuHo nAHeHn: HemeJeHHo BBkIIOUHTe BCE KOHOpKn I 3NeKtpnueckne HaPBeBaTeNbHbIe 3NMeMeHTbl, a TaKKe OTcoeHNHTe np6OpOT CETn 3NeKtpOnNTaHnra.
He npikacaiTecb K noBepxHocTn np6opa.
He npb3yntec np6opom.
1. INHCTPYKUNI NO BbIIOJIHEHNIO YCTAHOBKN
YCTAHOBKA BbITOBON TEXHNI BBLIETCJLOXHO PABOTOH, HENPABNJBHOE BbINOJIHEHNE KOTOPO MOKET OTPNUATELBO CKA3ATbCS HA BE30NACHOCTN NOBJ3OBATEJI. NO 3TOI PPUNHE YCTAHOBKA BbITOBON TEXHNI DOJNXHA BBIIOJNHTCBBAICOKOKBAINPHUPOBAHHBM NCEUANICTAMN, KOTOPBIE BbIOJNHT YCTAHOBKY C COBIOJEHNEM BCEX DEICTBYUOUX INPABNJN HOPM. B TOM CUYAE, ECJN 3TO IPEIOCTEPEXEHNE BYET IPOINHGPOBAHO, NYCTAHOBKA BYET BBIIOJNHEHA JINOCM, HE IMEIOJNM IOCTATOOH KBANPHKAUIN, IPOIN3BOJNTENB HE BYET IPNHIMATB HNKAKNX IPETEH3N OTHOCNTELBO BbIXOJA OBOPUDAHNA N3 CTPOR N HAHECEHHORO PPN 3TOM UYCEPBNA MMYUCTBYNJ 3DOPOBBJOIIODEI.
1.1.BCTPANBAEMbIE BAPOUHbIE IOBEPXHOCTN
Bapouhna NoBPexHocbMboket yctahabnBaTbCra Ha IIO6o pa6oey NoBPexHoctn KyxOHHO CTOna, KOTOPa BbldePckmBaAeT HarpeB Do TemnepaTpyb 100 C, N Meet ToIuHry O25 do 4 SM. Pa3Mepbl OTBepCTN, KOTOpoe DQJHXo 6BblBpE3aHO Bpa6oey NoBPexHoctn KyxOHHO CTOna, NOKa3AhbHa puc.2.
Ecnn noB BapOoho NOBepxHocTbIO NMeetc CBO6oHoe npocTpaHCTBO,TO noB BapOoho NOBepxHocTbIO HJXHO YCTaHOBTb pa3dIeNTbHyIO NaHeIb, N3rOToBNeHHyIO N3 TeNlON3OnuOHnHO MATEpHana (HanpImep, N3 depeBA)(cm. pnc2).
Ecni BapouHaj noBepxHocTb ycTaHaBnBaEeTc Ta, YTo no oBe ee ctopoHb paCNoIarAOCTc WkaΦbl, To paccToHHe MeXy BapouHoi noBepxHocTbU WkaΦom DoJnxHo 6bItb He MeHbue 17 cm (60 cm) nn 25 cm (75 cm) (cm. pnc. 2), a paccToHne MeXy BapouHoi noBepxHocTbU n paCnoIoxKeHHoC3aDn CTehoDOnJxHo 6bItb He MeHbue 70 mm.
PacctoHne MeKdy BapouHoi NOBepxHocTbIO n DpyrIM 3JIeKTPoPn6OpOM (HaNPmEp, BbITJXHO KONNAK) DOJXHO 6bITb He MeHbIe 70 cm (cM. pnc.4).
Metannueckne npedMeB RAUNKE MORYT DocnraT BbICOKNX TemnepaTp n3-3a peunpknynauu BO3dyxa. PekomeHdyetc HcNoIb3OBaT npomexyToHyno DepeBHHy noHeIb.
Baxhna HOpmaaHa Ha pnc. 1 noka3aHo, kak HaHocntcRepeMeTnK
BapouHnA NOBepxHOCTb KpENITcC NOMOuBHO pKNCpyUoNIX 3aXIMOB, KOtOpbIe BCTaBnIOTcB OTBepCTn, paCNOIOKeHHbIe Ha OCHOBAHnBapOuHn IOBepxHOCTn.
EcnB Bapouhna NobepxHocb60 Cmnn 75 cm Kpeintc HnD yXOBKo, TOBdyXOBKe DOJNkHa 6bItb CNTemaOxJaXdHnCBEHTINrTOPOM.
1.2.BbIbOP MECTA JJIYCTAHOBKN BAPOCHON NOBEPXHOCTN
DaHHbI 6bTOBOI npBOp DOJKeH ycTaHaBnBaTcB C COOTBeCTBmC
DeiCTByUOuMM INpABINAMM, N TOJIbKO B XOPOJIO IPOBETPBAEMBX
nomeueHN. Pepe yCTaHOBKO mN INCIOJIb3OBAHmE M bITOBORO
npbopia npOHTNE IHCTpyKUMO.
B Mectax, Ie yctahobnheI ra3oBbIe PInTbI, BbldEJeTcR TaNIO INBnaI.
POTOMy BblDxHbI o6ceuHTb XOPOUHy BOHTNIAUHO B NOMueHNI
LIOC C NOMOUBO TBPcETPNCQI DCTECBHeHN BENTNIAUIN, LIOBO C
NOMOUBO 3JIeKTPnuCeKO BtTBaKKN. PtN HNTHCNBHO IN
NPoDOJXHTeBHON 3KcPnYataUN NINTbMOKeT NOpeBOAATBC
DOIOHNTeBHNA BEHTNIAUIN, O6CEeNUBAEMAR, HAPIMep, C NOMOUBO
OTKpIBAHNA OKHA, INPOBETPBAHNA NOMEHEIN NIN C NOMOUBIO
YBEENHNEHCA KOPOCNTB BpaAeHNA 3JIeKTPnuCeKTOREBTNIAJTOPA CNTEmbI
PNHUYNTeBHON BEHTNIAUIN (ecIN OH YCTAHOBEN).
EcJH HET BO3MOXKHOCTN YCTAHOBITb BbTJAHKOH KOJNAK, TO B CTEHE NIM B OKOHOM IPOE ME HYKH OYcTAHOBNTb 3JIeKTPNueckn BTAAKHOB BEHTJITTOP.
BbITKHOI BEHTNIArTO PONKHe HIMeTb MOUHcTb,IOCTaTOHyIO IINrTO, YTO6bI BO3dyX B KXYHe NIOHOCtBIO 3ameHnC3-5 pa3 B Yac. YcTAHOBA KOJHXBA BIIONHITCB R COOTBETCTBN C Tpe6OBAHmM HauHOHJIbHbIX nPABUN HOPM.
NAVODILA ZA VARNO UPORABO
7.VYHLASENIE O ZHODE
Spotrebič splina poziadavky europšekj smernice 2009/142/ES (GAD) a od 21.04.2018 s nariadením pre plynové spotrebiče 2016/426 (GAR).
Oznacenim znackou na toto vyrobku potvrdzujeme zhodu so vsetkymi prisluasnymi europskymi, zdravotnymi a environmentalnymi poziadvakami, ktoré sa v przyvych predipsoch vztahuju na tento vyrobok.
Tabulka 1
| Usporiadanie horákov | 4 Plyn - L1 - STD | 4 Plyn - L2 - Diamond | 4 Plyn - L3 - Big Rear | 4 Plyn - L4 - Big Front | 5 Plyn - L5 - Central | 5 Plyn - L6 - 4+1 |
| Horák | AUX/SR/2R | AUX/SR/2R | AUX/SR/R/DC | AUX/SR/R/DC | AUX/SR/2R/DC | AUX/SR/2R/DC |
| Typ | PVUH60MF | PVUH60MF | PVUH60MF | PVUH60MF | PVUH75MF | PVUH75MF |
| FFD | ANO | ANO | ANO | ANO | ANO | ANO |
| AUX 1kW | 1 | 1 | 1 | 1 | 1 | 1 |
| SR 1,75 kW | 2 | 1 | 1 | 1 | 1 | 2 |
| R 2,7 kW | 1 | 2 | 1 | 1 | 2 | 1 |
| DC 4 kW Mono | - | - | 1 | - | - | - |
| DC 4,2 kW Mono | - | - | - | 1 | - | 1 |
| DC 4,5 kW Mono | - | - | - | - | 1 | - |
| Nominálny tepelný príkon | 7,2kW | 8,15kW | 9,45kW | NG9,65kW LPG9,45kW | 12,65kW | NG11,4kW LPG11,2kW |
| G20/20 mbar | 686 l/h | 776 l/h | 900 l/h | 920 l/h | 1204 l/h | 1085 l/h |
| G30/28-30 mbar | 524 g/h | 593 g/h | 688 g/h | 688 g/h | 920 g/h | 814 g/h |
| Trieda instalácie | 3 | 3 | 3 | 3 | 3 | 3 |
| Napätie (V)/frekvencia (Hz) | 220-240V 50/60Hz | 220-240V 50/60Hz | 220-240V 50/60Hz | 220-240V 50/60Hz | 220-240V 50/60Hz | 220-240V 50/60Hz |
| Elektrický vykon | 1 | 1 | 1 | 1 | 1 | 1 |
| Elektrický zapálenie | ANO | ANO | ANO | ANO | ANO | ANO |
| Rozmery vyrobku | 595x505x42 | 595x505x42 | 595x505x42 | 595x505x42 | 745x505x42 | 745x505x42 |
Efficiency Declaration 2016/426
| PVUH60MF-STANDARD(L1) | ||
| SINGLEBURNEREFFICIENCY | ||
| AUXRSRR | ||
| -60%60%54.8% | ||
| MEDIUM%58 | ||
| PVUH60MF - DIAMOND (L2) | |||
| SINGLEBURNEREFFICIENCY | |||
| AUX | SRR | R | |
| - | 60% | 54,3% | 54,3% |
| MEDIUM%56.2 | |||
| PVUH60MF - BIG REAR (L3) | ||
| SINGLEBURNEREFFICIENCY | ||
| AUX$R | R | DC4 kW |
| -60% | 54,3% | 57,6% |
| MEDIUM%57.3 | ||
| PVUH60MF-BIG FRONT(L4) | |||
| SINGLEBURNEREFFICIENCY | |||
| AUX5RRDC4 | 2 kW | ||
| - | 57% | 54,3% | 52,8% |
| MEDIUM%54.7 | |||
| PVUH75MF - Central (L5) | ||||
| SINGLEBURNEREFFICIENCY | ||||
| AUX | SR | R (Left) | R (Right) | DC 4,5 kW |
| - | 60% | 53% | 55,9%56,6% | |
| MEDIUM%56.3 | ||||
| PVUH75MF - 4+1(L6) | ||||
| SINGLEBURNEREFFICIENCY | ||||
| AUX | SR | SR | R | DC 4,2 kW |
| - | 60% | 60% | 54,3%59,4% | |
| MEDIUM%54.4 | ||||

GB-IE
The manufacturer will not be responsible for any inaccuracy resulting from printing or transcript errors contained in this brochure. We reserve the right to carry out modifications to products as required, including the interests of consumption, without prejudice to the characteristics relating to safety or function.