
KM 1394 CB - Food Processor BOMANN - Free user manual and instructions
Find the device manual for free KM 1394 CB BOMANN in PDF.
| Product type | Food processor with mixing bowl |
| Brand | Bomann |
| Model | KM 1394 CB |
| Power consumption | 1000 W |
| Power supply | 220-240 V ~ 50/60 Hz |
| Protection class | II |
| Net weight | Approx 5.60 kg |
| Bowl capacity | Up to 3.0 kg of light dough or 2.3 kg of heavy dough |
| Speeds | 6 speeds + pulse function (P) |
| Included accessories | Whisk, mixing hook, dough hook, protective disc, splash guard |
| Bowl material | Stainless steel or plastic (according to manual) |
| Functions | Mix, knead, whisk, whip egg whites, cream |
| Safety | Automatic stop if arm raised, overheating protection |
| Cleaning | Bowl and accessories hand washable (not dishwasher safe) |
| Dimensions (approx.) | Approx 35 x 25 x 30 cm (height with arm lowered) |
| Country of manufacture | Not specified |
Frequently Asked Questions - KM 1394 CB BOMANN
User questions about KM 1394 CB BOMANN
0 question about this device. Answer the ones you know or ask your own.
Ask a new question about this device
Download the instructions for your Food Processor in PDF format for free! Find your manual KM 1394 CB - BOMANN and take your electronic device back in hand. On this page are published all the documents necessary for the use of your device. KM 1394 CB by BOMANN.
USER MANUAL KM 1394 CB BOMANN
| Contents | |
| Overview of the Components | Page 3 |
| Instruction Manual | Page 30 |
| Technical Data | Page 34 |
| Disposal | Page 34 |
ENGLISH
WAARSCHUWING: Risico op letse!
Thank you for choosing our product. We hope that you enjoy using the appliance.
Symbols in this Instruction Manual
Important information for your safety is specially marked. It is essential to comply with these instructions in order to avoid accidents and prevent damage to the machine:

WARNING:
This warns you of dangers to your health and indicates possible injury risks.

CAUTION:
This refers to possible hazards to the machine or other objects.

NOTE: This highlights tips and information.
General Notes
Before using this appliance, carefully read this instruction manual and keep it together with the warranty certificate, cashier receipt and, if possible, the original packaging including the interior packing. If you give this appliance to other people, please also pass on the instruction manual.
- The appliance is designed exclusively for private use and for the envisaged purpose. This appliance is not fit for commercial use.
- Do not use it outdoors. Keep it away from sources of heat, direct sunlight, humidity (never dip it into any liquid) and sharp edges. Do not use the appliance with wet hands. If the appliance is humid or wet, unplug it immediately.
- When cleaning or putting it away, switch off the appliance and always pull out the plug from the socket (pull the plug itself, not the lead) if the appliance is not being used and remove the attached accessories.
- Do not operate the machine without supervision. If you leave the room you should always turn the device off. Remove the plug from the socket.
- The device and the mains lead have to be checked regularly for signs of damage. If damage is found the device must not be used.
- Use only original spare parts.
- In order to ensure your children's safety, please keep all packaging (plastic bags, boxes, polystyrene etc.) out of their reach.

WARNING:
Do not allow small children to play with the foil. There is a danger of suffocation!
Special Safety Instructions for this Appliance

WARNING: Risk of injury!
- Before replacement of accessories or additional parts that move during operation, the appliance must be switched off and cut off from the mains!
- Do not touch moving parts.
- Before switching on, make sure that the accessories attachment has been installed correctly and is seated securely.
- Always disconnect the appliance from the supply if it is left unattended and before assembling, disassembling or cleaning.
- This appliance shall not be used by children.
- Keep the appliance and its cord out of the reach of children.
Children may not play with the appliance.

WARNING: Risk of injury!
- Appliances can be used by persons with reduced physical, sensory, or mental capabilities or lack of experience and / or knowledge, if they are supervised or have been instructed concerning safe use of the appliance and understand the hazards involved.
- Do not try to repair the appliance on your own. Always contact an authorized technician. If the supply cord is damaged, it must be replaced by the manufacturer, its service agent or similarly qualified persons in order to avoid a hazard.

CAUTION:
Do not immerse the device into water for cleaning. Follow the instructions that we provide in the chapter "Cleaning".
- Do not manipulate any of the safety switches.
- Only process foodstuffs with this appliance.
- Misuse of the appliance for other purposes may cause injury.
Overview of the Components / Delivery Scope
1 Swivel arm
2 Lever for lowering / raising the arm
3 Control knob
4 Motor housing
5 Whisk
6 Mixing bowl
7 Protective disk
8 Drive shaft with splint
9 Transparent splash guard lid with replenishing opening
10 Mixing hook
11 Kneading hook
Unpacking the Appliance
- Remove the packaging of the appliance.
- Remove all packaging material such as plastic fi lm, filer material, cable ties and box packaging.
- Check that all parts are in the box.
- If the packaging content should be incomplete or if damages should be noticeable, do not operate the appliance. Return it to the distributor immediately.
NOTE:
Dust or production residues may still be found on the appliance. We recommend that you clean the appliance as described under "Cleaning".
Electric Connection
Check that the mains voltage to be used matches the voltage of the appliance. Refer to the rating label for detailed specifi cations.
Operation
- Opening the swivel arm: Swivel the lever in direction and hold it in that position. Move the swivel arm by hand to the top position and release the lever.
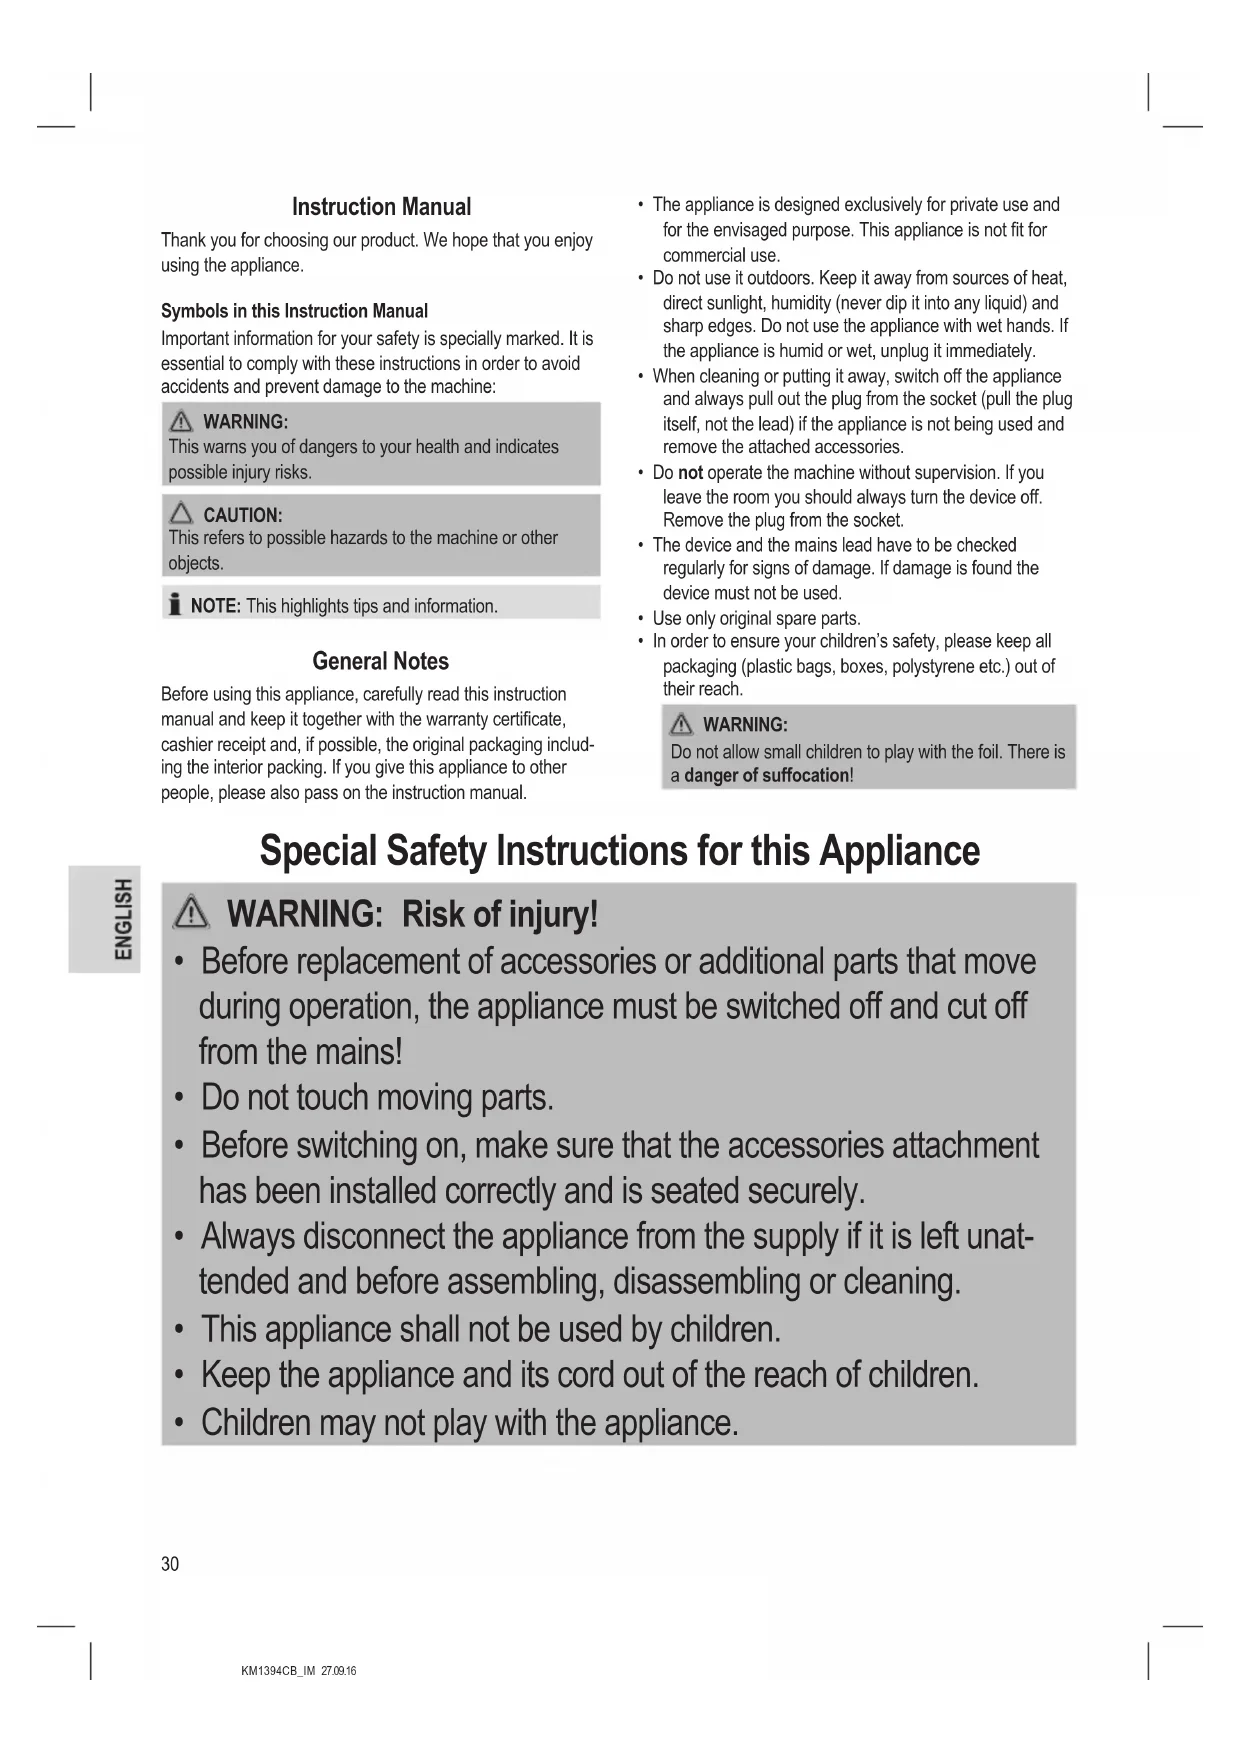
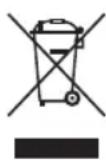
- For use of the kneading hook (11) or the mixing hook (10), first attach the protective disk. It prevents contact of dough with the drive shaft.
Hold the disk like a bowl. Insert the kneading hook (11) or the mixing hook (10) from below through the recess in the disk opening and tighten it by a quarter turn to the left.
3. Use of an attachment:
On the top of the attachment, you can see a recess for the drive shaft and a recess for the splint. Push the attachment onto the drive shaft. Push the attachment
while turning it clockwise to the limit, so that the splint of the drive shaft locks in the attachment.
-
Mixing bowl: Set the mixing bowl to its holder. Turn the bowl all the way in the direction “→ LOCK” shown on the housing.
-
Fill your ingredients into the mixing bowl.
- Check that the control knob is set to "0".
- Hold the swivel arm securely. Swivel the lever in direction and hold it in that position. At the same time, lower the arm slowly by hand. Release the lever.
- Hold the splash guard lid so that the replenishing opening is in front of you. Then set it so onto the mixing bowl that the bowl edge is inside the three keyways.
- Insert the power plug into a suitable socket.
- Select a speed using the table below.
Table Dough Types and Tools
| Dough type Attachment Setting Quantity Max. operat-ing time | ||||
| Heavy dough (e.g. bread or short pastry) | Kneading hook | 1-4 | max. 2.3kg | 5 minutes |
| Medium dough (e. g. batter) Mixing hook 3-4 | min. 500g max. 3.0kg | 2-4 minutes | ||
| Light dough (e.g. waffle or crêpes dough, pudding) | Whisk | 2-4 | min. 500g max. 3.0kg | 2-4 minutes |
| Cream | Whisk | 5-6 | min. 200ml max. 1 litre | 3-5 minutes |
| Egg whites | Whisk | 5-6 | 3-10 egg whites | 4-5 minutes |
NOTE:
- Short time operation: With heavy dough, do not operate the appliance longer than 5 minutes and then let it cool down for 10 minutes.
- Setting "P" for pulse operation: Switch the motor momentarily to the top speed by holding the control knob in this position.
Pause Operation

WARNING: Danger of injury!
Always set the control knob to "0" if you want to interrupt the operation.
Pull the power plug to change attachments.
- Wait for the attachment to come to a complete stop!
If you activate the lever during operation to raise the arm, a safety switch deactivates the motor.
- The motor is turned on again only when the swivel arm is lowered again and the control knob is set to "0" before returning it to its original position!
End Operation and Remove the Bowl
- At the end of work, set the control knob to "0". Pull the power plug.
- Remove the splash protection before raising the swivel arm.
- Swivel the lever in direction and hold it in that position. Move the swivel arm by hand to the top position and release the lever.
- Remove the attachment.
-
Turn the mixing bowl clockwise for a short turn to remove it. 32
-
You can loosen the fi nished dough with a scraper and remove it from the mixing bowl.
- Clean all used components as described in the chapter "Cleaning".
Recipes
Sponge Mixture (Basic Recipe)
Speed 3-4
Preparation:
250 g soft butter or margarine, 250 g sugar, 1 package of vanilla sugar or 1 package Citro-Back, 1 pinch of salt, 4 eggs, 500 g wheat fl our, 1 package of baking powder, approx. 18 litre milk.
Preparation:
Fill the wheat fl our with the remaining ingredients into the mixing bowl and mix it with the mixing hook fi rst for 30 seconds at speed 2 and then approx. 3 minutes at speed 3. Grease the form or line it with baking paper, fi ll in the dough, and bake. Before the cake is removed from the oven, test to see if it is done: With a sharp wooden stick, pierce the centre of the cake. If no dough sticks to it, it's done. Place the cake on a baking grid to let it cool.
Conventional oven:
Tray slot: 2
Heating: Electric oven upper and lower heat 175-200°C, gas oven: Speed 2-3
Baking time: 50-60 minutes
You can modify this recipe according to your taste, e. g. with 100 g raisins or 100 g nuts or 100 g grated chocolate. Let your imagination run wild.
Linseed Rolls Speed 1-2
Ingredients:
500-550 g wheat flour, 50 g linseed, 3% litre water, 1 cube yeast (40g) , 100 g low-fat curd, well drained, 1 teaspoon salt. For brushing: 2 tablespoons water.
Preparation:
Soak linseed in 18 litre of lukewarm water. Place the remaining lukewarm water ( 14 . litre) into the mixing bowl, crumble the yeast into it, add curd, and mix well with the kneading hook on speed setting 1. The yeast must be completely dissolved. Add the flour with the soaked linseeds and salt into the mixing bowl. Knead on speed 1, then change to speed 2 and knead another 3 - 5 minutes. Cover the dough and let it rise in a warm place for 45 - 60 minutes. Knead again, take it out of mixing bowl, and form 16 rolls from it. Cover a baking tray with wet baking paper. Place the rolls on it, let them rise for 15 minutes, brush with lukewarm water, and bake.
Conventional oven:
Tray slot: 2
Heating: Electric oven: Upper and lower heat
200 - 220 °C (preheat for 5 minutes),
gas oven: Speed 2-3
Baking time: 30-40 minutes
Chocolate Cream Speed 4-5
Ingredients:
200 ml sweet cream, 150 g dark chocolate, 3 eggs, 50 - 60 g sugar, 1 pinch of salt, 1 package of vanilla sugar, 1 tablespoon cognac or rum, leaf chocolate.
Preparation:
Whip the cream stiff in the mixing bowl with the whisk, remove it from the bowl, and keep it cool. Melt the chocolate according to the instructions on the package or heat it for 3 minutes in the microwave at 600W . In the meantime, whisk the eggs, the sugar, the vanilla sugar, cognac or rum, and salt in the mixing bowl with the whisk at speed 4 to a foam. Add the melted chocolate and mix it in uniformly at speed 4 - 5. Keep some of the whipped cream for garnishing. Add the remaining cream to the creamy matter and fold in for a short time with the pulse function (speed ^ ^ ). Garnish the chocolate cream and serve it well cooled.
Cleaning

WARNING:
- Always pull the power plug before cleaning.
- Never immerse the appliance in water for cleaning. This might result in an electric shock or fire.

CAUTION:
- Do not use a wire brush or abrasives for cleaning.
- Do not use acrid or abrasive cleaning agents.
Motor Housing
Clean the housing only with a damp cloth and a squirt of detergent.
Mixing Bowl, Kneading and Mixing Attachments

CAUTION:
The attachments are not suitable for cleaning in a dishwasher. Heat and aggressive cleaning agents may warp or discolour the attachments.
- Parts that have come into contact with food can be rinsed with water.
- Dry all components well before re-attaching them to the appliance.
Troubleshooting
| Problem Possible Cause | Remedy | |
| The appliance cannot be switched on or stops operation. | Appliance without power supply. Check the socket with | another appliance. |
| Connect the power plug properly. | ||
| Check the fuse. | ||
| The swivel arm is not locked in the lowest position. A safety switch prevents operation. | Push the lever and the swivel arm at the same time until the arm locks. | |
| The appliance is too hot. The overheat protection has been activated. | Let the appliance cool down. | |
| The appliance is defective. Contact our service centre or | a specialist. |
Technical Data
Model: KM 1394 CB
Power supply: 220-240V\~, 50/60Hz
Power consumption: 1000 W
Protection class: II
Net weight: approx. 5.60 kg
The right to make technical and design modifications in the course of continuous product development remains reserved.
This device has been tested according to all relevant current CE guidelines, such as electromagnetic compatibility and low voltage directives, and has been constructed in accordance with the latest safety regulations.
Disposal
Meaning of the "Wheelie Bin" Symbol
Take care of our environment; do not dispose of electrical appliances via the household waste.
Dispose of obsolete or defective electrical appliances via municipal collection points.
Please help to avoid potential environmental and health impacts through improper waste disposal.
You contribute to recycling and other forms of utilization of old electric and electronic appliances.
Your municipality provides you with information about collecting points.
Instrukcja obslugi
CTC Clatronic Sp. z o.o
I P E D U N P E X K D E H N E:
- Пераюпстков Всерда n3Влесайт e BnIky nITaHЯ.
He norpykaite yctpoiCTBO B BODy dIy OUHCTKN. 3TO MOKET npnBecTN K nopaxeHIO 3JIeKTPnueCKIM TOKOM IIN IOXapy.
BHIMAHHE:
He nIOnb3yIe MeTaNIIueckyIO ueKy NnN HbIe abpa3NBbIe YIcTReIe CpeCTBa DnO uNCTKn.
He nCnoB3yTe arpeccnBbIe nn a6pa3nBbIe. HCTraIue cpeDCTBa.
Koxy MoTopa
KoKyx CneIyET YIcHTb TOnbKO C NOMOJIbIO BnAaKHOI TKaHI, D06aBbH EMHORO XNIDKOCTIN MByTbN Oncybl.
KyBUnH DnA CMeunBaHnA, HacaKn DnB36uBaHnA n CmeunBaHnA
BHIMAHHE:
Hacdkn HeIb3MbITB NocyDmoeHNo MaHInHe. HarpeB n arpeccBHBie uCTaue cpeCTBa MoryT deOpMnPOBaT bNIO bcETNb Hacdkn.
- DeTann yctpoNCTBa, CONPnKacabIuece C nIuIeBbIMn npOdyKTAMn, MOxHO pONONOCKaTB BOIo.
Xopoio npocuynte BCE KOMnoHENTbI nepei NOBtOpHBIM NOKIOHHeHEM K np60py.
YcTaPaeHHe HeNCpPaBHOte
eagllgailjpa aadabai plalwbal lclg 4aSlaai agsall gai
laigssy, pgiogall oia giali caiuall lgs aygsgall ai jls ylg 51g
lglagg gaii gaii gaii gaii gaii gaii gaii gaii gaii gaii gaii gaii gaii gaii gaii gaii gaii gaii gaii gaii gaii gaii gaii gaii gaii gaii gaii gaii gaii gaii gaii gaii gaii gaii
129y0d j00d j00d

y( 1) = y( 2)
100000000000000000000000000000000000000
e glll jjg jjgl e g
- 2020 11 11:11:11:11:11
4...jUJj
-
a1yjg20
-
aeglo jaoailljy
b1ol
7 1
#
4-3 aJwJ 1
(a)
BAC = 1
aS g S L b S, 250 j J aJ g J bJ aJ 250
g g g g g g g g g g g g g g g g g g g g g g g g g g
8/1
S OBC = S COD + S_ BOC
a aal 3 123 3 2 30 30 30 30 30 30 30 30 30 30 30 30 30 30 30 30 30 30 30 30 30 30 30 30 30 30 30 30 30 30 30 30 30 30
:glalj j
2 :aall a
200-175 jyjgulj yjglj aagllg agaagl o
y
m = 311 ;
S APQ = S AQP + S_ PQR
aJyolal aBil 1gol, gbl alln j 2011 1
ggl ggl gl aalgl 50 aga 82
.
jgllldeIgssjooLJtJ16sJ5
aai jilw yg aiae ae lao paoiog hao allo waaabai bai
.
.
.
JU 1
jglall gaoolwulg jil
daii daiolgl jUgauu Juaa I gj
山
jglgljgljgljgljgljgljgljgljgljgljgljgljgljgljgljgljgljgljgljgljgljgljgljgljgljgljgljgljgljgljgljgljgljgljgljgljgljgljgljgljgljgljgljgljgljgljgljgljgljgljgl
AaBb
yjg(10)blll 2
gaaagaaaagaaal Jaaai aai jai gai
(10)blalilgj(11)jollllglj
Jll 100g g jda a 100g 100g
aollo1o1yajjg j:laolllpao


- ENGLISH
- WAARSCHUWING: Risico op letse!
- Symbols in this Instruction Manual
- WARNING:
- CAUTION:
- General Notes
- Special Safety Instructions for this Appliance
- WARNING: Risk of injury!
- Overview of the Components / Delivery Scope
- Unpacking the Appliance
- NOTE:
- Electric Connection
- Operation
- Use of an attachment:
- Pause Operation
- WARNING: Danger of injury!
- End Operation and Remove the Bowl
- Recipes
- Sponge Mixture (Basic Recipe)
- Preparation:
- Conventional oven:
- Linseed Rolls Speed 1-2
- Ingredients:
- Chocolate Cream Speed 4-5
- Cleaning
- Motor Housing
- Mixing Bowl, Kneading and Mixing Attachments
- Technical Data
- Disposal
- Meaning of the "Wheelie Bin" Symbol
- Instrukcja obslugi
- I P E D U N P E X K D E H N E:
- BHIMAHHE:
- Koxy MoTopa
- #
- JU 1
- 山
Brand : BOMANN
Model : KM 1394 CB
Category : Food Processor