
BPDSPW - Wall mount PIONEER - Free user manual and instructions
Find the device manual for free BPDSPW PIONEER in PDF.
| Product type | Wall mount |
| Brand | Pioneer |
| Model | BPDSPW |
| Compatibility | Pioneer PDSP-1 Digital Audio Sound Projector |
| Maximum supported weight | Approximately 58 kg (mount + projector) |
| Total height (with projector) | Approximately 640 mm |
| Material | Metal |
| Package contents | Metal plate (x1), metal installation bars (x2), M5x40mm Phillips screws (x2), hex key (x1), full-size paper template (x1), instruction manual (x1) |
| Wall mounting | Screws not included, suitable for wall material |
| Installation | Recommended by a qualified professional |
| Safety | Do not climb or hang on it; check every 5 years by a professional |
| Maintenance | Clean with a soft, dry cloth; avoid abrasive products |
| Repairability | Spare parts available from the manufacturer; repair by a professional |
| Warranty | Consult Pioneer's general terms and conditions |
Frequently Asked Questions - BPDSPW PIONEER
User questions about BPDSPW PIONEER
0 question about this device. Answer the ones you know or ask your own.
Ask a new question about this device
Download the instructions for your Wall mount in PDF format for free! Find your manual BPDSPW - PIONEER and take your electronic device back in hand. On this page are published all the documents necessary for the use of your device. BPDSPW by PIONEER.
USER MANUAL BPDSPW PIONEER
Operating Instructions
Mode d'emploi
Bedienungsanleitung
Gebruiksaanwijzing
natural_image
Isometric line drawing of a rectangular metal plate with internal slots and mounting holes (no text or symbols)取付金具 x2
natural_image
Technical line drawing of two metal bracket components with mounting holes (no text or symbols)六角穴付ボルト(M8 x15mm)x6

natural_image
Technical line drawing of a mechanical assembly with two components and a directional arrow indicating movement (no text or symbols)natural_image
Line drawing of a hand using a tool to adjust or install a rectangular panel with internal grid patterns (no text or symbols)■ 仕様
Thank you for buying Pioneer's product. Please read through the Operating Instructions to learn how to operate your model safely and properly. Please be advised to keep the Operating Instructions in your place for future reference.
[Item to Be Handled by Professional Installation Workers]
Pioneer is not liable for any damages resulting from improper assembling, installation, or use other than specified in the instructions, or accidental damages due to modification or natural disasters.
Installation Work
●This product is sold on the premise that it will be installed by a professional with sufficient technique and skills. Make sure to request installation and mounting from a professional construction company or your sales agent.
●Pioneer shall not be liable in any way for any accidents or damage resulting from improper installation or mounting, incorrect usage, remodeling, natural disasters or the like.
■ Cautions
This Wall Mount Unit is exclusively designed for the Digital Sound Projector PDSP-1.
Do not install or modify the product other than specified. Do not use this product for any other purpose.
Installation Location
- Do not neglect to verify the structure's suitability and safety of the installation location before starting the installation work.
- Please be advised to consult with professional installation workers in the case the wall is not sufficiently strong to support the unit and the main projector, or in the case any supplemental material should be needed to support the unit.
- Make sure to install this Wall Mount Unit in a location that can sufficiently support the combined weight of the product to be attached and Wall Mount Unit.
- Do not install the Wall Mount Unit in a location where any person may easily hang on to or lean over the Stand, or where the Wall Mount Unit may be affected by vibration or shock.
- Do not install this unit outdoors, at a hot spring, or near the beach.
- Install this unit away from direct sunlight or extremely high temperatures.
Assembling and Installation
- Before assembling and installation, make sure the main power switch on the main body of PDSP-1 is turned off, and remove the power plug from the wall outlet.
- Please be advised that two persons or more should be in charge of the work for safety purposes.
- Tighten the screws firmly in accordance with the installation steps to prevent damages and accidents such as a violent fall after installation.
- Do not forget to make sure the screws on each part are tightened before installation. If they are too loose, an accident may occur such as the falling of the unit.
How to Use the Wall Mount Unit
- Do not ride or hang on to the Wall Mount Unit. Be careful to prevent children from doing such activities with the Wall Mount Unit. If the Wall Mount Unit falls down or breaks, it can be dangerous and may cause injury.
Please be advised to immediately contact a professional installation worker when any abnormality is found or any part is out of order.
This unit may become unable to support the main projector due to aging, depending on the installation environment, after being used for a long time. Ask a professional installation worker to check the unit about every five years, making sure the unit can be used without problems.
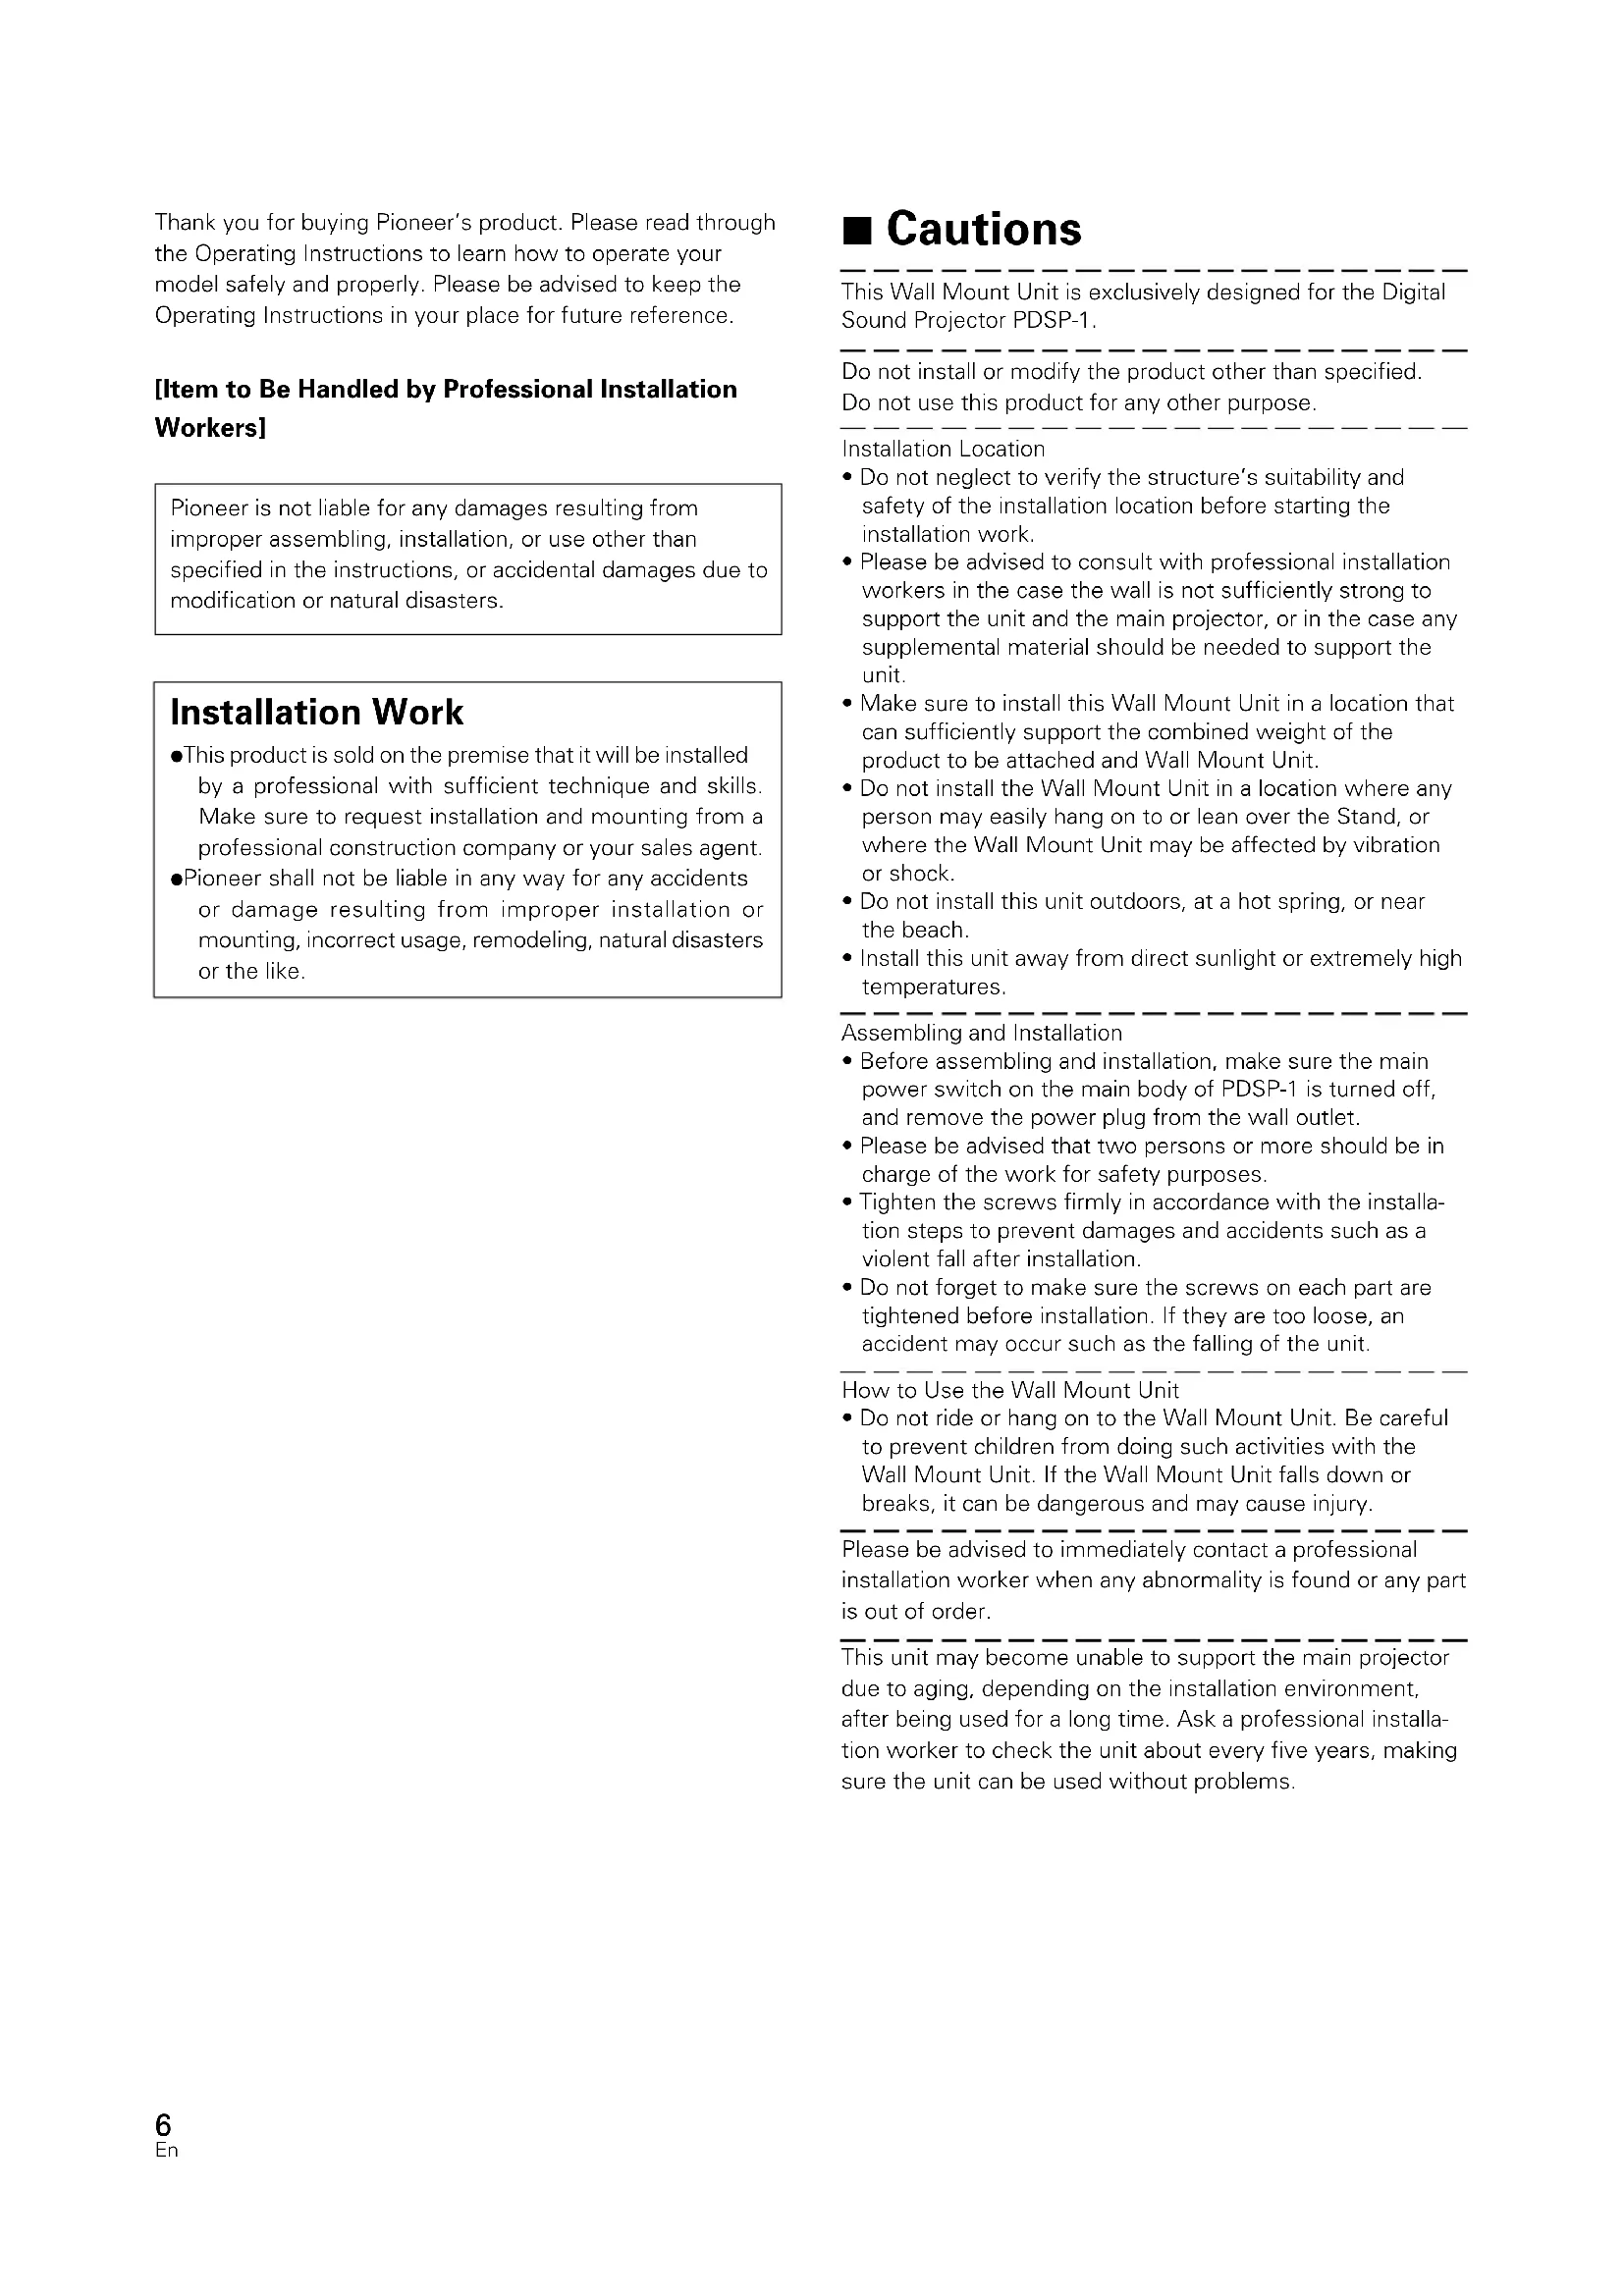
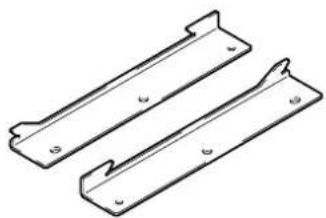
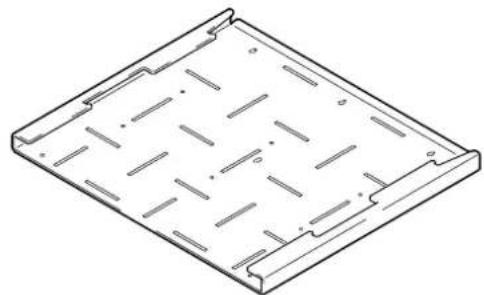
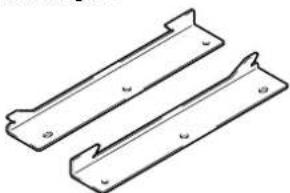
■ Verify That You Have All the Parts
Verify you have the enclosed parts for the Wall Mount Unit before installation.
Wall mount metal fitting x 1
natural_image
Isometric line drawing of a rectangular metal plate with internal slots and mounting holes (no text or symbols)Installation metal fitting x 2
natural_image
Technical line drawing of two metal bracket components (no text or symbols)Hexagon socket head cap bolt (M8 x 15mm) x 6

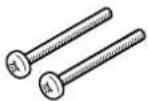
Phillips binder screw (M5 x 40mm) x 2
Hexagonal wrench x 1
Wall mount metal fitting (actual size) pattern x 1
Operating Instructions (this manual) x 1
Caution
This product does not include screws to fix the wall mount metal fitting onto the wall.
■Installation Steps
Follow procedures 1-7 to install the Wall Mount Unit and to attach the Digital Sound Projector.
1 Determining the installation location on the wall.
Make sure the foundation around the screw positions under the wall mount metal fitting has sufficient strength, using the actual size of the pattern, to determine the installation location of the Unit.
Caution
The combined weight of the Wall Mount Unit and the Digital Sound Projector to be attached is about 58 kg. Before installation, do not forget to make sure that the installation location on the wall has sufficient strength. If the wall's foundation is not strong enough, change the installation location, or reinforce the installation location.
2 Hook the wall mount metal fitting onto the wall.
Insert a screw into the tentative screw hole, and tighten it so the wall mount metal fitting is level, then hook the wall mount metal fitting onto the screw.
(Hook the wall mount metal fitting onto the screw in the center so you can easily make sure it is level.)
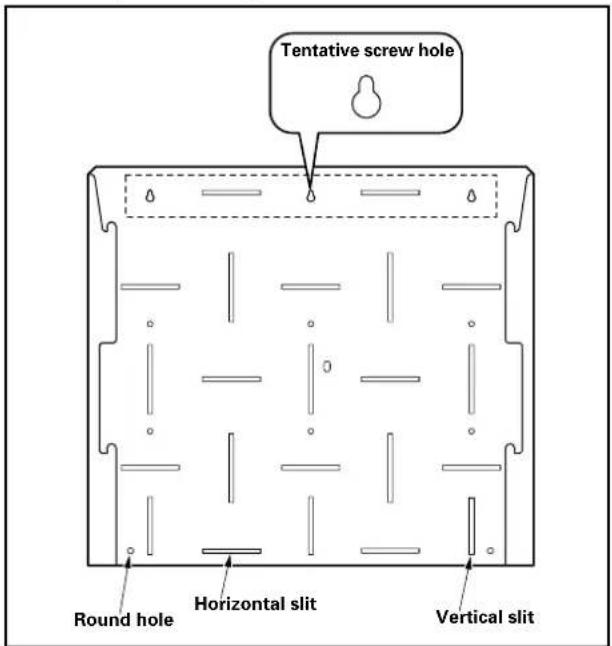
text_image
Tentative screw hole Round hole Horizontal slit Vertical slitCaution
This product does not include screws to fix the wall mount metal fitting onto the wall. Use screws suitable for the strength and material of the wall.
3 Attach the wall mount metal fitting onto the wall.
Tighten six or more screws at the positions of the vertical slits, horizontal slits, or round holes to stabilize the installation of the unit. Screws must be tightened symmetrically on both sides and evenly onto the entire surface.
4 Tentatively screw the wall mount metal fitting.
Using the Phillips binder screws (M5 x 40 mm), tentatively attach the wall mount metal fitting by screwing in at least 2 mm – 3 mm, as the product is screwed onto the wall mount metal fitting.
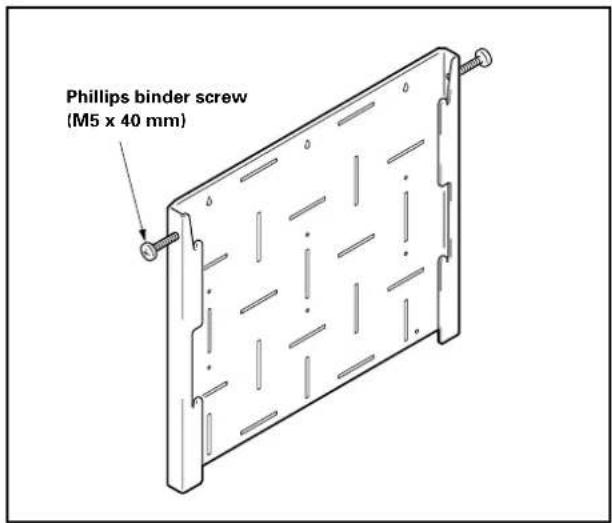
text_image
Phillips binder screw (M5 x 40 mm)5 Attaching the installation metal fittings to the Digital Sound Projector.
Tighten the six places ① - ③ in order, using the bolts (M8 x 15 mm).
Caution
The main body of the product, especially the speaker section, is a very delicate sound device. Be careful not to damage or impair the main body; for example, put a sheet under the main body for safety.
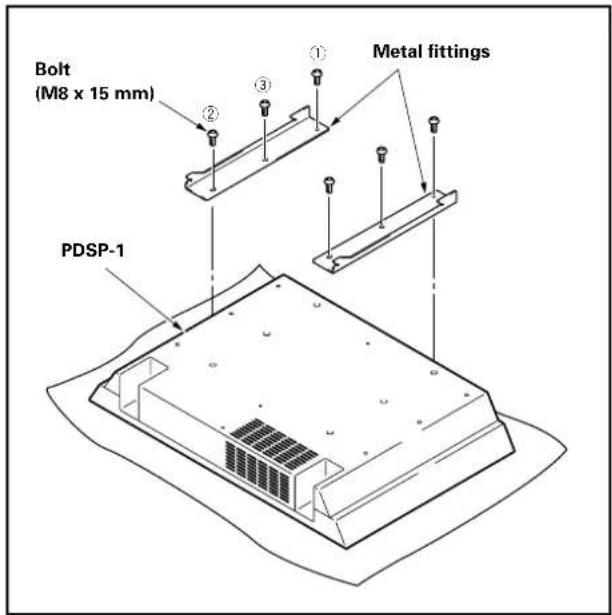
text_image
Bolt (M8 x 15 mm) ① Metal fittings ② ③ ④ PDSP-16 Attach the Digital Sound Projector to the metal fitting fixed to the wall.
Make sure to firmly insert the installation metal fittings into the four slots on the wall mount metal fitting, to hang the hooks of the installation metal fittings.
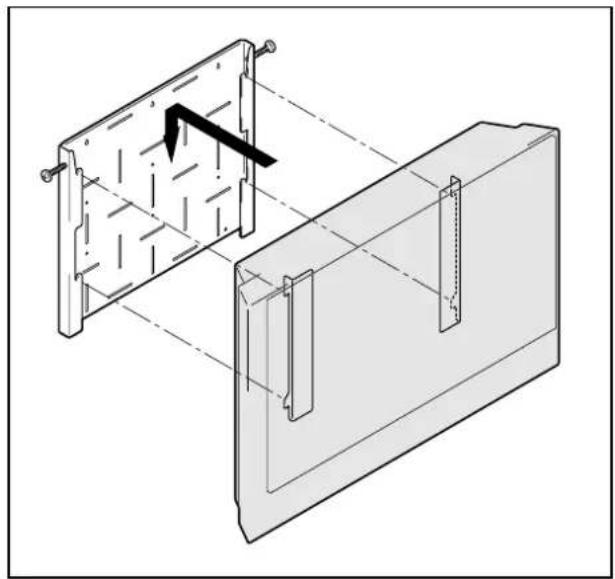
natural_image
Technical line drawing of a mechanical assembly with a bracket and mounting plate (no text or symbols)7 Screwing the Digital Sound Projector to the wall mount metal fitting so the Projector will not be moved.
Using a Phillips screwdriver, tighten the Phillips binder screws (M5 x 40 mm) on the two places of the Projector.
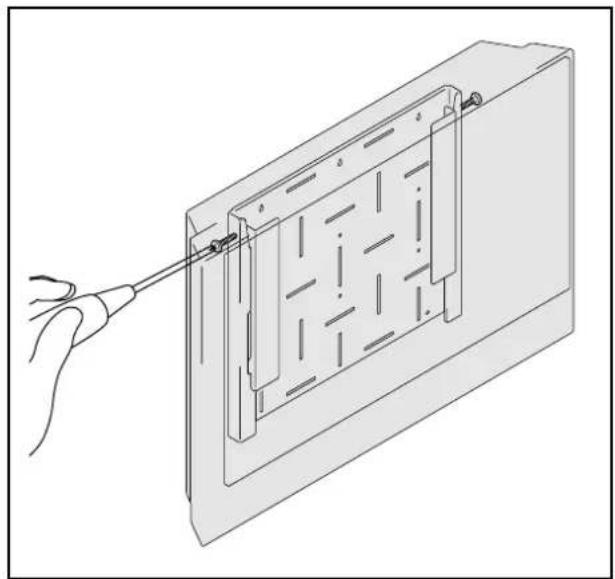
natural_image
Diagram of a hand using a tool to adjust or install a rectangular panel with internal grid patterns (no text or symbols)■Specifications
Dimensions: 630 (W) x 550 (H) x 33 (D) mm
Weight: 8.0 kg
In the case of modifications, the above specifications and exterior view may be changed without notification.
■Dimensional Diagram
Unit: mm
When the Digital Sound Projector is attached:
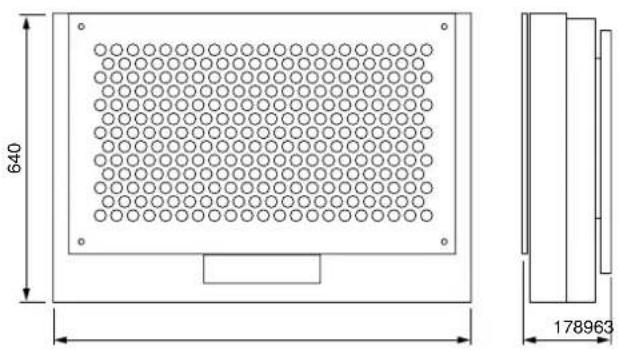
text_image
640 178963Published by Pioneer Corporation.
Copyright © 2003 Pioneer Corporation. All rights reserved.
natural_image
Isometric line drawing of a rectangular metal plate with internal slots and mounting holes (no text or symbols)natural_image
Technical line drawing of two metal bracket components with mounting holes (no text or symbols)Vis-boulon hexagonales (M8 x 15mm) x 6

natural_image
Technical line drawing of a mechanical assembly with two components, one showing internal structure and the other showing alignment (no text or symbols)natural_image
Line drawing of a hand using a screwdriver to adjust or install a rectangular panel with internal compartments (no text or symbols)■Spécifications
Dimensions: 630 (L) × 550 (H) × 33 (P) mm
Poids: 8,0 kg
Publication de Pioneer Corporation.
© 2003 Pioneer Corporation
natural_image
Isometric line drawing of a rectangular metal plate with internal slots and mounting holes (no text or symbols)natural_image
Technical line drawing of two metal bracket components with mounting holes (no text or symbols)natural_image
Technical line drawing of a mechanical assembly with two components, one showing internal structure and the other showing a rectangular housing (no text or symbols)natural_image
Line drawing of a hand using a tool to adjust or install a rectangular panel with internal grid patterns (no text or symbols)■Technische Daten
natural_image
Isometric line drawing of a rectangular metal plate with internal slots and mounting holes (no text or symbols)natural_image
Technical line drawing of two metal bracket components with mounting holes (no text or symbols)Zeskantbout (M8 × 15mm) × 6

natural_image
Technical line drawing of a mechanical assembly with a bracket and housing (no text or symbols)natural_image
Line drawing of a hand using a tool to adjust or install a rectangular panel with internal compartments (no text or symbols)■Specifications
Afmetingen: 630 (B) × 550 (H) × 33 (D) mm
Gewicht: 8,0 kg
Copyright © 2003 Pioneer Corporation.
AFTER-SALES SERVICE FOR PIONEER PRODUCTS
Please contact the dealer or distributor from where you purchased the product for its after-sales service (including warranty conditions) or any other information. In case the necessary information is not available, please contact the Pioneer's subsidiaries (regional service headquarters) listed below: PLEASE DO NOT SHIP YOUR PRODUCT TO THE COMPANIES at the addresses listed below for repair without advance contact, for these companies are not repair locations.
AMERICA
PIONEER ELECTRONICS (USA) INC. CUSTOMER SUPPORT DIVISION
P.O. BOX 1760, LONG BEACH, CA 90801-1760, U.S.A. CUSTOMER SERVICE HOTLINE : (800) 421-1404
EUROPE
PIONEER EUROPE NV EUROPEAN SERVICE DIVISION
HAVEN 1087, KEETBERGLAAN 1, B-9120 MELSELE, BELGIUM
ASEAN
PIONEER ELECTRONICS ASIACENTRE PTE. LTD. SERVICE DEPARTMENT
253, ALEXANDRA ROAD #04-01 SINGAPORE 159936
JAPAN AND OTHERS
PIONEER CORPORATION (HEAD OFFICE) CUSTOMER SUPPORT CENTER
Published by Pioneer Corporation.
Copyright © 2003 Pioneer Corporation.
All rights reserved.
PIONEER ELECTRONICS AUSTRALIA PTY.LTD. 178-184 Boundary Road, Braeside, Victoria 3195, Australia, TEL: 61-39-586-6300
PIONEER ELECTRONICS ASIACENTRE PTE. LTD. 253 Alexandra Road #04-01, Singapore 159936, TEL: 65-472-1111
PIONEER HIGH FIDELITY TAIWAN CO., LTD. 13FL., No44 Chung Shan North Road, Sec.2. Taipei, Taiwan, TEL: 886-2-2521-3588
PIONEER ELECTRONICS (CHINA) LTD. Room 1704-06, 17/F World Trade Centre, 280 Gloucester Rd. Causeway Bay, Hong Kong, TEL: 852-2848-6488
PIONEER GULF FZE Lob 11-017, Jebel Ali Free Zone P.O. BOX 61226, Jebel Ali, Dubai, United Arab Emirates, TEL: 971-4-8815756
PIONEER ELECTRONICS DE MEXICO S.A. DE C.V. Blvd.Manuel Avila Camacho 138 10 piso Col.Lomas de Chapultepec, Mexico,D.F. 11000 TEL: 55-9178-4270
