
I 3070 SL BK - Cooker NODOR - Free user manual and instructions
Find the device manual for free I 3070 SL BK NODOR in PDF.
| Product type | Induction hob |
| Brand | Nodor |
| Model | I 3070 SL BK |
| Number of cooking zones | 4 |
| Control type | Touch slider (slide bar) |
| Main functions | Induction cooking, Power function, zone timer, automatic shut-off, pan detection, keep warm, automatic steaming |
| Power supply | 230 V ~ 50 Hz (confirm on rating plate) |
| Maximum power | Not specified in the manual - power varies per zone |
| Safety | Child lock, automatic shut-off in case of overheating, pan detection, residual heat indicator, protection against accidental activation |
| Maintenance | Use a scraper for residues, mild cleaner and cloth, avoid metal sponges and harsh products |
| Surface material | Vitroceramic |
| Pot compatibility | Ferromagnetic base (magnetic), ferritic stainless steel, enameled cast iron; not recommended: glass, ceramic, aluminum, copper |
| Dimensions (W x D) | Approximately 59 x 52 cm (common estimate) |
| Weight | Approximately 8-10 kg (estimate) |
| Installation | Built into worktop, requires ventilation, electrical connection by qualified personnel |
| Repairability | Power cable replaceable by approved after-sales service; no information on spare parts |
| General information | Manual available in several languages, CE standards, maximum operating temperature 50°C above ambient |
Frequently Asked Questions - I 3070 SL BK NODOR
User questions about I 3070 SL BK NODOR
0 question about this device. Answer the ones you know or ask your own.
Ask a new question about this device
Download the instructions for your Cooker in PDF format for free! Find your manual I 3070 SL BK - NODOR and take your electronic device back in hand. On this page are published all the documents necessary for the use of your device. I 3070 SL BK by NODOR.
USER MANUAL I 3070 SL BK NODOR
Marche/Arretà commandepar effleurement:
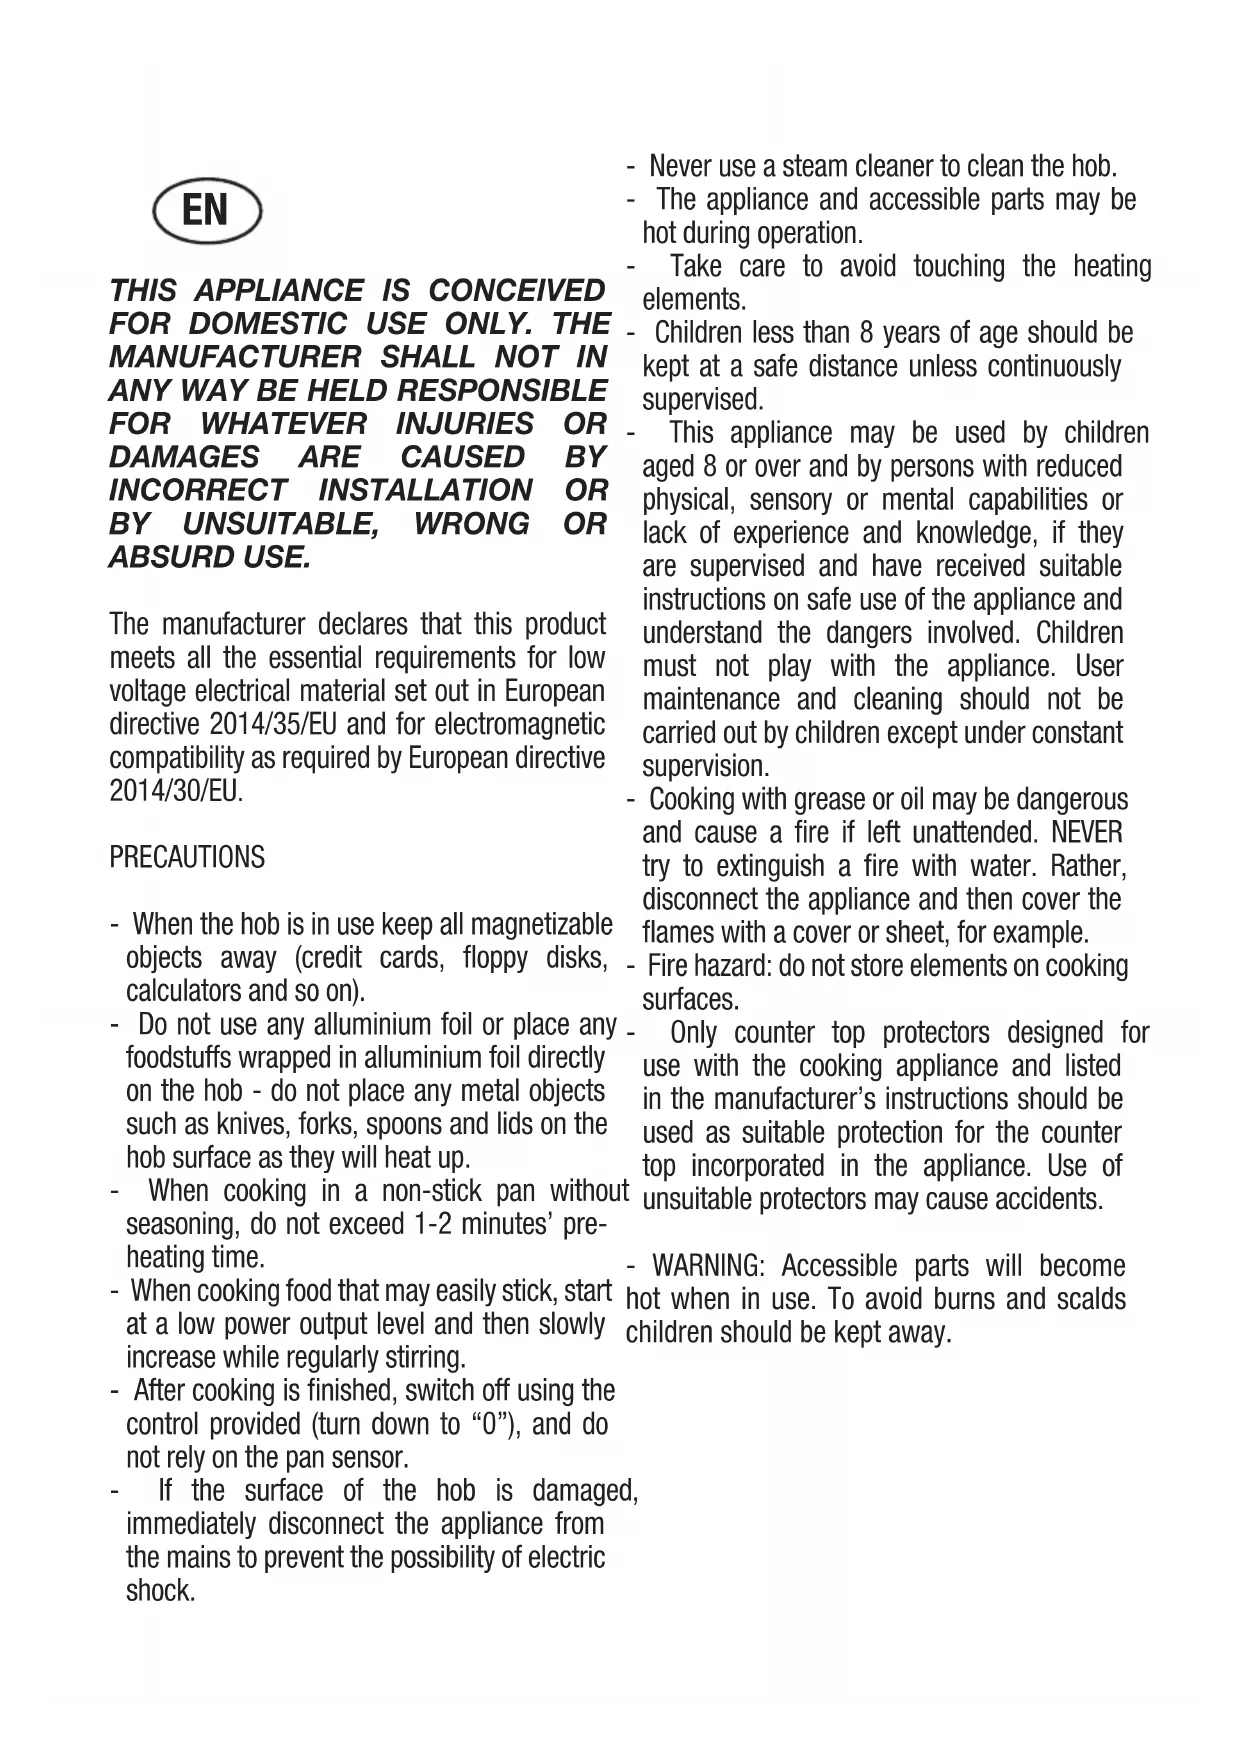
THIS APPLIANCE IS CONCEIVED FOR DOMESTIC USE ONLY. THE MANUFACTURER SHALL NOT IN ANY WAY BE HELD RESPONSIBLE FOR WHATEVER INJURIES OR DAMAGES ARE CAUSED BY INCORRECT INSTALLATION OR BY UNSUITABLE, WRONG OR ABSURD USE.
The manufacturer declares that this product meets all the essential requirements for low voltage electrical material set out in European directive 2014/35/EU and for electromagnetic compatibility as required by European directive 2014/30/EU.
PRECAUTIONS
- When the hob is in use keep all magnetizable objects away (credit cards, floppy disks, calculators and so on).
- Do not use any aluminium foil or place any foodstuffs wrapped in aluminium foil directly on the hob - do not place any metal objects such as knives, forks, spoons and lids on the hob surface as they will heat up.
- When cooking in a non-stick pan without seasoning, do not exceed 1-2 minutes' preheating time.
- When cooking food that may easily stick, start at a low power output level and then slowly increase while regularly stirring.
- After cooking is finished, switch off using the control provided (turn down to "0"), and do not rely on the pan sensor.
-
If the surface of the hob is damaged, immediately disconnect the appliance from the mains to prevent the possibility of electric shock.
-
Never use a steam cleaner to clean the hob.
- The appliance and accessible parts may be hot during operation.
Take care to avoid touching the heating elements. - Children less than 8 years of age should be kept at a safe distance unless continuously supervised.
- This appliance may be used by children aged 8 or over and by persons with reduced physical, sensory or mental capabilities or lack of experience and knowledge, if they are supervised and have received suitable instructions on safe use of the appliance and understand the dangers involved. Children must not play with the appliance. User maintenance and cleaning should not be carried out by children except under constant supervision.
- Cooking with grease or oil may be dangerous and cause a fire if left unattended. NEVER try to extinguish a fire with water. Rather, disconnect the appliance and then cover the flames with a cover or sheet, for example.
- Fire hazard: do not store elements on cooking surfaces.
- Only counter top protectors designed for use with the cooking appliance and listed in the manufacturer's instructions should be used as suitable protection for the counter top incorporated in the appliance. Use of unsuitable protectors may cause accidents.
- WARNING: Accessible parts will become hot when in use. To avoid burns and scalds children should be kept away.
Insert in the fixed wiring a mean for disconnection from the supply mains having a contact separation in all poles that provide full disconnection under overvoltage category III conditions, in accordance with the wiring rules. The plug or omnipolar switch must be easily reached on the installed equipment.
This appliance is not intended to be used via an external timer or a remote control system. The manufacturers decline any responsibility in the event of non-compliance with what is described above and the accident prevention norms not being respected and followed.
To avoid all risk, if the power cable becomes damaged, it must only be replaced by the manufacturer, by an authorised service centre, or by a qualified electrician.
OPERATING PRINCIPLE (Fig. 1)
It exploits the electromagnetic properties of most cooking vessels.
The coil (inductor) which produces the electromagnetic field is operated and controlled by the electronic circuit.
The heat is transmitted to food by the cooking vessel itself.
The cooking process takes place as described below.
- loss of heat is minimum (high efficiency)
- the system stops automatically when the vessel is removed or even just lifted from the hob
- the electronic circuit guarantees maximum flexibility and fine adjustments.
(Fig.1)
1 Vessel
2 Induced current
3 Magnetic field
4 Inductor
5 Electronic circuit
6 Power supply
User's Instructions (Fig. 2)
1 Power ON / Power OFF
2 Slider sensor
3 Power key
4 Lock key
5 ON/OFF LED
6 Slider LED
7 Lock LED
8 Heating zone and setting display
9 Timer indicator zone
10 Timer
Installation
All operations relative to installation (electric connection) should be carried out by skilled personnel in conformity with the rules in force. As for the specific instructions see part pertaining to installer.
Functionality Slider TC:
Slider: sensor technology of the novel Slider TC allows as well an adjustment of the cooking levels (1-9) as the timer value (1-99) by touching and pulling the finger over the designated area. Pulling to the right is increasing and to the left is decreasing accordant value. Moreover a direct selection of the designated value is also possible on the slider area.
ON/OFF Touch Control
After connecting to the mains the TC unit takes 1 second to prepare for operation. After a reset all displays and LEDs flashes up for 1 second. After 1 second all displays and LEDs are switched off again.
The TC unit may now be switched ON by pressing the ON/OFF key "1". Displays show a steady "0". Possible optic warnings for hot cooking zones [H] are displayed in alternation with [O] and the synchronously display dot. The display dots on the cook top displays flashes up every second (0.5 sec.off, 0.5 sec.on). Electronics remains activated for 20 seconds. If there is no cooking level or timer selection done in this period the
electronics automatically resets to the Off-mode by releasing a signal tone.
The TC may only be switched on by pressing the power key as sole input In case of an other key is pressed (single or in parallel with the power key), the control unit is not switched on.
In case of an active "Child Lock Function" when switching POWER ON, all cooking zone displays show "L" for LOCKED.
Possible optic warnings for hot cooking zones [H] are displayed in alternation with [L] (H-ON = 0.5 sec; L-ON = 1.5sec).
By pressing the ON/OFF key "1" of the control unit in ON-Mode, the Touch Control may be switched off at any time. This is also applicable for locked control units (active child lock). The
ON/OFF key takes always priority with the POWER-OFF function.
Automatic Switch Off
The TC switches from Power ON to OFF after 20 sec., provided that no cooking zone is activated or a select key is pressed during that time.
In case of a selected cooking zone (with cooking stage is "0") this Auto Power off time is composed of a 10 sec deselection time and 10 sec Power off time.
ON/OFF Cooking Zone
In case of On-state of the TC a cooking zone may be selected by touching the dedicated display (Select-Sensors "8"). The respective display changes to a steady display dot and "0" instead of "H" - in case of a hot cooking zone-. On all other cooking zone displays the dot expires.
That followed a cooking level may be set by using the Slider area. Thus switches the respective cooking zone on. End stops are 9^ (right side) and 0^ (left side).
First place the pan in the chosen cooking zone. If the pan is not present the system cannot be switched on the correspondent zone.

Switching Off a single cooking zone:
A single cooking zone may be switched off by selecting and setting cooking level to [0]. In case of an optic warning for hot cooking zones [H] this is displayed in alternation with [0] and the synchronously display dot.
After the TC is switched Off the display remains black respectively [H] is displayed for an optic warning for hot cooking zone.
Switching Off all cooking zones:
Immediately switching off all cooking zones is always possible by using the ON/OFF key.[H] possibly appears on all hot cooking zones. All other cooking zone displays remain black.
Power Stages
The power of the cooking zone is adjustable in 9 different stages; the respective stage is displayed ([1] to [9]) via LEDseven-segment-displays.

Automatic Parboiling (selectable)
When Automatic parboiling is activated, the power of the cooking zone is switched to 100% for a period of time depending on the selected onboiling stage. As soon as the parboiling time is over, the preselected onboiling stage is valid again.
Procedure to start Automatic parboiling:
The control unit is switched on and a cooking zone is selected. After setting cooking stage "9" Automatic parboiling is activated by pressing at the right slider sensor. "A" appears on the display immediately.
Now the required onboiling stage is selected via Slider area. The "A" symbol appears after 3 sec upon releasing the key - alternating with the onboiling stage (500 msec, A and 1.5 sec onboiling stage).
The onboiling stage may be changed within 15 sec after activation without switching off the parboiling boost. Therefore, the cooking zone is to be selected and the relevant cooking zone is to be set afterwards.
In case of a selection after 15 sec a lower cooking stage may be set; automatic onboiling is switsched of.
a higher onboiling stage may be selected; this leads to the parboiling time being automatically brought in line with the currently selected onboiling stage
Power function
After selection of a respective cooking zone, the power function can be selected directly via the power function key "3". By means of this function certain cooking zones are enabled to receive power over the nominal. If the desired cooking zone has the capacity to activate the booster, the display shows a "P" symbol. The boosting time is limited to 8 min to protect cooking utensils. After the booster is switched off automatically, the cooking zone continues operation on power level "9". The booster can be reactivated after some minutes.
In case that the pan is removed from the cooking zone during boosting,
the boosting function remains active and boosting time continues.
Residual Heat
The determination of how long a cooking zone has residual heat after operation and switch off - which may lead to burnings when contacting - is calculated.
Status is calculated depending on:
Selected power stage (,0^ bis 9^*
On/Off Time of the Relays
The residual heat indication of each cooking zone remains activated until the calculated temperature is smaller than +60^ . Automatic Switch-off (Operating Time Limitation)
For each activated cooking zone a max. operating time is defined. The max. operating time is depending on the selected cooking stage. After the expiration of the max. operating time the cooking zone is automatically switched off.
Each actuation of the cooking zone status (changing the cooking level etc.) resets the count-down timer to the initial starting value.
Timer settings takes priority vs. operating time limitations for high cooking stage setting.
Protection against unintentional activation
The electronic system cuts off automatically in case of an identified permanent use of keys for about 10 seconds. The control unit releases an audible signal for 10 sec of the malfunction (period: 1000 msec, 500 msec ON) and the error code "ER 0 3" flashes on the display (0.5 s ON 0.5s OFF). If the permanent actuation exceeds 10sec, alone the error code "ER 03" keeps flashing as long as the malfunction occurs and is identified as such. In case the cooking zone is at stage "hot" the [H] symbol alternates with the error code (0.5 sec Symbol 0.5 sec "H").
Water sprinkled on the glass surface does not always lead to a key actuation and cannot be surely detected. ( After wiping the
glass covering the keys, all keys are ready for operation in no time).
If no cooking zone is activated within 20 sec after pressing POWER ON, the control unit is reset to Off-mode (black displays).
Key Lock (Optional)
The actuation of the key lock key "4" in the wait or active mode locks the keyboard and the assigned key-lock LED "7" is statically illuminated. Here, the actuation times of the key-lock key have to be taken into account. The control continues to work in the set mode, but may no longer be operated with any key, except the key-lock key itself or the on/off key "1".
The switching OFF with the on/off key "1" is also possible in the locked condition. The assigned key-lock LED "7" fades when switching off the control. The key-lock function included LED is active again when switching on (in wait mode 10 s) until this is deactivated by a repeated actuation of the key-lock key. The activation/deactivation of the key-lock function in the off mode is not possible.
When programmed timers expire the respective timer alarms may be confirmed by actuating any key without needing to unlock the control.
The repeated actuation of the key-lock key in the wait or active mode unlocks the keyboard and the assigned key-lock LED fades. All sensor keys may be operated as usual again.
Acoustic Feedback (Buzzer)
The following activities occurring during operation of the TC unit are fed back audibly via a buzzer:
Short single tone for regular actuation of a key
Longer, intermittent tone for permanent use of keys over a longer period of time (≥ 10 sec)
Expiry of the timer
Timer-function (optional)
The timer function is available in two types:
- Stand-alone-timer 1..99 min: Audible signal with timing. This function can only be activated as long as no cooking zone is in operation (all stages = 0). Is any cooking zone started with operation (level >0) than the stand alone timer keeps in operation. If the timer shall be used to cut off a cooking zone (see cooking zone timer) then the control must first be switched off (power sensor) and switched on again.
-Cooking zone timer 1..99 min: This function can only be activated as long as a cooking is active (stage < 0 ; display dot). Audible signal with timing, four cooking zones to be cut off are freely programmable.
Setting a timer value:
By adjustment with the slider area.
Primarily the adjustment of the first digit takes place and thereafter the adjustment of the second digit.
Within 10sec after the adjustment of the second digit the value might be reset. (Illuminated display dot in the timer display and in case of a cooking zone specific timer a blinking assigned LED).
In case of an active timer display the timer value may be set to [0] directly by pressing [0] on the slider area (left side) Switching of an active timer:
A timer can be switched of by setting its value to 0.
A stand alone timer can be switched of by a double actuation of the power key "1".
Timer Stand-Alone:
If the control unit is switched on (all cooking zone displays show [0]), the stand-alone timer may be activated by pressing the timer select key. The timer display show "00". The decimal dot
on the timer display flashes. The timer is cut off after 10 sec (black display) if no further settings are made. In case of a timer value is set with no activation of a cooking zone within 10sec, the cooking zone displays are cut off (interposing relays are also cut off). Possible optic warnings for hot cooking zones [H] are displayed permanently
As long as the timer is selected (display dot flashes for 10 sec) it can be set. The setting range is 0 -99 minutes in single steps; by Slider area.
Directly after the timer value is set, the timer displays the current time. The timer is automatically updated every 10 sec and the timer display indicates the time value. After expiration of the set time, the timer displays the current time.
The acoustic signal is terminated
-after 2 min and/or
-by actuating any key.
Thereafter timer display stops blinking and extinguishes.
Possible optic warnings for hot cooking zones [H] are displayed permanently
By pressing the ON/OFF key "1", the control unit may be switched from "purely timer operation" to cooking zone at any time -with or without an activated Stand-Alone timer -
Switching back to TC active mode with an active
Stand-Alone timer the timer is selected first (decimal dot on timer display flashes). After a cooking zone is
selected, the decimal dot disappears from the timer display and a steady decimal dot on the cooking zone
display flashes on. When switching off the control unit by ON/OFF key "1", the Stand-Alone timer - if still in operation -is also switched off.
Cooking zone specific timer programming
Switching on the TC enables timer setting for dedicated cooking zones.
By actuating a cooking zone (cooking zone stage >0 ) followed by selecting the timer display (within 10 sec) a timer value may be assigned to the cooking zone as a cut-off function. The LED around the timer "9" indicates which cooking zone the timer had been activated for.
As soon as the timer is selected the according LED is blinking and the dot in the timer display is flashing permanently. In case of a cooking zone is selected thereafter, the dot extinguishes and the LED stops blinking.
When switching from one cooking zone to another, the timer display indicates the current timer value of the respective cooking zone. Timer settings of other cooking zones stay active. Further setting is like with the stand-alone timer In case of more than one active timer the display indicates the lowest timer value (after 10s deselection time).
After expiring of the set time an acoustic signal is given and the timer display flashes 00^ . The related timer LED is blinking synchronously. The programmed cooking zone is cut-off, a permanent "0" is displayed and the cooking zone is selected automatically. After 10 sec (deselection time) a permanent "H" is displayed on a
hot"cooking zone. Otherwise, the symbol "0" is indicated.
The acoustic signal and the blinking of the cooking zone timer Led is terminated
-
after 2 min and/or
-
by actuating any key.
Thereafter timer display stops extinguishes and the cooking zone stays unselected.
Behaviour of the cooking zone specific timer is similar to the stand alone timer.
In case of a timer is programmed for a cooking zone the
operating time limitation is dependent of the timer value and not of the standard table value.
Cooking vessels (Fig. 3)
- a magnet-attracting vessel may be a suitable vessel for induction cooking
- prefer vessels which are especially declared to be suitable for induction cooking
- flat- and thickbottomed vessels
- a vessel with the same diameter as zones ensures the maximum exploitation of power
- a smaller vessel reduces power exploitation, but does not cause any energy loss. We would anyhow not recommend the use of vessels with diameters smaller than 10cm .
- stainless-steel vessels with multi-layer or ferritic stainless-steel bottoms when specifically suited for induction cooking
- cast-iron preferably enamel-bottomed vessels to avoid scratching the pyroceram surface
- we do not recommend the use of any glass, ceramic, earthenware, alluminium, copper or non-magnetic (austenitic) stainlesssteel vessels.
Maintenance (Fig. 4)
By means of a scraper immediately remove any alluminium foil bits, food spills, grease splashes, sugar marks and other high sugarcontent food from the surface in order to avoid damaging the hob.
Subsequently clean the surface with some towel and appropriate product, rinse with water and dry by means of a clean cloth. Under no circumstance should sponges or abrasive cloths be used; also avoid using aggressive chemical detergents such as oven sprays and spot removers.
Installer's Instructions
Installation
These Instructions are for the qualified technician, as a guide to installation, adjustment and maintenance, according to the laws and standards in force. These operations must always be carried out when the appliance has been disconnected from the electric system.
Positioning (Fig. 5)
The fixture is especially designed for fitting into a work-top as shown in the corresponding figure.
Place the supplied sealing agent along the hob perimeter.
Do not install the hob over an oven; in case you do, make sure of the following:
- the oven is equipped with an appropriate cooling system
- there is no warm-air leakage from the oven towards the hob
- suitable air-inlets are provided as shown in the figure.
Electrical connection (Fig. 6)
Prior to carrying out the electrical connection, please ensure that:
- the plant characteristics are such as to follow what is indicated on the matrix plate placed at the bottom of the working area;
- that the plant is fitted with an efficient earth connection, following the standards and law provisions in force.
The earth connection is compulsory in terms of the law.
Should there be no cable and/or plug on the equipment, use suitable absorption material for the working temperature as well, as indicated on the matrix plate. Under no circumstance must the cable reach a temperature above 50^ of the ambient temperature.
IT
QUESTO PRODOTTO è STATO CONCEPITO PER UN IMPIEGO DI TIPO DOMESTICO. IL COSTRUTTORE DECLINA OGNI RESPONSABILITA NEL CASO DI EVENTUALI DANNI A COSE O PERSONE DERIVANTI DA UNA NON CORRETTA INSTALLAZIONE O DA USO IMPROPRIO, ERRONEO OD ASSURDO.
Controllo tattle ON/OFF
VOORZORGSGMAATREGELEN
AAN/UIT touch-control
PpHnHnnblpa6oTb1(Pnc.1)
PnHcNbIpa60bIocHOBaHbHa3JIeKTpOMaHHTbIX CBOCTBAX KAcTpOJIb,CKOBOpOOK INHOH NOcYbI DnI pNtROBHeHn\Pu.
HnykuohnKaTuWkaynpaBnEeTc3NeKtpoHHo CXeMoI dNc03aHnCnblHorO MaHHTHOrO nJIA.
Tepno nepedaetra npdykram nHTaHn oT cMoNocybl.
Bapka npoaykTOB IN npiroTOBHeHne NnO cUyEcTBnEeTcNcNyIOOM 06pa30M:
-MHIMMaBbHaIaNcNepCnA(BbIOxNbIXoD)
- CHTne KAcTpOJn C 30HbBapKn (NIM npocTo ee noHaTne BBepx) ABTomatueckn BNoKpye TcTeMy.
3NEKtpOHHa CNTeMa 06yCnabNBAeT MaKcMmaBHyO TIOKOCTb TOHKoCTpeYnnpOBKn.
(Puc.1)
1 KaCTPIOJIa
2 INHduyu npoBaHHbIM TOK
3 Marthmthoe none
4 INyKTop
5 3neKtpoHHa cxema
6 3eKtpueeckoe noDkIuoyehne
Hnctpykuiu nn nonb3oBaTea(Pnc.2)
1 BKIOUeHHe/BBKIOUeHHe ON/OFF
2 Slider
3 Power
4BIOKINPOBka
5JAMIOHKN BKKIOHHe/BBKIOHHeHN ON/OFF
6 JAmIOuKH Slider
7IIOcBtKa HINKAtopa 6IOKNPOBKN
830HaBapKN
9ПОДСВЕТКАИНДИКATOPAТМЕРа
10 TaHMeP
MOHTAK
Bce onepaunno MOHTaxy (Anektpueeckne npoknouehna) DOnKHBIpon3BODNTbCToIbKO KBaHnOuPObAHbIM nepcoHaON M BCOOTBeCTBn C cyueCTByIOUmm HOpMaTHBaMn.
B Pa3dene "MOnTaxHnKa" npuBeHeBb BCE noOpob6HoCT MoTaXa.
Функшн саддер TC:
CiaIep: ceHCOPHae TexHOIOITHe HHHOBAIOHOHOTo CiaIepa TC IO3BOJIeT TaKKe peRyIHPOBaTb yPOBHH IINrTOOBJIeHH (1-9) B BVHe 3HaueHH TAImepa (1-99) 3a CHTI INPKOCHOBEH H yDEpKHBAHn HEo6XoDNMOH O6JAcTH. CMeIIeHHe BHPaBO yBeJIHvHBAet Heo6XoDNMOE 3HaueHH, a BJIeBO -IOHNKAeT.
Ha cnaepe cyeeCTByeT BO3MOKHOCTb HIOOpeCTBHeHOro Bb6opa TOrO HIN HHORO 3HaueHH.
Cecnphoe ynpabJeHHe BkJI/BbIKJ
IocHe BkIOUeHHB Cetb 6IOK TC B TeueHHe I cek. IOTOBHTcK pa6ote.IocHe 3TORO B TeueHHe I cek.. 0bHOJIaOTcB BCE HCHIIeH H 3aropaETcB CBETOHOJ. CInyCTA1 cek.BCE HCHIIeH H CBCTOHOJBI BHOBJ OTKIOUaOTcR.
BIOK TC MOKHO BKIOHHTb. HAKAB HA KHOIKY BKJI/BBIKJI. Ha INCHIIIEE NOBHTC 3HAueHHe "0". IIOIepemeHHO c [0] MOrYT IOIBJITbcN OITTHeCKHe npEynpckJeHHra TOpAHHX 3OH pHirotOBJIeHHa [H]. a TAKKe CnHXPOHHBe TOOK NCHIIe. 3TH TOOK NCHIIe Ha BepxHHX INCHIIeX INHIOTOBJIeHHa 3aRopaiOTc KaKdyIO cek.yHdy (0.5 cek. BBKI, 0.5 cek. BKI). 3NeKTPOHHKa OCTaETcA KTHBHOn B TeueHne 20 cek. Ecln yPoBEb INPIROTOBJIeHHn TaHMeP He 6bl BB6paH B 3OT IepHO, 3NEKTPOHHKa ABtOMaTHueCKN INpeXoIHr B peKM BBKI, H3daBaar 3ByKOBoH cHHaJI.
TC MOKET 6bITB BKIOHey HINHB HAKAthEm KHOIIKN INHTAHN. B cIyueae HaxaTHA IO60I pyroH KHOIIKN (NO OTJeJIbHOCTH HINBMecTe C KHOIIKOI INHTAHN).6JOK yipabJIeHH He BKIOHuaetc.
EcnH INP BKNIOUeHHN 6bIa AKTHBnPOBaHa ( y H K I n h 6IOKHPOBKN OT JeTeH》,Ha BCEH 3OHe INPIHROBJIeHHN IHOBHTCB B IOITBePKeHHe 6IOKHPOBKH. IIOIpeMeHHo c [L] MOrY T IOBHTbcn IIpeDyHpeKJdeHHN ropHnx 30H INPHIOTOBJIeHHN [H] (H-ON= 0.5 cek.; L-ON = 1.5 cek.).
CeHcOpHc eYipabJIeHHe MOxHO B JIO60m MOMENT OKJIOOHtB. HAKAB KHOIIky BKJI/BbIKJI 6JIOka yipabJIeHHa B peKHMe BKJI. 3TO TAKKe OTHOCr K 3a6JIOKHPOBaHHbIM 6JOKAM yipabJIeHHa (c AKTHBHO 6JIOHPOBKOIOT JeH). KHONKA BKJI/BbIKJI HMeet npHopHTc c fyHKHeI OEKIOUChHHIHTAHH.
ABTomatMueeCKoe OTKIOUeHne
TC nepexoJnt nCocToHnI nTaHne BkJI B BbIKI cnYCTa 20 cek.. npu ycnoBm OTCyTCTBnA kTUBHO 30hbl npiroTOBHeHn Hn HaxaToN KHONK Bb6opa B TeYeHne 3TO RbpeMeHn.
Ecn30Ha npiroTOBHeHn6bIa BbIpaHa (ypoBeHb npiroTOBHeHn «O»), BpemABToMaTHueCKoro
OTKIOUeHncoCTOnu130cK.OTMeHbBb6opaN10ceK. OTKIOUeHnNTaHn. BKN/Bblk3oHbNPuroTOBHeHn
Ecni TC Haxoundc B COCTOHN BKN, 30Hpy npiroTOBNEHNOxHO Bb6paTb, KOCHyBnCb COOTBeCTByIOUero DNCPNRe (uipPOBble ceHCOPbblbopa).COOTBeCTByIOUe DnCnPeu N3MeHReT COCTOHNHe Ha NoctoHHbIe ToKu, n "0"BMecTo "H"-Jra Tropuey nobepxHocTN npiroTOBNEHn. HBCex OCTaNbHbIX 30Hax npiroTOBNEHn TOKIN NCpe3aIOT.
YpOBeHb npriTOrBJeHn MOxHO yCTaHOuTB c NOMoUbIO cnaIepa. PnI 3OTM BKNIOUHaETc COOTBETCTBYIOua 3OHa npriTOBHeHn. PpeJebHbe 3HaueHn,9" (CnpBa) u,0"(CneBa).
NoctabBe KaCTPioIHO Ha COOTBEcTByIOuIyIO 3OHy BAPK.
EcnKaCTPNOHcTOnHTHaMeTe,CnCTemaHeAKTNBpyeT COOTBeTCTByOuIyO 30Hy,aHaDcNpnee NOBtCAeNyUoM CNMBOJI:

OmkJIOueHue oHOu 30Hb npU2oMObHeu:
OHy 3Ony npiroTOBnEHH MOxHO OTKIOUHTb, BbI6paB uYCTaHOVB yPoBeHb
npurotoBneHn Ha [0].EcnnoBnAeTcOnTnueckoe npedynpeKdHeHn ropeH 3ObH npuroTOBneHn [H] nonepeMeHHo C [0] nCnHXPOHHbIMn TOOKAMN DCINIE.
Pocne BbIKIOUeHnT C, DcNNeOCTaETcYepHbIM. [H] OTo6paKaTeC KAK npdynpexdHe ropuey 30hbl nproTOBHeHn.
OtkloueHne Bcex 30n HpnpToBnHeHn:
OTKIOUHTB BCE 30HbI pNPOTOBHeHMa rHOBeHNO MoXHo C nOMOuBIO KONKn BKN/BblKn.[H] MoKeT NOBtBcA DnR BCe xropaux oBnaTei npiroTOBHeHn. Nocne 3Toro dncnn E Bcex 30h npiroTOBHeHn OCTaETC HepbIM.
YpOBHMOUHOCTH
Mouhoctb 30Hb npiroTOBHeHH perynnpyETc H 9 ypoBHx; CoOTBeCTByOuH yPOeHb OTo6paXaETc (oT [1") Do [9]) uepe3 ducnneu CBETOIOOB IN cEMN CEmENTOB.

AbTomatnueckoe nponapuBaHne (BbIbnpaemoe)
EcnakTbnpoBaHO abTomatueckoe npopnabHme, MoHocTB 30hI npiroTOBHeHn BKIOUeHa Ha 100% B TeueHne nepnoa, KOtOpBn 3abNCIT OT cTADn KINHeHn. Iocne OKOuHaHn BpEmn nponapBaHn BHOBb BKIOUaeTc STADn KINHeHn.
IpoceUpa Hauana ABToMaTUnueckOro IpoPnApMbAHNA:
BnOK ynpablenb BKNIOaTeC, n Bbl6npaTeC 30Ha npiroTOBHeHn.
Pocne Bb6opa ypOBH npiroTOBHeHn BkIIOHaTcA bOMaTHueckoe npopnBaHne "9" c nOmoBcNEuaJIbHO KHOKN 1. Ha dncnnee HEmeJeHHo NOBnEaTc"A".
Tenepb Heo6xOIMaMa CTaIg KIneHb BbIbpaETc c NMOU bCnApe. CnYCT3 cek. nocle OTKIOUeHn KHOJN NOBJIeTc CMBOB "A" - nepeXoHa CTaIIO KIneHn (500 MceK. "A" u 1.5 cek. CTaIg KIneHn).
CtadnIO KUNeHMOxHO N3MeHntB TeueHne 15 cek.
NOCNE BKJIOUeHn6e0TKIOUeHnHaHHTaTeNaIPOnpaBaHn. CJeIOBATEbHO,3OHa pnproTOBHeHn BbIbpaTcA COOTBeCTByuOua 3OHa pnproTOBHeHn yCTaHabIMBaTc NOCNE 3TOrO.
PnBbIbOpe cncyra 15ceK.MoXHO yCTaHOBNTb 60Jee H3KN yPOBeHb PnIroTOBHeHMa;ABTOMaTHueCKN BKNIOHaETcK KIneHne.
Moxho Bb6paTb 6oJeB BcOKm ypoBeH npiroTOBHeHnA;
3TO npBODNT K ABTOMATMueckomy peryIIMPOBaHNI BpeMeHN IpOpaNBAHN NO yCTAHOBLEHHO CTaNN KUNeHNA.
Функци Power (byctep)
Pocne Bb6opa HxHcHn Bam 30hbl, Bbl MoXeTe aKTHBnPOBaT bFyHKUHOPOWER nOpeCTBOM KlaBnHn POWER "P". PpI NOMoUs DaHHoF yHKUOnOTDeIbHbIe 30hbl BapKN MOrTy NOnyUHTb MOUHOCb, IpeBbIaHouYIO
HOMHaIbHyIO. Pn HAIuINB O3MOXHOCTN AKTBAUIN QYHKUIN POWER B ONpeJeHHo 3OHe, Ha DcNpEe NOrBtC NO3aueHne "P". Bpem AKTBAUIN POWER ORpaHueHO 8MHyTuM N IOn o6ceueHn 6e3onacHOCTN KxOHbIX PnHaIaNEXKHOCTe. Nocne ABToMaueckO Ke3aKTBAUIN POWER, 3OHa 6yET npdoJnxTa b pa60Ta b Ha yOpBE MOUHOCTN «9'. MoXHo ChOBa BKIOuHTb POWER B pa60Ty No nCTeueHm HeCKoJIbKO MInHYr.
ECINBNEPNOB BKIOUeHnPOWER BbI y6peTe KaCTpIIOu 330hBi BAPKN, FyHKUNPOWER He 6ydtOTKIOUeHa n erO uKn npOdoNkntc.
OctaTochoe Tenno
OnpeenetaTcBpemB TeueHne KOTOPORO 30Ha npuROTOBHeHn CoXpaHIT octatoHoe TENIO NOCE pa6oTBbBkIOUeHn, YTO MOKe TaKke Bbl3BaTb OKOr Bclyae npNKOCHOBeHn.
Ctayc onpepeenreTcB 3aBACIMOCTNOT:
BbIbpaHHoro ypoBnMoIOHocTn (OT,0"do,9")
BpeMeHH BkJI/BbIK pene
HnKaunOCTaTOHOroTeNn30HbI npHrOToBHeHHOcTaeTcAaTHBHO, noka paCteHra Tempepatypa He noHn3ntca Hnke +60^
ABTomaTnueckoe BbIKIoucheHne (orpaHnueHne BpeMeHH pa60Tb)
IJa KaKdoaKtBnBpuBaHNo 30HbI onpeJeTcA MaKcMaJIbHOe Bpem pa60Tb. MaKcMaJIbHOe Bpem pa60Tb 3aBNCt OT Bb6paHHoro ypoBH npuroTOBHeHn.
CnyTMAKcMmAbHoeBpempa60tby30HaPnIroTOBHeHnABToMaTuYeCKNOTKJIouyaeTCA.
KaKdAaKTbauCtAtyca 30HbI npuROToBHeHn (m3MeHeHne ypoBn npuROToBHeHn nT.D.) C6paCbBaTe TaMep Ha mCXoDHe 3HaueHne.
HactpoKu Taimepa HmeoT npnopTe DnO rpaHueHb BpeHn pa60tbc HactpoKaMn BbICOKO ypOBH npIroTOBHeHn.
3aunita oT clyauHoro BkIoueHn
3NeKToHHa CnCTeMa ABToMaTmUeCKN OTKNouayetC Bcnyae 6bHapyKeHHa NcNoB3OBAHHa KHONOK B TeueHne 10 cek. Bnok ynpaBHeHHa 3daet 3BykoBc HnHaN NoCe 10 cek. HeNCnpabHocTH (epnoD: 1000 MceK., 500 MceK.
BKNI) KOn OoN6Kn "ER 03"3aTogapTaHa HaDcTnnee (0.5 cek.BKIN 0.5 cek.BbIK).Ecn NoCTOHHoe BKNIOueHne IpeBbIaAet 10 cek., KOJ OoN6Kn "ER 03" npOoNJaet ropeT, noka npCytCTbYET HeCNpABHOCTb, N oka OHa He 6ydt EeHTnOuupoBaHa. Ecn 30Ha npriTOBHeHna HxOuNTcHa yPobHe "Toprpo", CmBOH [H] YepedyTeC kOdom OoN6Kn (0.5 cek.CmBOH, 0.5 cek."H").
Boda, KOTOPa nonaadaet Hc TcKnHHyIO NobepxHocTb, He BcERda pnpBODNT K BKNUeHHKOHNOK IN He MOKeT 6bITb yCTaHOBHeHa. (PocIe BtIpaHna CTeKnA, KOtOpoe NOKpbBaET KHONK, BCE KHONK MometaIbHO rTOBbIK NCIOJIb3OBAHIO).
EcnHnOHa30Ha npiroTOBneHnHe 6blya aKTINbPOBaHa B TeeHme 20 cek. nocne haxatna BKJI nTahme, 6loK ynpabneHn nepexoNT B pexm BblKI (uehbl dncnn).
BLOKINPOBKA KHOJOK (DONOJIHNTeIbHo)
BkIouHne yHKUIN 6IOKPOBK KHOJOK B AKTUBOM peXIMe IIN PEXIMe OxuaHn 6IOKnpyET KnaBnATpy, a CBeToNDaDHNO KHOJKN 3aRopaetc. 3Decb Heo6xoNIMO yuHTbBaT BpeM BKIOueHn FYHKUIN 6IOKpOBK KHOJOK. YnpabLeHne npOJNkaet paOtaTb B yCTaHOBNEHOM peXIMe, HO yKe He peryInpYETCA H N OHOH IN KHOJOK, 3a NCKIOueHnEM cMoI FOHKUIN 6IOKpOBK KHOJOK IN KHOJKN BKL/BblKIJI.
B3a6bokupobahHom COCTOHHN BO3MOKHO TaKKe
OTKIIUOHeIe cAmOI KONIKBKL/BblKI.CBeToIOIo YHKUIN6KOpOBKN KHOOK rachET nocIE OTKIOUeHIn ynpaBHeN.I CBeToIOIO YHKUIN 6NOKIOPOBKN KHOJOK 3aropaeTcpi IN BKLIOUeHN (B pexnme OxuaHn10 ceK.), noka OH He 6yDet OTKIOUeH NOBTOPbIM BKIOUeHEm KHOJKN 6NOKIOPOBKN.
BknOyeHHe/BbIKnOyeHHe KHOKN 6IOKnpOBKn KHOONK HeBO3MOxHO BpeXmE BblJI.
Iocne nCTeueHn BpeMeHN TaMepa COOTBeTCTByOuine CnHaNbTa Mepa MoXHO NODTBePdNTb, Haxab IIO6yU KHOkky, 6e3 pa36NoKpOBKn YnpabNeHn.
PnIOBTOHOM BKNIOUeHN KNOKIN 6IOKUPOBKN B PEXKIMOE OXNDAHNA INN aKTINBHOM PEXKIMpea36JIOKNPyETc KnaBnAtya, a COOTBeTCTByOuIN CBeToNDIO 6IOKUPOBKN rachet. Bce KHOKN ceHCopa MoJHo BHOBb NCIOJIb30BaTb, KaK paHbWe.
3BykoBoi cnHaan (zympep)
CnEduoue DeIeCTBnB BO BpeMa pa60TbI 6noka TC conpoBoxdaIOTcR 3ByKOBblm 3ymMepom:
KopoTkn OdnokpaThbI CNrHaN IaI NOBTOpHOrO BkIIOUeHn KHOJIKN
Boluee DOnrnn, npepbIbNCTbl 3Byk Ia NocToHnO uCNoIb30BaHna KHOIOK B TeeyHe nnTeJIbHOr npnoJa
BpeMeHn ( ≥ 10 cek.)
IteueHHe BpeMeHn TaMepa
Функцятмета(Dононтьho)
He3aBcIMbIM TaMepOM, Chayana Bb6uPaetc TaMep (3aRopaetc TaOka DecaTnHOn DpO6n Ha DCnPee TaMepa). Nocne Bb6o4 30hbl npiroTOBJeHnRA, ToKca DecaTnHOn DpO6n NCye3aET Ha DCnPee TaMepa, H noCToHHa TOpKa DecaTnHOn DpO6n 3aRopaTeC Ha DCnPee 30hbl npiroTOBJeHnRA.
Pn BbKIOUeHN 6NOKa ynpabNeHc NOMOUI KHOJIIN PtAHHe, He3ABNCIMbT TaMep,ecn OH pa6oTaET, TAKXe OTKIOUaeTc.
IporpammmpoBaHne TaHmepa DnA 30hbl npiroTOBHeHHa
PnBkHIOeHmTCaKTHBIPyeTcHacTpOka TaMepa IOnpEeHbIX
30HnpfroTOBNEHIA
PnBKnIOUeHm 30Hb npiroTOBHeHn (ypoBeHb > 0) n Bb6ope dncnnep TaHMepa (B TeueHme 10 cek.) 3naHne TaHMepa MoKet 6bTb npCBOHO daHHo 3OHe npiroTOBHeHn KaK cyHKuO TKNIOHcBToND
BOKpy TaImepa 03HauaET,ДЯ KaKoJ 3OHbI pNROTOBHeHn6bln aKTINBUPOBaH TaImep.
Iocne BbIbopa TaMepa COOTBECTBYOUM CBETOIOH HauHHaET MIRaTb, a ToUka Ha DcNpEe TaMepa NOCTOARHO RopeTb. Ecn 30Ha npiroTOBHeHHa 6bla BblpaHa Nocle,
TOUka rachET, a CBeToIOuN IpeKpaaaet MURaTb.
PnpeKIOUeHmC OHOH 30HbI PpIROTOBHeHn Ha DpyrYIO DCNIIe TaMepa NOKa3bIbAe TEkyuee 3HaueHne TaMepa IIN COOTBeTCTByIOe 30HbI PpIROTOBHeHn.
HactpoKn TaIMepe Apyrnx 30H npiroTOBHeHnOCTaHTcA kTtBbIMM.
JaIbHeIMe HAcTPOIKu BbINOpHIAOTc,KaN Ipn He3aBcMmOTo TaIMepa
EcnakTnBbim YBaIeTcH He OINH TaMep, DnCIIeN NOKa3bBaET HAMMeHbWee 3HaueHeNe TaMepa (Cnyctr 10 cek.).
Iocne nCTeueHn yCTaHOBNEHHOro BpeMeHN pa3daetc 3ByKOBoCnHaJI, H Na dncnnee TaMepa 3aropaeTcN 00^
OndoBpeMeHNO 3aropaeTcCooTBeTCTByIOUcn CBTeODnD TaIMepa.
3anporpammnoBaHHa 30Ha npiroTOBHeHnO kHouaeTc, noBnAeTc nocToHHb "0", m30Ha npiroTOBHeHn BbIpaTeC aBTOMaTneCKn. Cnyct 10 cek. (BpeMa OTMeHbl) Ha «Topyue» 3OHe npiroTOBHeHn noBnAeTc NoCToHHb CMBON "H".
B npotnbHOM cnyuea nOABJraTc cIMBOJ"0".
3ByKOB0B CnHAn mrraHne CBeOIOda TaMepa 30hI npiroTOBHeHn npekpaaetc
-uepe32MnH/nn
-TOCIE BKJIOUeHnKHOJIKN.
Iocne TORO, KaK DcNpEe OCTaHOBKn IORaCHET, 30Ha IIpiuROTOBHeHn BHOBb OCTaETc HBe Bb6paHHo.
Pa60Ta TaMepa DnI ONpeDeneHHo 30HbI pNroTOBneHna aHaONuHa He3aBNCUMOMy TaMepy.
EcTn TaMep nporpammpuyetc dna onpeeneHHo 30hbl npiroTOBNEHn, orpaHueHne pa6Oeero BpeMeHN 3aBNCIT OT 3HaueHn TaMepa, a He O T cTaNapTHOro Ta6NHyHOrO 3HaueHn.
Kacrtphn (Pnc.3)
- Ecn MaHnT npnnnaet K0 Dny KAcTpOJN PpN pnp6nKHeH N KO dHy, 3Ta KAcTpOJraOJNTcDnBapKn Ha INyDuKUOnHOHnPiNTe. -NOKynaTe KAcTpOJN, CneMaJIbHO paccuTaNHbIe Ha INyDuKUOnHOHyIO BApKy.
KaCTPIOIM CIIIOCKIM U TOJICTbIM IHOm. - KaCTpHON, DnAmEtP DnA KOtOpbIX TOcH0 COOTBeTcBye TnAmEtpy KOHΦoPKN DnA MaKcImaJIbHOr NcONb3OBAHn MOnuHcTn. - KaCTpHON MeHbIINx pa3MepOB CHNkae MOUHcTb, Ho He pInBODIT K NoTepe 3Heprn. B IIO6OM Cnyae He peKOMeHdyetcN cNcONb3OBAHne NocyDbI C DnAmEtPOM MeHee 10 cm.
- nocya n3 HepxabeIOeI CTaII C MHOROcNOHbIM dHOM ININ NOcyda n3 HepxabeIKn c feppuTOM, eCNI Ha DHe NOCybl yKa3aHO: IJI INNkyUOHHbIX PNT.
B Cnyuae nCnObn30BaHnueyHyHNo nocdybl, nyuwe, yTo6bl nx Dno 6bln OMaJeBoe, BO n36exKaHne NoaBHeHn capanHH ha CTeKne KepaMuecko nnHen. - CLENYUOJIA NOCyDA He npuROHa DnA NcNOb3OBAHN: CTeKIO, KepaMnKA, oOxKeHnA rInHa, NOcyDA n3 aIOMHHN, Mei nn He HAmarHmuaBIOeCraTAn (ayctehTHoH).
YxOa(Pnc.4)
OCTaTOK ANOMMHNEBOI FOJbTN, OCTaTK NINUEBbIX IPOyKTOB, JNPHBe IYTHa 6pb13rCaxap,IPOyKtBc60JIbWMCOpEprKaHEm Caxapa-BCE 3TO CnEpyET HeMeJeHNO CnCTmTB CBapOuHoi NaHNI
C NOMOuBIO CNEUaJIbHOI NOATKU WABepA, BO N36eXaHne NOARHeHNApaAHN Ha NOBepxHOCTN. Cp3y NoCte 3TOro HAnEchTc CNEUaJIbHbHINPODyKT N CNOJb3OBaTB DnA OUYCTKN NaHEN 6ymaxhble NOIOTHa.
3aTeM npomblb BOOn n BbCyuHTb uHCTOuTpAnOpKo. 3aIpeuaeTcA
NcNoIb3OBAHHe 6pa3nBbIX ry60K mnn MoaJok, TaKKe He NcNoIb3OBAbTa arpeccNBhIe XmMueckne npOdyKTbI n CpeIcTba dnydAenHn PATeH.
Hnctpykui nIa MoNTaxHHka
MOHTAK
HaCToaIue HnCTpyKuun PnpHa3HaueHbI DnI NcNoIb3OBAHnB nepnoD MoTaja IIO MoTaXnKa, 3TO pyKOBOCTBO IINMOTaJa, peYnIpOBKn IyXoJa 3a IIITOnB B COOTBeTCTBne C CyUeCTBYIOUMN HopMaTHBaMn. He 3a6bBaInTe O Tom, YTO Heo6xOJIMO OTKIOUHTb IIINTy IINBblONHeHHa KaKnx-ⅡI60 onepaun.
YctaHOBka(Pnc.5)
IyctahOBKn PnntbHa NIOCKoN NOBepXHOCTN 06paNTecb K COOTBeTCTByHoucemy PncyHKy.
IJIreMpTeN3aUHBCero nepMeTpapNTbI NnB3yTEc6 3aONHHTeEM, BXoJAMMBcoCTABNOCTABK.
He peKoMeHdyem yCTaHaBnBaTb nHTy Ha dYxOBKe, nN, B cIyae TaKOrO pOda yCTaHOBKn, y6eINTecb B TOM, qTO:
DyXOBKa o6OpyDoBaHa 3ΦΦeKTHBHO CNTeMO OxNaJdEHHa
-TopruiB Bo3DyX u3 DxyOBKn He MoKet nonactb no KaHaJy B 06NaCTb HdykuHHoHn paHenn,
- npdeyCMOTpeTb Bo3DyUHbIe KaHaJIb I COOTBeTCTBIM CyKa3aHHbIM Ha PnCyHKe.
3neKtpnueckme noKnluoyenra (Pnc.6)
Ipepe noKIOHHeMn K cTeu nHTaHnY, y6eNTecb TOM, qTO:
XapaKTePcTnKn yCTaHOBKn COBnaJaIO T C xapaKTePcTnKaMn, npBHeHbIMn Ha yCTaHOBOUHOI PnACTnHE, HaxOJaEeCnHa DHe NaHeNn DnBaPkn;
-Дя yctaHOBKN npeyCMOTpeHo DoCTaTOHc MoUHoe 3a3eMNeHne, B COOTBeTCTBUN C HopMaTnBaMn N Tpe6oBaHnA Mn DeiCTByIOJIero 3aKoHOdaTeNbCTBa. 3a3eMNEHne npeyCMOTpeHo B yctaHOBHeHHbIX HopMaTnBAx.
B TOM Cnyuae, ecn dna annapata He npedycmTope Hnyp n - nnn po3eTka BKIOUeHnra, Heo6xOIMMO NcNOb3OBaTb MaTePnA1, pnproHbI dna 3NaueHn EJIeKTPnueckoro ToKa, npNBedeHNbIX Ha yCTaHOBOOHn IIaCTnHe C xapaKTePncTnKaMn, n DnA daHHo pa6Oey TempepaTypb. 3anpeaaetcN cNoIb3OBaTb Wnyp B Cnyuae erOp neperpeBaHn npn ppeBbIuHn 50^ TempePaTypb OkpykauoJe Cpebl.
ZH
yall llll jlll 10 10 10
500 1000dall) yj 10
yli0.5) jlll ER03" Ulll 25 (jli 11
10 yailll llll 25 (jli 0.5 1
jglll llll 25 (jli 25 jaiy jaiy
jglll jaiy csiell jaliy jaiy
(H" jaiy 0.5, jaiy 0.5) Ulll 25 e dally [H]
al jaiil lai y jaiy oall iyl jaiy jaiy
jaiill jaiy ta yjaiy jaiy
(jaiy jaiy jaiy ta ybaia tae! y jaiy
(4, g Jaiy tajla jaiy jaiy
jaiill jaiy le baiial y jaiy ta jaiy p a1
jaiy jaiy le paill ta ybaia tae! y jaiy 20 uinee
(s)
y 1.99 0
=0) caiall gai bai jia jia jia jia jia jia jia jia jia jia jia jia jia jia jia jia jia jia jia jia jia jia jia jia jia jia jia jia jia jia jia jia jia jia jia jia jia jia jia jia jia jia jia jia jia jia jia jia jia jia j
Jb jll 1.99 80 80
y .(jll 0 80
:aiyall ayjbdyo
aill aaiy
a a a a a a a a a a a a a a a a
ailll lal 10 dla gall bala e! Saa aal
[0] 1
:Jaiill gaiall
0 1 aal 1 1
"1" 1y/1y 1y
:
[0] jll gall cllb i y jy) saill s, jy tie jy jayell jiall 1o bainly jilll ayall jayl luy jayell jayell jayell jayell
yolal y (Jad yj) 10 y jall c y j
Jd all jai n y aall aay p 1 Jaiall eay j
(ajll cxall ay jll) jall jai Cllj j 10
jall jai jl alaiall jaiill j
[H]
10 1al jaiall abii jaiyi) dill i jil jia jiall a hao ay
aill bll aeg y 8y jll lall dny qall aag y 10 ay gaiy al! ay "00" jll jssg s s s! jd! ay agaaal egil ay
aagaa
V. 1
y 1000000000000000000000000000000000000000000000000000000000000000000000
y 11
aall 10 10 10 10 10 10
aai aai yaiy LED ayll aay jaiy jaiy jaiy jaiy jaiy jaiy jaiy jaiy jaiy jaiy jaiy jaiy jaiy jaiy jaiy jaiy jaiy jaiy jaiy jaiy jaiy jaiy jaiy jaiy jaiy jaiy jaiy jaiy
yall yall yall yyy yll ybl yla yla yll 1111111111111111111
10 1
00" jyll syy yiy yj 12y ydy ydy ydy ydy ydy ydy ydy ydy ydy ydy ydy ydy ydy ydy ydy ydy ydy ydy ydy ydy ydy ydy ydy ydy ydy ydy ydy ydy ydy ydy ydy ydy ydy ydy ydy ydy ydy ydy ydy ydy ydy ydy ydy ydy ydy ydy ydy ydy ydy ydy y dy yy dy yy dy yy dy yy dy yy dy yy dy yy dy yy dy yy dy yy dy yy dy yy dy yy dy yy dy yy dy yy dy yy dy yy dy yy dy yy dy yy dy yy dy yy dy yy dy yy dy yy dy yy dy yy dy yy dy yy dy yy dy yy dy yy dy yy dy yy dy yy dy yy dy yy dy yy dy yy dy yy dy yy dy yy dy yy dy yy dy yy dy yy dy yy dy yy dy yy dy YY
gall LED
- ① = ( x1,y1) , = ( x2,y2)
-
1 1
Jaaa aae aee
(3)
aall llll e 8 wblll all llll 8y
yall yall yannn
1
ailll jaaaii aaiy gall aiia iai aiie
y 1 y
10
y
jlll jll ljjlll llll llll llll llll
y j 1 1 1 1 1 1 1 1 1 1 1 1 1 1 1 1 1 1 1
()
saiyabaiial aybiell 1
a a g jll a bill jilie g aulio
a
C
Lgusabls
yjg ayjgcsclibio Jaoi
a1110j0s
yjill Jalal aagaaolil
ailll, ailll l 5 jll 5j
1g 2y jy dall xj g jg jg jg
jlln jaiy jilal
- loa 2. loa lo
(5)
u3 = 1,u4 = 0( 0 < a/2)
Ueueeueae e
(1) a4 = 2a1 + 3d a_4 = 12
uuauee uae eee
G
E = P1U2 的 P2 = P1U2 = E1Q_2
A
0
ece 200d Utey
1
[ \in \left( {0,1}\right) ,\because \left| {x - 1}\right| = 1,\therefore h\left( x\right) = \ln x + 1.]
AD = BD
UAA
a1 = 2,an + 1 = 2( 3n + 1) ( 3n + 2)

Fig.1 - Abb.1 - Afb. 1 - Pnc. 1 - Rys. 1 - Kuva 1.- 图 1-1.ábra - Erk. 1.

Fig.2 - Abb.2 - Afb. 2 - Pnc. 2 - Rys. 2 - Kuva 2.- 图 2-2.äbra - Erk. 2.


Fig.3 - Abb.3 - Afb. 3 - Phc. 3 - Rys. 3 - Kuva 3. - 图3-3.äbra-Euk.3.

Fig.4 - Abb.4 - Afb. 4 - Puc. 4 - Rys. 4 - Kuva 4. - 图4-4. abra - EuK.4.


Fig.5 - Abb.5 - Afb. 5 - Pinc. 5 - Rys. 5 - Kuva 5.- 图 5-5. abra - Erk. 5.
| A | B | C | D | E |
| 700 | 350 | 680 | 330 | 68 |


Fig.6 - Abb.6 - Afb.6 - Pnc.6 - Rys.6 - Kuva 6. - 图6-6.ábra-Euk.6.

NODOR
CNA group
CATA ELECTRODOMÉSTICOS, S.L.
C. Ter, 2 - 08570 TORELLO (Barcelona) SPAIN
Tel. +34 938 594 100 - Fax +34 938 594 101
www.cnagroup.es - cna@cnagroup.es
Atencion al CLIENTe: 902 410 450 / +34 938 521 818 - info@cnagroup.es
SAT Central Portugal: +351 214 349 771 - service@junis.pt


- Marche/Arretà commandepar effleurement:
- PRECAUTIONS
- Automatic Switch Off
- ON/OFF Cooking Zone
- Switching Off a single cooking zone:
- Power Stages
- Automatic Parboiling (selectable)
- Power function
- Residual Heat
- Protection against unintentional activation
- Key Lock (Optional)
- Acoustic Feedback (Buzzer)
- Timer-function (optional)
- Cooking vessels (Fig. 3)
- Maintenance (Fig. 4)
- Installation
- Positioning (Fig. 5)
- Electrical connection (Fig. 6)
- IT
- Controllo tattle ON/OFF
- VOORZORGSGMAATREGELEN
- AAN/UIT touch-control
- PpHnHnnblpa6oTb1(Pnc.1)
- Hnctpykuiu nn nonb3oBaTea(Pnc.2)
- MOHTAK
- Функшн саддер TC:
- Cecnphoe ynpabJeHHe BkJI/BbIKJ
- OtkloueHne Bcex 30n HpnpToBnHeHn:
- YpOBHMOUHOCTH
- AbTomatnueckoe nponapuBaHne (BbIbnpaemoe)
- Функци Power (byctep)
- OctaTochoe Tenno
- BpeMeHH BkJI/BbIK pene
- ABTomaTnueckoe BbIKIoucheHne (orpaHnueHne BpeMeHH pa60Tb)
- 3aunita oT clyauHoro BkIoueHn
- BLOKINPOBKA KHOJOK (DONOJIHNTeIbHo)
- B3a6bokupobahHom COCTOHHN BO3MOKHO TaKKe
- BknOyeHHe/BbIKnOyeHHe KHOKN 6IOKnpOBKn KHOONK HeBO3MOxHO BpeXmE BblJI.
- 3BykoBoi cnHaan (zympep)
- IporpammmpoBaHne TaHmepa DnA 30hbl npiroTOBHeHHa
- Kacrtphn (Pnc.3)
- YxOa(Pnc.4)
- Hnctpykui nIa MoNTaxHHka
- YctaHOBka(Pnc.5)
- 3neKtpnueckme noKnluoyenra (Pnc.6)
- ZH
- NODOR
Brand : NODOR
Model : I 3070 SL BK
Category : Cooker