
VCC 7670 A - Vacuum Cleaner GRUNDIG - Free user manual and instructions
Find the device manual for free VCC 7670 A GRUNDIG in PDF.
| Product type | Canister vacuum cleaner |
| Brand | Grundig |
| Model | VCC 7670 A |
| Nominal power | 800 W |
| Supply voltage | 220-240 V~, 50-60 Hz |
| Filter type | HEPA 13 |
| Dust bag capacity | 2.8 L |
| Operating radius | 11 m |
| Filtration system | Cyclonic with cyclone separator |
| Suction power adjustment | Yes, rotary control on handle |
| Cable winder | Yes, with rewinding button |
| Bag full indicator | Yes, red light indicator |
| Thermal protection | Integrated thermal circuit breaker |
| Included accessories | Parquet/carpet brush, hard floor brush, furniture brush, dusting brush, crevice tool, telescopic tube |
| Intended use | Household only |
| On/off button | Yes, on the appliance |
| Hose attachment | By snap-fit with tabs |
Frequently Asked Questions - VCC 7670 A GRUNDIG
User questions about VCC 7670 A GRUNDIG
0 question about this device. Answer the ones you know or ask your own.
Ask a new question about this device
Download the instructions for your Vacuum Cleaner in PDF format for free! Find your manual VCC 7670 A - GRUNDIG and take your electronic device back in hand. On this page are published all the documents necessary for the use of your device. VCC 7670 A by GRUNDIG.
USER MANUAL VCC 7670 A GRUNDIG
Please read this instruction manual thoroughly prior to using this appliance! Follow all safety instructions in order to avoid damages due to improper use!
Keep the instruction manual for future reference. Should this appliance be given to a third party, then this instruction manual must also be handed over.
Always keep hair, clothing and any other utensils away from the appliance during operation in order to prevent injury and damages.
The appliance is designed for domestic use only. Claims on the guarantee are not valid if the appliance is used for industrial or commercial purposes.
- Observe these instructions in order to prevent damage to the appliance or danger arising from improper use. Keep them in a safe place.
- Do not use on wet surfaces and do not attempt to use it on wet objects.
- Do not use the appliance in wet surroundings.
- Do not use the appliance with wet hands.
This appliance is designed for vacuuming dust and dust particles. Do not attempt to use it on large objects which could block the appliance and damage it.
- Do not use it on cigarette stubs, ash from a fireplace or matches. This could cause a fire.
This appliance is not designed for cleaning people or animals.
- Do not insert any foreign objects into the suction intake. Always keep the suction intake free of all objects.
- Do not stand the appliance upright while you are cleaning.
- Do not roll the appliance over the power cord.
- Do not pull the power cord round sharp edges and do not squash it.
If you move the appliance to another room, always disconnect the power cord and carry the appliance by the handle.
- Never move the appliance by pulling on the power cord.
- Never operate the appliance without the dust container or filter.
- Change the filter when necessary.
Only use original GRUNDIG accessories when exchanging parts.
- Check if the mains voltage on the rating label corresponds to your local mains supply. The only way to disconnect the appliance from the mains is to pull out the plug.
Always pull out the power cord before cleaning or carrying out any maintenance on the appliance.
- Whenever possible, insert the power cord plug directly into the socket. Avoid using extension cables or multipoint connectors.
For additional protection, this appliance should be connected to a household residual current device with a maximum rating of 30mA . Consult your electrician for advice.
Pull out the power plug after use. Do not disconnect the plug by pulling on the cable.
- Do not close any doors on top of the power cord.
- Never use the appliance if it or the power cord is visibly damaged. This also applies if the appliance has accidentally become wet. Please contact your specialist dealer if this is the case.
- Our GRUNDIG Household Appliances meet all the applicable safety standards; thus if the appliance or the power cord is damaged, it must be replaced by the dealer, a service centre or a similarly qualified and authorised service person to avoid any danger arising. Faulty or unqualified repair work may cause danger and risk to the user.
-
Keep the appliance away from children.
This appliance can be used by children aged from 8 years and above and persons with reduced physical, sensory or mental capabilities or lack of experience and knowledge if they have been given supervision or instruction concerning use of the appliance in a safe way and understand the hazards involved. Children shall not play with the appliance. Cleaning and user maintenance shall not be made by children without supervision. -
Do not dismantle the appliance under any circumstances. No warranty claims are accepted for damage resulting from improper handling.
The vacuum cleaner is very powerful; thus before plugging the cord into the wall socket, make sure the switch is in the 'off' position. Hold the vacuum cleaner firmly when starting and while using it.
If the inlet, hose or telescopic tube is blocked, switch off the vacuum cleaner and remove the blockages before re-starting the vacuum cleaner. - Washing filters improves vacuum performance. Make sure all the filters are completely dry before inserting back into the vacuum cleaner.
Caution
The motor is equipped with a thermal cut-out. If for any reason, the vacuum cleaner should over-heat, the thermostat will automatically turn the unit off. Should this occur, unplug the vacuum cleaner from the wall socket. Remove the dirt container and empty. Clean the filters. Allow the cleaner to cool for approximately 1 hour. Continue operating the appliance by inserting the power plug into the wall socket and switching it back on. If the appliance does not start, wait another 30 minutes and repeat the above-mentioned steps.
Esteemed Customer,
Congratulations for purchasing the new VCC 7670 A vacuum cleaner.
Please read the following instructions carefully in order to enjoy the use of your product with the GRUNDIG quality for many years.
A responsible approach!

GRUNDIG aims to provide social working conditions accepted by a contract that presents fair payment for both the employees and suppliers; efficient use of the raw material; reducing plastic waste
amount for a few tons each year and ensuring that the accessories produced by it are used for 5 years minimum.
For a future worth living.
For a good reason. Grundig.
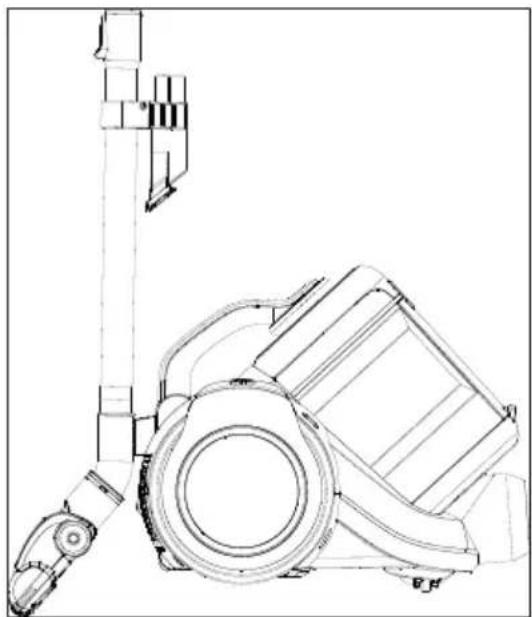
Controls and parts
See the figure on page 3.
A On/Of button
B Dust container removal button
Carriage handle
Cable winding button
Dust container
F Suction nozzle
Hose cap
H Opening button for the motor protection filter (MIF) housing
Parquet/carpet brush
J Upholstery tool
K Dust brush
L Accessory carrier
M Telescopic tube adjustment latch
N Telescopic tube
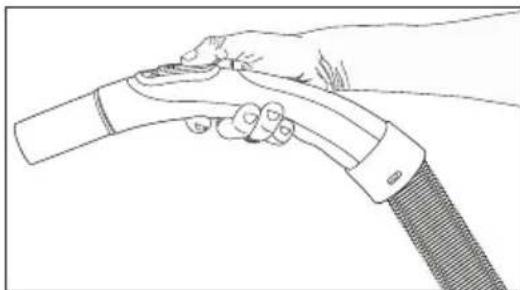
Suction power adjustment control
P Handle
R Hose
Hard floor brush
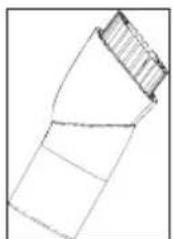
Attaching/removing the hose
To attach the hose R push the hose cap G in the direction of arrow until it is aligned with the housing.
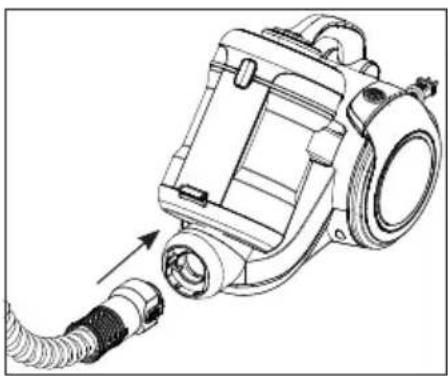
The tabs on the hose cap G must be seated correctly.
2 To remove the hoseR, press on the tabs on the hose cap G and pull it.
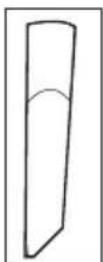
Attaching/removing the telescopic tube
1 Attach the telescopic tube to the handle P.
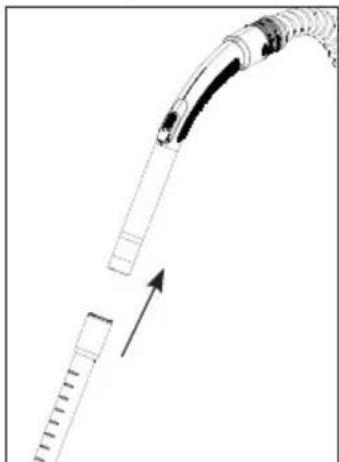
2 Pull the telescopic tube N from the handle P to remove it.
3 You can extend or shorten the telescopic tube by sliding the telescopic tube adjustment latch back and forth.
Attaching/removing the parquet/carpet brush
1 Attach the telescopic tube N to the parquet/ carpet brush I.
2 Pull the telescopic tube N from the parquet/ carpet brush I to remove it.
Adjusting the parquet/carpet brush
Perform the following actions on the adjustment latch located on the parquet/carpet brush I;
Use "position for hard floors and parquet.

Use "position for rugs and carpets.

Operation
1 Plug in the appliance after pulling the power plug located at the back of the appliance.
Caution
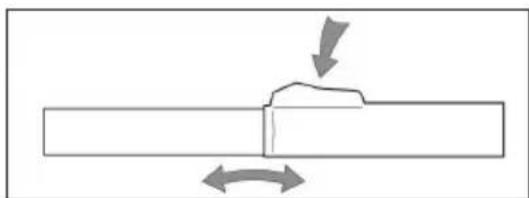
- Stop pulling the appliance cable when it comes to the yellow mark located on it. After the yellow mark the red mark comes. Do not pull any more after reaching the red mark.
2 Press the on/off button to switch on your appliance.
Adjusting the suction power
You cans adjust the suction power with the suction power adjustment control on the handle P. The more you open the control, the more the suction power will be decreased.
Accessories
Upholstery tool

Suitable for cleaning the floorings, stair steps, inside of the cars, sofas, armchairs etc.
Dust brush
Suitable for cleaning the curtains, and sensitive and fragile objects.
Crevice tool
Suitable for cleaning "hard-to-reach" areas including spaces between chairs and furniture.
Caution
Do not perform cleaning by using the end part of the handle P.
Hard floor brush
The hard floor brush was developed for use on hard floors such as tile, ceramic, parquet, wooden floors etc.
It prevents potential scratches while cleaning hard floors thanks to its specially-developed soft hair.
Switching off the vacuum cleaner and parking feature
1 After using the appliance, switch it off by pressing the On/off button A and unplug it.
2 Insert the hook of the parquet/carpet brush into the parking groove located at the rear section of the appliance.
Switch off and unplug the appliance before cleaning it.
Caution
Never use gasoline, solvent, abrasive cleaning agents, metal objects or hard brushes to clean the appliance.
Dust indicator
If the dust container is full or the hose or the tube is blocked by a large item such as a sock and thus the suction is prevented, the dust indicator next to the on/off button lights red.
Caution
If the dust container is empty, this means that a large item (such as a sock) is stuck in the hose or the tube and thus the air flow is blocked. In such cases, switch off the appliance and check the components.
Emptying the dust container
1 Press the dust container removal button B to remove the dust container E and remove the dust container.
2 Push the dust container removal latches located at the back of the dust container E from both sides.
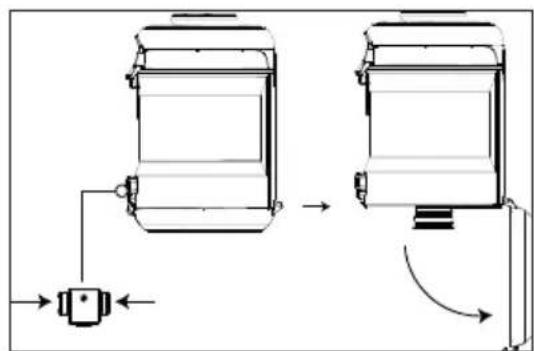
-Open the dust container E cover and empty the container.
3 When you have emptied dust, close the dust container cover E; a click sound will be heard.
4 Insert the dust container E back into its location.
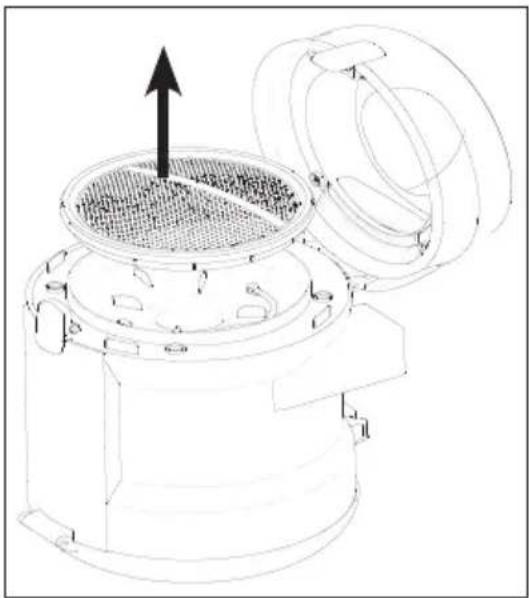
Cleaning the cyclone separator
1 Press the dust container removal button and remove the dust container.
2 Press the opening button for the motor protection filter (MIF) housing and open the cover.
3 Remove the motor protection filter (MIF) located inside.

4 After removing the motor protection filter, you will see the metal handle on the cyclone separator. Holding this handle, remove the cyclone separator from the dust container E.
5 Clean the cyclone separator and the dust container E compartment with a soft brush and wipe them with a damp cloth.
Caution
Cyclone separator should not be immersed in water.
Cleaning the Filters
Replace your filters at regular intervals according to the frequency of use. It is recommended that you replace the filters every 6 months for average use.
While you empty the dust accumulated in the dust container to clean the container, you need to clean the motor protection filter, the foam filter and HEPA filter as well.
Warnings
- Do not use appliances producing hot air such as hair dryer or heater to dry the filters.
Do not install the filters without completely drying them; otherwise, smell of moisture may occur during use, water can leak from the back of the appliance or the filters may get damaged. - Attach the filters into their places after they have dried.
Motor protection filter (MIF)
This filter is located on the dust container.
1 Press the dust container removal button and remove the dust container E.
2 Press the opening button for the motor protection filter (MIF) housing H.
3 Remove the motor protection filter by pulling it.
4 After shaking if off, wash it under running water, wring it out gently and leave it to dry (for 24 hours minimum).
Foam filter
1 Push down the rear cover opening latch to open the cover.
2 Remove the foam filter behind the cover and wash it.

3 After shaking if off, wash it under running water, wring it out gently and leave it to dry (for 24 hours minimum).
HEPA filter
1 Push down the rear cover opening latch to open the cover and remove the HEPA filter by pulling it from its handle.

2 You can wash the filter under running water after shaking it off.
3 If you wash the HEPA filter, dry it at room temperature (for 24 hours minimum). Do not use it before ensuring that it is completely dry.
4 For a longer service life, you can clean the HEPA filter by hitting it on a hard surface instead of washing it. Thus the dusts accumulated on the HEPA filter will leave the filter as you hit it on a hard floor.
Compliance with WEEE Directive and Disposing of the Waste Product
This product complies with EU WEEE Directive (2012/19/EU). This product bears a classification symbol for waste electrical and electronic equipment (WEEE). This symbol indicates that this
product shall not be disposed with other household wastes at the end of its service life. Used device must be returned to official collection point for recycling of electrical and electronic devices. To find these collection systems please contact to your local authorities or retailer where the product was purchased. Each household performs important role in recovering and recycling of old appliance. Appropriate disposal of used appliance helps prevent potential negative consequences for the environment and human health.
Compliance with RoHS
Directive
The product you have purchased complies with EU RoHS Directive (2011/65/EU). It does not contain harmful and prohibited materials specified in the Directive.
Package information
Package of the product is made of recyclable materials in accordance with our National Legislation. Do not dispose of the packaging materials together with
the domestic or other wastes. Take them to the packaging material collection points designated by the local authorities.
Storage
If you do not intend to use the appliance for a long time, store it carefully.
Unplug the appliance.
- Keep the appliance out of the reach of children.
Specifications

Power :800W
Supply voltage
220-240 V\~, 50-60 Hz
Filter :HEPA13
Dust container volume : 2.8 L
Operating radius : 11 m
Technical and design modification rights are reserved.
Chere cliente, cher client,


- Caution
- A responsible approach!
- Controls and parts
- Attaching/removing the hose
- Attaching/removing the telescopic tube
- Attaching/removing the parquet/carpet brush
- Adjusting the parquet/carpet brush
- Operation
- Adjusting the suction power
- Accessories
- Upholstery tool
- Dust brush
- Crevice tool
- Hard floor brush
- Switching off the vacuum cleaner and parking feature
- Dust indicator
- Emptying the dust container
- Cleaning the cyclone separator
- Cleaning the Filters
- Warnings
- Motor protection filter (MIF)
- Foam filter
- HEPA filter
- Compliance with WEEE Directive and Disposing of the Waste Product
- Compliance with RoHS
- Directive
- Package information
- Storage
- Specifications
Brand : GRUNDIG
Model : VCC 7670 A
Category : Vacuum Cleaner