
RBO 3683A - Fridge ROSIERES - Free user manual and instructions
Find the device manual for free RBO 3683A ROSIERES in PDF.
| Brand | Rosieres |
| Model | RBO 3683A |
| Product type | Refrigerator with top freezer compartment |
| Electrical supply | 220-240 V, 50 Hz |
| Thermostat | Adjustment from 1 to 5, position 0 to turn off |
| Recommended temperature | Position 2 or 3 |
| Refrigerator defrosting | Automatic when compressor stops |
| Freezer defrosting | Manual (not specified in the manual) |
| Freezing capacity | Food requires 24 hours to reach freezing |
| Reversing door opening direction | Yes, reversible |
| Installation | Built-in column, requires ventilation grille |
| Mounting accessories for furniture door | Slides provided |
| Door seal | Supplied, to be fixed on the side opposite the hinges |
| Maintenance | Keep the water drainage area clean |
| Safety | Wait 2 hours after transport before starting |
Frequently Asked Questions - RBO 3683A ROSIERES
User questions about RBO 3683A ROSIERES
0 question about this device. Answer the ones you know or ask your own.
Ask a new question about this device
Download the instructions for your Fridge in PDF format for free! Find your manual RBO 3683A - ROSIERES and take your electronic device back in hand. On this page are published all the documents necessary for the use of your device. RBO 3683A by ROSIERES.
USER MANUAL RBO 3683A ROSIERES
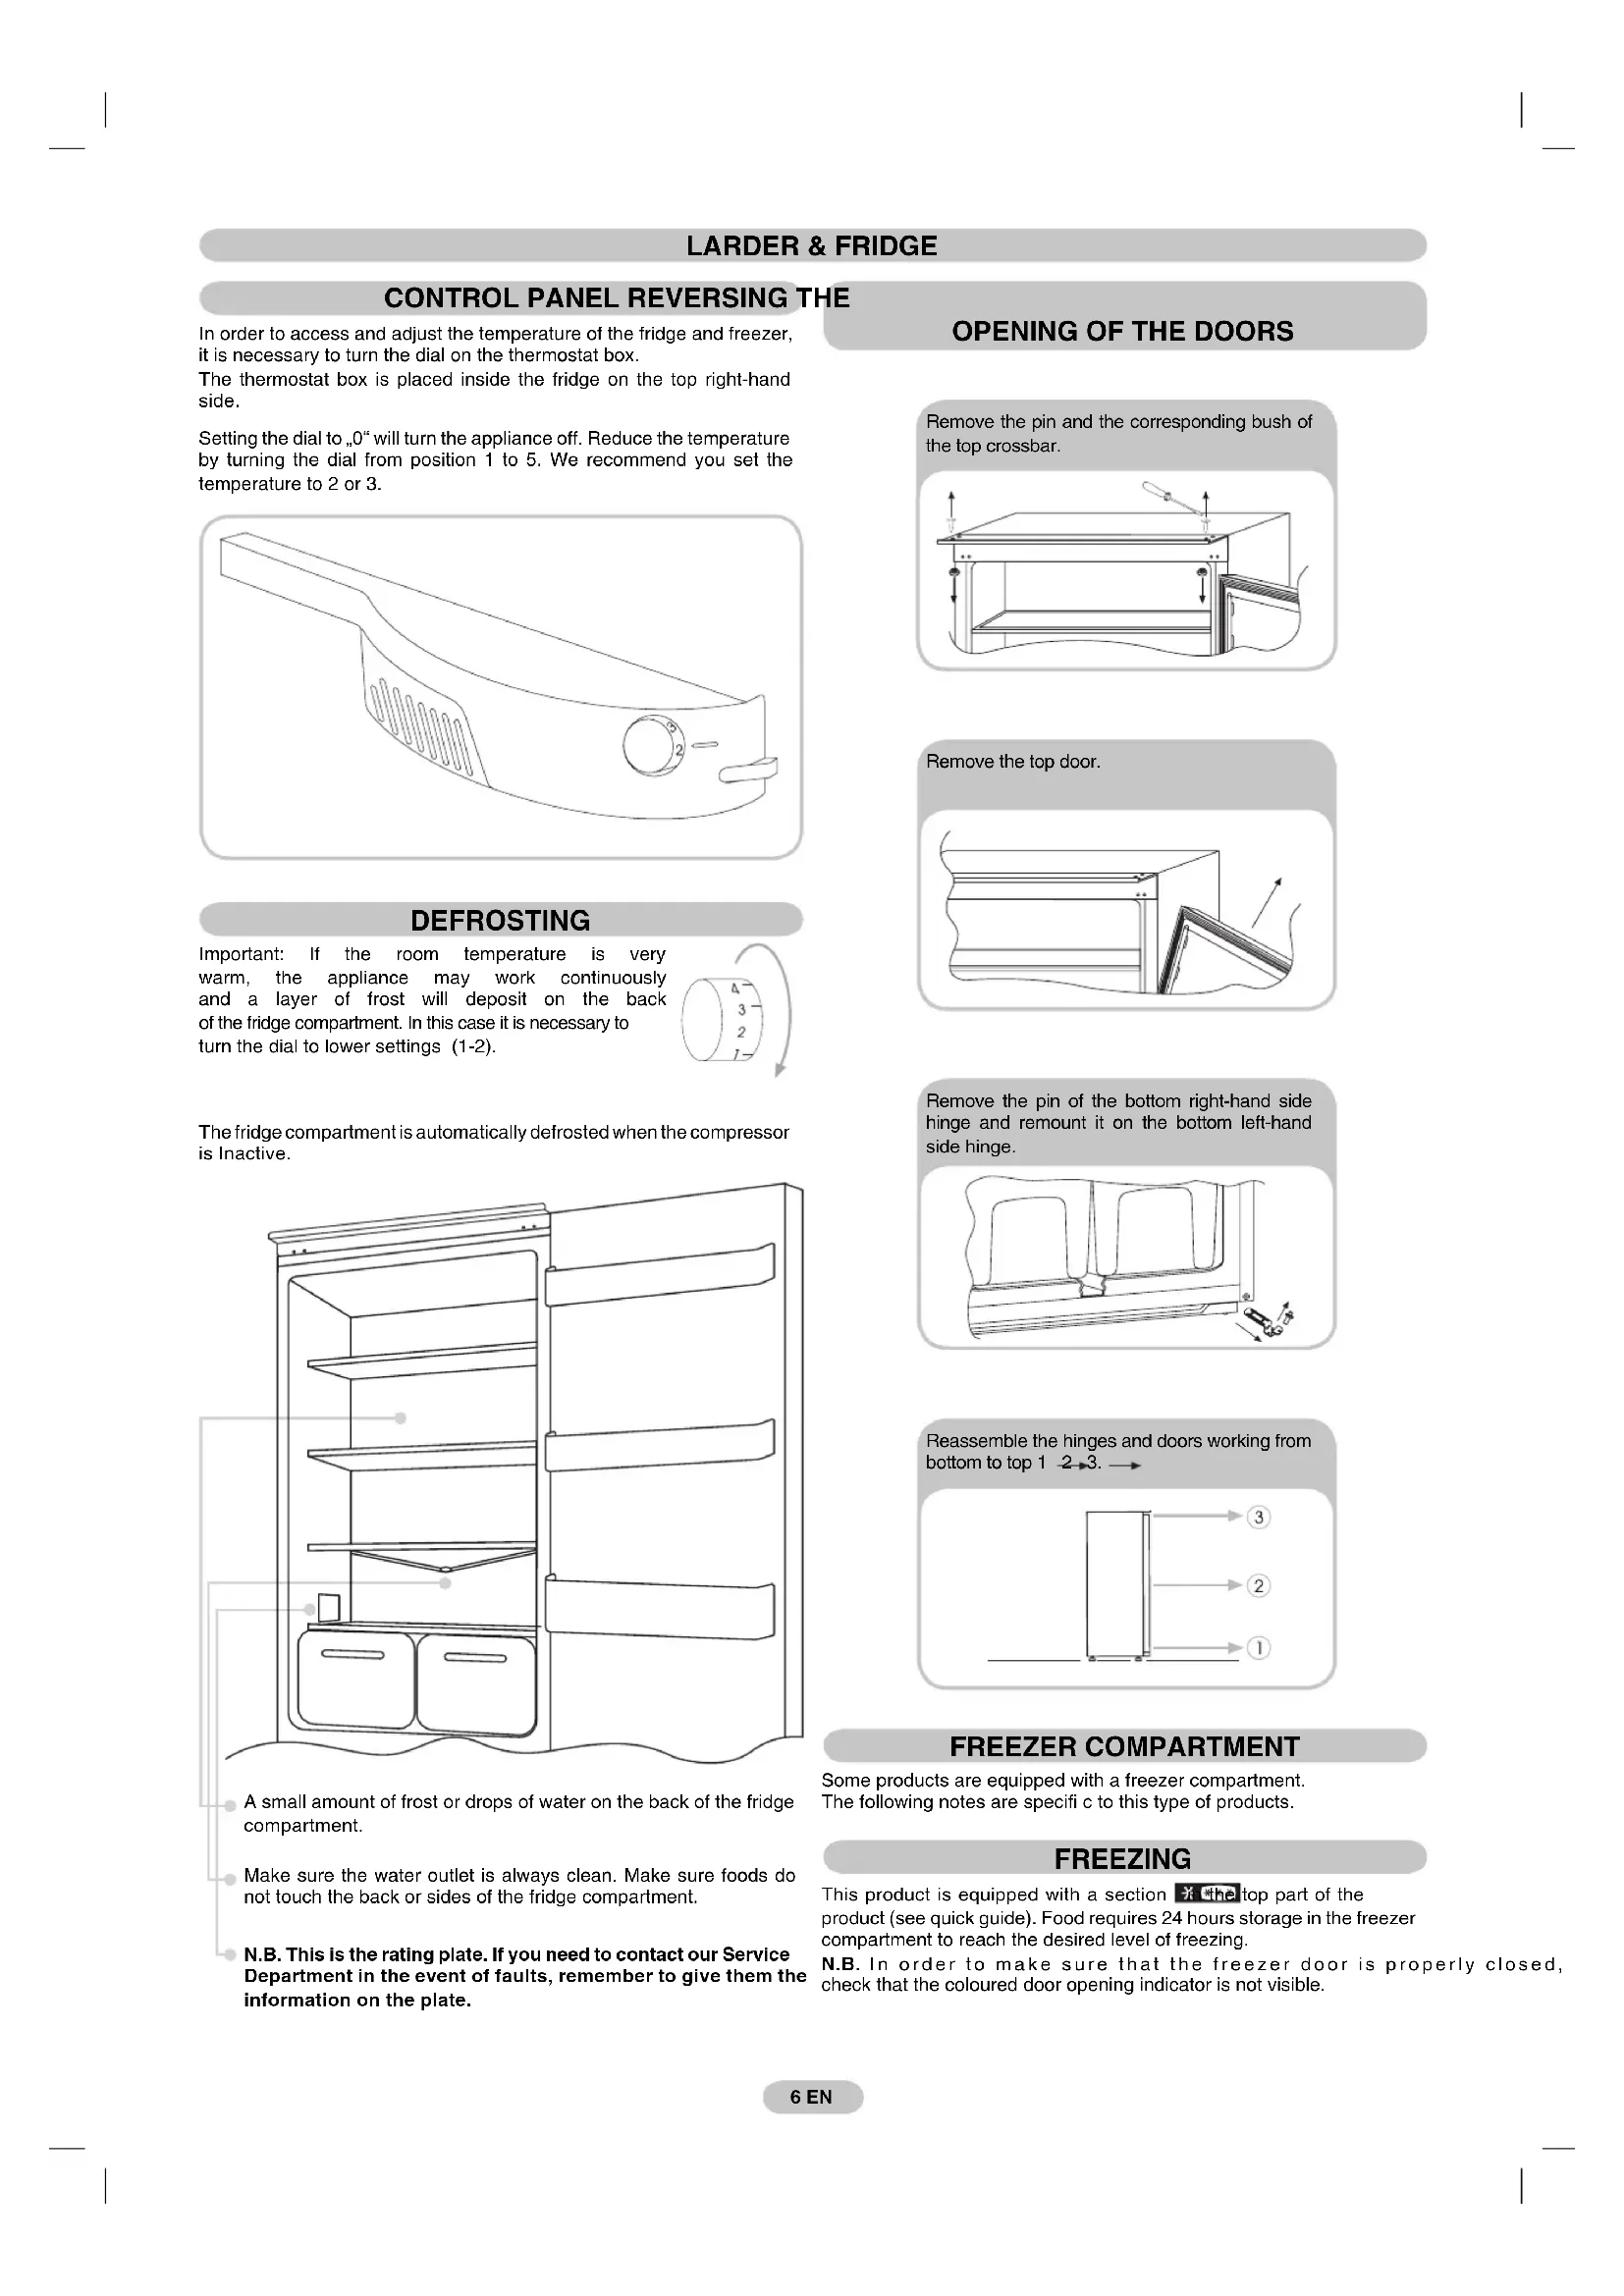
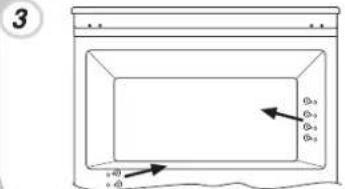
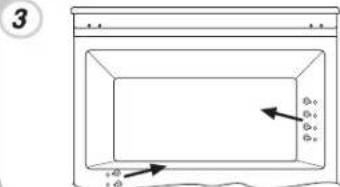
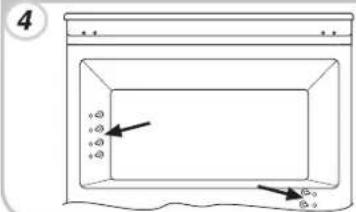
In order to access and adjust the temperature of the fridge and freezer, it is necessary to turn the dial on the thermostat box.
The thermostat box is placed inside the fridge on the top right-hand side.
Setting the dial to 0^ will turn the appliance off. Reduce the temperature by turning the dial from position 1 to 5. We recommend you set the temperature to 2 or 3.
DEFROSTING
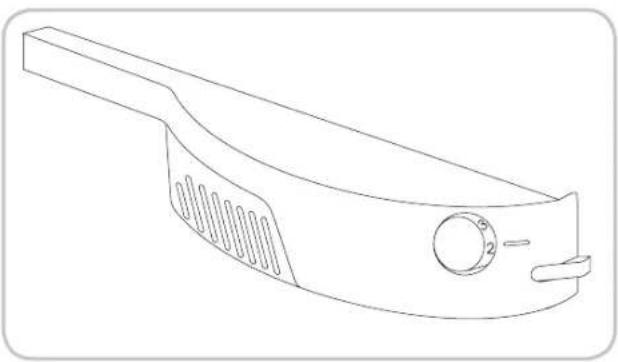
Important: If the room temperature is very warm, the appliance may work continuously and a layer of frost will deposit on the back of the fridge compartment. In this case it is necessary to turn the dial to lower settings (1-2).
The fridge compartment is automatically defrosted when the compressor is Inactive.
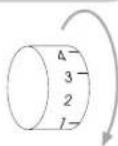
A small amount of frost or drops of water on the back of the fridge compartment.
Make sure the water outlet is always clean. Make sure foods do not touch the back or sides of the fridge compartment.
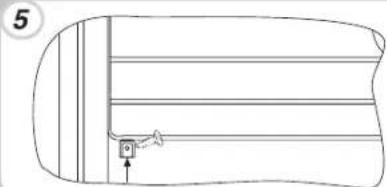
N.B. This is the rating plate. If you need to contact our Service Department in the event of faults, remember to give them the information on the plate.
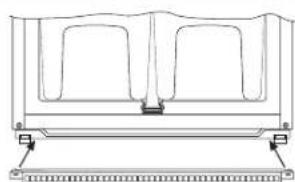
OPENING OF THE DOORS
Remove the pin and the corresponding bush of the top crossbar.
Remove the top door.

Remove the pin of the bottom right-hand side hinge and remount it on the bottom left-hand side hinge.
Reassemble the hinges and doors working from bottom to top 1 2-3.
FREEZER COMPARTMENT
Some products are equipped with a freezer compartment. The following notes are specific to this type of products.
FREEZING
This product is equipped with a section of the top part of the product (see quick guide). Food requires 24 hours storage in the freezer compartment to reach the desired level of freezing.
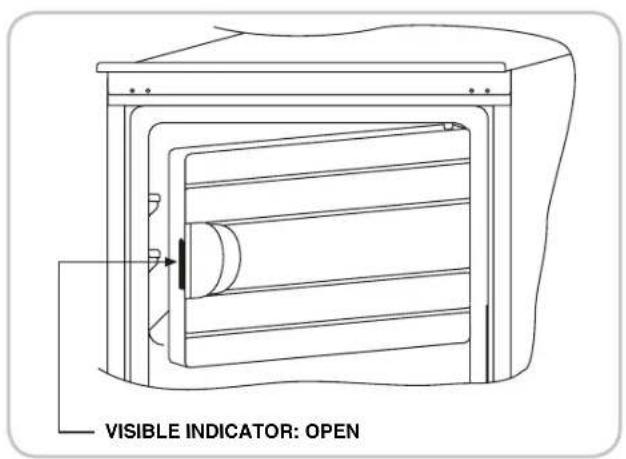
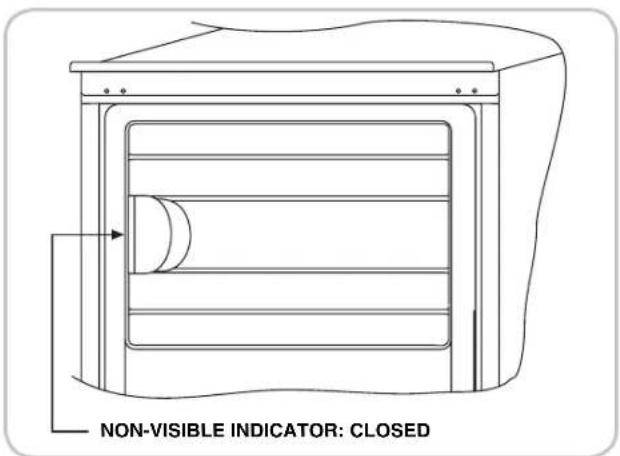
N.B. In order to make sure that the freezer door is properly closed, check that the coloured door opening indicator is not visible.
REVERSING THE OPENING OF THE FREEZER COMPARTMENT
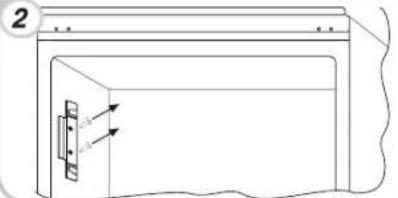
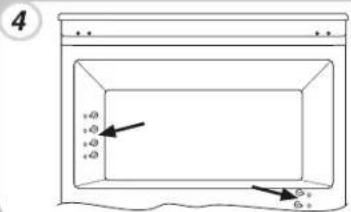
Disassemble the bottom right-hand hinge.
Position the door and hinge first and then screw the latter to the product.
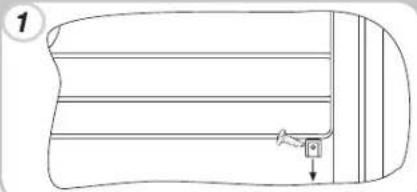
Unscrew the hook positioned on the left-hand side of the freezer compartment.
Screw the hook on the right-hand side of the freezer compartment.
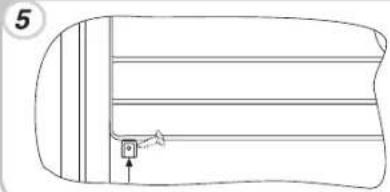
Remove the hole cover plugs, as indicated in the figure.
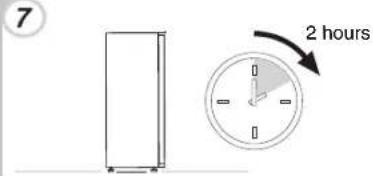
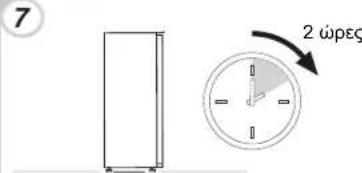
Put the appliance in an upright position and wait two hours before turning it on.
Insert the plugs as indicated in the fi gure.
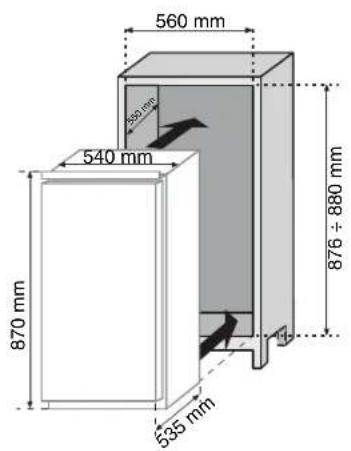
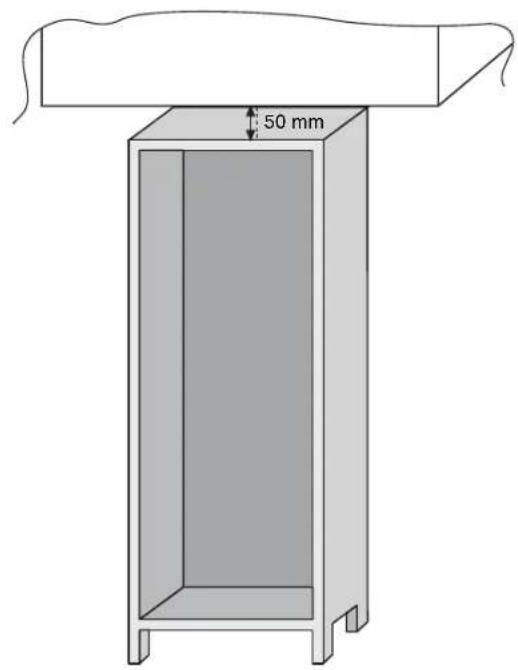
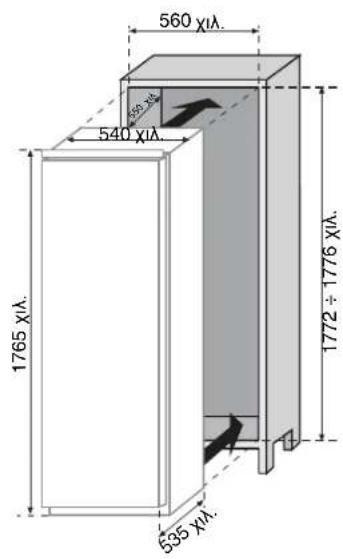
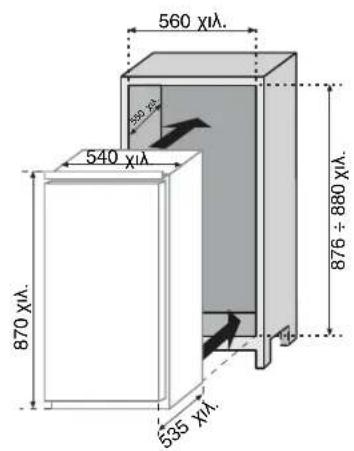
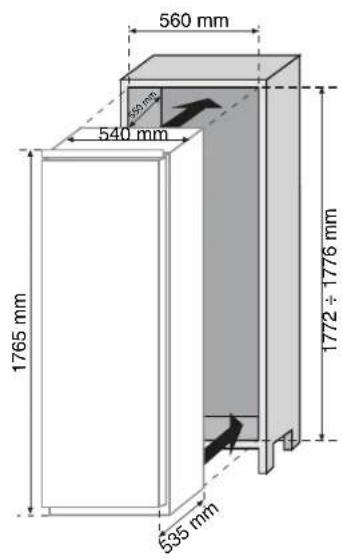
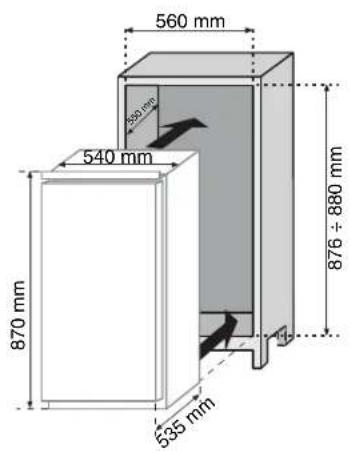
SIZE OF THE APPLIANCE AND HOUSING UNIT

INSTALLATION OF THE APPLIANCE IN THE COLUMN
Fasten the gasket equipped with the appliance on the opposite side of the hinges.
1
Insert the appliance in the column, placing it on the opposite side of the hinges.

2
fi is perfectly into the cabinet.

3
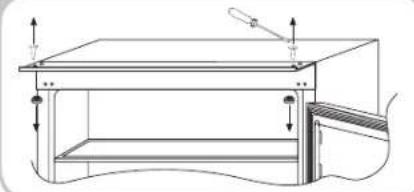
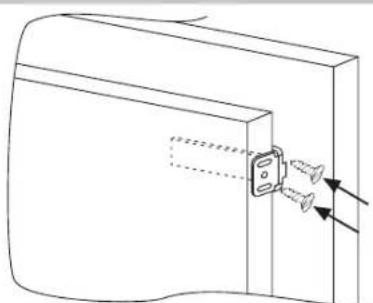
Fasten the top part of the appliance to the cabinet, using the screws provided.
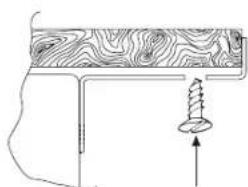
4
Fasten the bottom part of the appliance with the screws provided.
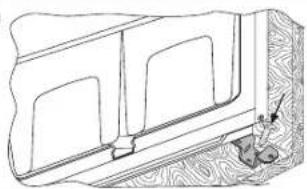
5
Apply the ventilation grill.Make sure that the top plate of the cabinet
6
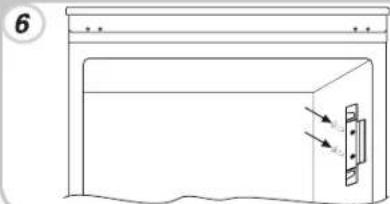
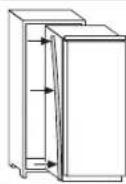
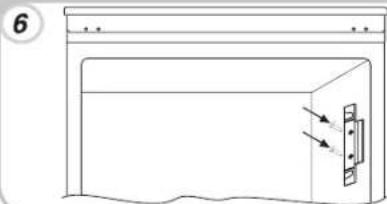
COUPLING OF THE BUILT-IN COLUMN PANELS TO THE DOORS OF THE APPLIANCE
The appliance is equipped with coupling devices for the appliance doors with the column panels (drive sleds).
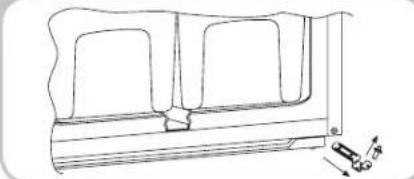
Fasten the sled in the inner part of the built-in column panel at the desired height and at approx. 20mm from the outer wire of the door.
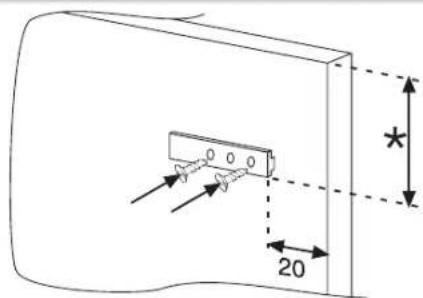
1
Open the doors of the built-in column and the fridge. Position the built-in loader in the slide, then fit it into the fridge door.
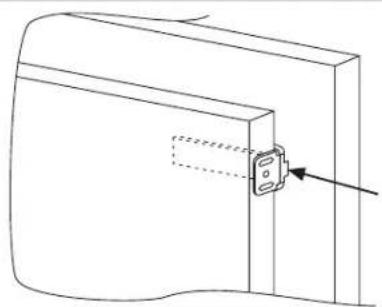
2
Mark the fixing points for the screws and drill with a bit of a diameter of 2.5.
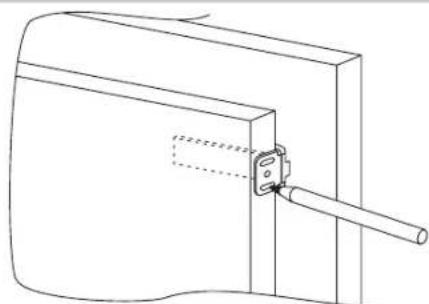
3
Connect the appliance door to the cabinet panel having the sled slots as references.
4
PRECAUTIONS FOR THE CORRECT FUNCTIONING
Once the product has been built in, position the rear part of the column in contact with the wall so as to prevent access to the compressor compartment.
For the product to operate correctly it is essential to allow adequate air circulation so as to cool down the condenser located in the rear part of the appliance.
For this reason, the column must be equipped with a rear chimney, whose upper opening must not be blocked and with a front slot which will be covered with a ventilation grill.
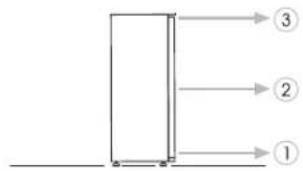
Dimensions of the column lock-pickings.
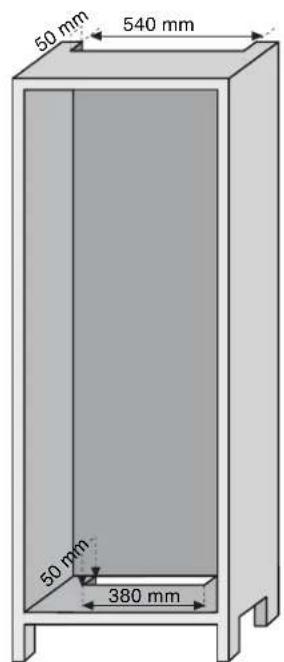
Dimensions of the gap to be left between the column and the ceiling.
REFRIGERATEUR TOUT UTILE ET 4*
THERMOSTAT INVERSOR LE
SPEISESCHRANK & KÜHLSCHRANK
TToTOBETHOTNVPaKaI TOePwKa KaTOnIV BiWote ToeVTeO tN OuaKeuH.
Eeipowto akyiotpo TIO Eivai ToTTOBtnevo OTN apotepi TIAupa TO BAlauou KAtauuucn.

Biodote to aykiotpo otn dejia TLEUPa Tou 0aauou katauucn.
Apaieote Ta Tmuata kauyns沃ov otuv, OTwS paiveta otnv Eikova.
TOTTOBEMOTE m ouokceun o opbia eon kai TEPIEVEET DUO WpEg pivn th eoeite OEaoupyia.
TOnoTeHnTe Ta TmuaTa OTWc paivetai Otny EIKOVA.
AIAZATAEIZ THE ΣYΣKEYHΣ KAI THE MONADAA Σ ENTOIXI ΣMOY
VOORZORGSGMAATREGELEN VOOR EEN JUISTE WERKING
SIZE OF THE APPLIANCE AND HOUSING UNIT
INSTALLERING AV APPARATET I SKAPET
KYLSKAP OCH KYLSKAP MED FRYS
KONTROLLPANELÄDRINGAV
INSTALLATION AF APPARATET I SKABET

- DEFROSTING
- OPENING OF THE DOORS
- FREEZER COMPARTMENT
- FREEZING
- REVERSING THE OPENING OF THE FREEZER COMPARTMENT
- SIZE OF THE APPLIANCE AND HOUSING UNIT
- INSTALLATION OF THE APPLIANCE IN THE COLUMN
- COUPLING OF THE BUILT-IN COLUMN PANELS TO THE DOORS OF THE APPLIANCE
- PRECAUTIONS FOR THE CORRECT FUNCTIONING
- REFRIGERATEUR TOUT UTILE ET 4*
- THERMOSTAT INVERSOR LE
- SPEISESCHRANK & KÜHLSCHRANK
- AIAZATAEIZ THE ΣYΣKEYHΣ KAI THE MONADAA Σ ENTOIXI ΣMOY
- VOORZORGSGMAATREGELEN VOOR EEN JUISTE WERKING
- INSTALLERING AV APPARATET I SKAPET
- KYLSKAP OCH KYLSKAP MED FRYS
- KONTROLLPANELÄDRINGAV
- INSTALLATION AF APPARATET I SKABET
Brand : ROSIERES
Model : RBO 3683A
Category : Fridge