
RBC 3380 A - Refrigerator ROSIERES - Free user manual and instructions
Find the device manual for free RBC 3380 A ROSIERES in PDF.


| Brand | Rosieres |
| Model | RBC 3380 A |
| Product type | Refrigerator-freezer |
| Height | 1772-1776 mm |
| Width | 560 mm |
| Depth | 650 mm |
| Supply voltage | 220-240 V / 50 Hz |
| Control type | Electronic with control panel on top door |
| SUPER freeze function | Yes (quick freeze, max duration 50 h) |
| Temperature alarm | Yes (red light at -7 °C, turns off below -8 °C) |
| Refrigerator defrost | Automatic |
| Freezer defrost | Manual (recommended if frost >3 mm) |
| Door opening direction reversal | Yes |
| Built-in possibility | Yes (column) |
| Door coupling device | Yes (pull-out slides) |
| Number of compressors | 1 or 2 depending on version |
| Safety stop | Yes (after 15 seconds pressing key (1)) |
| Ventilation grille supplied | Yes |
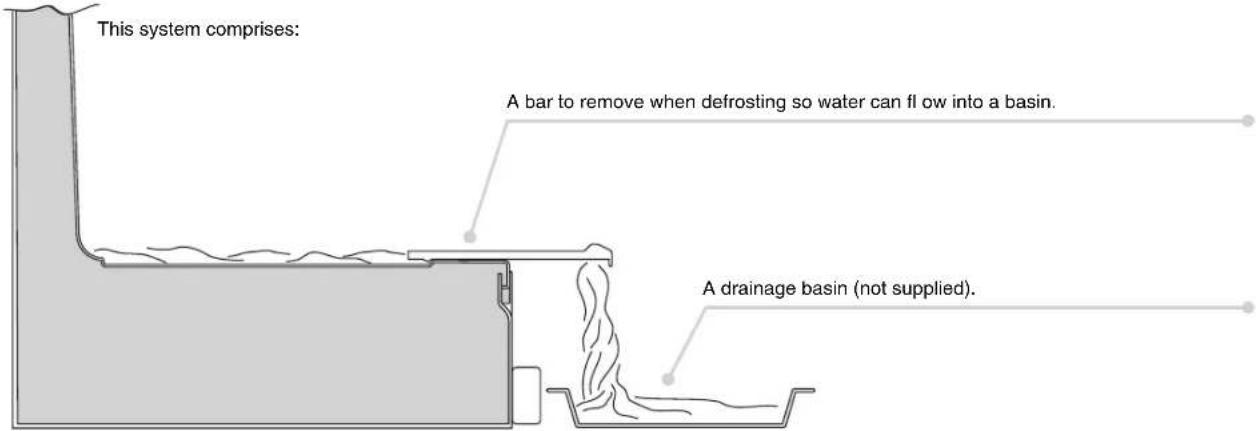
| Defrost water drainage system | Lever and tray (not supplied) |
Frequently Asked Questions - RBC 3380 A ROSIERES
User questions about RBC 3380 A ROSIERES
0 question about this device. Answer the ones you know or ask your own.
Ask a new question about this device
Download the instructions for your Refrigerator in PDF format for free! Find your manual RBC 3380 A - ROSIERES and take your electronic device back in hand. On this page are published all the documents necessary for the use of your device. RBC 3380 A by ROSIERES.
USER MANUAL RBC 3380 A ROSIERES
BUILT-IN FRIDGE FREEZER...... page 5 to page 8 EN
BUILT-IN COMBI FRIDGE-FREEZER from page 9 to page 12 EN
BUILT-IN COMBI
CONTROL PANEL FOR THE FREEZER COMPARTMENT OF THE TWO-COMPRESSOR REFRIGERATOR
DEFROSTING
(Figure 2)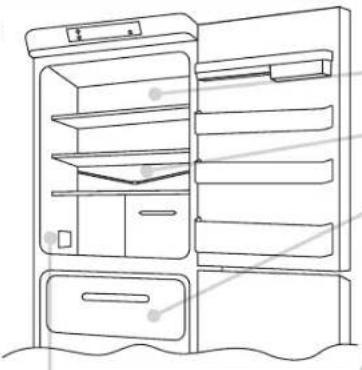
Remove the central hinge and its washers.
3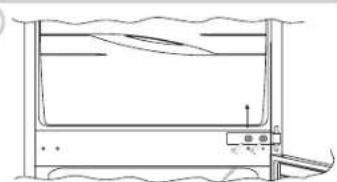
Open the top door of the fridge-freezer to access the control panel.
Press button (1) to turn the freezer compartment on/off.
The manufacturer normally supplies the appliance with the temperature on an intermediate setting, so you simply have to connect the appliance.
NOTE: if no temperature is displayed when you connect the appliance, press button (1) to turn on the freezer compartment.
The appliance's electronic memory stores the control panel settings when you turn off the appliance, so you simply have to press button (1) to turn the freezer compartment on again.
If the appliance stops because the electricity goes off, press button (1) to start up the fridge-freezer when the electricity comes back on.
NOTE: When you press the button and the freezer compartment is turned off, the compressor takes 15 seconds before it stops. If you press the button again during this time, the appliance will keep working. This prevents the appliance being accidentally turned off, for example when cleaning it.
Use these buttons to set the freezer compartment temperature.
Press button (2) to lower the temperature and button (3) to raise the temperature.
These LEDs show whether the temperature increases or decreases in the freezer compartment.
More LEDs come on and the lights get brighter as the temperature decreases.
The freezer compartment is off when all the LEDs are off. Each LED has two display modes. A dull light means the freezer is set to an intermediate temperature, while a bright light means the freezer is set to a colder temperature.
(Figure 1)
2

-25
-22
-18
1

3

-18
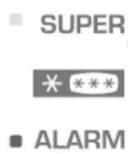
■ ALARM
The red alarm light comes on if the freezer compartment temperature is -7°C. If the temperature goes below -8°C the light will automatically turn off.
NOTE: If the appliance is turned off for a long time or is switched on for the first time, the red light will come on until the freezer temperature decreases.
The orange light comes on when SUPER mode is working. To select this mode, keep pressing button (2) so that all LEDs come on with a bright light, and press the button again until the orange light comes on.
This mode powers the compressor of the freezer compartment continually for a maximum of 50 hours, for quick freezing. Press button (3) to stop Super mode before the end of the 50-hour period.
NOTE: If the compressor is not operating when you select SUPER mode, the system will wait for the compressor to work before starting SUPER mode.
FREEZING OF THE DUAL COMPRESSOR FRIDGE
If you want considerably faster freezing times, you can also remove the *box. Set the freezer control panel to SUPER and the orange light will come on (see figure 1). After 24 hours, put foods directly on the metal rack. Freezing takes 24 hours and you can then put the box back and arrange the foods in the freezer. After 50 hours, the electronic memory board will automatically reset the temperature to the previous intermediate setting.
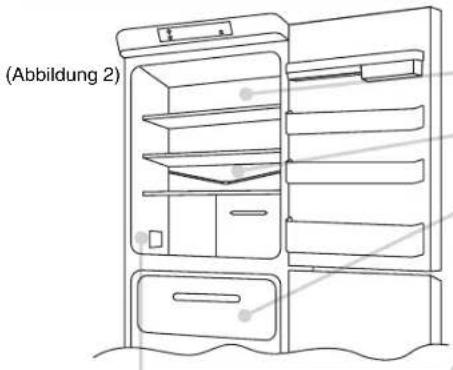
The maximum quantities of food that you can freeze are indicated on the rating plate (see figure 2).
Remove all boxes apart from the bottom one for freezing and storage standards' tests.
FREEZING OF THE SINGLE COMPRESSOR FRIDGE
Create the necessary space to contain the load to be frozen, which will be evenly distributed on the shelf. After a few hours, introduce the food to be frozen. After 24 hours, freezing is completed. In order to avoid excessive cooling of the food inside the fridge compartment during the freezing phase, if necessary, slightly move back the position of the thermostat when entering the food to be frozen. At the end of the freezing process, turn the thermostat knob back to the usual value.
For testing regulations of freezing and storage, remove all drawers except for the bottom one. The maximum quantity of foodstuffs that can be frozen is specified on the name plate (see figure 2).
SINGLE COMPRESSOR AND DUAL COMPRESSOR FRIDGE COMPARTMENT CONTROL PANEL BOX
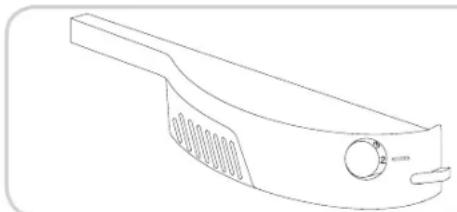
Turn the knob on the control panel to set and adjust the temperature of the fridge and freezer.
The thermostat panel is inside the fridge, in the top right-hand corner. The appliance is turned off when the knob is set to "0". We recommend you set the temperature to 2 or 3.
CAUTION: If the product is equipped with 2 compressors, it will be possible to switch off the freezer by acting directly upon the control panel of the freezer compartment.
DEFROSTING
(Figure 2)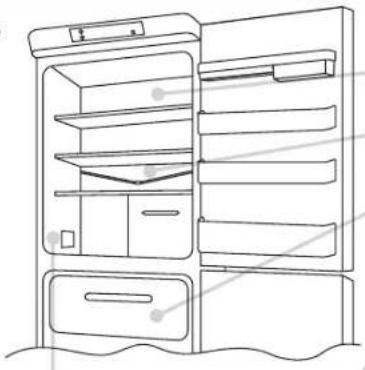
The fridge compartment is automatically defrosted when the compressor is not working.
A small amount of frost or drops of water on the back of the fridge compartment when the fridge is working is normal.
Make sure the water outlet is always clean. Make sure foods do not touch the back or sides of the fridge.
We recommend you defrost the freezer compartment when the frost is more than 3 mm thick.
N.B. This is the rating plate. If you need to contact our Service Department in the event of faults, remember to give them the information on the plate.
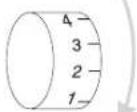
Note: If the room temperature is very warm, the appliance may work continuously and a layer of frost will deposit on the back of the fridge compartment. In this case, turn the knob to lower settings (1-2).
DRAINING WATER
The appliance has a system for draining water from defrosting.
REVERSING THE FRIDGE-FREEZER DOORS
Remove the pin and bushing from the top panel.
1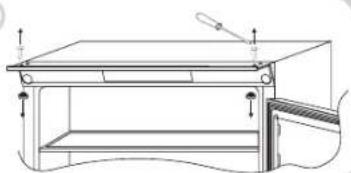
Remove the top door.
2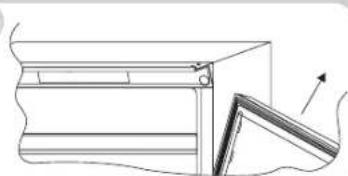
Remove the middle hinge and washers.
3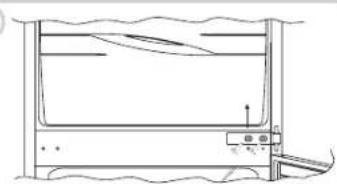
Remove the bottom door.
4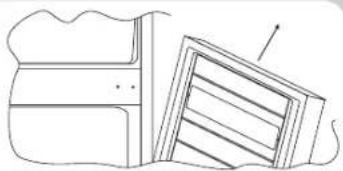
Remove the pin of the bottom right-hand hinge and refit it on the bottom left-hand hinge.
5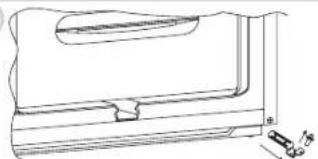
Reverse the bracket cover snap, which is snap-fitted on the bracket.
6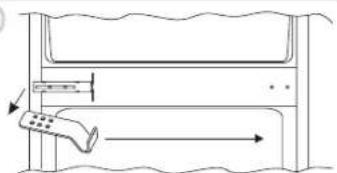
Fit the hinge and doors, working from top to bottom 1 → 2 → 3
7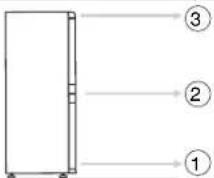
SIZE OF THE APPLIANCE AND UNIT
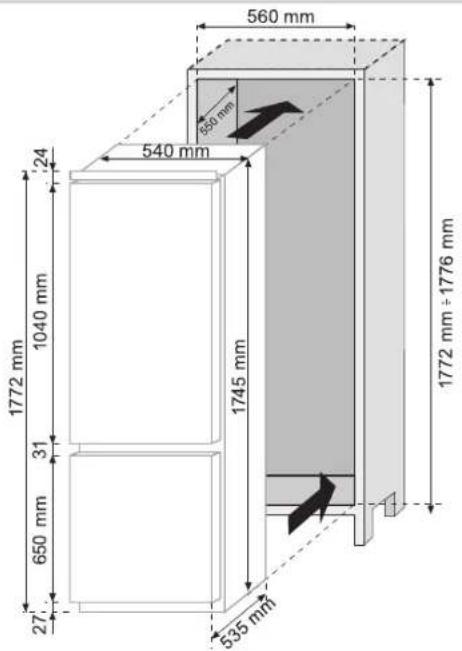
INSTALLING THE APPLIANCE IN A UNIT
Secure the seal (supplied) to the appliance, on the opposite side from the hinges.
1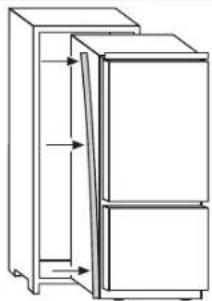
Install the appliance in the unit, aligning it on the opposite side from the hinges.
2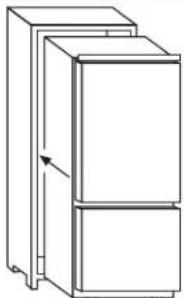
Make sure the top bracket of the appliance is against the unit.
3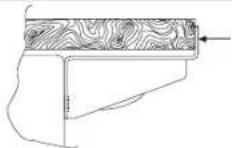
Secure the top of the appliance to the unit with the screws provided.
4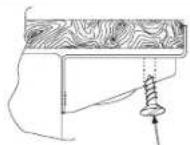
Secure the bottom of the appliance with the screws provided.
5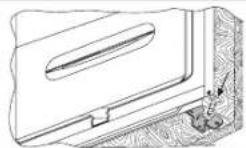
Fit the ventilation grid. Loosen the screws on the middle right-hand hinge.
6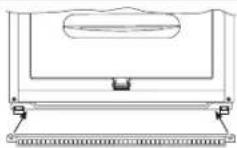
7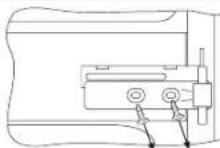
Position the plate close to the column.
8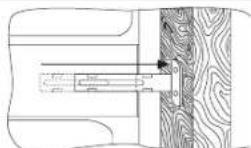
Fit the bracket to the unit with the screws provided.
9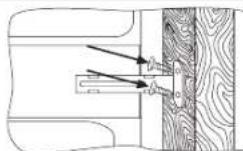
Tighten the screws in the middle right-hand hinge.
10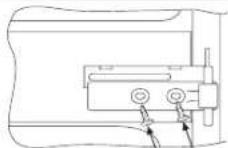
Repeat the same steps for the middle left-hand hinge.
11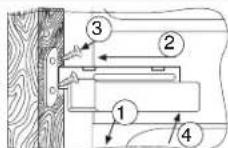
ALIGNING UNIT DOORS WITH THE FRIDGE-FREEZER DOORS
The appliance is supplied with fittings (slides and slide brackets) to align the fridge-freezer doors with the doors of the unit.
Fix the slide on the inside of the unit door, at the height you want. Make sure it is approximately 20 mm from the outside edge of the door.
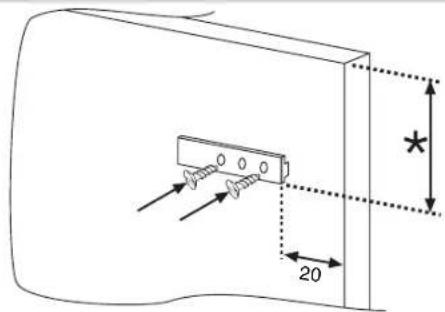
Open the doors of the unit and fridge. Position the slide bracket around the slide and secure to the appliance door.
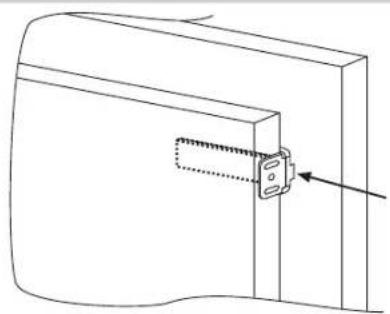
Mark the holes for the screws and drill with a 2.5 mm diameter bit.
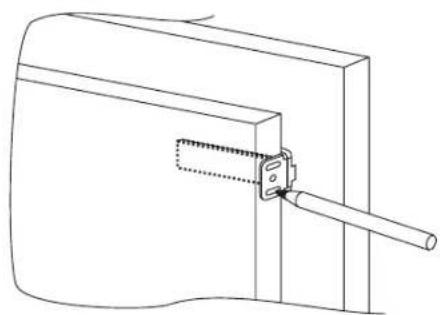
Fit the appliance door to the door of the unit, using the slots on the slide bracket as a guide.
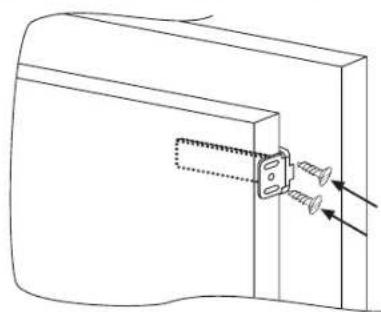
ENSURING YOUR FRIDGE-FREEZER WORKS PROPERLY
After fitting the appliance, place the rear of the unit against the wall to prevent access to the compressor unit.
To make sure the fridge-freezer works properly, air must circulate to cool the condenser which is situated at the bottom of the appliance.
The unit must have a rear outlet with top opening that is not obstructed and a front opening which is covered by the ventilation grid.
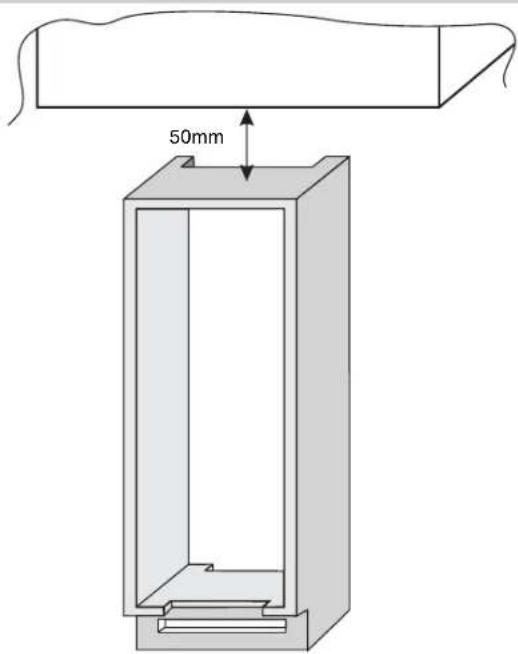
Size of the unit cut outs.
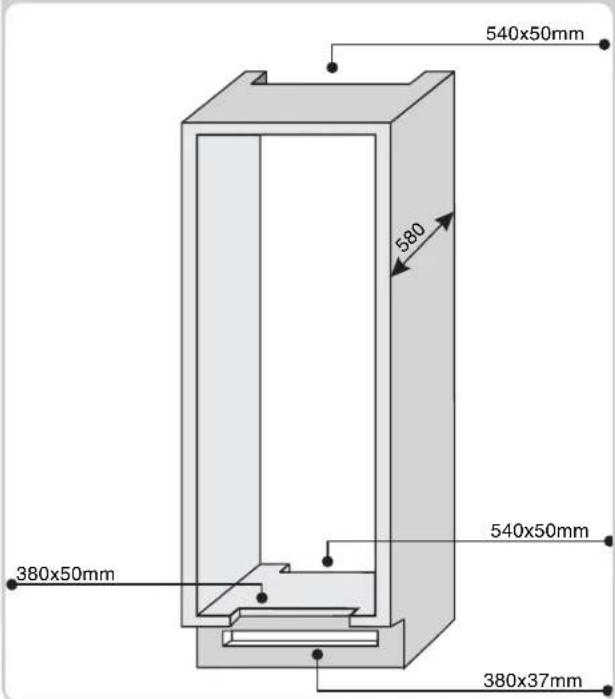
Room to leave between the unit and ceiling.
BUILT-IN COMBO
CONTROL PANEL OF THE FREEZER COMPARTMENT OF THE DOUBLE COMPRESSOR REFRIGERATOR
PRECAUTIONS TO ENSURE THE PROPER OPERATION OF THE APPLIANCE
DEFROSTING
DEFROSTING
(Figure 2)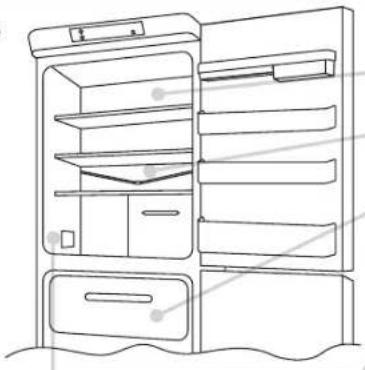
Remove the upper door.
2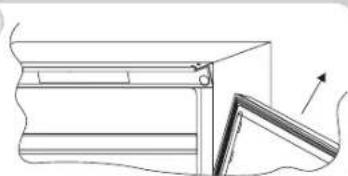
Remove the lower door.
4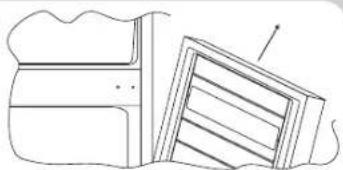
DEFROSTING
(Figure 2)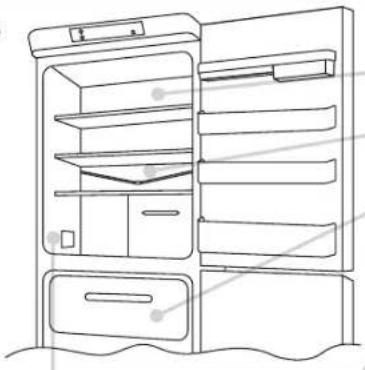
DEFROSTING
(Figure 2)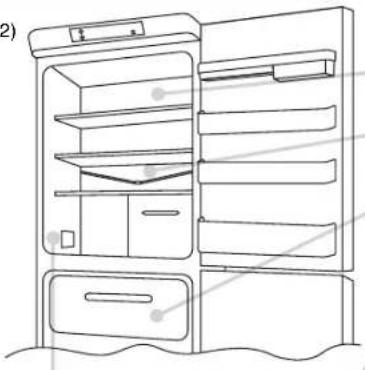
HOW TO ENSURE THE PROPER OPERATION OF THE APPLIANCE
MAKE SURE YOUR REFRIGERATOR-FREEZER IS WORKING PROPERLY
BUILT-IN REFRIGERATOR-FREEZER COMBINATION
CONTROL PANEL FOR THE FREEZER COMPARTMENT OF A REFRIGERATOR-FREEZER COMBINATION WITH TWO COMPRESSORS
DEFROSTING
(Figure 2)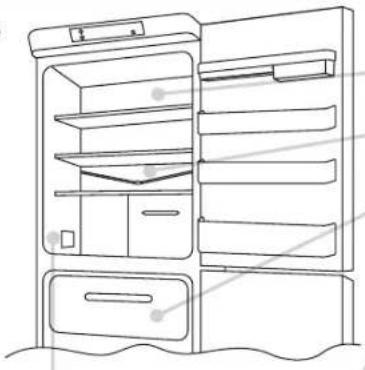
MAKE SURE YOUR REFRIGERATOR-FREEZER IS WORKING PROPERLY
DEFROSTING
(Figure 2)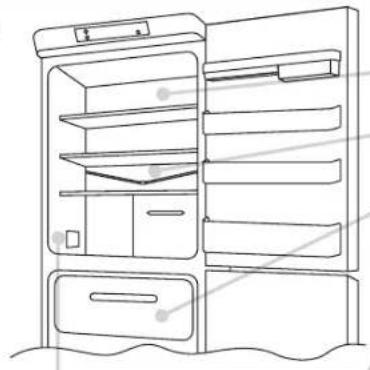
Remove the upper door.
2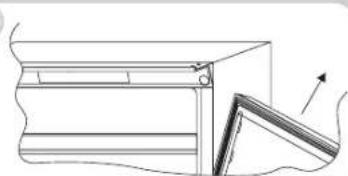
Remove the lower door.
4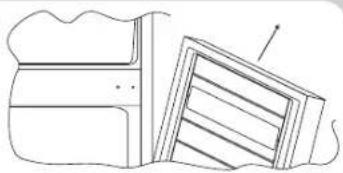
ENSURING YOUR REFRIGERATOR-FREEZER WORKS PROPERLY
FREEZING IN THE REFRIGERATOR WITH TWO COMPRESSORS
FREEZING IN THE REFRIGERATOR WITH ONE COMPRESSOR
DEFROSTING
(Figure 2)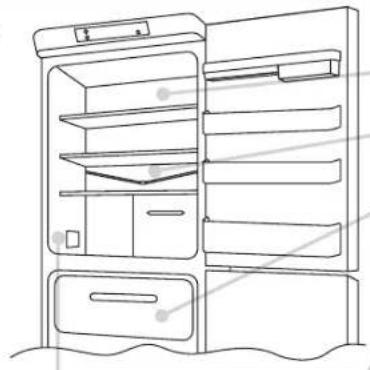
SIZE OF APPLIANCE AND BUILT-IN CABINET
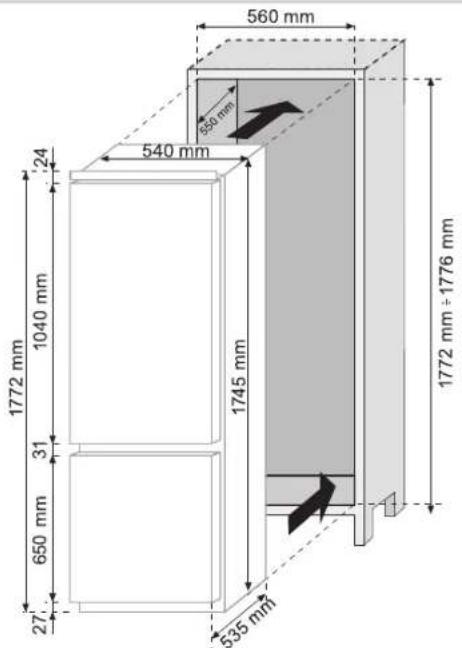
BUILDING IN THE APPLIANCE
Mark the screw holes and drill holes with a diameter of 2.5 mm.
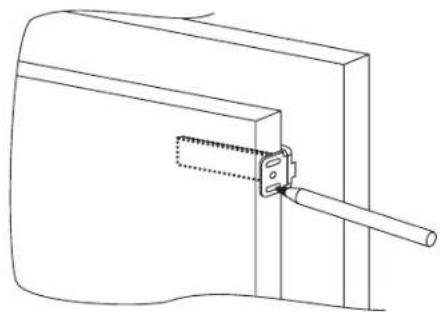
CHECK THAT YOUR REFRIGERATOR-FREEZER WORKS PROPERLY
BUILT-IN REFRIGERATOR AND FREEZER
CONTROL PANEL FOR THE FREEZER COMPARTMENT, REFRIGERATOR WITH DOUBLE COMPRESSOR
DEFROSTING
(Figure 2)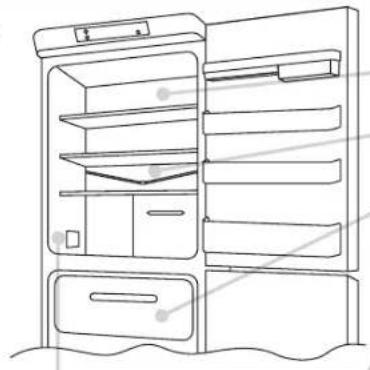
ENSURE THAT YOUR REFRIGERATOR AND FREEZER WORK PROPERLY
DEFROSTING
(Figure 2)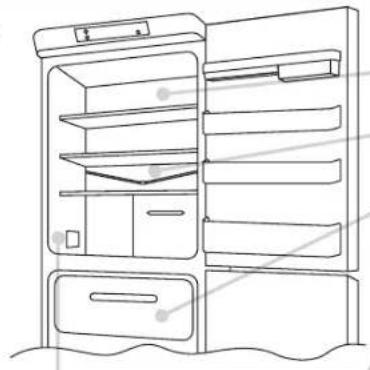
CHECK THAT THE REFRIGERATOR-FREEZER WORKS CORRECTLY

- BUILT-IN COMBI
- CONTROL PANEL FOR THE FREEZER COMPARTMENT OF THE TWO-COMPRESSOR REFRIGERATOR
- DEFROSTING
- FREEZING OF THE DUAL COMPRESSOR FRIDGE
- FREEZING OF THE SINGLE COMPRESSOR FRIDGE
- SINGLE COMPRESSOR AND DUAL COMPRESSOR FRIDGE COMPARTMENT CONTROL PANEL BOX
- DRAINING WATER
- REVERSING THE FRIDGE-FREEZER DOORS
- SIZE OF THE APPLIANCE AND UNIT
- INSTALLING THE APPLIANCE IN A UNIT
- ALIGNING UNIT DOORS WITH THE FRIDGE-FREEZER DOORS
- ENSURING YOUR FRIDGE-FREEZER WORKS PROPERLY
- BUILT-IN COMBO
- CONTROL PANEL OF THE FREEZER COMPARTMENT OF THE DOUBLE COMPRESSOR REFRIGERATOR
- PRECAUTIONS TO ENSURE THE PROPER OPERATION OF THE APPLIANCE
- HOW TO ENSURE THE PROPER OPERATION OF THE APPLIANCE
- MAKE SURE YOUR REFRIGERATOR-FREEZER IS WORKING PROPERLY
- BUILT-IN REFRIGERATOR-FREEZER COMBINATION
- CONTROL PANEL FOR THE FREEZER COMPARTMENT OF A REFRIGERATOR-FREEZER COMBINATION WITH TWO COMPRESSORS
- ENSURING YOUR REFRIGERATOR-FREEZER WORKS PROPERLY
- FREEZING IN THE REFRIGERATOR WITH TWO COMPRESSORS
- FREEZING IN THE REFRIGERATOR WITH ONE COMPRESSOR
- SIZE OF APPLIANCE AND BUILT-IN CABINET
- BUILDING IN THE APPLIANCE
- CHECK THAT YOUR REFRIGERATOR-FREEZER WORKS PROPERLY
- BUILT-IN REFRIGERATOR AND FREEZER
- CONTROL PANEL FOR THE FREEZER COMPARTMENT, REFRIGERATOR WITH DOUBLE COMPRESSOR
- ENSURE THAT YOUR REFRIGERATOR AND FREEZER WORK PROPERLY
- CHECK THAT THE REFRIGERATOR-FREEZER WORKS CORRECTLY
Brand : ROSIERES
Model : RBC 3380 A
Category : Refrigerator