
IAN 300049 - Coffee machine SILVERCREST - Free user manual and instructions
Find the device manual for free IAN 300049 SILVERCREST in PDF.
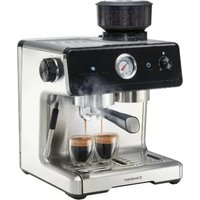
| Product Type | Filter coffee maker |
| Brand | SilverCrest |
| Model | IAN 300049 |
| Power | 1000 W |
| Mains voltage | 220-240 V ~ 50/60 Hz |
| Maximum capacity | 10 cups |
| Thermal carafe | Yes, with leak-proof lid |
| Timer function | Programmable up to 24 hours |
| Anti-drip system | Yes, valve in the filter holder |
| Automatic shut-off | Red LED turns off 2 minutes after completion |
| Paper filter | Size 1×4, folded at the sides |
| Maintenance | Clean after each use, descaling recommended monthly |
| Safety | Overheating protection, shut-off if water tank is empty |
| Warranty | 3 years (HOYER Handel GmbH) |
| Country of origin | Germany (distributing brand) |
Frequently Asked Questions - IAN 300049 SILVERCREST
User questions about IAN 300049 SILVERCREST
0 question about this device. Answer the ones you know or ask your own.
Ask a new question about this device
Download the instructions for your Coffee machine in PDF format for free! Find your manual IAN 300049 - SILVERCREST and take your electronic device back in hand. On this page are published all the documents necessary for the use of your device. IAN 300049 by SILVERCREST.
USER MANUAL IAN 300049 SILVERCREST
MACHINE A CAFÉ SKMD 1000 A1 KAT
HOYER Handel GmbH
Taskoprustraße 3
DF22761 Hamburg
DEUTSCHLAND
Stand der Informationen · Status of information · Version des informations · Stand van de informatie
Stav informaci - Estado de las informaciones - Estado das informacoes:
02/2018 ID:SKMD1000A1KAT18V1.2
MAQUINA DE
- Overview 17
- Intended purpose 18
- Safety instructions 18
- Items supplied 21
5.How to use 21
6.Before using for the first time 21
6.1 First cleaning 21
6.2 Setting the clock 21
- Operation 22
7.1 Drip Stop 22
7.2 Opening and closing the lid.. 22
7.3 Brewing coffee 22
7.4 Starting with the timer 23
- Cleaning 24
8.1 After every use 24
8.2 Dscaling 24
-
Storage 25
-
Disposal 25
11.Troubleshooting 25 - Technical specifications 26
- Warranty of the HOYER Handel GmbH 26
1. Overview
1 Lid
2 Water nozzles
3 Overflow of the water tank
4 Water tank
5 Water level indicator: minimum 2, maximum 10 cups
6 Coffee machine
7 Power cable with mains plug
8 Thermal jug
9 Lid with valve
10 Anti-drip valve
11 Filter holder
12 Handle of the filter holder
13 Display
14 Blue LED: is lit when the timer is activated
15 Changes between timer and time display
16 MIN For setting the minutes
17 HOUR For setting the hours
18 On/off button and activation of the timer
19 Red LED: is lit when the brewing process is activated
not shown: coffee spoon
Thank you for your trust!
Congratulations on the purchase of your new coffee machine.
For a safe handling of the device and in order to get to know the entire scope of features:
- Thoroughly read these user instructions prior to initial use.
- Above all, observe the safety instructions!
- The device should only be used as described in these user instructions.
- Keep these user instructions for reference.
- If you pass the device on to someone else, please include this copy of the user instructions. The operating instructions are a part of the product.
We hope you enjoy using your new coffee machine!
Symbols on your device

The food-safe material of devices with this symbol will not change the taste or smell of food.
2. Intended purpose
The coffee machine 6 is intended only for the production of filter coffee.
The device is designed for private, domestic use. The device must only be used indoors.
This device must not be used for commercial purposes.
Floreseeable misuse
WARNING! Risk of material damage!
- Never put fluids other than fresh drinking water into the water tank 4!
3. Safety instructions
Warnings
If necessary, the following warnings will be used in these user instructions:

DANGER! High risk: failure to observe this warning may result in injury to life and limb.
WARNING! Moderate risk: failure to observe this warning may result in injury or serious material damage.
CAUTION: low risk: failure to observe this warning may result in minor injury or material damage.
NOTE: circumstances and specifics that must be observed when handling the device.
Instructions for safe operation
- This device can be used by children from the age of 8 and people with restricted physical, sensory or intellectual abilities or people without adequate experience and/ or understanding, if they are supervised or instructed on how to use this device safely and if they are aware of the resulting hazards.
Children must not play with the device. - Cleaning and user maintenance must not be performed by children unless they are older than 8 years and supervised.
Children under the age of 8 must be kept away from the device and the power cable. - This device is also intended for use in the home and in applications similar to the home, for example ...
... in kitchens for staff in shops, offices and other commercial settings;
... on agricultural properties;
... by customers in hotels, motels and other residential facilities; ... in bed-and-breakfast establishments.
- This device is not intended to be operated using an external timer clock or a separate remote control system.
- Fill the device only to the maximum filling level, as boiling water may otherwise spray out.
- It is always necessary to close the lid when brewing coffee, as boiling water may otherwise spray out!
- The coffee machine, the power cable and the mains plug must not be immersed in water or other liquids.
- If the power cable of this device should become damaged, it must be replaced by the manufacturer, the manufacturer's customer service department or a similarly qualified specialist in order to avoid any hazards.
- Please take note of the chapter on cleaning (see “Cleaning” on page 24).
- Make sure that no liquid overflows onto the plug connections of the device.
- Remember that the surface of the heating element remains hot after use.

DANGER for children
Children must not play with packing material. Do not allow children to play with plastic bags. There is a risk of suffocation.

DANGER to and from pets and livestock
- Electrical devices can represent a hazard to pets and livestock. In addition, animals can also cause damage to the device. For this reason you should keep animals away from electrical devices at all times.

DANGER! Risk of electric shock due to moisture
- Protect the device from moisture, water drops and water splashes: failure to observe this instruction may result in an electrical shock hazard.
- If liquids get into the device, remove the mains plug immediately. Have the device checked before reusing.

DANGER! Risk of electric shock
- Never put the device into operation if there are visible damages to the device or the power cable or if the device has been dropped before.
- Only connect the mains plug to a properly installed and easily accessible grounded wall socket whose voltage corresponds to the specifications on the rating plate. The wall socket must continue to be easily accessible after the device is plugged in.
-
Ensure that the power cable cannot be damaged by sharp edges or hot points. Do not wrap the power cable around the device.
The device is not fully disconnected from the power supply, even after it is switched off. In order to fully disconnect it, pull out the mains plug. -
When using the device, ensure that the power cable cannot be trapped or crushed.
- When removing the mains plug from the wall socket, always pull the plug and never the cable.
- Disconnect the mains plug from the wall socket...
...if there is a fault,
... when you are not using the coffee machine,
... prior to cleaning the coffee machine, and
... during thunderstorms.
- To avoid any risk, do not make modifications to the device.

DANGER! Risk of injury through scalding
It is always necessary to close the lid when brewing coffee, as boiling water may otherwise spray out!
During the brewing process, hot steam escapes upwards through the lid. The lid becomes hot. Do not touch it or put your hands or other body parts in the steam under any circumstances.
Do not open the lid during the brewing process.
- Fill the coffee machine only to the maximum filling level (10), as hot water may otherwise spray out.
Do not bend over the coffee machine when you open the lid and the contents are still hot. There is a danger of being scalded by escaping steam.
WARNING! Risk of material damage
The device is fitted with non-slip silicon feet. Because furniture can be coated with a wide variety of varnishes and plastics, and treated with various care products, the possibility cannot be excluded that some of these substances have ingredients that may attack and
soften the silicon feet. If necessary, place a non-slip mat under the device.
- Never put fluids other than fresh drinking water into the coffee machine!
- Place the device on a stable, flat surface.
Do not use any astringent or abrasive cleaning agents.
4. Items supplied
1 coffee machine 6
1 thermal jug 8
1 filter holder 11
1 coffee spoon
1 copy of the user instructions
5. How to use

DANGER! Risk of electric shock!
-
Only connect the device to an easily accessible wall socket with earthing contacts whose voltage corresponds to the specifications on the rating plate. The wall socket must continue to be easily accessible after the device is plugged in.
-
Remove all packing material.
- Check to ensure that all parts are present and undamaged.
- Place the device on a dry, level, non-slip surface.
6. Before using for the first time
6.1 First cleaning
Clean all parts before using for the first time (see "Cleaning" on page 24).
- Fill the water tank 4 with clear water twice up to the 8 cup marking and start the brewing process (see "Operation" on page 22).
- Wait until the coffee machine 6 has cooled down. Then it is safe to use the device.
6.2 Setting the clock
Set the correct time so that the timer will start the coffee machine 6 at the right time.
NOTE: the timer cannot be set if a brewing process has already started (i.e. if the red LED 19 is lit).
- Connect the coffee machine 6 with the mains plug 7 to a wall socket. The wall socket must also be easy to reach after the plug has been inserted.
- Press the button 15 repeatedly until CLOCK appears at the top in the display 13.
- Press HOUR 17 in order to set the hours. Keep the button pressed to run through the options quickly.
- Press MIN 16 in order to set the minutes. Keep the button pressed to run through the options quickly.
- Wait for 10 seconds without pressing a button. After 10 seconds the time is stored.
NOTE: the set time will be lost after a few seconds in the case of a power cut. Then 12:00 will be shown again in the display 13. The clock has to be set again.
7. Operation

DANGER! Risk of injury through scalding!
- It is always necessary to close the lid 1 when brewing coffee, as boiling water may otherwise spray out!
During the brewing process, hot steam escapes upwards through the lid 1. The lid becomes hot. Do not touch it or put your hands or other body parts in the steam under any circumstances. - Do not open the lid 1 during the brewing process.
- Fill the coffee machine 6 only to the maximum filling level (10), as hot water may otherwise spray out.
Do not bend over the coffee machine 6 when you open the lid 1 and the contents are still hot. There is a danger of being scalded by escaping steam.
WARNING! Risk of material damage!
- Fill in water at least up to the 2 marking on the water level indicator 5. Otherwise the device may overheat.
- Do not fill in water above the 10 marking on the water level indicator 5. If too much water is put into the water tank 4, it will run out again through the overflow 3 and under the base of the coffee machine.
- Never put fluids other than fresh drinking water into the coffee machine 6.
7.1 Drip Stop
The filter holder 11 has an anti-drip valve 10. This ensures that no coffee drips out of the filter, when you remove the thermal jug 8.
- In order to ensure that the valve opens during the brewing process, it is important that the filter holder 11 is inserted correctly and the thermal jug 8 with lid 9 is positioned completely in the coffee machine. The lid 9 on the thermal jug 8 opens the anti-drip valve 10. Otherwise the filter can overflow.
7.2 Opening and closing the lid
In order that the appliance can work correctly, it is important for the thermal jug 8 to be placed in the coffee machine 6 and that the lid 9 is closed.
Figure B: lid 9 opened, coffee can be poured out.
Figure C: lid 9 closed, the thermal jug 8 can be placed in the coffee machine 6 or coffee is kept hot.
7.3 Brewing coffee
- Lift up the lid 1 of the coffee machine 6.
- Only fill fresh, cold tap water into the water tank 4. Hot or carbonated water can result in malfunctions.
Fill the water tank 4 up to desired marking with water (for not more than 10 cups: 10).
-
Hold the filter holder 11 by its handle 12 and lower it into the holder of the coffee machine. Turn the filter holder 11 in such a way that it can be lowered completely into the holder. Fold the handle 12 of the filter holder 11 towards the front.
-
Place a paper filter (size 1 × 4 ) with folded sides in the filter holder 11. When it is folded, the paper filter fits better in the filter holder 11 and the seams are prevented from tearing.
- Place coffee grounds into the filter. For medium-strength coffee, put one coffee spoon (around 7 - 8g ) of coffee powder per cup into the filter. Use ground coffee powder for filter coffee. If you grind the coffee yourself, grind it on a medium fineness level.
- Close the lid 1 of the coffee machine 6.
- It is very important to screw the lid 9 on the thermal jug 8. The lid 9 is closed by turning it clockwise.
- Place the thermal jug 8 in the coffee machine 6.
- Press 18. The red LED 19 lights up and the brewing process will start after a short time.
- The red LED 19 goes off approx. 2 minutes after the end of the brewing process.
- Figure B: take the thermal jug 8 by the handle out of the coffee machine 6, open the lid 9 slightly (by turning anticlockwise) and pour out the coffee.
- Figure C: close the lid 9 again (by turning clockwise) to keep the coffee hot.
NOTE: the brewing process can be stopped by pressing the button 18. Press the button 18 repeatedly until all LEDs have gone off.
7.4 Starting with the timer
Enter the desired time if the timer shall start the coffee machine at a certain time.
NOTE: the timer cannot be set if a brewing process has already started (i.e. if the red LED 19 is lit).
The timer can be set up to 24 hours in advance.
- Connect the coffee machine 6 with the mains plug 7 to a wall socket.
- Fill the coffee machine as usual with coffeepowder and water.
- Close the lid 1 of the coffee machine 6.
- It is very important to screw the lid 9 on the thermal jug 8. The lid 9 is closed by turning it clockwise.
- Place the thermal jug 8 in the coffee machine 6.
- Press the button 15 repeatedly until TIMER appears at the top in the display 13.
- Press HOUR 17 in order to set the hours. Keep the button pressed to run through the options quickly.
- Press MIN 16 in order to set the minutes. Keep the button pressed to run through the options quickly.
- Press 18 twice. The blue LED 14 lights up. This indicates that the timer is active.
- At the time that has been set, the brewing process will start automatically and the red LED 19 will light up.
- The red LED 19 goes off approx. 2 minutes after the end of the brewing process.
NOTE: you can stop the timer by pressing the 18 button. Press 18 once while the blue LED 14 is lit. All LEDs are off.
8. Cleaning

DANGER! Risk of electric shock!
- Pull out the mains plug 7 from the wall socket before cleaning the coffee machine 6.
The coffee machine 6 and the power cable with the mains plug 7 must not be immersed in water or other liquids.

DANGER! Risk of injury through scalding!
The coffee machine 6 becomes very hot during operation. Allow it to cool down before cleaning.
WARNING! Risk of material damage!
Do not use any astringent or abrasive cleaning agents.
NOTE: in order to start the brewing process with clear water or a descending solution, the filling of the water tank 4 must not exceed the 8 cup marking. Otherwise, the thermal jug 8 may overflow.
8.1 After every use
Clean the device after every use, if possible.
- Disconnect the mains plug 7 from the wall socket.
- Open the lid 1.
- Lift up the handle 12 of the filter holder 11, remove the filter holder and dispose of the used paper filter.
- Rinse out the filter holder 11 with warm water.
- Rinse out or off the thermal jug 8 and its lid 9 with clear water. Only in the case of stubborn residues, you should use a little mild detergent and a rinsing brush which is not too hard. Then rinse all parts thoroughly with clear water.
-
Wipe down the coffee machine 6 and the power cable 7 with a damp cloth when required. Dry with a dry cloth.
-
Allow all parts to dry completely before you put them away or use the device again.
NOTE: the thermal jug 8 can also be cleaned on the outside with stainless steel cleaners from specialist retailers.
8.2 Descaling
Time intervals for descending
The intervals for descending are dependent on the hardness of the water, and how often you use the device. Where the hardness of the water is medium or high, we recommend descending monthly.
If using tap water, you can find out the hardness of the water in the area where you live by inquiring at your local waterworks.
After some time, the boiling process will result in limescale being deposited in parts of the coffee machine (depending on the hardness of the water used). You should remove this at regular intervals, because otherwise the power consumption of the device will increase.
- Turn off the coffee machine 6 and allow it to cool down completely.
- Place the descending agent into the water tank 4. Use a liquid, environmentally friendly descending agent based on citric acid, and follow the instructions of the manufacturer.
- Fill the water tank 4 to the 8 cup marking.
- Close the lid 1 of the coffee machine 6.
- It is very important to screw the lid 9 on the thermal jug 8.
- Place the thermal jug 8 in the coffee machine 6.
- Press 18. The red LED 19 lights up and the brewing process will start after a short time.
- Allow approximately half of the descending agent to run through the machine,
and then switch off the device by pressing 18.
- Leave the descending agent to work for approx. 30 minutes.
- Switch the coffee machine 6 on by pressing 口 18 and allow the rest of the descending agent to run through.
- The red LED 19 goes off approx. 2 minutes after the end of the brewing process.
- Empty the thermal jug 8 and rinse it out with water.
- Fill the water tank 4 with clear water twice more up to the 8 cup marking and start the brewing process.
9. Storage

DANGER for children!
-
Keep the device out of the reach of children.
-
Clean the coffee machine 6 and rinse out the thermal jug 8.
- Leave the cleaned coffee machine 6 and the cleaned accessories to dry before you assemble them and put them away.
10. Disposal
This product is subject to the provisions of European Directive 2012/19/EC. The symbol showing a wheelie bin crossed through indicates that the product requires separate refuse collection in the European Union. This applies to the product and all accessories
marked with this symbol. Products identified with this symbol may not be discarded with normal household waste, but must be taken
to a collection point for recycling electric and electronic appliances. Recycling helps to reduce the consumption of raw materials and protect the environment.
Packaging
When disposing of the packaging, make sure you comply with the environmental regulations applicable in your country.
11. Troubleshooting
If your device fails to function as required, please try this checklist first. Perhaps there is only a minor problem, and you can solve it yourself.

DANGER! Risk of electric shock!
Do not attempt to repair the device yourself under any circumstances.
| Fault | Possible causes/Action |
| No function | Has the device been connected to the power supply?Check the connection. |
| The quality of the coffee brewed is becoming worse. | The coffee machine 6 needs to be descaled. |
| The boiling process takes longer for the same volume. | |
| The lid 1 of the coffee machine does not close properly. | Is the filter holder 11 correctly inserted into the coffee machine 6? |
12. Technical specifications
| Model: SKMD 1000 A1 KAT |
| Mains voltage: 20-240 V ~ 50/60 Hz |
| Protection class: I |
| Power rating: 1,000 W |
Technical Symbols
| GS | Certified Safety. Devices must comply with the generally acknowledged rules of technology and the German Product Safety Act (Produktssicherheitsgesetz - ProdSG). |
| CE | With the CE marking, HOYER Handel GmbH declares the con-formity with EU guidelines. |
| This symbol reminds you to dis-pose of the packaging in an envi-ronmentally friendly manner. | |
| 21PAP | Recyclable materials: cardboard (except corrugated cardboard) |
Subject to technical modifications.
13. Warranty of the HOYER Handel GmbH
Dear Customer, your device is provided with a 3 year warranty starting with the purchase date. In the event of product defects, you are entitled to statutory rights against the vendor. These statutory rights are not restricted by our warranty presented in the following.
Warranty conditions
The warranty period starts with the purchase date. Please keep the original purchase receipt in a safe place. This document is required to verify the purchase.
If within three years from the purchase date of this product a material or factory defect occurs, the product will be repaired or replaced by us - at our discretion - free of charge to you. This warranty implies that within the period of three years the defective device and the purchase receipt are presented, including a brief written description of the defect and the time it occurred.
If the defect is covered by our warranty, the repaired or a new product will be returned to you. No new warranty period starts with a repair or replacement of the product.
Warranty period and statutory claims for defects
The warranty period is not extended when the warranty has been claimed. This also applies to replaced and repaired parts. Any damages and defects already existing at the time of purchase must be reported immediately upon unpacking. Repairs arising after the expiration of the warranty period are subject to a charge.
Warranty coverage
The device was produced carefully according to strict quality guidelines and tested diligently prior to delivery.
The warranty applies to material or factory defects.
Excluded from the warranty are wear parts subject to normal wear and damages to fragile parts, e.g. switches, batteries, lamps or other parts manufactured from glass.
This warranty expires if the product is damaged, not used as intended or not serviced. For the proper operation of the product, all instructions listed in the operating instructions must be observed carefully. Any form of use and handling that is advised against in the operating instructions or warned against must always be avoided.
The product is only intended for private and not for commercial use. In the case of incorrect and improper treatment, use of force and interventions not performed by our authorised Service Centre, the warranty shall cease.
Handling in case of a warranty claim
In order to ensure prompt processing of your matter, please observe the following notes:
- Please keep the article number IAN:300049 and the purchase receipt as a purchase verification for all inquiries.
- The article number can be found on the rating plate, an engraving, the title page of your instructions (in the bottom left), or as a label on the rear or underside of the device.
- If faulty operation or other defects occur, first contact the Service Centre listed in the following by telephone or email.
- Then, you are able to send a product reported as defective free of charge to the service address specified to you, including the purchase receipt and the information on the defect and when it occurred.

Please visit www.lidl-service.com to download this and many other manuals, product videos and software.

Service Centre
GB Service Great Britain
Tel.: 0871 5000 720 (£ 0.10/ Min.)
E-Mail: hoyer@lidl.co.uk
IE Service Ireland
Tel.: 1890 930 034
(0,08 EUR/ Min., (peak))
(0,06 EUR/ Min., (off peak))
E-Mail: hoyer@lidl.ie
MT Service Malta
Tel.: 80062230
E-Mail: hoyer@lidl.com(mt
CY Service Cyprus
Tel.: 80094409
E-Mail: hoyer@lidl.com.cy
IAN:300049
Supplier
Please note that the following address is no service address. First contact the aforementioned Service Centre.
HOYER Handel GmbH
Taskoprüstae 3
DE-22761 Hamburg
GERMANY
Sommaire


- Overview
- Thank you for your trust!
- Symbols on your device
- Intended purpose
- Floreseeable misuse
- Safety instructions
- Warnings
- Instructions for safe operation
- DANGER for children
- DANGER to and from pets and livestock
- DANGER! Risk of electric shock due to moisture
- DANGER! Risk of electric shock
- DANGER! Risk of injury through scalding
- WARNING! Risk of material damage
- Items supplied
- How to use
- DANGER! Risk of electric shock!
- Before using for the first time
- First cleaning
- Setting the clock
- Operation
- DANGER! Risk of injury through scalding!
- WARNING! Risk of material damage!
- Drip Stop
- Opening and closing the lid
- Brewing coffee
- Starting with the timer
- Cleaning
- After every use
- Descaling
- Time intervals for descending
- Storage
- DANGER for children!
- Disposal
- Packaging
- Troubleshooting
- Technical specifications
- Technical Symbols
- Warranty of the HOYER Handel GmbH
- Warranty conditions
- Warranty period and statutory claims for defects
- Warranty coverage
- Handling in case of a warranty claim
- Service Centre
- Supplier
- Sommaire
Brand : SILVERCREST
Model : IAN 300049
Category : Coffee machine