
SKA 1000 A1 - Coffee machine SILVERCREST - Free user manual and instructions
Find the device manual for free SKA 1000 A1 SILVERCREST in PDF.


| Product Type | Coffee Machine (Filter) |
| Brand | SilverCrest |
| Model | SKA 1000 A1 |
| Power Consumption | 1000 W |
| Voltage | 220-240 V ~ 50/60 Hz |
| Water Tank Capacity | 1.25 L |
| Number of Cups | Up to 10 cups |
| Dimensions (W x D x H) | Approx. 30 x 20 x 35 cm |
| Weight | Approx. 2.5 kg |
| Cable Length | Approx. 0.8 m |
| Brewing Temperature | 92-96 °C |
| Filter Type | Paper filter (size 4) |
| Keep Warm Function | Yes, automatic |
| Auto Shut-off | Yes (after 40 minutes) |
| Anti-drip System | Yes |
| Water Level Indicator | Yes |
| Descaling Indicator | No |
| Detachable Water Tank | No |
| Material | Plastic and stainless steel |
| Cleaning | Removable filter basket, washable jug |
| Safety Features | Overheat protection, auto shut-off |
| Spare Parts Available | Carafe, filter basket |
| Repairability Index | Moderate (common parts) |
Frequently Asked Questions - SKA 1000 A1 SILVERCREST
User questions about SKA 1000 A1 SILVERCREST
0 question about this device. Answer the ones you know or ask your own.
Ask a new question about this device
Download the instructions for your Coffee machine in PDF format for free! Find your manual SKA 1000 A1 - SILVERCREST and take your electronic device back in hand. On this page are published all the documents necessary for the use of your device. SKA 1000 A1 by SILVERCREST.
USER MANUAL SKA 1000 A1 SILVERCREST
Operating instructions
IAN 279509
DE AT CH
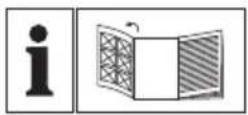
Before reading, unfold the page containing the illustrations and familiarise yourself with all functions of the device.
| GB | Operating | instructions | Page | 17 |

Table of contents
Introduction 2
Copyright....2
KOMPERNASS HANDELS GMBH
BURGSTRASSE 21
44867 BOCHUM
GERMANY
www.kompernass.com
Contents
Introduction 18
Copyright 18
Limitation of liability 18
Proper use....18
Package contents/Transport inspection 19
Disposal of the packaging 19
Safety information 20
Appliance elements 22
Set-up and connection 22
Setting the time 23
Before first use 23
Making coffee 24
Inserting ground coffee....24
Filling the appliance with water 25
Initiating the brewing process 25
Pouring coffee....26
Timer function 26
Cleaning and care 27
Cleaning 27
Descaling the appliance 28
Storage 29
Technical specifications 29
Disposal 29
Kompernass Handels GmbH warranty 30
Service 31
Importer 31
Introduction
Congratulations on the purchase of your new device.
You have chosen a high-quality product. The operating instructions are part of this product. They contain important information about safety, usage and disposal. Before using the product, please familiarise yourself with all operating and safety instructions. Use the product only as described and for the range of applications specified. Please also pass these operating instructions on to any future owner.
Copyright
This documentation is protected by copyright.
Any copying or reproduction, including in the form of extracts, or any reproduction of images (even in a modified state), is permitted only with the written authorisation of the manufacturer.
Limitation of liability
All technical information, data and instructions for installation and operation contained in these operating instructions correspond to the latest version at the time of printing and, to the best of our knowledge, take into account our previous experience and expertise.
No claims can be derived from the details, illustrations and descriptions in these instructions.
The manufacturer assumes no responsibility for damage caused by failure to observe these instructions, improper use, incompetent repairs, unauthorized modifications, or the use of non-approved replacement parts.
Proper use
This appliance is intended exclusively for preparing coffee in domestic households. It is exclusively intended for use in private households. Do not use it for commercial applications.
The device is not intended for any other purpose, nor for use beyond the scope described.
WARNING
Danger if not used as intended!
Failure to use the appliance for its intended purpose and/or any other type of use can be hazardous.
▶ Use the appliance only for its intended purpose. ▶ Observe the procedures described in these operating instructions.
No claims of any kind will be accepted for damage arising as a result of incorrect use.
The risk shall be borne solely by the user.
Package contents/Transport inspection
WARNING
Risk of suffocation!
Do not allow children to play with packaging materials. There is a risk of suffocation.
The appliance is supplied with the following components as standard:
Coffee Machine
Vacuum flask
Filter holder
Measuring spoon
Operating instructions
NOTE
Check the package for completeness and signs of visible damage.
Contact the service hotline if the contents are incomplete or damaged due to defective packaging or due to transport.
Disposal of the packaging
The packaging protects the device from damage during transport. The packaging materials have been selected for their environmental friendliness and ease of disposal, and are therefore recyclable.

Returning the packaging to the material cycle conserves raw materials and reduces the amount of waste that is generated. Dispose of packaging materials that are no longer needed in accordance with applicable local regulations.
NOTE
If possible, keep the original device packaging for the entire duration of the warranty period so that the device can be packaged properly for return shipment in the event of a warranty claim.
Safety information
To ensure safe operation of the device, follow the safety guidelines set out below:
⚠ WARNING - RISK OF INJURY!
■ Check the appliance for visible external damage before use. Do not operate a device that has been damaged or dropped.
■ The appliance and its connecting cable must be kept away from children younger than 8 years old.
■ This appliance may be used by children aged 8 years or older if they are supervised or have been instructed how to use the appliance safely and have understood the potential risks.
■ This appliance may be used by people with reduced physical, sensory or mental capabilities or lack of experience and/or knowledge if they are supervised and have been instructed in how to use the appliance safely and have understood the potential risks.
■ Cleaning and user maintenance must not be carried out by children, unless they are aged 8 or older and are supervised.
■ Do not allow children to use the appliance as a toy.
■ All repairs must be carried out by authorised specialist companies or by the Customer Service department. Improper repairs can pose significant risks to the user. It will also invalidate any warranty claims.

Never submerse the appliance in water or other liquids. Danger of electric shock!
■ Never touch the appliance with wet or moist hands. ■ To avoid risks, arrange for defective plugs and/or power cables to be replaced at once by qualified technicians or our Customer Service department. ■ Risk of burns! Some parts can become very hot during use! ■ Hot steam is produced while using the appliance. Ensure that you do not scald yourself! Keep a safe distance away from the steam. ■ The appliance should only be connected to correctly installed and earthed mains power sockets.
CAUTION - PROPERTY DAMAGE
■ Defective components must always be replaced with original replacement parts. Compliance with safety requirements can only be guaranteed if original replacement parts are used.
Protect the appliance from penetration by moisture and liquids.
Protect the appliance from impacts, dust, chemicals, extreme temperature fluctuations, etc., and keep it away from sources of heat (ovens, radiators).
Always remove the mains plug from the mains outlet. Never pull on the power cable.
Do not use an external timer switch or a separate remote control system to operate the appliance.
Never operate the appliance outdoors. This appliance is intended for indoor use only.
Appliance elements
Figure A:
① Appliance lid ② Water overflow ③ Green control lamp AUTO ④ AUTO/PROGRAMM button ⑤ MIN button ⑥ Water level gauge ⑦ Vacuum flask lid ⑧ Vacuum flask ⑨ STD button ⑩ AN/AUS button ⑪ Red control lamp BRÜHVORGANG ⑫ Display ⑬ Water tank ⑭ Filter holder
not illustrated:
Measuring spoon
Set-up and connection

DANGER - RISK OF ELECTRICAL SHOCK!
Never use the appliance near water that is, for example, contained in a bath, shower, wash basin or other vessels. Always place the appliance on a dry surface. The proximity to water is hazardous, even if the appliance is switched off. Always disconnect the plug from the mains power socket after use.
CAUTION - PROPERTY DAMAGE!
Never place the appliance near sources of heat. Always place the appliance on a level, heat-resistant surface in order to prevent damage to the appliance and surface.
1) Place the appliance on a level and heat-resistant surface. 2) Place the vacuum flask ⑧ in the device, making sure that the vacuum flask lid ⑦ is closed. 3) Insert the plug into the mains power socket. The display ⑫ will light up and read "12:00".
Setting the time
1) Press the AUTO/PROGRAMM button ④. The display ⑫ will read CLOCK.
2) Within 10 seconds, press the STD button ⑨ in order to set the desired time in hours:
- Press the STD button ⑨ repeatedly until the desired number of hours is shown in the display ⑫.
Alternatively,
- Press and hold the STD button ⑨ until you reach the desired number of hours. This will cause the hour display to cycle faster.
3) Once you have set the desired number of hours, press the MIN button ⑤ in order to set the minutes:
- Press the MIN button ⑤ repeatedly until the desired number of minutes is shown in the display ⑫.
Alternatively,
- Press and hold the MIN button ⑤ until you reach the desired number of minutes. This will cause the minute display to cycle faster.
4) Once you have set the desired time, wait for 10 seconds without pressing any buttons. The display ⑫ will no longer show CLOCK. The time has been saved.
Before first use
CAUTION - PROPERTY DAMAGE!
▶ Never fill more than 8 cups of water into the water tank ⑬ (MAX mark). A small hole is located on the back of the appliance. It is a water overflow ②, which prevents excessive amounts of water from being filled into the machine. If the water level exceeds the MAX mark, the water will escape through the water overflow ② onto the worktop. If the water tank ⑬ is full (8 cups of water) and the appliance is moved, water may spill through the water overflow ②. ▶ Never fill the water tank with less than 2 cups of water ⑬. Use the water level gauge ⑥ on the water tank ⑬.
1) Unscrew the lid ⑦ and remove it from the vacuum flask ⑧. 2) Carefully rinse the vacuum flask ⑧ with water. 3) Open the appliance lid ① and remove the filter holder ⑭ from the appliance.
4) Rinse the filter holder 14 and lid 7 of the vacuum flask 8 with clean water. Place the filter holder 14 back in the appliance. Screw the lid 7 back on the vacuum flask 8.
5) Fill the water tank ⑬ with water. To empty it again, carefully turn over the appliance over a sink and pour out the water. When you turn the appliance around again, water will escape from the appliance. Hold the appliance over the sink until no more water escapes. Then carefully dry the appliance.
6) Fill the water tank ⑬ with water up to the MAX mark.
7) Close the appliance lid ①.
8) Place the lid ⑦ back on the vacuum flask ⑧. Place the vacuum flask ⑧ in the appliance.
9) Press the ON/OFF button ⑩. The display ⑫ will read BREW and the red control lamp BREWING PROCESS ⑪ will light up. Wait until the brewing process finishes and you hear 6 acoustic signals.
10) Empty the vacuum flask ⑧ and rinse it with clean water again.
11) Wait until the appliance has cooled down, then rinse the filter holder ⑭ with clean water again.
The appliance is now ready for use.
Making coffee
Inserting ground coffee
1) Open the appliance lid ①. The filter holder ⑭ is already inserted.
2) Take a paper coffee filter (size 1 x 4) and fold its sides over. Insert the paper filter into the filter holder ⑭.
3) Use the measuring spoon to insert ground coffee into the filter.
NOTE
▶ Use approximately one flat measuring spoon of ground coffee for each cup of filter coffee. If the filter coffee is too strong, reduce the amount of ground coffee per cup.
Filling the appliance with water
⚠️ WARNING - HEALTH HAZARD!
▶ Only use drinking water for your coffee!
The appliance lid ① is still open after adding the ground coffee.
1) Use the vacuum flask ⑧ or another container to fill the water tank ⑬ with water. Fill enough water for your desired amount of coffee into the water tank ⑬. Use the water level gauge ⑥ on the water tank ⑬ for reference.
2) Place the vacuum flask ⑧ into the device, making sure that the vacuum flask lid ⑦ is shut tight.
CAUTION - PROPERTY DAMAGE!
▶ Never fill more than 8 cups of water into the water tank ⑬ (MAX mark). A small hole is located on the back of the appliance. It is a water overflow ②, which prevents excessive amounts of water from being filled into the machine. If the water level exceeds the MAX mark, the water will escape through the water overflow ② onto the worktop. If the water tank ⑬ is full (8 cups of water) and the appliance is moved, water may spill through the water overflow ②. ▶ Never fill the water tank with less than 2 cups of water ⑬. Use the water level gauge ⑥ on the water tank ⑬.
3) Close the appliance lid ①.
NOTE
▶ During the brewing process, the amount of water decreases: some evaporates, while the coffee grounds also retain some water. This is why the volume of coffee in the vacuum flask ⑧ will be slightly lower than the amount of water you filled into the water tank ⑬.
Initiating the brewing process
After you fill with the ground coffee and water:
WARNING - RISK OF INJURY!
▶ Never open the appliance lid ① while brewing is in progress! Bursts of hot steam may be released. Risk of scalding!
1) Press the AN/AUS button ⑩. The red control lamp BRÜHVORGANG ⑪ will light up and the display ⑫ will read BREW. The appliance will start brewing.
NOTE
Thanks to the anti-drip function of this appliance, you can remove the vacuum flask ⑧ and pour coffee even during the brewing process. Make sure to put the vacuum flask ⑧ back into the device within 30 seconds, however.
2) Once the coffee has run through the appliance completely and no more coffee is dripping into the vacuum flask ⑧, you will hear 6 acoustic signals. The red control lamp BRÜHVORGANG ⑪ goes out and BREW is no longer displayed.
NOTE
▶ You can use the AN/AUS button ⑩ at any time to stop the brewing process.
Pouring coffee
WARNING - RISK OF INJURY!
Following the brewing process, a small amount of hot coffee may have collected on the lid ⑦ of the vacuum flask ⑧. Carefully wipe the coffee with an absorbent tissue before removing the vacuum flask ⑧ from the appliance.
1) Remove the vacuum flask ⑧ from the appliance. 2) The lid ⑦ is shut tight, the arrow on the handle points at the 🔒 symbol. 3) To pour coffee, turn the lid ⑦ a half turn until the arrow on the handle points at the 🔍 symbol. You can now pour coffee without the lid ⑦ falling off. 4) Before placing the vacuum flask ⑧ back in the appliance, turn the lid ⑦ back until the arrow points at the 🔒 symbol again.
Timer function
You can set a scheduled time within a 24-hour period for the appliance to start brewing coffee.
NOTE
If you wish to use the timer function, ensure that the correct time has been set (see chapter "Setting the time").
1) Fill the appliance with ground coffee and water as described previously. 2) Press the AUTO/PROGRAMM button ④ twice. The display ⑫ will read PROG. 3) Repeatedly press the STD ⑨ and MIN ⑤ buttons to set the desired starting time (see chapter "Setting the time").
4) Press and hold the AUTO/PROGRAMM button ④ for approximately 3 seconds until the green control lamp AUTO ③ lights up. This light indicates that the timer is active and the appliance will initiate the brewing process at the set time.
NOTE
You can use the AN/AUS button 10 at any time to deactivate the timer.
As soon as the set time is reached, the brewing process begins. The green control lamp AUTO ③ goes out and the red control lamp BRÜHVORGANG ⑪ lights up. The display ⑫ will read BREW.
As soon as the brewing process is completed, 6 acoustic signals sound and the appliance switches itself off.
Cleaning and care
Cleaning

DANGER - RISK OF ELECTRICAL SHOCK!

Never immerse the appliance in water or other liquids. Danger of electric shock!

WARNING – RISK OF INJURY!
Always remove the plug from the mains power socket before you clean the appliance. Danger of electric shock! Always allow the appliance to cool down before cleaning it. Risk of burns!
CAUTION - PROPERTY DAMAGE!
Never use abrasive, aggressive or chemical cleaning agents to clean the appliance. These could damage the outer surface of the appliance.
1) Remove the plug from the power socket and allow the device to cool down completely. 2) Open the appliance lid ① and remove the paper filter together with the filter holder ⑭. Dispose of the paper filter.
- Rinse the filter holder 14, the lid 7 of the vacuum flask 8 and measuring spoon with mild rinse water. Rinse all parts afterwards with plenty of clean water.
NOTE
The filter holder 14 and measuring spoon can be cleaned in a dishwasher. Make sure that the parts do not get jammed in the dishwasher.
■ Wipe the appliance with a damp cloth. If required, use a mild washing-up liquid on the cloth. Ensure that there are no detergent residues on the appliance, and that the appliance is completely dry before using it again.
- Rinse the vacuum flask ⑧ with clean water. In case of stubborn dirt, add a mild detergent to the vacuum flask ⑧ and clean the inside with a scrub brush. Afterwards, rinse the appliance with plenty of clean water to remove all residual detergent.
Descaling the appliance
Descale the appliance at regular intervals.
NOTE
▶ Depending on the hardness of your water, the necessary descaling intervals may vary considerably. If your water is very hard, descaling is generally necessary after approximately 30 uses, while less hard water only requires you to descale your appliance after approximately 60 uses. Your local water supplier can tell you about the hardness of your water.
Only use descaling agents that are specifically suitable for coffee machines and take note of their usage instructions.
Proceed as follows to descale:
1) Fill the water tank ⑬ with the descaling agent. 2) Fill in the right amount of water as specified in the usage instructions for the descaling agent, but do not exceed the MAX mark (8 cups) on the water level gauge ⑥. 3) Press the AN/AUS button ⑩ to start the brewing process. The red control lamp BRÜHVORGANG ⑪ will light up and the display ⑫ will read BREW. 4) Wait until enough water for approximately 2 cups has run through the machine, then interrupt the brewing process by pressing the AN/AUS button ⑩ again. 5) Allow the descaling agent to take effect for 15 minutes. 6) Repeat steps 3 to 5 twice.
7) Then start the brewing process and wait until the water has run through completely. 8) Allow the coffee machine to brew three times with the maximum amount of clean water. Following three brewing cycles, all residues of the descaling agents are removed and you can use your coffee machine again.
Storage
If you do not intend to use the appliance for long periods, ensure that no coffee grounds remain in the appliance. ■ Clean the appliance again as described in "Cleaning and care". ■ Place the power cord inside the cable storage compartment. ■ Store the dry appliance in a clean and dust-free location.
Technical specifications
| Mains voltage 220-240 V ~ / 50 Hz | |
| Rated power 1000 W | |
| Food-safe | |
Disposal
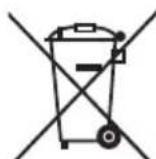
Never dispose of the appliance in your normal domestic waste. This product is subject to the provisions of European Directive 2012/19/EU-WEEE (Waste Electrical and Electronic Equipment).
Dispose of the appliance via an approved disposal company or your municipal waste facility. Please comply with all applicable regulations. Please contact your waste disposal facility if you are in any doubt.
This appliance has a 3-year warranty valid from the date of purchase. If this product has any faults, you, the buyer, have certain statutory rights. Your statutory rights are not restricted in any way by the warranty described below.
Warranty conditions
The validity period of the warranty starts from the date of purchase. Please keep your original receipt in a safe place. This document will be required as proof of purchase.
If any material or production fault occurs within three years of the date of purchase of the product, we will either repair or replace the product for you at our discretion. This warranty service is dependent on you presenting the defective appliance and the proof of purchase (receipt) and a short written description of the fault and its time of occurrence.
If the defect is covered by the warranty, your product will either be repaired or replaced by us. The repair or replacement of a product does not signify the beginning of a new warranty period.
Warranty period and statutory claims for defects
The warranty period is not prolonged by repairs effected under the warranty. This also applies to replaced and repaired components. Any damage and defects present at the time of purchase must be reported immediately after unpacking. Repairs carried out after expiry of the warranty period shall be subject to a fee.
Scope of the warranty
This appliance has been manufactured in accordance with strict quality guidelines and inspected meticulously prior to delivery.
The warranty covers material faults or production faults. The warranty does not extend to product parts subject to normal wear and tear or fragile parts such as switches, batteries, baking moulds or parts made of glass.
The warranty does not apply if the product has been damaged, improperly used, or improperly maintained. The directions in the operating instructions for the product regarding proper use of the product are to be strictly followed. Uses and actions that are discouraged in the operating instructions or which are warned against must be avoided.
This product is intended solely for private use and not for commercial purposes. The warranty shall be deemed void in cases of misuse or improper handling, use of force and modifications / repairs which have not been carried out by one of our authorised Service centres.
Warranty claim procedure
To ensure quick processing of your case, please observe the following instructions:
■ Please have the till receipt and the item number (e.g. IAN 12345) available as proof of purchase.
■ You will find the item number on the type plate, an engraving on the front page of the instructions (bottom left), or as a sticker on the rear or bottom of the appliance.
If functional or other defects occur, please contact the service department listed either by telephone or by e-mail.
■ You can return a defective product to us free of charge to the service address that will be provided to you. Ensure that you enclose the proof of purchase (till receipt) and information about what the defect is and when it occurred.

You can download these instructions along with many other manuals, product videos and software on www.lidl-service.com.
Service
GB Service Great Britain
Tel.: 0871 5000 720 (£ 0.10/Min.)
E-Mail: kompernass@lidl.co.uk
IAN 279509
Importer
Please note that the following address is not the service address. Please use the service address provided in the operating instructions.
KOMPERNASS HANDELS GMBH
BURGSTRASSE 21
44867 BOCHUM
GERMANY
www.kompernass.com
KOMPERNASS HANDELS GMBH
BURGSTRASSE 21
44867 BOCHUM
GERMANY
www.kompernass.com


- DE AT CH
- TABLE OF CONTENTS
- INTRODUCTION
- CONTENTS
- SAFETY INFORMATION
- APPLIANCE ELEMENTS
- SET-UP AND CONNECTION
- BEFORE FIRST USE
- MAKING COFFEE
- CLEANING AND CARE
- STORAGE
- TECHNICAL SPECIFICATIONS
- DISPOSAL
- KOMPERNASS HANDELS GMBH WARRANTY
- COPYRIGHT
- LIMITATION OF LIABILITY
- PROPER USE
- WARNING
- DANGER IF NOT USED AS INTENDED
- PACKAGE CONTENTS/TRANSPORT INSPECTION
- RISK OF SUFFOCATION
- NOTE
- DISPOSAL OF THE PACKAGING
- ⚠ WARNING - RISK OF INJURY
- CAUTION - PROPERTY DAMAGE
- FIGURE A
- DANGER - RISK OF ELECTRICAL SHOCK
- SETTING THE TIME
- INSERTING GROUND COFFEE
- FILLING THE APPLIANCE WITH WATER
- ⚠️ WARNING - HEALTH HAZARD
- INITIATING THE BREWING PROCESS
- WARNING - RISK OF INJURY
- POURING COFFEE
- TIMER FUNCTION
- CLEANING
- WARNING – RISK OF INJURY
- DESCALING THE APPLIANCE
- WARRANTY CONDITIONS
- WARRANTY PERIOD AND STATUTORY CLAIMS FOR DEFECTS
- SCOPE OF THE WARRANTY
- WARRANTY CLAIM PROCEDURE
- SERVICE
- IMPORTER
Brand : SILVERCREST
Model : SKA 1000 A1
Category : Coffee machine