PCTAZ 1110 - Toaster PROFICOOK - Free user manual and instructions
Find the device manual for free PCTAZ 1110 PROFICOOK in PDF.
User questions about PCTAZ 1110 PROFICOOK
0 question about this device. Answer the ones you know or ask your own.
Ask a new question about this device
Download the instructions for your Toaster in PDF format for free! Find your manual PCTAZ 1110 - PROFICOOK and take your electronic device back in hand. On this page are published all the documents necessary for the use of your device. PCTAZ 1110 by PROFICOOK.
USER MANUAL PCTAZ 1110 PROFICOOK
Thank you for purchasing our product. We hope that you enjoy using the appliance.
Symbols in this Instruction Manual
Important information for your safety is specially marked. It is essential to comply with these instructions in order to avoid accidents and prevent damage to the machine:
CAUTION:
This warns you of dangers to your health and indicates possible injury risks.
CAUTION:
Indicates potential dangers for the appliance or other objects.
NOTE:
This highlights tips and information.
Contents
Overview of the Components 3
General Notes 30
Special Safety Information for this Appliance 30
Intended Use 31
Description of Parts 31
Scope of Delivery 32
Unpacking the Appliance 32
Application Notes 32
Operation 32
Storage 33
Cleaning 33
Troubleshooting 33
Technical Date. 34
Disposal 34
General Notes
Before using the appliance for the first time, read the operating instructions very carefully and keep them safe together with the warranty certificate, the receipt, and, if possible, the carton with the inner packaging. If you give this appliance to other people, please also pass on the operating instructions.
- Only use the appliance for private use and the intended purpose. This appliance is not intended for commercial use.
- Do not use it outdoors. Keep away from heat, direct sunlight, damp (never immerse in liquids), and sharp edges. Do not use the appliance with wet hands. If the appliance is humid or wet, unplug it immediately.
- Always switch off and unplug the appliance (pull the plug, not the cable) when you do not use the appliance, or when you attach accessories, during cleaning, or in case of malfunction.
- Do not leave the appliance unattended during operation. Always switch off the appliance when leaving the room. Disconnect the plug from the mains.
- Regularly check the appliance and the mains cable for signs of damage. Do not continue to operate the appliance in case of damage.
- Use only original parts.
- For the safety of your children, keep any packaging parts (plastic bags, cartons, polystyrene, etc.) out of their reach.
WARNING:
Do not let small children play with plastic foil.
There is the danger of suffocation!
Special Safety Information for this Appliance
- Always watch the unit while it is being used!
WARNING:
Very dry bread can start to burn when being toasted!
- The metal parts get hot. Danger of burns!
- Do not insert forks, knives or other objects in the toasting slot.
-
Do not insert your fingers into the toasting slots (danger of burns).
-
Do not set up the unit next to inflammable objects (e.g. curtains, wood, etc.)!
- Do not operate the appliance with an external timer or separate remote control system.
- Do not repair the appliance by yourself. Please contact authorized personnel. In order to avoid hazards, a damaged mains cable must be replaced with an equivalent cable by the manufacturer, our customer service or any other qualified specialist.
- This appliance can be used by children aged from 8 years and above and persons with reduced physical, sensory or mental capabilities or lack of experience and knowledge if they have been given supervision or instruction concerning use of the appliance in a safe way and understand the hazards involved.
Children may not play with the appliance. - Cleaning and user maintenance shall not be made by children unless they are older than 8 years and are supervised.
- Keep the appliance and its cord out of reach of children less than 8 years.
CAUTION:
Do not immerse the appliance into water for cleaning.
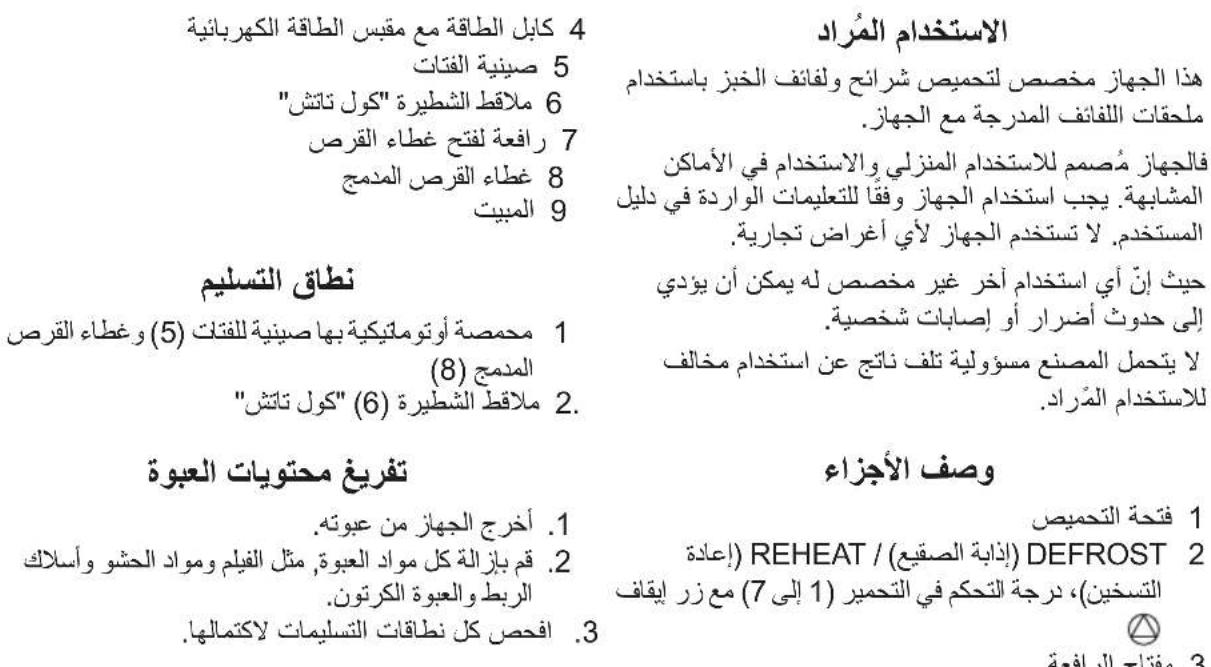
Intended Use
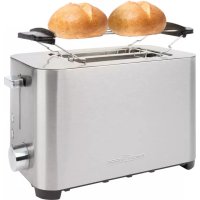
This appliance is intended for toasting of bread slices and rolls with use of the integrated rolls attachment.
It is intended for domestic use and use of similar areas. The appliance is only to be used as described in the user manual. Do not use the appliance for any commercial purposes.
Any other use is not intended and can result in damages or personal injuries.
The manufacturer assumes no liability for damage resulting from use other than the intended purpose.
Description of Parts
1 Toasting well
2 DEFROST (Defrost) / REHEAT (Reheat), controller degree of browning (1 to 7) with stop button
3 Carriage lever
4 Power cable with power plug
5 Crumb tray
6 "Cool touch" sandwich tongs
7 Lever for opening the roll top
8 Integrated roll top
9 Housing
Scope of Delivery
- Automatic toaster with crumb tray (5) and integrated roll top (8)
- "Cool touch" sandwich tongs (6)
Unpacking the Appliance
- Remove the appliance from its packaging.
- Remove all packaging materials such as film, filling materials, cable holders, and carton packaging.
- Check the scope of deliveries for completeness.
NOTE:
Dust or production residues may still be found on the appliance. Clean manufacturing residues and dust from the appliance as described under "Cleaning".
Application Instructions
Before Initial Use

CAUTION:
In order to remove the protective layer on the heating coil, you should operate the machine approximately three times while empty. Please select the maximum level of browning.
NOTE:
Occurrence of light smoke and odors is normal with this procedure. Ensure adequate ventilation.
Power cable (4)
Unwind the required power cable (4) from the bottom part.
Electric Connection
Check that the mains voltage to be used matches the voltage of the appliance.
You will find the information about this on the type plate on the underside of the appliance.
Operation
- Only connect the unit to a properly installed and earth-hed power socket.
- Adjust the degree of browning on the selector switch (2) as required between the lightest level 1 to the darkest level 7. If you are not sure, start with a lower setting.
-
Insert the slice(s) of bread into the toasting well (1) and lower the slide with the lever (3) until it snaps into place.
-
The appliance starts the toasting. When the set level of browning is reached, the appliance switches off automatically. Then the slide (3) pops up automatically.
Special Functions
For use of the desired special function, press the relevant key, after pushing down the lever (3).

NOTE:
Heating or thawing: The relevant pilot lamp (blue) indicates the function.
DEFROST (2) Defrost To thaw and then
toast deep-frozen bread.
REHEAT (2) Reheat To reheat bread

Stop (2)
already toasted.
To stop toasting early.
Roll top (integrated) (8)
Want to warm up or toast some rolls?
Open the roll top (8) above the toasting wells (1) by pushing the lever (7) at the rear of the toaster down. Push the lever (7) up when warming of the rolls has been completed.

CAUTION:
- Do not overload the roll top (8)! Never put more than one roll into the roll top (8)!
- Set the selector switch for the degree of browning (2) to level 3 max.
- Wait for one minute between toasting cycles.
- Never coat the roll with fat or butter. Fat could drip down and ignite!
Sandwich tongs (6)
The sandwich tongs (6) are excellently suited for quick and easy sandwich toasting.
- Press the handles of the sandwich tongs (6) together and place the sandwich into the tongs (6). Then release the handles.
- Set the sandwich tongs (6) with the sandwich into the toasting well (1) and use the lever (3) to lower the slide as far as possible.
- Select the degree of browning to start toasting.
- Remove the sandwich tongues (6) after completion of toasting.
-
Do not forget: The sandwich tongs (6) are hot immediately after toasting.
-
Remove the sandwich from the tongues (6). Caution: The sandwich and the sandwich tongs (6) are hot.
Storage

WARNING:
As the housing (9) and the metal parts become hot during operation, let the appliance cool down before storing it.
- Clean the appliance as described and allow it to dry completely. We recommend storing the appliance in its original packaging during longer periods of non-use.
- Always keep the appliance out of reach of children and in a well-ventilated, dry place.
Mains Cable Take-up Device (4)
The mains cable can be wound onto the base.
Cleaning

WARNING:
- Before each cleaning, pull the power plug (4) out of the power socket and let the unit cool down.
- Do not submerge the appliance in water! Danger of electric shock or fire.

CAUTION:
Do not use acid or abrasive cleaning agents.
Housing (9)
Use only a moderately moist cloth to clean the outside of the appliance.
Crumb tray (5)
The crumb tray (5) is located on the side opposite the control buttons.
- Use the handle to pull the crumb tray (5) out, remove any bread crumbs, and push the tray (5) back in.
Troubleshooting
| Problem Possible | Cause | Solution |
| Appliance not functioning. | Appliance without power supply. | Check the socket with another appliance. |
| Connect the power plug (4) properly. | ||
| Check the fuse. | ||
| Appliance defective. | Contact our service center or a specialist. |
| Problem Possible | le cause | Solution |
| The bread becomes too dark. | The toaster setting was too high. | Select a lower toaster setting. |
| The bread is too light. | The toaster setting was too low. | Select a higher toaster setting. |
| The toasting slide (3) no longer pops up. | A slice of bread has become stuck in the well (1). | Pull the plug (4) from the socket! Let the appliance cool down!Free the slice of bread with an insulated object, e.g. a wooden stick. If necessary, turn the toaster over, so that the slice of bread drops out. |
Technical Date
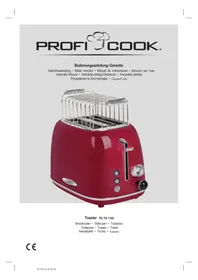
Model: PC-TAZ 1110
Power supply: 220-240 V~, 50/60 Hz
Power consumption: 860 - 1050 W
Protection class:
Net weight: approx. 1.77 kg
The right to make technical and design modifications in the course of continuous product development remains reserved.
This device has been tested according to all relevant current CE guidelines, such as electromagnetic compatibility and low voltage directives, and has been constructed in accordance with the latest safety regulations.
Disposal
Meaning of the "Dustbin" Symbol

Protect our environment: do not dispose of electrical equipment in the domestic waste.
Dispose of obsolete or defective electrical appliances via municipal collection points.
Please help to avoid potential environmental and health impacts through improper waste disposal.
This will contribute to the recycling and other forms of reutilization of electrical and electronic equipment.
Information concerning where the equipment can be disposed of can be obtained from your local authority.
Instrukcja oblsugi
PykoBoDCTBO no 3KcnIyatauIN
Blaoradapm Bac 3a Bb6op Hawei npodykun. Mbl Hadeemc, YTO Bbl noIynte yIOBOJIbCTBne OT nCnoJIb3OBAHnHaWero np6opa.
CIMMBOJIbI B DaHHOM pyKOBoOCTBe No 3KcIIlyaTaUH
BaxHbIe peKoMeHdaUIN IaI o6ecneueHnBaWei 6e3OpachocTn CneuaJIbHO OTMeueHbI. O6a3TeNbHO cNeDuYte 3TNM peKoMeHdaUIN M, YTObI ppeOtBpaTNTb HeCuaCTbI CNyau INI NOnOMky H3dEInN:
BHIMAHNE:
PpeDynpexkaetobnacHocTINIg3dOpOBbI BO3MOxHOM pncke nolnyeHn TpaBMbl.
BHIMAHHE:
OTmeyaET noteHuaJIbHyIO anachocTb IJI npi6opa nIpynx npedmetOB.
I PIMMEAHNIA:
JaetcoBtIINHΦopMaζuI.
OrnabJeHne
O63op deTaei np6opa 3
Obuine 3ameuahnna 46
CneuaJIbHaI HOpMaUaO 6e3oNaChocTu DnT ATO np6opa .46
PpeJnoJaeraemoe npImeHHe 48
Oncanhe coctabhix qacte.. 48
KOMJIeKT NOCTABKN 48
PacnaKobka npnbopa 48
IcnoJIb3OBAHne 48
Pa6ota 48
Xpanenie 49
OuInCTka. 49
DnaHocTnka 50
TexHHueckne daHHbIe 50
Ytunnaia 51
06zne3ameuHn
Ipeed nepBbIM npIMeHHeM np6bopa BnMaTeNbHO npOHTnte pyKOBoCTBO NO 3KcNlYatauN I coXpaHnte erO BmecTe C rapaHTnHBIM TaHOHOM, YekOM N, PO BO3MOxHocTN, C KapTOHHo N BHyTpeHHeYnaKOBKOJ. Ppi nepeDaue np6bopa KOMy-TO dpyrOmy, peedeAte TaKke N 3Ty NHCTpyKUHIO NO 3KcNlYatauN.
- IVcnoIb3yIte np6op TOnbKO B JInuHbIX ZeIaX I NO pIpyMOMy Ha3NaueHnIO. Pnp6Op He npedHa3NaueH nIg KOMMepeCKOrO IVcNoJIb3OBAHnI.
He nCIOJIb3yIte yCTPOIcTBO HA OTKpbITOM BO3DyXe. He NOBBePraIte yCTPOIcTBO BO3DeIcTBIO NCTOuHnKOB TENIIa, INPMBIX COINHeYbIX NUYeI, BnAHI (NHKoTJa He NOrpykaIte B XnIKoCTn) N OCTpbIX npEIMetOB. EcIn yCTPOIcTBO HAMOKINO, HEmeJNeHHO OTCoEiHNITE erO OT cETn. EcnPi6Op cTahET BnAJaKHbIM IINI MOKpbIM, HEmeJNeHHO OTKnIOUHTe erO OT cETn.
Bcerda BbIKnOuaTe np6op n OTKIOUaIte ero ot cetn 3JIeKTPoNTaHna (BbIHMaIte UHyp n3 po3ETKN 3a BNkY, a He 3a Ka6eb), KOrDa np6Op He 6y-DeT npIMHeTbcS, PnI pOKIooHnn AkceccyapOB, IJRA OCHTKN INB CNYae HennpaBnBHO pa60tbl.
Bo Bpempa6oTbI He octabJnTe np6op 6e3 npCmOTpa.Bcerda BbIKNoaHTe np6Op, KOrDa BbIXOdnte BdpuyKOMHaTy. OTKIOHTe BUNKy OT cETN 3JIeKTPoNTaHnI. - Perylaepno npoBepaTe npb6op nHyp nHTaHna Bnuimble noBpeXdEHH. B cIyae noBpeXdEHH npekpaTne mCOnlb3ObaHne npb6opa.
-ПиMuHЯTeToIbKONoIINHHbIe3aNaCHbIeYacTn.
-Дябз�асноCTNдржNTe BCE ynaKOBOCHbIe MaTePnAbl (Пл actIKOBbIe NaKeTbI, KapTOH, nONITnJIEN H T.D.) BHe DoCraHaemocTn DeTei.
PENEYNPEXDEHNE:
He no3BOJnTe DeTm nIpaTb C nIaCTNKOBOnnnKo. CyueCTByet onaChocb ydysb!
CneuNbHa HOpMaun O 6e3OnaChOCTn dJa 3TOrO np6opa
He octablan Te np6op 6e3 na3opa!
I PEPdUYPEXKDEHNE:
Pn noJxapBaan cHsKOM cyXoX ne6 moKeT 3aRopeTbCra!
- Metalniueckne yactn harpeBaIOTc. Onachoctb oxora!
- Ioznycta, He BCTabJte BHytpb TocTepa BNIKN, HOXN IJI N T.I.
He BCTaBnIe naiBcI B OTBepCTne TocTepa (OnaCHOCTb OXoROB).
He yctaHaBnBaIte np6op B6n3n IeKOBocJaMeHraUxCra npedMeTOB (HaPpIMep: rapdInbI, DepeBO n T.d.).
He ynpabJyTe yCTpoiCTBOM C NOMOu BHeUHero TaMepa IIN OTdEJIbHOI CNCTeMbI DnCTaHcNOHOrO ynpabJeHna.
He pemontnyte np6op camocToTeIbNo. IoxaJyIcTa, o6paTITecb K KBaIIuΦnUPOBaHHOMy nepcoHany. Bo n36exKaHne onacHOCTN MeHrTb NOBpeXdEHHbI Ka6eIb Ha aHaIOnuHbI DoJIxeh Ipon3BOIDTeIb, Haua KIneHTCKa ClyK6a IIIN JIO6oI dpyroKBAIIuΦnUPOBaHHbI CNeuaJIInCT. - Даньи пибор может ксплуатюразьсдтBMn haunha c 8-лгено BO3pacTa, a takke ЛцamN C ORpaHnueHHbIMN PCIN-XUYeCKIMN, CEHCOPHBIMN IIN YMCTBEHHbIMN BO3MOxHOCTaMn IN HeIOCTaTOUHbIM ONbITOM obpaшени C NOO6HbIMN пиборamN/IIIN 3HaHni TAKOBbIX TOIbKO IOd PnICMOTpOM OTBETCTBEHNOIJIua IIN NocNe ppoBeDEHnY UcBOeHnY INCTpykTaxa OTHOCInTeMbHO 6e3OpacHoi kCpLyaTaUmпрбopa n CBa3aHHbIX C pni-6opor OnaCHOcteN.
-ДетямЗапразаetсиграьс пибором.
OuNTka n NOIb3OBaTeJIbCKoe TexHnueckoe 6cIyXnBaHne DoJIxHbI pON3BOJntbCra TOnbKO DeTbMn CTapWe 8 JeT n PoI NaI3OpOM. - UcTpoIcTBo I CTeBOI SHHyp DOJXHbI HaxOJNTbcr BHe DoCTyPa DeTei MnaDwe 8 let.
BHUMAHNE:
Bo Bpemr qnctkn 3anpeaetc nprykaTb npnbop B Body.
PpeDnoJaraemoe npImeHeHne
Pnp6op npedHa3NaueH nIpaKapuBaHn JOMTKOB xIe6a (pnproTOBJIeHn TOCTOB) 6yIouek Ha CneUaIbHOM npncnoc6JeHn dIg HIX.
YcTPOIcTBOpnpEHa3HaueHo DnI DOMaHHeRo IcNoJIb3OBAHn. YcTPOIcTBOpDJIKHO IcNoJIb3OBAtBcra TOnJIbKO TaK, KAK ONICAO BpyKOBODCTBE NOL3OBATEJ. He IcNoJIb3yIe erO B KaKIN-ПИбО KOMMepuecknx ZeIeX.
IIO6oe npyroe nCnoB3OBaHHe CHTaETcN CNOB3OBaHnEM He No Ha3NaYeHn, M MoKet PpNBecTn K NOBpeKdEHHm UIN TpaBMam.
Pon3BOJNTeJIb He 6epet Ha ce6a OTBeTCTBeHHOCTn 3a yIep6, npuHHeHHbB pe3yIbTaTe npMHeHnnp60pa He no Ha3HaueHnIO.
Onncahne coCTaBbIX YacteI
1 OTeBepTne IINrTOCTOB
2. DEFROST (pa3MopaxnBaHne) / REHEAT (no-dorpeB), KOHTPOINpyET CTeneHb NOJxapnBaHn (1-7) cKHOKNO OCTaHOBKn
3 Pbyar noDbema
4. ⅢHypпintaняс cTeBOB BnTkoI
5. IotokДЯкpoшek
6.Яьчkn“xoJIOHOrO npIKoCHOBHeNIA"ДЯ 6yTepe6poda
7. Pbyar OTKpbTnB BepxA dny 6yIoueK
8. BCTrhoeHHbI Bepx dna 6ynoueK
9. Kopnyc
Komnnekt noctabkn
- ABTomatnueckm TocTeP C JOTKOM IIN KPOUeK (5) IN BCTpoEHbIM BepXOM IIN 6yIooeK (8)
2.ЯЗИКIN“XOJOODHOrO npNKOCHOBeHnI"ДЯ 6yTeP-6pOda (6)
PacnaKOBka npn6opa
- N3BNeKInTe yCTpoINCTBO n3 Kopo6Kn.
- CHIMITE BCE ynaKOBOHbI MaTePnAJIb, BKJIIO- YaIeHKy, 3aONHITeN, DePkaTeJIb Ka6eJIa I KAPToHHU OYnaKOBky.
- ПоверьтЕ KOMПЛЕКТHOCTь NOCTaBKN.
I\PNIMEYAHNA:
Ha npi6ope moKet octaBaTbCn PbIb nI IN npo3BOJCTBeHHbIe OCTaTKN. OuNCTInTe npi6op OT npo3BOJCTBeHHbIX OCTaTKOB nIbIN KAK ONCaHO B pa3dene "OuNcTkA".
UcnoJb3ObaHne
IpeepnepBbIM BkJIIOHeHHeM
BHIMAHHE:
Дя удяпеня 3ацntнов смзки C HarpeBaTeIbHorO элем enta npi6op Heo6xOdmo npimepHo Tpr pa3a nporpeTb nyctbm. PoЖanycta, Bbl6epHTe ДЯ 3TOrO MaKcImaJIbHbI ypoBeHb ПОДЖAPUBAHЯ.
IIPIMEUYAHNA:
Pn3TOM BbIeJIeTcHemHO DbIMa N NOBJIeTc3anax, YTO RAJIeTcHOpMaJIbHbIM. OBeCneBte DoCTaToHy BOHTNJIaIIO.
Hyp nHa (4)
Pa3motaTe Heo6xOaMbI nIpa60tbl shyp nIta-Hnra (4) c HIXHei qactn np6opa.
3nKtpnueckoe coeHHeHne
PpOBepbTe, yTO nCnOlb3yEmoe HAnpJxHHe 3JeKToPOnTahmcooBtctByeT HApJxKeHH np6opa.
Hopmaqna 6TOM haoDnTcHa TaBnUKe Bn3y npbopa.
Pa6ota
-Подключаite npi6op TOnbKO K npaBnIbHo yCTaHOBJIeHHoP03ETKE C 3a3EMJIHOUIM 3aUHTbIM KOHTaKTOM.
Hactpoite HxKbI yPoBeH NOJkapBaHnpepeKnOHTeMe-CEKeTOpOM (2),OT CBeTlOro 1do TEMHO7.Bcnyae HeyBepenHocTn,HaunHaTe c HxKHeRo yPoBH.
BCTaBbTe JOMTK(н) xIe6a B OTBepCTne NOJXapINBaHn (1) n onyCTnte caIa3Kn pbIarom (3) do 3aueJIJIeHn Ha MeCTe.
Tocep NaHnHaet noJxapnbatb Xne6. KaK TOnbKO OH noJxapntcdo yCTaHOBJIeHHoro CBeta, Tocep abTomaHTueCKN BbIKNoHTcR. 3aTeM caJa3Kn (3) BBICKOCh aBTOMaHTueCKN.
CneunalbHbIe yHKcnn
UTo6bI BOCNoB3OBaTbCn HyXHO CnEuaJIbHOH FyHKLne, HaxMITE COOTBECTByIOuYO KnaBnUy NocNe onyckaHn pyiura (3).
IPIIMEUYHNA:
Pa3orpeBaHne nIpa3mOpaxnBaHne: CoOTBeTCTByIOUaKoHTpObnHaJaMNoUka (rOy6a) noka3bIbAeT cyHKuHIO.
DEFROST (2) Pa3MopaxnBaHneTTo6bI
pa3Mop03ntb,a 3aTeM nOdkapntb XJIe6 rJy6OKoI 3amOp03KN.
REHEAT (2) Pa3orpeBaHne Iŋ
pa3oRpeBaHnnyKe
IooKapEnHoRo
paHee Xne6a.
IpynHyDntelbHoRo
IpeKpaUeHnry
IOoKapuBaHnry.

OctahOBka (2)
Bepx dny 6ynoyek (BCtpoehhbl) (8)
XoITpe pa30rpeb nnI NOJxkapntb 6yIoouKn?
OTKPOnteBepxIpy6ynoeK(8)HaO TBepCTnMn POJXAPNBAHN(1),HADABVBHa pbyar(7)B HIXHei 3aHNeY aCTnTOCTepa.HaDABNTe pbyar(7)BBepx, KOrda npiroTOBlenHe 6yNoeK 3aKOHHTcR.

BHIMAHHE:
He neperpuxkaTe Bepx dJa 6yIoueK (8)! He BbIKIaIbIBaIte HeCKoJIbKO 6yIoueK Ha Bepx dJa 6yIoueK (8)!
- YctaHOBInTe nepeKJIouateIb-ceJIeKTop ypoBnI NOJkapINBaHn (2) MaKcIMyM Ha ypoBeH 3.
- POnOxNTe OAnMy MNHyTMyexNyPocIeIOBaTeIbHbIMn UKNaMn POnXapNBHa.
- Hnkorda He Hama3bIbaiTe Ha 6yIoQKn KInp NnCnBOUHoe MaCNO. KInp MoKet Haayatb KaanTb IN BOCnJaMeHHTbcr!
J3bIyKn dnn 6yTeP6pOoB (6)
"alalil alu" joll gao
a yll clll jol 1y: lill yla
ailll aalll aayyss 0 jn oals
aalall aalll gaae bai qip n
aill l aalll aaii dai
Jn aill Jn Jn Jnn n nn nnnn nn nnnnnnnnnnnnnnnnnnnnnnnnnnnnnnnnnnnnnnnnnnnnnnnnnnnnnnnnnnnnnnnnnnnnnnnnnnnnnnnnnnnnnnnnnnnnnnnnnnnnnnnnnnnnnnnnnnnnnnnnnnnnnnnnn
liljll jaiinall jy jaiill
a + b = 1
J 18
4k = 3
1i 1i i 1j 1j j 1j j
4^x - y^2 = 1 或 3^x + 3^y = - 1
a 4
(6)
jilbail jiaoi jiao kui (6) 8 jubill bdo
y
(6) yabla bdo cda lo laa 10
j_4 = 1
a 6) 3 (1)
gill
(6)jlaalbdo all jy
1
.
gill (2) yill cie g yill a b
aal 10000000000000000000000000000000000000000000000000000
(3) 1
#
y = - ( x - 2) ^2 + 9 = - x^2 + 4x + 5
aiau jge aiee 9) aaii L ay
142 45jg 83 83 83
83 83 83
83 83 83
L
(3)
45 = 210
1
aalld oai (3) 111 111
aaiy
DEFROST (2)
(4)
sclll Jg jy
41 + 21 = 76
4.4.2.1.2.2.2.3.
Jiill cai jai yao Jgall piau Jiaaill sai gao jia Jaiy aai Jaiy Jai Jai Jai Jai Jai Jai Jai Jai Jai Jai Jai Jai Jai Jai Jai Jai Jai Jai Jai Jai Jai Jai Jai Jai Jai Jai Jai Jai
jgl jgl jgl jgl jgl jgl jgl jgl jgl jgl jgl jgl jgl jgl jgl jgl jgl jgl jgl jgl jgl jgl jgl jgl jgl jgl jgl jgl jgl jgl jgl jgl jgl jgl jgl jgl jgl jgl jgl jgl jgl jgl jgl jgl jgl jgl jgl jgl jgl jgl jgl
L 155
156
157
158
159
160
.
:
L
jglalisiwi ciisui jI Joli lii iJai
iinll 5g 6g gall jgs
Ic llaill liayai Ig slyi pi aolo clogse 11io 8 g i j Ciaiaill oij Jlls yj gnnnna
aia aiaaaai jell gail
:
1 1 1 1 1 1 1 1 1 1 1 1 1 1 1 1 1 1 1 1 1 1
:4
1 1
:
Cilsgaleall jil
#
3
. 55611. jlll. 1000
: sglsluull.
55
55 1j21
54
54
54
54
53
53
53
53
52
jglal jglal alalal yll
!daiy1eijlaijgljgjj
:
1 1
1j 1 j 1
()
GARANTIEKARTE
warranty card · garantiekaart · carte de garantie · scheda di garanzia · tarjeta de garantia · cartao de garantia · garantikort · karta gwarancyjna · zaručni list · karta jamstva · carte de garantie · fapaunuzhna Kapta · zaručnly list · garancijski list · garanciajegy · rapahtinHHΦopMynap · fapaHTHbI TanoH
juul 28
PC-TAZ 1110
24 Monate Garantie gemäß Garantieerklarung - 24 months warranty according to warranty declaration - 24 maanden garantie volgens garantieverklaring - 24 mois de garantie selon la déclaration de garantie - 24 mesi de garania seconda la dichiarazione di garanzia - 24 meses de garantia de acordo con la déclaration de garantia - 24 manedors garanti
1 henhold til garantibetingensene - 24 misise gwarancj na podstawie owiadzcnia gwarancjnego - zaruka 24 mescu podle prohlasei o zaruke - 24 mesecno jamstvo
u skladu s jamstvenom déclaracion - 24 luni garantie conform déclaratien de garantie - 24 mecua rapanu h bctetbntbc n capanuohnata deknapau n - 24-mesca nza zaruka podla vyhlasenia o zaruke - 24-mesecna garancjia, skladn o garancjsko izavo - 24 honap garancia a garancifeltetelekben leirtak szerint - rapanrHa 24 mcui iBIOHIOI 3aII npo raptanio - raptanr 24 mecua corncho 3aBHeHHBM raptanHHMnpaannm + 24 10
Kaufdatum, Handierstempel, Unterschied - date of purchase, dealer stamp, signature - aankoopodium, dealerstempl, handeltkening - date d'achat, tampon du concessionaire, signature - data de acquiste, timbo del rvenitodi, firma - fecha de compa, sella del distribuidor, firma - data de compra, carinido do distribuidor, assinatura - kgsedata, forhandierstempel, signature - data zakupu, piezec spredawcy, podisp - datum zakeuperi, naiziko projece, podisp - datum kupevine, jrg trovica, podisp - data of achizjie, stampila fumizorulis, seminatura - daa ha noxymara, lvear ha Iipogasaia, Ipognaic - datum nakuki, peptatika obchodnika/ predajcu, podisp - datum napka, jrg trovica, podisp - vassanas datuma, keraikeo belyegzje, alalras - daa npnoanbina, nevatka npnoana, npnnc - daa npnoepetrenna, ilramm npnoana, npnoana.
PROFI COOK
www.proficook.de