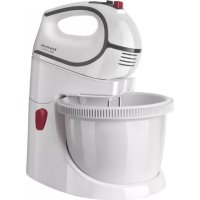
Giro Complet - Hand blender TAURUS - Free user manual and instructions
Find the device manual for free Giro Complet TAURUS in PDF.



| Product type | Hand blender with rotating bowl |
| Brand | Taurus |
| Model | Giro Complet |
| Number of speeds | 5 |
| Turbo function | Yes (pulses) |
| Maximum flour capacity | 1 kg |
| Maximum usage time | 5 minutes |
| Minimum cooling time | 15 minutes |
| Included accessories | Mixing whisks, kneading whisks, spatula, rotating bowl |
| Rotating bowl | Yes, with removable base |
| Electronic speed adjustment | Yes, continuous progressive |
| Child safety | Not intended for children |
| Safety stop | Cut-off button then unplug before cleaning |
| Power supply | 220-240 V ~ 50/60 Hz, grounded plug (10 A min) |
| Cleaning | Bowl dishwasher safe; motor body wiped with damp cloth |
| Use | Household use only |
| Warranty | According to legal conditions, repair by authorized service |
Frequently Asked Questions - Giro Complet TAURUS
User questions about Giro Complet TAURUS
0 question about this device. Answer the ones you know or ask your own.
Ask a new question about this device
Download the instructions for your Hand blender in PDF format for free! Find your manual Giro Complet - TAURUS and take your electronic device back in hand. On this page are published all the documents necessary for the use of your device. Giro Complet by TAURUS.
USER MANUAL Giro Complet TAURUS
Many thanks for choosing to purchase a TAURUS brand product.
- Thanks to its technology, design and operation and the fact that it exceeds the strictest quality standards, a fully satisfactory use and long product life can be assured.
SAFETY ADVICE AND WARNINGS
-
Read these instructions carefully before switching on the appliance and keep them for future reference. Failure to follow and observe these instructions could lead to an accident.
-
Clean all the parts of the product that will be in contact with food, as indicated in the cleaning section, before use.
-
This appliance shall not be used by children. Keep the appliance and its cord out of reach of children.
-
This appliance can be used by people with reduced physical, sensory or mental capabilities or lack of experience and knowledge if they have been given supervision or instruction concerning use of the appliance in a safe way and understand the hazards involved.
-
This appliance is not a toy.
Children should be supervised to ensure that they do not play with the appliance.
-
Always switch off the appliance and disconnect from supply if it is left unattended and before changing accessories or approaching parts that move in use, assembling, disassembling and cleaning.
-
If the connection to the mains has been damaged, it must be replaced, take the appliance to an authorised technical support service. Do not attempt to disassemble or repair the appliance by yourself in order to avoid a hazard.
-
Ensure that the voltage indicated on the rating label matches the mains voltage before plugging in the appliance.
- Connect the appliance to a socket that can supply a minimum of 10 amperes.
- The appliance's plug must fit into the mains socket properly. Do not alter the plug. Do not use plug adaptors.
- Keep the working area clean and well lit. Cluttered and dark areas invite accidents.
- Keep children and bystanders away when using this appliance.
- Do not use the appliance if the cable or plug is damaged.
- If any of the appliance casings breaks, immediately disconnect the appliance from the mains to prevent the possibility of an electric shock.
- Do not use the appliance if it has fallen on the floor, if there are visible signs of damage or if it has a leak.
- Do not force the power cord. Never use the power cord to lift up, carry or unplug the appliance.
- Do not wrap the power cord around the appliance.
- Check the state of the power cord. Damaged
or tangled cables increase the risk of electric shock.
- Do not use or store the appliance outdoors.
- Do not touch the plug with wet hands.
- Take the necessary measures to avoid starting the appliance involuntarily.
- Do not touch any of the appliance's moving parts while it is operating.
USE AND CARE:
- Do not use the appliance if its accessories are not properly fitted.
- Do not use the appliance if the accessories attached to it are defective. Replace them immediately.
- Do not use the appliance if the on/off switch does not work.
- Do not move the appliance while in use.
- This appliance is for household use only, not professional, industrial use.
- Store this appliance out of reach of children and/or persons with physical, sensory or reduced mental or lack of experience and knowledge.
- Keep the appliance in good condition. Check that the moving parts are not misaligned or jammed and make sure there are no broken parts or anomalies that may prevent the appliance from operating correctly.
- Never leave the appliance connected and unattended if is not in use. This saves energy and prolongs the life of the appliance.
- Do not use the appliance for more than 5 minutes at any one time. Allow to cool for 15 minutes before subsequent use.
- Do not work with more tan 1 kg flour.
SERVICE:
- Any misuse or failure to follow the instructions for use renders the guarantee and the manufacturer's liability null and void.
DESCRIPTION
A Eject button
B Speed selector control
C Turbo button
D Motor body
E Motor body anchoring button (^)
F Unlock appliance arm button (^)
G Rotating bowl (^)
H Bowl stand (^)
I Beater
J Dough hooks
K Scaper (*)
- (^*) Only available in the model Giro Complet
- If the model of your appliance does not have the accessories described above, they can also be bought separately from the Technical Assistance Service.
INSTRUCTIONS FOR USE
BEFORE USE:
- Make sure that all products' packaging has been removed.
- Before using the product for the first time, clean the parts that will come into contact with food in the manner described in the cleaning section.
USE (MODEL GIRO):
- Unroll the cable completely before plugging it in.
- Place the accessory (I, J) you want to use to motor body accordingly. (Fig.1).
- Connect the appliance to the mains.
- Turn the appliance on, by using the speed selector control (B).
- From the appliance's five speeds select the one you need. Always start with slow speeds and increase gradually until you reach the one you wish to use.
- Work with the food you want to process.
USE (MODEL GIRO COMPLET):
- Unroll the cable completely before plugging it in.
- Press the unlock appliance arm button (F) to lift machine arm.
- Hold the appliance by hand while pressing the motor body anchoring button to remove it (E).
Fix the accessory (I, J) as desired on the anchor by matching the hole and ensuring it is properly engaged. - Place the motor body in the bowl stand and press down until the button returned to its original position (E).
- Press the uncock appliance arm button (F) to returns to initial position.
- Connect the appliance to the mains.
- Turn the appliance on, by using the speed selector control.
- To avoid a fierce, start up of the fan, it is advisable to start off from the lowest speed position and, once the fan has been switched on, progressively increase the speed to the desired position.
-
Work with the food you want to process. You can use the scraper (K) to stir the mixture while the appliance is working.
-
The appliance can be switched on again using the switch once the control device has cooled, if it is not switched on again, do not force it, allow it to cool.
ELECTRONIC SPEED CONTROL:
- The speed of the appliance can be regulated by using the speed selector control (B). This function is very useful, as it makes it possible to adapt the speed of the appliance to the type of work that needs to be done.
ONCE YOU HAVE FINISHED USING THE APPLIANCE (GIRO MODEL):
- Stop the appliance, selecting position 0 on the speed selector control.
- Unplug the appliance from the mains.
- Clean the appliance.
ONCE YOU HAVE FINISHED USING THE APPLIANCE (GIRO COMPLET MODEL):
- Stop the appliance, selecting position 0 on the speed selector control.
- Unplug the appliance from the mains.
- Press the button (F) and lift the motor body.
- Remove the bowl (G) from the base (H).
- Press the button (E) to remove motor body.
- Press the button (A) to remove beater or dough hooks.
- Clean the appliance.
ACCESSIONS:
BEATER ACCESSORY (I):
- This accessory is used to whip cream, beat eggs, batters, fatless sponges, meringues, cheeses, mousses, and souffles.
- Insert the beater into the orifices in the body of the motor pressing them in until you hear a click (Fig.1A). The beater can be placed in either of the two orifices, as they are identical.
- Put the food into the rotatory bowl (G) or into a large receptacle and switch the appliance on. For best results with Giro model, turn the whisk clockwise.
- Using speed selector control (B), from minimum speed, increase gradually to maximum speed.
- Remove the blending accessory pressing the eject button (A).
DOUGH HOOK ACCESSORY (J):
- This accessory is used for knead bread, pizza dough, etc.
- Insert the dough hooks into the orifices in the
body of the motor pressing them in until you hear a click (Fig.1B). The dough hooks are not the same. Place the dough hook with the washer in the large orifice. They cannot be fitted inversely.
- Put the food into the rotatory bowl (G) or into a large receptacle and switch the appliance on. For best results with Giro model, turn the whisk clockwise.
- Using speed selector control (B), from minimum speed, increase gradually to maximum speed.
- Remove the kneading accessory pressing the eject button (A).
TURBO FUNCTION (C):
- This allows you to work using pulses and helps to control the result of the preparation.
- Press the turbo button (C). Keep the button pressed down to achieve the desired result.
CLEANING
- Disconnect the appliance from the mains and allow it to cool before undertaking any cleaning task.
- Clean the equipment with a damp cloth with a few drops of washing-up liquid and then dry.
- Do not use solvents, or products with an acid or base pH such as bleach, or abrasive products, for cleaning the appliance.
- Do not let water or any other liquid get into the air vents to avoid damage to the inner parts of the appliance.
- Never submerge the appliance in water or any other liquid or place it under running water.
- It is advisable to clean the appliance regularly and remove any food remains.
- The following pieces may be washed in a dishwasher (using a soft cleaning program):
Bowl (^*)
- Then dry all parts before its assembly and storage.
ANOMALIES AND REPAIR
- Take the appliance to an authorised technical support service if product is damaged or other problems arise. Do not attempt to disassemble or repair the appliance yourself as this may be dangerous.
FOR EU PRODUCT VERSIONS AND/OR IN CASE THAT IT IS REQUESTED IN YOUR COUNTRY:
ECOLOGY AND RECYCLABILITY OF THE PRODUCT
The materials of which the packaging of this appliance consists are included in a collection, classification and recycling system. Should you wish to dispose of them, use the appropriate public recycling bins for each type of material.
The product does not contain concentrations of substances that could be considered harmful to the environment.
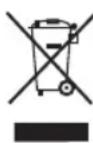
This symbol means that in case you wish to dispose of the product once its working life has ended; take it to an authorised waste agent for the selective collection of Waste from Electric and Electronic Equipment (WEEE).
This appliance complies with Directive 2014/35/EU on Low Voltage, Directive 2014/30/EU on Electromagnetic Compatibility, Directive 2011/65/EU on the restrictions of the use of certain hazardous substances in electrical and electronic equipment and Directive 2009/125/EC on the ecodesign requirements for energy-related products.
François
Pétrisseur batteur
Giro
Giro Complet
Cher Client,
FOUETS A PETRIR (J):
ELEKTRISCHE SNELHEIDSCONTROLE:
NAPATHPHSEIIPIN TH XPHSH:
- Beβaiωθeite Οι ἐχετε αφαipéσεί ολa Ta uλikα
-
συκεuaσiας Tou προίντος.
-
Piv xpoiopoioe To Tpoiov yia Tpwn φopá, kaapioe Ta μépn Tou εpxovtaσ επaφn μe Tpoipia oTiwC Tpeipapαetai OTNV Tapaypao yia Tny kaapioTnta.
XPHSEH (MONTEAO GIRO):
AEIOTOPTIA TOYPMIO (C):
ACCESORIU CÄRLIG PENTRU ALUAT (J):
ББРКAJIKN 3A MECEHE (J):
-Ta3n npictabka cnjxna 3a MeceHe Ha xIy6, TECTO 3a Nua nT.H.
- NocTabete 6bpkaknte 3a MeceHe B OTBOpnte Ha Kopnyca C MOTopa, KaTo HATnCKate, Dokato ce yye n3uPAkBAhe. (Fig. 1B). 6bpkaknte 3a MeceHe He ca eHaKBN NOMexdy cn. NocTabete
6bpkaKATA C 7aBbata B rOJIeMn OTBOP.
6bpKaIKe Tp6Ba Da ce nocTabr BCra Ka B
cbOTBETCTBaun OTBOP.
-Пoctabete npodkykTnte B kynata (G) nnnB shnpok cbld, cnejd Koeto BKIOUcTe ypeDa da pa6oTn. PpenopbUBaMe, 3a noctrane Ha hau-nO6bp pe3yIITat C MmKcep a Giro,doKaTo MeCtte Da BbPNTe ypeDa B Nocoka Ha YacOBHnKBoTa CTpeJka.
-Пoctabete ceJIeKTopa 3a ckopoct(B) B MInHmAJHo NOJIOXeHne N IOCTeNeHHO yBeIuHaBaIte ckopoCTTa.
- Cnei n3no13BaHe Ha ypeHa, n3BaJeTe 6bPkakata 3a MeceHe, HATnckaKn 6yToHa 3a n3XBbPnA He Ha 6bPkaknte (A)
-Функця",Tpy6o"(c):
-Позволява де пабOTи Ha Tласьи nДа ce упраьлива no-добpe pe3уЛТаТБТ OTnprirotBERHeTo Ha npodykta.
- HaTnCHeTe 6yToHa ,Typ6o(C) n ro pBxKTe HATnCHaT,doKaTO noLyUHTe JeNaHnpe3yJTTaT.
ПОЧТBAHE
-ИЗкlioуete урета озхранвашита мрека
и Го OCTаВеTe Да се ИЗСТИне, ппдл д
3anoHETe Да Го NOUHCTBaTe.
-Почиреурда CBlaЖна Kbpna, HanoeHa C HЯколкКаIGN MNeU npenapaT, cneД Koeto ro NOdcyWeTe.
-3a nouCTBaHeTo Ha ypeHa He nI3noI3BaIte pa3TBOpHTeN I npenapatn C KInCeJIHHeH IIN OCHOBEN pH fakTOp, KaTO HAnpImep 6eJIHa I a6pa3NBn npOdykTN.
-He donyckaIte npOHKbaHTo Ha Boda npe3 BEHTnlaQIOHHTe OTBOpN; B npOTnbEN CnyaM MoKe Da npEIN3BkAte NOBpeDa Ha pa60THnte Yactn BB BbTpEwHocTtHa ypeNa.
-He notanrTe ypeDa BB BODa nn npyra TeuHocT n He ro noCTabYte eoT Teuaa BODa.
-Прелорьчтелно eда поства即时ураpepeOBHINanbIHO da OTCTpaHЯBaTeOCTaTbUHTeOTхраHa.
- CJIeHHTe YacTn MOraT Da Ce MmT B TOnIa CaNyHeHa BOda NmB MmNHa MaMInHa (U3NoJ3BaIte MeKa nporpama 3a MneHe):
Kyna (^*)
- CneTToBa, noCcyWeTe Do6pe BCnUKN YacTN, NoCTaBeTe nO6paTHo N cbxpaHete ypeDa.
HEN3ПРABHOCTN I PEMOHT
- B cnyaHa Heu3npaBHOCT, MoJI OTHecTe ypeDa B OTOpu3npaH cepBn3 3a TEXHnuecko o6cnykBaHe. MoJI He ce ONITBaIte da pa3rno6BaTe ypeDa IIN Da ro nonpaBraTe - TOBa e OnaCHO.
3a pa3HOBNIOCTNE EU Ha TOBa n3dJeNne n/nnB cnya, npNJIOXIM 3a Baawata cTpaHa:
ОПАЗВАЕ HA OKOLHATA CРЕДА NPELUKNЛИРАЕ HA ИЗДENNETO.
- MaTePnAnIte, ot KOnTO n3pa6oTeHa OnaKOBkTaHa To3n eNeKTpoypeEd ca BKnIOueHb CnCTeMa 3a T8XHOTo Cb6uPaHe, KNaCnOuNcUpAne H peuNKnUpAne. Ako JeNaeTe Da ce OcBO6oDnTE OT T8x, N3NoN3BaJTe 0BSeCTBeHnTE KOHTeHepn, npriOeHn 3a BCEKN OTdJIeHn BVn MaTePnAn.
-Bn3denneto HamaHaInuHn KOHcHTpaunn Ha BeuectBa, KOTo MoRaT Da 6bDaT onpeJeHn KaTO BpeHn 3a OKOHHaTa cpea.
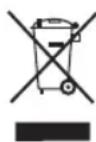
To3n CmB0n O3HaayBa, Ye aKo KeJaTe Da ce ocBo6Ondte OT ypea cnei n3TuHae Ha EKCnNoaTaCuHOHHyT My XHBOT Tp6Ba Da ro npedeAeTe NO noXoJHa NaHn Ha pnpMa 3a npepa6OtKa Ha OTnaDbu, OTopu3npaHa 3a pa3deJIHo
c6bnpaHe Ha OTHOCHO OTNaIbUcN OT eNEKtpnue-CKo n eNEKtpoHNO obOpyDbaHe (OEO).
HactoIypeN3nBnHnBa DnpeKtNbBa 2014/35/UE 3a Hnckn HnpeXeHnra, DnpeKtNbBa 2014/30/UE 3a eNeKtpomarHeTnUHO CbOTBeCTBne nC DnpeKtNbBa 2011/65/EU 3a orpaHnueHnra Tnp ynotpe6ha HnKoN onpeDeJeHn OanChn BeIecTBA B eNEKtpuYeCKn ENEKTPoHHn anapatn n C DnpeKtNbBa 2009/125/CE 3a n3ncKBaHnraTa 3a ekONOruHen DN3aHn, npInOxHM NkM n3deJnna, CBbp3aHn C eHepnra.
-08ill 1io 2o
-1yjyjyj
..(H) 10G
.0j0j 1JxJy (E)
.1yAJIy(A)
jglsl jki
Iogjg jwll dagg joll jaoj gall his
y.3sSll aal 1aal lal yabla gagglus cun jnall ylaan (B1.gIF) bai cgo elao jnall yjbjn jnall jnall jnall
sIaIcIyI ygog s
aLlwl aoeolg b yabla yaaal j ooriG algal gao gaiuall jiaagall jagell agagpalbllg (G) eall
aJgjyosyjy jgsjSgB (B) aRall
(A) Jaaai jdoaiaai yjao jao aiai jao ai jao ai
:(C)g2gaa
: (a) (a) (a) (a) (a) (a) (a) (a) (a) (a) (a) (a) (a) (a) (a) (a) (a) (a)
(4) 或 g .
m = 311 ;
j00j00j00j00j00j00j00j00j00j00j00j00j00j00j00j00j00j00j00j00j00j00j00j00j00j00j00j00j00j00j
aolal
oJl JtOyIg 1. Jtaaui b d aai y Iaiaol jagll Jzss s b Jd lalwryll aiai jil
Jablllgliaa jy bai yjg jaglllge bla. Jablll jn no jaglll lla uay L 1
Aagbglal gl aiai g aiaiaibil aiaeall g aiaaill alrddlll jaglll lla pduu n j k
Aie aiajblgblg w gswg w ay bny jaglll Uaaaswly bgy biny jaywblg yf ydy Iy dlo 1
jagbll y g yblg yblg c t Jabll ykyn jy B. yj yj yj yj yj yj yj yj yj yj yj yj yj yj yj yj yj yj yj yj yj yj yj yj yj yj yj yj yj yj yj yj yj yj yj yj yj yj yj yj yj yj yj yj yj yj yj yj yj yj y
jzab- jzgallie jzaoal
-
aJySdo 1000 Jgol gol yjgl jll no jagol Jnagall de p a Jgolll cldao no g 13
Jr 15 1] g 11 1] g 15 1] g Jau 15] Jgall pnnu Y.
Jagl uJag 1] Joo g Jgol yjgl yjgl Jgolll Uauu V. Jgol Jgol yjgl Jgolll Uauu Uauu Uauu Uauu Uauu Uauu Uauu Uauu Uauu Uauu Uauu Uauu Uauu Uauu Uauu Uauu Uauu Uauu Uauu Uauu Uauu Uauu Uauu Uauu Uauu Uauu Uauu Uauu Uauu Uauu Uauu Uauu Uauu Uauu
:daIg p
J 15 J 15 J 15 J 15 J 15 J 15 J 15 J 15 J 15 J 15 J 15 J 15 J 15 J 15 J 15 J 15 J 15 J 15 J 15 J 15 J 15 J 15 J 15 J 15 J 15 J 15
1
1
一
一

- SAFETY ADVICE AND WARNINGS
- USE AND CARE:
- SERVICE:
- DESCRIPTION
- INSTRUCTIONS FOR USE
- BEFORE USE:
- USE (MODEL GIRO):
- USE (MODEL GIRO COMPLET):
- ELECTRONIC SPEED CONTROL:
- ONCE YOU HAVE FINISHED USING THE APPLIANCE (GIRO MODEL):
- ONCE YOU HAVE FINISHED USING THE APPLIANCE (GIRO COMPLET MODEL):
- ACCESSIONS:
- BEATER ACCESSORY (I):
- DOUGH HOOK ACCESSORY (J):
- TURBO FUNCTION (C):
- CLEANING
- ANOMALIES AND REPAIR
- FOR EU PRODUCT VERSIONS AND/OR IN CASE THAT IT IS REQUESTED IN YOUR COUNTRY:
- ECOLOGY AND RECYCLABILITY OF THE PRODUCT
- François
- Pétrisseur batteur
- FOUETS A PETRIR (J):
- ELEKTRISCHE SNELHEIDSCONTROLE:
- NAPATHPHSEIIPIN TH XPHSH:
- XPHSEH (MONTEAO GIRO):
- AEIOTOPTIA TOYPMIO (C):
- ACCESORIU CÄRLIG PENTRU ALUAT (J):
- ББРКAJIKN 3A MECEHE (J):
- ПОЧТBAHE
- HEN3ПРABHOCTN I PEMOHT
- ОПАЗВАЕ HA OKOLHATA CРЕДА NPELUKNЛИРАЕ HA ИЗДENNETO.
- aolal
- :daIg p
Brand : TAURUS
Model : Giro Complet
Category : Hand blender