
G5 Graphite Series PG5000 - Shaver REMINGTON - Free user manual and instructions
Find the device manual for free G5 Graphite Series PG5000 REMINGTON in PDF.
| Brand | Remington |
| Model | G5 Graphite Series PG5000 |
| Product type | Multi-groomer with precision shaver |
| Color | Graphite |
| Power source | Rechargeable lithium-ion battery, AC adapter PA-0505E (EU) |
| Charge time | 4 hours |
| Run time | Up to 90 minutes |
| Charge indicator | Blue LED (charging, complete) and red (low level) |
| Included accessories | Wide trimmer, precision trimmer, nose/ears/eyebrows trimmer, mini foil shaver, body groomer attachment, adjustable comb, fixed combs (1.5 mm and others), storage pouch, adapter |
| Cutting lengths | From 0.2 mm (micro-stubble) to 20 mm (adjustable comb) |
| Cutting technology | Stainless steel blades, Trim Shave for 0.2 mm micro-stubble |
| Water use | Yes, washable under water (detachable head) |
| Maintenance | Cleaning under running water, regular oiling of blades |
| Safety | Adapter with transformer, do not use if cord damaged, keep out of reach of children |
| Batteries/Battery | Integrated non-replaceable battery, removal by professional for disposal |
| Recycling | Do not dispose of with household waste, take to collection center |
Frequently Asked Questions - G5 Graphite Series PG5000 REMINGTON
User questions about G5 Graphite Series PG5000 REMINGTON
0 question about this device. Answer the ones you know or ask your own.
Ask a new question about this device
Download the instructions for your Shaver in PDF format for free! Find your manual G5 Graphite Series PG5000 - REMINGTON and take your electronic device back in hand. On this page are published all the documents necessary for the use of your device. G5 Graphite Series PG5000 by REMINGTON.
USER MANUAL G5 Graphite Series PG5000 REMINGTON
G5 Graphite Series Personal Groomer
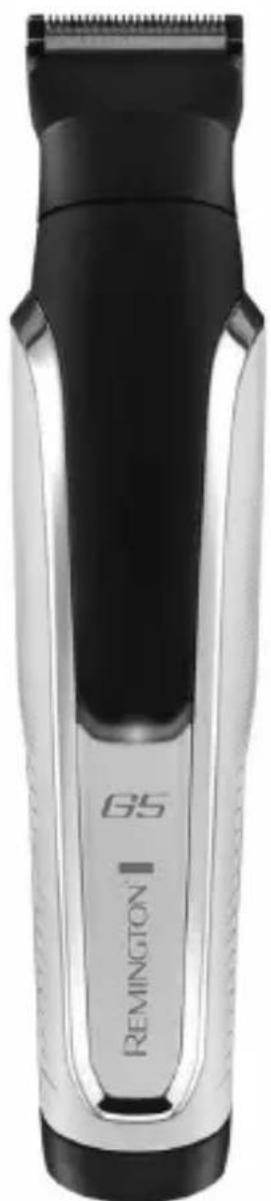
PG5000
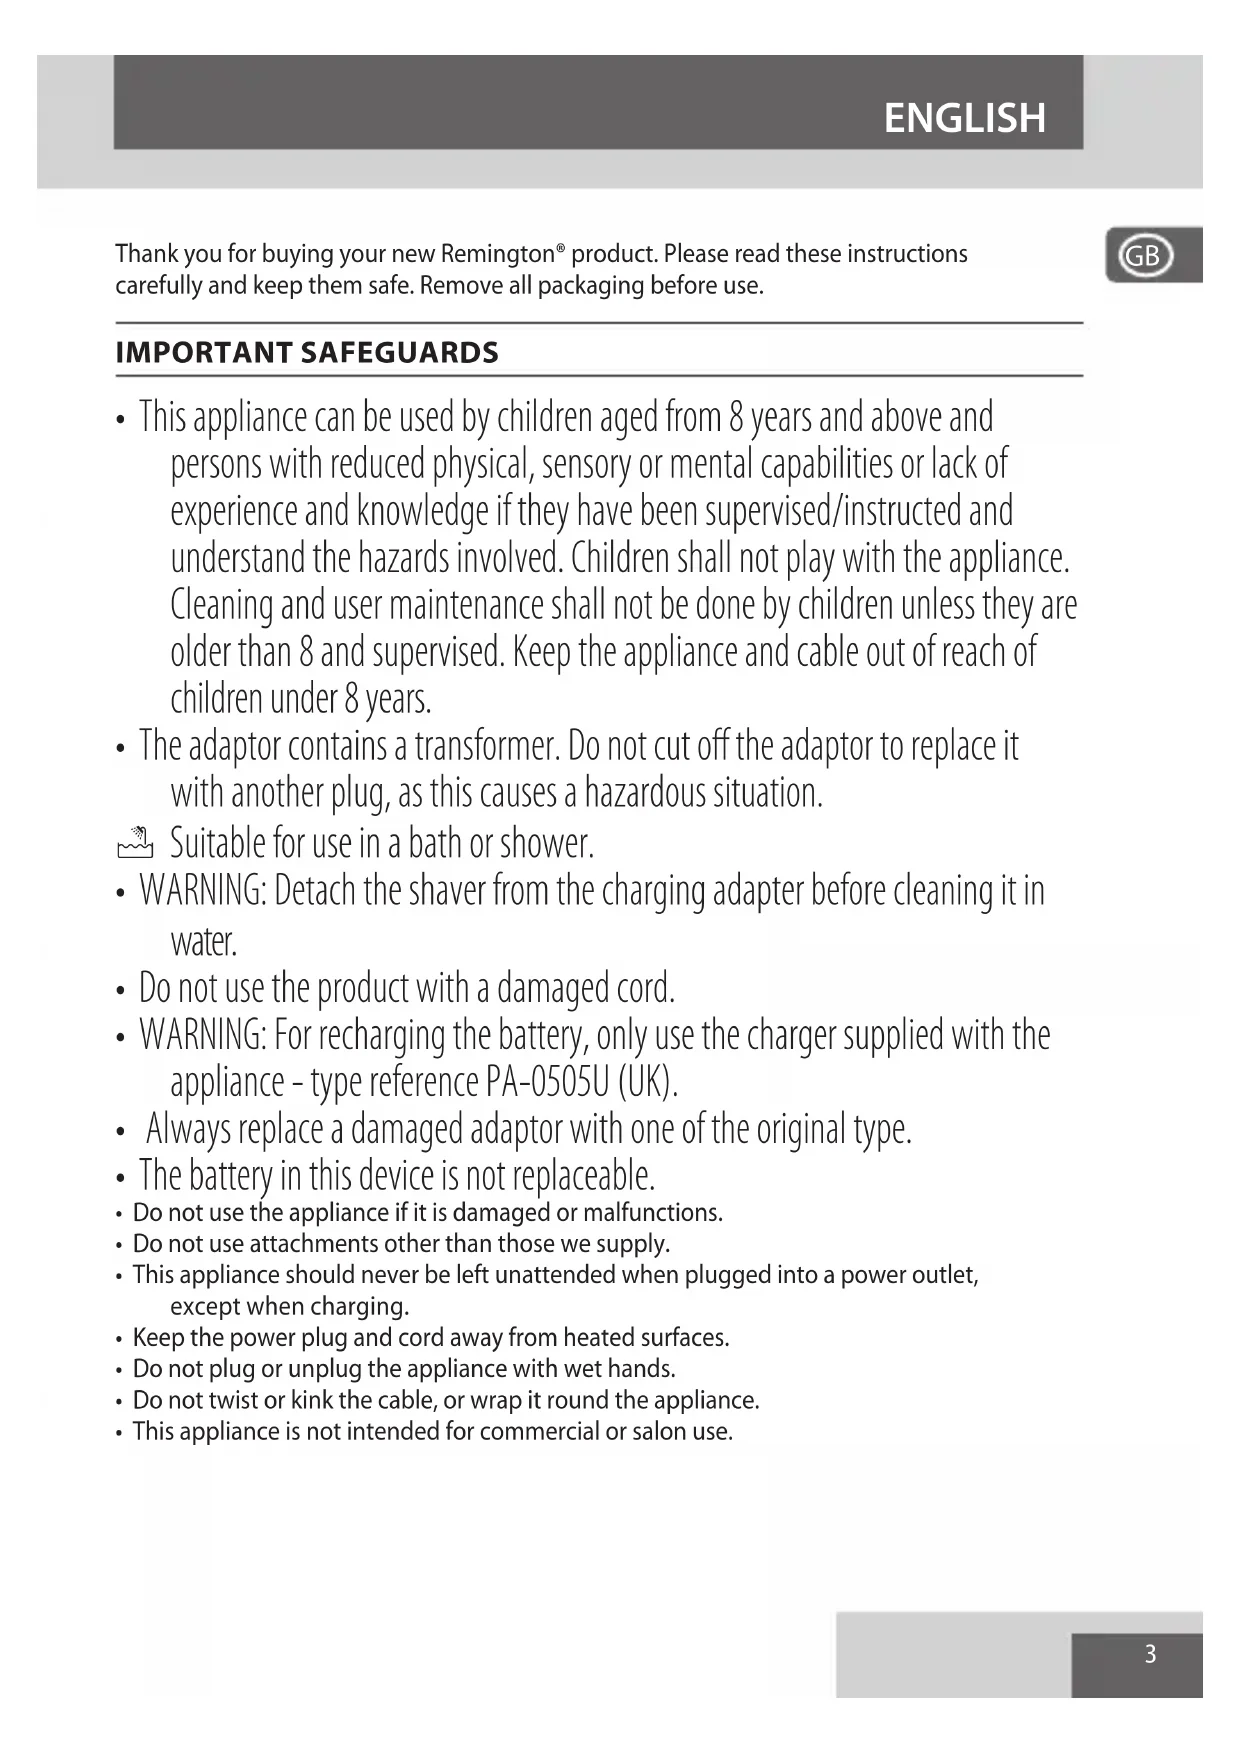
Thank you for buying your new Remington® product. Please read these instructions carefully and keep them safe. Remove all packaging before use.

IMPORTANT SAFEGUARDS
- This appliance can be used by children aged from 8 years and above and persons with reduced physical, sensory or mental capabilities or lack of experience and knowledge if they have been supervised/instructed and understand the hazards involved. Children shall not play with the appliance. Cleaning and user maintenance shall not be done by children unless they are older than 8 and supervised. Keep the appliance and cable out of reach of children under 8 years.
- The adaptor contains a transformer. Do not cut off the adaptor to replace it with another plug, as this causes a hazardous situation.
Suitable for use in a bath or shower.
- WARNING: Detach the shaver from the charging adapter before cleaning it in water.
- Do not use the product with a damaged cord.
- WARNING: For recharging the battery, only use the charger supplied with the appliance - type reference PA-0505U (UK).
- Always replace a damaged adaptor with one of the original type.
- The battery in this device is not replaceable.
- Do not use the appliance if it is damaged or malfunctions.
- Do not use attachments other than those we supply.
- This appliance should never be left unattended when plugged into a power outlet, except when charging.
- Keep the power plug and cord away from heated surfaces.
- Do not plug or unplug the appliance with wet hands.
- Do not twist or kink the cable, or wrap it round the appliance.
- This appliance is not intended for commercial or salon use.
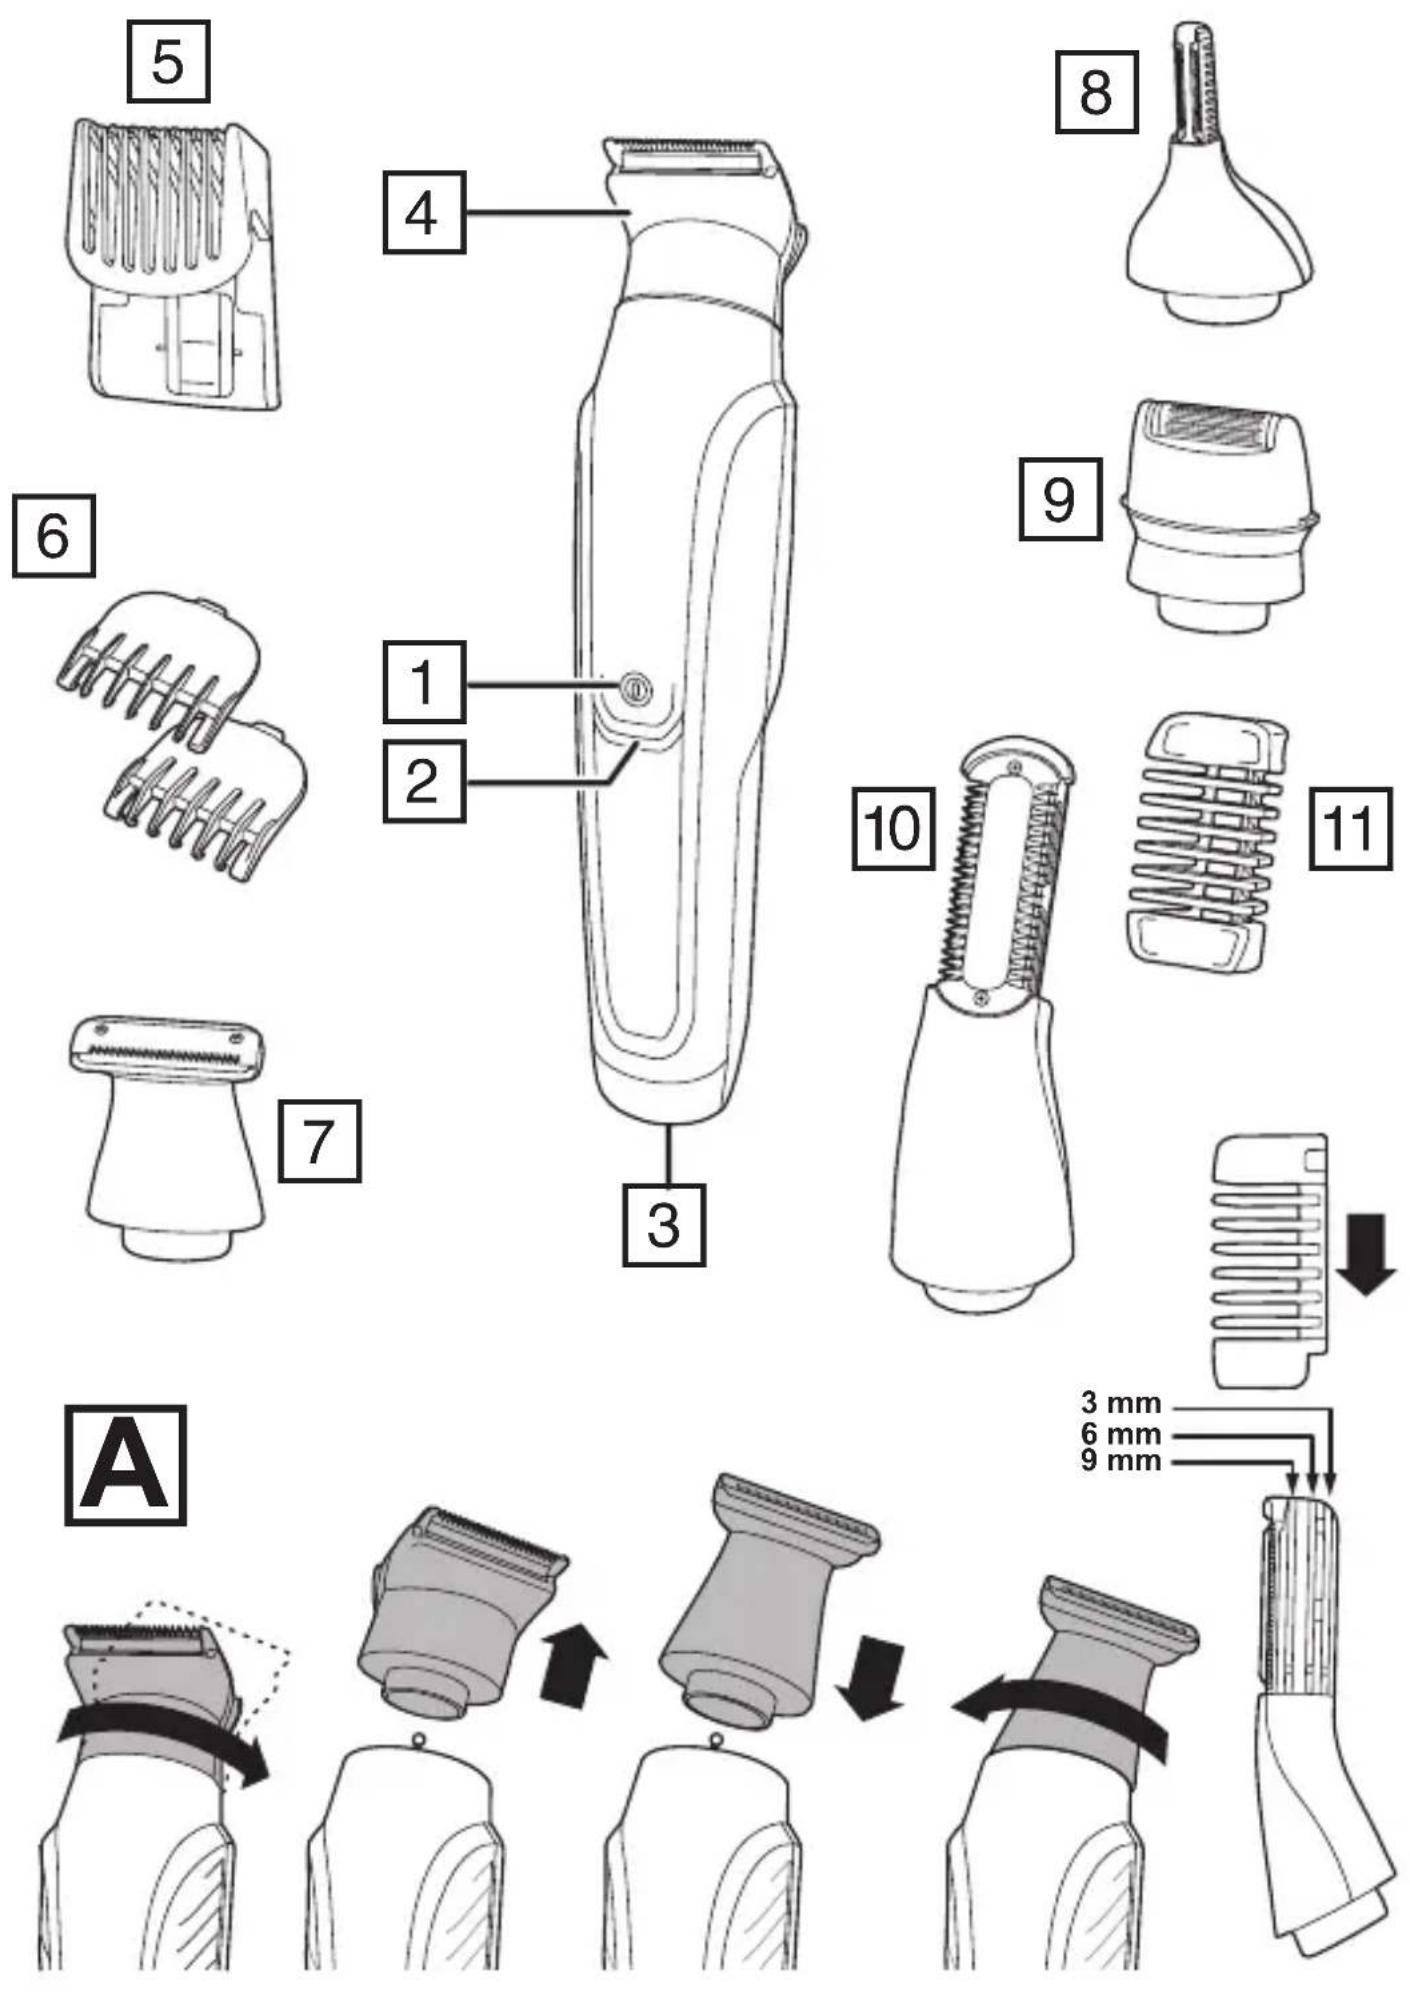
PARTS
-
On/Off switch
-
Nose, ear, eyebrow trimmer
-
Charging indicator light
-
Mini foil shaver
-
Charging connector
-
Body hair attachment
-
Wide trimmer
-
Comb
-
Adjustable comb
Not shown
- Attachment guide combs
Adaptor
- Precision trimmer
Storage pouch
CHARGING YOUR APPLIANCE
Before using your trimmer for the first time, charge for 4 hours.
- Ensure the product is switched off.
- Connect the charging adaptor to the product and then to the mains.
CHARGING INDICATOR
| Charge Level Light | |
| Charging Blue LED will flash | |
| Fully Charged Blue LED will light up continuously | |
| Battery charge is low Red LED will flash |
- Run time from fully charged is up to 90 minutes.
- Your trimmer cannot be overcharged. However, if it is not going to be used for an extended period of time (2-3 months), unplug it from the mains and store.
- To preserve the life of your batteries, let them run out every 6 months then recharge for 4 hours.
ATTACHMENTS
TO FIT AND REMOVE ATTACHMENTS (FIG. A)
Ensure that the device is switched off before fitting or removing attachments.
- To remove, rotate the attachment anti-clockwise until it unlocks and then lift it off.
- To fit, place the desired attachment on top of the device and rotate the attachment clockwise to lock it into place.
FITTING AND REMOVING FIXED GUIDE COMBS
To Fit
- Hook the front of the guide comb over the teeth of the wide trimmer.
- Press the back of the guide comb down until it clicks into place.
To Remove
- Lift the tab on the back of the guide comb upwards until it comes free from the wide trimmer head.
FITTING AND REMOVING THE ADJUSTABLE COMB
- To fit, line up the rails on the comb with the slots on the sides of the groomer and slide the comb downwards onto the groomer.
- To adjust, press and hold the adjustment button on the back of the comb and slide the comb up or down. Release the button to lock the comb at that position. The length of cut is indicated by the scale on the side of the trimmer.
INSTRUCTIONS FOR USE
- Comb facial hair with a fine comb before you start trimming.
- Comb your hair in the direction that it grows so that the hairs are at their maximum height and facing in the same direction.
- After trimming, lightly go over the trimmed areas with the foil to get a smooth clean finish.
- Since all hairs do not grow in the same direction, you may want to try different trimming positions (i.e. upwards, downwards or across) for better results.
- Hair should be dry and free from any waxes or lotions.
- If hair builds up during use, switch the unit off, remove any attachment in use and clean any excess hair clippings from the attachment and groomer.
3-DAY STUBBLE, AND BODY HAIR MAINTENANCE
| Attachments |
| Wide trimmer with 1.5 mm fixed comb |
3-day stubble look:
Let your stubble grow to a length that is slightly longer than the look you are trying to achieve.
- Fit the 1.5mm fixed comb to the wide trimmer attachment.
- Run your trimmer through your beard against the direction of hair growth.
- Tidy the edges of the stubble using the precision trimmer attachment.
- For more control over the length of your stubble, you can use the adjustable comb and trim your stubble down in increments starting at a longer length setting until you get the desired look.
Body hair maintenance: Trimming to length
- Fit the body hair attachment.
- Body hair can be trimmed to 3 different lengths (3, 6 and 9mm ). Select the desired length by sliding the comb into one of the three slots on the side of the attachment.
- Place the flat side of the attachment against the skin.

- Slowly slide the trimmer through the hair in the direction of hair growth.
- Use slow, well-controlled movements.
Body hair maintenance: Removal
- Remove the comb from the body hair attachment and go over the areas where you want to remove the body hair.
- Stretch the skin with your free hand to make the hairs stand upright.
- Use light pressure and shave against the direction of hair growth.
HAIR CLIPPING
| Attachments |
| Wide trimmer with adjustable comb |
Step 1: Nape of the neck
- Fit the wide trimmer and adjustable comb.
- Set the adjustable comb to the desired length.
- Hold the clipper with the blade teeth pointing upwards. Begin starting at the centre of the head at the base of the neck.
- Slowly lift the clipper, working upwards and outwards through the hair, trimming just a little at a time.
Step 2: Back of the head
- With the comb set at 12 mm or 18 mm ,cut the hair at the back of the head.
Step 3: Side of the head
- Adjust the comb to a shorter length setting for the areas around the ears.
- Increase the length setting on the adjustable comb to gradually transition the length of hair on the side of the head to the longer hair on the top of the head.
Step 4: Top of the head
- Adjust the comb to the longer length settings (up to 20mm ) then cut the hair on top of the head against the direction in which the hair normally grows.
- Always work from the back of the head.
Trim the sideburns
- To trim the sideburns, adjust the comb to the desired length setting, or use one of the fixed guide combs.
SHORT/LONG BEARD TRIMMING
| Attachments |
| Wide trimmer with adjustable comb |
| Precision trimmer |
- Fit the wide trimmer and adjustable comb.
-
Set the adjustable comb to the desired length.
-
Start trimming under the chin following the line of the jaw.
- Work upwards towards the ear and upper beard line.
- Tidy the beard edges using the precision trimmer attachment.
CONTOUR EDGING AND CLOSE HAIR CUTTING
| Attachments |
| Wide trimmer |
Contour edging:
- Hold the device with the cutting blade (teeth) facing you and at 90 degrees to the skin.
- Start with the edge of the beard/moustache line and, with the blade resting lightly against the skin, use slow controlled movements to create contoured lines.
Close hair cutting:
- Use the fingers of one hand to lift the hair at the base of your head up off your neck.
- Your index finger should be covering the roots of the hairs you are lifting to prevent them from being accidentally cut.
- Hold the trimmer to the base of your neck with the blade facing up. Move the trimmer up the neck until it touches your index finger which is protecting the hair roots.
- Move your trimmer slowly and keep the hair roots at the base of your head out of the way of the trimmer.
DETAILED NOSE, EYEBROW AND EAR HAIR TRIMMING
| Attachments |
| Nose, ear and eyebrow trimmer |
Nose and ear:
- Fit the nose, ear and eyebrow trimmer.
- Insert the attachment gently into the nostril or ear.
-
Gently move the attachment in and out while rotating the groomer at the same time.
-
Don't insert the attachment more than 6mm into the nostril or ear.
Eyebrow:
- Carefully guide the attachment to remove any stray or longer hairs from the eyebrow.
- To completely remove hairs, let the attachment touch the skin then move over the desired area.
MICRO STUBBLE AND PRECISION TRIMMING
| Attachments |
| Precision trimmer |
Micro stubble:
The attachment has Trim Shave Technology which trims hair down to 0.2mm to leave a micro stubble finish.
- Fit the precision trimmer.
- Hold the attachment so that the guide on the lower edge of the blade contacts the skin (in a the same way you as you would hold a wet razor). The guide on the lower edge of the blade helps to stretch the skin during trimming.
- Use motions similar to wet shaving.
Precision trimming:
- Hold the precision trimmer attachment perpendicular to the skin.
- Move it towards or away from the beard hair to achieve the desired result. Use gentle pressure and controlled movements.
CLEAN SHAVEN EDGING
Attachments
Mini Foil Shaver
- Hold the groomer so the mini foil shaver gently touches your face.
- Use short, well-controlled movements to shave around your beard moustache. Use your free hand to stretch your skin. This encourages the hair to stand upright, making it easier to shave.
- Note: The mini foil shaver was designed to shave the detail areas around your beard/ moustache/sideburns. It was not designed to shave your entire face. For a close comfortable shave, guaranteed, use one of Remington's electric shavers.
Care for your product to ensure a long lasting performance. We recommend that you clean your groomer after each use.
AFTER EACH USE
- Brush any accumulated hairs from the groomer and attachment heads.
- The easiest and most hygienic way to clean the groomer is by detaching the head from the groomer body and rinsing the head with warm water.
- Place one or two drops of cutter oil or sewing machine oil on the blades.
- Turn the clipper on to distribute the oil evenly, wipe off any excess oil.
BATTERY REMOVAL
We strongly recommend that a professional removes the rechargeable battery. Parts of the shaver case, and tools have sharp edges and may cause injury if not handled correctly.
- The rechargeable battery must be removed from the appliance before it is scrapped.
-
Disconnect the charging adapter before removing the battery.
-
Ensure that the battery is fully discharged. To do this, operate the shaver until it stops.
- Unplug the trimmer.
- Using a suitable tool, carefully pry apart the front and rear halves of the case at the joint line.
- Remove the two screws that hold the transparent inner case to the back half of the outer case.
- Lift out the inner case.
- Pull the black motor holder off the transparent case.
- Slide the circuit board and battery out of the transparent inner case.
- Cut the tabs holding the battery to the circuit board.
- The battery must be disposed of safely.
RECYCLING
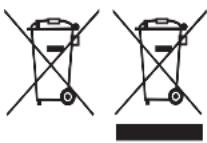
To avoid environmental and health problems due to hazardous substances, appliances and rechargeable and non-rechargeable batteries marked with one of these symbols must not be disposed of with unsorted municipal waste. Always dispose of electrical and electronic products and, where applicable, rechargeable and non-rechargeable batteries, at an appropriate official recycling/ collection point.
UW APPARAAT VERZORGEN
| Accessoires |
| Tondeuse large |
- Coloque elazo plano del accesorio contra la piel.
- Slowly slide the trimmer through the hair in the direction of hair growth.
- Use slow, well-controlled movements.
3 DAGES STUBBE, OG PLEJE AF KROPSHÄR
Tilbehør
Bredt trimmerblad med 1,5 mm fast kam
3 dages stubbe look:
FOR ATT FASTA OCH AVLAGSNA TILLBEHOR (FIG. A)
CISTÉ OHOLENE OKRAJE
Nastavce
Ipeed yctahOBKO INN CHaTNEM HacaOy6eNTecb, UTO yCTPOINCTBO BbIKJIUOHeHO.
- UTo6bI CHaTb HacaNky, NOBOpauHbAitE ee npOTNB YacOBn CTpeKN, Noka OHa He pa36bnKnpyETc. Pocne 3tOrO oTcoeHNHTe ee.
- UTo6bI yCTaHOBnTb Heo6xOIMyIO HacaIKy, paCNoIoxKe ee CBepxu yCTpoiCTBa n IOBOPaUNBaIte no YacOBoi CTpeNke Do fNKcaUIN.
YCTAHOBKA IN CHR'TNE ΦИКСИРОВАньIX HANPABЛЯЮДNX HACAOK
Ymo6bI Hademb Hacaadky
3aueHnTe nepdHIOU qactb HnpaBnaIooe HacaKn 3a 3y6uKn shpOKoro Tpmmepa.
- HaxnmaTe Ha 3aHIOU qAcTb HappaBIAIOUe HacaDNo IeNcKa.
Ymo6bi cHarmb Hacaadky
- Повима Teязвчok, раснолженьи Ha 3адн части habраьюшени Habcaдки, пoka OHa He OTcoeДИNTсЯ OT rolOBКИ 施рOKOr TpIMMepa.
YCTAHOBKA I CHATNE PEGYINPYEMOHNACADKN-TPEBH
- UTo6bl yCTaHOBnTb HacaIky-rpe6eHb, COBMeCTnTe ee HanpaBnaIOuIne C na3amn Ha oBeHX CTOpOHax TpIMMepa I CdBInhTe HacaIky-rpe6eHb Ha TpIMMep.
-Дяperулровин haKMITEи уdepxuBaIte KhoNky peryuInpOBKn Ha 3aHneJ yactn HacaDNKr-rg6hny, npn 3TOM cDnRgAra HacaKDy BBePx nII N Bn3. OTnyCTnte KhoNky, YTO6bl 3aФИКсИрОВаТь HacaKDy-rg6eHb B Heo6xOДmOM NOLOXeHnN.ДlnHa CTpnKKN BbICTabJIeTcHашkaIe c6OKy TprIMMepa.
HCTPYKUNI NO 3KCPJYATAUN
- BolocbHa IInue neped cTrpNkKo cNeDyTe pauecbBaTb ToHko pauecko.
-Причichte BOLOcI NO HAnpaBHeHIO POCTa,ЧTO6bl OHI BbITaHyINcB BO BCIOДINHy I 6bln OdHaKOBO HApPaBHeHbl. - После брптб поидпесь по Вьбрптим мсетам Фольгов, чтобь сбрптв Волocы Начисто.
- Посковы He BCE BOLOCKn paCTyT B ODHOM HAnpaBHeHn, ДяdoctnxKeHn JyUwepe3yIbTaTa Bbl MoKeTe nonpo6oBaTb 6pntbe n3 pa3HbIX noLoxKeHn (T.e., BBepx, BHN3,NopeK).
BolocbI OJXHbI 6bITb CyxIMn, 6e3 HaHeceHHoro Bocka IIN JIOcbOHa. - Ecnn BO BpeMnIcNoJIb3OBAHnB yCtpoNCTBe cKaJIINBaIOTc BAIOcbl, BbIKIIOHTe erOn ChIMnTe BCE HacaKn. Nocne 3TOrO OuNCTnTe HacaKn n TpIMMep OT CKONIBWIXxCra Cpe3aHHbIX BOLOC.
IodpaBnuehue 6akeH6apd
- Дя подравиваши 6akeнбарн Habстpoite Heo6xOДIMyH ДлиHy CTprnxKn Ha Hacadke-rpe6He nIIN BOCNoIb3yITeCb OdHOn I3 ΦИКсИрОВaHHbIX HappaBЯIOUx HacadOK.
ПОДРABHIBAHNE KOPOTKОДЛINHHOБОДы
Jelob nomimha zemuHa
HacaKny dny ToHoro nipribnOBaHHn OchaueHo Texhonorieo Trim Shave, 0do3Bolare CTpNrtn BONOCsI DO DOBxHHn 0,2 MM, 3aIIuAouy neDb NOMiTHy uetInHy.
- PnKpinitb TpImep dny ToHoro niipBHOBaHHa
- TpmaTe Hacdky TaK, 06 HanpMaHa Ha HxHki KpOMci Ie3a TopKaIacr Shkipn (rk iD qac BOnorO roJIHH). HapmHa Ha HxHki KpOMci Ie3a Donomarae HATryBaTH Wkipy nd qac nipBHBIOBAHH BOLOCCr.
- BnKohyTe pyxN, kN iD yac BOnorO roiHHa.
ToHne niOpieBHOeAHHa:
- TpmaTe hacaky dny toHoro niipibHouBaHHn nepneHdkyIrpHo nobepxhi wkipn.
2.перемиут e iB ha npmaKy Bonooc 6oPoOn a6o B cToPOHy BiD hboTo dIaDocarHHeHH 6axKaHOrpe3yNbTaTy.3nerka npntnCHiTb ii Ta BnKOHyTe BnBaXeHi pyxN.
ΦOPMByAHHЯ KOHTyPIB y PA3I ΓλAДKOΓΟΓOIHHЯ
| Hacadku |
| CitkoBa mini-6pntBa |

3APEKDAHE HA BAUNYPEI
Ipei Da n3noJI3BaTe ypea 3a npbB nbT, ro 3apeJe T npoJbJIxKeHne Ha 4 Yaca.
- YBepete ce, ye ypeIbTe n3KIOUeH.
- CbpxKeTe aanTepa 3a 3apeXdaHe KbM npOyKta n cIeT TOBa KbM eNeKtpnueckaTa MpeXa.
INHДИKATOP 3A 3APEXДАHE
CTbIIKA 1-3aδHa yacm Ha εpama
- MoNTpaIte ⅢpOKnTprImep n peryInpyemna rpe6eH.
- HactpoTe perynpyemra rpe6eHa JKeJHaTa DbJKNHa.
- 3aɪpɒkTe Maɪnɪkɑtæ KaTo 3b6nte Ha HoxoBete da ca hacoueHn Harope. 3aɪnoʊhete OT ueHTbpa Ha rɪəBaTæ B OCHOBata Ha Bpata.
4.БabHOBdIraTe MaunHKaTa,DbXKeTe HaOpe N HABbN ppe3 Kocata, KaTo NOdCTpNRBaTe N0 MaNKo BCEKN PbT.
CTbIIKA 2-3adHama yacm Ha 2naBama
C rpe6eH, hactpoeh Ha 12 MM nnn 18 MM, noctpnxke Te Kocata B 3aHaTa qact Ha TnaBaT.
CTbIIKA 3 - CmpaHu7Hama yacm Ha 2JaBaMa
- PerynpaTe rpe6eHa Ha hAcTroKaTa 3a NO-KbCa DblxHHa 3a oBnaCTnte OKoNo yuInTe.
- Ybenuye NaCTPOkata 3a NJIxHa Bbpxy peryIpyemn rpe6eH 3a NoCTeENHa npomHa Ha NJIxHaTa Ha Kocata OTcPaHn Ha TlaBaTa KbM NO-DbJIrTa KOca OTrope Ha TlaBaTa.
CTbIIKA 4 - TopHa qacm Ha 2naBama
- PerynpaTe rpe6eHa Ha HAcTroPKaTa 3a No-rolMa DbLxHnHa (do 20 MM), cIed Koeto 3anOuHHeTe Da NODCTPnRBAte Kocata OTrope Ha TlAbaTa CpeUy NOCOKaTa Ha paCTexK Ha KOCbMa.
- BnHa n 3aNoUbaIte O T 3aHaTa YacT Ha rJaBaTa.
Iopexeme 6aKeH6apdume.
3a da nopejnte 6aHKeH6apnTe hactpoite rpe6eha Ha keHaTa hactpoiKa 3a DblxHa nIIN I3NoI3BaIte eINH OT fIKCupanTe Bodeu n rpe6ehn.
IIOCTPnΓBAHE HA KbCA/ДьЛГA bPAДА
Cama6pbchauka Minifoil
- XbaHete oΦopMraTa npicTabKa TaKa, ye camo6pbchauKaTa C MmH MnpeKa JneKo da DOKOCBa InueTo Bn.

- Използваite Кратуни добре КонтPORINРANДВИЖЕНИЗа 6рсcheHe OKOLO 6paDAtA/ Myctaцinte. Използваite СвобODнATERpbka,3a da ONbHete KOKaTAt. Taka KocbMueTeTa 3aCTaBAT BEPTUKaJIHo, KOETO yIeCHRA 6рсheHTo.
3a6eJekka: camo6pbchauKaTa C MmH MnpeJa3HaueHa 3a 6pbchHe Ha DeTaNHTe oBnactn OkOTo 6paDATA/MyCTaunTe/6aKeH6apdnte. TЯ He e npedHa3NaueHa 3a 6pbChHe Ha cIaNoto IInCe. 3a Da cn rapaHTnPate ydo6Ho 6pbChHe 6IIN30 Do KOxAta, n3PON3BaIte eJeKTPnueCKnTe camo6pbchauKn Ha Remington.
ΓPUNKA 3A ΓPYMEPA
Tpnxke Ce 3a npoodykTa, c zeI noCTnraHe Ha nbJrOToPaen nepnoiHa pa6ota.
IpeopbUbme Bn da nouchBaTe rpymepa cneBcKa ynoTpe6a.
CJIEDBCAUYNOTPEBA
-Изүйтүй Ксбмүүтата OT рүмөрүл пүпүхгд.
- Han-lechnayi Haai-xinrueHnuynay HauHH da Nouchte ypea e ue3 n3BaXdaHe Ha rnaBaTa OT OCHOBHaTa My qact u 3PnlaKbaHe c TOnla Boda.
- Пocтавеета Нд Вс Калп MaС lo 3a 施ВаЧа МшИнБьрху OCTрЕТа.
BknueTe ypeDa, 3a da MoKe MaCNoTo Da ce pa3npeIeN paBHomepHo N n36bPweTe OCTaHaJIoT O MacNo.
CBAJIaHE HA BATEPnIyTA
Cnilho npenopbunTeHno e da npesapexdaaata ce 6atepya 6bde cmeheHa ot Cneuannct. Yactte Ha Kopnyca Ha camo6pbchauKaTa n HnCTpymEnTte mAt OCTpn Kpaunla, Koeto MoKe Da doBeDe Do HapaHbaHe, aKO He pa6OTte BHMaTeHNo CTAX.
BaTePnraTAp6BaJa 6bIe n3BaJeHa npEi npEiB Ta ce npEaIe 3a ckpan.
Pa3kayeTe 3apeKdaunna aanTep npen da OTCTpaHbate 6aTePnra.
- YBepete ce, ye 6aTepeTae Hnblno npa3Ha. Toba cTaBa ype3 HnpeKbChata ynoTpe6a Ha ypeDa,doKaTo He cnpe ot camo ce6e cn.
2.ИЗкlioуeteТриметаOTзхранБаHeTo. - C nOMOuTa Ha nOxOJaHnCTpyMeHT BnMaTeJHo pa3JeIe Te npEHaTa n 3aHaTa NOOBnHa Ha KOpNyCa npCbP3BaUaTa JINHn.
- ŒCTpaHeTe DbTa BnHTa, KOnTO npNDbpKaat npO3paunBbTppeHEn Kopnyc KbM 3aHaTa YacT Ha BbHsHnKopnyc.
- Повдигнелу Вьтpeшни Корпс.
6.Издьрай Te дьржаHa MoTopa OТ позрачня KOpnyc.
7.ПьзHeTe NeayatHaTа ПlaTka 6aTePnraTa HABbH OT npO3paHnB bTpeWeH Kopnyc. -
- Cpeke Ta6obete, KOnTo 3aIbpxaT 6aTePnra T KbM NeyaTHa T PnAaTKa.
BaTepeIa Tpa6Ba Da ce n3Xbpyn 6e30NaCHO.
- Cpeke Ta6obete, KOnTo 3aIbpxaT 6aTePnra T KbM NeyaTHa T PnAaTKa.
PEUKNJIUPAHE
3a da ce n36erHaT ekONoruHn H 3dpabHn npo6neMn nopadn haunue Ha onaChi cy6ctaHcN, ypeDHTe, akymyNaTopHnTe n
HeakymyIaTopHnTe 6aTepn, 06o3HaueHc c eINH OT Te3N CmBOLn, He Tp8Ba Da ce N3XBbPnT 3aeHNO C HecOpTnpaHn O6uHCKN OTNaDbuN.
BnHa n3XbpbIe Te eJektpnueckn n eJekTpoHn npOdyKtn n,
KbdeTo e npnoJMO, akymylaTOPHn H heakymylaTOPHn 6aTePNn, Ha NOxOJaIO OfNuaJIHO MrcTO 3a peuNKnpaHe/cb6npaHe.
Jg 1
.1
aale aie g ciej
8 n m J a c 1234567890123456789012345678901234567890123456789012345678901234567890123456789012345678901234567890123456789
.
cIaI aIbIaIg I aI dI
1jbiia
.
.
- jie
.PA-0505E
aJ1
.
J
1,2,3 ,2 ,3
.
·
a
12j 14
.
A
.
jgl jg4gl jgl jgl
.
4 2
81
jllg jy1 g yj 8
S OBC = S COD + S BOC - S BDO
paalj yoo 10
m = 311
:
jai 1
jill
(On/off) / 1.1
jai jia 2
Jalil Jago 3
J 4
Jiaill Jiall Iai.5
gala 15 bua .6
.7
#
4 4 4 4 4 4 4 4 4 4 4 4 4 4 4 4 4 4 4 4 4 4 4 4 4 4 4
1
2
J 1
a a a a a a a a a a a a a a a a a a a a a a a a a a a
4ilS = 12 · 4il · S
gag aaiia gaoa glia 15
#
aaii i 1
jssjjb jll jll ball gJgall 1d! sly j
J 1
-4g
wSe wJll gIgI gI gI gI (p20) JbI I bI I
.
bln 121 p 1 g 1 y 1 j 1 1 1 1 1 1 1 1
auii i 1
a1ygbbl/0rjzabla a1ybl
buii jilai buii i
1
2
3
4
.5
:
.1
2
.3a bgsie Jgssll Jle
:
1
1b2 4a 4a 4a 4a 4a 4a 4a 4a 4a 4a 4a 4a 4a 4a 4a 4a 4a 4a 4a 4a 4a 4a 4a 4a 4a 4a 4a 4a 4a
gial jie i 1jge 1. jie aia oai jai gial dale ie wai jie
.
4
AE
y
19/INT/PG5000T22-7000786-D Version 12/19
Remington® is a Registered Trade Mark of Spectrum Brands, Inc., or one of its subsidiaries
VARTA Consumer Batteries GmbH & Co. KGaA, Alfred-Krupp-Str. 9, 73479 Ellwangen, Germany www.remington-europe.com