
VCC 4350 A - Vacuum Cleaner GRUNDIG - Free user manual and instructions
Find the device manual for free VCC 4350 A GRUNDIG in PDF.
| Brand | Grundig |
| Model | VCC 4350 A |
| Product type | Vacuum cleaner with bag |
| Power supply | 220-240 V~ 50/60 Hz |
| Nominal power | 700 W |
| Maximum power | 800 W |
| Dust container capacity | 2.0 L |
| Operating radius | 8 m |
| Net weight | 3.9 kg |
| Bag type | Swirl® Type Y 05® or Menalux® Type 1840 |
| Motor filter | Washable with soapy water |
| Exhaust filter | Washable with soapy water |
| Suction control | Yes, on the handle |
| Multi-surface brush | Yes, with two positions (hard floors/carpets) |
| Telescopic tube | Yes, metal |
| Automatic cord rewinding | Yes |
| Full bag indicator | Yes, light indicator |
| Included accessories | Crevice tool |
| Intended use | Household only |
| Protection class | Not specified (estimated: class II) |
| Repairability | Parts available for 5 years |
Frequently Asked Questions - VCC 4350 A GRUNDIG
User questions about VCC 4350 A GRUNDIG
0 question about this device. Answer the ones you know or ask your own.
Ask a new question about this device
Download the instructions for your Vacuum Cleaner in PDF format for free! Find your manual VCC 4350 A - GRUNDIG and take your electronic device back in hand. On this page are published all the documents necessary for the use of your device. VCC 4350 A by GRUNDIG.
USER MANUAL VCC 4350 A GRUNDIG
natural_image
Black-branded vacuum cleaner with coiled hose and handle, no visible text or symbols on bodyDE EN TRIS
FR HR PL

natural_image
Close-up of a white curled corner page corner on white background (no text or symbols)
text_image
A B C D E F G H I J K L M N O P Q GRUNDIG BEGUIDDEUTSCH 05 - 13
ENGLISH 14 - 22
TÜRKÇE 23-31
ESPAÑOL 32 - 40
FRANÇAIS 41 - 49
HRVATSKI 50-58
POLSKI 59 - 67
natural_image
Line drawing of a robotic vacuum cleaner with a black arrow pointing to the nose area (no text or symbols present)Hinweis
natural_image
Diagram showing a mechanical joint or fracture with directional arrows indicating movement (no text or symbols)natural_image
Line drawing of a mechanical component with a flanged top and base (no text or symbols)natural_image
Simple line drawing of a mechanical component with a downward arrow indicating a process or operation (no text or symbols)Fugendüse
natural_image
Line drawing of a pen-like object with a tapered tip and stem (no text or symbols)natural_image
Line drawing of a hand gripping a curved mechanical device (no text or symbols)Netzkabel einziehen
text_image
Diagram showing a device with a sensor and a magnified view of the screen, labeled with Chinese text.natural_image
Illustration of a hand inserting a device into a patient's ear area, with an upward arrow indicating the process (no text or symbols present)natural_image
Diagram of a mechanical component inside a container, showing internal structure with no visible text or symbolstext_image
Diagram illustrating a vacuum cleaner's internal components and cleaning process, with labeled parts and directional arrows.Hinweis
Please read this manual completely before using your appliance! Follow all the safety instructions to avoid damage caused by improper use!
Please retain this user manual for further reference. This manual shall also be supplied with the appliance when the appliance is handed over to a third person.
■This appliance is intended for household use only. Warranty shall be void when the appliance is used for industrial or commercial purposes.
■ Please observe these instructions to prevent damage and risks due to improper use.
■ Do not clean wet surfaces and vacuum wet objects with this appliances.
■ Do not use this appliance in wet areas.
■ Do not use this appliance with wet hands.
■This appliance is intended for cleaning dirt and dust particles. Do not attempt to vacuum large objects that can damage the appliance by blocking it.
■ Do not use the appliance to vacuum cigarette butts, fireplace ashes or matchsticks. These objects may cause fire.
■ This appliance is not intended for cleaning persons or animals.
- Do not insert anything through the suction clearance of the appliance. Always keep the suction clearance open.
■ Do not hold the appliance up-right while vacuuming.
■ Do not roll the appliance over its power cord.
■ Do not close a door over the power cord.
■ Do not pull the power cord round sharp edges and do not squash it.
■ If you move the appliance to another room, always disconnect the power cord and carry the appliance by the handle.
■ Never carry the appliance by pulling its power cord.
■ Never operate the appliance without the dust container or filter.
■ Replace the dust bag when the indicator illuminates in red.
■ Always pull out the power cord before cleaning or carrying out any maintenance on the appliance.
■ Whenever possible, insert the power cord plug directly into the socket. Avoid using extension cables or multipoint connectors.
■ Pull out the power plug after use. Do not disconnect the plug by pulling on the cable.
■ Never use the appliance if there is visible damage on the appliance or on the power cord. This also applies if the appliance has accidentally become wet. Please contact a service centre in this case.
- Our GRUNDIG Household Appliances meet all the applicable safety standards; thus if the appliance or the power cord is damaged, it must be replaced by the dealer, a service centre or a similarly qualified and authorised service person to avoid any danger arising. Faulty or unqualified repair work may cause danger and risk to the user.
■Always keep the appliance away from children.
■ This appliance can be used by children aged from 8 years and above and persons with reduced physical, sensory or mental capabilities or lack of experience and knowledge if they have been given supervision or instruction concerning use of the appliance in a safe way and understand the hazards involved. Children shall not play with the appliance. Cleaning and user maintenance shall not be made by children without supervision.
- Do not open the appliance under any circumstances. No warranty claims are accepted for damage resulting from improper handling.
Dear Customers,
Congratulations on your purchase of your new vacuum cleaner VCC 4350 A.
Read the following user notes carefully to ensure full enjoyment of your quality GRUNDIG product for many years to come.
Responsible approach!

GRUNDIG focusses on contractually agreed social working conditions with fair wages for both inter nal employees and suppliers. We also attach great importance to the efficient use of raw materials with continuous waste reduction of several tonnes of plastic every year. Furthermore, all our accessories are available for at least 5 years.
For a future worth living.
For a good reason. Grundig.
Controls and parts
See the figure on page 3.
A Suction control
B Lower body
C Metal telescopic tube
D Flexible hose adapter
E Height setting switch
F Wheel
G On/Off button
H Multi-floor brush switch
I Multi-floor brush
J Brush parking position
K Power cord rewind button
L Rear cover
M Carrying handle
N Dust container cover
Dust bag full indicator
P Dust container button
Flexible hose
Accessories
Crevice tool
Preparation
Your appliance is provided with a dust bag. The appliance is ready for use when all parts are installed together.
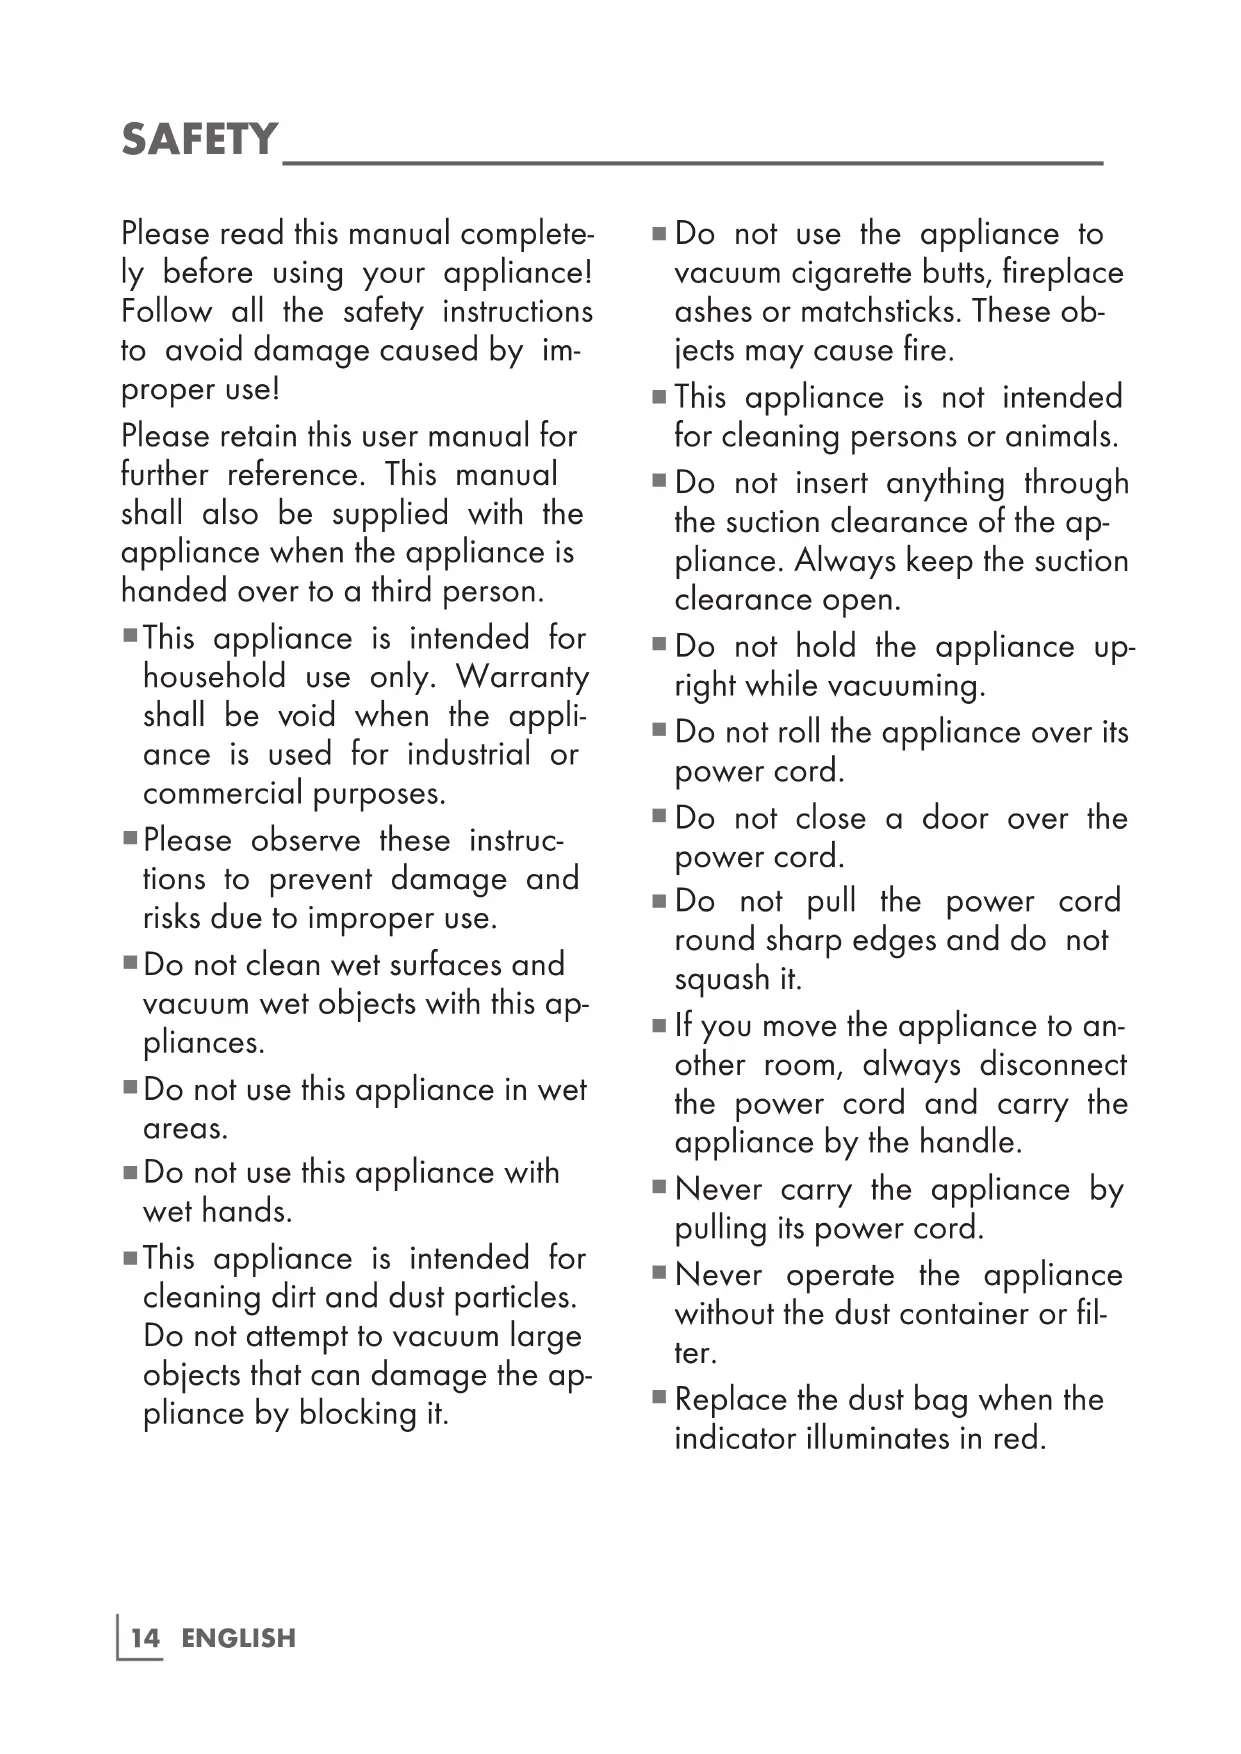
1 Insert the flexible hose@ with the flexible contact into the inlet on the main body of the appliance until it latches in.
natural_image
Line drawing of a vacuum cleaner with a black arrow pointing to the tip (no text or symbols)Note
■ To remove the flexible hose☐ press the side release buttons buttons on the flexible hose adapter ☐ and then pull out the hose.
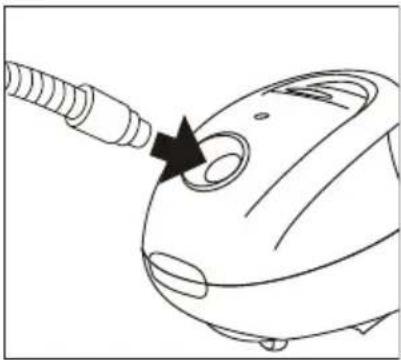
2 Insert the end of the flexible hose to the metal telescopic tube C.
Note
To adjust the length of the metal telescopic tube C, push and hold the height setting switch E and slide the tube out or in as required. Release the height setting switch E and make sure that the tube clicks into place.
natural_image
Diagram showing a pipe joint with two directional arrows indicating flow or movement (no text or symbols)3 Insert the multi-floor brush or crevice tool into the lower end of the metal telescopic tube c.
Note
■ Install all snap-on elements by pushing and rotating to each other and remove them by pulling and rotating.
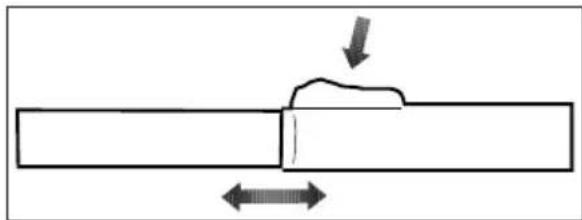
Usage of multi-floor brush in two different positions
Brush part shall be out while cleaning hard surfaces and parquet floors.

natural_image
Line drawing of a mechanical component with a flanged top and base (no text or symbols)Brush part shall be inside while cleaning carpets and rugs.
natural_image
Simple line drawing of a mechanical component with a downward arrow indicating force or direction (no text or symbols)Crevice tool
This accessory is suitable for removing dust from bookcases, curtains, window frames and upholstered furniture.

natural_image
Line drawing of a pen-like object with a tapered tip and handle (no text or symbols)Switching on and off
1 Pull the power cord out to a suitable length.
Caution
■ The maximum cable length is indicated by a red mark. Never try to pull out the power cord beyond the red mark.
2 Plug the power cord plug into the wall socket.
3 Switch on the appliance by pressing On/Off button G.
4 Press On/Off button G to turn off the appliance after using it and remove the power cord from the outlet.
Caution
■ Never unplug the appliance when it is in use.
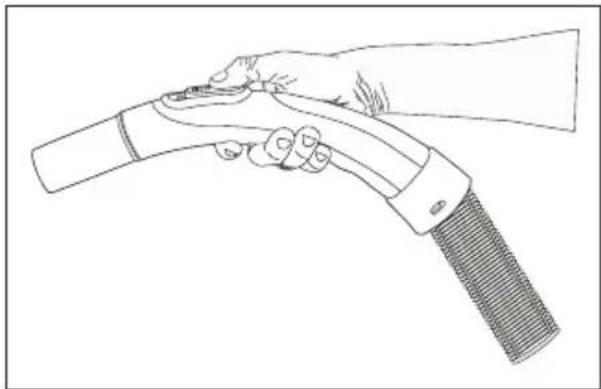
Suction control
The suction control A is located on the handle and can be operated with your thumb. When the control A is fully closed, the maximum suction power is reached.
However, in some cases it is advisable to have less suction power, such as when cleaning sensitive materials, upholstery or shag pile carpets. Open the suction control if and when required.
natural_image
Line drawing of a hand gripping a curved object, possibly a tool or device (no text or symbols present)Rewinding the power cord
1 Unplug the appliance.
2 Hold the power cord with one hand and press and hold the cord rewinding button K.
3 Rewind the power cord carefully.
Caution
As rewinding in high speed may cause unexpected cord movements, be careful when you are rewinding the power cord by pressing on the cord rewinding button K.
Dust bag full indicator
Dust bag full indicator ☐ will provide a warning when the suction power is reduced when the thin pores of the dust bag are blocked by thin dust. It shall also indicate if a big object blocks the hose or suction clearance.

text_image
Diagram showing a device with a screen and a close-up of its screen, labeled in Chinese.Replacing dust bag
1 Unplug the appliance.
2 Open the dust container cover N by pressing on the dust container button P and lifting the cover.
3 Pull out the filter holder.
natural_image
Illustration of a hand inserting a medical device into a patient's chest (no text or symbols)4 Dispose of the dust bag.
Caution
- Do not attempt to empty and re-use the dust bag.
5 Insert a new dust bag in the holder.
6 Close the dust container cover N.
Note
■ You should use dust bags from Swirl®, Type Y 05® or Menalux®, Type 1840 for VCC 4350 A.
Caution
- Do not use the appliance without the dust bag. Dust container cover cannot be closed without installing the dust bag.
Note
Even if the dust bag does not appear full, vacuuming very fine dust such as flour or plaster may block the pores instantly and reduce the suction power. You shall replace the dust bag even if it appears to be empty in this case. Always replace the dust bag every 6 months even if it is not filled in order to prevent foul odors.
Caution
- Your appliance is equipped with a system that prevents closing of the front cover when the dust bag is not inserted. Please check whether the dust bag is inserted if the front cover cannot be closed.
Replacement or cleaning of the filter
Caution
■ Install the dust bag and filter before operating the appliance; otherwise motor may be damaged.
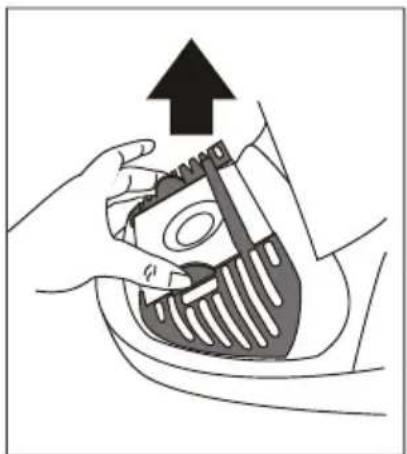
Cleaning the filter of the dust container (motor protection filter)
1 Open the dust container cover N by pressing on the dust container button P.
2 Pull out the dust bag from the bracket.
3 Pull out the filter.
natural_image
Diagram of a hand holding a container with a lid and an arrow indicating direction (no text or symbols)4 Shake out the filter and wash it with hot soapy water, rinse carefully and leave to air dry.
Caution
■ Do not wash the filter in washing machine or dry with a hair dryer.
■ Make sure that the filter is completely dried before installing it in the appliance.
5 Place a new filter in the bracket if required.
6 Replace or change the dust bag.
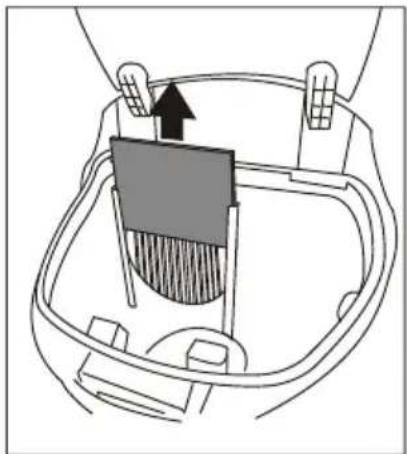
Clean the exhaust air fan filter
1 Remove the filter bracket by pressing on the release button (on the rear of the appliance).
2 Remove the filter from filter bracket.
3 Shake out the filter and wash with hot soapy water, rinse carefully and leave to air dry.
Caution
- Do not wash the filter in washing machine or dry with an hair dryer.
■ Make sure that the filter is completely dried before installing it in the appliance.
4 Replace all parts carefully to their positions.
Note
■ Dust container filter shall be replaced every six months or when required.
■ Exhaust air filter shall be replaced every six or nine months or when required.
■ Washing the filter frequently may cause wear of the filter.
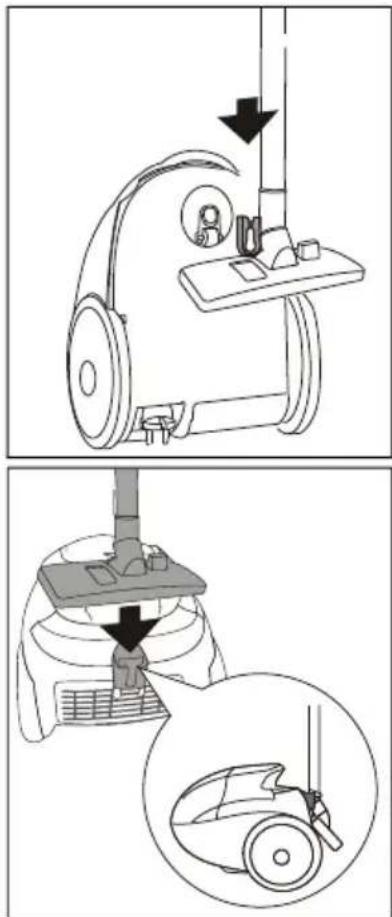
Parking Feature
You can store your appliance by using less space when your appliance is in one of below parking positions.
text_image
Diagram illustrating a vacuum cleaner's internal components and cleaning process, with labeled parts and directional arrows.Note
■ You may install the hook part behind the brush elbow to the parking seat on the rear of your appliance when you need a break during usage.
Troubleshooting
If you have problems with your appliance, these problems (reduced suction power, abnormal noise or breakdown) may be caused by blocked vacuuming tools or faulty electrical parts.
1 Check whether the vacuuming tools are blocked.
2 Check dust bag and motor protection filter.
3 Contact your dealer or GRUNDIG service center if the appliance still cannot be operated.
Storage
If you do not intend to use the appliance for a long time, please store it carefully.
■ Please make sure that the appliance is unplugged, cooled down and totally dry.
■ Store the appliance in a cool and dry place.
- Keep the appliance out of the reach of children.
Compliance with the WEEE
Directive and Disposing of the Waste Product:
This product complies with EU WEEE Directive (2012/19/EU). This product bears a classification symbol for waste electrical and electronic equipment (WEEE).

This product has been manufactured with high quality parts and materials which can be reused and are suitable for recycling. Do not dispose of the waste product with normal domestic and other wastes at the end of its service life. Take it to the collection center for the recycling of electrical and electronic equipment. Please consult your local authorities to learn about these collection centers.
Compliance with RoHS Directive
The product you have purchased complies with EU RoHS Directive (2011/65/EU). It does not contain harmful and prohibited materials specified in the Directive.
Package information

Packaging materials of the product are manufactured from recyclable materials in accordance with our National Environment Regulations. Do not dispose of the packaging materials together with the domestic or other wastes. Take them to the packaging material collection points designated by the local authorities.
Technical specifications

Power supply
220-240 V\~ 50/60 Hz
Power
Maximum 800 W
Nominal 700 W
Dust capacity
2.0 L
Usage radius
8m
Net weight
3.9 kg
Technical and design modification rights are reserved.
natural_image
Line drawing of a vacuum cleaner with a black arrow pointing to the nose area (no text or symbols)Not
natural_image
Diagram showing a mechanical joint or pipe with two opposing arrows indicating direction (no text or symbols present)natural_image
Line drawing of a mechanical component with a flanged top and base (no text or symbols)natural_image
Simple line drawing of a mechanical component with a downward arrow indicating force or direction (no text or symbols)Dar ağızlı uç
natural_image
Line drawing of a pen-like tool with a pointed tip and handle (no text or symbols)Açma ve kapatma
natural_image
Line drawing of a hand holding a handheld device (no text or symbols)text_image
Diagram showing a device with a sensor icon and a magnified view of its internal structure.natural_image
Illustration of a hand holding a medical device with an upward arrow, no text or symbols presentnatural_image
Diagram of a mechanical component with a highlighted section and directional arrow (no text or symbols)text_image
Diagram illustrating a vacuum cleaner's internal components and cleaning process, with labeled parts and directional arrows.Not
natural_image
Line drawing of a vacuum cleaner with a black arrow pointing to the nose area (no text or symbols)Nota
natural_image
Diagram showing a pipe with a small block and directional arrows indicating flow or movement (no text or symbols)natural_image
Line drawing of a mechanical component with a flanged top and base (no text or symbols)natural_image
Simple line drawing of a mechanical component with an arrow pointing to a specific part (no text or symbols)natural_image
Line drawing of a pen or stylus with a pointed tip and handle (no text or symbols)Encender y apagar
natural_image
Line drawing of a hand holding a handheld welding torch (no text or symbols)Recogida del cable
text_image
Diagram showing a device with a screen and a close-up of its screen, labeled in Chinese.natural_image
Illustration of a hand holding a toothbrush with an upward arrow indicating pressure or force (no text or symbols present)natural_image
Diagram of a mechanical component with a central block and directional arrow, no text or symbols presenttext_image
Diagram illustrating a vacuum cleaner's internal components and cleaning process, with labeled parts and directional arrows.Nota
natural_image
Line drawing of a vacuum cleaner with a black arrow pointing to the nose area (no text or symbols)Remarque
natural_image
Diagram showing a pipe with a small block and directional arrows indicating flow or movement (no text or symbols)natural_image
Line drawing of a mechanical device with a top component and base (no text or symbols)natural_image
Simple line drawing of a mechanical component with a downward arrow indicating force or motion (no text or symbols)Suceur plat
natural_image
Line drawing of a pen-like tool with a pointed tip and handle (no text or symbols)Marche/Arrêt
natural_image
Line drawing of a hand holding a handheld device (no text or symbols)text_image
Diagram showing a device with a sensor and a magnified view of the screen, likely illustrating a diagnostic or testing setup.natural_image
Illustration of a hand holding a medical device with an upward arrow, no text or symbols presentnatural_image
Diagram of a mechanical component with a highlighted section and directional arrow (no text or symbols)text_image
Diagram illustrating a vacuum cleaner's internal components and cleaning process, with labeled parts and directional arrows.Remarque
natural_image
Line drawing of a vacuum cleaner with a black arrow pointing to the nose area (no text or symbols)Napomena
Da biste uklonili fleksibilno crijevo ^Q pritisnite bočne gumbe za otpuštanje na adapteru fleksibilnog crijeva, ^D a zatim izvucite crijevo.
natural_image
Diagram showing a pipe joint with two directional arrows indicating force or movement (no text or symbols)3 Umetnite četku za više vrsta podova ili nastavak za proreze u donji kraj metalne teleskopske cijevi C.
Napomena
Instalirajte sve nasadne elemente tako što ćete ih uvlačiti i zavrtati međusobno, a uklanjanje izvršite izvlačenjem i odvrtanjem.
natural_image
Line drawing of a kitchen appliance with a chimney and side panel (no text or symbols)natural_image
Simple line drawing of a mechanical component with a downward arrow indicating force or direction (no text or symbols)Nastavak za proreze
Ovaj dodatak pogodan je za uklanjanje prašine iz polica za knjige, zavjesa, prozorskih okvira i tapeciranog namještaja.

natural_image
Line drawing of a pen or stylus with a pointed tip and handle (no text or symbols)natural_image
Line drawing of a hand holding a handheld device (no text or symbols)Namatanje kabela napajanja
1 Isključite uređaj iz struje.
2 Kabel napajanja pridržite jednom rukom i pritisnite i zadržite gumb za namotavanje kabela K.
3 Pažljivo namotajte kabel napajanja.
Pažnja
Kako brzo namotavanje može izazvati neočekivane pokrete kabela, budite pažljivi pri namotavanju kabela pritiskom na gumb za namotavanje K.
text_image
Diagram showing a device with a screen and a magnified view of its screen, likely illustrating a device's status or status.Vađenje vrećice za prašinu
natural_image
Illustration of a hand holding a toothbrush with an upward arrow indicating a process (no text or symbols present)natural_image
Diagram of a hand holding a brush inside a container with an arrow indicating direction (no text or symbols)4 Otresite filtar, zatim ga operite u toploj vodi sa sapunicom, dobro isperite i ostavite da se osuši na zraku.
Pažnja
text_image
Diagram illustrating a vacuum cleaner's internal components and cleaning process, with labeled parts and directional arrows.Napomena
natural_image
Line drawing of a vacuum cleaner with a black arrow pointing to the nose area (no text or symbols)Uwaga
natural_image
Diagram showing a pipe joint with two opposing arrows indicating force or displacement (no text or symbols)natural_image
Line drawing of a mechanical component with a flanged top and base (no text or symbols)natural_image
Simple line drawing of a mechanical component with a downward arrow indicating a process or assembly (no text or symbols)natural_image
Line drawing of a pen or stylus with a pointed tip and handle (no text or symbols)natural_image
Line drawing of a hand holding a handheld device (no text or symbols)text_image
Diagram showing a device with a sensor and a magnified view of the screen, likely illustrating a diagnostic or testing setup.Wymiana worka na kurz
natural_image
Illustration of a hand holding a medical device with an upward arrow, no text or symbols present4 Wyrzuć worek na kurz.
