L1715 - Monitor DGM - Free user manual and instructions
Find the device manual for free L1715 DGM in PDF.



| Product Type | 17-inch LCD Monitor |
| Screen Size | 17 inches (43.2 cm) |
| Maximum Resolution | 1280 x 1024 (SXGA) |
| Contrast Ratio | 450:1 (typical) |
| Brightness | 260 cd/m² (typical) |
| Response Time | 16 ms (Tr+Tf) |
| Viewing Angles (H/V) | 140° / 140° |
| Number of Colors | 16.7 million (True Color) |
| Pixel Pitch | 0.264 mm x 0.264 mm |
| Horizontal Frequency | 30 - 62 kHz |
| Vertical Frequency | 50 - 75 Hz |
| Connectivity | D-sub 15-pin (RGB), DVI (optional), stereo audio input, headphone jack |
| Power Supply | Universal external adapter (100-240 V, 50/60 Hz) |
| Power Consumption (Active) | < 48 W |
| Power Consumption (Standby) | < 3 W |
| Dimensions (W x H x D) | 378 x 386 x 53.5 mm |
| Net Weight | 4.0 kg |
| OSD Functions | Brightness, contrast, phase, clock, position, color temperature, volume, auto adjust, reset |
| Power Saving Function | VESA DPMS, EPA Energy Star |
| Built-in Speakers | 2 x 2 W (stereo) |
| Certifications | CE, FCC |
| Cleaning Instructions | Use a soft, lint-free cloth; avoid corrosive products |
| Safety Precautions | Do not expose to moisture, do not open, avoid shocks |
Frequently Asked Questions - L1715 DGM
User questions about L1715 DGM
0 question about this device. Answer the ones you know or ask your own.
Ask a new question about this device
Download the instructions for your Monitor in PDF format for free! Find your manual L1715 - DGM and take your electronic device back in hand. On this page are published all the documents necessary for the use of your device. L1715 by DGM.
USER MANUAL L1715 DGM
natural_image
Line drawing of a flat-screen computer monitor with a blank screen and control buttons (no text or symbols)17" TFT LCD Monitor
User "s Manual
开始
目录 2
显示器前后视图 3
包装 4
警示 4
硬件安装....5
图标硬件安装....6
主要功能键 7
功能键介绍....7
清洁要点 8
注意事项 8
简易故障排除....8
OSD 视控模式....9-10
支持显示模式....11
产品规格表 11-12
natural_image
Line drawing of a flat-screen computer monitor with control panel and base mount (no text or symbols)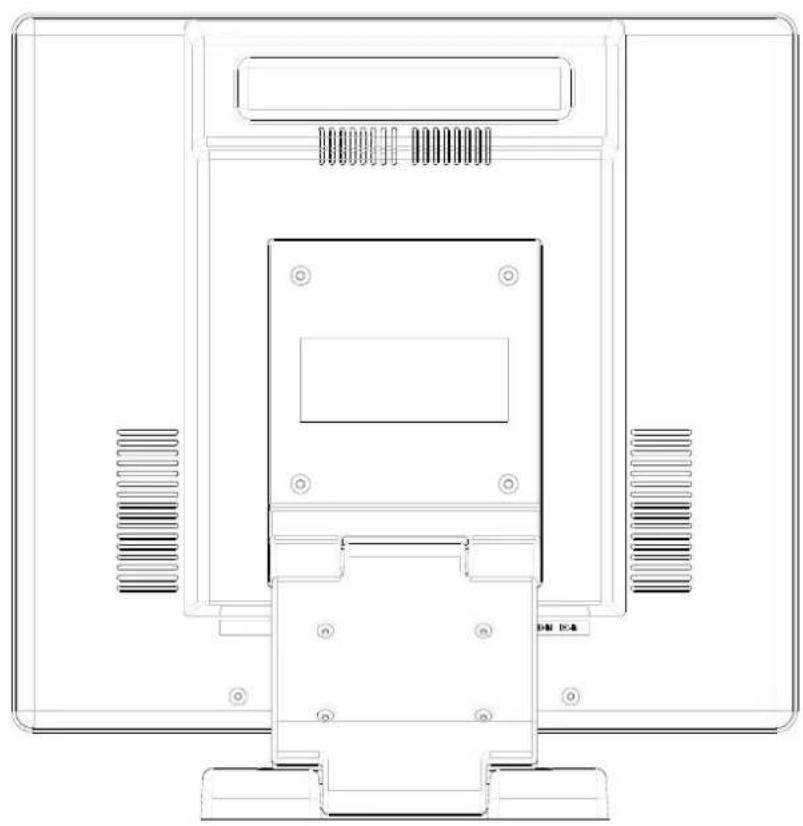
natural_image
Technical line drawing of a mechanical or electronic component with mounting holes and internal structure (no text or symbols)包装
natural_image
Back view of a computer monitor rear panel showing port labels including VGA, S12, and USB drive (no text or symbols visible)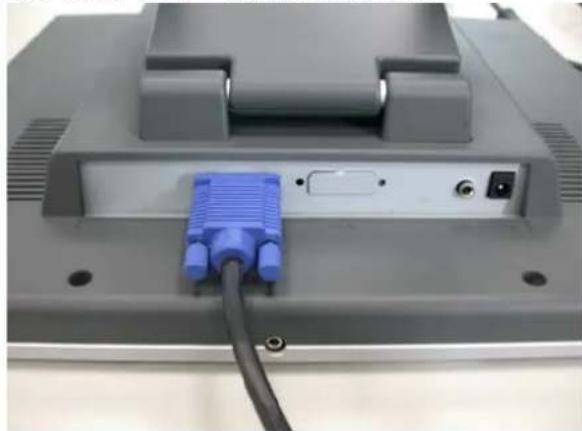
natural_image
Back view of a computer monitor with a blue VGA port and cable (no visible text or symbols)natural_image
Back view of a computer monitor with visible ports and connectors (no text or symbols)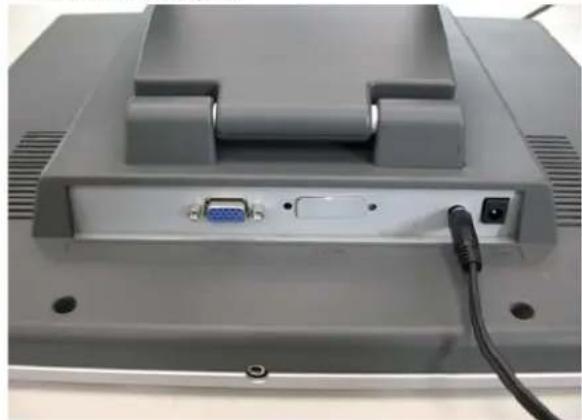
natural_image
Back view of a computer monitor with an ABCD port and cable (no visible text or symbols)- 将变压器及电源线连接起来。
natural_image
Black electrical adapter with two pins on a plain surface, next to a black cable (no text or symbols visible)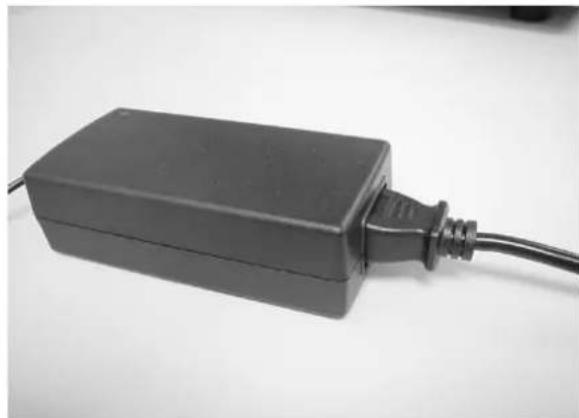
natural_image
Black rectangular electronic device with a cable inserted, placed on a plain surface (no text or symbols visible)natural_image
Back view of a computer monitor with an VGA port and external cable (no visible text or symbols)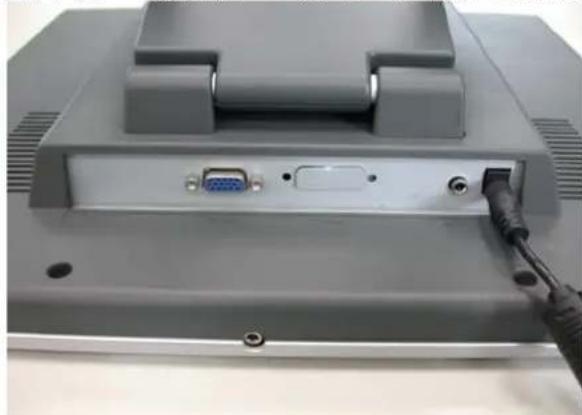
natural_image
Back view of a computer monitor with an VGA port and cable, no visible text or symbolsMiscellaneous : (其它)
text_image
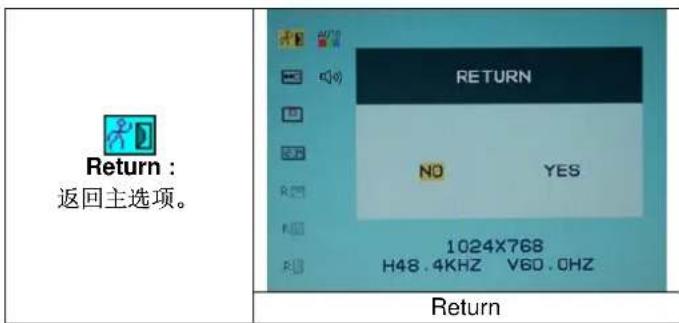
Return : 返回主选项。 RETURN NO YES 1024X768 H48.4KHZ V60.0HZ Return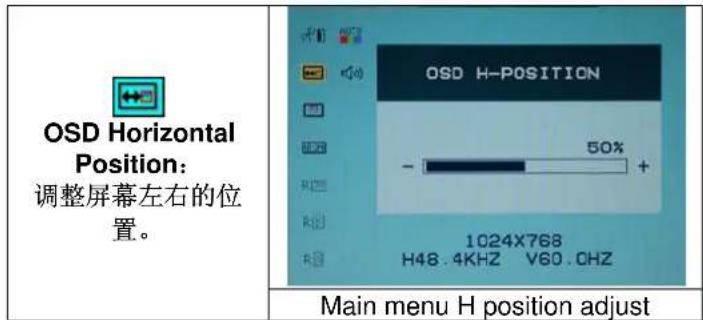
text_image
OSD Horizontal Position: 调整屏幕左右的位 置。 Main menu H position adjust OSD H-POSITION 50% - 1024X768 H48.4KHZ V60.OHZ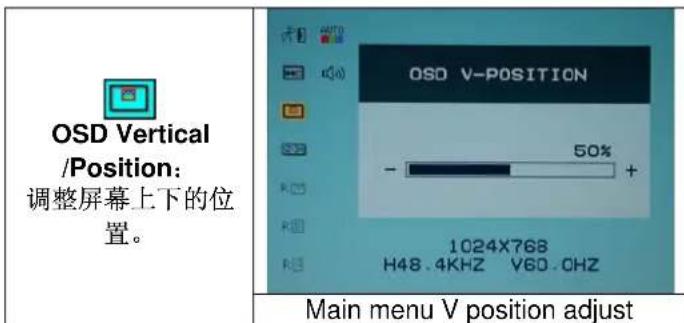
natural_image
Line drawing of a flat-screen computer monitor with control panel and base mount (no text or symbols)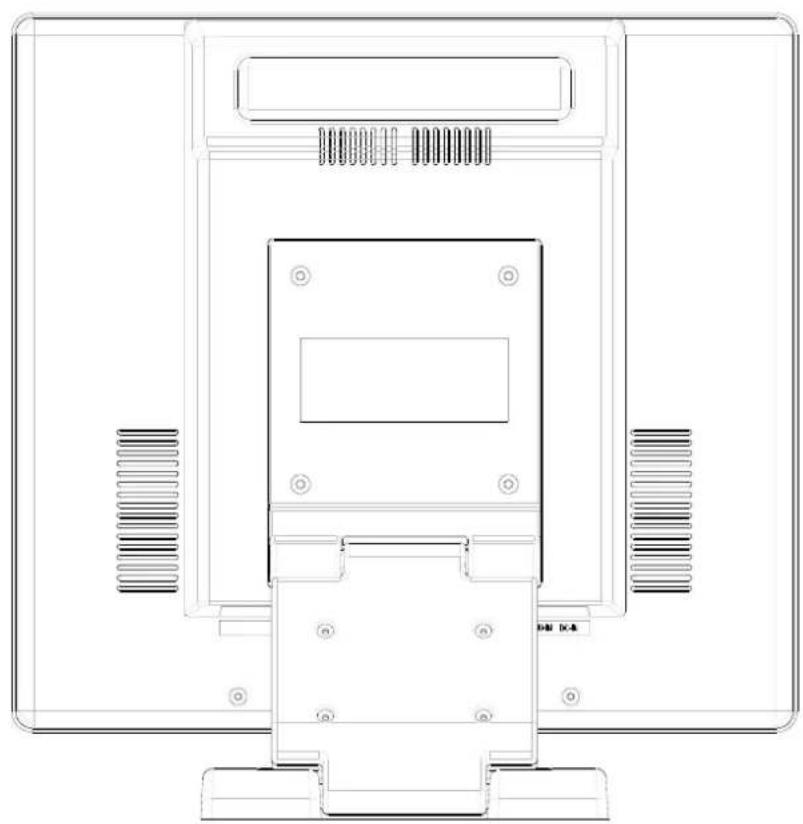
natural_image
Technical line drawing of a mechanical or electronic component with mounting holes and internal structure (no text or symbols)包装
natural_image
Back view of a computer monitor rear panel showing port labels (VGA, SRS) and connectors (no readable text or symbols)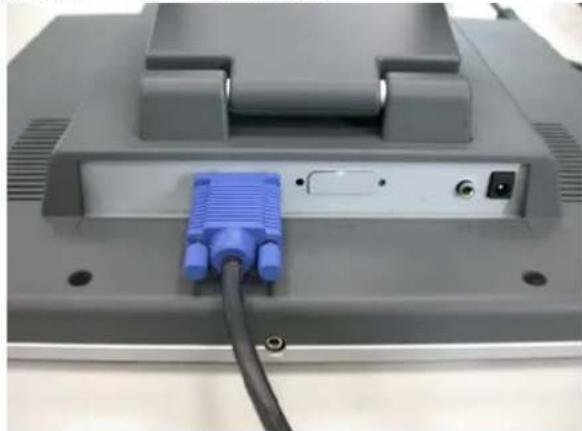
natural_image
Computer monitor rear panel showing a blue V123 port connected to a cable (no visible text or labels)natural_image
Back view of a computer monitor with port, VGA, and cable (no visible text or labels)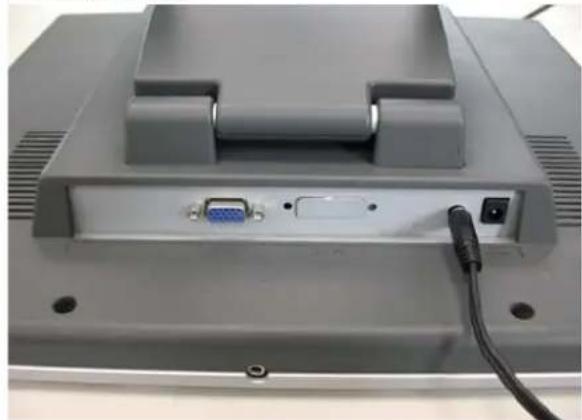
natural_image
Back view of a computer monitor with an A5 port, cable, and ventilation slots (no visible text or symbols)- 將變壓器及電源線連接起來。
natural_image
Black electrical adapter with two ports, next to a black cable (no text or symbols visible)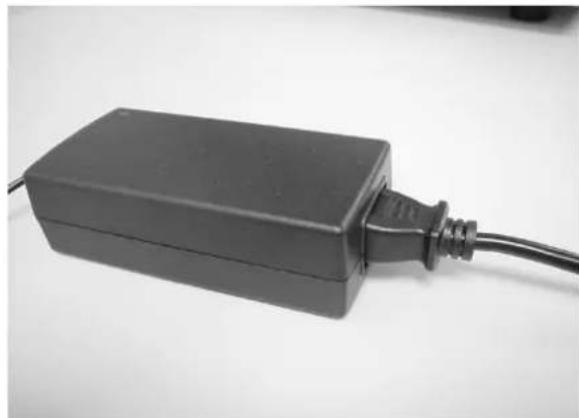
natural_image
Black rectangular electronic device with a cable inserted, placed on a plain surface (no text or symbols visible)natural_image
Back view of a computer monitor with an A7 port, power cord, and cable (no visible text or symbols)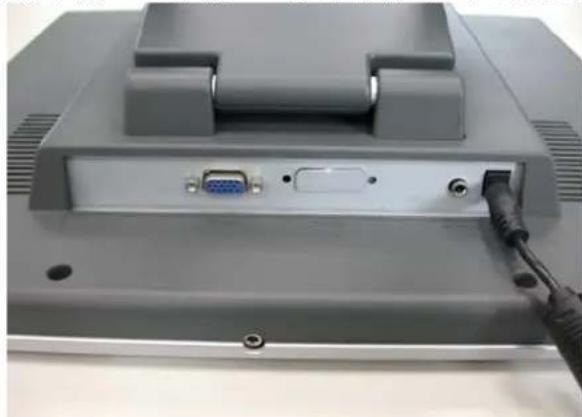
natural_image
Back view of a computer monitor with an VGA port and cable connector (no visible text or symbols)View of Monitor....3
Unpacking 4
Warning 4
Hardware Installation....5
Hardware Installation Step by Step....6
Menu control button....7
Key introduction....7
Cleaning Notices 8
Precaution 8
Troubleshooting....8
OSD (On-Screen Display) Menu Mode 9-10
Display Mode....11
Specification 11-12
All Information in this manual may change from time to time without prior notice.
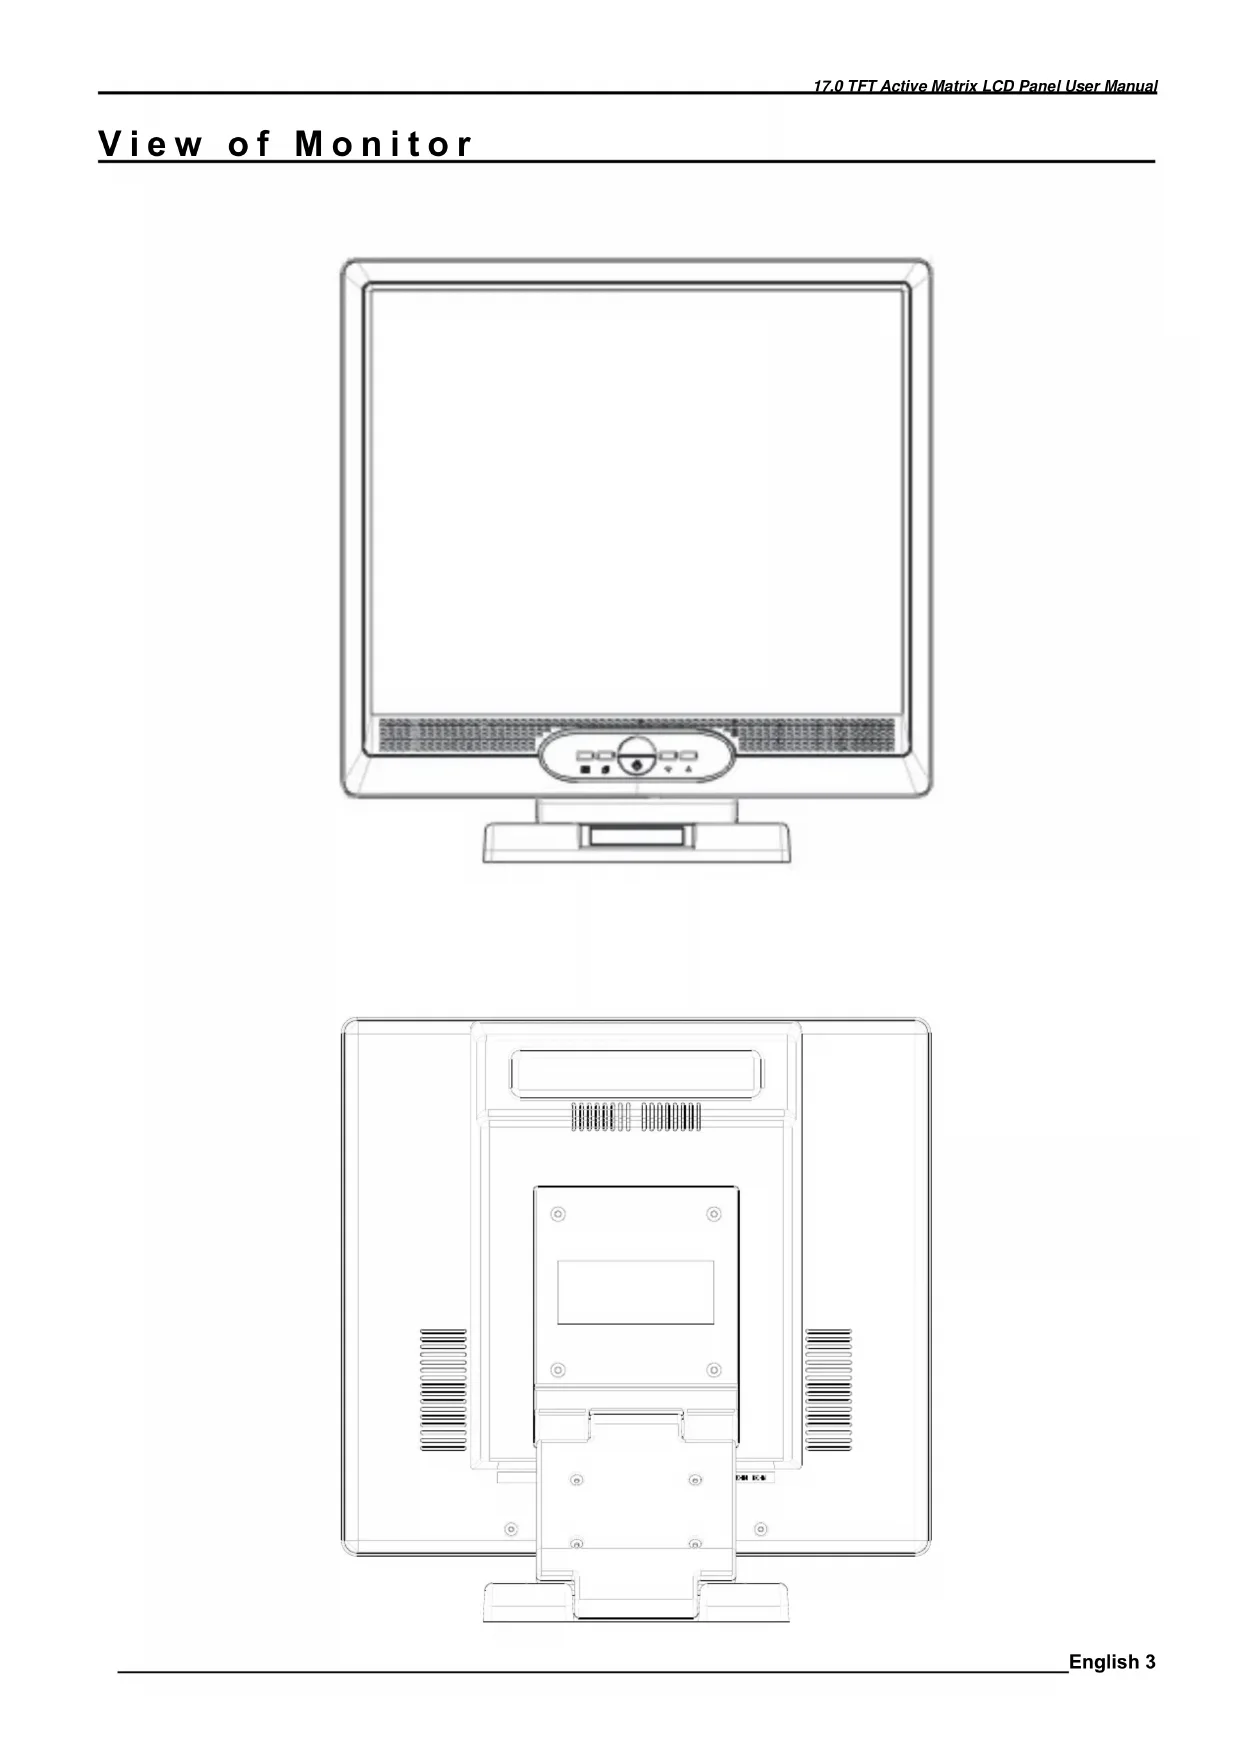
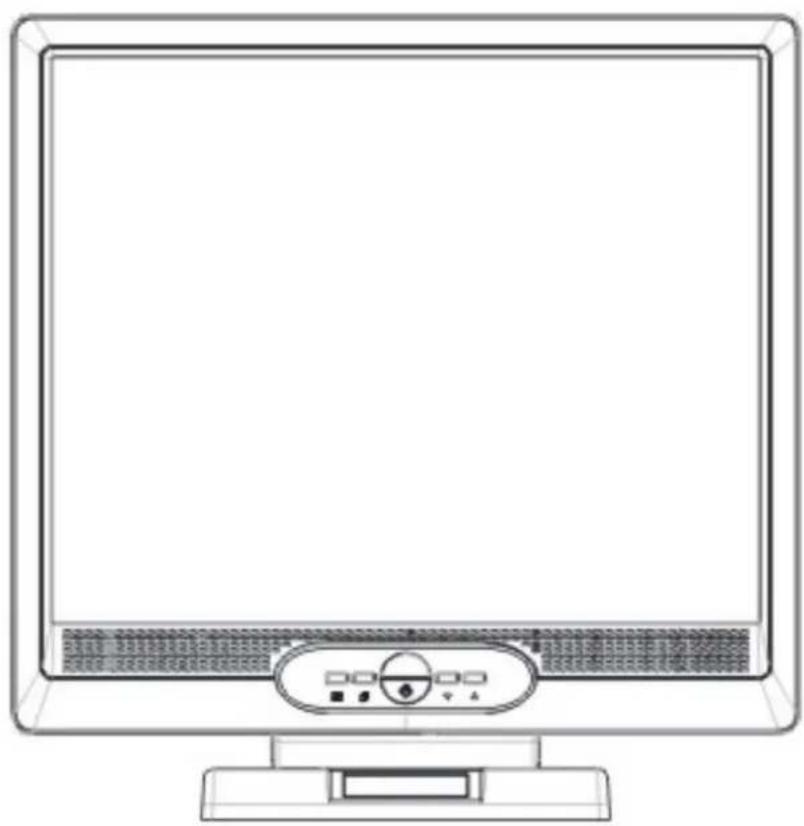
View of Monitor
natural_image
Line drawing of a flat-screen computer monitor with control panel and stand (no text or symbols)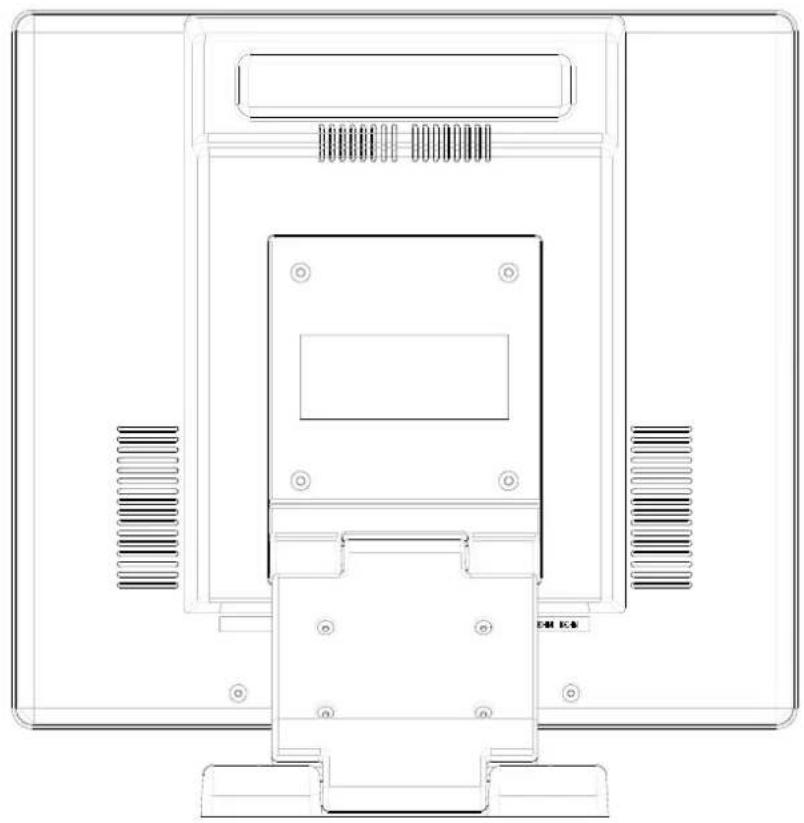
natural_image
Technical line drawing of a mechanical or electronic component with mounting holes and internal structure (no text or symbols)Unpacking
Our 17" LCD monitor shall be content with these following items. Make sure you get all these set ready, otherwise contact to your dealer or store which you purchased it. At last, feel free to contact us.
17" TFT LCD Monitor
natural_image
Line drawing of a flat-screen computer monitor with control panel and stand (no text or symbols)External Univ15 pin D-sub (RGB Analog) input signal cable
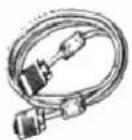
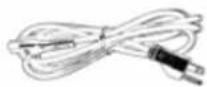
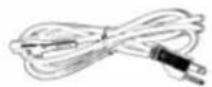
Power Cord
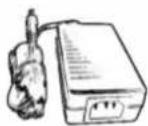
ADAPTER TECH. External Universal AC Adaptor STD-1203 (100-240V, 50/60Hz)
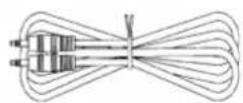
Audio connector : stereo Phone Jack
CD User's manual
Quick Start Guide
DVI cord *
* DVI function is optional.
Warning
- Make sure that the system power is turned off.
- Plug the signal cable to the signal connector at the rear of PC.
- Plug adapter output cable to the jack at the rear of LCD monitor and the power cord to the adapter.
- Connect the power cord to power source.
- Turn on the computer and the monitor.
- For the best quality of the performance, we suggest you to set resolution as page 10 (Display Mode).
Hardware Installation
Be carefully to your LCD monitor, it's very exquisite but easy to broken. Turn off LCD's and PC's power before you set it up. Follow our installation step by step.
Input
natural_image
Technical line drawing of a mechanical or electronic component with mounting holes and internal features (no text or symbols)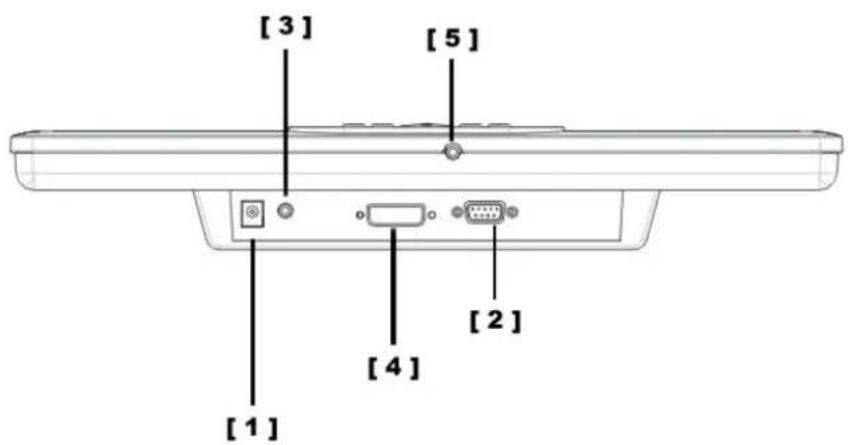
text_image
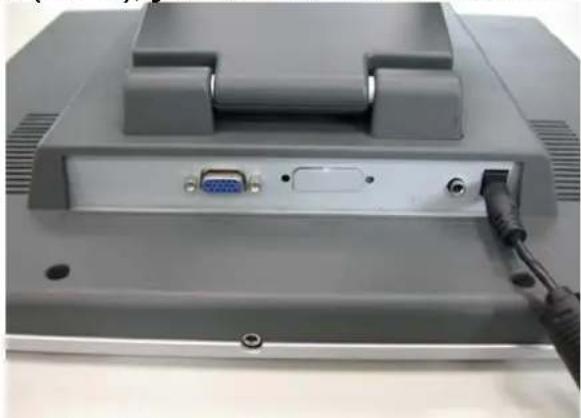
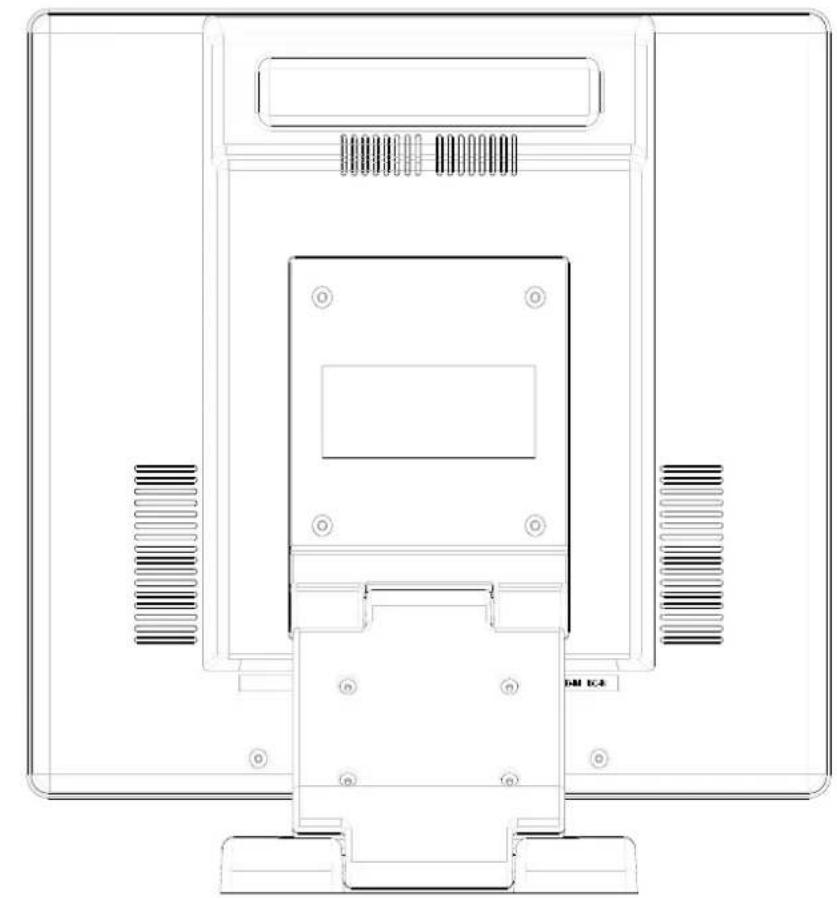
[3] [5] [2] [4] [1]【1】DC port : This is for connecting the power cable.
【2】PC In : This can be connected with the D-Sub 15 pin signal Cable.
【3】LINE in : This can be connected to the audio-out connector of any sound resource.
【4】DVI port : This can be connected with the DVI signal Cable.
【5】 Earphone jack : This is for connecting the earphone.
Hardware Installation Step by Step
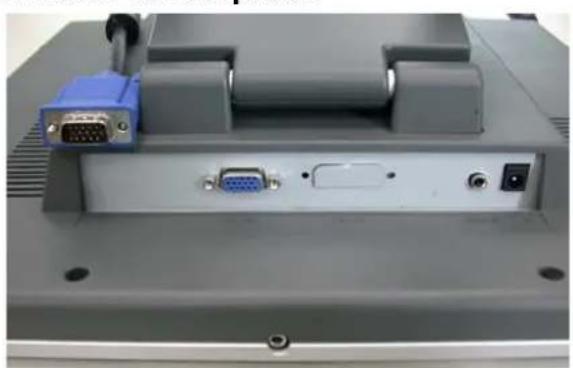
- Turn your LCD opposite carefully which can see all the connection port.
- Inset the signal cable such as RGB analog (standard) to its own port, and the other side connects to computer.
natural_image
Back view of a computer monitor rear panel showing port labels (VGA, SRS) and connectors (no readable text or symbols)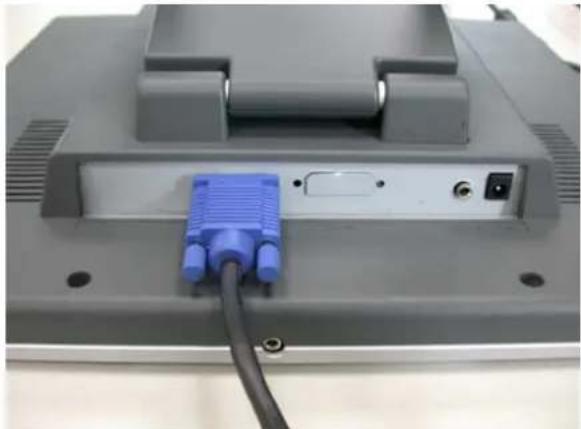
natural_image
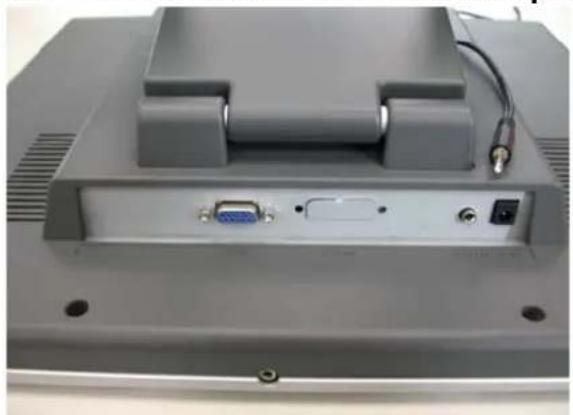
Back view of a computer monitor with a blue VGA port and cable (no visible text or symbols)- Inset the Audio connector to its own port, and the other side connects to computer line out.
natural_image
Back view of a computer monitor with ports and cables (no visible text or symbols)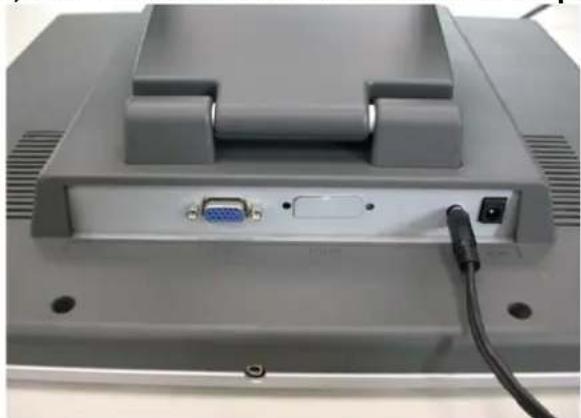
natural_image
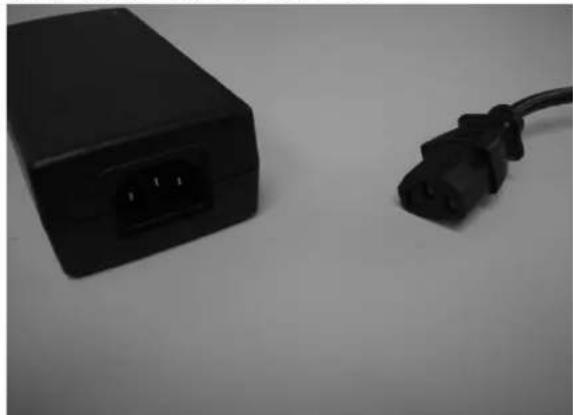
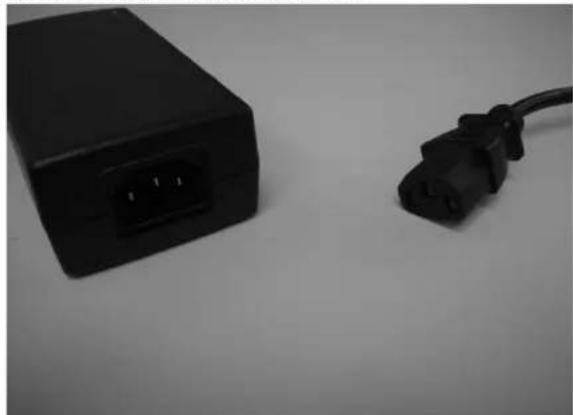
Back view of a computer monitor with an A7 port, cable, and indicator lights (no visible text or symbols)- Put AC Adaptor and Power Cord together.
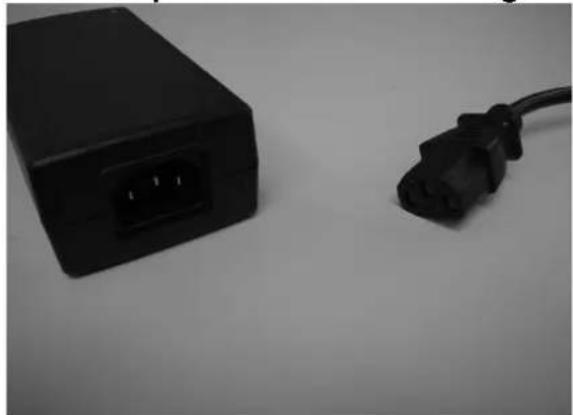
natural_image
Black electrical plug and cable on a plain surface (no text or symbols visible)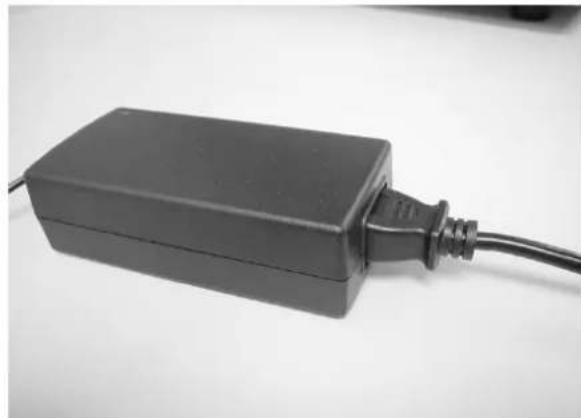
natural_image
Black rectangular electronic device with a cable inserted, placed on a plain surface (no text or symbols visible)- Inset the DC cable to its own port (DC in), and the other side connect to socket.
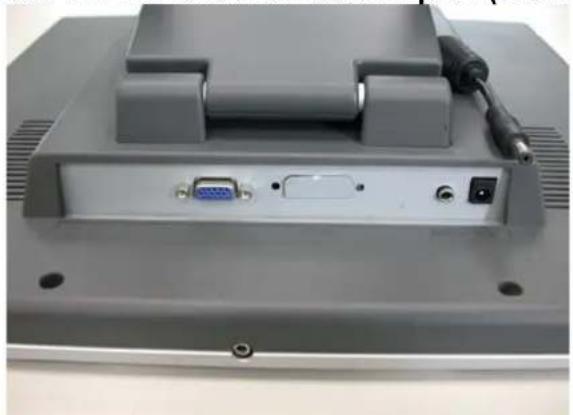
natural_image
Back view of a computer monitor with port, VGA, and cable (no visible text or labels)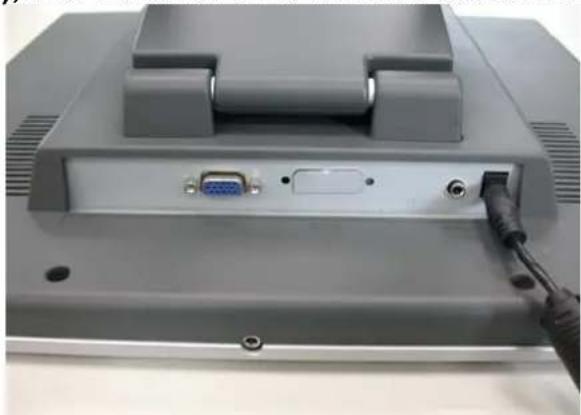
natural_image
Back view of a computer monitor with an A8 port, cable, and connector (no visible text or symbols)- Congratulations you had done with it. You can enjoy the excellent performance.
Monitor Adjusting
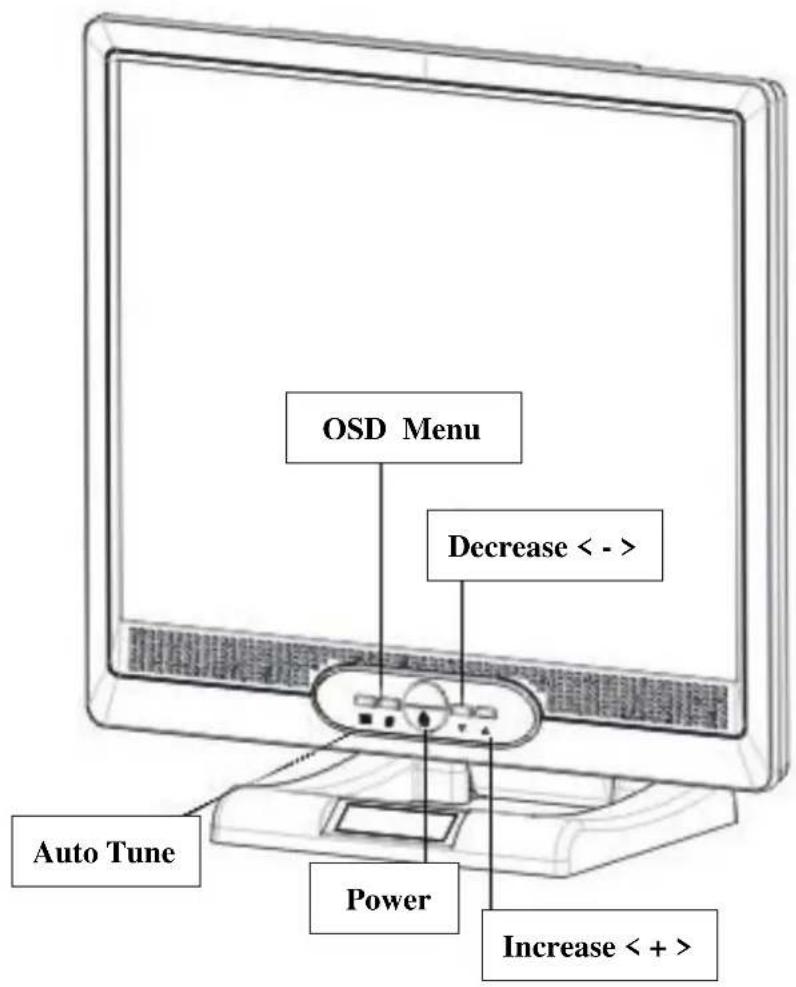
Menu control button
text_image
OSD Menu Decrease < - > Auto Tune Power Increase < + >Key introduction
Power: Turn the LCD power on and off. When the power is on, the light is showing green, stand by will be orange.
OSD Menu: Press the button to OSD menu, menu right adjustment.
Auto Tune: Auto adjust, menu left adjustment.
Decrease < - >: Decrease the option value in the OSD menu.
Increase < + >: Increase the option value in the OSD menu.
Cleaning Notice
- Be gentle to clean the screen.
- Never, ever, using any kind of corrosiveness chemical dissolvent to clean the screen, it may hurt your screen surface.
- We suggest that using a clean camel hair brush or a soft, clean, lint-free cloth to wipe the screen.
- Don't give any pressure directly to the LCD
Precaution
- Do not expose the monitor to direct sunlight or heat.
- Do not spill liquid on the monitor.
- Do not attempt to open the monitor. You may be hurt by electric shock. For service, call your place of purchase.
- Do not use your monitor when magnets or electronic products are operating nearby.
- Do not use harsh chemicals or strong cleaning solvents to clean the monitor screen. Wipe it with clean, soft clothes applied with mild solution.
- Do not place anything on your monitor. Bad ventilation may elevate temperature in the monitor.
- Don't use your fingers to touch the LCD Screen, directly. Fingerprint that contains oil and may by difficult to clear.
Troubleshooting
Make sure that your monitor is properly installed if you have encountered any trouble using this product.
' There is no picture on the screen.
Check:
- Power saving mode. Press any key and move the mouse to deactivate the mode.
- Signal cable connector pins. If there are bent or missing pins, consult your place of purchase.
* Characters look too dark or too light
Check:
- Using OSD Menu to adjust the Brightness.
* When your monitor shall be Adjusted?
Check:
- If the resolution of frequency is being changed.
. The Text appears on the screen are unclear.
Check
- Make sure the resolution or refresh rate match with the Display Mode.
OSD (On-Screen Display) Menu Mode
Option select
- Press the OSD button to access menu.
- Using Auto Tune for left adjustment.
- Press OSD again for right adjustment.
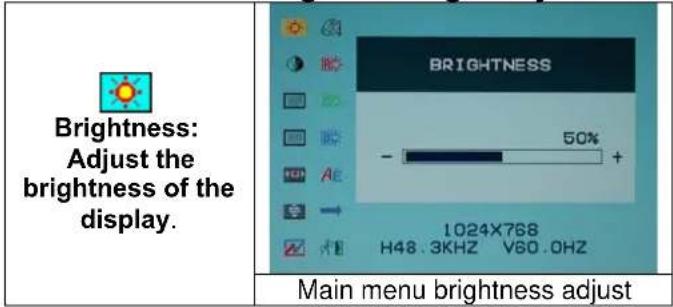
text_image
Brightness: Adjust the brightness of the display. BRIGHTNESS 50% - + 1024X768 H48.3KHZ V60.0HZ Main menu brightness adjust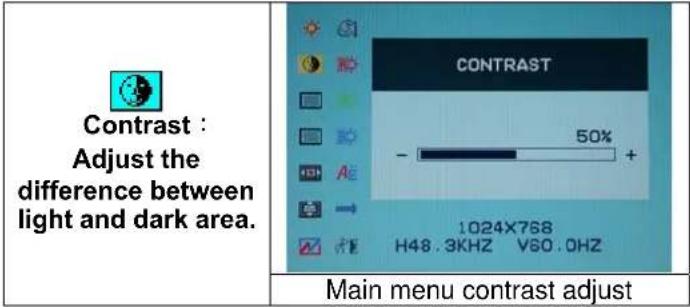
text_image
Contrast : Adjust the difference between light and dark area. CONTRAST 50% - Ae 1024X768 H48.3KHZ V60.0HZ Main menu contrast adjust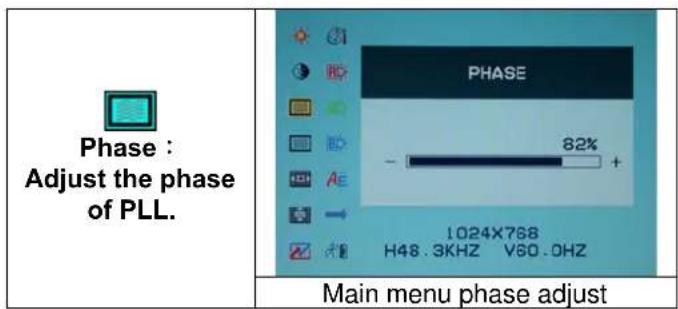
text_image
Phase : Adjust the phase of PLL. PHASE - 82% 1024X768 H48.3KHZ V60.0HZ Main menu phase adjust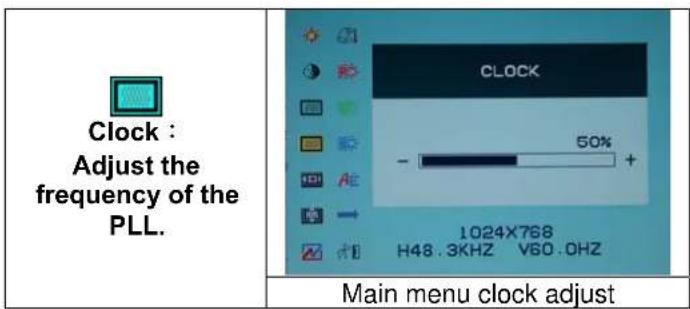
text_image
Clock : Adjust the frequency of the PLL. CLOCK 50% - + 1024X768 H48.3KHZ V60.0HZ Main menu clock adjust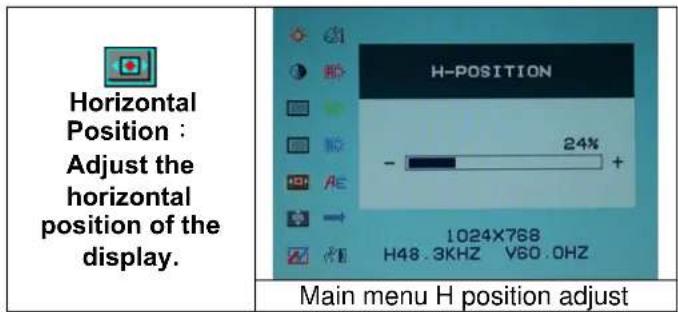
text_image
Horizontal Position : Adjust the horizontal position of the display. H-POSITION 24% - + 1024X768 H48.3KHZ V60.0HZ Main menu H position adjust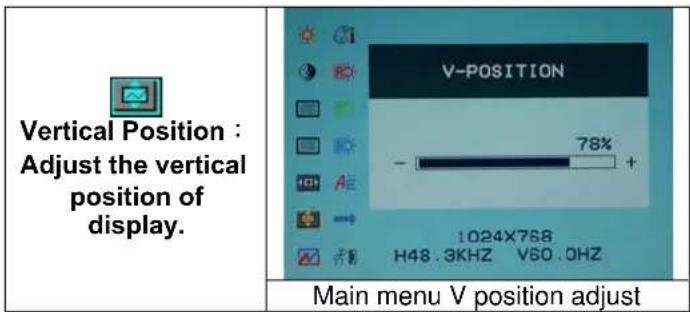
text_image
Vertical Position : Adjust the vertical position of display. V-POSITION - 78% + 1024X768 H48.3KHZ V60.0HZ Main menu V position adjust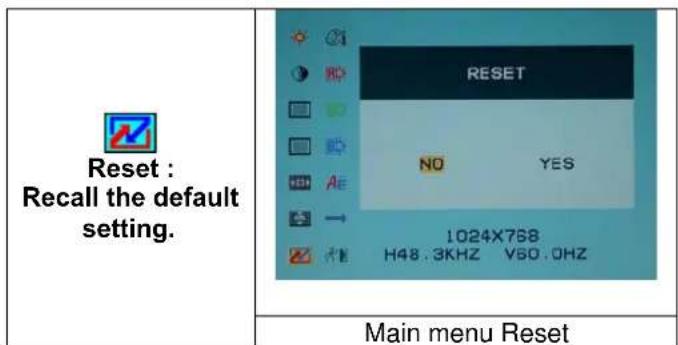
text_image
Reset : Recall the default setting. RESET NO YES 1024X768 H48.3KHZ V60.0HZ Main menu Reset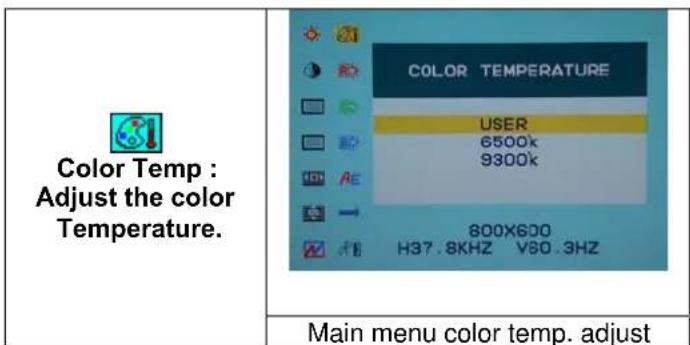
text_image
Color Temp : Adjust the color Temperature. COLOR TEMPERATURE USER 6500k 9300k 800X600 H37.8KHZ V80.3HZ Main menu color temp. adjust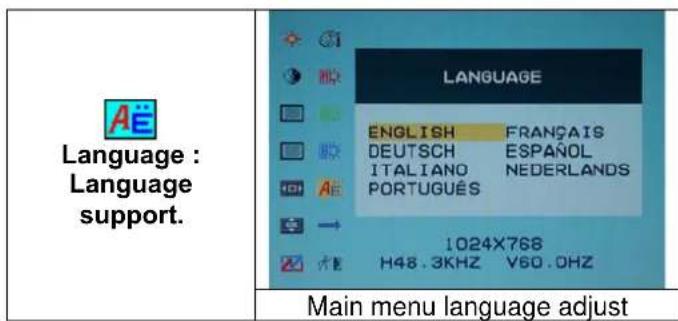
text_image
Language : Language support. LANGUAGE ENGLISH FRANÇAIS DEUTSCH ESPAÑOL ITALIANO NEDERLANDS PORTUGUÉS 1024X768 H48.3KHZ V60.OHZ Main menu language adjust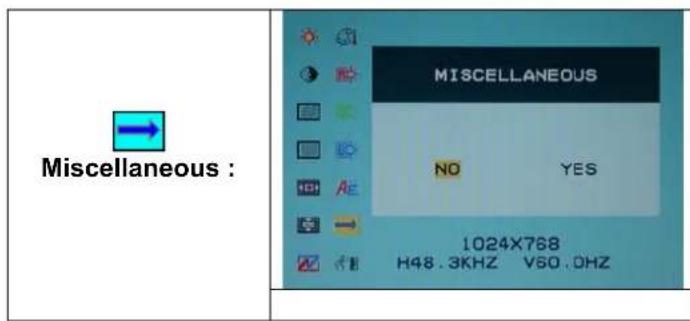
text_image
Miscellaneous : MISCELLANEOUS NO YES 1024X768 H48.3KHZ V50.0HZ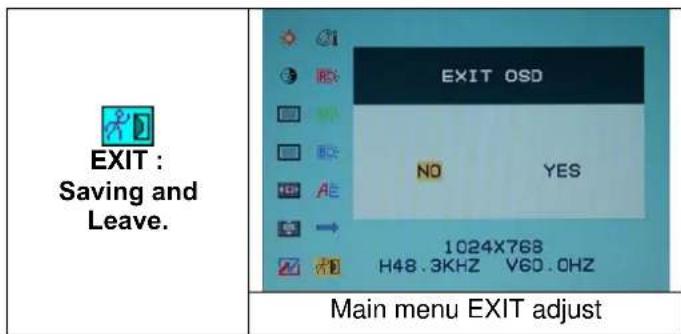
text_image
EXIT: Saving and Leave. EXIT OSD NO YES 1024X768 H48.3KHZ V60.0HZ Main menu EXIT adjustMiscellaneous
text_image
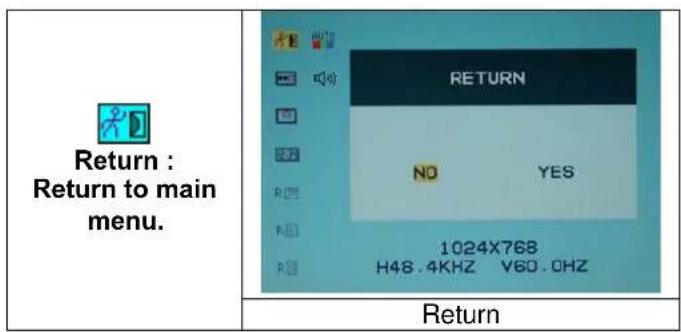
Return : Return to main menu. RETURN NO YES 1024X768 H48.4KHZ V60.0HZ Return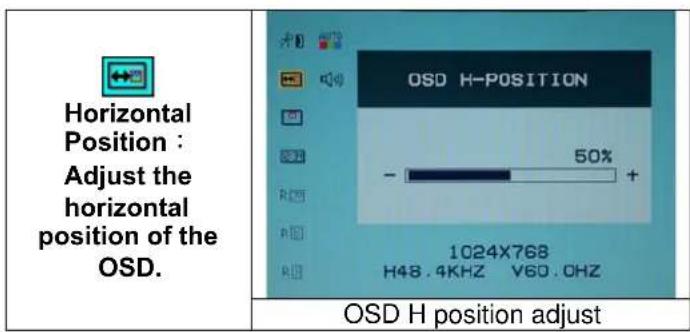
text_image
Horizontal Position : Adjust the horizontal position of the OSD. OSD H-POSITION 50% - + 1024X768 H48.4KHZ Y60.0HZ OSD H position adjust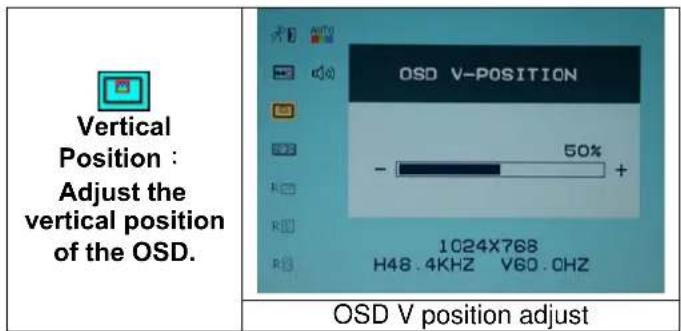
text_image
Vertical Position : Adjust the vertical position of the OSD. OSD V-POSITION 50% - 1024X768 H48.4KHZ V60.0HZ OSD V position adjust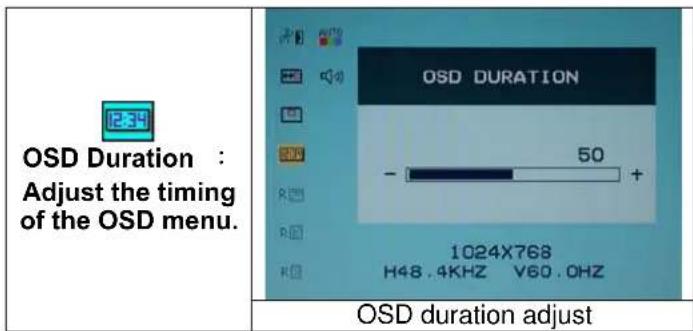
text_image
OSD Duration : Adjust the timing of the OSD menu. OSD DURATION 50 - 1024X768 H48.4KHZ V60.0HZ OSD duration adjust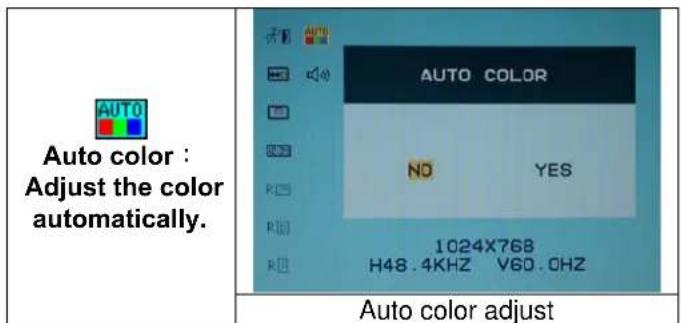
text_image
AUTO COLOR NO YES 1024X768 H48.4KHZ V60.0HZ Auto color adjust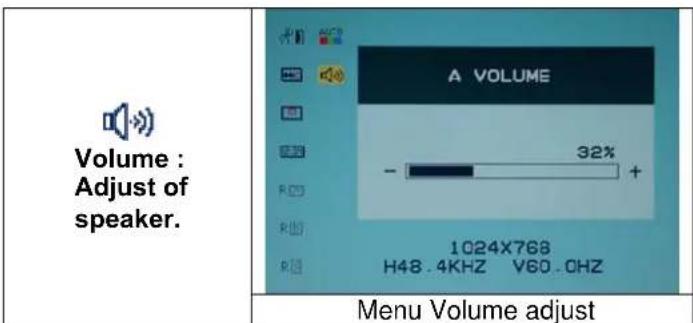
text_image
Volume : Adjust of speaker. A VOLUME 32% - 1024X768 H48.4KHZ V60.0HZ Menu Volume adjustDISPLAY MODE
| Incoming Display Mode | ||
| Resolution Horizontal Frequency (KHz) Vertical Frequency (Hz) | ||
| 640X350 | 31.475 | 70.100 |
| 640X480 | 31.469 | 59.940 |
| 640X480 | 37.500 | 75.000 |
| 720X400 | 31.469 | 70.087 |
| 800X600 | 37.879 | 60.317 |
| 800X600 | 46.875 | 75.000 |
| 1024X768 | 48.363 | 60.004 |
| 1024X768 | 60.023 | 75.029 |
| 1280X1024 | 63.981 | 60.020 |
| 1280X1024 | 79.976 | 75.024 |
- We offer you 8 available modes compatible with Windows.
- If any interference occurs on your screen while you modulating your PC or OSD. It is normal.
- To have Best quality present on the PC, remember to upgrade your video card Driver. We strongly recommend you to choose a Mode listed in the table.
- The other Modes may not be supported that are not list on the table above
- You may use the power management on your computer. It's good for last service life of the product.
* DVI function is optional.
Specification
| LCD Panel Type | Viewing AngleContrast RatioBrightnessResponse Time(Tr+Tf)Display ColorsMax ResolutionPixel Pitch | 17.0” TFT Active Matrix LCD DisplayH:140°, V:140°450 : 1 (Typical)260 cd/m2 (Typical)16 ms16.7M colors(True color)1280X1024(SXGA)0.264mm(H)x0.264mm(V) |
| Input Signals | RGB AnalogDVI* | Video Level:0.7Vp-p(75Ω)Sync TTL with 75Ω internal pull-up resistorsFrequency FH:30~62KHzF V: 50 ~ 75 HzSupport digital RGB signal with TMDS signaling type |
| Compatibility | PC | Up to 1280X1024@75Hz(Non-interlaced) |
| Connector RGB Analog | AudioPower | D-sub 15-pinsStereo Phone Jack, RCA-Jack(L/R)*12V/DC Power Jack |
| Power | VoltageConsumptionPower saving mode | 100-240V, 50/60Hz(universal) via external AC AdapterActive < 48 Watt MaxStandby < 3 Watt |
| Internal Speaker | 2Wx2(Stereo) | |
| User Interface | LED Indicator | Active - GreenStandby - OrangeOff - Turn off |
| Operating Condition | TemperatureAir Humidity | 5°C~40°C20% ~ 80% R.H. |
| Dimensions(W x H x D) | Physical | 378mm(W) x 386mm(H) x 53.5mm(D) |
| Net Weight 4.0 Kg | ||
| DDC DDC1/DDC2B Compliant | ||
| Power Management VESA DPMS, EPA Energy Star | ||
| Regulation (Certifications) | CE, FCC | |
Pour Commencer
Table des matières ....2
natural_image
Line drawing of a flat-screen computer monitor with control panel and stand (no text or symbols)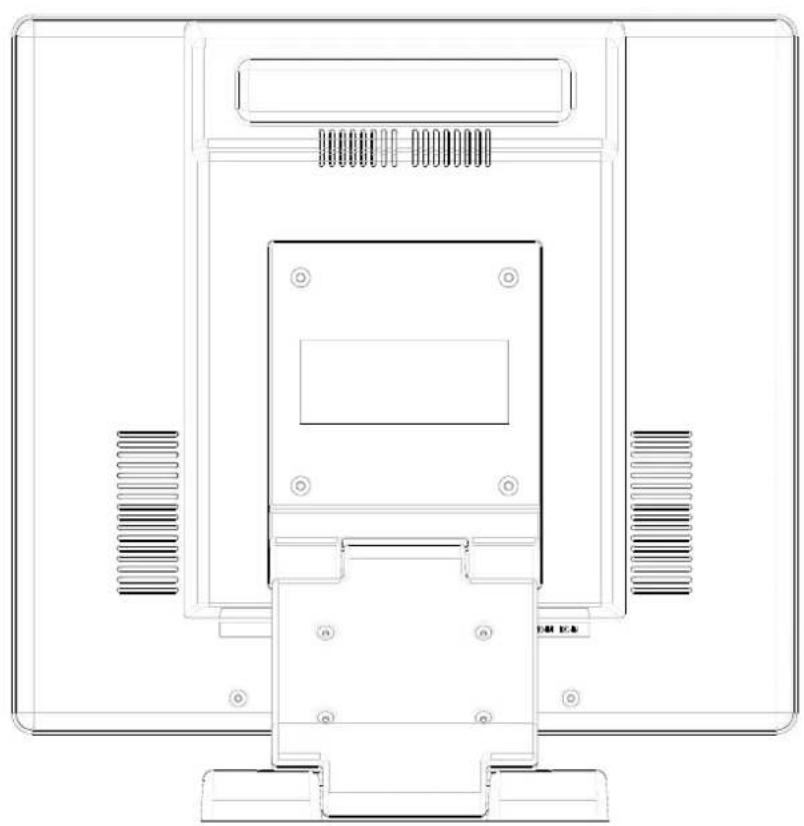
natural_image
Technical line drawing of a mechanical or electronic component with mounting holes and internal structure (no text or symbols)Déballage
natural_image
Line drawing of a flat-screen computer monitor with control panel and stand (no text or symbols)natural_image
Technical line drawing of a mechanical or electronic component with mounting holes and internal features (no text or symbols)
text_image
[3] [5] [2] [4] [1]natural_image
Back view of a computer monitor rear panel showing port labels including VGA, USB, and drive slots (no readable text or symbols)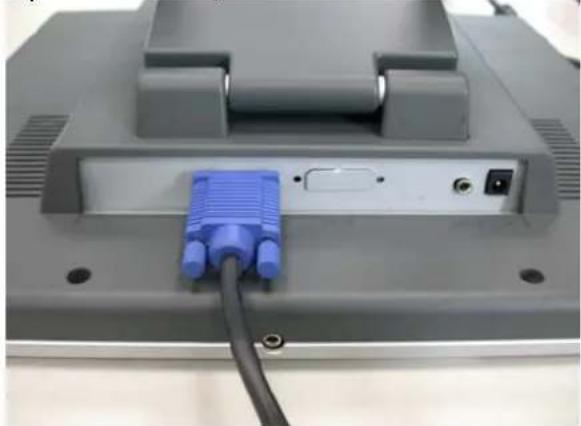
natural_image
Back view of a computer monitor with a blue VGA port and cable (no visible text or symbols)natural_image
Back view of a computer monitor with ports and cables (no visible text or symbols)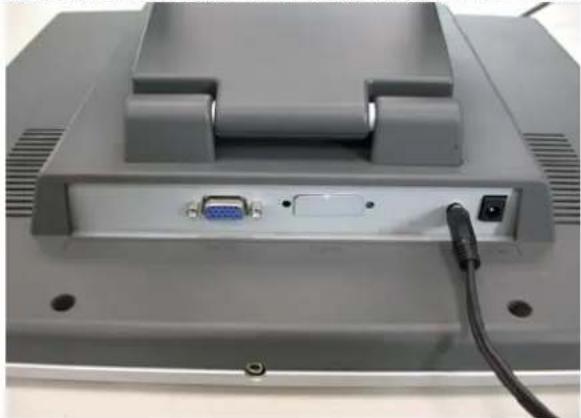
natural_image
Back view of a computer monitor with an A9 port, cable, and indicator lights (no visible text or symbols)natural_image
Black electrical adapter with two ports, next to a black cable (no visible text or symbols)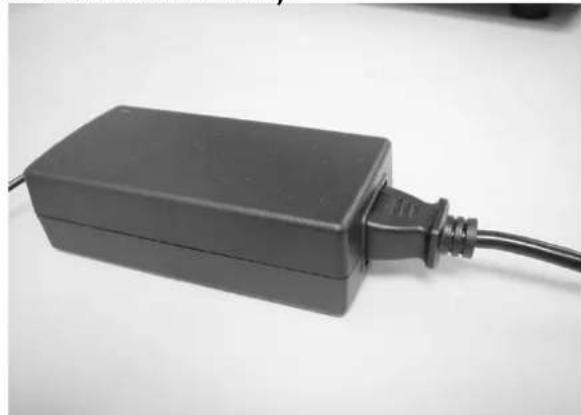
natural_image
Black rectangular electronic device with a cable inserted, placed on a plain surface (no text or symbols visible)natural_image
Back view of a computer monitor with visible ports and a USB port (no text or symbols)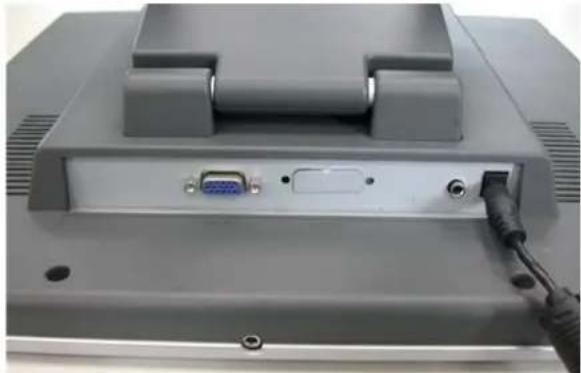
natural_image
Back view of a computer monitor with an VGA port and cable, no visible text or symbolsHardwareinstallation....5
Schritte der Hardwareinstallation....6
Menüeinstellungstasten....7
Die Tasten 7
natural_image
Line drawing of a flat-screen computer monitor with control panel and stand (no text or symbols)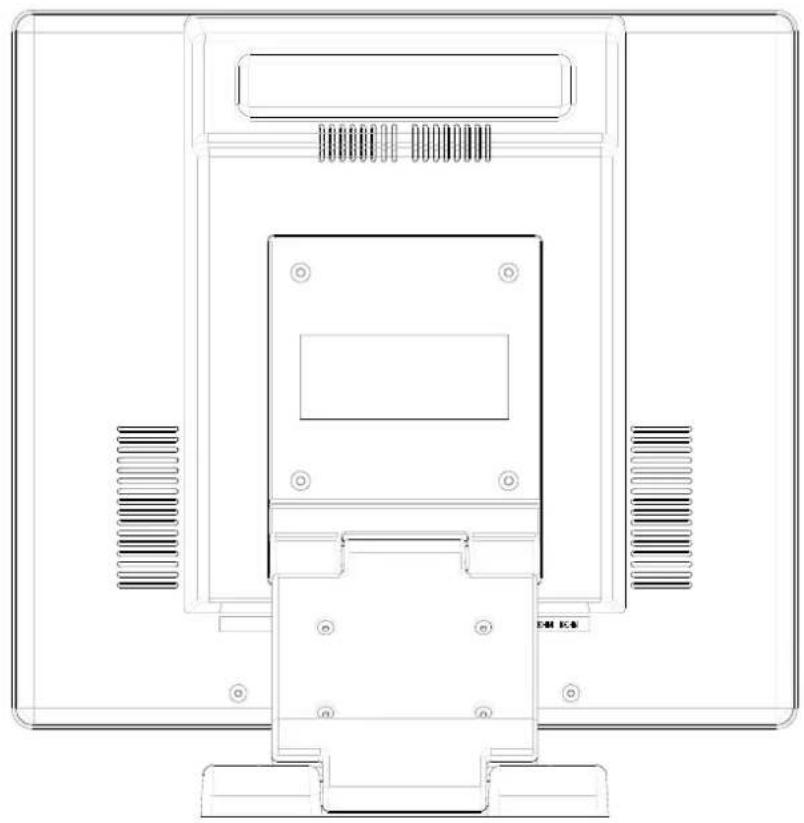
natural_image
Technical line drawing of a mechanical or electronic component with mounting holes and internal structure (no text or symbols)Auspacken
natural_image
Line drawing of a flat-screen computer monitor with a control panel and stand (no text or symbols)| Externer Univ15-poligesD-Sub(RGB Analog) Eingangs-signalkabel | 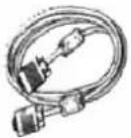 |
Netzkabel
Hardwareinstallation
natural_image
Back view of a computer monitor rear panel showing port labels including VGA, SGA, and USB drive (no text or symbols visible)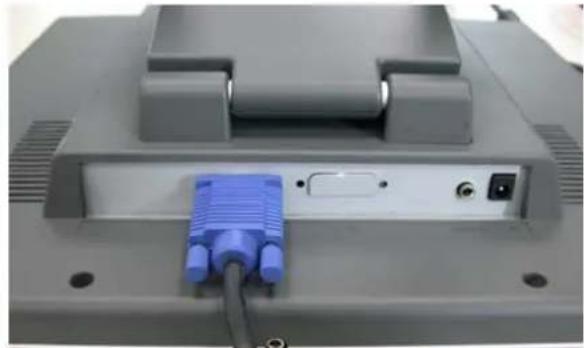
natural_image
Close-up of a computer monitor rear panel showing a blue VGA port and drive slots (no text or symbols visible)natural_image
Back view of a computer monitor with visible ports and cables (no text or symbols)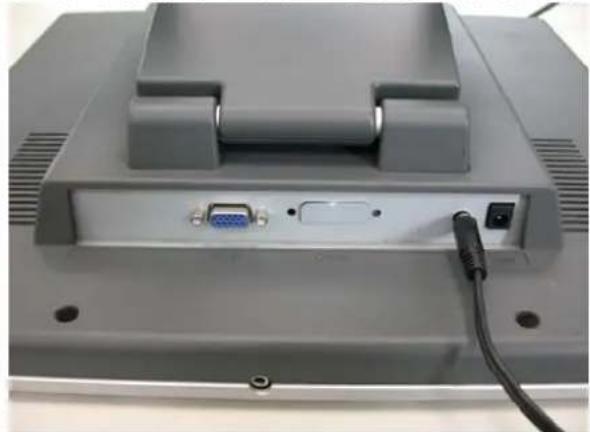
natural_image
Back view of a computer monitor with an ABCD port and cable, no visible text or symbolsnatural_image
Black electrical adapter and cable on a plain surface (no text or symbols visible)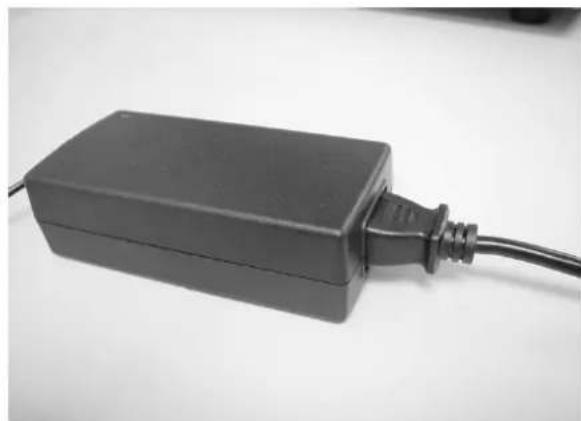
natural_image
Black rectangular electronic device with a cable inserted, placed on a plain surface (no text or symbols visible)natural_image
Back view of a computer monitor with visible ports and cable (no text or symbols)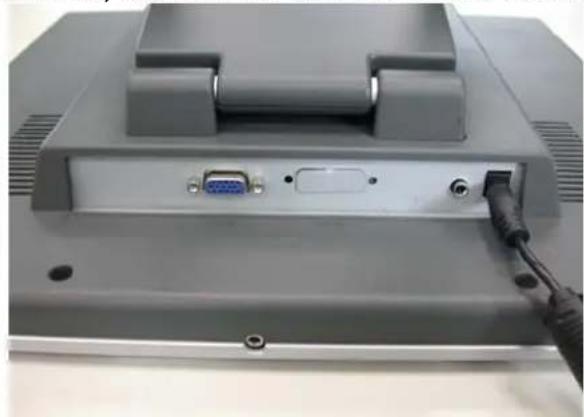
natural_image
Back view of a computer monitor with an A9 port, cable, and connector (no visible text or symbols)natural_image
Line drawing of a flat-screen computer monitor with control panel and stand (no text or symbols)
natural_image
Technical line drawing of a mechanical or electronic component with mounting holes and internal structure (no text or symbols)Disimballaggio
natural_image
Line drawing of a flat-screen computer monitor with control panel and stand (no text or symbols)natural_image
Technical line drawing of a mechanical or electronic component with mounting holes and internal features (no text or symbols)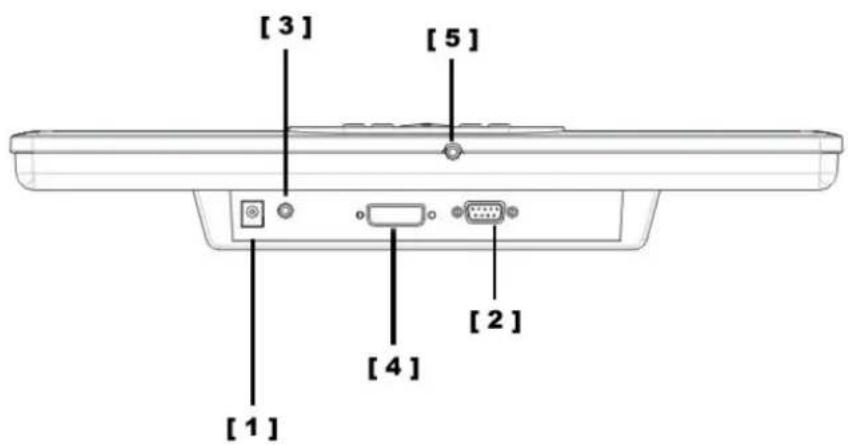
text_image
[3] [5] [2] [4] [1]natural_image
Back view of a computer monitor rear panel showing port labels including VGA, USB, and drive button (no readable text or symbols)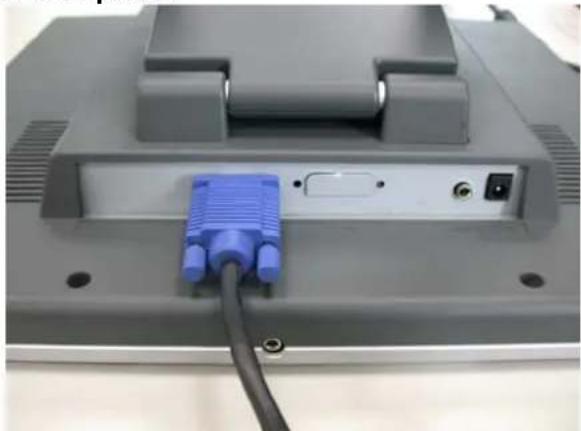
natural_image
Back view of a computer monitor with a blue VGA port and cable (no visible text or symbols)natural_image
Back view of a computer monitor with ports and connectors (no visible text or symbols)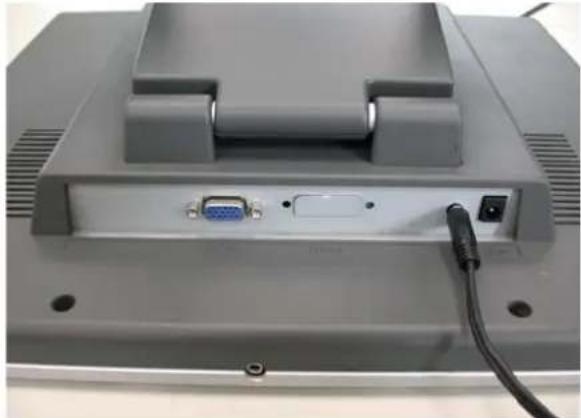
natural_image
Back view of a computer monitor with an A7 port, cable, and ventilation slots (no visible text or symbols)natural_image
Black electronic device with two ports and a black cable, placed on a plain surface (no text or symbols visible)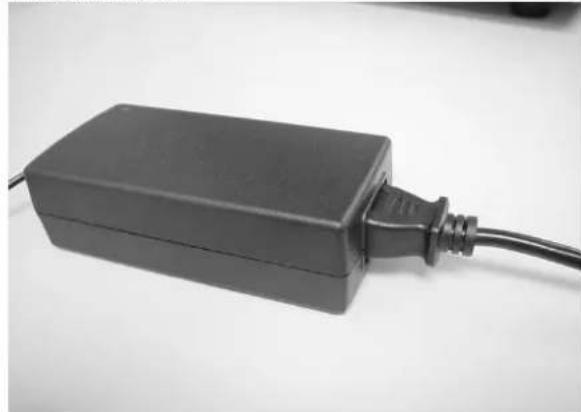
natural_image
Black rectangular electronic device with a cable inserted, placed on a plain surface (no text or symbols visible)natural_image
Back view of a computer monitor with port, VGA, and cable (no visible text or symbols)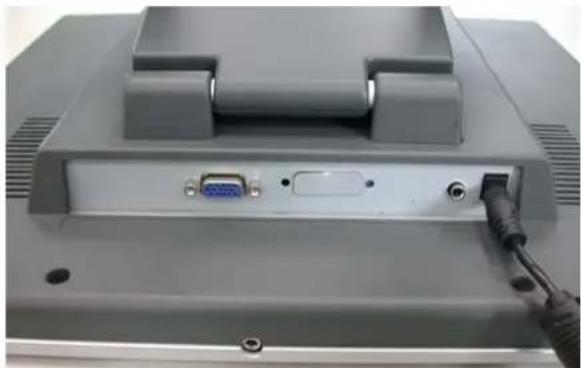
natural_image
Back view of a computer monitor with an A8 port, cable, and connector (no visible text or symbols)natural_image
Line drawing of a flat-screen computer monitor with control panel and stand (no text or symbols)
natural_image
Technical line drawing of a mechanical or electronic component with mounting holes and internal structure (no text or symbols)パッケージの開梱
natural_image
Line drawing of a flat-screen computer monitor with a control panel and stand (no text or symbols)natural_image
Technical line drawing of a mechanical or electronic component with mounting holes and internal structure (no text or symbols)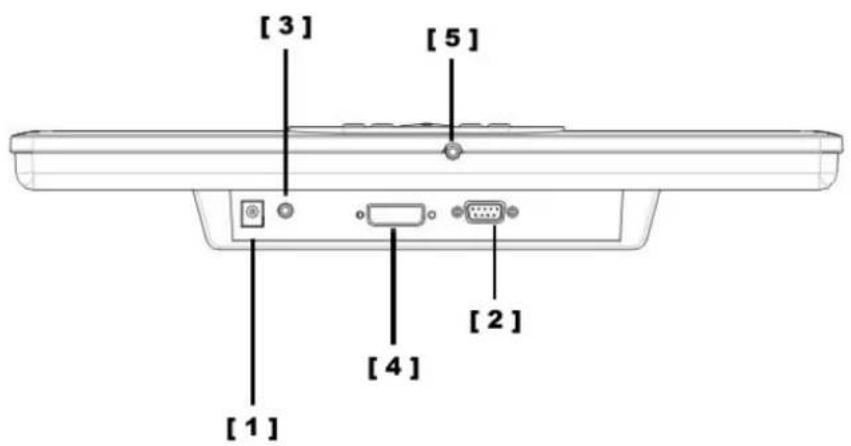
text_image
[3] [5] [2] [4] [1]natural_image
Back view of a computer monitor rear panel showing ports including VGA, SGA, and drive slots (no visible text or labels)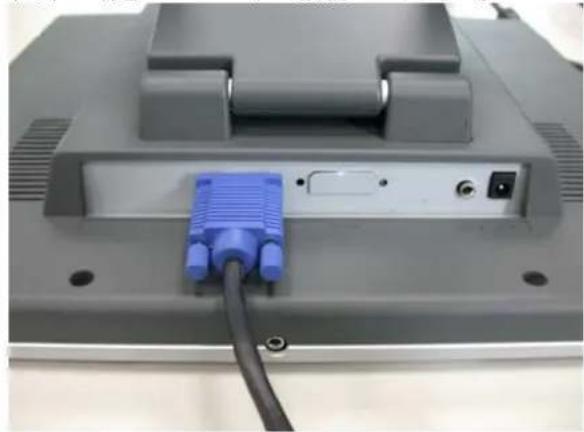
natural_image
Back view of a computer monitor with a blue VGA port and cable (no visible text or symbols)natural_image
Back view of a computer monitor with visible ports and connectors (no text or symbols)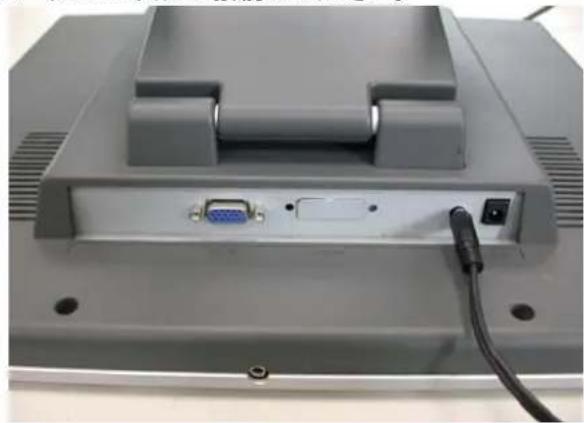
natural_image
Back view of a computer monitor with an A7 port, cable, and ventilation slots (no visible text or symbols)natural_image
Black electronic device with two ports and a black cable, placed on a plain surface (no text or symbols visible)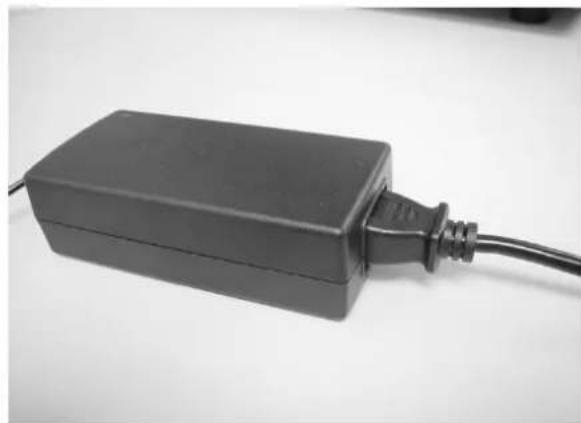
natural_image
Black rectangular electronic device with a coiled cable, placed on a plain surface (no text or symbols visible)natural_image
Back view of a computer monitor with visible ports and a port, no text or symbols present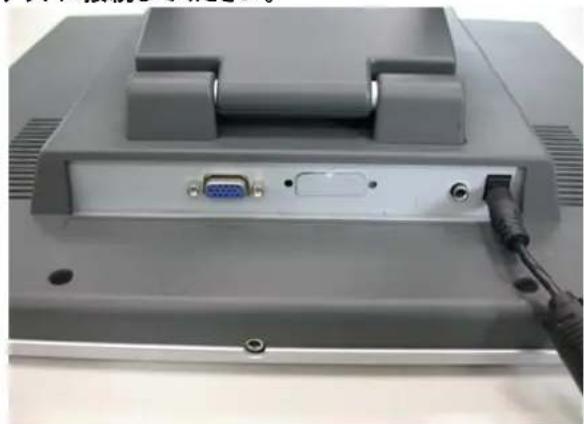
natural_image
Back view of a computer monitor with an A7 port, cable, and ventilation slots (no visible text or symbols)natural_image
Line drawing of a flat-screen computer monitor with control panel and stand (no text or symbols)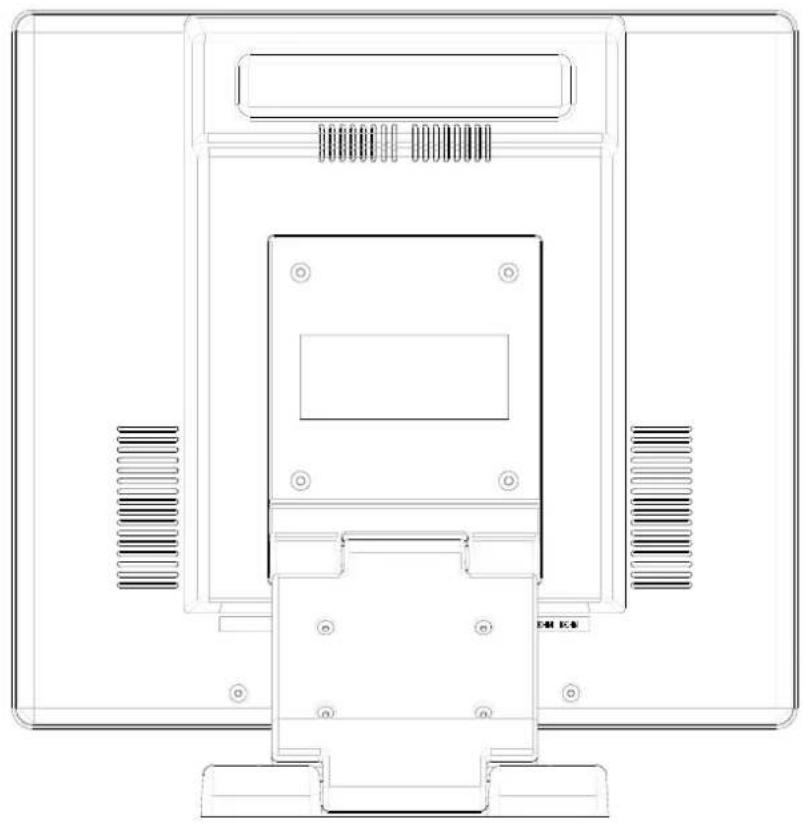
natural_image
Technical line drawing of a mechanical or electronic component with mounting holes and internal structure (no text or symbols)Desempacar
natural_image
Technical line drawing of a mechanical or electronic component with mounting holes and ventilation slots (no text or symbols)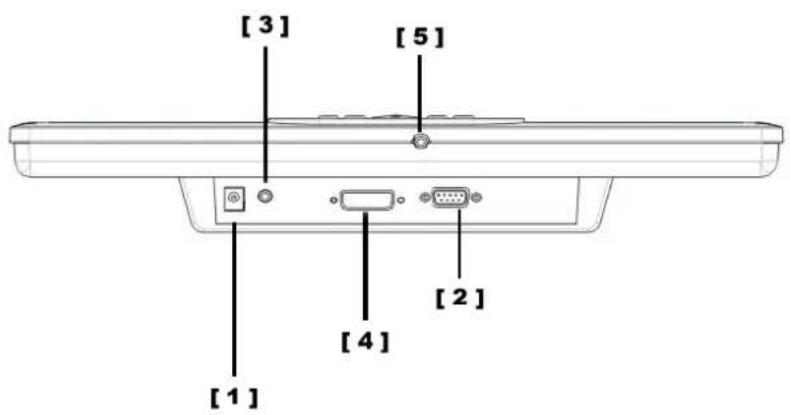
text_image
[3] [5] [2] [4] [1]natural_image
Back view of a computer monitor rear panel showing port labels (VGA, S12) and ports (no readable text or symbols)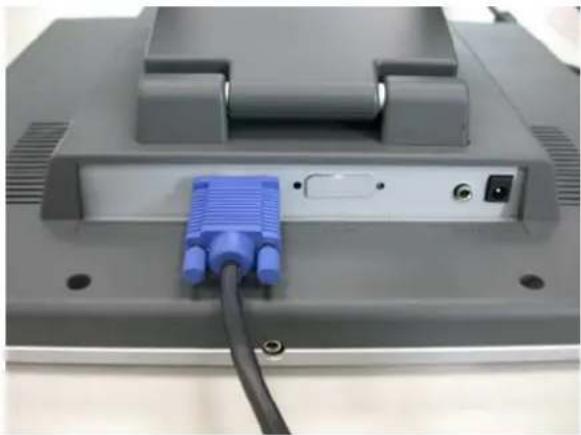
natural_image
Close-up of a computer monitor rear panel showing a blue V12 port connected to a black cable (no text or symbols visible)natural_image
Back view of a computer monitor with ports and connectors (no visible text or symbols)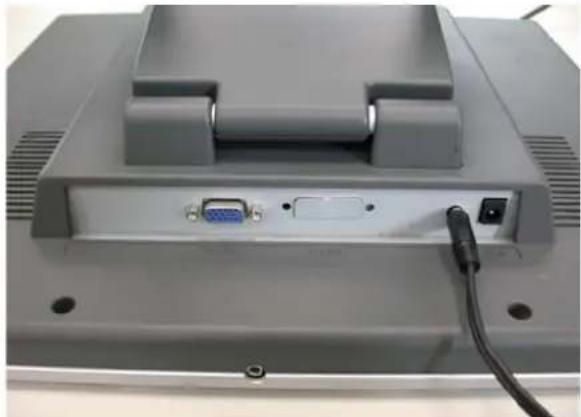
natural_image
Back view of a computer monitor with a VGA port, cable, and ventilation slots (no visible text or symbols)natural_image
Black electrical plug and cable on a plain surface (no text or symbols visible)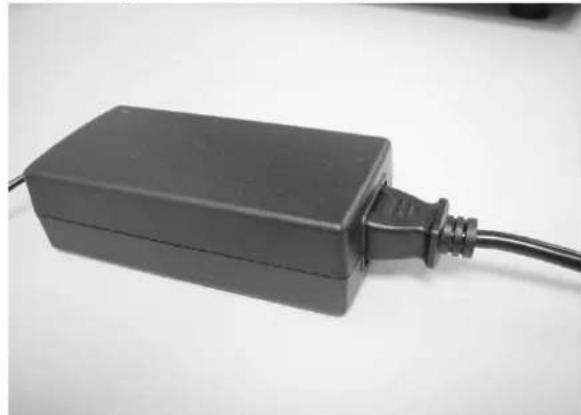
natural_image
Black rectangular electronic device with a cable inserted, placed on a plain surface (no text or symbols visible)natural_image
Back view of a computer monitor with an VGA port and cable, no visible text or symbols