L1531 - Monitor DGM - Free user manual and instructions
Find the device manual for free L1531 DGM in PDF.


User questions about L1531 DGM
0 question about this device. Answer the ones you know or ask your own.
Ask a new question about this device
Download the instructions for your Monitor in PDF format for free! Find your manual L1531 - DGM and take your electronic device back in hand. On this page are published all the documents necessary for the use of your device. L1531 by DGM.
USER MANUAL L1531 DGM
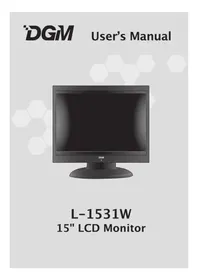
L-1531 15" LCD Monitor
Before You Start
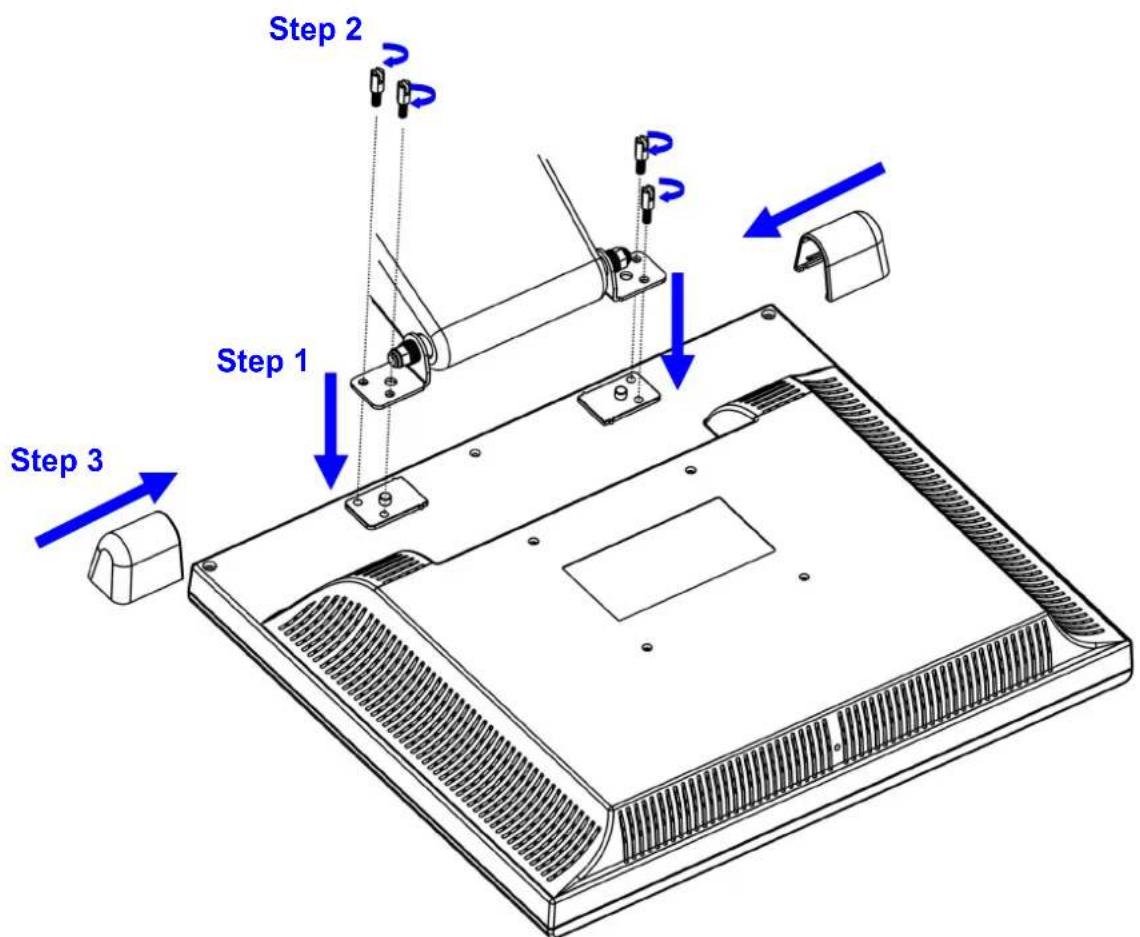
Attaching the Base to the Monitor
Contents
English
Notice 3
Safety Information 3
Precaution 3
Package Contents 3
Hardware Installation Input 4
Control Buttons 4
OSD Menu Mode 5
Troubleshooting 6
Supported Timing 6
Specification 7
Warranty Card. 8
Français
- All Information in this manual may change from time to time without prior notice.
- To ensure safety operation of this product, please read the following menu carefully before using this product.
Safety Information
- Do not place anything wet on the monitor or the power cord.
- Be sure to turn the monitor off before plugging the power cord into the socket.
- Be sure to check the power cord and the other cords are securely and rightly connected.
- Do not attempt to open the monitor. You may be hurt by electric shock. For service, call your place of purchase.
Precaution
- Do not expose the monitor to direct sunlight or heat.
- Do not spill liquid on the monitor.
- Do not use your monitor when magnets or electronic products are operating nearby.
- Do not use harsh chemicals or strong cleaning solvents to clean the monitor screen. Wipe it with clean, soft clothes applied with mild solution.
- Do not place anything on your monitor. Bad ventilation may elevate temperature in the monitor.
- Do not use your fingers to touch the LCD Screen directly. Fingerprint that contains oil and may be difficult to clean.
Package Contents
Our LCD monitor contains these following items. Make sure you get items listed below, otherwise contact to your dealer or store.
- 15.0"TFT LCD Monitor
- Power Cord
- VGA Cable
- Audio Cable
- User's Manual
Hardware Installation
Be carefully to your LCD monitor, it's very exquisite but easy to broken. Turn off LCD's and PC's power before you set it up. Follow our installation step by step.
Input
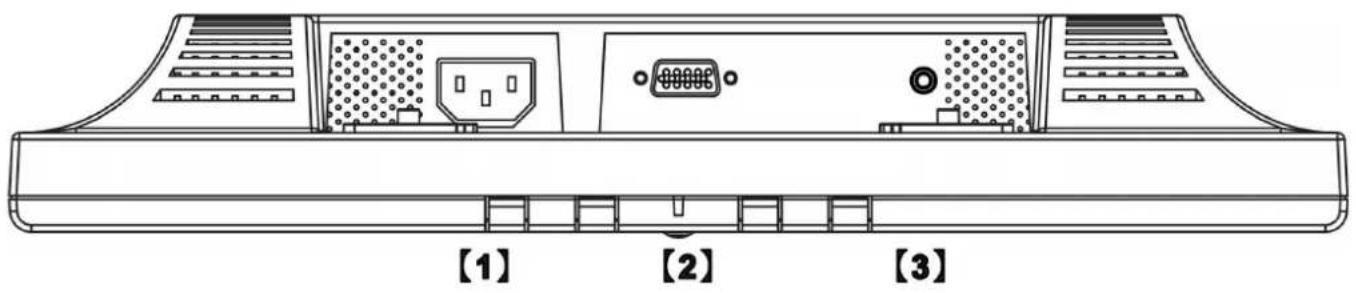
【1】AC Input : This is for connecting the power cable.
【2】VGA PORT : This can be connected with the D-Sub 15 pin signal Cable.
【3】Audio In : This can be connected to the PC audio-out connector of sound resource.
*NOTICE: Audio function is optional feature.

Control Buttons
There are 5 keys for user to set up the monitor, including "Auto Adjust", "OSD menu", "Power", "Adjust < -> ", "Adjust < +> ". The following descriptions are the introduction of these Keys.
Auto Adjust (Function)--
A Function Select Button: This button allows you to select the control functions up in the OSD.
Hotkey: Press this button to apply the monitor setting automatically.
Menu (Function)--
M Function Select Button: This button allows you to select the control functions down in the OSD.
Hotkey: Press this button to get a pop-up OSD menu.
Power: Turn the LCD power on and off. When the power is on, the light is showing green, Stand by will be orange.
- Adjust < -> : Decrease the option value in the OSD menu.
- Adjust < + > : Increase the option value in the OSD menu.
OSD (On-Screen Display) Menu Mode
*Please adjust your Speaker Volume via your PC computer Speaker Volume control icon.
*Please note that Sound will continue to play when your monitor is off, to turn off please turn off your PC computer or mute the Speaker Volume control icon.
Press the OSD button to access menu, and press Increase / Decrease button for adjustment.
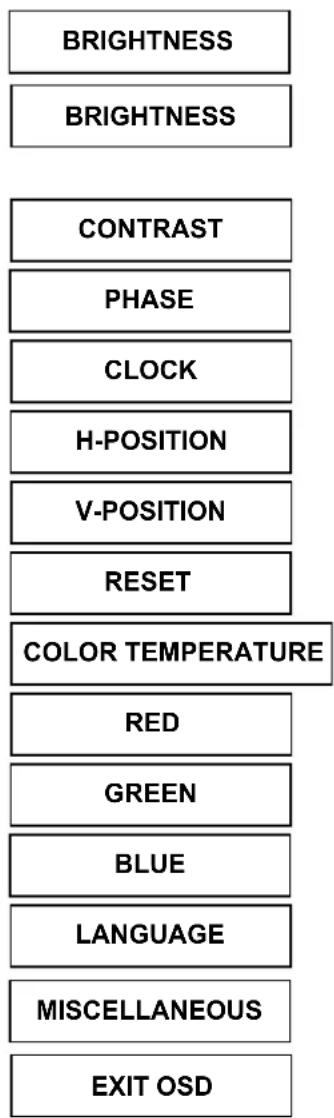
Adjust the brightness of the display.
IBT (Light Sensor)-(Optional): This feature automatically adjust your monitor brightness base on ambient light changes. To activate this feature please select Auto icon within the main OSD Brightness icon. To deactivate please select Manual instead of Auto.
Adjust the difference between light and dark area.
Adjust the phase of PLL.
Adjust the frequency of the PLL.
Adjust the horizontal position of the display.
Adjust the vertical position of display.
Recall the default setting.
Adjust the color temperature.
Adjust the Red color temperature.
Adjust the Green color temperature.
Adjust the Blue color temperature.
Select the display language of the OSD Menu.
"No" will take you to the exit menu. "Yes" will bring you to the sub menus of the Miscellaneous menu.
Saving and Leave.
MISCELLANEOUS
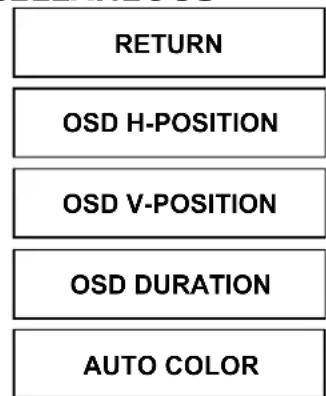
Return to main menu.
Adjust the horizontal position of the OSD.
Adjust the vertical position of the OSD.
Adjust the timing of the OSD menu.
Adjust the color automatically.
Troubleshooting
Make sure that your monitor is properly installed if you have encountered any trouble using this product.
There is no picture on the screen.
Check: 1.Power saving mode. Press any key and move the mouse to deactivate the mode.
- Signal cable connector pins. If there are bent or missing pins, consult your place of purchase.
Characters look too dark or too light
Check: Using OSD Menu to adjust the Brightness.
- When your monitor shall be adjusted?
Check: If the resolution of frequency is being changed.
. The text appears on the screen are unclear.
Check: Make sure the resolution or refresh rate match with the Display Mode.
Supported Timing
| Item | Standards Resolution | Dot Clock (MHz) | Vertical Scanning Frequency (Hz) | Horizontal Scanning Frequency (KHz) | Sync Polarity or composite sync (H/V) | Operating Mode | ||
| 1 | MAC 13" | mode 640x480 | 30.24 | 66.67 | 35.00 | -/- | ||
| 2 | MAC 16" | mode 832x624 | 57.28 | 74.55 | 49.73 | -/- | ||
| 3 | MAC 17" | mode 1024x768 | 80.00 | 75.02 | 60.24 | -/- | ||
| 4 | VGA | 640x480 | 25.18 | 59.94 | 31.47 | -/- | A | |
| 5 | VESA | 640x480 | 31.50 | 72.81 | 37.86 | -/- | A | |
| 6 | VESA | 640x480 | 31.50 | 75.00 | 37.50 | -/- | A | |
| 7 | VESA | 800x600 | 36.00 | 56.25 | 35.16 | +/+ | A | |
| 8 | SVGA | 800x600 | 40.00 | 60.32 | 37.88 | +/+ | A | |
| 9 | VESA | 800x600 | 50.00 | 72.19 | 48.08 | +/+ | A | |
| 10 | VESA | 800x600 | 49.50 | 75.00 | 46.88 | +/+ | A | |
| 11 | VGA | 720x400 | 28.32 | 70.09 | 31.47 | -/+ | A | |
| 12 | XGA | 1024x768 | 65.00 | 60.00 | 48.36 | -/- | A | |
| 13 | VESA | 1024x768 | 75.00 | 70.07 | 56.48 | -/- | A | |
| 14 | VESA | 1024x768 | 78.75 | 75.03 | 60.02 | +/+ | A | |
| 15 | 1024x768 | 71.64 | 66.13 | 53.96 | +/+ | A | ||
| 16 | SUN | 1024x768 | 64.13 | 59.98 | 48.29 | H+V | A | |
| 17 | SUN | 1024x768 | 74.25 | 70.04 | 56.59 | H+V | A | |
A = Analog Mode
If the input timing is closed to one of the above, generally it can be displayed well by optimum adjusting.
Specification
| Input Signals | VGA | VGA compatible analog RGB Composite sync supported |
| Compatibility | PC | Up to 1024X7 |
| Connector | VGA Audio* Power | D-sub 15-pins Stereo Phone Jack A/C Input |
| Power | Voltage Consumption Power saving mode | Built-in universal power supply: 100-240 VAC, 50/60 Hz Active < 30 Watt Max. Standby < 2 Watt |
| Internal Speaker | Speaker x 2* | |
| User Interface | LED Indicator Active | - Green Standby - Orange |
| Operating Condition | Temperature Humidity | Operating:5°C to 40°C 20% ~ 80% R.H. |
| Dimensions | Physical 357.0mm(W) x 242 | 9mm(H) x 161.9mm(D) |
| Net Weight | 2.5 Kg ± 0.4 | |
| DDC | DDC2B | |
| Power Management | VESA DPMS | |
| Regulation (Certifications) | UL, FCC, CE | |
| Others | Light Sensor |
Notice: * Speaker and Light Sensor are optional.
Limited Warranty Policy
All LCD monitors feature a three-years-limited warranty with free change in the first year from the date of purchase. If products is determined to be defective, we will repair or replace the product with refurbished or remanufactured parts or components during the warranty period. This warranty is valid only for the first consumer purchaser.
This warranty does not cover cosmetic damage or damage due to acts of God, accident, misuse, abuse, negligence, commercial use or modifications of, or to any part of the product. This warranty does not cover damage due to improper operation or maintenance (see manual), connection of improper voltage supply, or attempted repair by anyone other than a facility authorized by us to service the product. This warranty does not cover irregular pixel performance on the screen, and damages result due to delivery or improper shipping. This warranty does not cover product sold AS IS or WITH ALL FAULTS, and failure to follow instructions supplied with the product.
This warranty is invalid if the factory-applied serial number has been altered or removed for the product and broken security seal.
The customer must have model number, serial number, and original proof of purchase in the form of a bill of sales or receipt invoice, which is evidence that the unit is within the warranty period, must be presented to obtain warranty service. Our helpful technical support and customer service staff will attempt to correct any minor issues that might be causing the product failure. If the technical service or customer representative is unable to fix the issue by phone, a return material authorization (RMA) number will be issued. Along with the proof of purchase and the RMA number, the customer can ship the defective unit back to us. Once the defective unit is received, and tested, we will ship a replacement unit back to customer. It is the responsibility of the customer to properly package the monitor with plugs, power supply, etc.
We shall not be liable for the loss of the use of the product, inconvenience, loss or any other damages, direct or consequential, arising out of the use of, inability to use, or any claim against the customer by any other party. Some regions do not allow exclusion of incidental or consequential damages, so the above limitations and exclusions may not apply to you.
Distributor/Retailer
François
Avertissement
Distributor/Retailer