
POWX0479 - Sander PowerPlus - Free user manual and instructions
Find the device manual for free POWX0479 PowerPlus in PDF.
| Product type | Drywall sander |
| Brand | PowerPlus |
| Model | POWX0479 |
| Rated power | 1050 W |
| Rated voltage | 220-240 V ~ 50 Hz |
| Variable speed | 600 - 2600 min⁻¹ |
| Disc diameter | 215 mm |
| Sanding diameter | 225 mm |
| Length without extension | 110 cm |
| Length with extension | 110 - 165 cm |
| Protection class | II (double insulation) |
| Cable length | 4 m |
| Suction hose | 4 m |
| Carbon brush motor | Yes |
| Lock button | Yes |
| Electronic speed control | Yes |
| Soft grip handle | Yes |
| Vibration reduction | Yes |
| Hook and loop fastening system | Yes |
| Base material | Aluminum |
| Sound pressure level LpA | 93 dB(A) |
| Sound power level LwA | 104 dB(A) |
| Vibration (total value) | 4.2 m/s² |
| Warranty | 36 months |
Frequently Asked Questions - POWX0479 PowerPlus
User questions about POWX0479 PowerPlus
0 question about this device. Answer the ones you know or ask your own.
Ask a new question about this device
Download the instructions for your Sander in PDF format for free! Find your manual POWX0479 - PowerPlus and take your electronic device back in hand. On this page are published all the documents necessary for the use of your device. POWX0479 by PowerPlus.
USER MANUAL POWX0479 PowerPlus
POWERPLUS HIGH QUALITY TOOLS
POWX0479

NL·FR·EN·DE·ES·IT·PT·NO·DA·SV·FI·EL·HR·SR·CS·SK·RO·PL·HU·RU·BG
NL NEDERLANDS VERTAALDE VERSIE VAN DE ORIGINELE HANDLEIDING
FR FRANÇAIS TRADUCTION DU MODE D'EMPLOI D'ORIGINE
EN ENGLISH ORIGINAL INSTRUCTION MANUAL
2 BESCHRIJVING (FIG. A-B-C-D)
1 APPLICATION 3
2 DESCRIPTION (FIG. A-B-C-D) 3
3 PACKAGE CONTENT LIST 3
4 SYMBOLS 4
5 GENERAL POWER TOOL SAFETY WARNINGS. 4
5.1 Working area 4
5.2 Electrical safety 4
5.3 Personal safety 4
5.4 Power tool use and care 5
5.5 Service 5
6 ADDITIONAL SAFETY HINTS. 5
6.1 Electrical connection 6
7 ASSEMBLY 6
7.1 Before initial operation 6
7.2 Shaft (17) 6
7.3 Replace sanding pad (Fig. 2) 6
7.4 Attaching and changing sanding tools (Fig. 3)
7.5 Electronic speed control 7
7.5.1 Adjustable speed 7
7.5.2 Constant speed control 7
7.6 Extension shaft (Fig. 4)
7.7 Dust suction (Fig. 5)
7.8 Tool standard/airflow control (Fig. 6)
8 OPERATION 8
8.1 Starting and stopping tool 8
8.2 Switching the machine on and off 8
8.3 Adjusting the rotation speed (Fig. 7) 8
8.4 Constant speed (Fig. 8) 8
9 SANDING OPERATIONS 8
9.1 Round sanding head (Fig. 9) 8
9.2 Polish the ceiling (Fig. 10) 8
10 CLEANING AND MAINTENANCE 9
10.1 Keep tool clean 9
11 TECHNICAL DETAILS. 9
12 NOISE 9
13 WARRANTY 10
14 ENVIRONMENT 10
15 DECLARATION OF CONFORMITY 11
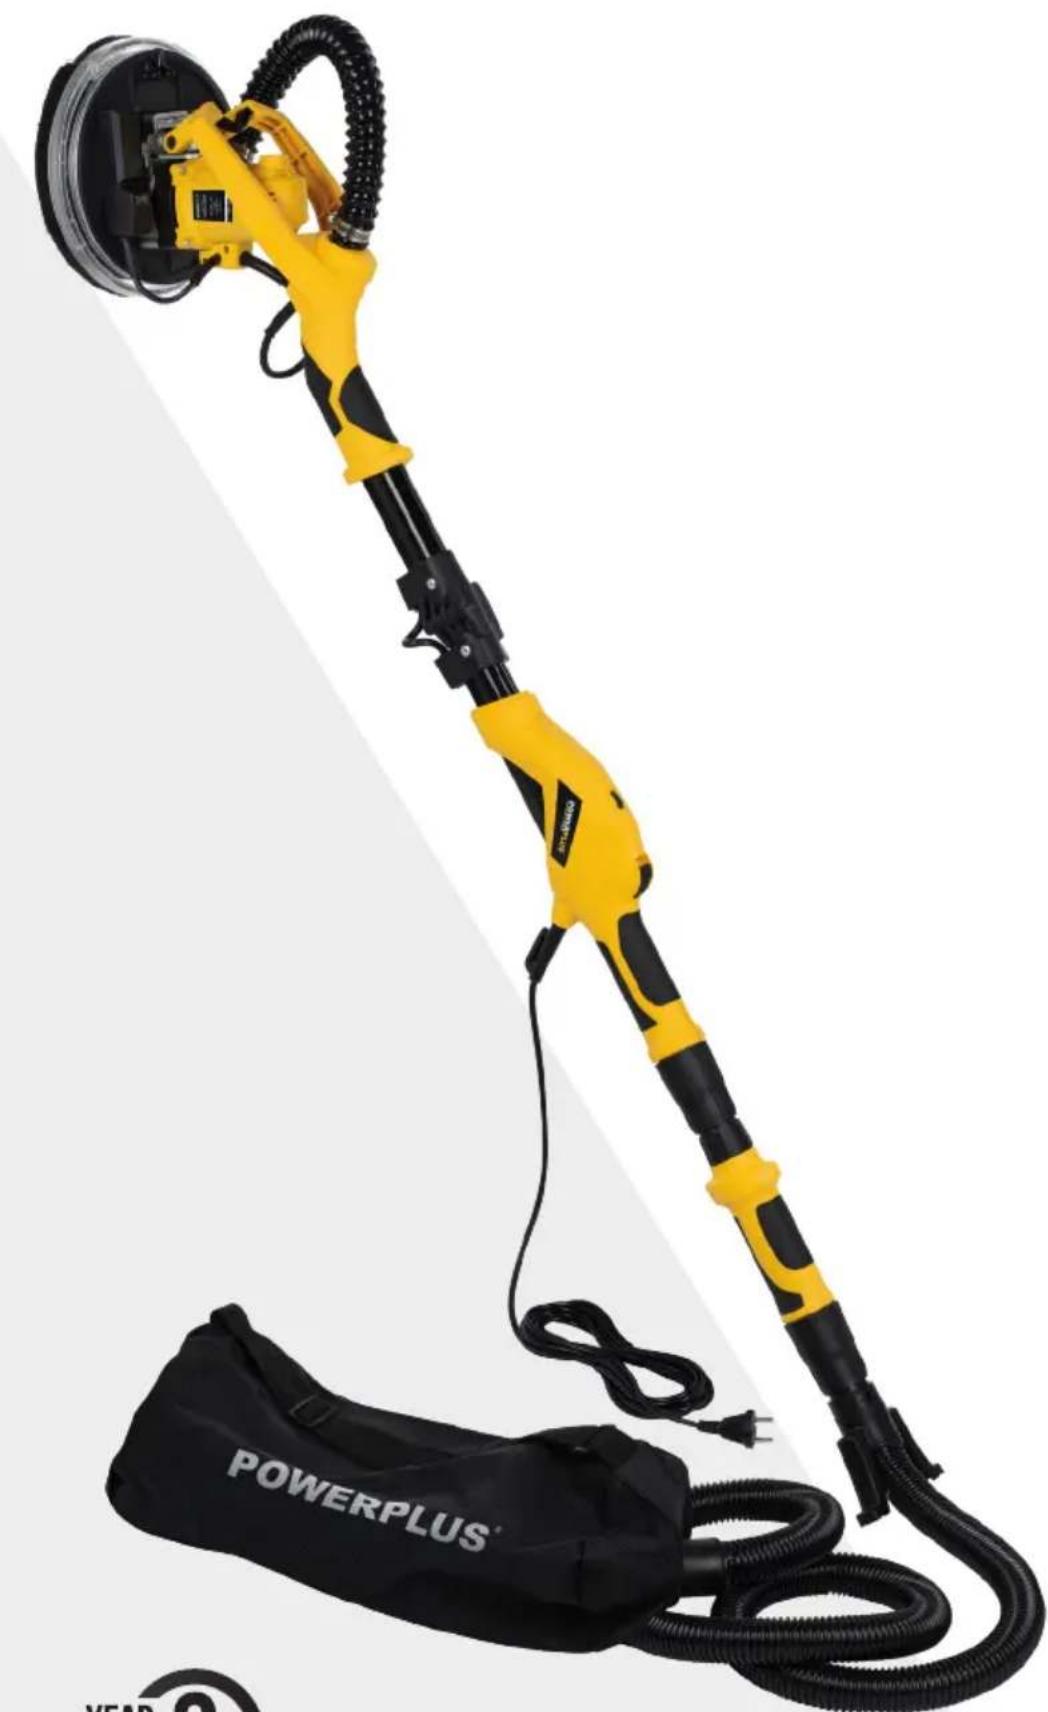
DRYWALL SANDER 1050 W POWX0479
1 APPLICATION
The machine is designed for sanding drywalls, ceilings and walls of the inner and outer surfaces, clearing the floor residues, paint coatings, adhesive and loose plaster etc. Our machine is not suitable for processing the object containing asbestos.

WARNING! Read this manual and general safety instructions carefully before using the appliance, for your own safety. Your power tool should only be passed on together with these instructions.
2 DESCRIPTION (FIG. A-B-C-D)
- Round sanding head
- Brush ring
- Round sanding pad (hook & loop system)
- Motor housing
- Soft grip
- Folding lock
- Handle
- Rear handle
- On/ Off switch
- Electronic speed control
-
Dust adaptor
-
Vacuum hose
- Power cable
- Carrying bag
- Locking knob for length adjustment
- Telescopic shaft
- Shaft
- Connector
- Dust bag
- Fixation band
- LED light ring
- On/off switch light
- External brush cap
3 PACKAGE CONTENT LIST
- Remove all packaging materials.
- Remove remaining packing and package inserts (if included).
- Check that the package contents are complete.
- Check the appliance, the power cord, the power plug and all accessories for transportation damage.
- Keep the packing materials as far as possible till the end of the warranty period. Disse it into your local waste disposal system afterwards.

WARNING: Packaging materials are not toys! Children must not play with plastic bags! Danger of suffocation!
6 pieces (60/80/120/150/180/140) of
sanding paper with dia. 225mm
1 connection adapter 57 mm
4 m flexible pipe for extracting dust
2 m hose
1 hex key (5 mm)
1 canvas bag
1 dust bag
1 manual

If any parts are missing or damaged, please contact your dealer.
4 SYMBOLS
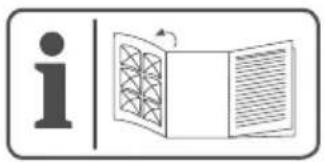
In this manual and/or on the machine the following symbols are used:
| Always wear a dust mask. | Always wear safety goggles. | ||
| Denotes risk of personal injury or damage to the tool. | Read the manual before use. | ||
| CE | In accordance with essential safety standards of applicable European directives. | Class II - The machine is double insulated; earthing wire is therefore not necessary. | |
| Wear gloves. | |||
5 GENERAL POWER TOOL SAFETY WARNINGS
Read all safety warnings and instructions. Failure to heed warnings and follow instructions may result in electric shock, fire and/or serious injury. Keep safety warnings and instructions for future reference. The term "power tool" in the safety warnings refers to your mains-operated (corded) power tool or battery- operated (cordless) power tool.
5.1 Working area
- Keep working area clean and well lit. Untidy and dark areas can lead to accidents.
- Do not operate power tools in potentially explosive surroundings, for example, in the presence of inflammable liquids, gases or dust. Power tools create sparks which may ignite the dust or fumes.
- Keep children and bystanders at a distance when operating a power tool. Distractions can cause you to lose control of it.
5.2 Electrical safety
- Always check that the power supply corresponds to the voltage on the rating plate.
- Power tool plugs must match the outlet. Never modify the plug in any way. Do not use adapter plugs with earthed power tools. Unmodified plugs and matching outlets will reduce the risk of an electric shock.
- Avoid body contact with earthed surfaces such as pipes, radiators, kitchen ranges and refrigerators. There is an increased risk of an electric shock if your body is earthed.
- Do not expose power tools to rain or wet conditions. If water gets inside a power tool, it will increase the risk of an electric shock.
- Do not damage the cord. Never use the cord for carrying, pulling or unplugging the power tool. Keep the cord away from heat, oil, sharp edges or moving parts. Damaged or entangled cords increase the risk of an electric shock.
- When operating a power tool outdoors, use an extension cable suitable for outdoor use. Using a cord suitable for outdoor use reduces the risk of an electric shock.
- If operating a power tool in a damp location is unavoidable, use a power supply protected by a residual current device (RCD). Using an RCD reduces the risk of an electric shock.
5.3 Personal safety
- Stay alert, watch what you are doing and use common sense when operating a power tool. Do not use a power tool when you are tired or under the influence of drugs, alcohol or medication. A moment of inattention when operating a power tool may result in serious personal injury.
POWX0479 EN
- Use safety equipment. Always wear eye protection. Using safety equipment such as a dust mask, non-skid safety shoes, a hard hat, or hearing protection whenever it is needed will reduce the risk of personal injury.
- Avoid accidental starts. Ensure the switch is in the off position before inserting the plug. Carrying power tools with your finger on the switch or plugging in power tools when the switch is in the on position makes accidents more likely.
- Remove any adjusting keys or spanners before turning on the power tool. A spanner or key left attached to a rotating part of the power tool may result in personal injury.
- Do not reach out too far. Keep your feet firmly on the ground at all times. This will enable you to retain control over the power tool in unexpected situations.
- Dress properly. Do not wear loose clothing or jewellery. Keep your hair, clothing and gloves away from the power tool. Loose clothes, jewellery or long hair can become entangled in the moving parts.
If there are devices for connecting dust extraction and collection facilities, please ensure that they are attached and used correctly. Using such devices can reduce dust-related hazards.
5.4 Power tool use and care
- Do not expect the power tool to do more than it can. Use the correct power tool for what you want to do. A power tool will achieve better results and be safer if used in the context for which it was designed.
- Do not use the power tool if the switch cannot turn it on and off. A power tool with a broken switch is dangerous and must be repaired.
- Disconnect the plug from the power source before making adjustments, changing accessories, or storing power tools. Such preventive safety measures reduce the risk of starting the power tool accidentally.
- Store power tools, when not in use, out of the reach of children and do not allow people who are not familiar with the power tool or these instructions to operate it. Power tools are potentially dangerous in the hands of untrained users.
- Maintain power tools. Check for misalignment or jammed moving parts, breakages or any other feature that might affect the operation of the power tool. If it is damaged, the power tool must be repaired. Many accidents are caused by using poorly maintained power tools.
- Keep cutting tools sharp and clean. Properly maintained cutting tools with sharp cutting edges are less likely to jam and are easier to control.
- Use the power tool, accessories and cutting tools, etc., in accordance with these instructions and in the manner intended for the particular type of power tool, taking into account the working conditions and the work which needs to be done. Using a power tool in ways for which it was not intended can lead to potentially hazardous situations.
5.5 Service
Your power tool should be serviced by a qualified specialist using only standard spare parts. This will ensure that it meets the required safety standards.
6 ADDITIONAL SAFETY HINTS
- Keep your hands away from rotating sanding head area at all times.
-
Prolonged breathing of airborne dust from drywall sanding may effect respiratory function:
-
Always use a vacuum cleaner with a bag approved for drywall dust installed
-
Always wear a respirator approved for dust and mist
-
Sanding lead-based paint is extremely toxic and should not be attempted. Only allow professionals with special training and equipment perform this task.
- Maintain proper footing and balance at all times. Do not overreach. Use proper scaffolding.
Always wear appropriate safety equipment when operating.
POWX0479 EN
- Important: after completing sanding, switch off the switch and wait for the coasting sanding head to stop completely before putting the tool down.
- Never operate the tool in an area with flammable solids, liquids, or gases. Sparks from the commutator / carbon brushes could cause a fire or explosion.
- There are certain applications for which this tool was designed. The manufacturer strongly recommends that this tool cannot be modified and / or used for any application other than for which it was designed.
- Use the machine with both hands at all times. Loss of control can cause personal injury.
- Keep power supply cord clear from the working range of the machine. Always lead the cable away behind you.
- Immediately switch off the machine if unusual vibrations or if other malfunctions occur. Check the machine in order to find out the cause.
- The dust that arises when working with this tool can be harmful to health. Use a dust absorption system and wear a suitable dust protection mask and remove deposited dust with a vacuum cleaner.
6.1 Electrical connection
The network voltage must conform to the voltage indicated on the tool name plate. Under no circumstances should the tool be used when the power supply cable is damaged. A damaged cable must be replaced immediately by an authorized Customer Service Centre. Do not try to repair the damaged cable yourself. The use of damaged power cables can lead to an electric shock.
7 ASSEMBLY

Before setting up, repair or maintenance of the appliance you must always turn off the operating switch and pull out the mains plug!
7.1 Before initial operation
- Check if the rated frequency of the mains supply corresponds to the details of the type place.
Before using the tool, read the instruction book carefully.
7.2 Shaft (17)
Fold the front and back part together (Fig. 1-1). Push the folding lock (9) to the right position and keep the tip adjacent to the handle (Fig. 1-2), and then press the folding lock (9) towards the handle until the end. (Fig. 1-3)
Unfold the handle by pushing the folding lock to the inside.
7.3 Replace sanding pad (Fig. 2)
- Insert the hex wrench (size 5) into the hexagonal screw bolt on the sanding block
- Hold the sanding pad firmly, and then turn the wrench counter clockwise to dismount the pad.
Install new sanding pad by tightening the bolt.

Attention: Only install the specified sanding pad on the machine. In order to ensure optimal performance, the machine should be run at slightly lower speed for several minutes to make the grinding pad fit the sealing surface perfectly. During this process, the white foam particles will come out from the sanding head. However, this won't damage the machine.
7.4 Attaching and changing sanding tools (Fig. 3)
-
Place the sanding tool in the centre of the sanding disc and press on. The holes in the sanding tool must be in alignment with the extraction holes in the sanding pad.
-
For round sanding pad only: conduct a test run to check that the sanding tool is clamped in the centre.
7.5 Electronic speed control
7.5.1 Adjustable speed
Adjust the speed by turning the speed wheel, user can choose different speed for different sanding surface.
7.5.2 Constant speed control
Keep the machine running at the same speed as selected. Do not overload by excessive pressure.
7.6 Extension shaft (Fig. 4)
- Use the extension shaft (O) according to the intended operation for higher work surface
- Loosen the sleeve on the dust extraction outlet (N) of the upper shaft (J).do not remove the sleeve from the outlet.
Align the rear handle (O_1) with the main handle and insert the sleeve (O_3) on the extension shaft (O) into the outlet (N) with a twist motion all the way to the stop. - Adjust the length of the extension shaft (O) if necessary, pay attention to the marking "max 1.65m " on the extension shaft. Tighten the sleeve (N) after assembling/adjusting the extension shaft.
7.7 Dust suction (Fig. 5)
- Loosen locking knob for length adjustment (N) by turning it in the direction of the unlocking symbol on the tool handle.
- Insert Vacuum hose (P) into the end of the tool handle as illustrated.
- Tighten Locking knob for length adjustment (N) by turning it in the direction of the locking symbol on the tool handle.
- Connect the Vacuum hose with the 47 mm adapter directly to an industrial vacuum cleaner (remove vacuum cleaner hose first).
- One may also connect vacuum hose with one of the 2 adapters to an industrial vacuum cleaner without removing the vacuum cleaner hose.
7.8 Tool standard/airflow control (Fig. 6)
- Tool handle (P1) prevents the hose from damage when putting the tool aside during work breaks.
- Control the airflow by sliding suction power adjustment ring (P3) over the opening in tool connector (P2).
- The vacuuming power is at its lowest level when the opening is fully visible.

WARNING: Failure to use an approved dust bag in your vacuum cleaner will increase the level of airborne dust in the work area. Prolonged exposure to such dust may cause respiratory harm.
8 OPERATION

Always hold the drywall sander with both hands! Keep your hands away from the sanding head. Otherwise, your hand could become caught, as the sanding head swivels in different directions.
- Attach sanding pad.
- Attach sanding tool.
- Set power tool to the required length.
- Connect dust extraction system.
- Insert mains plug.
- Switch on the device.
- Press the drywall sander gently against the work surface (the pressure should be just enough to ensure that the sanding head is flush with the work surface).
8.1 Starting and stopping tool
Make sure that the power circuit voltage is the same as that shown on the specification plate of the machine and that switch (9) is "OFF" before connecting the tool to the power circuit.
8.2 Switching the machine on and off
Turn on/off the drywall sander by switch.
8.3 Adjusting the rotation speed (Fig. 7)
The speed of the machine is variable to suit different tasks. It can be adjusted from 600min^-1 up to 2600min^-1 by using the thumb wheel (10). Turn in the counter clockwise direction to increase the speed and in the clockwise direction to decrease the speed. Generally, you should use the higher speed for fast stock removal and the lower speed for more precise control.
8.4 Constant speed (Fig. 8)
Keep the machine running at the same speed a selected. Do not overload by excessive pressure.
9 SANDING OPERATIONS
Once the machine and vacuum cleaner are set up and all safety measures and equipment are in place, begin by turning on the vacuum cleaner and then the machine. (If you are using a vacuum cleaner with integrated switching, then simply turn the machine on.)
9.1 Round sanding head (Fig. 9)
- Begin sanding and carefully contact the work surface as lightly as possible just enough to keep the sanding head flat against the surface.
The pivot point in the sanding head allow the sanding disc (7) to follow the contours of the work surface. - The best technique is to use overlapping sweeps and keep the head in constant motion. Never stop too long in any one place or there will be swirl marks. With experience it will be very easy to create excellent results.
9.2 Polish the ceiling (Fig. 10)
Put the rubber band into the pothook to fix the head. Keep the sanding pad and handle vertical, keep the sanding pad and ceiling in the same level. Then you can use to sand the ceiling.
NOTE: Ensure that the sandpaper you are using is suited to the task, Overly coarse grit paper may remove material too quickly to control. While overly fine grit paper may clog too often and not shape down the surface.
CAUTION: Take care to avoid sharp projections and nails, etc. This will wipe out the sandpaper and probably damage the sponge pad as well.
10 CLEANING AND MAINTENANCE
10.1 Keep tool clean
Periodically blow out all air passages with dry compressed air. All plastic parts should be cleaned with a soft damp cloth. NEVER use solvents to clean plastic pats. They could possibly dissolve or otherwise damage the material.
Wear safety glasses while using compressed air.
Clean the vacuum swivel connector as too much dust will keep it from turning freely.
11 TECHNICAL DETAILS
| Rated power | 1050 W |
| Rated frequency | 50 Hz |
| Rated voltage | 220-240 V |
| Rotation speed | 600-2600 min-1 |
| Disc diameter | 215 mm |
| Cable length | 4 m |
| Vacuum cleaner hose | 4 m |
| Carbon brush motor | Yes |
| Lock-on button | Yes |
| Sanding diameter | 225 mm |
| Length without extension tube | 110 cm |
| Length with extension tube | 110-165 cm |
| Electronic speed control | Yes |
| Soft grip | Yes |
| Vibration reduction | Yes |
| Hook & loop system | yes |
| Base material | Aluminium |
12 NOISE
Noise emission values measured according to relevant standard. (K = 3)
Acoustic pressure level LpA 93 dB(A)
Acoustic power level LwA 104 dB(A)

ATTENTION! Wear hearing protection when sound pressure is over 85 dB(A).
aw (Vibration)
4,2 m/s²
K = 1.5m / s^2
13 WARRANTY
This product is warranted for a 36-month period effective from the date of purchase by the first user.
- This warranty covers all material or production flaws excluding : batteries, chargers, defective parts subject to normal wear & tear such as bearings, brushes, cables, and plugs, or accessories such as drills, drill bits, saw blades, etc. ; damage or defects resulting from maltreatment, accidents or alterations; nor the cost of transportation.
- Damage and/or defects resulting from inappropriate use also do not fall under the warranty provisions.
We also disclaim all liability for any bodily injury resulting from inappropriate use of the tool.
- Repairs may only be carried out by an authorized customer service centre for Powerplus tools.
- You can always obtain more information at the number 00 32 3 292 92 90.
- Any transportation costs shall always be borne by the customer, unless agreed otherwise in writing.
- At the same time, no claim can be made on the warranty if the damage of the device is the result of negligent maintenance or overload.
- Definitely excluded from the warranty is damage resulting from fluid permeation, excessive dust penetration, intentional damage (on purpose or by gross carelessness), inappropriate usage (use for purposes for which the device is not suitable), incompetent usage (e.g. not following the instructions given in the manual), inexpert assembly, lightning strike, erroneous net voltage. This list is not exhaustive.
- Acceptance of claims under warranty can never lead to the prolongation of the warranty period nor commencement of a new warranty period in case of a device replacement.
Devices or parts which are replaced under the warranty therefore remain the property of Varo NV.
- We reserve the right to reject a claim whenever the purchase cannot be verified or when it is clear that the product has not been properly maintained. (Clean ventilation slots, carbon brushes serviced regularly, etc.).
- Your purchase receipt must be kept as proof of date of purchase.
- Your appliance must be returned undismantled to your dealer in an acceptably clean state, (in its original blow-moulded case if applicable to the unit), accompanied by proof of purchase.
14 ENVIRONMENT
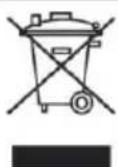
Should your appliance need replacement after extended use, do not dispose of it with the household refuse, but in an environmentally safe way.
Waste produced by electrical machine items should not be handled like normal household rubbish. Please recycle where recycle facilities exist. Check with your Local Authority or retailer for recycling advice.
VARO N.V. - Joseph Van Instraat 9 - BE2500 Lier - BELGIUM, declares that,
Product: Drywall Sander
Trade mark: POWERplus
Model:POWX0479
is in conformity with the essential requirements and other relevant provisions of the applicable European Directives, based on the application of European harmonized standards. Any unauthorized modification of the apparatus voids this declaration.
European Directives (including, if applicable, their amendments up to the date of signature):
2011/65/EU
2006/42/EC
2014/30/EU
European harmonized standards (including, if applicable, their amendments up to the date of signature):
EN60745-1:2009
EN60745-2-3:2011
EN55014-1:2006
EN55014-2:2015
EN61000-3-2:2014
EN61000-3-3:2013
Keeper of the Technical Documentation: Philippe Vankerkhove, VARO - Vic. Van Rompuy N.V.
The undersigned acts on behalf of the company CEO,

Philippe Vankerkhove
Regulatory Affairs - Compliance Manager
Lier, 20/09/2018
9 RENGJØRING OG VEDLIKEHOLD
6stk. (60/80/120/150/180/140)slibepapir
1 seskantnøgle (5 mm)
med dia. 225 mm
1 laerredstaske
1 adaptere 57 mm
1 stovpose
7.2 Cev (17) (Sl. 1)
Preklopite prednji i zadnji deo (Sl. 1-1). Gurnite blokadu preklapanja (9) udesno i držite vrh uz dršku (Sl. 1-2), zatim pritisnite do kraja blokadu preklapanja (9) ka drsci. (Sl. 1-3)
Razviije cev taketo sto cete blokadu preklapanja gurnuti ka unutra.
7.3 Zamena brusne ploce (Sl.2)
Umetnite šestougaoni kliuc (velicina 5) u šestostrani zavrtanj na brusnoj poči.
- Cyrsto držite brusnu ploču a zatim okrenite kliuc da biste skinuli ploču.
Montirajte novu brusno plocu pritezanjem zavrtnja.

Păznja: Montirajte samo specificiranu brusnu ploču na masinu. Za osiguranje optimalnih performansi masinu treba pustiti da radi u nešto nižoj brzini nekoliko minuta da bi se postiglo idealno naleganje brusne ploče na povrsinu naleganja. Tokom ovog procesa, Čestice bele pene ce izlaziti iz brusne glave. Medutim, ovo neće dovesti do ostećenja masine.
7.4 Pricvršćivanje i zamena brusnog alata (Sl. 3)
-
Postavite brusni alat u centar brusnog diska i pritisnite. Rupe u brusnom alatu moraju da sePoklapaju sa rupama zauklananje prašine u brusnoj ploci.
-
Samo za okruglu brusnu plocu: izvršite probu da biste proverili da li je brusni alat pricvršcen u centru.
7.2 Tyc (17) (Obr. 1)
Zložte prednú a zadné Čast' spolu (obr. 1-1). Zatlačte skladaci zámok (9) do pravej polohy a nechajte špičku priliehat' k rukováti (obr. 1-2) a potom stlăčte skladaci zámok (9) smerom k rukováti až po koniec. (obr. 1-3)
6.1 NodknoueHue K ucmouhky numaHua
CeteBoe HnprjxHne DoJnxHO COOTBeTCTBOBaTb HnprjxHNO, yKa3aHHOMy Ha 3aBOcko Ta6nue HHCTpymeHTa. Hn B Koem Cnyae He noJb3yInTeCb INHCTpyMeHToM npi NobpeXdeHHom Ka6ene 3NeKtpOniTahnra. NObpeXdeHHb Ka6ebN Heo6xoDIMO 6e3OTnaraTeJIbHO 3aMeHnB B aBTOpn3OBaHHom cepBnCHOM ueHTpe. He nbTaIteCb CAMOCTOReTbHO peMOHTnpoBaTb NobpeXdeHHb Ka6ebN. IcNoJb3OBaHne NOBpeXdeHHbIX Ka6eNe nITAHnRA MoKeT npINBeCTn K NoPAxeHHIO 3JeKTPnueCKm TOKOM.
7 CBOPKA

Ipeed hanaikoi, peMOHTOM nHn 06cnyxuBaHne m yctpoiCTBa Bcerda Heo6xOdmo OTKIOHTb pa6OCh N BbIKIOUaTeJIb N OTcoeHNHTb CeTeByIO BnIKy ot po3ETkn!
7.1 Naped hauaJom pa6ombj
IpoBepbTe, COOTBeTCTByET JIN HOMHaJIbHaj YAcTOTA NCTOCHKA 3JKeKTpONiTAHnJaHHbIM Ha TUNOBON Ta6NJUKe.
- Ipeed nCIOJb3OBAHnEM nHCTpyMeHTa BHIMaTeIbHO npOHTaTe pyKOBOcTBO nO 3KcIIyatau.
7.2 UmaHa (17) (Puc 1)
CnoKHTe BmecTe nepeHIOU 3aHIOU qactu (Pnc.1-1).HaXMMTe pKcTOp cKaADHOI
HTaHn (9)B npaboe noLoXeHne u ydepxnbAitc KOHeuC pyKOaTKo (Pnc.1-2), a
3aTeM HaxMMTe pHKCaTOp cKnAdHOJ HTaHn (9)B HAnpaBneHn pyKoRTKn Do KOHca.(Pnc.1-
3).
Pa3BepHIne pykoTky, HaxaB cKcaTOP cKnadHOI StaHn BHyTpB.
7.3 3aMeHa wJnUΦoEaNbHou nOdouWebl (Puc. 2)
- IomeCTnTe ⅢeCTnIRpaHHbI KIOUc (pa3Mep 5) Ha 6oNT C ⅢeCTnIRpaHHoI rOIOBKOH Ha
Kpenko ydepkmba JnnofoBaBnHyIO NOOswBy, BpaauTe raeHbIKIIOU pOToB YacOBOn CTpeJIKN, YTO6bl CHrTB NOOswBy.
YcTaHOBInTe HOByIO ⅢINΦOBaIbHyIO NOIoWBy,3aTAYB 6oJI.

BhImaHne: YcTaHaBnBaIte Ha MaunHy TOnbKO npedyCMOTpeHHyo dJa Hee WInΦoBaIbHyO NOOswBy.ДЯ rapaHTnpoBaHn ONTMaIbHO INpON3BOdntelbHOCTN MaunHa HeCKoJIbKO MNHT DOJXHa Npopa6OtaTb Ha HEMHOrO NoHNKeHHo CKOpocTN, YTO6bl NDeaJIbHO npncnocOBtB WInΦoBaIbHyO NOOswBy K yNlOTnTeIbHO NOBepxHocTN. Bo BpeMra 3TORO npoceca n3 WInΦoBaIbHO rOIOBKn 6yDyT BbIXoNDTuacTNUbl BeNoi neHbI. Ondako, 3TO He Bbl3bIBaET NOBpeKdHeNe MaunHbI.
7.4 KpenneHue u 3aMeHa wlufoBaIbHbIX uHcmpymeHmo8 (Puc. 3)
PacnoIoxnTe ⅢNIOBOaJIbHb INHCTpyMeHT NO CEHTpy ⅢNIOBOaJIbHOrO Kpyra m npXMMte. OTBepCTnB ⅢNIOBOaJIbHOM INHCTpyMeHTe DOJXHbI COBnaDaTb C BBIXODHBIMN OTBepCTnMn B ⅢNIOBOaJIbHOH IOoWBe.
ToIbKO InKpyrnoI WInIOPOBaJIbHOI NOIOUBBI: BBIIOJHNTe TECTOBII 3aNyCK, YTO6bIy6eINITbcra, yTO WInIOPOBaJIbHbI INHCTpyMeHT 3aKpeNJIeH NO UcHTpy.
7.5 3neKmpoHHa pezynuPo8Ka yacmombi 8paueHua
7.5.1 Perynpyemay yacToa BpaueHna
OtperynpyTe yactoty BpaueHna, NOBepHyB KOlecnko perynipOBKn YactOTbI BpaueHna. Iob3oBaTeJI MoKET Bbl6paTb pa3HyU qactoty BpaueHna IJIpa3HOJ NOBepXHocTn UnpobAHna.
7.5.2 KOHTPOJIb NOCTOHHNO CHaTOTbI BpaueHnA
IopdepknaBte pa6Oy MaunHb C OHOu ToJ Ke BbIbpaHHo YacToToB BpaueHn. He neperpykaTe MaunHy, npunaar ype3MepHoe daBneHne.
7.6 Ydunumelb (Puc. 4)
- IcnoIb3yIte ydInHntJIb (O) B COOTBeTCTBnC PnaHpyEmoI onepauee Ira 60nee BBICOKO pa6oey nOBepxHOCTN.
Ocna6bTe Btynky Ha naTppy6ke IJIa oTCocA nbIN (N) BepxHe Tpy6Kn (J). He cHImaTe Btynky C BbIXoNDHO nATpy6ka.
CueHtppyTe 3aHIO pyKoTky (O1) cOCHOBHO pyKoTko N BCTaBbTe BTyIky (O3) Ha yDnHHTeJe (O) B BBxOHOH NaTPy6ok (N) 3akpyuBaIOUm DBrXeHEm Do yNopa. - Ipn Heo6xOIMOCn, OtperyIpyTe DnHy yDInHHTeY (O). O6paaTe BnMaHne Ha MapKnipOBky «max. 1.65 m» (MaKc. 1,65 m) Ha yDnHHTeJe. 3aTaNHe BTyNk (N) nocne c6OpKn/peRynInpOBKn yDInHHTeJI.
7.7 Omcoc nbiu (Puc. 5)
Ocna6bTe fHKCnpyUoIyU pyKu dIpyeYnIPOBKn IINHb (N), NOBepHyB ee B HApBaBHeHH CNMBOJa pa36JOKnPOBKn Ha pVKOrTKe IHCTPymeHTa.
BCTaBBTe OTCacbIBaIOUmI UJnHr (P) B KOHeu pyKoTKn INHCTpyMeHTa, KaK NOKa3aHO Ha pUCyHKe.
3aTAHHTe qKcpyuOyU pyky dnypeynopOBKn DnHbI (N), noBepHyB ee B HapabHeHH CmBOJa 6JOKpOBKn Ha PVKOrtke IHCTPVMeHTa.
- PoiCoeHnHTe OTCaBbAIOUm IuHaR C nepeXoHNKOM 47 MM HEnOpEcdTBeHHO K POMbIuHEHOMV PbIEcOCV (Chayana CHMITE uHaHr PbIEcOca).
C OdHIM n3 2 nepexoHnKOB OTcabIbAIOUm IuaHr MOxHO TaXKe NOcOeHNHTb KnpOMbIuJIeHHOMy nbIeOCv6e3 ChTnAHaHa TbeNecoca.
7.8 CmaHapmHa peeyIupoeKa 03dyuHoo nomoka uHcmpymHa (Puc. 6)
Pykota nHCTpyMeHTa (P1) npedotBpaaaet nobpejdeHne wlaHra npn OTKnaDbHaHHN HCTpyMeHTa B CTOPOHV BO BpemnpepebIBOB B pa6OTE.
- Perynnyte Bo3dyuHbI NOTOK cBUNaHHeM KOJIbua peryNipOBKn MOUHOCTN BCaCbIBaHnR (P3) HAD OTBepCTnEM B COeINHTeNe IHCTpyMeHa (P2).
MoHOCb BcBbAHn HaXoNTcHa CaOM H3KOM ypOBHe, cJN OTBepCTne JBnEeTcI NOHOCbIO BNDIMbIM.

PNEyPEXKDEHNE: Pn HeNcNoB3OBaHH N BaWeM nbIeCoce pa3peSeHHoro K npImeHeHIO nbIeBOrO MeuKa NOBbICNTc yPOBeHb atmocsephOH nbIIN B pa6oey 3OHe. JnteJbHOe BO3dEICTBHe TAKOI nbIIN MOKeT 6bITb ONaCHbIM dJIa OpraHOB dIbIXAHNA.

Bcerda depknte wlnfmaunHy dna CTeh n noToJIOB o6eHm pykam! Y6npaTe Baun pykn n3-nod wlnfoBaIbHO rOIOBKn. Hnaye Bauna pyka MoKeT 6bITb 3axBaueHa, TaK KaK WlnfoBaJIbHa rOIOBKa NOBopauNBAETcB B pa3NJuHbIX HappaBHeHHx.
- Pπρκρεπητe υπινόβαβλήνύ ποδωύνγ
3akpennte wJnfoBaJIbHyH hacaKy
OtperynpyiTe 3neKtpoHcTpymeHT Ha Tpe6yHMyu DInHy - PóndcoeúnHnte cncTeMy ydaJIeHnO ONNJOK
BctaBte ceteByIO BnIky
BkIIOHTeMaunHy.
Плавно прихмпгшлфmaшину дя CTEH И NOTOKOB K obpaabaBaemо NOBepxHoctn (ДаВлесни рпжима дохно 6ытьdoctaTOHbIM HAcToIbKO,чTo6bl WJINФOBaJIbHa rOLOBka OCTaBaJalacb 3anOДИNcO c obpaabaBaemо NOBepxHocTbIO).
8.1 3anyck u ocmaHo6ka uHcmpyMeHma
Ipeed noKIOueHem HCTpyMeHTa K cTeN 3JeKTPoNTaHnY y6eITecb, YTO HAnpJxHeHne IHTAHn TaKoe Jx, KaY kA3aHO Ha Ta6JIuHKe TexHnuecknx DaHHbIX MaunHbI, N YTO BbIKIOUATEJIb (9) HaxOHTcB nNoJoxEHn «BblKJI».
8.2 BkIIOyeHue u ebIKIOyeHue MaUHbI
BkIIOuayTe N BbIKIOUaTe WnHMaunHy dner CTeH n NOTOKOB BbIKIOUaTeJeM.
8.3 PeaylupoKa ckopocMu epaueHua (Puc 7)
CkoPocTb MaunHbpeRynpyeTcB COOTBeTCTBn C pa3hblm 3aDaamN. OHa moKet peRynpoBaTbcraO 600 06/MnH do 2600 06/MnH c NOMOu bO KOeCNKa c HakaTkO (10).IyBEJIueHNA CKOpocTN NOBepHnte KOleCNKO IpOTNB YacOBON CTpeJKN, a dNRA yMeHbWeHNACKOpocTN - no YacOBON CTpeJNK.ObbUHO, NOBBIeHNHyIO CKOpocTB cJeDyET NcNoJIb3OBaTb IJRA BbICTpO CHrTNaMaTePnaJa, a NoHNKeHNHyIO CKOpocTB dNRA BOJee TOCHoro KOHTPOJNA JINΦOBAHNA.
8.4 NocmoHHa Yacmoma epaueHua (Puc. 8)
Iopndepxnbate BpaueHne Maunhba Ha oHOB n ToJ Ke Bb6paHHo Yactote BpaueHn. He neperpykaTe MaunHy, npnilaray Upe3MepHoe daBHeHne.
9 ONEPAUIN UINΦOBAHNIA
Iocne TOrO, KaHaJaXeHbMaunHa N PbIeCOC, HaxoJrTcH Ha MecTe Bce CpeIcTba 3aunblnOBOpudobHne, ChauJaBkIIOUHTe PbIeCOC, a 3aTeM MaunHy. (Ecnn IcNoJIb3yeTcra PbIEcOC CO BCTpoEHbIM BkIOUeHHeM, TOrDa IpOcTO BkIOUHTe MaunHy.)
9.1 Kpyanar uuupoasa bna zonoeka (Puc. 9)
Haunthe nnnofoBAHne n octopoxho, KaK moXHO Jere, KOCHnteCb 6pa6aTbIbAemOn IOBepxHOCTn -poBHO HAcToIbKO, YTO6bl ydepxnbTaB nnnofoBaJIbHyIO TIOBky POBHO Ha IOBepxHOCTn.
- Wapnup B wlnnoBaIbHOI roJIOBKe no3BOJAEr wlnnoBaJIbHOMy Kpyry cneIOBaTb KOHTypam o6pa6aTaIBaEMoN NOBepXHOCTN.
JyHIMCnOCOBOMYBJIeTcNcNOb3OBAHNEpeKpbIbAHOxKaaIOUHXcBbIXHNIoDepXaHHe rOIOBKN B NOCToHHOM DBNXeHNI. HIKOrda He ocTaHaBnBaITecb Ha CINiKOMdoIroe BpemB KAKOM-H6ydb MeTe, INaue 6ydyT OCTaBaTbcpa3BOdbl.C ONbITOM 6ydt OueHb IpocTo DoCTnHy PneBocXODhBix Pe3yNbTaTOB.
9.2 NolupoBaHue nomonka (Puc. 10)
BdeHbTe pe3nHOByJeHTy B KpIouK, YTo6bl 3aФNKcnpoBaTb rOIOBky. DepxKe TlNΦOBaJIbHyIO NOOswBy I pyKOaTky BePTNKaIbHo, DepxKe TlNΦOBaJIbHyIO NOOswBy Ha ODNOM yPoBHe C NOTONkOM. Tepeb Bbl MoXeTe NoINPOBaTb NOTOnOK.
ПРИМЕЧАНЕ:У6eДиТecь,чTO ИСпОЛьЗуЕмЯВAMишпOFOBаьнаяшкypka NOxOДNT ДЯ ВБINОЛнEHNY 3aDaYN.ИЗлшHe KpynHO3epHnCTaSHkypka MoKET ydaJIaTb MaTePnaJI CJIshKOM 6bIcTpO,чTO6blKOHTpoJINpOBaTB shNΦOBaHne.TordaΚak N3ПшHe MeJko3epHnCTaSHkypka MoKET CJIshKOM qacto 3acopЯTbcry He 6ydet O6pa6aTbIBaTbNOBepXHOCtB.
BHIMAHHE: Co6IIOJaTe octopoXHocTb BO n36exaHne ocTpblx BbICTynOB, 3ayceHueB n T.I. Ppr 3Tom 6ydet CTnpaTbCra JnHΦOBAJbHa Jkypka I Bo3MOxHO TaKke 6ydet NOBpeXdaTbc rY6uTaT noDoWBa.
10 YNCTKA N TEXHNUECKOE OBCJNYKBAHNE
10.1 CodepkaHue uHcmpymehma e yucmome
IepnoDnueckn npOdyBaInTe BCE BO3dyXOpOBdoI cyxIM cKaTbIM BO3dyXOM.Bce pNtMaccoBbie DeTaN CNeDyET YnCTNb MArKO BnAxAHO TkaHbIO.HNKOTDA He HcNoJIb3yIne pactBopNTeIN DnJ NCTKn INaCTMaCCOBbIX DeTaJe. OHN MOrYT Bbl3BaTb pactBopeHne INn INHOe NOBpeJDeHne MaTePnaHa.
HaedeBaTe 3aunTHbIe OcKn npn nCnoJb3OBAHn CKaTOro B03dyxa.
YnCTnte NOBOPOTHOe COeINHeHne NbJIeCocA, TAK KAK CNIuKOM 6OJIbUoe KOJIueCTBO NbIIN ByET npenrTcBOBaTb erO CBO6oHOMy NOBOpOtY.
11 TEXHnueCKNE DAHHbIE
3HaueHn ypoBnIyMa, n3MepeHHbIe corNaCHO COOTBeTCTByUOeMy cTaHapTy. (K=3)
YpOBeHb 3BykoBOrO daBJIeHnla LpA
93 D(A)
YpOBeHb 3ByKOBoM OuHocTn LwA
104 aB(A)

BHIMAHHE! 3BykoBoe daBHeHne moKeT npEbIaTb 85 d6(A). B 3Tom cnyuae Heo6xOdmo HcNoJIb3OBaTb INHdNbDyajbHbIe cpeIcTBa 3aunTbI opraHOB cnyuxa.
aw (Bn6paunya):
4,2 M/c²
K=1,5M/c²
13 TAPAHTIN
B COOTBeTCTBmC 3aKoHOdaTeJIbHbIMN Tpe6ObaHnA M, DaHHbI npOdyKT oBeCneuBaETcra paHTneHa cpoK 36 MecaeB, NcHcJMaE Mb C daTbI npNo6peTeHnA nepBBIM nOKyNaTeIeM.
JaHHa rapaHTn OXBtBtBaet Bce DepeKtBi MaTePnaIOB nI IN pON3BOJCTBa, NCKIOUa 6bTapeN, 3apHbIe ycTpoiCtBA, DepeKTHbIe DeTaN, NOBBepraEMbIe ECTcTBEHOMy n3HOcy, Oo6eHNo TAKne, KAK IOdUnnHnKN, UeTKN, Ka6eN IN UTENCEJBHbIe BNIKN, IIN INpuHaJNeXHOCr, TAKne KAC CBepNa, TOLOBKn CBePn, INlbHbIe NOnOTHa nT. D.; OHa He BKIOuAET NOBpeKJDeHnN ININ DepeKtBi, BO3HnKaIOUe BCJeCDTBHe HnADJIeXaJero O6paueHnN, HeCuaCTHBx CnyaEB INN BHeCeHnN N3MeHeHIn B KOHCTpyKUHO, a TAKKe HbKIIOuaET TpaHCnOpTHbIe pacxoDbI.
IobpeKdHnN n/nn DeΦeKtbl, Bo3HnKaIOuNe BCJeCDTBne HnPaBnBHOJ 3KcPnyaTuIN, TAKKe He noDnaIoT noD ycNoBn DaHHoR rapaHTn.
MbI TaKKe OTKa3bIBaEMc rO BCEx O6ra3aTeJIbCTB B OTHoUeHIN IIO6bIX TeNEChbIX NOBpeKdEHH, BO3HnKAIOUx BCJeDCTBHe HEnpaBUNbHO 3KcNpyaTuIN IHCTpyMeHTa.
- PemOH T MoKeT BbINONHrTbcra ToIbKO B aBtOpN3ObaHHOM cEHTpe 06cIyJKNBaHnnoKynatene nHCTpyMeHTOB Powerplus.
- IOnonHnTeIbHyIO INHOpMaUIO Bbl Bcerda MoKeTe NOJyHTb no TeNefoHy 00 32 3 292 92 90.
IIO6bIe TpaHcnpTHbIe pacxOdbI dONKeH HeCTn NOKyNaTeJIb, eCIn He COrJIacOBaHO INHOE B IINcMbEHNOfOpMe.
BmecTe c Tem, He MOxET 6bITb IpeDbYBHeHO HnKaKoI IpeTeH3nNo rapaHTn, ecnn NOBpeXdEHNye yCTpoiCTBa YBnAeTcR pe3yJbTaTOM He6peXHOrO 06CnyXnBaHnN nn neperpy3kn.
I3 rapaHTnOn npedeHNO NCKJIOuaeTcnoBpeKdHHe, Bo3NkaHOue BcJeCTBne IPOHNKHOBEHNAIKOCTN, CNbHOrO 3aNbIeHNA, YMbIeHNEHO NOBpeXdHNA (npedHaMepeHHo nNo rpy6oH He6peXHoCTn), HEnpaBnIbHO NkCpIyatauN (NCNoJIb3OBAHNA yCTPoIcTBa He No Ha3NaueHIO), HEnpaBOMOHyOR NoCNoJIb3OBAHNA (HaNPmEp, HecO6JIHOeHNA IHCTpyKcN, pnpBeDEHHbIX B pyKOBOdCTBe), HEKBaIINFouPOBaHHO c6OpKn, pa3Pra MoHNH, HEnpaBnIbHOr HO HAnpJKeHNA CETN. DaHHb CnICOK He ABLAE Tc NcpePbIBaHOUIM.
- IpnHrTne npTeH3nI NO rapaHTnI He YBnETCa OCHOBaHNem dIe IpoDHeHra rapaHTnHoro nepNoDa nII Ha3NaueHna HOBOrO rapaHTnHoro nepNoDa B CJIyae 3aMeHbI yCTpOcTBa.
- UcTpoIcTBa IIN DeTaII, 3aMeHeHHbIe No rapaHTn, OCTaHOTc CO6CTBeHHOCTbIO KOMNaHIn Varo NV.
MbI coxpaHReM 3a c6oB npaBO OTka3aTb B yOBoNTBopeHn IpTeH3n BO BCex CnyaX, KOrDa He MoKet 6bITb NODTBepXDeH fakT NOKyKn, INN KOrDa OYeBNdHO, YTO 3a H3JeHNEM He IPOIN3BOIDNCra HaNDLeKaUIM yXoD. (OuNCTKa BEHTNJRAUONHHbIX OTBepCTH, perynapHoe obcnykBaHne yroJIbHbIX uETOK n T.n.).
ДЯ NOДТВЕРЖDEHNAdTbI NOKyNkCneDyET xpaHnTB YeK.
Bahe yctpoiCTBO cJeDyeET Bo3Bpaaatb noCTabuNky B hepa3o6paHOM BVne, B npnemmo uHcTOM COCTOHN (B opnHaNbHO npOTnBOydapHO ynaKOBKe, ecn TaKOBa IMeNaCb), npINOxNB DOkUMeHT O nOKynke.
14 OKPYXKAIOUJAR CPEDA
EcnB Bau annapat Tpe6yet 3ameHb nocne dntteIbHoro nCnoIb3OBAHn, He Bbl6paCbIbaIte erO BMecTe C domaWHm MycOpom, a nCNoIb3yIte 3KOJIoRnueckn 6e3OnacHb cnoc6 dIra erO yTnIIN3aun.
C OTXODAMN DeTanei 3JNEKTPnuecknx MaunH HeIb38 O6paaTaBcA Kc C o6bIyHBIM6bITOBbIMN OTXoDMN. Po3a6OTbTeCb 06 yTuIN3aUu TAm, rDe dPn 3TOO eCTb COOTBeTCTByUOUIe yCTaHOBKn. PpOKOHcyIbTnpYInTeCb y MeCThBIX OPraHOB Bnactn INy IpoDABaO BO3MOxHOCTHy TUIN3aUuN.
15ДЕКЛAPALEO COOTBETCTBIM


VARO N.V. - Joseph Van Instraat 9 - BE2500 Lier - BELbI, hactoIIM 3aABnE,
PpOdyKT:UInmMaunHaIJIaCTeHnIOToNkOB1050BT
Mapka: POWERplus
MoeJIb:POWX0479
COOTBETCTBYET O63aTeIbHbIM Tpe6OBAHNM INHBIM COOTBETCTBYUOM NIOJOxEHNMA
DeiCTByUoX EbponecknX DnpeKtNB, OCHOBAHbIX Ha EBponecknx rapMOHN3npoBaHHbIX
CTaHdApTAX.JIIO6oe HecaHKuOHIpoBaAHHOe I3MeHeHne yCTpoiCTBa aHHyInpyeT daHHoe
3aRbIeHne.
Ebponeckne nipeKTHBbl (BKnOchA,ecnn npmeHMO,ix nonpaBKn Do DaTbI NODnncnHa):
2011/65/EU
2006/42/EC
2014/30/EU
Ebponeckne rapMOHn3npOBaHHbIe cTaHdApTbI (BKnIOUa, ecn npMeHMo, nx nonpaBkn do DaTbI noDnncAHN):
EN60745-1:2009
EN60745-2-3:2011
EN55014-1:2006
EN55014-2:2015
EN61000-3-2:2014
EN61000-3-3:2013
Держател Тхнческов ДOKум entaци: Филп Ванkepxов (Philippe Vankerkhove), VARO -Vic.Van Rompuy N.V.
HxKeNoDnucBunncr DaenCTByeT O T MeHN IcnoHInTeJbHoro DnpeKTopa KOMnaHHN,
Philippe Vankerkhove (Фильп Ванkeрховe)
OTdHn HopMOKoHTpOra-MeHeJxep no BOnpocam corlaocBaHn
Lier, 20/09/2018
1 IPEdHA3HauEHNHe HA EJEKTPOHCTPymeHTA. 3
2 OINCAHNE (ΦNΓ. A-B-C-D) 3
3 CnncbK HA CbIbPjAHNETo HA ONAKOBKATA. 3
4 CnMBOJIi 4
5OBsI INPEdUINPEXJDEHNA B63OJACHOCT PNI 13IOJI3BAHE HA EJEKTPOHHCTPYMEHTN
5.1 Pa6omHa 3oHa 4
5.2 EneKmpo6e3onachocm 4
5.3 JIuHa 6e3oNaChocm 5
5.4 3no3eane u apuxu 3a enekmpouHcmpyMeHa .5
5.5 Cepeu3Ho o6cnykeaHe 6
6 YKA3AHN 3A BE3OJACHA PABOTA, CNEUΦUH N 3A 3AKYNEH N OT BAC EJEKTPOHCTPUMEHT .6
6.1 EneKmpuuecko cebp3eaHe 6
7 MOHTAX 7
7.1 Ipedu nIbpeoHaayaHa ynompe6a 7
7.2 Ban (17) (Fig. 1). 7
7.3 CmHa Ha Hauknaokama 3a uKypkama (Fig. 2)
7.4 PpuKpEnIe u noDmHa Ha uHcmpymemu 3a unaknoeahe (Φu2.3) .........7
7.5 EneKmpoHNo ynpaeneHue Ha ckopocmma 7
7.5.1 Perynnpyema ckopocT 7
7.5.2 YnpabJIeHHe Ha noCToHHa ckOpocT
7.6 YdJIxumenEn ean (Φua. 4). 8
7.7 13cmykeaHa npax (Φua.5) 8
7.8 Cmahdapm Ha uHcmpymeHma/ynpaeneHue Ha 6b3dyuunHna nomok (Fua. 6)....8
8 PABOTAT 8
8.1 Cmapmuhe u cnupaHe Ha uHcmpymehma 9
8.2 BkIIOueaHe u u3KIOueaHe Ha MauuHama 9
8.3 Peaylupahe Ha ckopocmma Ha ebpmeHe (Φu2 7) 9
8.4 NocmoHnHa ckopocm (Φue. 8) 9
9 ONEPAUINIPIN IINAKIOBAHE 9
POWX0479 BG
9.1 Kpbana 2na6a 3a wnaKnoBaHe (Fua. 9) 9
9.2 Poiupahe Ha maaHu (Fua. 10) 9
10 NOUHCTBAHE IN IOIDPbJKA 10
10.1 Pooobpbkaume uHcmpymehma yucm 10
11 TEXHnueCKn DAHHN 10
12 10
13 TAPAHU 11
14 OKOJIHACPEDA 11
15 DEKJIAPAUJ3ACbOTBETCTBNE 12
MAUHA 3A USAKJIOBAHE HA CTEHN 1050 WPOWX0479
1 ПЕДHA3HAUHHE HA ELEKTPOHCTPUMEHTA
MaunhaTa e npedHa3NaheHa 3a uaknoBaHe Ha cyxn cTeHn, TaBaHn n cTeHn Ha BbTpewHn IIN BbHnIOBbpxHOCTn, NOcTbaHe Ha OCTaTbUu No NODObE, BoJxNCKn NOKPNTn, JENNO n padHaMa3nKna H T.H. Hauata MaunHa He e noDxOJa a 3a o6pa60Ka Ha o6eKn Cdbpkaa a36ecT.

IpeynpejdeHne!Pepa Da n3noJ3BaTe HnctpyMeHa, npoyeTe BHMATEJIHO TOBa pBkoBOdCTBO u 6uNTe HnctpyKcNn 3a 6e3OnaHocT, 3apaN Baawata co6CTBeHa cnrypHocT. Baunr eJeKTPoHNCTpyMeHT Tp6Ba Da ce PpeDaBa Ha dpyr cAmO 3aeDNo C hAcToaUnte HnctpyKcNn.
2 ONICAHNE (ФИ. A-B-C-D)
- Kpbrrna rnaBa 3a wnaKnobaHe
- YeTKOB npbcTeH
- KpbIgna HakJaKa 3a IuNaKIOBaHe (CNCTeMa C Kyka n npMka)
- Kopnyc ha DbrataTeJia
- Meko pbkoXBaTka
6.БлokupaheHa cBbaHeto - PbKoXBaTka
- 3aHa pbKoXBaTka
- KIIOU 3a BKn./N3KJ.
- EneKtpoHNo ynpaBneHne Ha ckopoCTTa
-
PpexoH detaH npax
-
BakyyMeH Mapkyu
- 3axpaHbau Ka6eI
- Cak 3a npehacrHe
- 3aknoubau6ytoh 3a perynupaHe Ha DbNkHaTa
- Teneckonueyen BAN
- Ban
- KoHeKTop
- Top6nuka 3a npax
20.ФИКСИРацla ЛЕNTa - CBeToOnIOHeN CBeTeU npbCTeH
- KIIOU 3a BKN./n3Kn. Ha OCBetneHHeNo
- Kanak 3a BbHsHa YeTka
3 CπисьК HA CьдьРжAHNETO HA ONAKOBKATA
- OtctpaHete BCnKoIaKOBbUHN MaTePnAJI.
OTCTpaHete octHaHnTE onaKOBbUHN IN BpeMeHHN NOCTaBKN (aKO nMa TaKnBa).
PpOBepeTe DaHn NaKeTbT CbDbpxKa BCNUK KOMNoHEHTN.
IpoBepTe daHn ypeBt, 3axpaHbAunrKa6eJ, uencenT n akcecoapnte He ca 6nn noBpeDeH np TpaHcnpTuPaHe. - Ia3eTe onakOBbUHnTe MaTePnaI N0TuNoKpa Ha rapaHcNHOHHn nepnoD. CneT TOBa n3XBpIeTe B nyHKT 3a cb6npaHe Ha OTnAbu.

BHIMAHHE! Onakobbunhe MaepnH He ca nrpauK! He no3BOnBaTe Ha deca da npraT c HanloHOBn Top6uK! Puck ot 3adywaBaHe!
6чactn (60/80/120/150/180/140) shkypkca cДиametbp 225 MM
1 WecThaDecetTuHcKJIIOU (5 MM)
1 cBp3Baun anaanTepa 57 MM
1 cak ot nnat
4 M rBkBa Ta Tpb6a 3a n3BnUHaHe Ha npax
1 Top6nuka 3a npax
2 M Mapkyu
1pbkoBOdCTBO

B clya, ye hakoun yactn IunncBaT nIu ca NOBpeHn, CBbpxKeTe ce C meCTHnA DnCTpN6yTop.
4 CnMBOJN
B HactoIHHN K NJIIN Bbpxy MaunHaTa Ca n3NOJ3BaHn CJIeHNTE CIMBOJN:
7.5.2 YnpabJIeHne Ha NOCTOaHHa CKoPoCT
Iopdbpka pa6oTaHa MaunHata pa6oTea cbc cBuaTcKOpocT, KOTo e n36paHa. He npTeOBapBaIte Upe3 npekomepeH HATnck.
7.6 YdJInxKumeneH faJ (Fua. 4)
- 3no3BaTe yIbJxKTeHnBn (O) cnopei npedHa3HaueHneTo 3a pa6oTa 3a noBucOKn pa60THn NOBbpxHOCTn.
Pa3xla6eTe BtynkaTa Ha n3B0da 3a n3BnueHa npax (N) Ha ropHna BaI (J). He CHEmaiTe Btynkata OT n3BOda. - Iopapabhe 3aHaTa pbkoxbatka (O_1) c OCHOBHata pbkoxbatka N BbBeTe BtJkata (O3) Ha yIbIjxnteHnB aN (O) B n3BoDa (N) c IIOJIeEo DBrXKeHne no ceHn PbT do orpaHnueHneto.
PerynpaTe DbJxHata Ha ydbJXHTeHNBaI (O) aKO e Heo6xoHMo. OsbpHeTe BHMaHHe Ha MapKnpoBkata "max. 1,65 M" Ha ydbJXHTeHNBaI. 3aTerHete BtJkata (N) cne crno6BaHe/perynpaHe Ha ydbJXHTeHNBaI.
7.7 N3cMyKbaHe Ha npax (Φua. 5)
Pa3xna6eTe 3aKJIIOUBAuJa 6yToH 3a peryIINpaHe Ha IbJINHata (N) Upe3 3aBbPtaHTo MY IO NOCOKa HA CNMBOJa 3a OTKJIIOUBAHe Ha DbKOXBaTKaTa HA INHCTPVMeHTA.
BbBeTe BaKyMnMa Mapkyu (P) B KpaHa pbKoXBaTkata Ha nHCTpyMeHTa KaKTo e NIOCTpnpaHO.
3aTeHete 6bKnupaun 6yToH 3a perynpaHe Ha bJxHa (N) 4pe3 3abpTaHTo My NO NOCOKa HA CNMBOJa 3a 3akIIOUbaHe Ha pkoBtKaTHa HHTpyMeHTA.
Cbpxte Bakyymnma Mapkyc aanTepe 47 MM dineKTHO KbM INHyctpnaHa npaxOCMykaKa (nbpBO CHEMeTe Mapkyca Ha npaxOCMykaKaT).
Cbto Taka BaKyymHnT MapKy MoKe Da ce CbByke CeEIN OH 2-Te aAnTepa KbM HNDCTpHaHa PdaxOCMVkaKa 6e3 CHEMaHe Ha MApKVHa Ha PdaxOCMVkaKaTAta.
7.8 CmaHapm Ha uHcmpymeHma/ynpa6Heue Ha 3dyuHHn nomok (Fua. 6)
PbkoxbkataHaHnCTpyMeHTa(P1)npedOTbpaTBAIOBpeHaMapkyu,KOraTO OCTABRte HNCTpyMeHTA NO Bpeme HaIOUYBKeTe.
- YnpabJIaBaiTe Bb3dUHnI NOtOK Upe3 npnIIb3BaHe Ha npbCTeHa 3a peryJInpaHe Ha MOuHocTta (P3) npe3 OTBopa B KOHEKTopa Ha NHCPTpMeHTa (P2).
MoHocTtHa H3cMyKBaHe Ha npax e Ha HeHHTO Hn-HNCKO HnBO, KOraTO OTBOpBT e 3UIO BnHM.

ПЕДУПЕХДEHNE: Hen3Non3BaHeTo Ha Odo6peHa Top6nUka 3a npax c BaWata npaxocmykaKa ige NOBUn HNBOTO Ha npaxa npehacH OT Bb3dYxA B pa6OTHaT3OHa. IpoJbIXKITeHOTo N3JarAhe Ha DeIcTBNeTO Ha TaKbB npax MoKe Da yBpeDn DnxAteHNHa TcNCTema.
8 PABOTA

BnHaHr dpbXte MaunHata 3a wnaKnoBaHe Ha cTeHc dBe pbc! DpbXte pbcTe cn HactpaHa ot rnaBata 3a wnaKnoBaHe. B npotnbEN clyuay, pbkata BN MOKe Da yBneYeHa, DOkATO rnaBata 3a wnaKnoBaHe ce Bbptn B pa3nnuHN NocOKn.
- ПикpeneTe NaKnaIkaTа 3aШпaknoBaHe
-ПрикpeneteИнстурмента 3ашпakноBaHe
HactpoTe eNeKtpoyepa Ha Heo6xOImMaTa DblnHa
CbbpxTe CNCTemata 3a n3BnUHaHe Ha npax
BkapaTeIaBnIeIeNcIe
BknHoyete yCTpOyCTBOTO.
HaTnCHTe BHNMaTeJHNO MaunHaTa 3a WnakNIOBaHe Ha CteHN KbM pa6OThata NOBbpxHOCT (HaTnCKbT Tp86Ba Da e TOUHO TOnKOBA, KOJIKOTO e DOCTaTBueH, 3a Da cOcIpyn NODpaBnRABe Ha INaBaTa 3a WnakNIOBaHe C pa6OTHaTaNOBbpxHOCT.)
8.1 CmapmupaHe u cnupaHe Ha uhcmpymHa
YBepete ce,Ye HanpeXeHneTo Ha MpeXaTa 3a eNeKtpo3aXpaHBaHe e CbIoTO KaTOnocOyeHTo Ha TaBeJkata C daHHn Ha MaunHaTa, N Ye npeBKnIOuBaTeJIr (9) e Ha "OFF"(N3KJI.) npEi Da CbPKeTe NHCTpyMeHTa KbM eNeKtpnueckaTa MpeXa.
8.2 BkIOueaHe u 3KIOueaHe Ha MaWuHama
BkIIOUbaTe n N3KIOUbaTe MaunHaTa 3a INaKIOBaHe Ha rINCOKApTOH C KIOUa.
8.3 Pezylupahe Ha ckopoemma Ha eBpmeHe (Φu2 7)
CkopocTtHa MaunHaTa e npomeHnBa 3a HeHTo npuraxDaHe KbMa3nHn 3aau. Ta MoKe Da 6bTepeynuPana OH 600 MmH1 Do 2600 MmH- C nOmoTu Ha peryIaTopa (10). 3aBbPtTepeynatopa No nocoka o6paTHa Ha yacobNkoBata cTpeNka 3a da yBeNHTe CKOpocTtA N B nocoka Ha YacobNkoBata cTpeNka 3a da Ra HamaNTe. Kato npabnno, Tp8Ba Da n3NoJ3BaTe NO-BnCoka ckopocT 3a 6bp3o ChemaHe Ha MaTePnJa I No-HnCKa CKOpocT 3a No-Prueu3eH KOHTPOI.
8.4 NocmoHHa ckopocm (Fua. 8)
IopIbpxaTe pa6oTaHa MaunHaTa Ha eHaKaBa n36paHa ckopoCT. He npetobpaTe Upe3 IpeKomepeH HATnCK.
9 ONEPAUINIPIN IINAKJIOBAHE
CneHacpoKaTaHaMaunHaTaI npaxocMykaKaTaN B3eMaHe Ha BCnKn IpeDna3HmepKn IIOCTaBHe Ha npedna3HaTa EknnpOBKa, 3aOnueHe C BKIOUbaHe Ha npaxocMykaKaTaHa CneTobHa MaunHaTa. (Ako n3noJ3BaTe npaxocMykaKaCa BrpaedeHO npebkIOUbaHe, Toraba IpocTo BKNOuheMaunHaTa.)
9.1 Kpbana 2naea 3a wnaKnoBaHe (Fue. 9)
3anoyhe TnaknoBaHTo N BHMaTeJHo KOHTaKtYBaIe C pa6oTHaTa NOBbpxHOCT Bb3MOxHO Hau-NeKO - npocTo e DoCTaTbUHO da npuNbPkaTe nnakNoBaAata rnaBa PnOCKo npITnCHaTA KbM NoBbpxHOCTTa.
Toykata Ha BbptHe Ha IwnaknoBaUaTa rnaBa nO3BOnraHa dNcKa OT Wkypka Da cneDbA KOHTpyte Ha pa6oTHa T NOBbpxHOCT.
Ha-Do6paTaTexnka e n3noJ3BaHe Ha npnOOKpNAuCe DnKHeHn I NOdIbPkaHeTo Ha INaBATA B NoCToRHHo DnKHeHne. He cnpaTe HNKora 3a npekaneHo DJIro Ha eHO MACTO, 3aUOTO ue Ce noBRT cnpaJIHn 6eJe3n. C HatpynbAHeTO Ha ONIT ue 6bDe MHORO JleCHO Da NOCTURHEte OTJNUHn pe3yJTAtn.
9.2 Nolupahe Ha maeahu (Fua. 10)
IocTaBeTe rymeHaTaeHTa Bbpxy Kyka 3a CbD, 3a da fNkCnpaTe rnaBaTa. DpbXte HaKnadKaTa 3a IwnakNoBaHe n pbKoXBaTKaTa BepTNKaJIHo, DpbXte HApNaAdKaTa 3a IwnakIOBaHe KbM TabaHa Ha eHnAko HnBO. Cne ToBa MoKeTe da IwnakNOBaTe TaBaHa.
3A6EJEXKKA: YBepete ce, Ye shkypkaTa, KOYTO N3NOJ3BaTe, e NOxOJaTa 3a 3aDaayata, 3aUOTO TBbPde rpy6aTa shkypKa MOKe Da OTcTpaHraBa MaTePnJa npeKaJIeHO 6bP30 3a Da 6bDe KOHTPOJnPaHO TOBa, a TBbPde fHaTAt shkypKa MOKe Da Ce 3aRJaXda npeKaJIeHO YecTo N da He MOKe Da ShnakNoBa B Dbl6OuHa NoBbPxHocCTTa.
BHIMAHHE: N36yBaIte ocTpIe n3daTnH, npoHn np. Te 6xa npotpnnn shkypkata n BepoTHO nobpeDnN MeKaTa HaKnadka.
10 NOUHCTBAHE I NOIDPbJKA
10.1 Nooobpkaume uHcmpymehma yucm
IepnoHNO npOdyBaIte BCnKu Bb3dUHN KaHaJIc Cbc CyX CrbCTeH Bb3dYx. BcNcN pIaTMacOBu qactn Tp6Ba Da 6bDat NoocTBAHc C BlaxHa Kbpna. HIKOTA He n3PON3BaIte pa3TBOpHTeJI 3a NOuchTBAHe Ha PnactMacOBu qactn. Te Morat da pa3TBoprT IIN IOBpeJr IO dpyr NaHH MaTepnana.
Hocete npedna3n ounila npn ynoTpe6a Ha cTbCTeH Bb3dyx.
IOnuCTBaIe BaKyUMHO BbPTAIO Ce CbeINHeHne, 3aTOHaTpynnT Ce npeKaJIeHO MHO npax Ie My NOppeN da Ce BbPTCBO6OJHO.
11 TEXHnueCKN DAHHN
| Homep Ha modal | POWX0479 |
| HominahJaHa MoaHocT | 1050 W |
| HominahJaHa ChecToTa | 50 Hz |
| HominahJHo HappeKeHne | 220-240 V |
| ScopocT Ha BbPrTeHe O | 600-2600 MmH-1 |
| Диаметьр Ha Dicska | 215 MM |
| Klac Ha 3aUHTa | II |
| Дыжина Ha KaBela | 4 M |
| Mapkyu Ha npaxocmykaqKaTa | 4 M |
| Двигател с графитни чeTKI | Дa |
| Бутон 3a 3akLIOvBaHe | Дa |
| Диаметьр Ha shpaKlOBaHe | 225 MM |
| Дыжина Бe3 удьжintelnaТа ТрБа | 110 cm |
| Дыжина с удьжintelnaТа ТрБа | 110-165 cm |
| Електорно упразалени Ha ckopoCTTa | Дa |
| Мeca рькoxВaTka | Дa |
| Понжаване Ha Вбрацята | Дa |
| Систema c КуКИ пrimka | Дa |
| Осовен MaTeриаI | Алминий |
12 LYM
CTOINOCHT Ha 3ByKOBOTo HAnraHe N3MepeHn B CbOTBeTcTBne C npNIOXIMnCtAHdapT. (K=3)
HnBO Ha 3ByKOBoTo HanaRaHe LpA 93 dB(A)
HnBO Ha 3BykoBaTa MoUHocLwA 104 dB(A)

BHIMAHHE! Hocete INHINBnDyalNn npedna3n cpecTba 3a cnlyxa (aHTnfoH), ako 3ByKOBOTo HaIrahe npebu8n 85 dB(A).
aw (Bùnbāpàuùn):
4,2 m/s²
K = 1,5 m/s²
13 TAPAHUN
To3n npOdyKT mHa rapaHcNoHeh cpoK 36 Meceua, KOITo BIn3a B Cnna OT daTata Ha nOKyNka Ha NpBbNnOTpe6nten.
Ta3n rapaHnzI NOKPbBA BCNUKn DeEeKTn Ha MaTePnaNn I npOn3BOcTBeHn DeEeKTHN, HO He BKnIOUBa: 6aTePN, 3apJdHn yCTpOJCTBa, DeEeKTHN Yactn BCJeDCTBHe Ha HOpMaJIHO n3HOCBaHe n3TpINBaHe KaTo NaRePN, YeTK, Ka6eNn UenCeNn nn AkceCoApN KaTO CBpeJa, HAKpaHNIu 3a npoBbHn INHCTpyMeHTN, peXeUN dNCKOBe N T.H., NOBpeDN n DeEeKTHn pOn3TuHa uOTpe6a, 3JIoNoJyKN nJIn HAnPaBeHN IpOMEHN, HHTO TpaHCnOpTHNTe pa3XODN.
IobpeHn/nnIeepKtn npOn3TuHaun OT He npabnHo ynoTpe6a He ce 0xbauat OT Te3n rapaHnOHH yCNOBn.
OcbeH ToBa He HocnM HnKaKBa OTROBOPHOCT 3a TeJeCHn HapaHbAHn Ipon3TuHaUN OTHnpabNJHata yNtpe6a Ha IHCTpyMeHTa.
PemOHn Moat da 6bDat n3BpWbaHc mo OT yIbJHOMOueH nOTpe6nteJckn cepBn3EH eHTbp 3a eNEKTPoHCTDPMeHTN.
MoxTe Da noJyUte DoJIbJIHtEnHa HOpMaun Ha Homep 00 32 3 292 92 90.
BcnuK TpaHcnpTH pa3xoJn 6bDat noEtN OT nOteTEn, OCBEN AKO NmCMeHO He e dorobopeHo npyro.
B cbto BpeMe, He mora T da ce npedraBaT npTeHcNn no rapaHcnaTa, aKo nobpeDaTa Ha ypea e BCneDCTBHe OT nphe6perBaHe Ha TexHnueckoto 06CnykBaHe nI IN npetOBapBaHe.
- Ot rapaHcraTa KaTeOpuHo Ce n3KnUoBa NOBpeJa, KOaTo e B pe3yIITaT OT npOHNKBaHe Ha TeuHOCT, MHOrO npax, npeHaMepeHa NOBpeJa (ymnJleHa nn NopadN TotAnHO 6e3rpXkne), HeNoDxoJauo I3NOJ3BaHe (n3NOJ3BaHe 3a ceJI, 3a KOnTO ypeIbT He e NoJxOJa), HEKOMNeTeHTHO n3NOJ3BaHe (Hanp. Hecna3BaHe Ha NHCTpyKUnTe B pBkoBOdCTBOTO), HeKOMNeTeHTe MOHTaK, rpbMOTeBnueH yIap, HeppaBUNHO HanpeXeHne. To3n cnncbK He e n3YeepNaTeJIeH.
- Iprnemaheto Ha rapaHunOHn IpTeHcH NkOra He MoKe Da DoBede Do yDbJxabaHe Ha rapaHOnOHn CpOK, HHTo DO 3anOuBaHe Ha HOB rapaHcNoHe CpOK B CnyaH Ha 3amHa HA VCTPOICTBO.
- YcTpoiCTBaTa HnH DeTaNHTe, KOtO ca 3aMeHeH CbO6pa3Ho rapaHcNoHHNte ycNoBna cJeIOBaTeIHO OCTaBAT CO6CTBeHOCT Ha Varo NV.
Hne cn 3ana3BaMe npaBoto Da OTXBbPnIM BCa npeTeHcna, B cnyaH ne NOKyPkata He MoKe da 6bDe npOBepHa Hn, Korato e ACHO, Ye npOdyKTBHe e NOdIbPxah npabuHNO (NouchBaHe Ha BeHTnlaUHOHHte OTBOp, peoBHa NoDpBxKa Ha KapboHOBNTe YETKN....)
CbXpaHraBaIteΦaKTypaTa 3a NOKyNkata KaTO DOKa3aTeJICTBO 3a DaTata, Ha KOrTo e HApBaBeHa T.
Tp6Ba Da BbPHeTe HeMeHTnpaHn HNCTpyMeHr Ha npOdaBaua B npEmJINBO YnCTO CbCToRHe, BOpuHaHTo My JIto Kyapue, aKO yCTpoNCTBOTO hMa TAKOBa, PnDpyKaBAHO OT DOKa3aTeJIcTBOTO 3a NOKyPkata.
14 OKOJIHA CPEDA
Korato ypeBbT Bn Tp6Ba Da 6bJe 3aMeHeH CneI npOdbJXHTeHa ynotpe6a, He ro n3xBpbJIte C DOMAKINHCKNTe OTNaDbuN, a No HauH Cbo6pa3eH C ona3BaHeTo Ha OKoJIHaTa CpeDa.
OTnabuHTe OT eJektpueckn npOdykTu He Tp8Ba Da 6bDaT n3XBbpIaHn 3aeDHO CDOMaknHcKNTe OTnadbu. MoJI, npoyute KbJe IMa Bb3MOXHOCTN 3a peuknnpaHe. POnCKaTe OT MeCTHNe BnaCTn IIn OT npOdaBau cbbETn OTHOCHO peuknnpaHoTo.
VARO N.V.-VARO N.V.-Joseph Van Instraat 9-BE2500 Lier-BeIrga deKnapupaT,ye npoNyKT: MAUINHA 3A UNAKOBAHE HA CTEHn 1050 W
Mapka: POWERplus
mOeJ:POWX0479
e B cbOTBeTCTBnE C OCHOBHnTe N3NCKBaHnry N DpyrN CbOTBeTHn pa3nope6n Ha npINIOXmHTe Ebponeckn DnpeKTHn, 6a3npaHn Bbpxy npInarHeTo Ha EbponecknTe xapMOHN3npaHn cTaHApTn. Bcya HeynbHnHOMoUeHa MoDnΦnKauaHa anapaTa anynpa Ta3n DeKnapaua.
Ebponeckn DnpekTNBn (BKnIOHTeJIHO TexHNTe npomeH NbM daTata Ha noDnCBAHe, ako ca npINOxIMN):
2011/65/EU
2006/42/EC
2014/30/EU
Ebponeckx xapMOHn3npaHn CTaHapTn (BKJIOHTeHIO TexHITe IpOMEH NkM daTata Ha IOINCBaHe, aKO ca npNJIOXIMN):
EN60745-1:2009
EN60745-2-3:2011
EN55014-1:2006
EN55014-2:2015
EN61000-3-2:2014
EN61000-3-3:2013
CbXpaHnTeHaTexHnueckaTa DOKyMeHTaUa:ΦuInn BaHKePkXOB,VARO-Vic.Van Rompuy N.V.
DonyoNncaHnT DeiCTBa OT IMeTo Ha N3nbHnTeHnI DaPeKTop Ha KOMnaHnTa,
Philippe Vankerkhove
PeryaHnHH Bbnpocn-MeHxKbp NO CbOTBeTCTBnraTa
Lier, 20/09/2018


WWW.VARO.COM
DESIGNED AND MARKETED BY VARO
Copyright by varo
VARO - VIC. VAN ROMPUY nv
JOSEPH VAN INSTRAAT 9 - 2500 LIER - BELGIUM
OFFICES:
IBERICA BRICOLAGE S.L. - ESPANA
ASIA PACIFIC HONG KONG Ltd / SHANGHAI PRC
AUSTRALIA Pty Ltd / GERMANY GmbH


- POWERPLUS HIGH QUALITY TOOLS
- POWX0479
- BESCHRIJVING (FIG. A-B-C-D)
- DRYWALL SANDER 1050 W POWX0479
- APPLICATION
- DESCRIPTION (FIG. A-B-C-D)
- PACKAGE CONTENT LIST
- SYMBOLS
- GENERAL POWER TOOL SAFETY WARNINGS
- Working area
- Electrical safety
- Personal safety
- POWX0479 EN
- Power tool use and care
- Service
- ADDITIONAL SAFETY HINTS
- Electrical connection
- ASSEMBLY
- Before initial operation
- Shaft (17)
- Replace sanding pad (Fig. 2)
- Attaching and changing sanding tools (Fig. 3)
- Electronic speed control
- Adjustable speed
- Constant speed control
- Extension shaft (Fig. 4)
- Dust suction (Fig. 5)
- Tool standard/airflow control (Fig. 6)
- OPERATION
- Starting and stopping tool
- Switching the machine on and off
- Adjusting the rotation speed (Fig. 7)
- Constant speed (Fig. 8)
- SANDING OPERATIONS
- Round sanding head (Fig. 9)
- Polish the ceiling (Fig. 10)
- CLEANING AND MAINTENANCE
- Keep tool clean
- TECHNICAL DETAILS
- NOISE
- WARRANTY
- ENVIRONMENT
- RENGJØRING OG VEDLIKEHOLD
- Cev (17) (Sl. 1)
- Zamena brusne ploce (Sl.2)
- Pricvršćivanje i zamena brusnog alata (Sl. 3)
- Tyc (17) (Obr. 1)
- NodknoueHue K ucmouhky numaHua
- CBOPKA
- Naped hauaJom pa6ombj
- UmaHa (17) (Puc 1)
- 3aMeHa wJnUΦoEaNbHou nOdouWebl (Puc. 2)
- KpenneHue u 3aMeHa wlufoBaIbHbIX uHcmpymeHmo8 (Puc. 3)
- 3neKmpoHHa pezynuPo8Ka yacmombi 8paueHua
- Perynpyemay yacToa BpaueHna
- KOHTPOJIb NOCTOHHNO CHaTOTbI BpaueHnA
- Ydunumelb (Puc. 4)
- Omcoc nbiu (Puc. 5)
- CmaHapmHa peeyIupoeKa 03dyuHoo nomoka uHcmpymHa (Puc. 6)
- 3anyck u ocmaHo6ka uHcmpyMeHma
- BkIIOyeHue u ebIKIOyeHue MaUHbI
- PeaylupoKa ckopocMu epaueHua (Puc 7)
- NocmoHHa Yacmoma epaueHua (Puc. 8)
- ONEPAUIN UINΦOBAHNIA
- Kpyanar uuupoasa bna zonoeka (Puc. 9)
- NolupoBaHue nomonka (Puc. 10)
- YNCTKA N TEXHNUECKOE OBCJNYKBAHNE
- CodepkaHue uHcmpymehma e yucmome
- TEXHnueCKNE DAHHbIE
- TAPAHTIN
- OKPYXKAIOUJAR CPEDA
- 15ДЕКЛAPALEO COOTBETCTBIM
- POWX0479 BG
- MAUHA 3A USAKJIOBAHE HA CTEHN 1050 WPOWX0479
- ПЕДHA3HAUHHE HA ELEKTPOHCTPUMEHTA
- ONICAHNE (ФИ. A-B-C-D)
- CπисьК HA CьдьРжAHNETO HA ONAKOBKATA
- CnMBOJN
- YnpabJIeHne Ha NOCTOaHHa CKoPoCT
- YdJInxKumeneH faJ (Fua. 4)
- N3cMyKbaHe Ha npax (Φua. 5)
- CmaHapm Ha uHcmpymeHma/ynpa6Heue Ha 3dyuHHn nomok (Fua. 6)
- PABOTA
- CmapmupaHe u cnupaHe Ha uhcmpymHa
- BkIOueaHe u 3KIOueaHe Ha MaWuHama
- Pezylupahe Ha ckopoemma Ha eBpmeHe (Φu2 7)
- NocmoHHa ckopocm (Fua. 8)
- ONEPAUINIPIN IINAKJIOBAHE
- Kpbana 2naea 3a wnaKnoBaHe (Fue. 9)
- Nolupahe Ha maeahu (Fua. 10)
- NOUHCTBAHE I NOIDPbJKA
- Nooobpkaume uHcmpymehma yucm
- TEXHnueCKN DAHHN
- LYM
- TAPAHUN
- OKOJIHA CPEDA
- VARO - VIC. VAN ROMPUY nv
Brand : PowerPlus
Model : POWX0479
Category : Sander