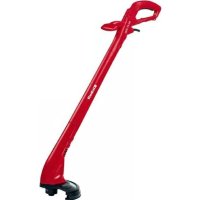
USER MANUAL GCET 2522 EINHELL
- Safety regulations
- Layout and items supplied
- Proper use
- Technical data
- Before starting the equipment
- Operation
- Replacing the power cable
- Cleaning, maintenance and ordering of spare parts
- Disposal and recycling
- Storage
- Troubleshooting
GB
Important!
When using the equipment, a few safety precautions must be observed to avoid injuries and damage. Please read the complete operating instructions and safety regulations with due care. Keep this manual in a safe place, so that the information is available at all times. If you give the equipment to any other person, hand over these operating instructions and safety regulations as well. We cannot accept any liability for damage or accidents which arise due to a failure to follow these instructions and the safety instructions.
1. Safety regulations
The corresponding safety information can be found in the enclosed booklet.
Caution!
Read all safety regulations and instructions.
Any errors made in following the safety regulations and instructions may result in an electric shock, fire and/or serious injury.
Keep all safety regulations and instructions in a safe place for future use.
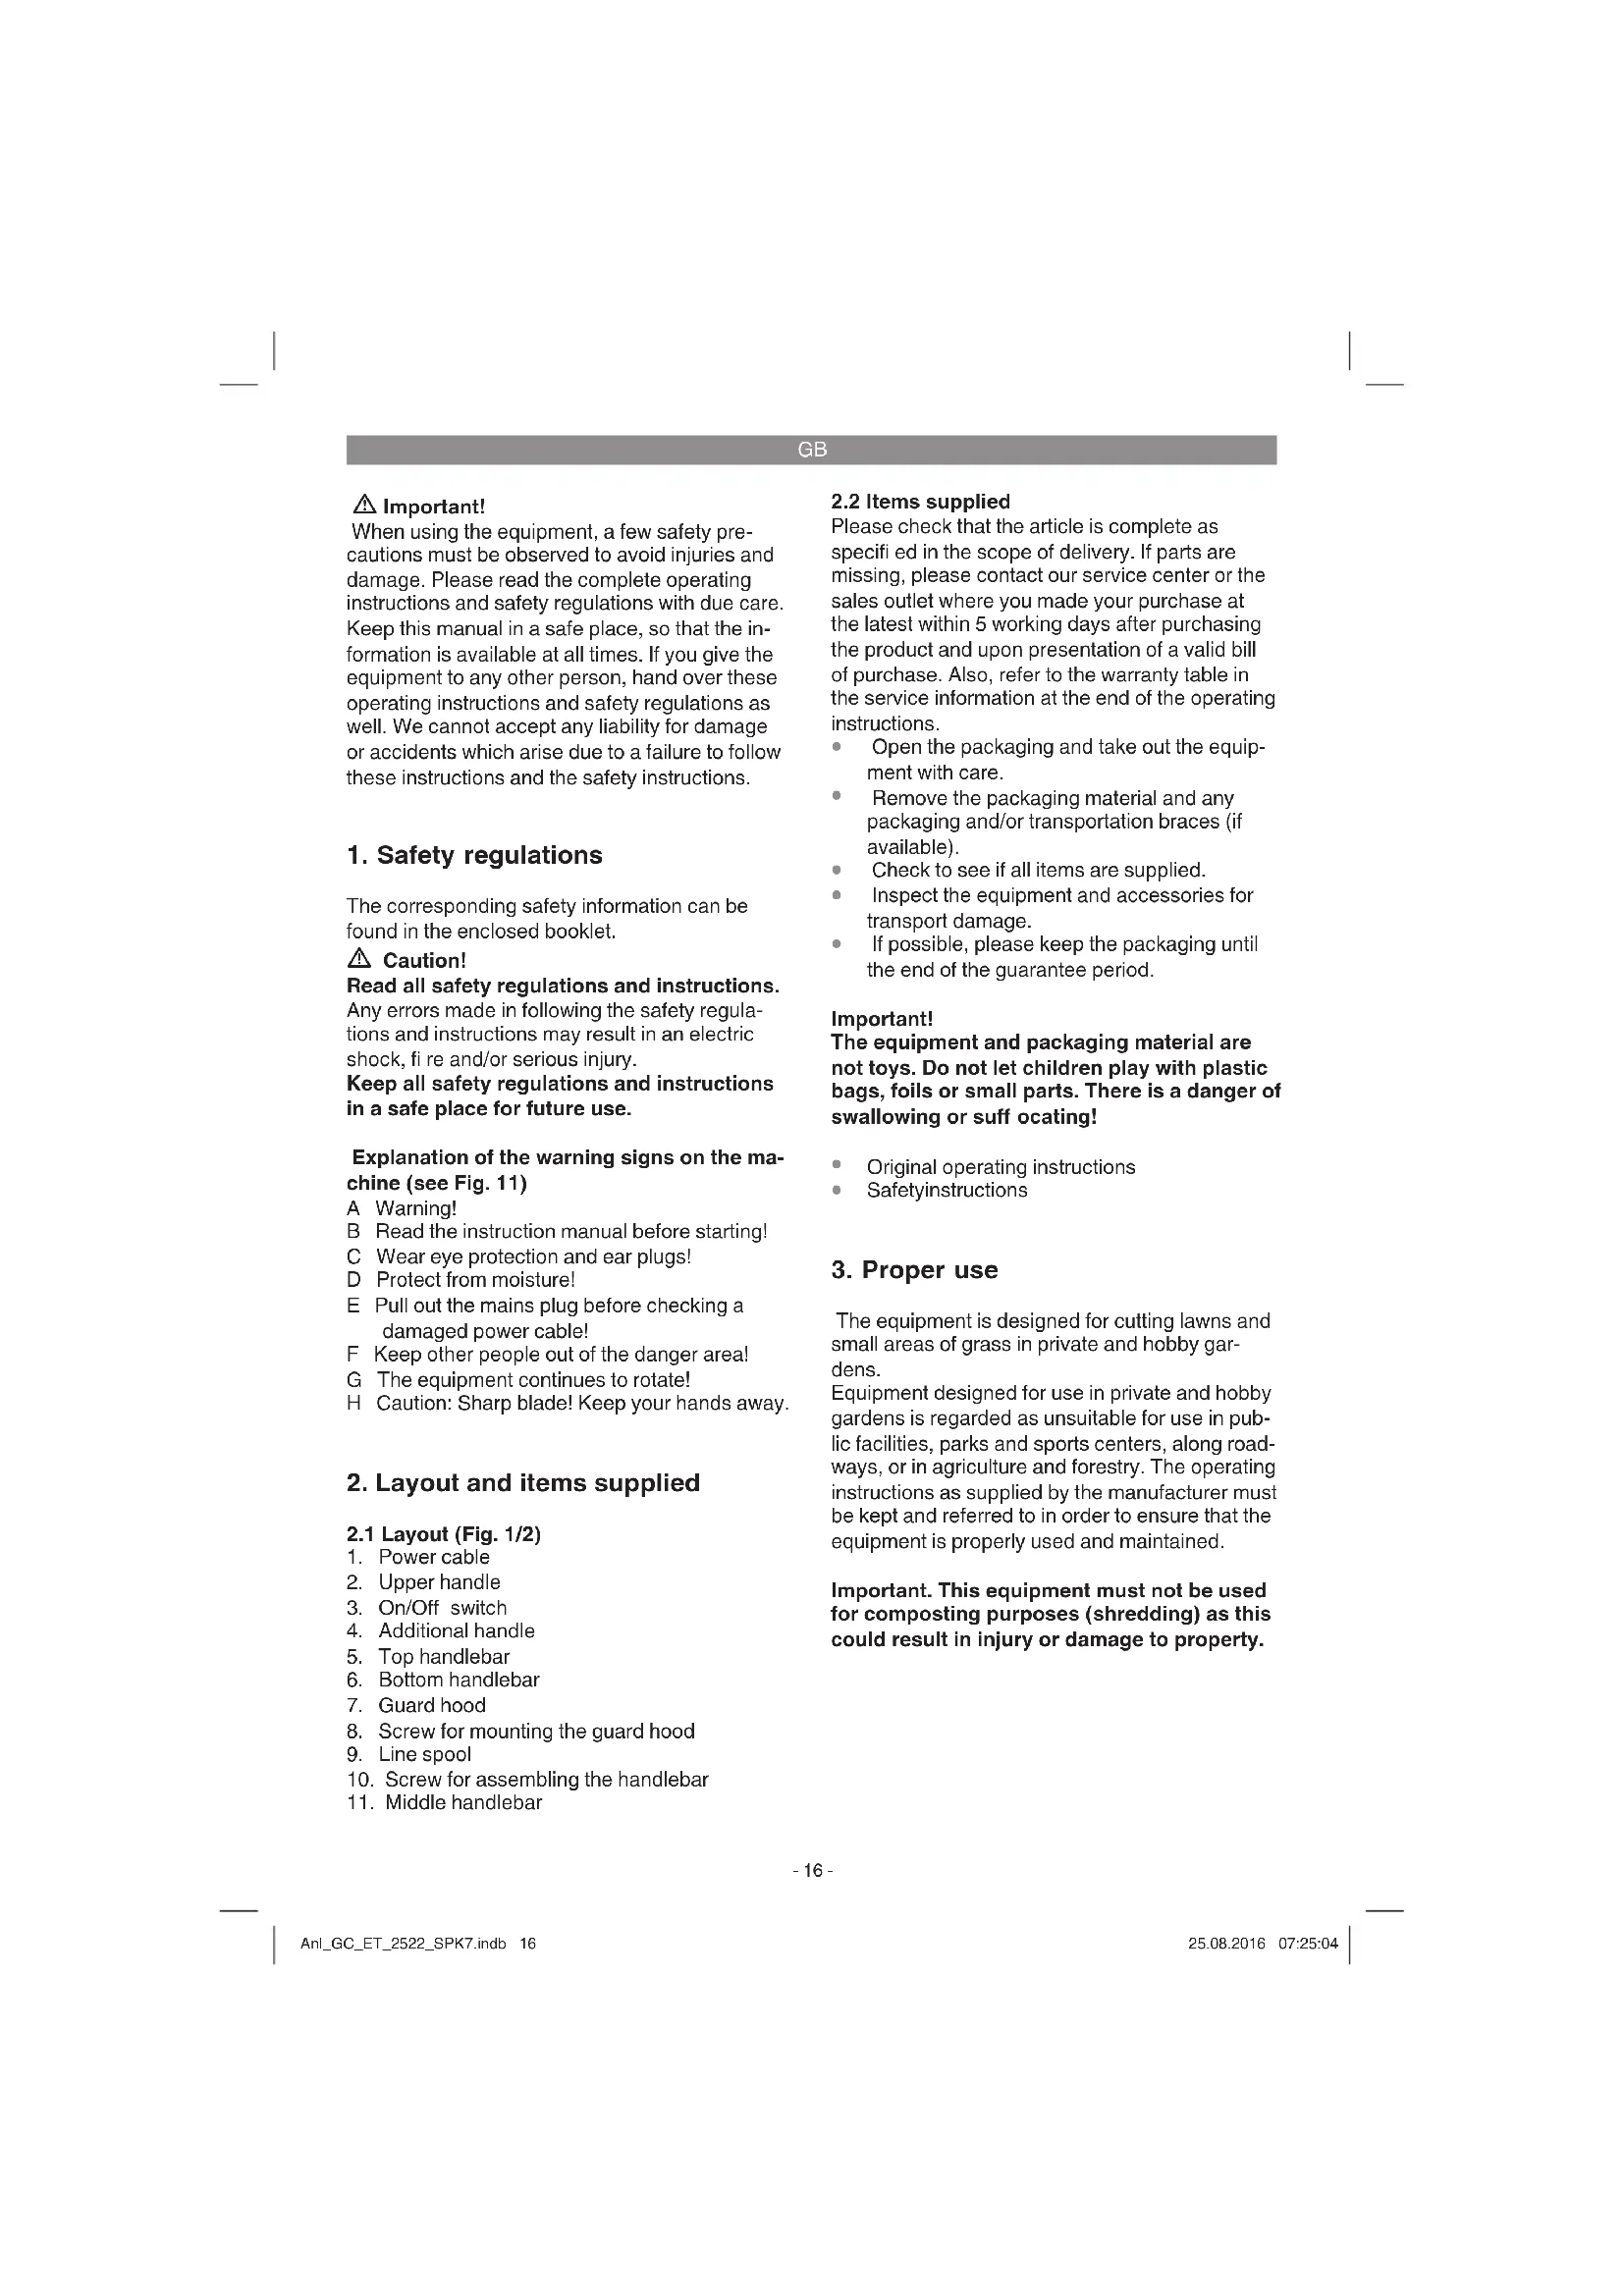
Explanation of the warning signs on the machine (see Fig. 11)
A Warning! B Read the instruction manual before starting! C Wear eye protection and ear plugs! D Protect from moisture! E Pull out the mains plug before checking a damaged power cable! F Keep other people out of the danger area! G The equipment continues to rotate! H Caution: Sharp blade! Keep your hands away.
2. Layout and items supplied
2.1 Layout (Fig. 1/2)
- Power cable
- Upper handle
- On/Off switch
- Additional handle
- Top handlebar
- Bottom handlebar
- Guard hood
- Screw for mounting the guard hood
- Line spool
- Screw for assembling the handlebar 11. Middle handlebar
2.2 Items supplied
Please check that the article is complete as specified in the scope of delivery. If parts are missing, please contact our service center or the sales outlet where you made your purchase at the latest within 5 working days after purchasing the product and upon presentation of a valid bill of purchase. Also, refer to the warranty table in the service information at the end of the operating instructions.
- Open the packaging and take out the equipment with care.
- Remove the packaging material and any packaging and/or transportation braces (if available). Check to see if all items are supplied.
- Inspect the equipment and accessories for transport damage. If possible, please keep the packaging until the end of the guarantee period.
Important!
The equipment and packaging material are not toys. Do not let children play with plastic bags, foils or small parts. There is a danger of swallowing or suffocating!
Original operating instructions - Safety instructions
3. Proper use
The equipment is designed for cutting lawns and small areas of grass in private and hobby gardens.
Equipment designed for use in private and hobby gardens is regarded as unsuitable for use in public facilities, parks and sports centers, along roadways, or in agriculture and forestry. The operating instructions as supplied by the manufacturer must be kept and referred to in order to ensure that the equipment is properly used and maintained.
Important. This equipment must not be used for composting purposes (shredding) as this could result in injury or damage to property.
The equipment is to be used only for its prescribed purpose. Any other use is deemed to be a case of misuse. The user / operator and not the manufacturer will be liable for any damage or injuries of any kind caused as a result of this.
Please note that our equipment has not been designed for use in commercial, trade or industrial applications. Our warranty will be voided if the machine is used in commercial, trade or industrial businesses or for equivalent purposes.
4. Technical data
Mains voltage 230-240 V ~ 50 Hz
Power 250W
Cutting circle Diameter 22 cm
Revolutions n0 12000 rpm
Cutting line diameter 1.2 mm
Weight 1.25 kg
Sound and vibration
LpA sound pressure level 81.3 dB(A)
KOA uncertainty 3 dB
LwA sound power level 94.4 dB(A)
KWA uncertainty 2.03 dB
Wear ear-muffs.
The impact of noise can cause damage to hearing.
Vibration emission value ah = 6.53 m/s2
K uncertainty = 1.5m / s2
Warning!
The specified vibration value was established in accordance with a standardized testing method. It may change according to how the electric equipment is used and may exceed the specified value in exceptional circumstances.
The specified vibration value can be used to compare the equipment with other electric power tools.
The specified vibration value can be used for initial assessment of a harmful effect.
Keep the noise emissions and vibrations to a minimum.
Only use appliances which are in perfect working order.
Service and clean the appliance regularly. Adapt your working style to suit the appliance. Do not overload the appliance. - Have the appliance serviced whenever necessary. - Switch the appliance off when it is not in use. Wear protective gloves.
Residual risks
Even if you use this electric power tool in accordance with instructions, certain residual risks cannot be ruled out. The following hazards may arise in connection with the equipment's construction and layout:
- Lung damage if no suitable protective dust mask is used.
- Damage to hearing if no suitable ear protection is used.
- Health damage caused by hand-arm vibrations if the equipment is used over a prolonged period or is not properly guided and maintained.
5. Before starting the equipment
Before you connect the equipment to the mains supply make sure that the data on the rating plate are identical to the mains data.
Always pull the power plug before making adjustments to the equipment.
5.1 Assembling the grass trimmer (Fig. 3a to 5b)
- Slot the top handlebar (Fig. 3a/Item 5), middle handlebar (Fig. 3a/Item 11) and bottom handlebar (Fig. 3a/Item 6) together in the direction of the arrow. Secure the handlebar parts with the screw (Fig. 3b/Item 10).
- Plug the guard hood with screw (Fig. 4/Item 7) onto the motor head and turn it counterclockwise as far as it will go
- Fasten the guard hood with the screw (Fig. 5/Item 8).
6. Operation
The grass trimmer has a semi-automatic line extension system. Each time you activate the semi-automatic line extension system, the line is automatically extended to ensure that you can cut your lawn with the perfect cutting width at all times. Please note that the more often you activate the semi-automatic line extension system, the more the line will wear.
Note: If the line is too long when you use the equipment for the first time, the surplus end of it will be cut by the blade on the guard hood.
If the line is too short when you start the machine for the first time, press the knob on the line spool and pull the line hard. When you start the equipment again the line will be cut to the perfect length automatically.
Your grass trimmer will work at its best if you observe the following instructions:
- Never use the grass trimmer without its safety devices.
- Do not cut grass when it is wet. The best results are had on dry grass.
- Connect the power cable to the extension cable and fasten this to the strain-relief clamp (Fig. 6/Item A). To switch on your grass trimmer, press the ON/OFF switch (Fig. 6/Item 3). To deactivate the grass trimmer, let go of the On/Off switch (Figure 6/ Item 3).
- Do not move the grass trimmer against the grass until the switch is pressed, i.e. wait until the trimmer is running. For the correct cutting action, swing the grass trimmer to the side as you walk forward, holding it at an angle of approx. 30° as you do so (see Figure 8 and Figure 9). Make several passes to cut long grass shorter step by step from the top (see Figure 10). Use the guard hood to prevent unnecessary wear on the line.
- Keep the grass trimmer away from hard objects in order to avoid unnecessary line wear.
7. Replacing the power cable
If the power cable for this equipment is damaged, it must be replaced by the manufacturer or its after-sales service or similarly trained personnel to avoid danger.
8. Cleaning, maintenance and ordering of spare parts
Always pull out the mains power plug before starting any cleaning work.
8.1 Cleaning
- Keep all safety devices, air vents and the motor housing free of dirt and dust as far as possible. Wipe the equipment with a clean cloth or blow it with compressed air at low pressure. We recommend that you clean the device immediately each time you have finished using it. Clean the equipment regularly with a moist cloth and some soft soap. Do not use cleaning agents or solvents; these could attack the plastic parts of the equipment. Ensure that no water can seep into the device. The ingress of water into an electric tool increases the risk of an electric shock. Use a brush to remove deposits from the safety guard.
8.2 Replacing the line spool
Important! Make sure that you pull out the power plug before replacing the line spool!
- Turn the spool receptacle counter-clockwise and remove it (Fig. 7a).
- Remove the empty line spool.
- Thread the end of the line from the new line spool through the eyelet in the spool mount (Fig. 7b) and allow approximately 10 cm of line to project.
- Fit the spool cover back in the spool mount. To do so, turn the spool receptacle clockwise until it snaps into place.
- When you start the equipment again, the line will be cut to the perfect length automatically. Important! Bits of the nylon line could cause injury when flung out!
8.3 Maintenance
There are no parts inside the equipment which require additional maintenance.
8.4 Ordering replacement parts:
Please quote the following data when ordering replacement parts:
Type of machine, Article number of the machine, Identification number of the machine, Replacement part number of the part required. For our latest prices and information, please go to www.isc-gmbh.info
Spare line spool Art. no.: 34.050.75
9. Disposal and recycling
The equipment is supplied in packaging to prevent it from being damaged in transit. The raw materials in this packaging can be reused or recycled. The equipment and its accessories are made of various types of material, such as metal and plastic. Never place defective equipment in your household refuse. The equipment should be taken to a suitable collection center for proper disposal. If you do not know the whereabouts of such a collection point, you should ask in your local council offices.
10. Storage
Store the equipment and accessories out of children's reach in a dark and dry place at above freezing temperature. The ideal storage temperature is between 5 and 30°C. Store the electric tool in its original packaging.
11. Troubleshooting
The machine will not work:
Check that the power cable is connected properly and check the mains fuses. If the machine will not work despite the voltage supply being OK, send it to the specified after-sales service address.
GB

For EU countries only
Never place any electric power tools in your household refuse.
To comply with European Directive 2002/96/EC concerning old electric and electronic equipment and its implementation in national laws, old electric power tools have to be separated from other waste and disposed of in an environment-friendly fashion, e.g. by taking to a recycling depot.
Recycling alternative to the return request:
As an alternative to returning the equipment to the manufacturer, the owner of the electrical equipment must make sure that the equipment is properly disposed of if he no longer wants to keep the equipment. The old equipment can be returned to a suitable collection point that will dispose of the equipment in accordance with the national recycling and waste disposal regulations. This does not apply to any accessories or aids without electrical components supplied with the old equipment.
The reprinting or reproduction by any other means, in whole or in part, of documentation and papers accompanying products is permitted only with the express consent of the iSC GmbH.
Subject to technical changes
GB
We have competent service partners in all countries named on the guarantee certificate whose contact details can also be found on the guarantee certificate. These partners will help you with all service requests such as repairs, spare and wearing part orders or the purchase of consumables.
Please note that the following parts of this product are subject to normal or natural wear and that the following parts are therefore also required for use as consumables.
| Category Example | |
| Wear parts* Line spool holder | |
| Consumables* Line spool | |
| Missing parts | |
- Not necessarily included in the scope of delivery!
In the event of defects or faults, please register the problem on the internet at www.isc-gmbh.info. Please ensure that you provide a precise description of the problem and answer the following questions in all cases:
Did the equipment work at all or was it defective from the beginning? Did you notice anything (symptom or defect) prior to the failure? - What malfunction does the equipment have in your opinion (main symptom)?
Describe this malfunction.
GB
Warranty certificate
Dear Customer,
All of our products undergo strict quality checks to ensure that they reach you in perfect condition. In the unlikely event that your device develops a fault, please contact our service department at the address shown on this guarantee card. You can also contact us by telephone using the service number shown. Please note the following terms under which guarantee claims can be made:
- These guarantee terms apply to consumers only, i.e. natural persons intending to use this product neither for their commercial activities nor for any other self-employed activities. These warranty terms regulate additional warranty services, which the manufacturer mentioned below promises to buyers of its new products in addition to their statutory rights of guarantee. Your statutory guarantee claims are not affected by this guarantee. Our guarantee is free of charge to you.
- The warranty services cover only defects due to material or manufacturing faults on a product which you have bought from the manufacturer mentioned below and are limited to either the rectification of said defects on the product or the replacement of the product, whichever we prefer. Please note that our devices are not designed for use in commercial, trade or professional applications. A guarantee contract will not be created if the device has been used by commercial, trade or industrial business or has been exposed to similar stresses during the guarantee period.
- The following are not covered by our guarantee:
- Damage to the device caused by a failure to follow the assembly instructions or due to incorrect installation, a failure to follow the operating instructions (for example connecting it to an incorrect mains voltage or current type) or a failure to follow the maintenance and safety instructions or by exposing the device to abnormal environmental conditions or by lack of care and maintenance.
- Damage to the device caused by abuse or incorrect use (for example overloading the device or the use of unapproved tools or accessories), ingress of foreign bodies into the device (such as sand, stones or dust, transport damage), the use of force or damage caused by external forces (for example by dropping it).
- Damage to the device or parts of the device caused by normal or natural wear or tear or by normal use of the device.
- The guarantee is valid for a period of 24 months starting from the purchase date of the device. Guarantee claims should be submitted before the end of the guarantee period within two weeks of the defect being noticed. No guarantee claims will be accepted after the end of the guarantee period. The original guarantee period remains applicable to the device even if repairs are carried out or parts are replaced. In such cases, the work performed or parts fitted will not result in an extension of the guarantee period, and no new guarantee will become active for the work performed or parts fitted. This also applies if an on-site service is used.
- To make a claim under the guarantee, please register the defective device at: www.isc-gmbh.info. Please keep your bill of purchase or other proof of purchase for the new device. Devices that are returned without proof of purchase or without a rating plate shall not be covered by the guarantee, because appropriate identification will not be possible. If the defect is covered by our guarantee, then the item in question will either be repaired immediately and returned to you or we will send you a new replacement.
Of course, we are also happy to offer a chargeable repair service for any defects which are not covered by the scope of this guarantee or for units which are no longer covered. To take advantage of this service, please send the device to our service address.
Also refer to the restrictions of this warranty concerning wear parts, consumables and missing parts as set out in the service information in these operating instructions.
Table of contents
Dear customer,
5. Before starting
Before switching on, check that the data on the type plate matches the mains data.
Before you start adjusting the device, pull the plug out of the socket.
5.1 Assembling the grass trimmer (figures 3a to 5b)
Connect the upper bar (fig. 3a/pos. 5), the middle bar (fig. 3a/pos. 11) and the lower bar (fig. 3a/pos. 6) in the direction of the arrow. Fasten the bar parts with the screw (fig. 3b/pos. 10). - Place the protective cover with the screw (fig. 4/pos. 7) onto the motor head and turn it fully clockwise towards the nozzle. - Fix the protective cover with the screw (fig. 5/pos. 8).
6. Operation
The grass trimmer has a semi-automatic line length adjustment system. Each time the semi-automatic line length adjustment system is activated, the line is automatically extended, so that you always cut your grass with the optimal cutting length. Please note that the wear
Note: If you use the machine for the first time, the excess protruding end of the cutting line will be shortened by the blade on the protective cover.
If the line is too short at first start-up, press the button on the spool and pull the line out firmly. At first start-up, the cutting line is automatically shortened to the optimal length.
To get the maximum power from your trimmer, please follow the instructions below:
Do not use the grass trimmer without the protective guard. Do not mow if the grass is wet. You will achieve the best results on dry grass. Connect the mains cable to an extension cord and attach it to the cable relief mechanism (figure 6 / pos. A). To switch on the trimmer, press the on/off switch (fig. 6 / pos. 3). To switch off the trimmer, release the on/off switch again (fig. 6 / pos. 3). - Bring the trimmer close to the grass only after you have pressed the switch, i.e. when the trimmer is running. To cut properly, tilt the device to the side and move forward. Keep the trimmer tilted at about 30° (see fig. 8 and 9). If the grass is longer, shorten it gradually from the top (see fig. 10). - Use the protective guard to avoid unnecessary wear of the line. - Keep the trimmer away from hard objects to avoid unnecessary wear of the line.
We reserve the right to make technical changes.
RUS
Service information
In all countries listed in the warranty certificate, we have competent service partners whose contact details you will find in the warranty certificate. They are always at your disposal for any questions regarding service, e.g. repairs, supply of spare parts and fast-wearing parts, as well as for purchasing consumables.
It should be noted that certain parts are subject to natural wear or wear due to use / the following parts are required as consumables.
Warranty certificate
We have carefully checked the quality of this product. If this device still does not function properly, please contact our service department at the address given in this warranty certificate. We will also be happy to answer your questions by phone, the number of which is given below. The following conditions apply to warranty claims.
- These warranty terms apply exclusively to consumers, i.e. natural persons who do not intend to use this product in the course of their professional or self-employed activity. These warranty terms regulate supplementary warranty services that the manufacturer grants to buyers of new devices in addition to the statutory warranty. These warranty obligations do not affect your statutory warranty rights. Our warranty services are free of charge for you.
- Warranty obligations apply only to defects of the new device specified below by the manufacturer that you have purchased, caused by material shortage or manufacturing defect, and are limited to the repair of such device defects or replacement of the device. Please note that our devices are not intended for use in industrial applications, in handicraft production, or for professional use. Therefore, the warranty agreement is considered invalid if the device was used during the warranty period in commercial, industrial, or handicraft production, or was subjected to comparable heavy load.
- The warranty does not cover:
- Damage to the device resulting from failure to follow the installation instructions or incorrect installation, failure to follow the operating instructions (for example, connection to a network with incorrect voltage or current type), failure to comply with technical maintenance requirements and safety regulations, exposure of the device to abnormal conditions and environment, and insufficient care and technical maintenance;
- Damage to the device resulting from incorrect or improper use (for example, overloading the device or using attachments or accessories not approved for use), ingress of foreign objects into the device (for example, sand, stones, or water), damage during transport, use of force or external influence (for example, damage from impact);
- Damage to the device or parts of the device caused by wear and tear due to operation, normal or other natural wear.
- The warranty period is 24 months, starting from the date of purchase. Warranty claims must be made before the expiration of the warranty period, within two weeks after the defect is discovered. Claims for warranty service after the expiration of the warranty period are not accepted. Repair or replacement of the device does not extend the warranty period; however, if such service is provided, a new warranty period for the device or possibly installed parts does not begin anew. This condition also applies to local service departments. 5. To assert warranty claims, report the device malfunction on the website www.isc-gmbh.info. Prepare the purchase receipt or other proof of purchase of the new device. Warranty services are provided only for devices submitted for review with corresponding proof of purchase; otherwise, they are excluded due to lack of data for identifying such devices. If our warranty covers the device malfunction, you will promptly receive a repaired or new device.
It goes without saying that we can also rectify, for a fee, defects of the device that are not covered by the warranty services or after the warranty period has expired. For this, you must send the device to the address of our service department.
Regarding rapidly wearing parts and missing components, we draw attention to the limitations of this warranty in accordance with the information on service maintenance in the operating instructions.
Contents
Dear customer,
Our products are subject to rigorous quality control. If, however, this device does not function flawlessly, we are very sorry and ask you to contact our service center at the address indicated at the end of this warranty certificate. Of course, we are also happy to assist you by phone at the service numbers mentioned. For warranty claims, the following must be taken into account:
GB explains the following conformity according to EU directives and norms for the following product
90/396/EC_2009/142/EC
89/686/EC_96/58/EC
X 2011/65/EU
X 2006/42/EC
Annex IV
Notified Body:
Notified Body No.:
Reg.No
2000/14/EC_2005/88/EC
Annex V
Annex VI
Noise: measured LWA = 94.4 dB (A); guaranteed LWA = 96 dB (A)
P=0.25kW; L/0=22cm
Notified Body: TÜV SÜD Industrie Service GmbH (NB 0036)
2012/46/EU
Emission No.:
Standard references: EN 60335-1; EN 50636-2-91; EN 62233; EN 55014-1; EN 55014-2; EN 61000-3-2; EN 61000-3-3
Subject to change without notice
Archive-File/Record: NAPR013051
Documents registrar: Alexander Scheifl
Wiesenweg 22, D-94405 Landau/Isar
EH 08/2016 (03)