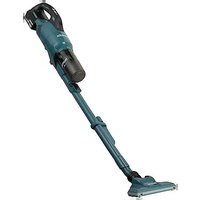
VC4210L - Cordless vacuum MAKITA - Free user manual and instructions
Find the device manual for free VC4210L MAKITA in PDF.
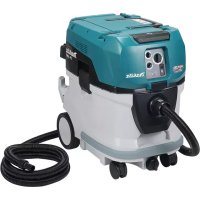
| Product type | Wet and dry vacuum cleaner |
| Brand | Makita |
| Model | VC4210L |
| Power supply | Mains (220-240 V, 50/60 Hz) |
| Power consumption | 1200 W (EU) |
| Max. air flow | 4500 l/min (270 m³/h) |
| Max. vacuum pressure | 250 mbar (250 hPa) |
| Tank volume (total) | 42 L |
| Dust tank volume | 34 L |
| Water tank volume | 30 L |
| Dimensions (L x W x H) | 385 x 575 x 605 mm |
| Weight (with accessories) | 16.0 kg |
| Cable length | 7.5 m |
| Protection class | I |
| Protection type | IPX4 |
| Dust class | L |
| Filter | HEPA (PTFE flat filter element) |
| Filter cleaning | Automatic (AutoClean) with deactivation option |
| Built-in socket | With auto on/off for power tools (max. 2400 W) |
| Antistatic system | Yes, with antistatic collar |
| Float system | Yes (automatic shut-off at max. water level) |
| Maintenance and cleaning | Regular emptying, filter cleaning, seal inspection |
| Spare parts | Filter bag, disposable bag, HEPA filter, cooling air filter |
| Warranty | According to general terms and conditions (see full manual) |
| Intended use | Industrial and professional (dry dust and non-flammable liquids) |
Frequently Asked Questions - VC4210L MAKITA
User questions about VC4210L MAKITA
0 question about this device. Answer the ones you know or ask your own.
Ask a new question about this device
Download the instructions for your Cordless vacuum in PDF format for free! Find your manual VC4210L - MAKITA and take your electronic device back in hand. On this page are published all the documents necessary for the use of your device. VC4210L by MAKITA.
USER MANUAL VC4210L MAKITA
natural_image
Warning symbol: black exclamation mark inside a triangle (no text or numbers)

VC4210L
natural_image
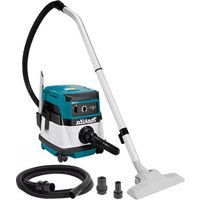
Line drawing of a small industrial vacuum cleaner with wheels and control panel (no text or symbols)Original Operating Instructions
A3*)

A4

natural_image
Line drawing of a mechanical device with a threaded connector and a circular button, no text or symbols present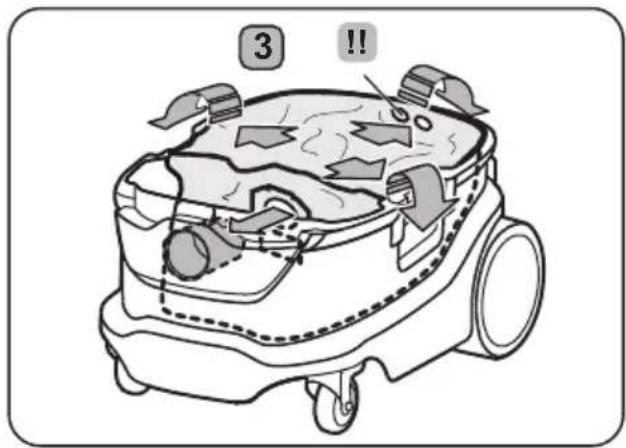

A5*)

A5 ^4
natural_image
Line drawing of a mechanical device interior with no visible text or symbols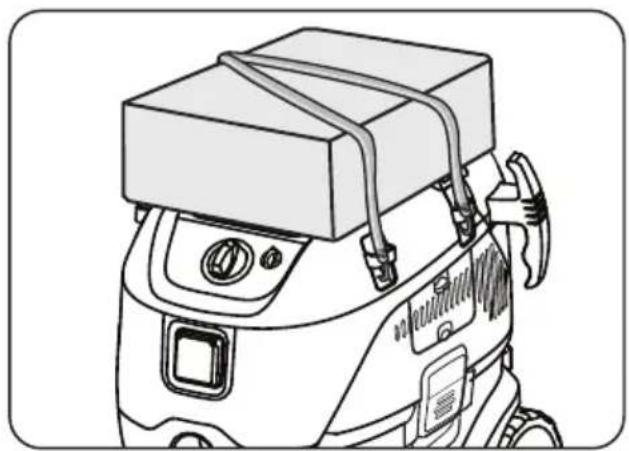
natural_image
Line drawing of a portable vacuum cleaner with attached box and control panel (no text or symbols)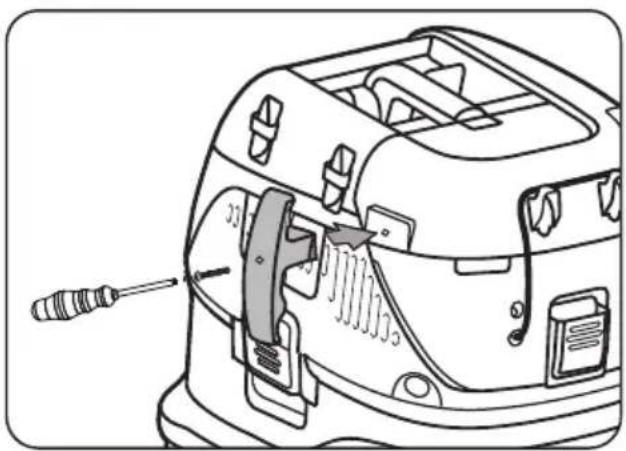
natural_image
Line drawing of a mechanical device with a screwdriver inserted, showing internal components and no text or symbols.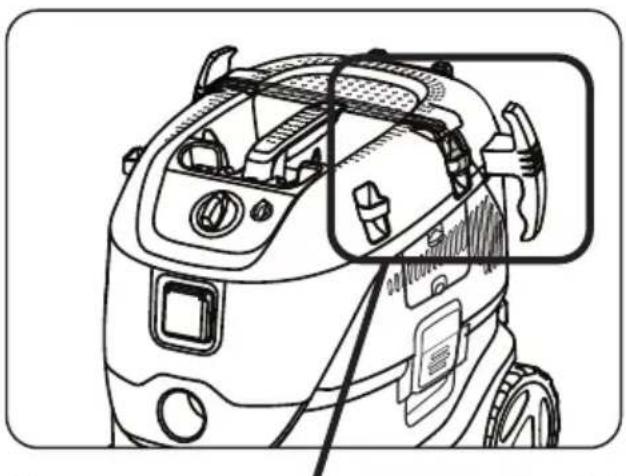
natural_image
Line drawing of a robotic vacuum cleaner with attached sensors and wiring (no text or symbols)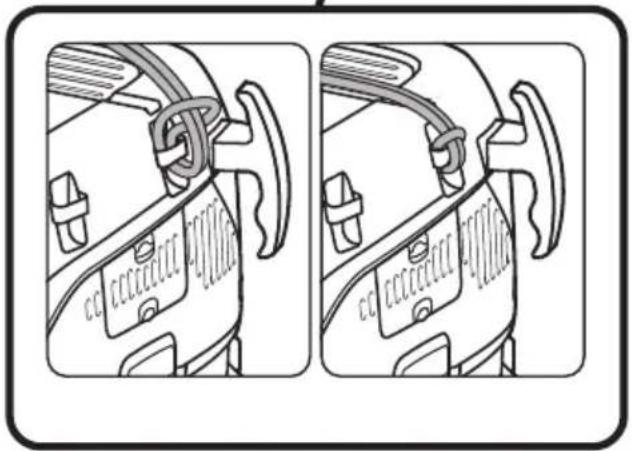
natural_image
Technical line drawing of a car interior showing two views of the door frame (no text or symbols)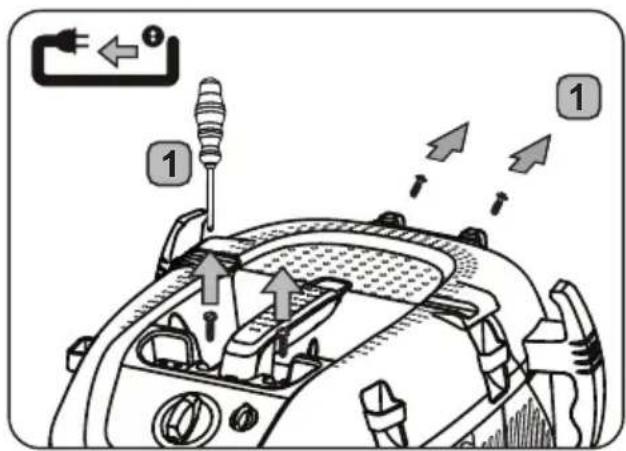
AutoClean
flowchart
graph TD
    A["Top Box with 🤔️"] --> B["Y-shaped Structure"]
    C["Bottom Box with 😊️"] --> D["Airplane Shape"]
    style A fill:#f9f,stroke:#333
    style C fill:#f9f,stroke:#333
natural_image
Line drawing of a small industrial or cleaning machine with wheels and a vertical pole, no text or symbols present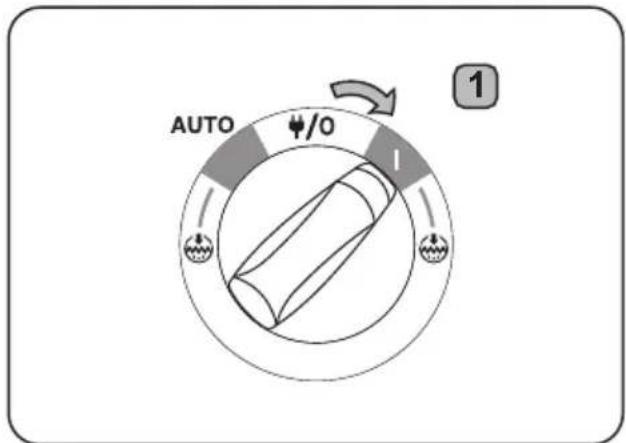

natural_image
Line drawing of a portable industrial vacuum cleaner with coiled cable (no text or symbols)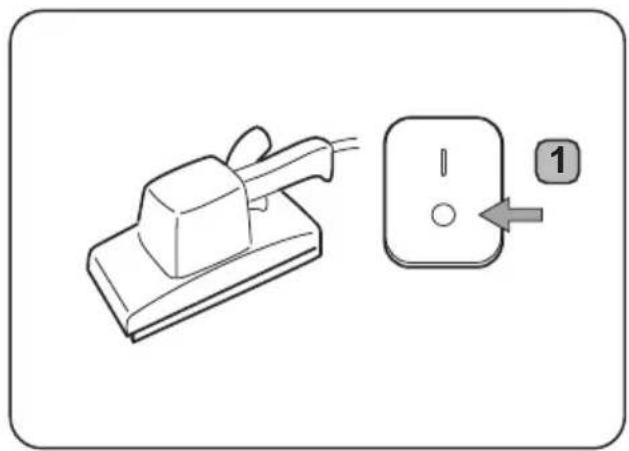
natural_image
Diagram showing a mechanical component being inserted into a rectangular socket with a labeled arrow (no text or symbols present)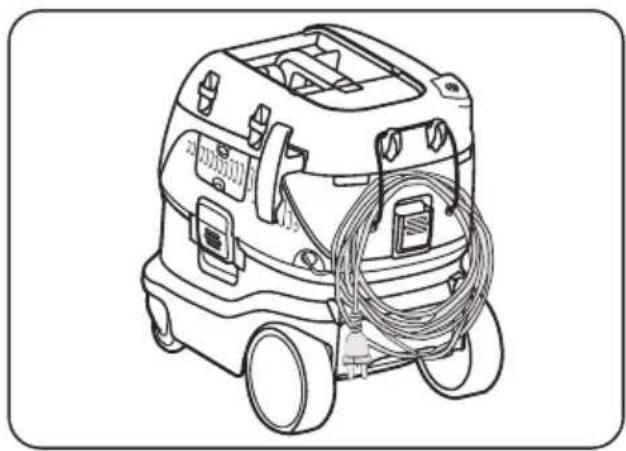
natural_image
Line drawing of a portable industrial vacuum cleaner with coiled cable (no text or symbols)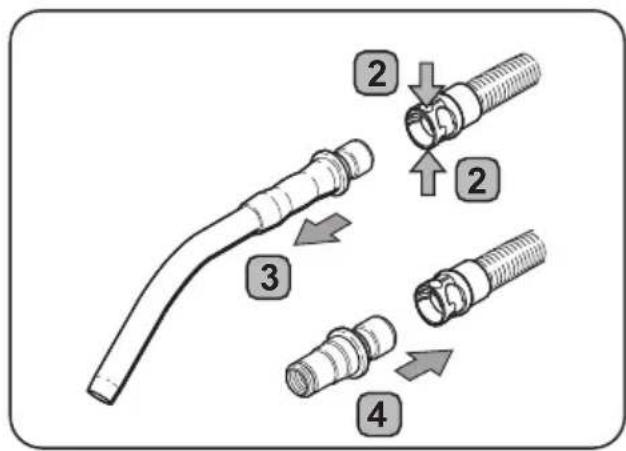
natural_image
Line drawing of a portable vacuum cleaner with coiled tubing and wheels (no text or symbols)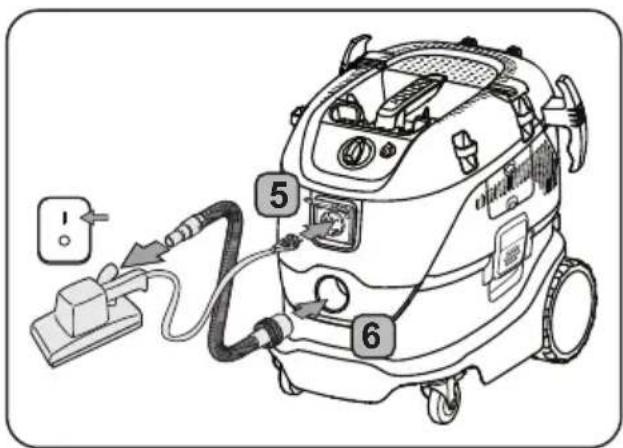
natural_image
Line drawing of a vacuum cleaner with coiled hose and wheels (no text or symbols)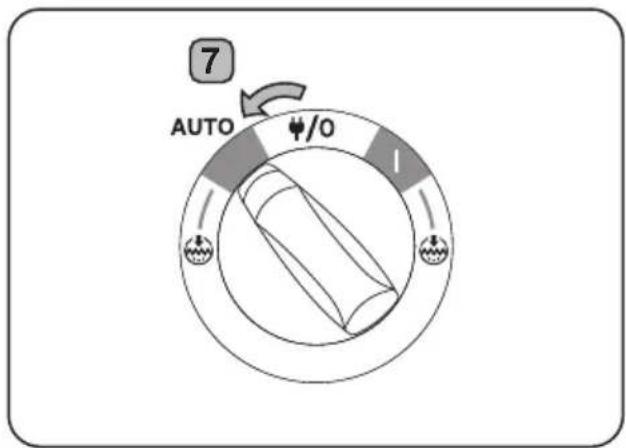
natural_image
Line drawing of a plug being inserted into a socket, with a numbered arrow pointing to the socket (no text or symbols present)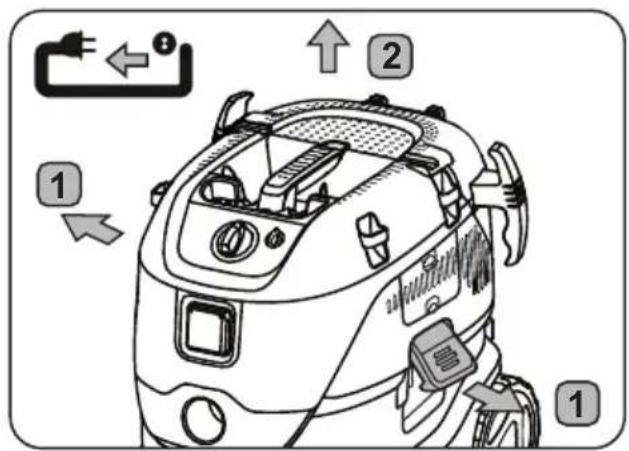
D2

D3
D4
D5
natural_image
Technical line drawing of a car interior showing structural components and airflow direction (no text or symbols)D5
natural_image
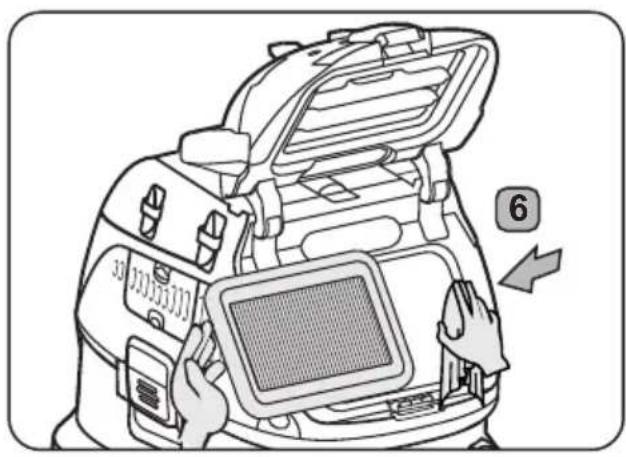
Line drawing of a camera module with hands operating the screen and a numbered arrow indicating component 6 (no text or symbols present)
Function of the resettable circuit breaker
Applicable for models for the Australian market with a resettable circuit breaker
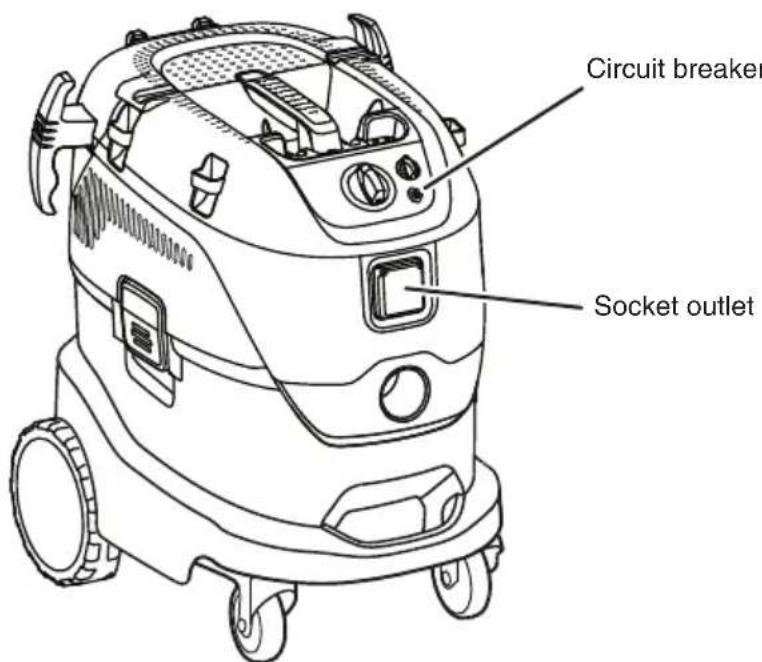
Only connect suitable power tools to the socket outlet on the vacuum cleaner. The power consumption of the power tool must not exceed 1,200 watts.
The socket outlet has a resettable circuit breaker. If the power consumption is too high, the circuit breaker interrupts the circuit. If the circuit breaker has tripped, it needs about 1 minute to cool down before it can be reset.
⚠ WARNING! Risk of injury from an automatically starting power tool. Before resetting the circuit breaker: Make sure that the connected power tool is switched off or disconnected from the socket outlet.
If the overload problem persists after resetting the circuit breaker several times: Seek professional help or contact Makita for technical advice.
Bedienelemente
Kurzanleitung
Bedienelemente
Director - Makita Europe N.V.
Makita Europe N.V., Jan-Baptist Vinkstraat 2, 3070 Kortenberg, Belgium
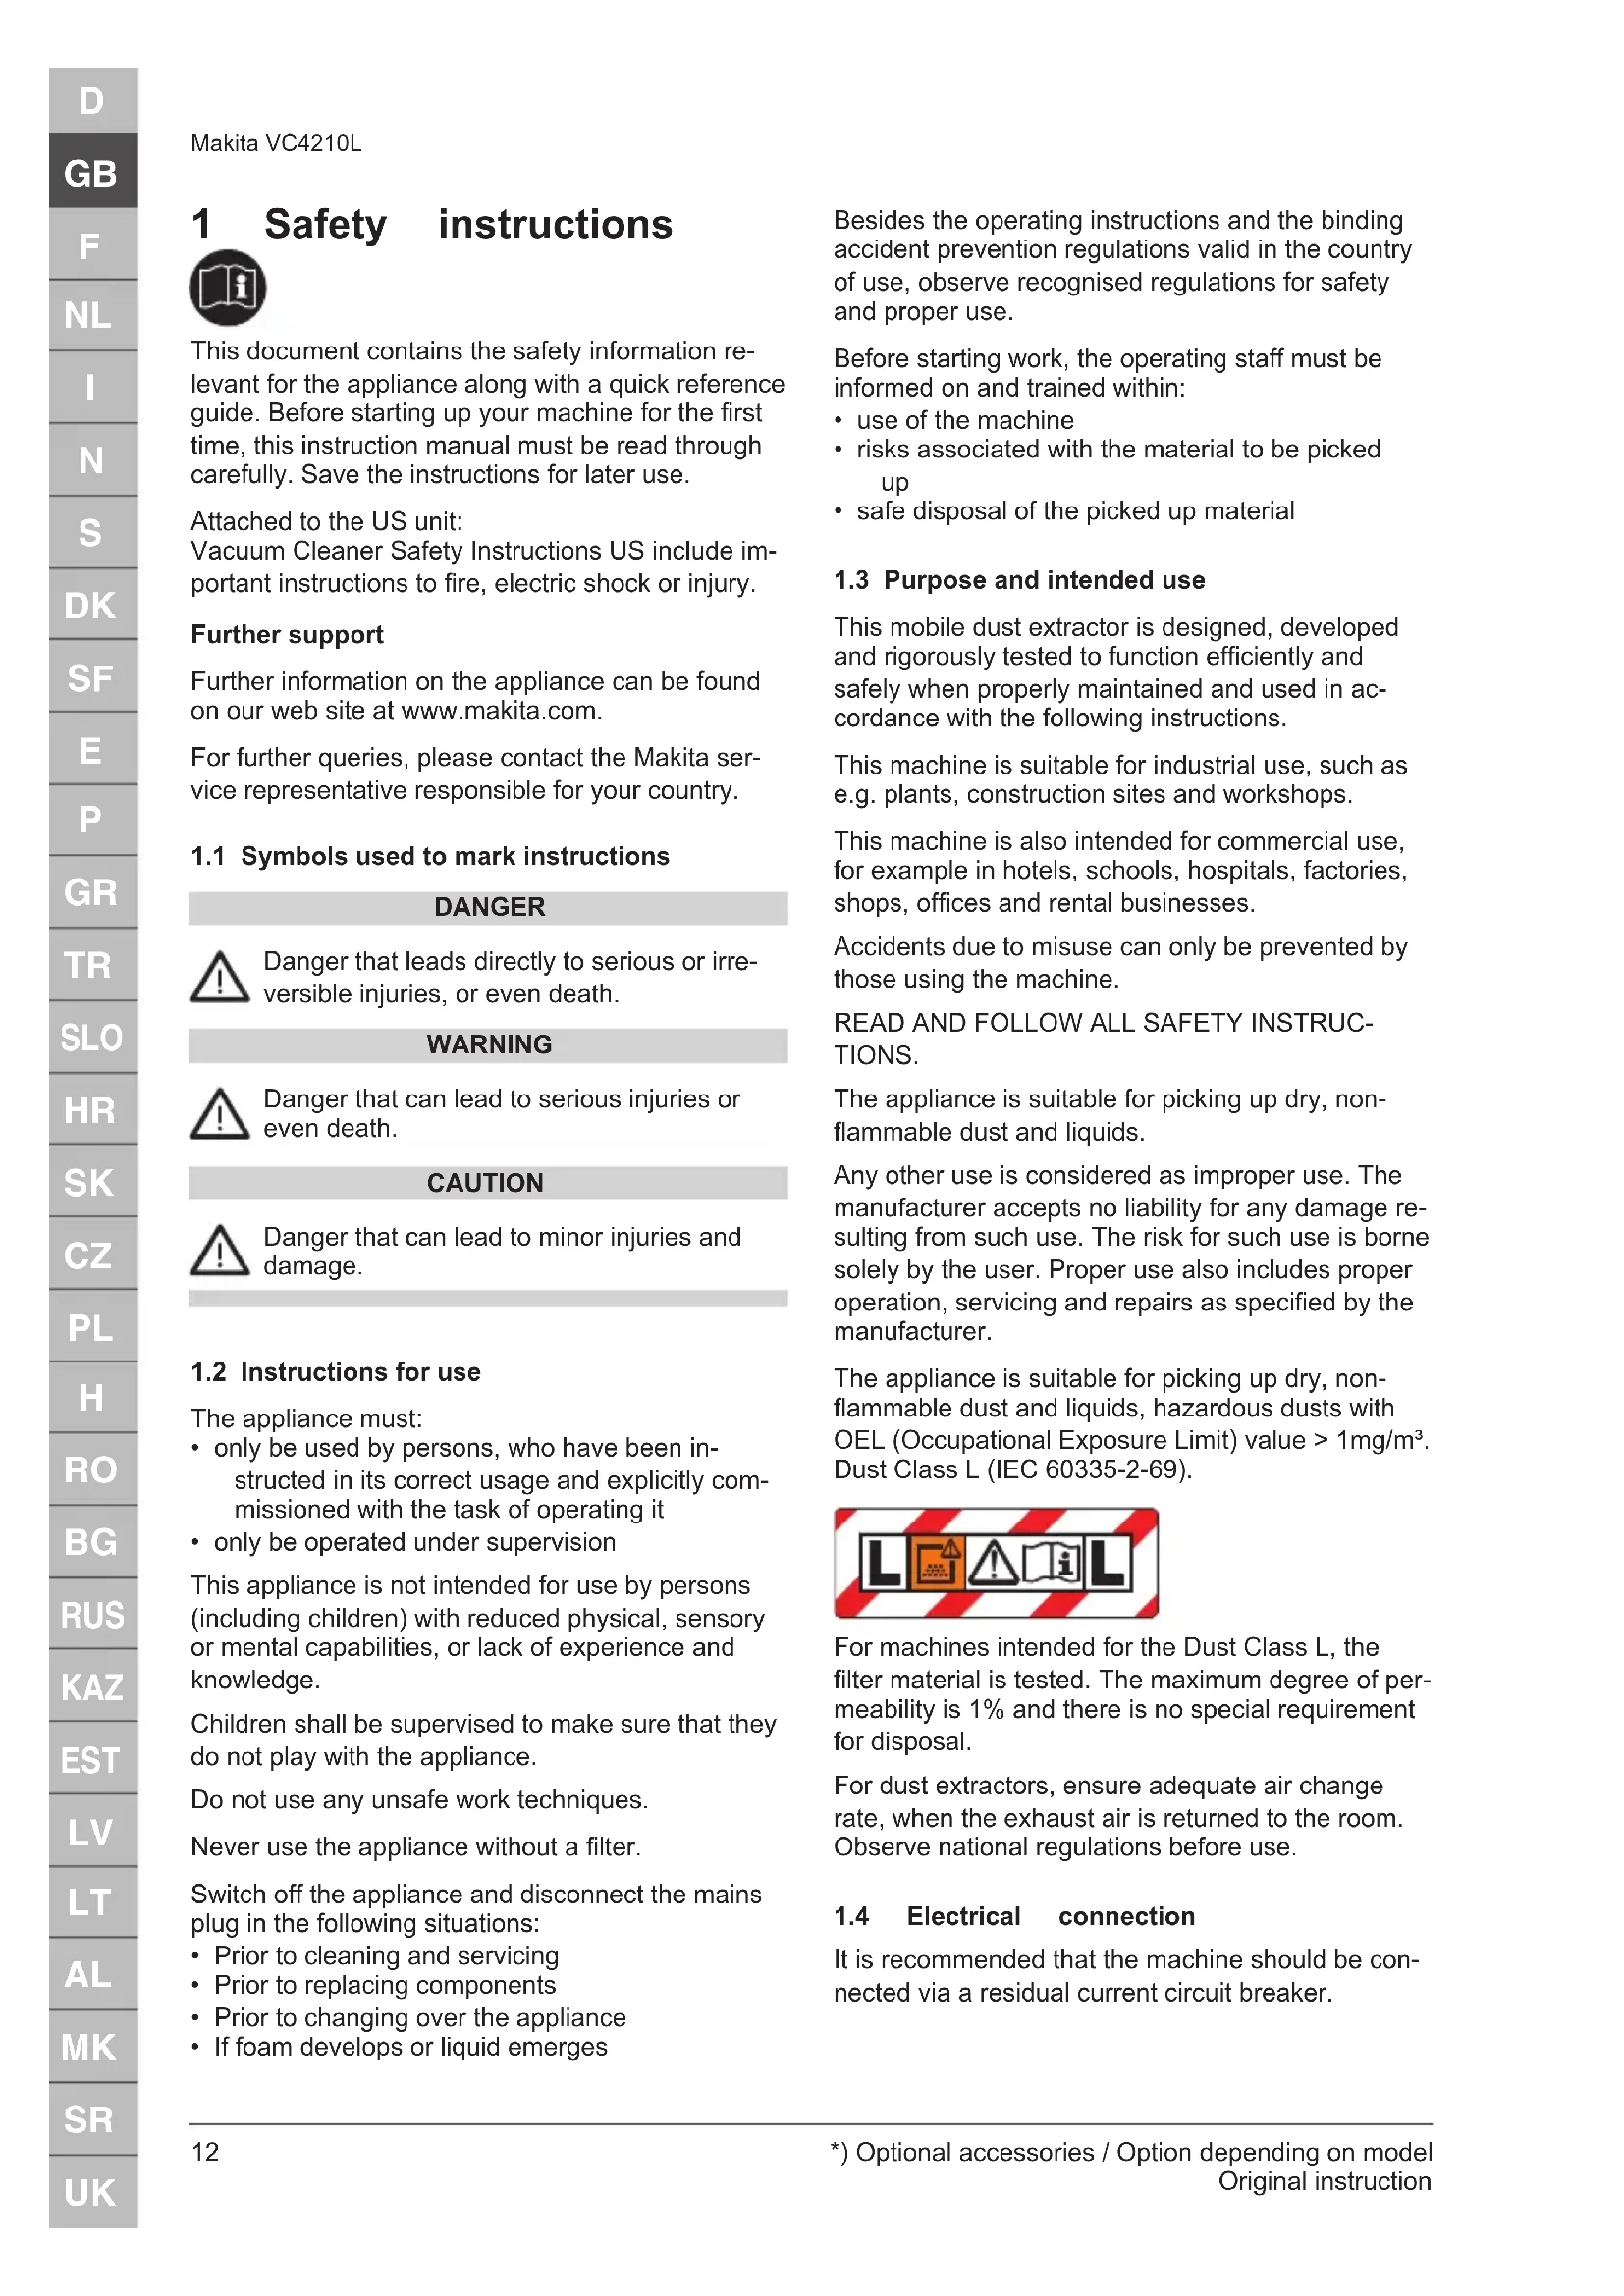
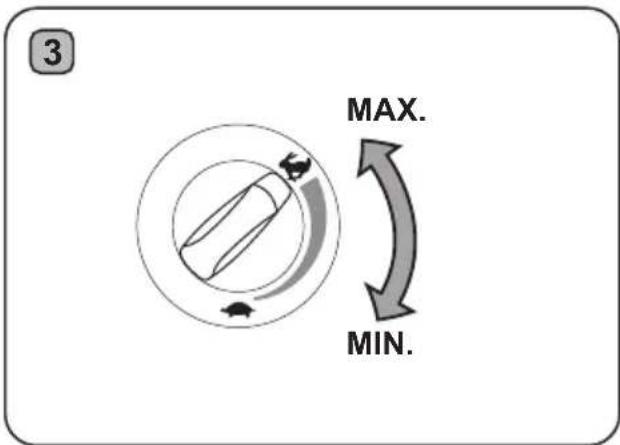
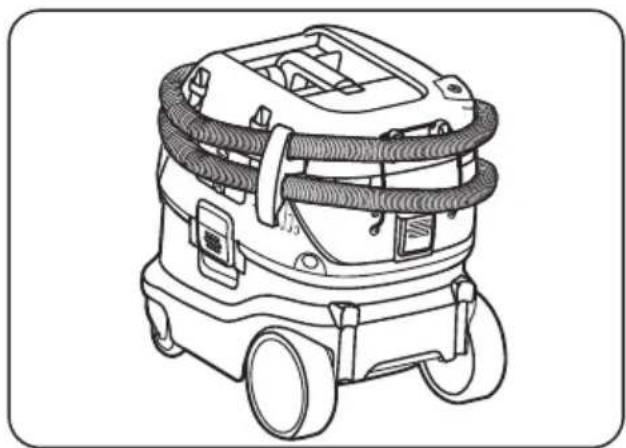
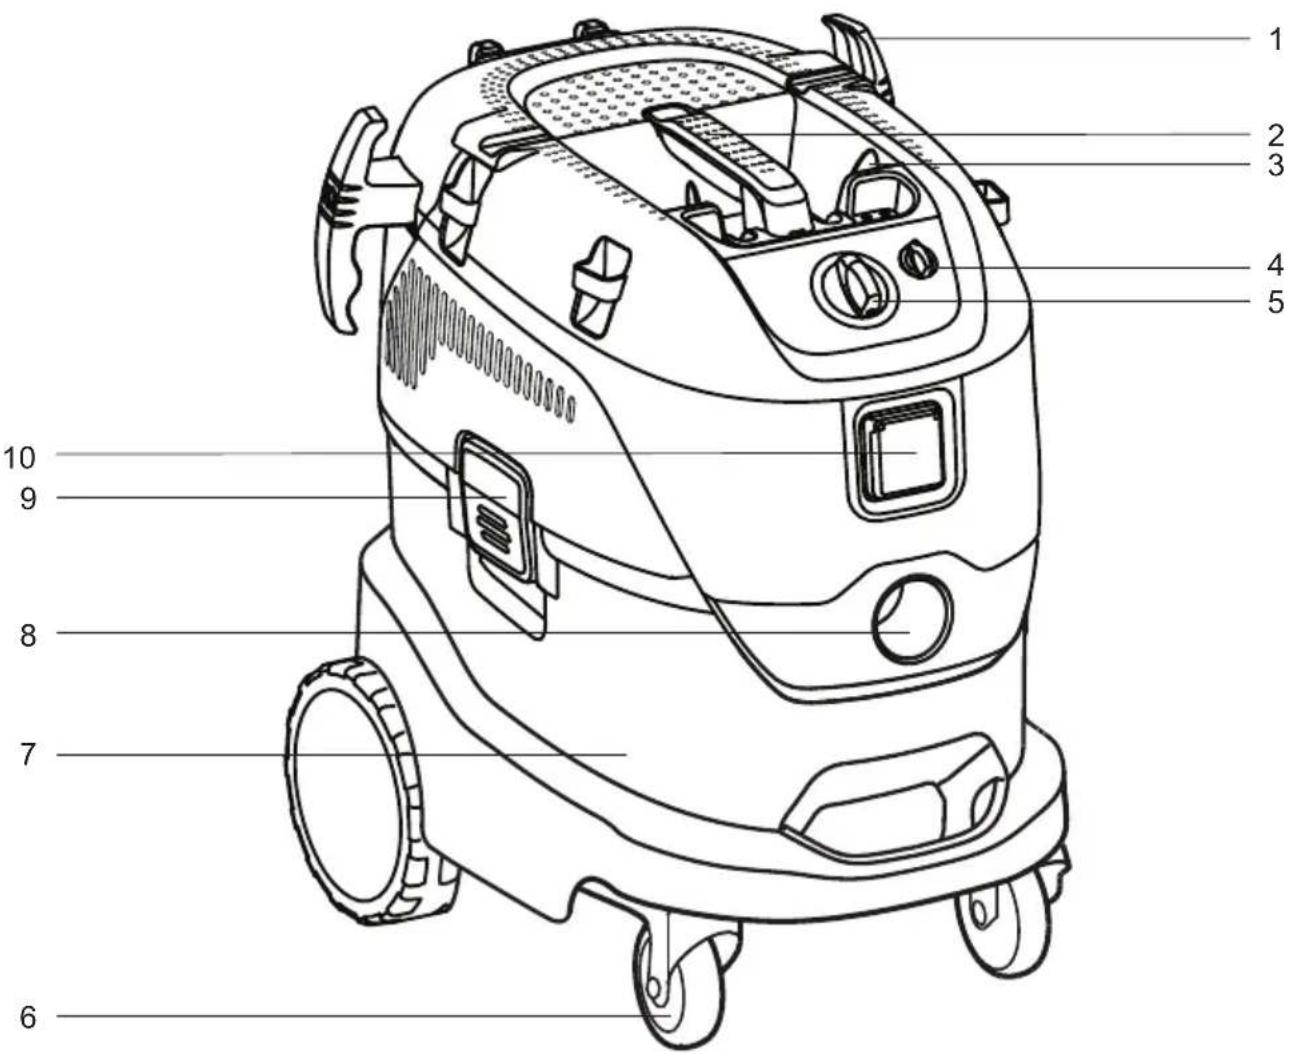
3 Accessory positions
4 Suction power control
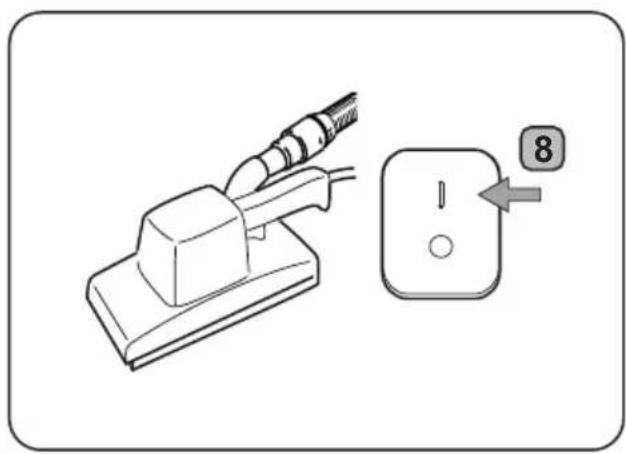
5 Switch
6 Castor
7 Container
8 Inlet fitting
9 Latch
10 Appliance socket
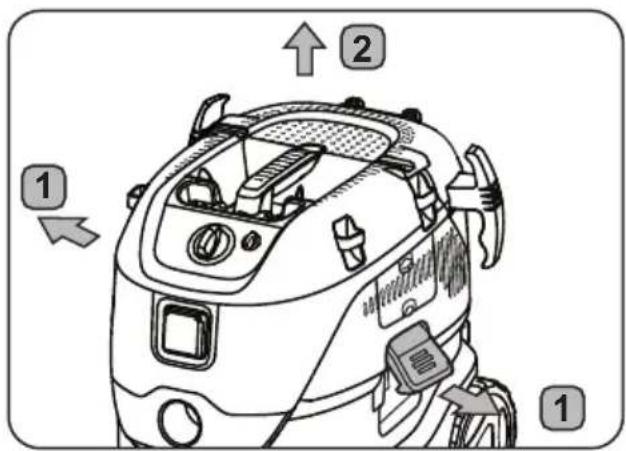
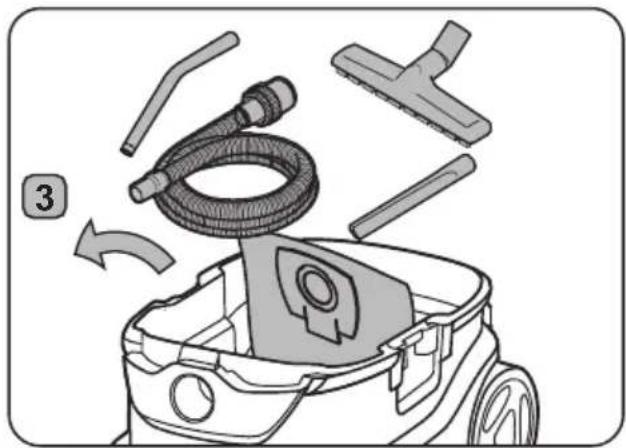
The pictorial quick reference guide
The pictorial quick reference guide is designed for helping you when starting up, operating and storing the unit. The guide are subdivided into 4 sections, which are represented by symbols:
A

Before starting
READ OPERATING INSTRUCTIONS BEFORE USE!
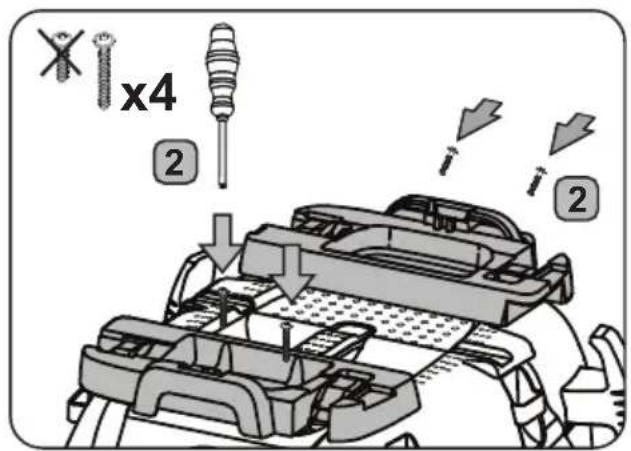
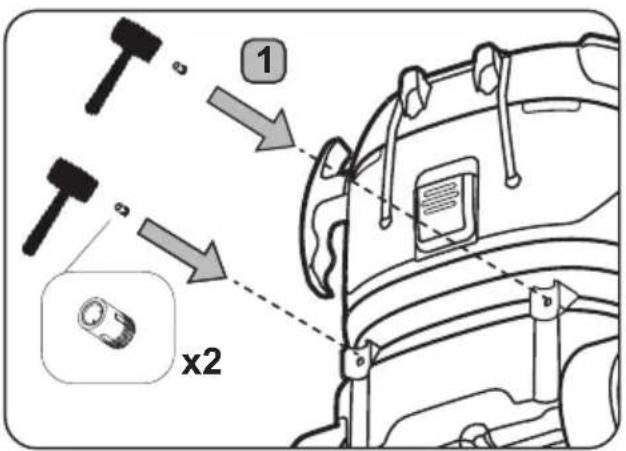
A1 - Unpack accessories
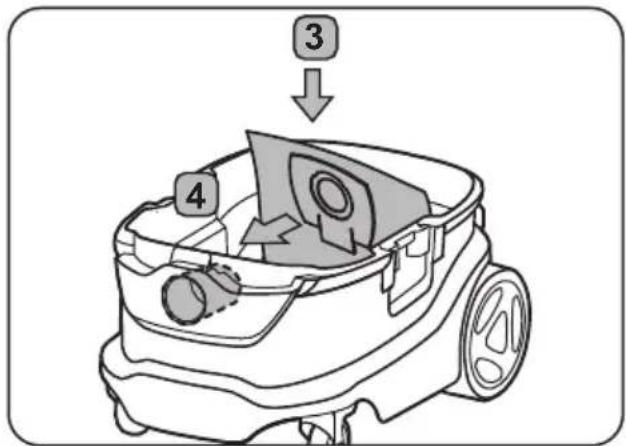
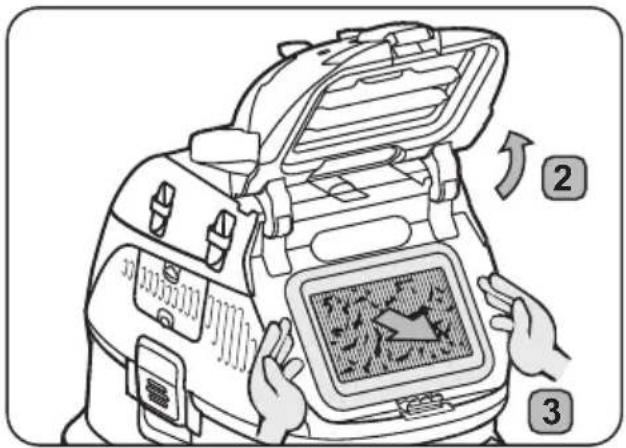
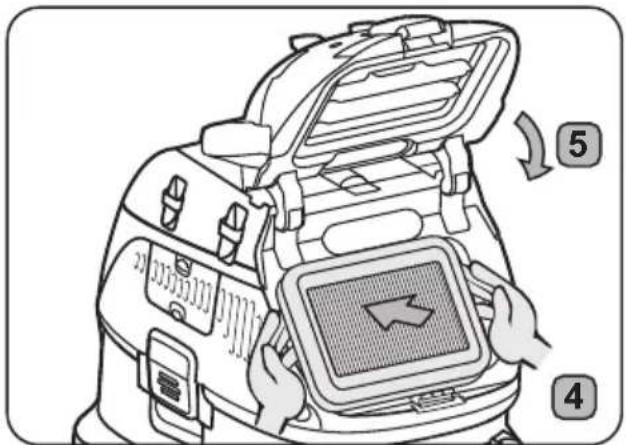
A2 - Filter bag installation
A3 - Disposal bag installation
A4 - Hose insert & operations
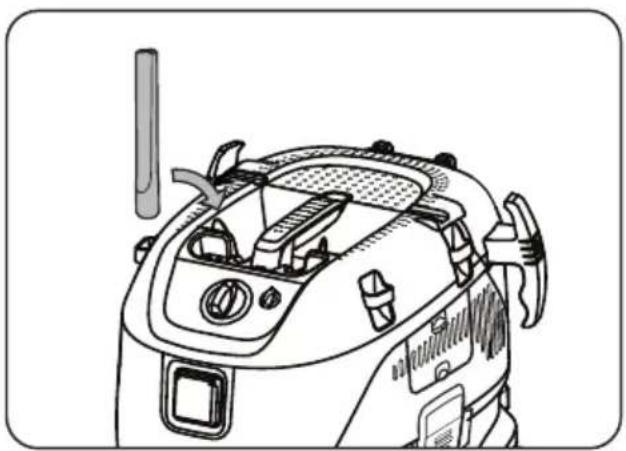
A5 - Accessories placement
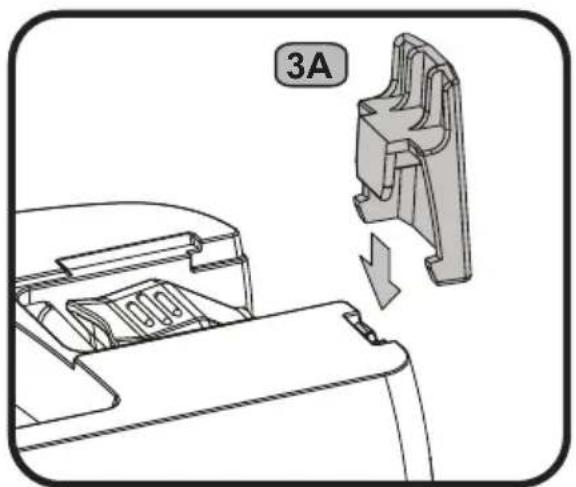
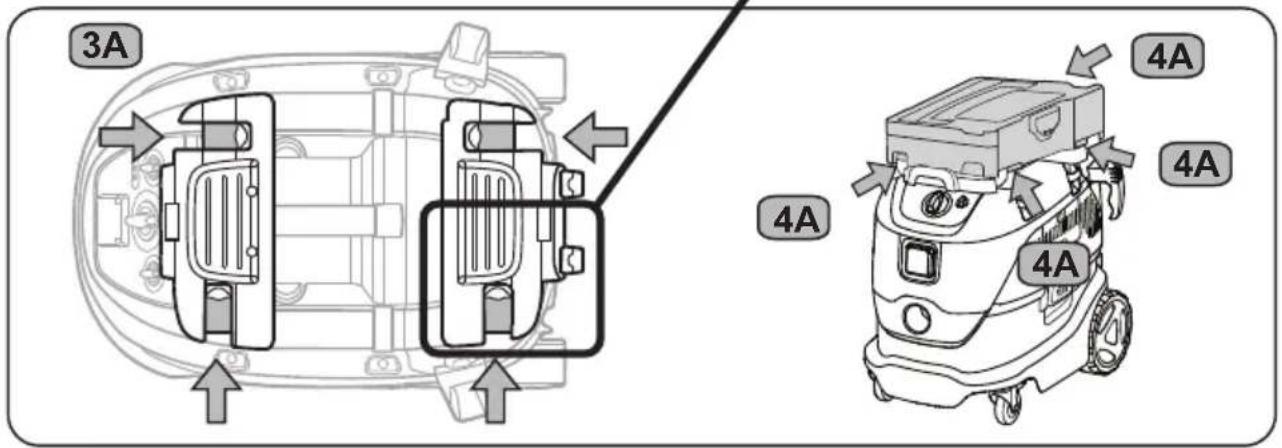
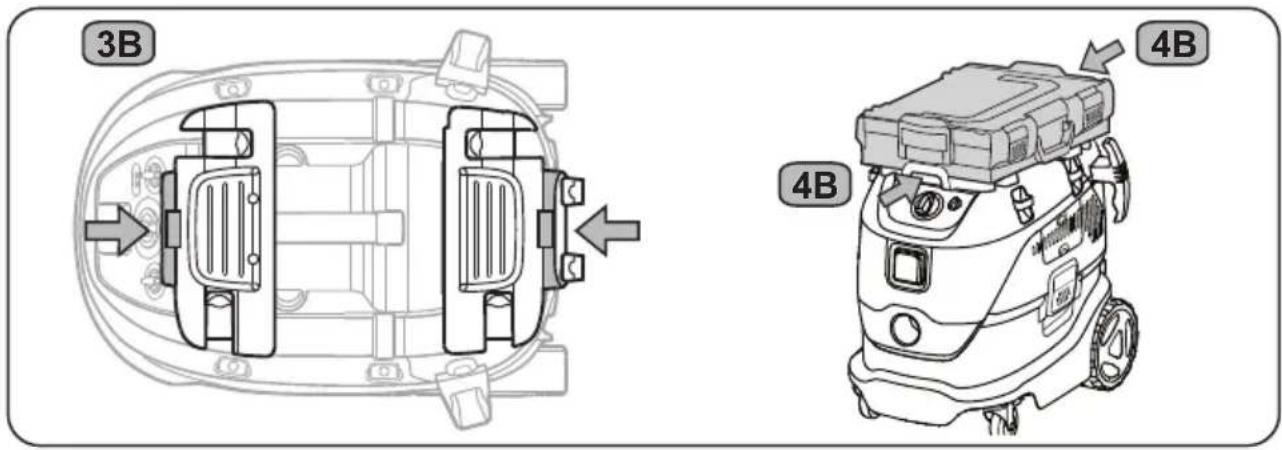
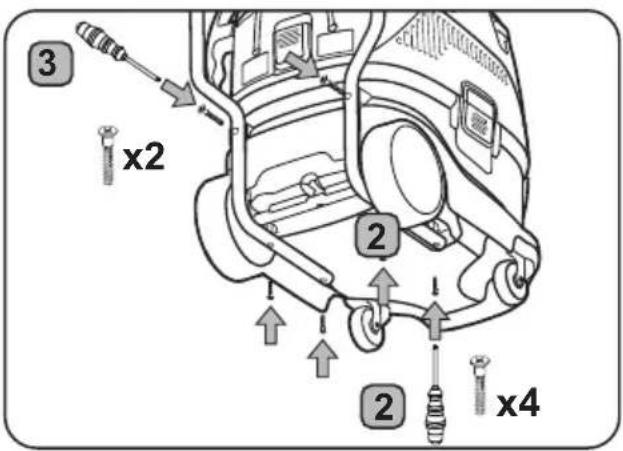
A6 - Adaptor plate installation
A7 - Trolley handle installation
B

Control/Operation
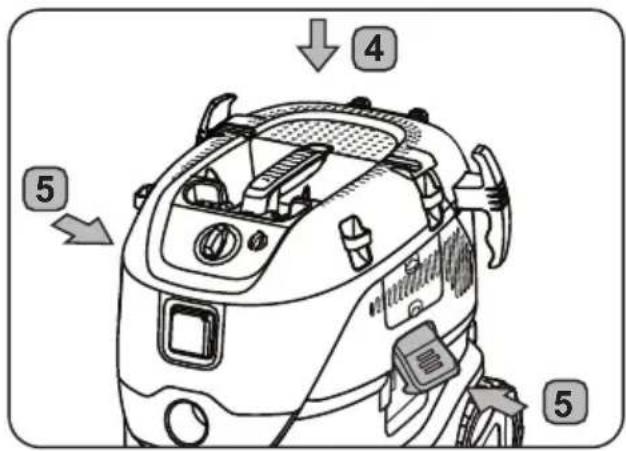
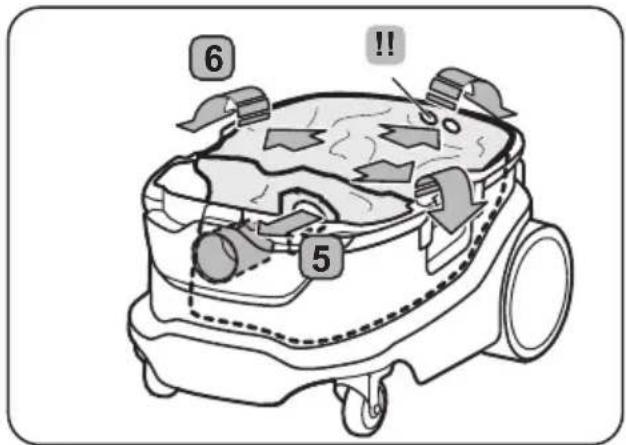
B1 - AutoClean filter cleaning system
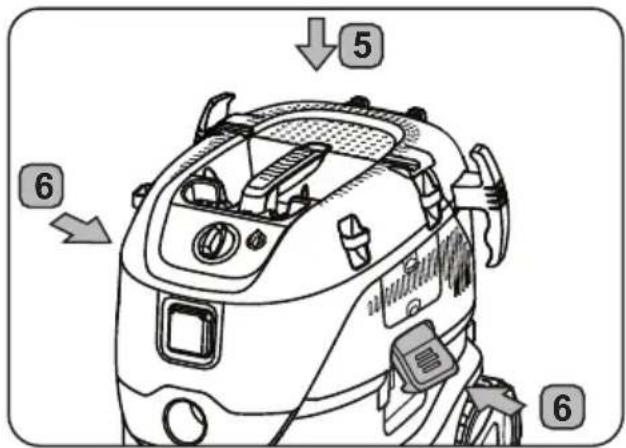
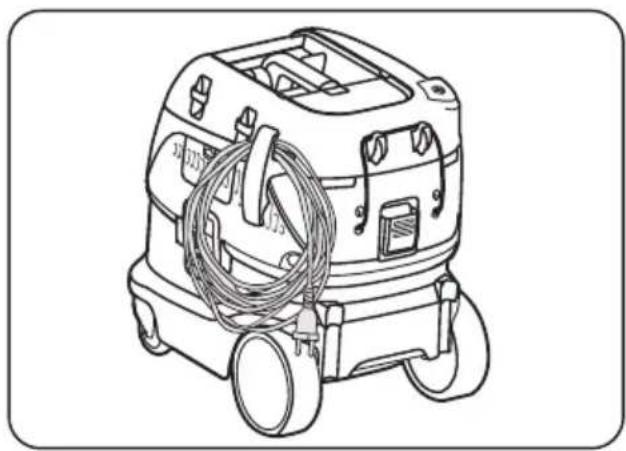
B2 - Cable and hose storage
C

Connecting electrical appliances
C1 - Power tool adaption
D
Maintenance
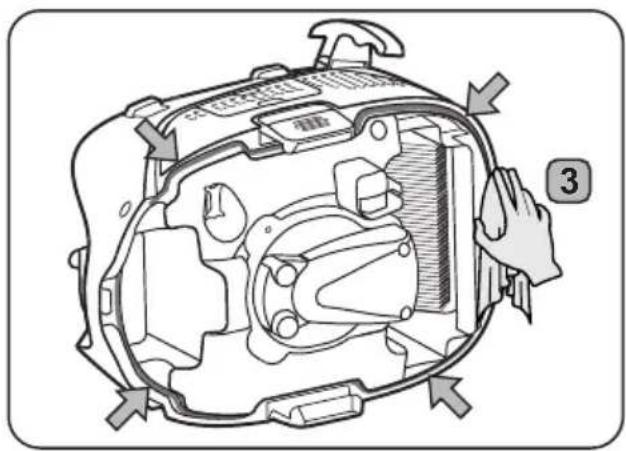
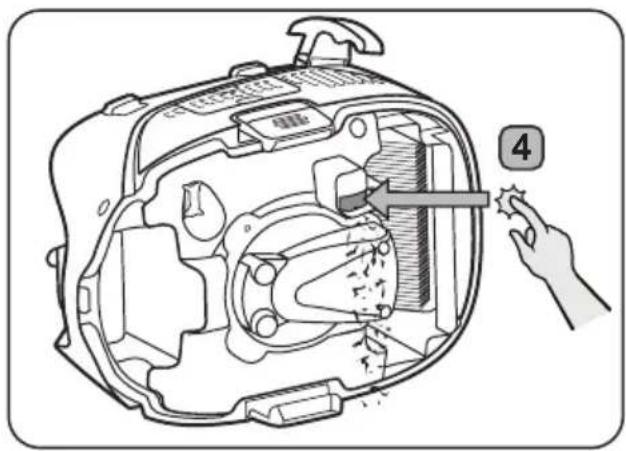
D1 - Filter bag replacement
D2 - Disposal bag replacement
D3 - Filter replacement
D4 - Motor cooling air diffuser cleaning
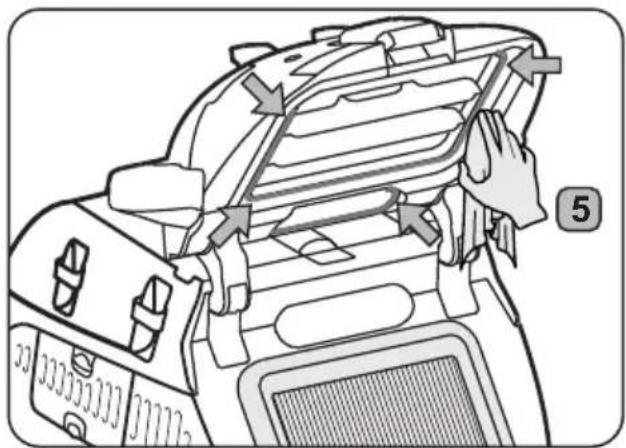
D5 - Gaskets and floater cleaning
Contents
1 Safety instructions 12
1.1 Symbols used to mark instructions ..... 12
1.2 Instructions for use 12
1.3 Purpose and intended use .....12
1.4 Electrical connection 12
1.5 Extension lead 13
1.6 Guarantee 13
1.7 Important warnings 13
2 Risks 14
2.1 Electrical components 14
2.2 Hazardous dust 15
2.3 Spare parts and accessories 15
2.4 In explosive or inflammable atmosphere 15
3 Control / Operation 15
3.1 Starting and operating of the machine 15
3.2 Auto-On/Off socket outlet for power tools 16
3.3 AutoClean 16
3.4 Antistatic connection) 16
3.5 Cooling air filter 16
3.6 Wet pick-up 17
3.7 Dry pick-up 17
4 After using the machine 17
4.1 After use.... 17
4.2 Transport 17
4.3 Storage 17
4.4 Accessory and tool storage 17
4.5 Recycling the machine 18
5 Maintenance.... 18
5.1 Regular servicing and inspection .....18
5.2 Maintenance 18
6 Further information 18
6.1 EC Declaration of conformity ..... 18
6.2 UK Declaration of conformity 19
6.3 Specifications 20
1 Safety instructions

This document contains the safety information relevant for the appliance along with a quick reference guide. Before starting up your machine for the first time, this instruction manual must be read through carefully. Save the instructions for later use.
Attached to the US unit:
Vacuum Cleaner Safety Instructions US include important instructions to fire, electric shock or injury.
Further support
Further information on the appliance can be found on our web site at www.makita.com.
For further queries, please contact the Makita service representative responsible for your country.
1.1 Symbols used to mark instructions
DANGER

Danger that leads directly to serious or irreversible injuries, or even death.
WARNING

Danger that can lead to serious injuries or even death.
CAUTION

Danger that can lead to minor injuries and damage.
1.2 Instructions for use
The appliance must:
- only be used by persons, who have been instructed in its correct usage and explicitly commissioned with the task of operating it
- only be operated under supervision
This appliance is not intended for use by persons (including children) with reduced physical, sensory or mental capabilities, or lack of experience and knowledge.
Children shall be supervised to make sure that they do not play with the appliance.
Do not use any unsafe work techniques.
Never use the appliance without a filter.
Switch off the appliance and disconnect the mains plug in the following situations:
• Prior to cleaning and servicing
• Prior to replacing components
• Prior to changing over the appliance
• If foam develops or liquid emerges
Besides the operating instructions and the binding accident prevention regulations valid in the country of use, observe recognised regulations for safety and proper use.
Before starting work, the operating staff must be informed on and trained within:
- use of the machine
- risks associated with the material to be picked up
- safe disposal of the picked up material
1.3 Purpose and intended use
This mobile dust extractor is designed, developed and rigorously tested to function efficiently and safely when properly maintained and used in accordance with the following instructions.
This machine is suitable for industrial use, such as e.g. plants, construction sites and workshops.
This machine is also intended for commercial use, for example in hotels, schools, hospitals, factories, shops, offices and rental businesses.
Accidents due to misuse can only be prevented by those using the machine.
READ AND FOLLOW ALL SAFETY INSTRUCTIONS.
The appliance is suitable for picking up dry, non-flammable dust and liquids.
Any other use is considered as improper use. The manufacturer accepts no liability for any damage resulting from such use. The risk for such use is borne solely by the user. Proper use also includes proper operation, servicing and repairs as specified by the manufacturer.
The appliance is suitable for picking up dry, non-flammable dust and liquids, hazardous dusts with OEL (Occupational Exposure Limit) value > 1mg/m ^3 . Dust Class L (IEC 60335-2-69).
For machines intended for the Dust Class L, the filter material is tested. The maximum degree of permeability is 1% and there is no special requirement for disposal.
For dust extractors, ensure adequate air change rate, when the exhaust air is returned to the room. Observe national regulations before use.
1.4 Electrical connection
It is recommended that the machine should be connected via a residual current circuit breaker.
Arrange the electrical parts (sockets, plugs and couplings) and lay down the extension lead so that the protection class is maintained.
Connectors and couplings of power supply cords and extension leads must be watertight.
1.5 Extension lead
As an extension lead, only use the version specified by the manufacturer or one of a higher quality.
When using an extension lead, check the minimum cross-sections of the cable:
| Cable lenth Cross section | ||
| < 16 A < 25 A | ||
| up to 20 m 1.5 mm | ^2 | 2.5 mm ^2 |
| 20 to 50 m 2.5 mm | ^2 | 4.0 mm ^2 |
1.6 Guarantee
Our general conditions of business are applicable with regard to the guarantee.
Unauthorised modifications to the appliance, the use of incorrect brushes in addition to using the appliance in a way other than for the intended purpose exempt the manufacturer from any liability for the resulting damage.
1.7 Important warnings
WARNING
To reduce the risk of fire, electric shock, or injury, please read and follow all safety instructions and caution markings before use. This machine is designed to be safe when used for cleaning functions as specified. Should damage occur to electrical or mechanical parts, the machine and / or accessory should be repaired by a competent service center or the manufacturer before use in order to avoid further damage to the machine or physical injury to the user.
Do not leave the machine when it is plugged in. Unplug from the socket when not in use and before maintenance.
Outdoor use of the appliance shall be limited to occasional use.
Do not use with damaged cord or plug. To unplug grasp the plug, not the cord. Do not handle plug or machine with wet hands. Turn off all controls before unplugging.
Do not pull or carry by cord, use cord as a handle, close a door on cord, or pull cord around sharp edges or corners. Do not run machine over cord. Keep cord away from heated surfaces.
Keep hair, loose clothing, fingers and all parts of the body away from openings and moving parts. Do not put any objects into openings or use with opening blocked. Keep openings free of dust, lint, hair, and anything else that could reduce the flow of air.
Do not use in outside areas at low temperature.
Do not use to pick up flamma-ble or combustible liquids such
as gasoline, or use in areas where they may be present.
Do not pick up anything that is burning or smoking, such as cigarettes, matches or hot ashes.
Use extra care when cleaning on stairs.
Do not use unless filters are fitted.
If the machine is not working properly or has been dropped, damaged, left outdoors, or dropped into water, return it to a service center or dealer.
If foam or liquid escapes from the machine, switch off immediately.
The machine may not be used as a water pump. The machine is intended for vacuuming air and water mixtures.
Connect the machine to a properly earthed mains supply. The socket outlet and the extension cable must have an operative protective conductor.
Provide for good ventilation at the working place.
Do not use the machine as a ladder or step ladder. The machine can tip over and become damaged. Danger of injury.
Only use the socket outlet on the machine for purposes specified in the instructions.
2 Risks
2.1 Electrical components
DANGER
The upper section of the machine contains live components.
Contact with live components leads to serious or even fatal injuries.
- Never spray water on to the upper section of the machine.
DANGER
Electric shock due to faulty mains connecting lead.
Touching a faulty mains connecting lead can result in serious or even fatal injuries.
- Do not damage the mains power lead (e.g. by driving over it, pulling or crushing it).
- Regularly check whether the power cord is damaged or shows signs of ageing.
- If the electric cable is damaged, it must be replaced
by an authorized Makita distributor or similar qualified person in order to avoid a hazard.
- In no circumstances should the power supply cord be wrapped around fingers or any part of the operators person.
2.2 Hazardous dust
WARNING
Hazardous materials. Vacuuming up hazardous materials can lead to serious or even fatal injuries.
-
The following materials must not be picked up by the machine:
-
hot materials (burning cigarettes, hot ash, etc.)
- flammable, explosive, aggressive liquids (e.g. petrol, solvents, acids, alkalis, etc.)
- flammable, explosive dust (e.g. magnesium or aluminium dust, etc.)
2.3 Spare parts and accessories
CAUTION
⚠️ Spare parts and accessories. The use of non-genuine spare parts, brushes and accessories can impair the safety and or function of the appliance.
- Only use original spare parts and accessories from Makita. Spare parts that can affect health and safety of the operator and or function of the appliance, are specified below:
| Description Order No. | |
| Flat filter PTFE, 1 pcs. W107418351 | |
| Fleece filter bag, 5 pcs. W107418353 | |
| Disposal bag, 5 pcs. W107418355 | |
| Motor cooling air filter PET, 1 pcs. W107418352 |
2.4 In explosive or inflammable atmosphere
CAUTION
This machine is not suitable for use in explosive or inflammable atmospheres or where such atmospheres are likely to be produced by the presence of volatile liquid or inflammable gas or vapour.
3 Control / Operation
CAUTION
Damage due to unsuitable mains voltage. The appliance can be damaged as a result of being connected to an unsuitable mains voltage.
- Ensure that the voltage shown on the rating plate corresponds to the voltage of the local mains power supply.
3.1 Starting and operating of the machine
- Check that the electrical switch is switched off (in position 0).
- Check that suitable filters are installed in the machine.
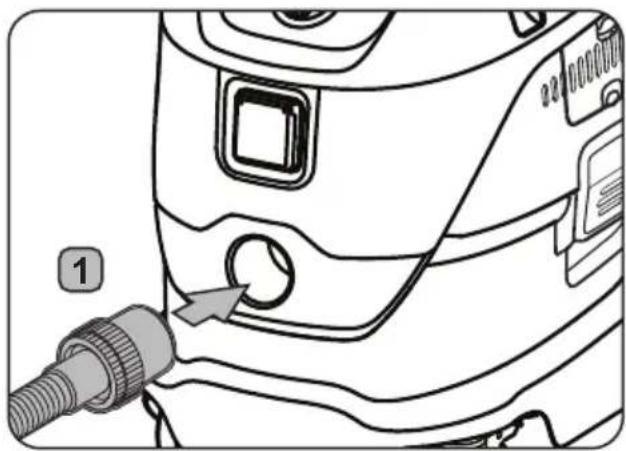
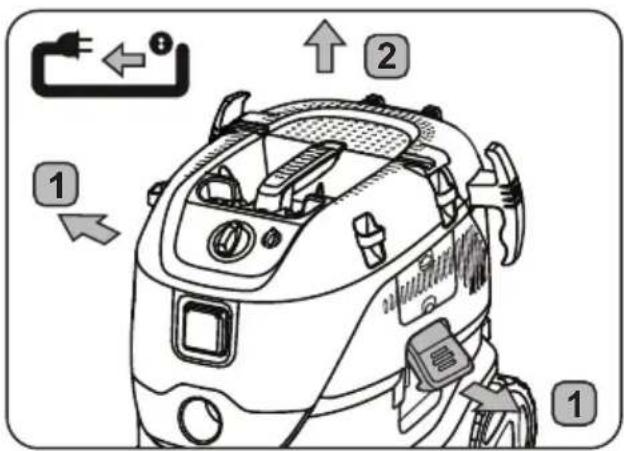
- Connect the suction hose into the suction inlet at the machine by pushing the hose forward until it fits firmly in place at the inlet.
- Connect the tubes with the hose handle, twist the tubes in order to ensure that they are properly fitted.
- Attach suitable nozzle to the tube. Choose nozzle depending on what type of material that is to be picked-up.
- If used for dust extraction in connection with dust producing tool then connect end of suction hose with appropriate adapter.
- Connect the plug into a proper electrical outlet.
- Put the electrical switch into position I in order to start the motor.
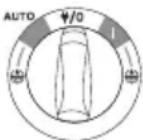 | Turn I:Activate the machine |
| Turn ♦/o:Stop the machine. Permanent power on socket | |
| Turn AUTO :Activate Auto-On/Off operation | |
| Turn I + ⚙️ :Activate the machine with deactivated automatic filter cleaning function | |
| Turn AUTO + ⚙️ :Activate Auto- On/Off operation with deactivated automatic filter cleaning function | |
 | Suction power control operation on separate turning knob |
3.2 Auto-On/Off socket outlet for power tools
CAUTION

Appliance socket.
The appliance socket is designed for electrical auxiliary equipment; see technical data for reference.
- Prior to plugging in an appliance, always switch off the machine and the appliance that is to be connected.
- Read the operating instructions to the appliance to be connected and observe the safety notes contained in these.
An appliance socket with earthing contact is integrated in the machine. An external power tool can be connected there. The socket features permanent power on, when the electrical switch is in position /0 , i.e. the machine can be used as an extension cord.
In position AUTO the machine can be switched on and off by the power tool connected. Dirt is picked up from the source of dust immediately. To comply with regulations, only approved dust producing tools should be connected.
The maximum power consumption of the connected electrical appliance is stated in section "Specifications".
Before turning the switch to position AUTO ensure that the tool connected to the appliance socket is switched off.
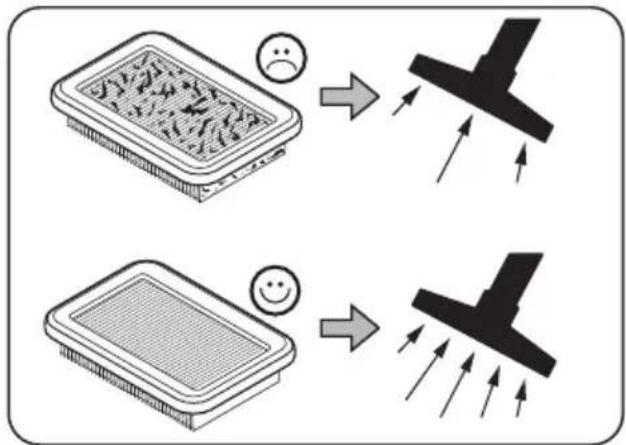
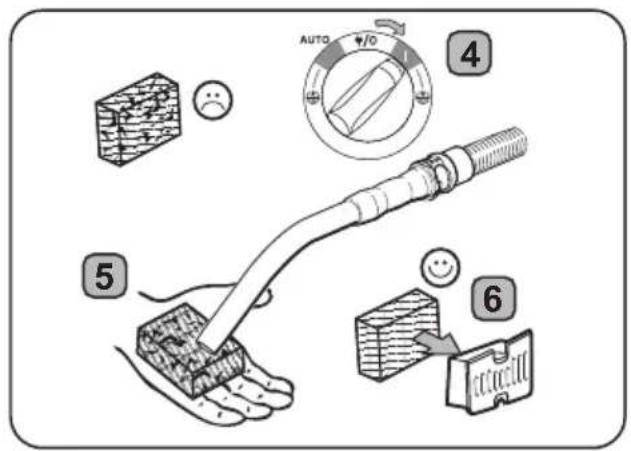
3.3 AutoClean
The machine is equipped with an automatic filter cleaning system, AutoClean. A frequent cleaning cy-
cle will automatically run during operation to ensure that suction performance is always at its best.
If suction performance decreases or in extensive dust applications a manually filter cleaning operation is recommended:
- Switch off the machine.
- Close the nozzles or suction hose opening with the palm of your hand.
- Turn the switch to position „I“ and let the machine operate at full speed for approx. 10 seconds with the suction hose opening closed.
If suction power is still reduced take out the filter and clean mechanically or replace filter.
For certain applications, like wet pick up, it is recommended to turn off the automatic filter cleaning system. For details see chapter 3.1.
3.4 Antistatic connection
CAUTION

The machine is equipped with an antistatic system to discharge any static electricity that develop during dust pick-up.
The antistatic system is placed in front part of the motor top and creates an earth ground connection to the inlet fitting of the container.
For proper function the use of an electrical conductive or antistatic suction hose is recommended.
- When inserting the optional disposal bag make sure the antistatic connection is kept.
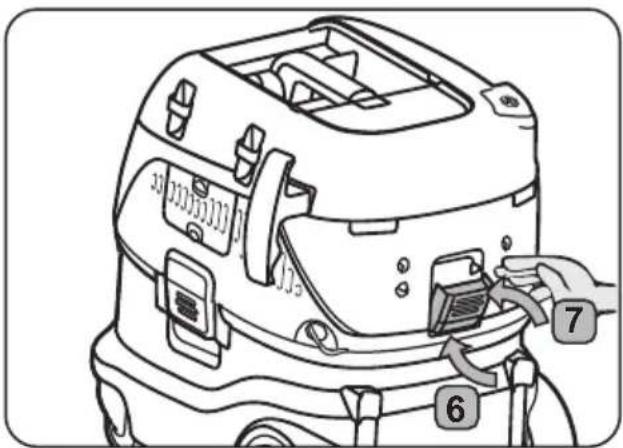
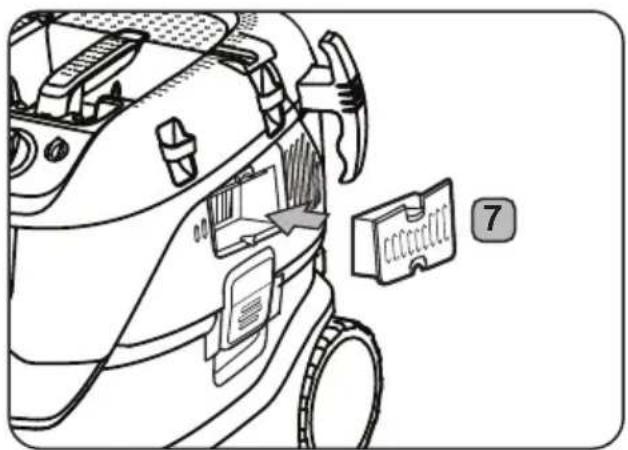
3.5 Cooling air filter
To protect the electronics and motor, the machine is equipped with a cooling air diffusor. Clean the cooling air diffusor regularly.
For areas with a high concentration of fine dust in the surrounding air it is recommended to equip the machine with an optional cooling air filter cartridge to prevent dust from settling inside the air channels and motor. Contact your local sales representative.
CAUTION

If cooling air filter is clogged by dust the overload protection switch in the motor can be acti-
- In such case switch off the machine, clean cooling air filter and allow machine to cool for approx. 5 minutes.
3.6 Wet pick-up
CAUTION
The machine is equipped with a water level limit system which shuts off the machine when the maximum liquid level is reached.
- When this occurs, switch off the machine.
- Disconnect the machine from the socket and empty the container.
- Never pick up liquids without the water level limit system and filter in place.
- Do not pick up flammable liquids.
- Before liquids are picked up, always remove the filter bag/wastebag and check that the water level limit works properly.
- If foam appears, stop work immediately and emty the tank.
- Clean the water level limiting device regularly and check for signs of damage.
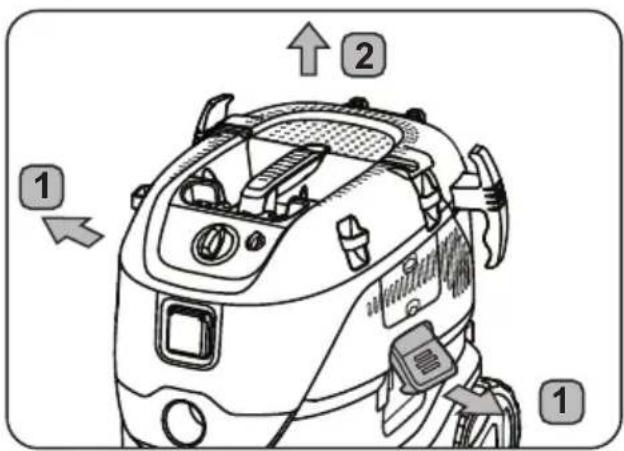
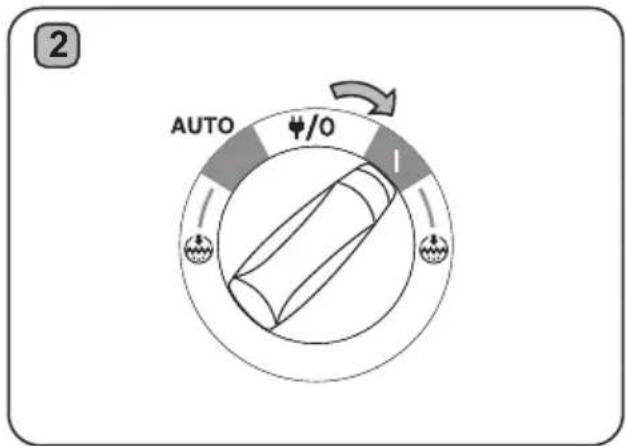
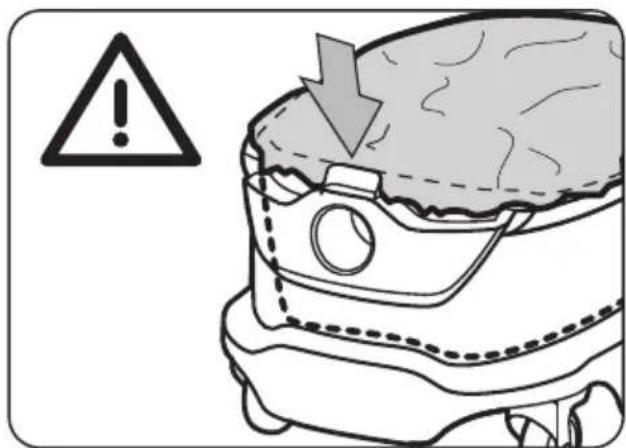
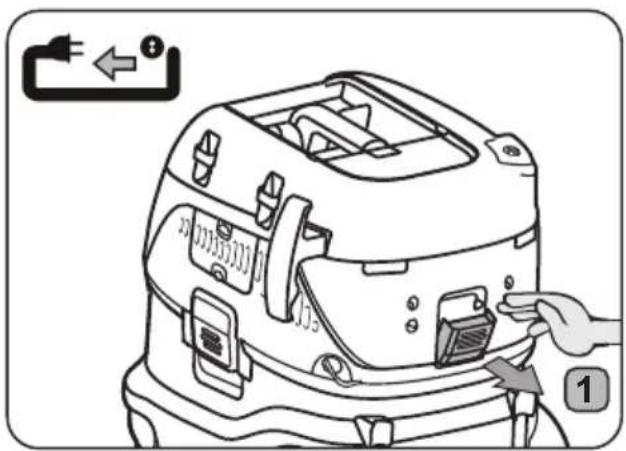
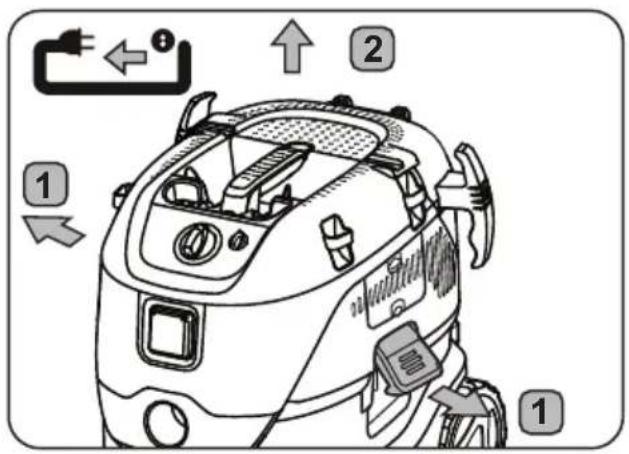
Before emptying the container, unplug the machine. Disconnect the hose from the inlet by pulling out the hose. Release the latches by pulling them outwards so that the motor top is released. Lift up the motor top from container. Always empty and clean the container and water level limit system after picking-up liquids.
Empty by tilting the container backwards or sideways and pour the liquids into a floor drain or similar.
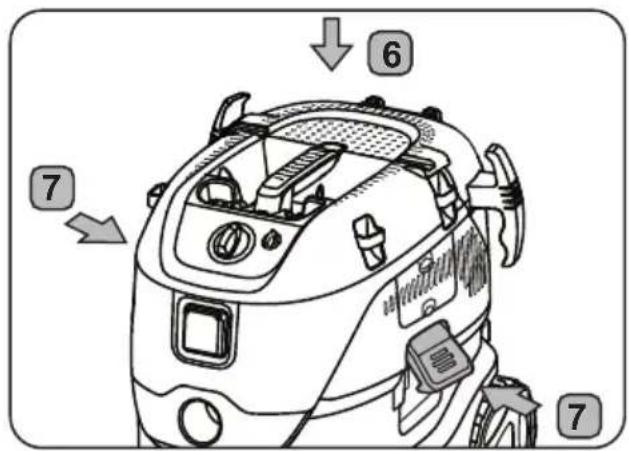
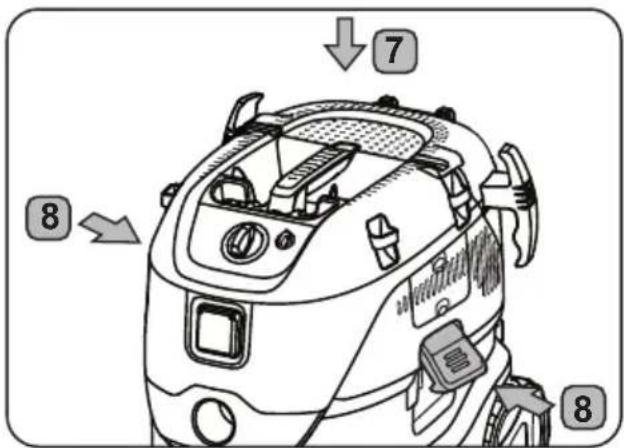
Put back the motor top to the container. Secure the motor top with the latches.
Heavy maneuvers can, by mistake, trigger the water level limiting device. Should this happen; turn off the machine and wait for 3 seconds to reset the device. Continue to operate the machine afterwards.
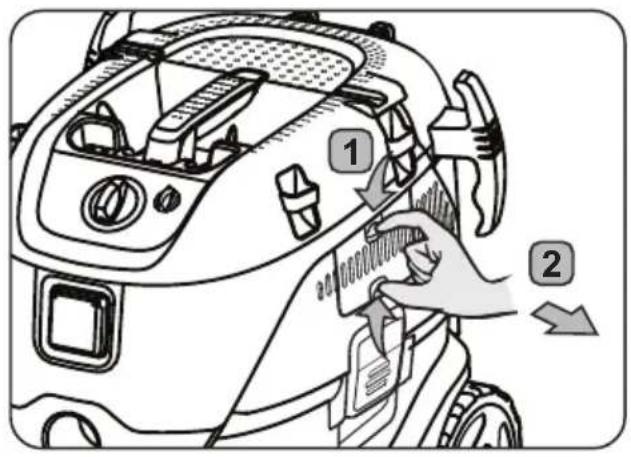
3.7 Dry pick-up
CAUTION
Picking up environmentally hazardous materials.
Materials picked up can present a hazard to the environment.
- Dispose of the dirt in accordance with legal regulations.
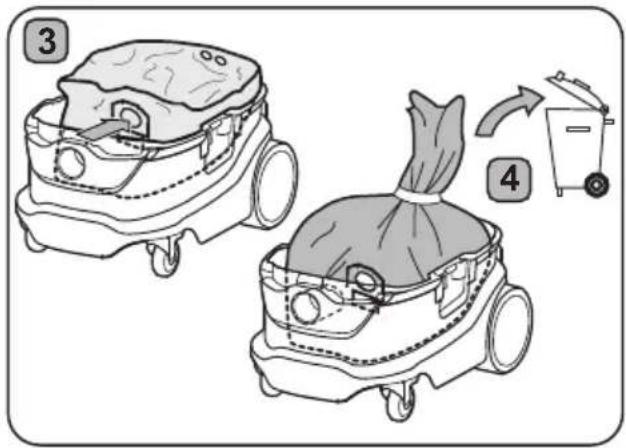
Remove the electrical plug from the socket before emptying after dry pick-up. Release the latches by pulling them outwards so that the motor top is released. Lift up the motor top from container.
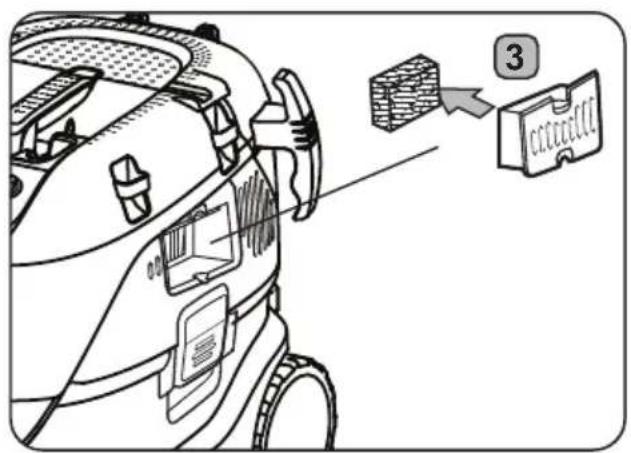
Filter: Check the filters. To clean the filter you can shake, brush or wash it. Wait until the filter is dry before re-starting dust pick-up.
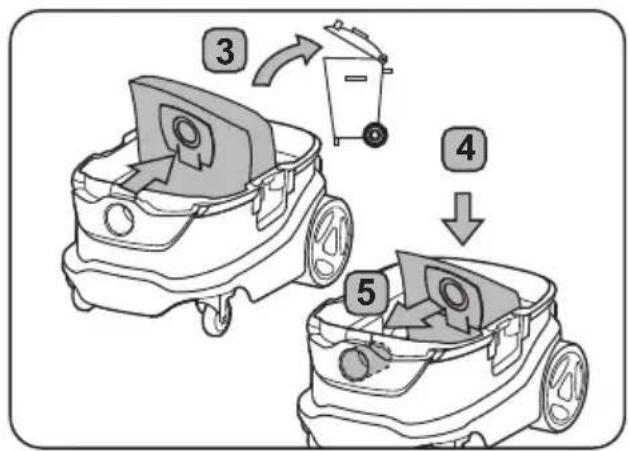
Dust bag: check bag to ensure the fill factor. Replace dust bag if necessary. Remove the old bag.
The new bag is fitted by passing the cardboard piece with the rubber membrane through the vacuum inlet. Make sure that the rubber membrane is passing past the heightening at the vacuum inlet.
After emptying: close motor top to the container and secure the motor top with the latches. Never pick up dry material without filter fitted in the machine. The suction efficiency of the machine depends on the size and quality of the filter and dust bag. Therefore – use only Original filter and dust bags.
4 After using the machine
4.1 After use
Remove the plug from the socket when machine is not in use. Wind up the cord starting from the machine. The power cord can be wound up around the motor top or at the container or placed in the included hook, or fastening means. Some variants have special storage places for accessories.
4.2 Transport
- Before transporting the machine, close all the latches.
- Do not tilt the machine if there are liquids in the dirt tank.
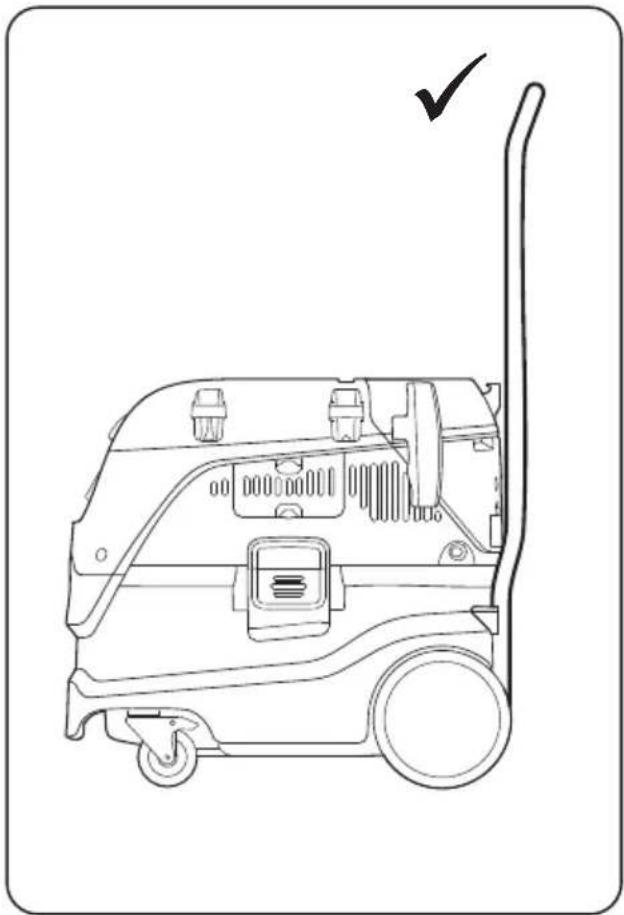
- Do not use a crane hook to lift the machine.
- Do not lift the machine by the trolley handle or the handle of the MAKPAC-Box ^1 .
4.3 Storage
Store the appliance in a dry place, protected from rain and frost. The machine shall be stored indoors only. Wet filters and the interior part of the liquid container shall be dried before storage.
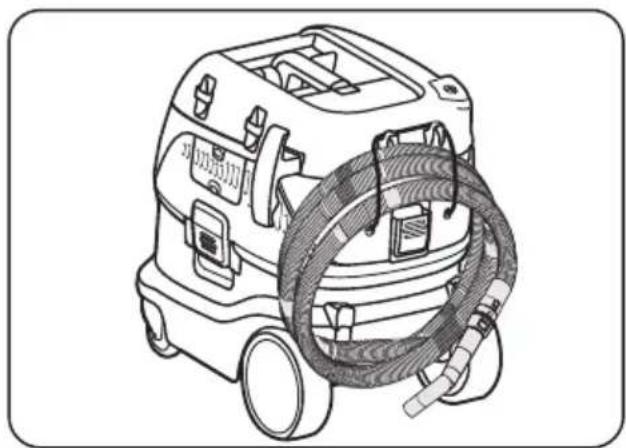
4.4 Accessory and tool storage
For convenient transport and storage of accessories or tools, integrated rails are found on side of machine which allows fastening with straps or other means. A flexible strap and hooks are included on back of machine for attachment of suction hose or mains cable. For instruction see quick reference guide.
An optional adapter plate ^4 with attachment system can be installed on top of machine for fastening of 2-point or 4-point storage cases.
Remove the electrical plug from the socket before installing the adapter plate.
CAUTION\*)
Do not lift machine in adapter plate without having storage case safely installed. Note the
weight and balance of the appliance in case of storage. Maximum weight of storage cases is 30 kg.
4.5 Recycling the machine
Make the old machine unusable.
- Unplug the machine.
- Cut the power cord.
- Do not discard of electrical appliances with household waste.
Due to the presence of hazardous components in the equipment, used electrical and electronic equipment may have a negative impact on the environment and human health.
Do not dispose of electrical and electronic appliances with household waste!
In accordance with the European Directive on waste electrical and electronic equipment and its adaptation to national law, used electrical and electronic equipment should be collected separately and delivered to a separate collection point for municipal waste, operating in accordance with the environmental protection regulations. This is indicated by the symbol of the crossed-out wheeled bin placed on the equipment.
5 Maintenance
5.1 Regular servicing and inspection
Regular servicing and inspection of your machine must be carried out by suitably qualified personnel in accordance with relevant legislation and regulations. In particular, electrical tests for earth continuity, insulation resistance, and condition of the flexible cord should be checked frequently.
In the event of any defect, the machine MUST be withdrawn from service, completely checked and repaired by an authorized service technician.
At least once a year, a Makita technician or an instructed person must perform a technical inspection including filters, air tightness and control mechanisms.
5.2 Maintenance
Remove the plug from the socket before performing maintenance. Before using the machine make sure that the frequency and voltage shown on the rating plate correspond with the mains voltage.
The machine is designed for continuous heavy work. Depending on the number of running hours – the dust filter should be renewed. Keep the machine clean with a dry cloth, and a small amount of spray polish.
During maintenance and cleaning, handle the machine in such a manner that there is no danger for maintenance staff or other persons.
In the maintenance area:
• Use filtered compulsory ventilation
- Wear protective clothing
- Clean the maintenance area so that no harmful substances get into the surroundings
During maintenance and repair work all contaminated parts that could not be cleaned satisfactorily must be:
- Packed in well sealed bags
- Disposed of in a manner that complies with valid regulations for such waste removal.
For details of after sales service contact your dealer or Makita service representative responsible for your country. See reverse of this document.
6 Further information
6.1 EC Declaration of conformity
For European countries only:
We hereby declare that the machine described below complies with the relevant basic safety and health requirements of the EU Directives, both in its basic design and construction as well as in the version put into circulation by us. This declaration shall cease to be valid if the machine is modified without our prior approval.
Product: Wet and dry vacuum cleaner Type: VC4210L
Relevant EU Directives: 2006/42/EC, 2014/30/EU, 2011/65/EU
Applied harmonized standards: EN 60335-1:2012+A11:2014+A13:2017 EN 60335-2-69:2012 EN 55014-1:2017 EN 55014-2:2015 EN IEC 61000-3-2:2019 EN 61000-3-3:2013+A1:2019 EN IEC 63000:2018
Authorised Documentation Representative: Makita Europe N.V., Jan-Baptist Vinkstraat 2, 3070 Kortenberg, Belgium
01.07.2020
Hiroshi Tsujimura
Director - Makita Europe N.V.
Makita Europe N.V., Jan-Baptist Vinkstraat 2, 3070 Kortenberg, Belgium
6.2 UK Declaration of conformity
For UK only:
We hereby declare that the machine described below complies with the relevant basic safety and health requirements of the UK Regulations, both in its basic design and construction as well as in the version put into circulation by us. This declaration shall cease to be valid if the machine is modified without our prior approval.
Product: Wet and dry vacuum cleaner
Type: VC4210L
Relevant UK Regulations:
S.I. 2008/1597 (as amended), S.I. 2016/1091 (as amended), S.I. 2012/3032 (as amended)
Applied Designated standards:
EN 60335-1:2012+A11:2014+A13:2017
EN 60335-2-69:2012
EN 55014-1:2017
EN 55014-2:2015
EN IEC 61000-3-2:2019
EN 61000-3-3:2013+A1:2019
EN IEC 63000:2018
Authorised Documentation Representative:
Makita Europe N.V., Jan-Baptist Vinkstraat 2, 3070 Kortenberg, Belgium
01.07.2020
Hiroshi Tsujimura
Director - Makita Europe N.V.
Makita Europe N.V., Jan-Baptist Vinkstraat 2, 3070 Kortenberg, Belgium
Importer: Makita (UK) Limited, Michigan Drive,
Tongwell, Milton Keynes, Buckinghamshire, MK15 8JD, UK
6.3 Specifications
| Makita VC4210L | |||||||
| EU / FR / RU AU / NZ CH GB CA / US / MX | |||||||
| Mains Voltage V 220-240 220-240 220-240 110-1 | 20 | ||||||
| Mains frequency Hz 50/60 50/60 | |||||||
| Power consumption W 1200 890 / 7.4 A | |||||||
| Connected load for appliance socket | W | 2400 | 1100 | 1100 | 1700 | 550 / 4.6 A | |
| Total connected load | W | 3600 | 2300 | 2300 | 2900 | 1440 / 12 A | |
| Fuse | A | 16 | 10 | 13 | 15 | ||
| Volume flow (air) max.) | l/min / m3/h / cfm | 4500 / 270 / 158 | 4200 / 252 / 148 | ||||
| Vacuum | mbar / hPa / H2O Lift | 250 / 250 / 100" | 230 / 230 / 92" | ||||
| Sound pressure level (IEC 60335-2-69) | dB(A) | 68 ±2 | |||||
| Sound level | dB(A) | 60 ±2 | |||||
| Hand-arm vibration | m/s2 | <2.5 | |||||
| Power cord length | m / ft | 7.5 / 24.6 | |||||
| Power cord type | H07RN-F 3G1.5 mm2 | H05RN-F 3G1.00 mm2 | H07RN-F 3G1.5 mm2 | SJTW-A 3AWG14 | |||
| Protection class | I | ||||||
| Type of protection | IPX4 | ||||||
| Radio interference suppression level | EN 55014-1 | ||||||
| Dust class | L | HEPA | |||||
| Filter cleaning | Automatic | ||||||
| Tank volume | max. | I (UKgal /USgal) | 42 (9,2 / 11,1) | ||||
| dust I (UKgal /USgal) | 34 (7,5 / 9,0) | ||||||
| water | I (UKgal /USgal) | 30 (6,6 / 8,9) | |||||
| Width | mm (in) | 385 (15.2) | |||||
| Depth | mm (in) | 575 (22.6) | |||||
| Height | mm (in) | 605 (23.8) | |||||
| Weight (net, most common application) | kg (lb) | 16.0 (35.3) | |||||
| Approvals | CE / CE / EAC | RCM | CE | CE | ANSI Approval / CSAus1017 | ||
* measured at turbine
Specifications and details are subject to change without prior notice.
Director - Makita Europe N.V.
Makita Europe N.V., Jan-Baptist Vinkstraat 2, 3070 Kortenberg, Belgium
Director - Makita Europe N.V.
Makita Europe N.V., Jan-Baptist Vinkstraat 2, 3070 Kortenberg, Belgium
Director - Makita Europe N.V.
Makita Europe N.V., Jan-Baptist Vinkstraat 2, 3070 Kortenberg, Belgium
Director - Makita Europe N.V.
Makita Europe N.V., Jan-Baptist Vinkstraat 2, 3070 Kortenberg, Belgium
6.2 Spesifikasjoner
| Makita VC4210L | |||||||
| EU / FR / RU AU / NZ CH GB CA / US / MX | |||||||
| Nettspenning V 220-240 220-240 220-240 110-120 | |||||||
| Nettfrekvens Hz 50/60 50/60 | |||||||
| Effektopptak W 1200 890 / 7,4 A | |||||||
| Tilkoplingsverdi for apparatstikkontakt | W | 2400 | 1100 | 1100 | 1700 | 550 / 4,6 A | |
| Total tilkoplingsverdi | W | 3600 | 2300 | 2300 | 2900 | 1440 / 12 A | |
| Nettsikring | A | 16 | 10 | 13 | 15 | ||
| Luft-volumstrøm max.°) | l/min (m3/h) | 4500 (270) | 4200 (252) | ||||
| Undertrykk | mbar (hPa) | 250 (250) | 230 (230) | ||||
| Måleflate-lydtrykknivå (IEC 60335-2-69) | dB(A) | 68 ±2 | |||||
| Arbeidsstøy | dB(A) | 60 ±2 | |||||
| Hånd-arm vibrasjon | m/s2 | <2,5 | |||||
| Nettilkoplingsledning: Lengde | m | 7,5 | |||||
| Nettilkoplingsledning: Type | H07RN-F 3G1,5 mm2 | H05RN-F 3G1,00 mm2 | H07RN-F 3G1,5 mm2 | SJTW-A 3AWG14 | |||
| Beskyttelsesklasse | I | ||||||
| Beskyttelsestype | IPX4 | ||||||
| Radiostøydempingsgrad | EN 55014-1 | ||||||
| Støvklasse | L | ||||||
| Beholdervolum | maks. | I (UKgal /USgal) | 42 (9,2 / 11,1) | ||||
| støv | I (UKgal /USgal) | 34 (7,5 / 9,0) | |||||
| vann | I (UKgal /USgal) | 30 (6,6 / 8,9) | |||||
| Bredde | mm (in) | 385 (15,2) | |||||
| Dybde | mm (in) | 575 (22,6) | |||||
| Høyde | mm (in) | 605 (23,8) | |||||
| Vekt inkl. tilbehør (netto, mest vanlig applikasjon) | kg (lb) | 16,0 (35,3) | |||||
Director - Makita Europe N.V.
Makita Europe N.V., Jan-Baptist Vinkstraat 2, 3070 Kortenberg, Belgium
6.2 Specifikationer
| Makita VC4210L | |||||||
| EU / FR / RU AU / NZ CH GB CA / US / MX | |||||||
| Spænding V 220-240 220-240 220-240 110-120 | |||||||
| Netfrekvens Hz 50/60 50/60 | |||||||
| Effektforbrug W 1200 890 / 7,4 A | |||||||
| Apparatets stikdåse | W | 2400 | 1100 | 1100 | 1700 | 550 / 4,6 A | |
| Effektforbrug | W | 3600 | 2300 | 2300 | 2900 | 1440 / 12 A | |
| Sikring | A | 16 | 10 | 13 | 15 | ||
| Luft-volumenstrøm max.°) | l/min (m3/h) | 4500 (270) | 4200 (252) | ||||
| Undertryk | mbar (hPa) | 250 (250) | 230 (230) | ||||
| Måleareallydtryksniveau (IEC 60335-2-69) | dB(A) | 68 ±2 | |||||
| Arbejdsstøj | dB(A) | 60 ±2 | |||||
| Hånd-arm vibrationer | m/s2 | <2,5 | |||||
| Netledning, længde | m | 7,5 | |||||
| Netledning, type | H07RN-F 3G1,5 mm2 | H05RN-F 3G1,00 mm2 | H07RN-F 3G1,5 mm2 | SJTW-A 3AWG14 | |||
| Beskyttelsesklasse | I | ||||||
| Beskyttelsesart | IPX4 | ||||||
| Radiostojdæmpningsgrad | EN 55014-1 | ||||||
| Støvklasse | L | ||||||
| Beholdervolumen | max. | I (UKgal /USgal) | 42 (9,2 / 11,1) | ||||
| støv | I (UKgal /USgal) | 34 (7,5 / 9,0) | |||||
| vand | I (UKgal /USgal) | 30 (6,6 / 8,9) | |||||
| Bredde | mm (in) | 385 (15,2) | |||||
| Dybde | mm (in) | 575 (22,6) | |||||
| Højde | mm (in) | 605 (23,8) | |||||
| Vægt inkl. tilbehør (netto, de mest almindelige anvendelse) | kg (lb) | 16,0 (35,3) | |||||
Director - Makita Europe N.V.
Makita Europe N.V., Jan-Baptist Vinkstraat 2, 3070 Kortenberg, Belgium
6.2 Tekniset tiedot
Director - Makita Europe N.V.
Makita Europe N.V., Jan-Baptist Vinkstraat 2, 3070 Kortenberg, Belgium
Director - Makita Europe N.V.
Makita Europe N.V., Jan-Baptist Vinkstraat 2, 3070 Kortenberg, Belgium
6.2 Especificações
Director - Makita Europe N.V.
Makita Europe N.V., Jan-Baptist Vinkstraat 2, 3070 Kortenberg, Belgium
6.2 Specifikacije
| Makita VC4210L | |||||||
| EU / FR / RU AU / NZ CH GB CA / US / MX | |||||||
| Omrežna napetost V 220-240 220-240 220-240 | 110-120 | ||||||
| Frekvenca omrežja Hz 50/60 50/60 | |||||||
| Sprejem moči W | 1 | 2 | |||||
| Priključna vrednost za vtičnico naprave | W | 2400 | 1100 | 1100 | 1700 | 550 / 4,6 A | |
| Sprejem moči | W | 3600 | 2300 | 2300 | 2900 | 1440 / 12 A | |
| Omrežna varovalka | A | 16 | 10 | 13 | 15 | ||
| Zračni volumski tok max.1) | l/min (m3/h) | 4500 (270) | 4200 (252) | ||||
| Podtlak | mbar (hPa) | 250 (250) | 230 (230) | ||||
| Merilna površinska jakost zvoka (IEC 60335-2-69) | dB(A) | 68 ±2 | |||||
| Hrup pri delu | dB(A) | 60 ±2 | |||||
| Vibracije dlan-roka | m/s2 | <2,5 | |||||
| Omrežni priključek: Dolžina | m | 7,5 | |||||
| Omrežni priključek: Tip | H07RN-F 3G1,5 mm2 | H05RN-F 3G1,00 mm2 | H07RN-F 3G1,5 mm2 | SJTW-A 3AWG14 | |||
| Zaščitni razred | I | ||||||
| Način zaščite | IPX4 | ||||||
| Stopnja radijskih motenj | EN 55014-1 | ||||||
| Klasifikacija prahu – razred | L | ||||||
| Volumen posode | maks. | I (UKgal /USgal) | 42 (9,2 / 11,1) | ||||
| prahu | I (UKgal /USgal) | 34 (7,5 / 9,0) | |||||
| vode | I (UKgal /USgal) | 30 (6,6 / 8,9) | |||||
| Širina | mm (in) | 385 (15,2) | |||||
| Globina | mm (in) | 575 (22,6) | |||||
| Višina | mm (in) | 605 (23,8) | |||||
| Teža vklj. dodatna oprema (neto, najpogostejša uporaba) | kg (lb) | 16,0 (35,3) | |||||
Director - Makita Europe N.V.
Makita Europe N.V., Jan-Baptist Vinkstraat 2, 3070 Kortenberg, Belgium
6.2 Specifikacije
| Makita VC4210L | |||||||
| EU / FR / RU AU / NZ CH GB CA / US / MX | |||||||
| Napon V 220-240 220-240 220-240 110-120 | |||||||
| Mrežna frekvencija Hz 50/60 50/60 | |||||||
| Primanje snage W 1200 890 / 7,4 A | |||||||
| Priključna vrijednost za utičnicu uređaja | W | 2400 | 1100 | 1100 | 1700 | 550 / 4,6 A | |
| Primanje snage | W | 3600 | 2300 | 2300 | 2900 | 1440 / 12 A | |
| Osiguranje | A | 16 | 10 | 13 | 15 | ||
| Volumen strujanja zraka max.) | l/min (m3/h) | 4500 (270) | 4200 (252) | ||||
| Podtlak | mbar (hPa) | 250 (250) | 230 (230) | ||||
| Razina bučnog tlaka mjerne površine (IEC 60335-2-69) | dB(A) | 68 ±2 | |||||
| Radna buka | dB(A) | 60 ±2 | |||||
| Vibracije prenose na šake i ruke sustava | m/s2 | <2,5 | |||||
| Mrežni vod: Dužina | m | 7,5 | |||||
| Mrežni vod: Tip | H07RN-F 3G1,5 mm2 | H05RN-F 3G1,00 mm2 | H07RN-F 3G1,5 mm2 | SJTW-A 3AWG14 | |||
| Klasa zaštite | I | ||||||
| Vrsta zaštite | IPX4 | ||||||
| Stupanj otklanjanja radio smetnji | EN 55014-1 | ||||||
| Klasa prašine | L | ||||||
| Volumen spremnika | maks. | I (UKgal /USgal) | 42 (9,2 / 11,1) | ||||
| prašina | I (UKgal /USgal) | 34 (7,5 / 9,0) | |||||
| voda | I (UKgal /USgal) | 30 (6,6 / 8,9) | |||||
| Širina | mm (in) | 385 (15,2) | |||||
| Dubina | mm (in) | 575 (22,6) | |||||
| Visina | mm (in) | 605 (23,8) | |||||
| Težina uklj. pribor (neto, najčešći zahtjev) | kg (lb) | 16,0 (35,3) | |||||
* mjereno na turbini
Specifikacije i detalji mogu se mijenjati bez prethodne najave.
Director - Makita Europe N.V.
Makita Europe N.V., Jan-Baptist Vinkstraat 2, 3070 Kortenberg, Belgium
Director - Makita Europe N.V.
Makita Europe N.V., Jan-Baptist Vinkstraat 2, 3070 Kortenberg, Belgium
Director - Makita Europe N.V.
Makita Europe N.V., Jan-Baptist Vinkstraat 2, 3070 Kortenberg, Belgium
6.2 Műszaki adatok
Director - Makita Europe N.V.
Makita Europe N.V., Jan-Baptist Vinkstraat 2, 3070 Kortenberg, Belgium
6.2 Specificații
Director - Makita Europe N.V.
Makita Europe N.V., Jan-Baptist Vinkstraat 2, 3070 Kortenberg, Belgium
6.2 Спецификации
Director - Makita Europe N.V.
Makita Europe N.V., Jan-Baptist Vinkstraat 2,
3070 Kortenberg, Belgium
LUGEGE LÄBI KÖIK OHUTUSJUHISED JA PIDAGE NEIST KINNI.
Director - Makita Europe N.V.
Makita Europe N.V., Jan-Baptist Vinkstraat 2, 3070 Kortenberg, Belgium
6.2 Tehnilised andmed
Director - Makita Europe N.V.
Makita Europe N.V., Jan-Baptist Vinkstraat 2,
3070 Kortenberg, Belgium
Director - Makita Europe N.V.
Makita Europe N.V., Jan-Baptist Vinkstraat 2,
3070 Kortenberg, Belgium
Director - Makita Europe N.V.
Makita Europe N.V., Jan-Baptist Vinkstraat 2, 3070 Kortenberg, Belgium
Director - Makita Europe N.V.
Makita Europe N.V., Jan-Baptist Vinkstraat 2, 3070 Kortenberg, Belgium
6.2 Технички подаци