SSW 18 LT 200 - Screwdriver METABO - Free user manual and instructions
Find the device manual for free SSW 18 LT 200 METABO in PDF.
| Technical specifications | METABO SSW 18 LT 200 cordless screwdriver, 18 V voltage, max torque 200 Nm, no-load speed 0-2400 rpm. |
|---|---|
| Usage | Ideal for screwing and unscrewing in various materials, including wood and metal. |
| Maintenance and repair | Regularly check the condition of the battery and accessories. Clean the motor and vents to prevent overheating. |
| Safety | Use safety glasses and gloves. Do not exceed the tool's capacity limits. |
| General information | Lightweight for prolonged use, compatible with METABO 18V batteries. 3-year warranty on the tool. |
Frequently Asked Questions - SSW 18 LT 200 METABO
User questions about SSW 18 LT 200 METABO
0 question about this device. Answer the ones you know or ask your own.
Ask a new question about this device
Download the instructions for your Screwdriver in PDF format for free! Find your manual SSW 18 LT 200 - METABO and take your electronic device back in hand. On this page are published all the documents necessary for the use of your device. SSW 18 LT 200 by METABO.
USER MANUAL SSW 18 LT 200 METABO
SSD 18 LT SSD 18 LTX 200 SSW 18 LT SSW 18 LTX 200
natural_image
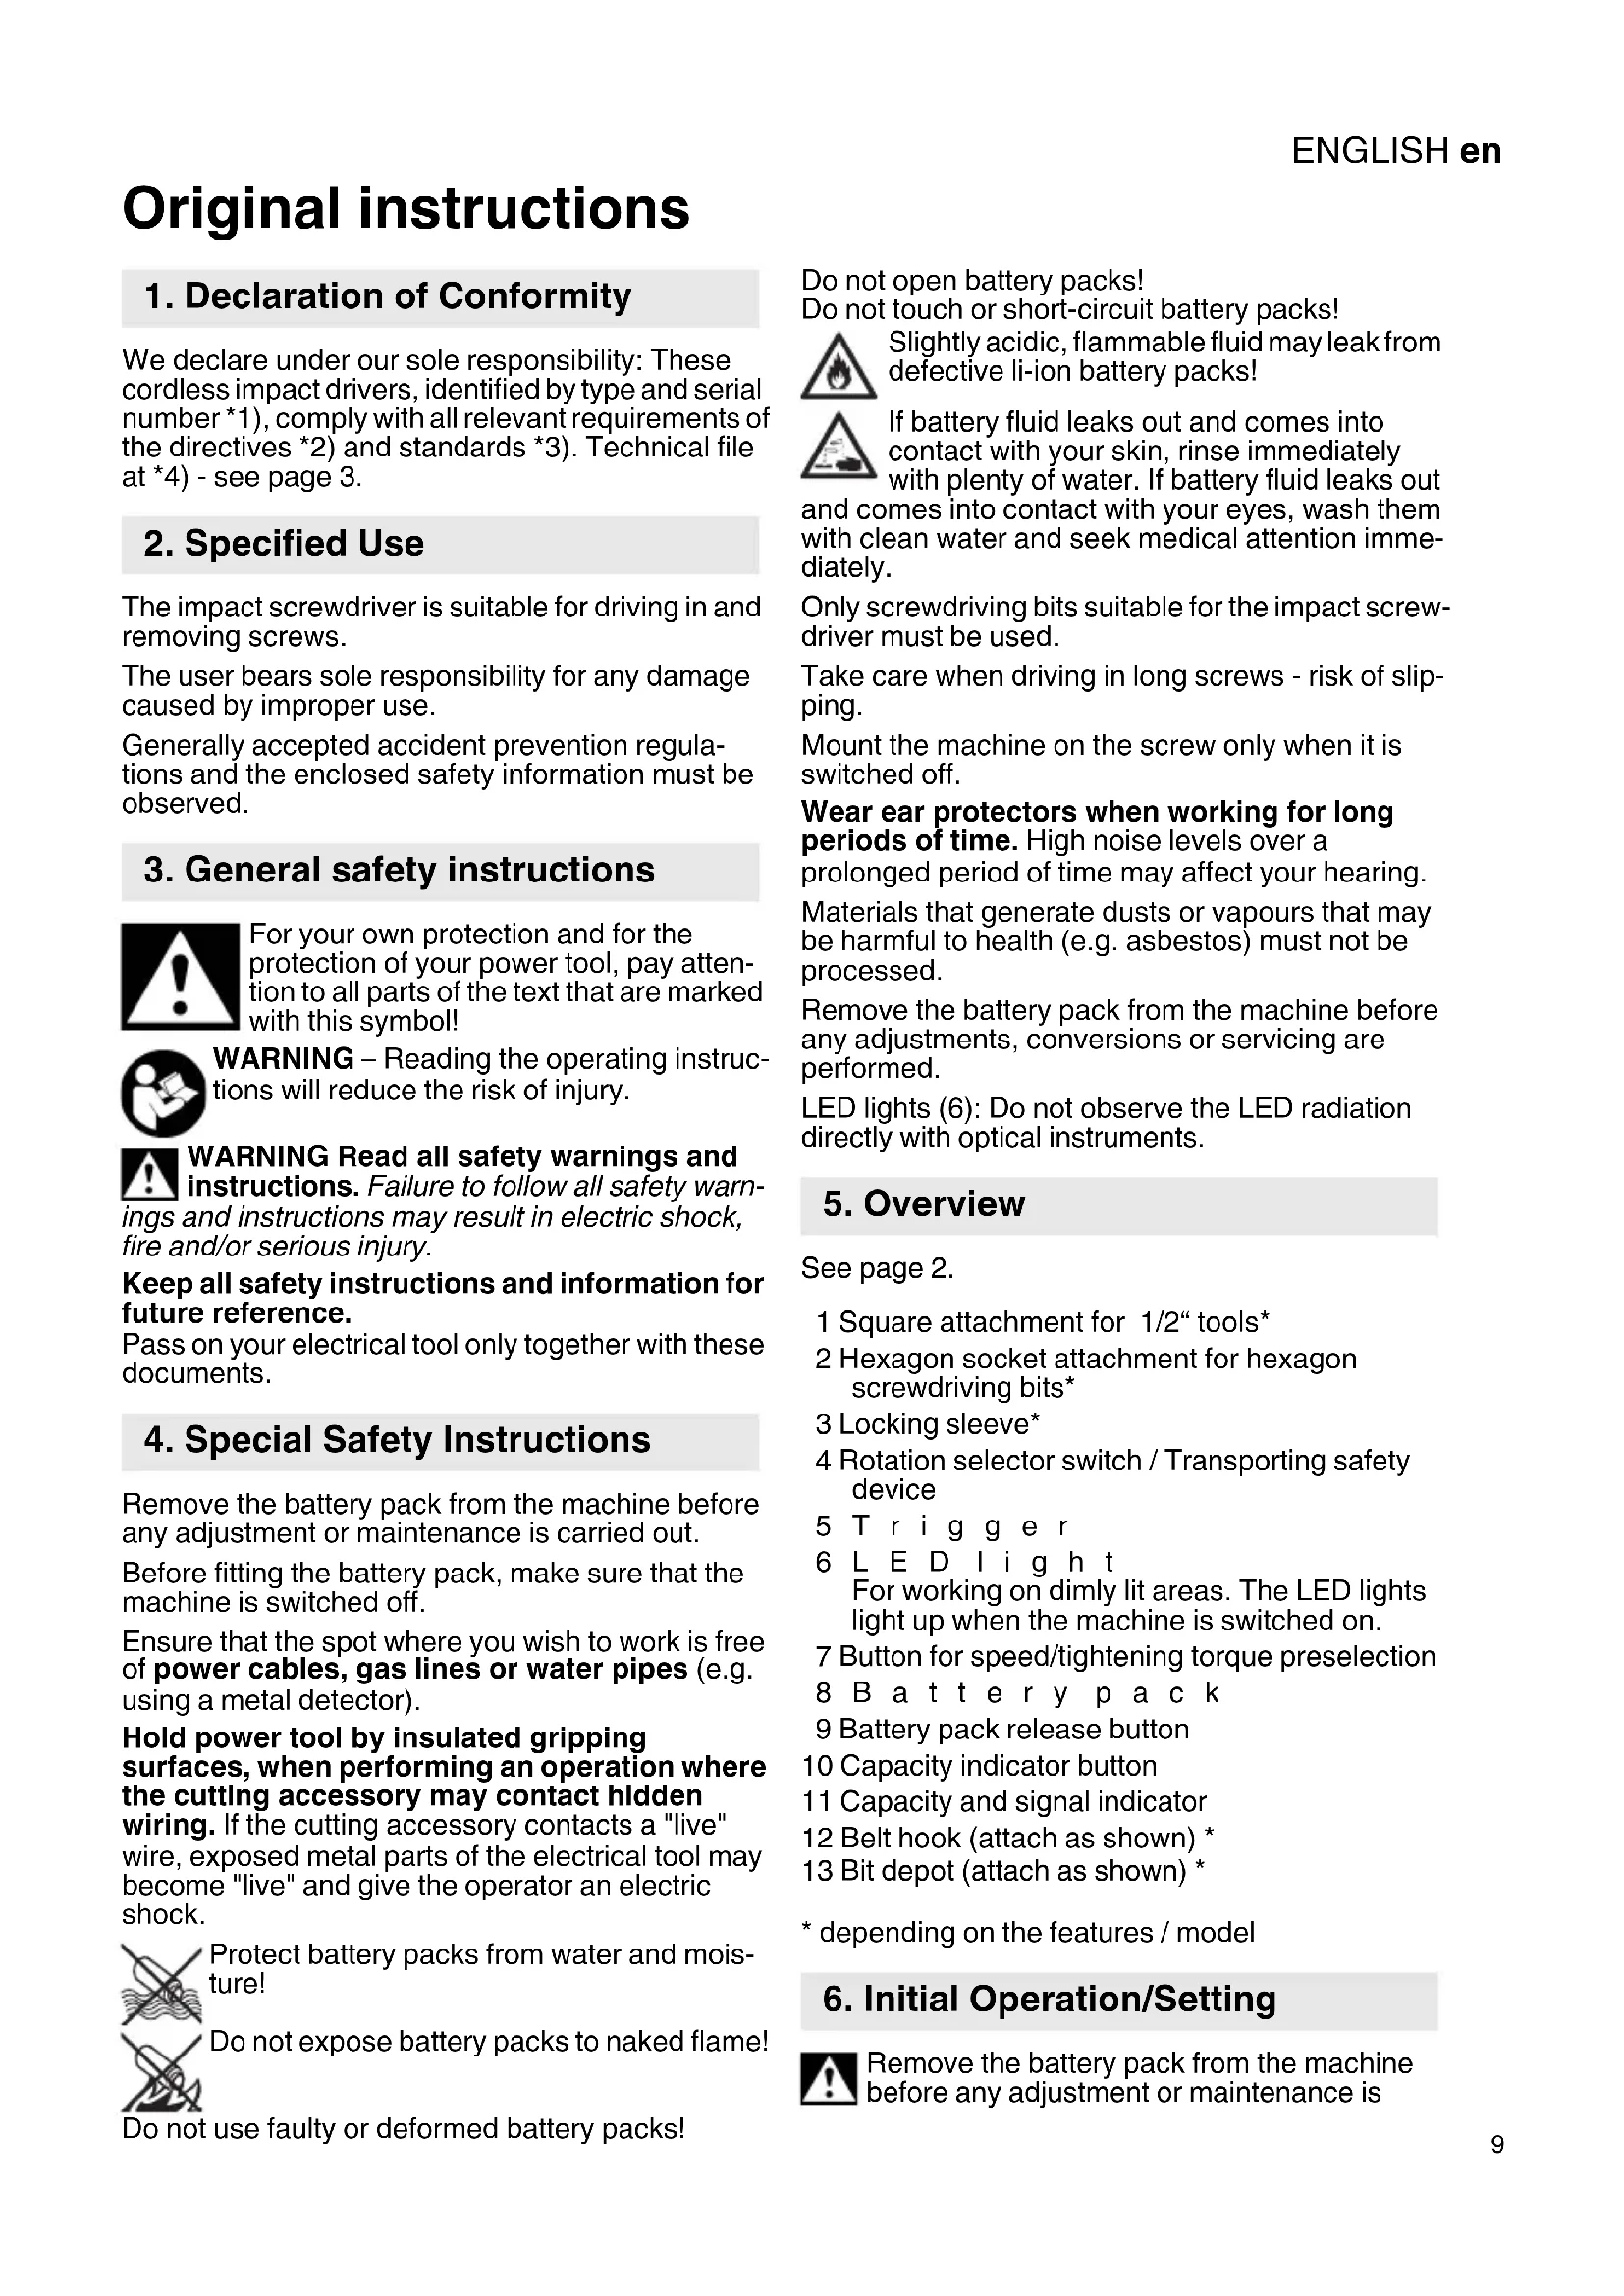
Two black metal-lift power drillers with 4.0Ah batteries and 18V Li-Power Extreme status (no visible text beyond branding)
de Originalbetriebsanleitung 5
en Original instructions 9
fr Notice d'utilisation originale 12
nl Oorspronkelijke gebruiksaanwijzing 16
it Istruzioni per l'uso originali 20
es Manual original 24
pt Manual original 28
sv Bruksanvisning i original 32
fi Alkuperäinen käyttöopas 35
no Original bruksanvisning 38
da Original brugsanvisning 41
pl Instrukcja oryginalna 44
el Πρωτότυπες οδηγίες λειτουργίας 48
hu Eredeti használati utasítás 52
ru Оригинальное руководство по эксплуатации 55
SSW...
1

natural_image
Close-up of a metalworking drill bit with 'metabo' branding (no additional text or symbols visible)SSD...
2

text_image
metabo 4.0 Ah AIR COOLED 18 V Li-Power Extreme3
4
5
6
7
8
2
3
4
5
6
7
8
2
3
4
5
6
7
8
2
3
4
5
6
7
8
2
3
4
5
6
7
8
2
3
4
5
6
7
8
2
3
4
5
6
7
8
2
3
4
5
6
7
8
2
3
4
5
6
7
8
2
3
4
5
6
7
8
2
3
4
5
6
7
8
| SSD 18 LTSSD 18 LTX 200*1) Serial Number: 02196... | SSW 18 LTSSW 18 LTX 200*1) Serial Number: 02195... | ||
| U | V | 18 18 | |
| n_0 | /min, rpm 0 | -1000 / 0-1850 / 0-2500 0-900 / 0-1 | 650 / 0-2300 |
| S /min | bpm 2100 / 2750 / 3300 1900 / 2500 / 3000 | ||
| H | - | 1/4" (6,35 mm) 1/2" (12,7mm) | |
| m | k g | ( I b | s ) 1,6 (3,5) 1,6 (3,5) |
| M_max.,I | Nm (in-lbs) | 75 (665) | 100 (885) |
| M_max.,II | Nm (in-lbs) | 120 (1065) | 140 (1240) |
| M_max.,III | Nm (in-lbs) | 150 (1330) | 210 (1860) |
| a_h/K_h | m/s^2 | 8 / 1,5 | 9,1 / 1,5 |
| L_pA/K_pA | dB(A) | 95 / 3 | 96 / 3 |
| L_WA/K_WA | dB(A) | 106 / 3 | 107 / 3 |

*2) 2004/108/EC (-> 19.04.2016) / 2014/30/EU (20.04.2016 ->), 2006/42/EC, 2011/65/EU
*3) EN 60745-1:2009+A11:2010, EN 60745-2-2:2010
2016-02-10, Volker Siegle
ASC 15, ASC 30, ASC 30-36, SC 60 Plus
B
text_image
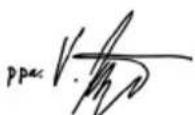
18 V 3,0 Ah 6.25455 Li-Power Extreme 18 V 4,0 Ah 6.25527 Li-Power Extreme 18 V 5,2 Ah 6.25587 Li-Power Extreme© SSD...:
text_image
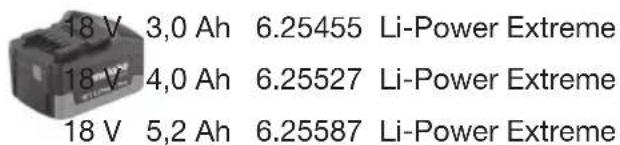
6.28849 6.28850 etc. 6.28838(D) SSW...:
text_image
6.28831 6.28832 1/2" 1/4" 6.28836text_image
9,5 mm (3/8")
Original instructions
1. Declaration of Conformity
We declare under our sole responsibility: These cordless impact drivers, identified by type and serial number *1), comply with all relevant requirements of the directives *2) and standards *3). Technical file at *4) - see page 3.
2. Specified Use
The impact screwdriver is suitable for driving in and removing screws.
The user bears sole responsibility for any damage caused by improper use.
Generally accepted accident prevention regulations and the enclosed safety information must be observed.
3. General safety instructions

For your own protection and for the protection of your power tool, pay attention to all parts of the text that are marked with this symbol!

WARNING – Reading the operating instructions will reduce the risk of injury.

WARNING Read all safety warnings and instructions. Failure to follow all safety warn-
ings and instructions may result in electric shock, fire and/or serious injury.
Keep all safety instructions and information for future reference.
Pass on your electrical tool only together with these documents.
4. Special Safety Instructions
Remove the battery pack from the machine before any adjustment or maintenance is carried out.
Before fitting the battery pack, make sure that the machine is switched off.
Ensure that the spot where you wish to work is free of power cables, gas lines or water pipes (e.g. using a metal detector).
Hold power tool by insulated gripping surfaces, when performing an operation where the cutting accessory may contact hidden wiring. If the cutting accessory contacts a "live" wire, exposed metal parts of the electrical tool may become "live" and give the operator an electric shock.
Protect battery packs from water and moisture!
Do not expose battery packs to naked flame!
Do not use faulty or deformed battery packs!
Do not open battery packs!
Do not touch or short-circuit battery packs!

Slightly acidic, flammable fluid may leak from defective li-ion battery packs!

If battery fluid leaks out and comes into contact with your skin, rinse immediately with plenty of water. If battery fluid leaks out and comes into contact with your eyes, wash them with clean water and seek medical attention immediately.
Only screwdriving bits suitable for the impact screwdriver must be used.
Take care when driving in long screws - risk of slipping.
Mount the machine on the screw only when it is switched off.
Wear ear protectors when working for long periods of time. High noise levels over a prolonged period of time may affect your hearing.
Materials that generate dusts or vapours that may be harmful to health (e.g. asbestos) must not be processed.
Remove the battery pack from the machine before any adjustments, conversions or servicing are performed.
LED lights (6): Do not observe the LED radiation directly with optical instruments.
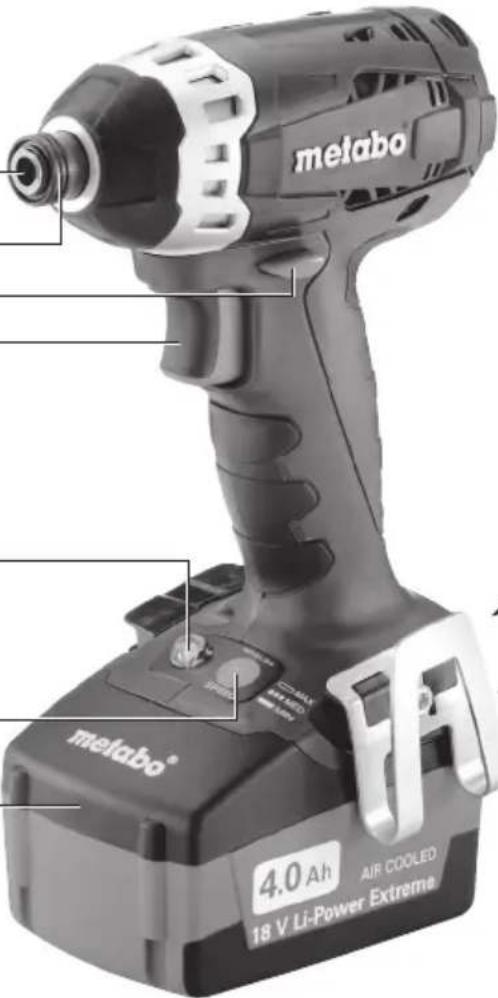
5. Overview
See page 2.
1 Square attachment for 1/2" tools*
2 Hexagon socket attachment for hexagon screwdriving bits*
3 Locking sleeve*
4 Rotation selector switch / Transporting safety device
5 Trigger
6 LED light
For working on dimly lit areas. The LED lights light up when the machine is switched on.
7 Button for speed/tightening torque preselection
8 Battery pack
9 Battery pack release button
10 Capacity indicator button
11 Capacity and signal indicator
12 Belt hook (attach as shown) *
13 Bit depot (attach as shown) *
* depending on the features / model
6. Initial Operation/Setting

Remove the battery pack from the machine before any adjustment or maintenance is
ENGLISHen
carried out. Before fitting the battery pack, make sure that the machine is switched off.
6.1 Battery pack
Charge the battery pack before use (8).
If performance diminishes, recharge the battery pack.
The ideal storage temperature is between 10^ C and 30^ C.
"Li-Power" li-ion battery packs have a capacity and signal indicator: (11)
- Press the button (10), the LEDs indicate the charge level.
- If one LED is flashing, the battery pack is almost flat and must be recharged.
Removal:
Press the battery pack release (9) button and pull the battery pack (8) forwards.
Inserting:
Slide in the battery pack (8) until it engages.
6.2 Setting the direction of rotation, engaging the transporting safety device (switch-on lock)

Do not actuate the rotation selector switch or engage the transportation lock (4) unless the motor has stopped completely!
Actuate the rotation selector switch / Engage the transportation lock (4)
$$ \mathbf {R} = \text { Right rotation set } (\text { insert screws }) $$
$$ \begin{array}{c} \mathbf {L} = \text { Left rotation set } \ (\text { remove screws }) \end{array} $$
$$ \begin{array}{c} \mathbf {0} = \text { Central position:transportation lock setting } \ \text {(switch - on lock)} \end{array} $$
6.3 Switching on and off
Switching on: press the trigger switch (5).
Switching off: release the trigger switch (5).
6.4 Speed / Tightening torque
The speed and tightening torque are connected directly. The lower the speed, the lower the tightening torque.
The tightening torque is influenced in two ways:
1) Preselect maximum tightening torque.
You can select one of three tightening torque settings by pressing the button (7). The maximum tightening torques are provided in the table on page 3 ( M_MAX , M_MED , M_MIN ).
Button (7) lights up to indicate which setting is selected.
$$ \text { MAX } = \text { Does not light up } = \text { max. torque } $$
$$ \text { MED } = \text { Flashing } = \text { medium torque } $$
$$ \text { MIN } = \text { Continuously lit } = \text { min. torque } $$
2) Stepless adjustment of the tightening torque:
The speed and tightening torque can be adjusted steplessly by pressing the trigger (5) firmly or lightly, thus adapting to working conditions.
Recommendation: determine the correct setting by carrying out trial screwdriving.
6.5 Changing screwdriving bit for SSD...
Inserting screwdriving bit: Slide locking sleeve (3) forward and insert screwdriving bit as far as the stop. Release locking sleeve (3).

Pull on the screwdriver bit to check that it is correctly seated.
Removing screwdriving bit: Slide locking sleeve (3) forward and remove screwdriving bit.

Only use screwdriving bits with such plug-in ends:
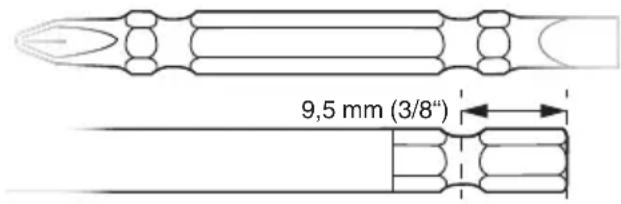
text_image
9,5 mm (3/8")
The screwdriving bit used must match the screw.

Damaged screwdriving bits must not be used.
6.6 Changing SSW... screwdriving bits
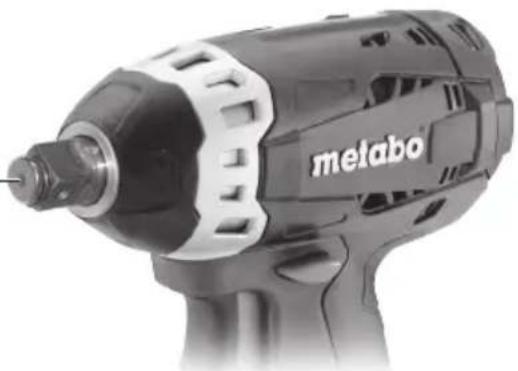
Inserting screwdriving bit: Fit the tool on the square attachment (1) until the limit stop.
Removing screwdriving bit: Pull the tool from the square attachment (1).

The screwdriving bit used must match the screw.

Damaged screwdriving bits must not be used.
7. Use
Mount the machine on the screw, ensuring it is aligned straight.
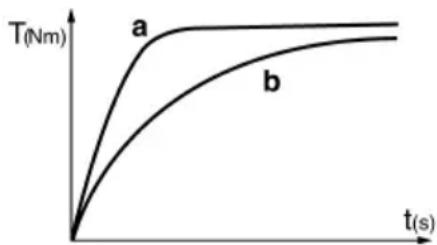
The screwdriving process has two elements: inserting the screw and tightening the screw with the percussion mechanism.
The tightening torque depends on the impact duration.
line
| t(s) | T(Nm) - Curve a | T(Nm) - Curve b | |------|-----------------|-----------------| | 0 | 0 | 0 | | t1 | ~2.5 | ~1.5 | | t2 | ~3.5 | ~2.5 | | t3 | ~4.0 | ~3.0 | | t4 | ~4.5 | ~3.5 | | t5 | ~5.0 | ~4.0 |With an impact duration of approx. 5 seconds, the maximum tightening torque has been reached.
The torque curve depends on the type of application:
With a hard screwdriving application (screw-couplings in hard material such as metal), maximum
tightening torque is already reached after a short impact duration (a).
With a soft screwdriving application (screw-couplings in soft material such as wood), a longer impact duration (b) is required.
Recommendation: determine the correct impact duration by carrying out trial screwdriving.
Caution! With small screws, maximum torque can be reached even below an impact duration of 0.5 seconds.
- This is why the duration of the screwdriving process must be monitored exactly.
- Select a suitable maximum tightening torque on button (7) (see chapter 6.4).
- Adjust the tightening torque by pressing firmly or lightly on the trigger (5), ensuring that the screw is not damaged or that the screw head does not tear off.
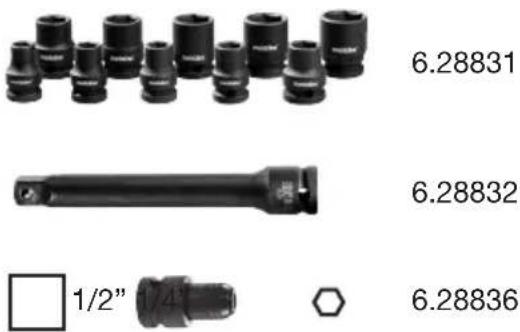
8. Accessories
Use only genuine Metabo accessories.
Use only accessories that fulfil the requirements and specifications listed in these operating instructions.
See page 4.
A Chargers
B Battery packs with different capacity
Only use battery packs with the appropriate voltage for your power tool.
C Screw driving bits
D 1 / 2 " tool
For a complete range of accessories, see www.metabo.com or the catalogue.
9. Repairs

Repairs to electrical tools must be carried out by qualified electricians ONLY!
If you have Metabo electrical tools that require repairs, please contact your Metabo service centre. For addresses see www.metabo.com.
You can download spare parts lists from www.metabo.com.
10. Environmental Protection
Observe national regulations on environmentally compatible disposal and on the recycling of disused machines, packaging and accessories.
Battery packs must not be disposed of with regular waste. Return faulty or used battery packs to your Metabo dealer!
Do not allow battery packs to come into contact with water!

Only for EU countries: Never dispose of power tools in your household waste! In accordance with European Guideline 2002/
96/EC on used electronic and electric equipment and its implementation in national legal systems, used power tools must be collected separately and handed in for environmentally compatible recycling. Before disposal, discharge the battery pack in the power tool. Prevent the contacts from short-circuiting (e.g. by protecting them with adhesive tape).
11. Technical specifications
Explanatory notes on the specifications on page 3.
Changes due to technological progress reserved.
U = Voltage of battery pack
n_0 =No-load speed
s = l m p a c t
H = Machine tool attachment
m = Weight (with smallest battery pack)
M_MAX =max. tightening torque (setting I)
M_MED = medium tightening torque (setting II)
M_MIN =min. tightening torque (setting III)
Measured values determined in conformity with EN 60745.
--- Direct current
The technical specifications quoted are subject to tolerances (in compliance with the relevant valid standards).

Emission values
Using these values, you can estimate the emissions from this power tool and compare these with the values emitted by other power tools. The actual values may be higher or lower, depending on the particular application and the condition of the tool or power tool. In estimating the values, you should also include work breaks and periods of low use. Based on the estimated emission values, specify protective measures for the user - for example, any organisational steps that must be put in place.
Vibration total value (vector sum of three directions) determined in accordance with EN 60745:
a_h = Vibration emission value(screwdriving with impact)
K_n = Uncertainty (vibration)
Typical A-effective perceived sound levels::
L_pA = Sound pressure level
L_WA = Acoustic power level
K_pA, K_WA = Uncertainty (noise level)
Wear ear protectors!

text_image
9,5 mm (3/8"
text_image
9,5 mm (3/8")
text_image
9,5 mm (3/8")
text_image
9,5 mm (3/8")
text_image
9,5 mm (3/8"
MAX = lyser ej = max. vridmoment
■■■MED = blinkande = medelmoment
MIN = fast sken = minimimoment
text_image
9,5 mm (3/8"
Skruvbitsen ska passa skruven.
text_image
9,5 mm (3/8")
line
| t(s) | T(Nm) - Curve a | T(Nm) - Curve b | |------|-----------------|-----------------| | 0 | 0 | 0 | | t1 | ~0.8 | ~0.4 | | t2 | ~1.0 | ~0.6 | | t3 | ~1.1 | ~0.7 | | t4 | ~1.2 | ~0.8 | | t5 | ~1.3 | ~0.9 | | t6 | ~1.4 | ~1.0 | | t7 | ~1.5 | ~1.1 | | t8 | ~1.6 | ~1.2 | | t9 | ~1.7 | ~1.3 | | t10 | ~1.8 | ~1.4 | | t11 | ~1.9 | ~1.5 | | t12 | ~2.0 | ~1.6 | | t13 | ~2.1 | ~1.7 | | t14 | ~2.2 | ~1.8 | | t15 | ~2.3 | ~1.9 | | t16 | ~2.4 | ~2.0 | | t17 | ~2.5 | ~2.1 | | t18 | ~2.6 | ~2.2 | | t19 | ~2.7 | ~2.3 | | t20 | ~2.8 | ~2.4 | | t21 | ~2.9 | ~2.5 | | t22 | ~3.0 | ~2.6 | | t23 | ~3.1 | ~2.7 | | t24 | ~3.2 | ~2.8 | | t25 | ~3.3 | ~2.9 | | t26 | ~3.4 | ~3.0 | | t27 | ~3.5 | ~3.1 | | t28 | ~3.6 | ~3.2 | | t29 | ~3.7 | ~3.3 | | t30 | ~3.8 | ~3.4 | | t31 | ~3.9 | ~3.5 | | t32 | ~4.0 | ~3.6 | | t33 | ~4.1 | ~3.7 | | t34 | ~4.2 | ~3.8 | | t35 | ~4.3 | ~3.9 | | t36 | ~4.4 | ~4.0 | | t37 | ~4.5 | ~4.1 | | t38 | ~4.6 | ~4.2 | | t39 | ~4.7 | ~4.3 | | t40 | ~4.8 | ~4.4 | | t41 | ~4.9 | ~4.5 | | t42 | ~5.0 | ~4.6 | | t43 | ~5.1 | ~4.7 | | t44 | ~5.2 | ~4.8 | | t45 | ~5.3 | ~4.9 | | t46 | ~5.4 | ~5.0 | | t47 | ~5.5 | ~5.1 | | t48 | ~5.6 | ~5.2 | | t49 | ~5.7 | ~5.3 | | t50 | ~5.8 | ~5.4 | | t51 | ~5.9 | ~5.5 | | t52 | ~6.0 | ~5.6 | | t53 | ~6.1 | ~5.7 | | t54 | ~6.2 | ~5.8 | | t55 | ~6.3 | ~5.9 | | t56 | ~6.4 | ~6.0 | | t57 | ~6.5 | ~6.1 | | t58 | ~6.6 | ~6.2 | | t59 | ~6.7 | ~6.3 | | t60 | ~6.8 | ~6.4 | | t61 | ~6.9 | ~6.5 | | t62 | ~7.0 | ~6.6 | | t63 | ~7.1 | ~6.7 | | t64 | ~7.2 | ~6.8 | | t65 | ~7.3 | ~6.9 | | t66 | ~7.4 | ~7.0 | | t67 | ~7.5 | ~7.1 | | t68 | ~7.6 | ~7.2 | | t69 | ~7.7 | ~7.3 | | t70 | ~7.8 | ~7.4 | | t71 | ~7.9 | ~7.5 | | t72 | ~8.0 | ~7.6 | | t73 | ~8.1 | ~7.7 | | t74 | ~8.2 | ~7.8 | | t75 | ~8.3 | ~7.9 | | t76 | ~8.4 | ~8.0 | | t77 | ~8.5 | ~8.1 | | t78 | ~8.6 | ~8.2 | | t79 | ~8.7 | ~8.3 | | t80 | ~8.8 | ~8.4 | | t81 | ~8.9 | ~8.5 | | t82 | ~9.0 | ~8.6 | | t83 | ~9.1 | ~8.7 | | t84 | ~9.2 | ~8.8 | | t85 | ~9.3 | ~8.9 | | t86 | ~9.4 | ~9.0 | | t87 | ~9.5 | ~9.1 | | t88 | ~9.6 | ~9.2 | | t89 | ~9.7 | ~9.3 | | t90 | ~9.8 | ~9.4 | | t91 | ~9.9 | ~9.5 | | t92 | >10 | >9 |text_image
9,5 mm (3/8"
text_image
9,5 mm (3/8")
K_n = Usikkerhed (vibration)
text_image
9,5 mm (3/8")
text_image
9,5 mm (3/8"
text_image
9,5 mm (3/8")