AN250HC - Electric stapler MAKITA - Free user manual and instructions
Find the device manual for free AN250HC MAKITA in PDF.

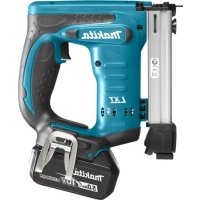
| Product Type | Pneumatic concrete nailer |
| Model | AN250HC |
| Brand | Makita |
| Air Pressure | 1.18 to 2.26 MPa (11.8 to 22.6 bar) |
| Nail Length | 19 mm to 25 mm |
| Nail Type | Coil nails glued on paper tape |
| Magazine Capacity | 100 nails |
| Minimum Hose Diameter | 5 mm |
| Dimensions (L x D x H) | 295 mm x 128 mm x 291 mm |
| Net Weight | 2.1 kg (according to EPTA 01/2003) |
| Recommended Oil | Pneumatic tool oil ISO VG32 or equivalent |
| Sound Pressure Level | 89 dB(A) |
| Sound Power Level | 102 dB(A) |
| Vibration (total value) | 3.5 m/s² |
| Main Functions | Intermittent nailing with contact device; depth adjustment by ring; trigger lock |
| Safety Devices | Contact device, trigger lock, safety glasses mandatory |
| Use | Fastening thin steel plates into concrete |
| Maintenance and Cleaning | Drain the tool after use; clean with an air blower; lubricate regularly; do not use solvents |
| Supplied Accessories | Nose adapters (A and B), cap, hook |
| Repairability | Maintenance and repairs exclusively by a Makita authorized service center with genuine parts |
Frequently Asked Questions - AN250HC MAKITA
User questions about AN250HC MAKITA
0 question about this device. Answer the ones you know or ask your own.
Ask a new question about this device
Download the instructions for your Electric stapler in PDF format for free! Find your manual AN250HC - MAKITA and take your electronic device back in hand. On this page are published all the documents necessary for the use of your device. AN250HC by MAKITA.
USER MANUAL AN250HC MAKITA
GB Pneumatic Concrete Nailer Instruction manual
ENGLISH (Original instructions)
Explanation of general view
| 1. Safety glasses | 10. Hook | 19. Workpiece |
| 2. Face shield | 11. Contact element | 20. Thin steel plate |
| 3. Compressor air output per minute | 12. Nose adapter | 21. Penetration amount into concrete |
| 4. Nailing frequency | 13. LOCK position | 22. Cap |
| 5. Adjuster | 14. FREE position | 23. Drain cock |
| 6. Too deep | 15. Latch lever | 24. Thinner |
| 7. Flush | 16. Door | 25. Stove |
| 8. Too shallow | 17. Driver channel | |
| 9. Screw | 18. Trigger |
SPECIFICATIONS
| Model AN250HC | |
| Air pressure 1.18 - 2.26 MPa (11.8 - 22.6 bar) | |
| Nail length | 19 mm - 25 mm Sheet-collated coil pin |
| Nail capacity 100 pcs | |
| Min. hose diameter 5 mm | |
| Pneumatic tool oil ISO VG32 or equivalent | |
| Dimensions (L X W X H) 295 mm X 128 mm X 291 mm | |
| Net weight 2.1 kg | |
- Due to our continuing program of research and development, the specifications herein are subject to change without notice.
- Specifications may differ from country to country.
Weight according to EPTA-Procedure 01/2003
Symbols
END105-3
The following show the symbols used for the equipment. Be sure that you understand their meaning before use.


... Read instruction manual.


...Wear safety glasses.
Intended use
ENE072-1
The tool is intended for securing a thin steel plate to the concrete.
Pneumatic nailer/stapler safety warnings ENB
WARNING: Read all safety warnings and all instructions. Failure to follow the warnings and instructions may result in serious injury, electric shock and/or fire.
Save all warnings and instructions for future reference.
For personal safety and proper operation and maintenance of the tool, read this instruction manual before using the tool.
General safety
- Do not permit those uninstructed to use the tool.
-
No horseplay. Respect the tool as a working implement.
-
Do not operate when under the influence of alcohol, drugs or the like.
- Never alter the tool.
Personal protective equipments
Always wear safety glasses to protect your eyes from dust or fastener injury.
WARNING: It is an employer's responsibility to enforce the use of safety eye protection equipment by the tool operators and by other persons in the immediate working area.
For Australia and New Zealand only
Always wear safety glasses and face shield to protect your eyes from dust or fastener injury. The safety glasses and the face shield should conform with the requirements of AS/NZS 1336. (Fig. 1)
- Wear hearing protection to protect your ears against exhaust noise and head protection. Also wear light but not loose clothing. Sleeves should be buttoned or rolled up. No necktie should be worn.
Work area safety
- Keep work area clean and well lit. Cluttered or dark areas invite accidents.
- Do not operate the tool in explosive atmospheres, such as in the presence of flammable liquids, gases or dust. Operating the tool can create sparks which may ignite the dust or fumes.
- Keep children and bystanders away while operating the tool. Distractions can cause you to lose control.
- Illuminate the work area sufficiently.
- There may be local regulations concerning noise which must be complied with by keeping noise levels within
prescribed limits. In certain cases, shutters should be used to contain noise.
Safety devices
- Make sure all safety systems are in working order before operation. The tool must not operate if only the trigger is pulled or if only the contact arm is pressed against the wood. It must work only when both actions are performed. Test for possible faulty operation with fasteners unloaded and the pusher in fully pulled position.
- Do not play with the contact element: it prevents accidental discharge, so it must be kept on and not removed. Securing the trigger in the ON position is also very dangerous. Never attempt to fasten the trigger. Do not operate a tool if any portion of the tool operating controls is inoperable, disconnected, altered, or not working properly.
- Do not attempt to keep the contact element depressed with tape or wire. Death or serious injury may occur.
- Always check contact element as instructed in this manual. Fasteners may be driven accidentally if the safety mechanism is not working correctly.
- When not operating the tool, always lock the trigger by turning the lock lever to the LOCK position.
- Make sure that the trigger is locked when the lock lever is set to the LOCK position.
Loading fasteners
- Do not load the tool with fasteners when any one of the operating controls is activated.
- Use only fasteners specified in this manual. The use of any other fasteners may cause malfunction of the tool.
Power source
- Never connect the tool to compressed air line where the air pressure can exceed the suitable air pressure range of the tool, specified in the "SPECIFICATIONS" table, by 10% . Make sure that the pressure supplied by the compressed air system does not exceed the suitable air pressure range of the tool. Set the air pressure initially to the lower value of the suitable air pressure range.
- Operate the tool at the lowest pressure required for the application, in order to prevent unnecessarily high noise levels, increased wear and resulting failures.
- Never use the tool with other than compressed air. If bottled gas (carbon dioxide, oxygen, nitrogen, hydrogen, air, etc.) or combustible gas (hydrogen, propane, acetylene, etc.) is used as a power source for this tool, the tool will explode and cause serious injury.
-
Always disconnect the air hose and remove all of the fasteners:
-
when unattended;
before performing any maintenance or repair;
before cleaning a jam; -
before moving the tool to a new location.
-
Use only pneumatic tool oil specified in this manual.
Operational safety
- Always check the tool for its overall condition and loose screws before operation. Tighten as required.
-
Handle the tool carefully, as there is high pressure inside the tool that can be dangerous if a crack is caused by rough handling (dropping or striking). Do not attempt to carve or engrave on the tool.
-
Stop the operation immediately if you notice something wrong or out of the ordinary with the tool. An improperly functioning tool must not be used.
- Do not point the ejection port at anyone in the vicinity. Keep hands and feet away from the ejection port area.
- Always assume that the tool contains fasteners.
- Never point the tool toward yourself or anyone whether it contains fasteners or not.
- Do not rush the job or force the tool. Handle the tool carefully.
- Do not activate the tool unless the tool is placed firmly against the workpiece.
- Never hold or carry the tool with a finger on the trigger or hand it to someone in this condition. Accidental firing can cause serious injury.
-
Never use fastener driving tools marked with the symbol "Do not use on scaffoldings, ladders" for specific application for example:
-
when changing one driving location to another involves the use of scaffoldings, stairs, ladders, or ladder alike constructions, e.g. roof laths;
-closing boxes or crates; -
fitting transportation safety systems e.g. on vehicles and wagons.
-
Check walls, ceilings, floors, roofing and the like carefully to avoid possible electrical shock, gas leakage, explosions, etc. caused by striking live wires, conduits or gas pipes.
- Do not use the tool for fastening electrical cables. It is not designed for electric cable installation and may damage the insulation of electric cables thereby causing electric shock or fire hazards.
- Watch your footing and maintain your balance with the tool. Make sure there is no one below when working in high locations, and secure the air hose to prevent danger if there is sudden jerking or catching.
- On rooftops and other high locations, drive fasteners as you move forward. It is easy to lose your footing if you drive fasteners while inching backward. When driving fasteners against perpendicular surface, work from the top to the bottom. You can perform driving operations with less fatigue by doing so.
- A fastener will be bent or the tool can become jammed if you mistakenly drive fastener on top of another fastener or strike a knot in the wood. The fastener may be thrown and hit someone, or the tool itself can react dangerously. Place the fasteners with care.
- Do not leave the loaded tool or the air compressor under pressure for a long time out in the sun. Be sure that dust, sand, chips and foreign matter will not enter the tool in the place where you leave it setting.
- Never attempt to drive fasteners from both the inside and outside at the same time. Fasteners may rip through and/or fly off, presenting a grave danger.
Service
- Perform cleaning and maintenance right after finishing the job. Keep the tool in tip-top condition. Lubricate moving parts to prevent rusting and minimize friction-related wear. Wipe off all dust from the parts.
- Ask Makita authorized service center for periodical inspection of the tool.
- To maintain product SAFETY and RELIABILITY, maintenance and repairs should be performed by
Makita Authorized Service Centers, always using Makita replacement parts.
SAVE THESE INSTRUCTIONS.

WARNING:
DO NOT let comfort or familiarity with product (gained from repeated use) replace strict adherence to safety rules for the subject product. MISUSE or failure to follow the safety rules stated in this instruction manual may cause serious personal injury.
INSTALLATION
Selecting compressor (Fig. 2)
The air compressor must comply with the requirements of EN60335-2-34.
Select a compressor that has ample pressure and air output to assure cost-efficient operation. The graph shows the relation between pin-driving frequency, applicable pressure and compressor air output.
Thus, for example, if pin driving takes place at a rate of approximately 15 times per minute at a compression of 1.76MPa (17.6 bar), a compressor with an air output over 70 liters/minute is required.
Pressure regulators must be used to limit air pressure to the rated pressure of the tool where air supply pressure exceeds the tool's rated pressure. Failure to do so may result in serious injury to tool operator or persons in the vicinity.
Selecting air hose (Fig. 3)
Use a high pressure resistant air hose.
Use an air hose as large and as short as possible to assure continuous, efficient pin-driving operation.
CAUTION:
- Low air output of the compressor, or a long or smaller diameter air hose in relation to the pin-driving frequency may cause a decrease in the driving capability of the tool.
Lubrication (Fig. 4)
Before and after use, oil the tool with pneumatic tool oil by placing two or three drops into the air fitting. For proper lubrication, the tool must be fired a couple of times after pneumatic tool oil is introduced.
FUNCTIONAL DESCRIPTION
CAUTION:
- Always disconnect the air hose before adjusting or checking function on the tool.
Adjusting the pin-driving depth
CAUTION:
- Always disconnect the hose before adjusting the pin-driving depth. (Fig. 5 & 6)
If pins are driven too deep, turn the adjuster clockwise. If pins are driven too shallow, turn the adjuster counterclockwise.
The adjustable range is 10mm . (One full turn allows 0.8mm adjustment.)
Hook
CAUTION:
Always disconnect the hose when hanging the tool using the hook.
- Never hang the tool on a waist belt or like. Dangerous accidental firing may result. (Fig. 7)
The hook is convenient for hanging the tool temporarily. This hook can be installed on either side of the tool.
When changing the installation position, remove the screw with a screwdriver. Install the hook on another side for installation and then secure it with the screw.
Use the nose adapter
CAUTION:
- Always disconnect the hose before installing or removing the nose adapter. (Fig. 8)
Always use the nose adapter. Otherwise a slippage may occur or even the nailer may not fire the nail.
Usually use one of two nose adapter A (transparent), one factory-installed on the contact element and the other stored below the grip.
When working on narrow partition tracks, use nose one of two nose adapter B (black) which are provided with in the tool carton box.
To attach the nose adapter to the contact element, press it onto the contact element as far as it will go.
Locking the trigger
This nailer is provided with the mechanism for locking trigger to avoid personal injuries and property damage caused by improper operation during other than pindriving operation. (Fig. 9)
Set the change lever to the LOCK position to lock the trigger. (Fig. 10)
Before driving pins, set the change lever to the FREE position. When NOT driving pins, be sure to set the change lever to the LOCK position and disconnect the air hose.
ASSEMBLY
CAUTION:
- Always disconnect the air hose before loading the nailer.
Loading the nailer (Fig. 11)
Disconnect the air hose from the tool. Select pins suitable for your work. Depress the latch lever and open the door and magazine cap. (Fig. 12)
Place the pin coil in the magazine. Uncoil enough pins to reach the pin guide. Place the first pin in the feeder and the second pin in the feed claw. Place other uncoiled pins on feeder body. Close the magazine cap slowly until it lock after checking to see that the pin coil is set properly in the magazine.
Connecting air hose
Slip the air socket of the air hose onto the air fitting on the nailer. Be sure that the air socket locks firmly into position when installed onto the air fitting.
OPERATION
CAUTION:
- Be sure to set the change lever to the LOCK position to avoid unexpected misfiring when the tool is not in use.
Make sure all safety systems are in working order before operation. (Fig. 13)
Only pulling trigger without contact element contacting workpiece must not bring about the tool firing. (Fig. 14)
Only contact element contacting workpiece without pulling trigger must not bring about the tool firing. (Fig. 15)
This nailer is only for intermittent pin-driving. Intermittent pin-driving is a method of pinning piece by piece with the following step.
- Set the change lever to the FREE position.
- Place the contact element against the workpiece
- And then pull the trigger.
Pin-driving of concrete
WARNING:
- Use hardened pins only for concrete.
Using other purported pins may cause serious injuries. Do not pin directly on the concrete. Failure to do so may cause concrete fragments to fly off or pins to strike back, causing serious injuries. - When driving pins, hold the tool so that it stands upright to the driving surface.
Slanted pin-driving may cause concrete fragments to fly off or pins to strike back, causing serious injuries. - Do not use on the surface that objects hang from, such as area where hangers for sewer pipe, dust pipe etc. are set up.
Choose and use pins so that the penetration amount into concrete ranges 15mm - 20mm (Fig. 16)
CAUTION:
- Use this tool only for soft concrete built up not so long before. Using on the hard concrete may cause pin bending or pin-driving to insufficient depth.
- When the penetration amount into concrete is required more than 20mm , driving pins to the sufficient length may not be obtained. Pins may be driven too shallow causing unstable workpiece, resulting in personal injury and damage to property.
Cutting off the sheet
CAUTION:
- Always disconnect the hose before cutting off the sheet. (Fig. 17)
Tear off the output sheet in the direction of the arrow when using the sheet collated pins.
MAINTENANCE
CAUTION:
- Always disconnect the air hose from the tool before attempting to perform inspection or maintenance.
- Never use gasoline, benzine, thinner, alcohol or the like. Discoloration, deformation or cracks may result.
Jammed nailer
CAUTION:
- Always disconnect the air hose and remove the pins from the magazine before cleaning a jam. (Fig. 18 & 19)
When the nailer becomes jammed, do as follows:
Open the magazine cap and remove the pin coil. Insert a small rod or the like into the ejection port and tap it with a hammer to drive out the pin jamming from the ejection port. Reset the pin coil and close the magazine cap.
Drain tool (Fig. 20)
Remove the hose from the tool. Place the tool so that the air fitting faces down to the floor. Drain as much as possible.
Cleaning of tool
Blow off dust adherent to the tool by using an air duster.
Cap (Fig. 21)
When not in use, disconnect the hose. Then cap the air fitting with the cap.
Storage
When not in use, the nailer should be stored in a warm and dry place.
Maintenance of compressor and air hose (Fig. 22)
After operation, always drain the compressor tank. If moisture is allowed to enter the tool, It may result in poor performance and possible tool failure.
Keep the air hose away from heat (over 60^ , over 140^ ), away from chemicals (thinner, strong acids or alkalis). Also, route the hose away from obstacles which it may become dangerously caught on during operation. Hoses must also be directed away from sharp edges and areas which may lead to damage or abrasion to the hose. (Fig. 23)
To maintain product SAFETY and RELIABILITY, repairs, any other maintenance or adjustment should be performed by Makita Authorized Service Centers, always using Makita replacement parts.
OPTIONAL ACCESSORIES
CAUTION:
- These accessories or attachments are recommended for use with your Makita tool specified in this manual. The use of any other accessories or attachments might present a risk of injury to persons. Only use accessory or attachment for its stated purpose.
If you need any assistance for more details regarding these accessories, ask your local Makita Service Center.
·Pins
Air hoses
- Safety goggles
NOTE:
- Some items in the list may be included in the tool package as standard accessories. They may differ from country to country.
Noise
ENG905-1
The typical A-weighted noise level determined according to EN792:
Sound pressure level (L_pA) : 89 dB (A)
Sound power level (L_WA) : 102 dB (A)
Uncertainty (K): 3 dB (A)
Wear ear protection.
Vibration
ENG904-2
The vibration total value determined according to EN792:
Vibration emission (a_h) : 3.5~m / s^2
Uncertainty (K): 1.5m / s^2
ENG901-1
- The declared vibration emission value has been measured in accordance with the standard test method and may be used for comparing one tool with another.
The declared vibration emission value may also be used in a preliminary assessment of exposure.

WARNING:
- The vibration emission during actual use of the power tool can differ from the declared emission value depending on the ways in which the tool is used.
- Be sure to identify safety measures to protect the operator that are based on an estimation of exposure in the actual conditions of use (taking account of all parts of the operating cycle such as the times when the tool is switched off and when it is running idle in addition to the trigger time).
For European countries only
ENH003-15
EC Declaration of Conformity
Makita declares that the following Machine(s):
Designation of Machine:
Pneumatic Concrete Nailer
Model No./ Type: AN250HC
Conforms to the following European Directives:
2006/42/EC
They are manufactured in accordance with the following standard or standardized documents:
EN792
The technical file in accordance with 2006/42/EC is available from:
Makita, Jan-Baptist Vinkstraat 2, 3070, Belgium
-
- 2015

Yasushi Fukaya
Director
Makita, Jan-Baptist Vinkstraat 2, 3070, Belgium
Lubrification (Fig. 4)
ACCESSIONS FOURNIS EN OPTION
ATTENTION:
WAARSCHUWING: Lees alle
ENB110-4
Aoalεia oTo xwpo εpyoia
Na diatnpieTe to xwpo epyaiac kaapo kai kaia i o. 2e akataotatouc n okoteivouc xwpouc npokalouvtai atuxnata.
Mn 0ETETe OE aeIoupyia TO epyaaleio OE EKpnKTikec atuOoepaiec, OTwC TAPouoiEA uov Uypv, aepiw n oKovnc. H aeIoupyia Tou epaaiou mTopei va dnoupynoei OTIVnpeC TOU mTopei va TpokaesouavavaeEgnTgokovnTowatmaw.
Na aTIOaKpUveTa TAIIDa KAI TOUC TAPeUIoKoEvouc otav XeiPiZeote To epyaEio. Av aTIOaTei n TPOooXn oac, MTOpeI va XaOeTe Tov EeYxo.
- PapeXETE ETTaPkn Wtioo Otnv TEPIOxN EpyaoiaC.
Evexoevwca Unpov Tniko kavovioi Tou apopouv To 0puBo Kai Otauc OToiouc TpETe i va oumuopawveTe biatnpwVtac Tn otaeun 0pouBou Evtoc Twv PpOdiaypafoEvw opiwv. ZE EIOKEC TEPITTTWEIC TpETe i xaPnoiOToIOuVTai TnapaTetaoata yia Tov TpepiOmo Tou 0pouBou.
UoKeuec aopaaeias
Bebaiwtheta otla ta ouatnata aospaleias Bpikovtai e ka n katostan npiv atio tn aeoupyia. To epyaieo dev pentei va aeitoupyei av tiotei mvo n okaovdahl n av nntnei movo o bpaxiovac etapncs Etnawto slo. Pentei va aeitoupyei mvo otav ekteaovtai kai oi duo evpeyies. Dokmuate yia tihavn Eaattwpatikn aeitoupyia otav to epyaieo dev eivai yeapo t me ouvdtnpes cai o whtnc Bpiketai otnv Tlnp np Taqnyevn theon.
Mny TnaiZTe ME TO OToXeio Etnaipnc: auto EmuObiZeI Tnu TuXia EKpoptwo, YIA TO loyo auto TTpeTcI VA Tnpauevei TAVTOE OTN THEOTU KAI VA MNV aPaiPeiTai. Eiva ETIOANG TOAU ETIkiivduvo va aopaaizete TN OKavdaan OTN EVpyh Theg ON). Note mny ETIXeipnoTe vAoopaiaote TN oKavdaan. Mn TheeTe To EPyaleio OE LEIToupyia av OTIOIOHNTOTE TMua TOW XeipiotpiwV LEIToupyiac eivai xaalaepavo, ATOoUVDEDEMEVO, TPOITIOINmuEv oN DEV LEIToupyei Oomega.
Mny TpooTtAeToe va KpatnoTe to OtoXieio ETTaPnC TIEoEvO e Taivia n oUpma. MTopei va TpokAnThei ThevatoC n oobapoc TpaumatouoC.
IavToe va eEyxTe TO OToIxEIO EtnaOnc OuPwva U TIC oyniecautoou Tou eYxepidoiou,oi uovetnpes mTopei va TTetaxTOUV kata aAtoC eav dEv aeIToupyei Owota o unxaviooC aopalia
- Otav dev xpnoioutoie to epyaleio, va kaleiodwveTe TAVTote tn okanovdaan TEPiOTpeovotac to oxlo kaleiodomegaatoc otnv kaleiodomegaevn eoon (LOCK).
Bebaiomegaite ot n okaovdaan eivai kaeiodomegaevn otav o moxlosk aeodomegaatoeivai totoeetnevoocotnv kaeiodomegaevn theon (LOCK).
ΦoTwOg Ouvδεπρωv
Mn yeiicTe To epyaieioe ouvdtnpce otav evai evepyotoinveo kantoio aTTo xeiipotnpia aeitoupyia.
Na xpnoiotioite movo ouvdtnpes Tou kathetaovtai sto evxepio auto. Av xpnoiotoine t aalouc ouvdtnpes, mtopei va npoknthe duatoupyia tou epyaaleiou.
Nynn 1oxuos
IotE mUovdeTe To epyaEio oE mia ypaun n TETIEOevou aepa, OTou n TIeON Tou aepa mTOpEi va UTEPbeKata 10% TO kATAALnO EUPOC TIEONC aepa Tou epyaEIou, TOU OpiETAI OTV TIVAKA "IPOADIAPAEZ". Na BcBaiwveote OTn TIeON Tou TApexTAtoTo OUsTnMa TETIEOeVou aepa Dev UTEPBAiveTn MeyiOTN ETITPEIOEvN TIEON Tou KApWtIKOU TIOAOU. PuOtiote apXkA tv NIEON aepa OTn XaunAoTePN TmTnC OUVIOIWueVnc ETITPEIOEVNS TIEONC.
AeioynoTe to epyaleio otm iikpotepn aataiouevn TIEON yia nTv eapapoyn, pokoieveou va atoepuxoov Ta aikaiolaoynta uynla eTTTEda 0opubou, auEnev npOpa kai pokutioucBaaEc.
Mn xnpoiouie TOTe TO epyaleio eOniHTOTE aALo EKTc aTIO TETIEOevo aepa.Av xnpoiotointheta i Emuiaawue aoepio (ioxiidio avpaka, ouyovo, aZwto, uDpooyo, aepa, kT.) n EuckeTo apio (uDpooyo, TPOIAVIO, AKETUeVIO, kT.) wC Tnyn 1xuoc yia To epyaleio auto, to epyaleio tha ekpayei kai npokntheoapoc tpaumatiooc.
- Na αποσυδεετη πάντο τον εύκαμπισο ωλήνα αέρα καινα φαρείτε σλους τοῦς συνδετήρες:
-otav npoεXkaveic to epyaio,
- TPIV EKTELESEOTIOIAOHTOTE Pyaia ouvtipnoanc n ETTIOKEUnc,
- PIV aTOKATAOTNEK KATIOA EUMKn,
- Tpiiv etakivnoeTe TO epyaleio ovea totoeoi.
Na xpnaiotnoite movo lai yia epyaia aenieou aepa tou kaopicietai oTo eXepidio auto.
Aoαλειαλειούργιας
- Pniv aTIO Tn aeIToupyia, va eEyxETe TnavTOTe Tn yevikn KaTaoTaON Tou epyaaEiou, aaKai av oi BiBec evai xaapc. ΣpiTe oTTwC aTtai
Na xeiipieote TO epyaieio TPOeXTiKa, ETEIDn UTIAPxuwnnpiocn OTO eowtepiokou, TOnu mTOpEVAivai ETIKIVouv n av POKAnthe pwyun ato aTPOeXTo Xeipiao (TTwO n xTuTnmu).Mny PPOaTeoTe va Kavete xapakiec n auakwoeic oTO epyaieio. - Σταμαπονε αμεως τη λειουργία αν παραπρησεό τό έτι κατι δεν παει καλά ἡ εῖαι αουνήσιο με το εργαλείο. Mθ χρησιμοποίεις κατιού εργαλείο που δεν λειουργεί σωτά.
Mn Otpepete Tn Upua EktivaEnc TPOC OTIOIOHNTOTE aTOUo Bpioketai Kovta. Na Kpatate Ta Xepia Kai ta TIObia aac uakpiia anto Tny TEPiox nTCS Upuac EKTivaEnc.
Na 8ewpeite TAVOTE oT OpyaAio Tepiexe i ouvdtpeC.
Mn Otpepete To Epyaaleio TPOC TO MEOs oac n TPOCS OTOIOVOnTne AALov, avEgaptnta av TEPiExeouvEtpec n 0x1.
Mnv Biaeote va eKteAeote TnV epyaia n aoknoete TIEON oTo epyaIeio. Na xeipieTe to epyaIeio TPOEXTIKa.
Mny EvpyoTIOeIe To EpyaIeio EKToC av Bpioketai TOnTOETnueO staepeA eTIAwOTo TEpaxoEpyaiaC.
Mny kpatate n metapepete TOTe TO epyaieo e To daKTUo oac otn oKavdaan h mnu To bivete OE kaTIOov aalov evw to daKTUo oac piaektaoi otn oKavdaan. H akouia evpyoioiog n ptopei va Tpokaeei obaopo Tpaumatioo.
Noté μη xροιμοτοίησε τακαρωτικα εργαλεία που φερουν την ενδείŋ “Mn xροιμοτοίεις σακαλωιες ἡ έκαλες” γι αἰδικές εφαμουές ὄπιως γι παράδειγμα:
-otav kata nvy aalayn ano ia totoeia Kapwmuoc o e ia aaan xpnoiopoiouvtai okaawoiie, okaolntaia, okaeic n aaaec Tapopoiec kataokeues, .x. avidecoketiwv,
- Kata to kλεισιμο κβωτιών ἡ τελαρων,
- Kata TnV Eφapuoyn Μοιtnματων ασραλειας μεταφορων π.χ. ΕE oxηματα Kαβayóvia.
Na eEyxETIPOeXTiKa Touc Toixouc, TIC oopoec, Ta TTaWmuata, TIC OTeyEc KAI TApOoIEc KATAoKEuec yia va aTTOpeuyETe TIV TIOavn NkEKTpoTTNxiia, dIappon aepiou, EKnEci, kTIA. TIOU TpOKaIoVtai aTIO KTUTnmuata nAekTpOoPovv Kaawv v noAWNVw AEPIWv.
Mn xnpoiotoeite To epyaieio yia tn otepewon nEKTPIKwV kaWbiw. exi oxediaotei yia tvv EYkataoataon nEKTPIKW Kaawdiw Kai evexetai va TpokaleoI Znui aTn movwn Twv nEKTPIKW kaawidiw, TpokaawvtaC kivduvo nEKTpoTTanxiac n TUPKayiac.
Na TPOEEXE WOTe VA OTEKEOTE KAa KAI VA DIATNpeITE tv IOoppoia aac otav XpnoiIOIOIE To EpyaIio. Na BcBaiwveote OTI DEV UTIAPXei Kaveic ATO KATOWtAV epyaCEOTE OE uynLec totoTheieC KAI VA aOpaALcETe TOV EUKaPTTO OAnva aepa YIA VA aTTOpeUYETe TOV KIVUVO SE TEPiTTWON Tnou ouubetai antoTOPO Tivayma n TIAIOIO.
Σ ΕΚΕΤΕς καί αλΑες Αψηλες τοῦ Εθεοίς, να καρφώνετε συνδεπήρες καθως KIVEIOTE προς τα μπροστά. Eivai εύκολoνα χασετε ηνιοροπία σας αν καρφώνετε συνδεπήρες καθως KIVEIOTE προς τα πίω. Šταν καρφώνετε συνδεπήρες σέ ΚΑΚΑΚΟΡUΦN ἐπιφάνει, να καρφώνετε από την κοριρή προς τα κατω. Me tov τὸῦ auto, μπορεῖνα εκτέλεῖνε ἔργασίες καρφώματος με λιγότηρι κόπωση.
Av aTo kaPawEte eva ouvEtnpa eTavwOe eva alno hxtutnoseTe pozo oTo gulo, o uuvetnpac O atpaBwoei n to epyaaleio 0a TAnoK. O ouvdtnpac mtopei va kntivaxoei kai va xTuTnOe i KATIOov n to ibio to epyaaleio mtopei va avtbpaoe1 EtIKivduva. ToTTOETnote Touc ouvdtnpes E ppooxn.
Mnv aqnvETe TO qoPTwuevo Epyaaleio n Tov oumuTieotn aepa uto TIEON VIA eYALO xpvikó diaoTnma Egwo Tov nA. Na BEEbaiwveote otBev EIOEpxovta oTo epyaaleio OKovn, auoc, Teuaixia n Evn UAn oTn Theon oTou to aqnvETe.
Not e mV ETIxEipnoEe va KAPpwoEe OuvbEtnpec taTOxPOVA kai aTIO MEa kai aT' EeW. OI ouvBETnpEc mTopei va dIATEPaOou To MEoo n/Kai va EKTIVaxoUv, YEovoc Tnou TTPOkAe oOapo Kivduvo.
Σερβις
- Na ekteleite Kaapioo kai ouvtnpon Tou epyaieou aoeos molc ooknpwote tnv epyaia. Na biatnpeite to epyaieio oe apiotn kataoan. Na iattavete ta kivoumuva nepy ia va attopeuyete tn v oedomega (koupiau) kai va eaaxiottoieite tn opa atto tv pibn. koutiote 6an tn okovn atio ta np Tou epyaieou.
A TeuovtEe t a EouoOoTo nEv a Kevtpa EutnpetnOns Tc Makita yia Tou cpiobikouc eEyxouc tou evaaleiou.
Tia va biatnpieiA ANAANEAIA KAI n AIONIISTIA Tou TPOIOVTOG,OI Epyaoic ouvtnpnOg KAI ETIOKEUNG O TIPETIEVA EKTEAOuVTa OE EGOUIOBDOTMEVA KEVTPa Ecutnpetnoq ts Makita, KAI TAVOTE ME Tn xpnon avtaaakikwv ts Makita.
ΦYΛΑΕTE AYTE Σ TΙΣ OΔΗΓΕΣ.
IPOEIAOIOIHsH:
MHN EITIpeEET OIN BOIAKOTnTa n OTNV EGOKEIWOn
OAC ME TO TPOIOV (Tou aTOKTHNKe ATO
ETAVEIANmuEvn XpON) VA AVTKATAOTNEI TNY
auoTnp IN PPOAnLwON OTouc KAVOe aQaAeiac Tou
EV LOyW TPOIOvTOc. H ANOAEMENH XPHEH n n
TnpON TWV KAVOVW aQaAeiac TPO BIATUWovTAI
OTO TAPOV EVXeipio 08nyiw V TPOPe i Va TPOKAe
OoBapOp Tpaumaio.
TONOQETHEH
Euupopwovotai e tis akokoutheta Eupwniikes
OdyieS:
2006/42/EK
KataoKeuaOvTa OuΦwva E To TnapakTt PToTTO n
TUTTOINIeva Eyypa:
EN792
To apxio ouuwova uTnv 2006/42/EK ivai diaeoiqaTO:
Makita, Jan-Baptist Vinkstraat 2, 3070, Belgium
-
- 2015

Yasushi Fukaya
△ieuθuvntns
Makita, Jan-Baptist Vinkstraat 2, 3070, Belgium
Makita Jan-Baptist Vinkstraat 2, 3070, Belgium
Makita Corporation Anjo, Aichi, Japan
884922D997 www.makita.com