
SkyStar 2 eXpress HD - Electronic board TECHNISAT - Free user manual and instructions
Find the device manual for free SkyStar 2 eXpress HD TECHNISAT in PDF.
| Product type | DVB-S2 receiving electronic card |
| Brand | TechniSat |
| Model | SkyStar 2 eXpress HD |
| Category | Electronic card |
| Interface | PCI-Express (PCIe) |
| Main functions | Satellite TV reception (DVB-S2) on PC, viewing and recording |
| Power supply | Via PCIe connector (separate power cable from computer power supply) |
| Dimensions (approx.) | Standard PCIe card: 17.5 cm x 10.7 cm (half-height possible) |
| Weight (approx.) | Approximately 50 g |
| Compatible operating systems | Windows (7, Vista, etc.) and Linux (via Video4Linux) |
| Provided software | DVB-PC TV Star, drivers, Server4PC application, EVE v2 (video editing) |
| Installation | Insert the card into a free PCIe slot, connect the power, connect the satellite cable, install drivers and software from the provided CD |
| Maintenance and cleaning | No maintenance required. Avoid dust and humidity. Clean with a dry, antistatic cloth if necessary. |
| Safety | Discharge static electricity before handling the card. Unplug the computer before installation. |
| Spare parts and repairability | Not applicable. No spare parts available. In case of failure, replace the card. |
| Warranty | Refer to manufacturer's conditions. Legal warranty of conformity. |
| General information | Manual available in several languages (FR, DE, EN, etc.). Technical support via hotline and website. |
Frequently Asked Questions - SkyStar 2 eXpress HD TECHNISAT
User questions about SkyStar 2 eXpress HD TECHNISAT
0 question about this device. Answer the ones you know or ask your own.
Ask a new question about this device
Download the instructions for your Electronic board in PDF format for free! Find your manual SkyStar 2 eXpress HD - TECHNISAT and take your electronic device back in hand. On this page are published all the documents necessary for the use of your device. SkyStar 2 eXpress HD by TECHNISAT.
USER MANUAL SkyStar 2 eXpress HD TECHNISAT
natural_image
Three electronic devices: a TechniSat server, a green PCI card, and a black TCP/IP network adapter (no visible text or symbols on main components)I. Einleitung 3
natural_image
Close-up of a computer motherboard with an oval highlight on the circuit board (no visible text or symbols)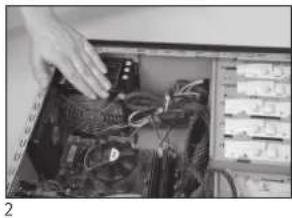
natural_image
Close-up of a computer tower with visible CPU socket and wiring, no text or symbols present
natural_image
Close-up of hands pressing down on a circuit board (no visible text or symbols)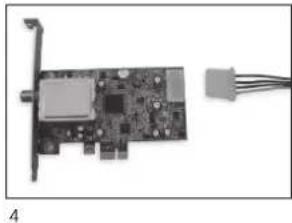
natural_image
Electronic circuit board with connector and wiring, no visible text or symbols
natural_image
Close-up of a computer motherboard with visible ports and connectors (no text or symbols)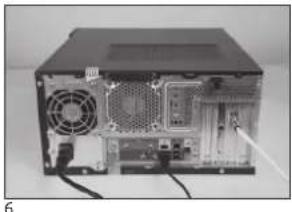
natural_image
Back view of a computer tower internal structure showing fan, drive, and ventilation (no visible text or labels)natural_image
Close-up of server rack with visible ports and a magnified inset showing internal components (no text or symbols)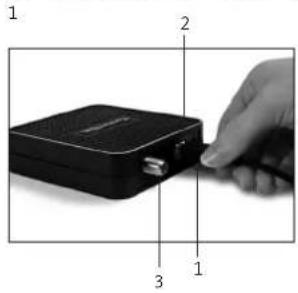
Quick Installation Instructions
for all TechniSat PCI/PCIe/USB 2.0 products from TechniSat
natural_image
Three electronic devices: a black SSK Star USB HD server, a green PCI card with a network interface, and a black Technipat Control HD controller device (no visible text or symbols on main components)Contents
I. Introduction 15
- Description of the TechniSat DVB-PC TV product range 15
1.1 PCI cards 15
1.2 PCI Express cards 15
1.3 USB 2.0 boxes/sticks 15
-
Latest software and instructions 15
-
Conventions used in this user manual 15
II. Installing the DVB-PC TV device 15
-
Installing the PCI/PCIe card 15
-
Installing the USB box/stick 17
III. Installing the driver and software components 17
-
Summary 17
-
Installing the driver and software package 17
-
Installing the DVB-PC TV Stars applications 18
-
Installing the driver manually 22
-
Updating the driver 23
-
Linux 23
I. Introduction
1. Description of the TechniSat DVB-PC TV product range
1.1 PCI cards
PCI cards are expansion cards which are inserted into a PCI slot on a PC's motherboard.
1.2 PCI Express cards
PCI Express cards are expansion cards which are inserted into PCIe slots on a PC's motherboard.
1.3 USB 2.0 boxes/sticks
USB 2.0 boxes are external PC devices that are connected to a USB port on a PC via a USB cable. USB sticks are inserted directly into a USB port.
2. Latest software and instructions
You can download the latest versions of drivers, software and instruction manuals from our website: http://www.technisat.com.
3. Conventions used in this manual
This user manual uses the following conventions for clarity:
Navigation paths are shown as follows:
$$ " \text { Start }" = >" \text { Program Files }" = >" \text { TechniSat DVB }" = >" \text { Setup4PC }" $$
The path shown in this example starts Setup4PC.
II. Installing the DVB-PC TV device
Please follow these step-by-step installation instructions.
You will also find the installation instructions on the installation CD and FAQs are provided on the TechniSat website at www.technisat.com to give additional help in the event of a problem. The software installation process requires you to restart the system. Please ensure that the installation CD is not removed from the CD drive until the installation process has been completed. If the CD does not start automatically, please use the "Start.exe" file on the CD.
1. Installing the PCI/PCIe card
Before you start: Before you install the PCI/PCIe card, please ensure that the computer is switched off and disconnected from the mains. A computer that is connected to the mains during installation can cause damage to your PC or DVB-PC TV product.
natural_image
Close-up of a computer motherboard with a highlighted rectangular area (no visible text or symbols)1
natural_image
Close-up of a hand inserting cables into an electronic device (no visible text or symbols)2
natural_image
Close-up of hands pressing a component on a circuit board (no visible text or symbols)3

natural_image
Electronic circuit board with connector and cable, no visible text or symbols4

natural_image
Close-up of a computer motherboard with a central connector and cable (no visible text or symbols)5
natural_image
Back view of a computer tower showing internal components and ventilation fan (no visible text or labels)6
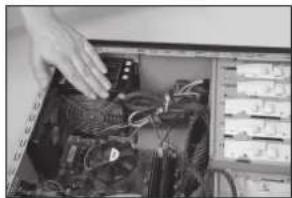
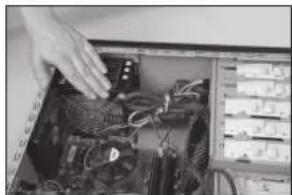
1.1 Open the computer housing as per the manufacturer's instructions.
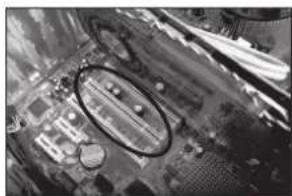
1.2 Locate a free PCI / PCIe slot for your PCI/PCIe card and remove the cover plate. (Fig. 1)
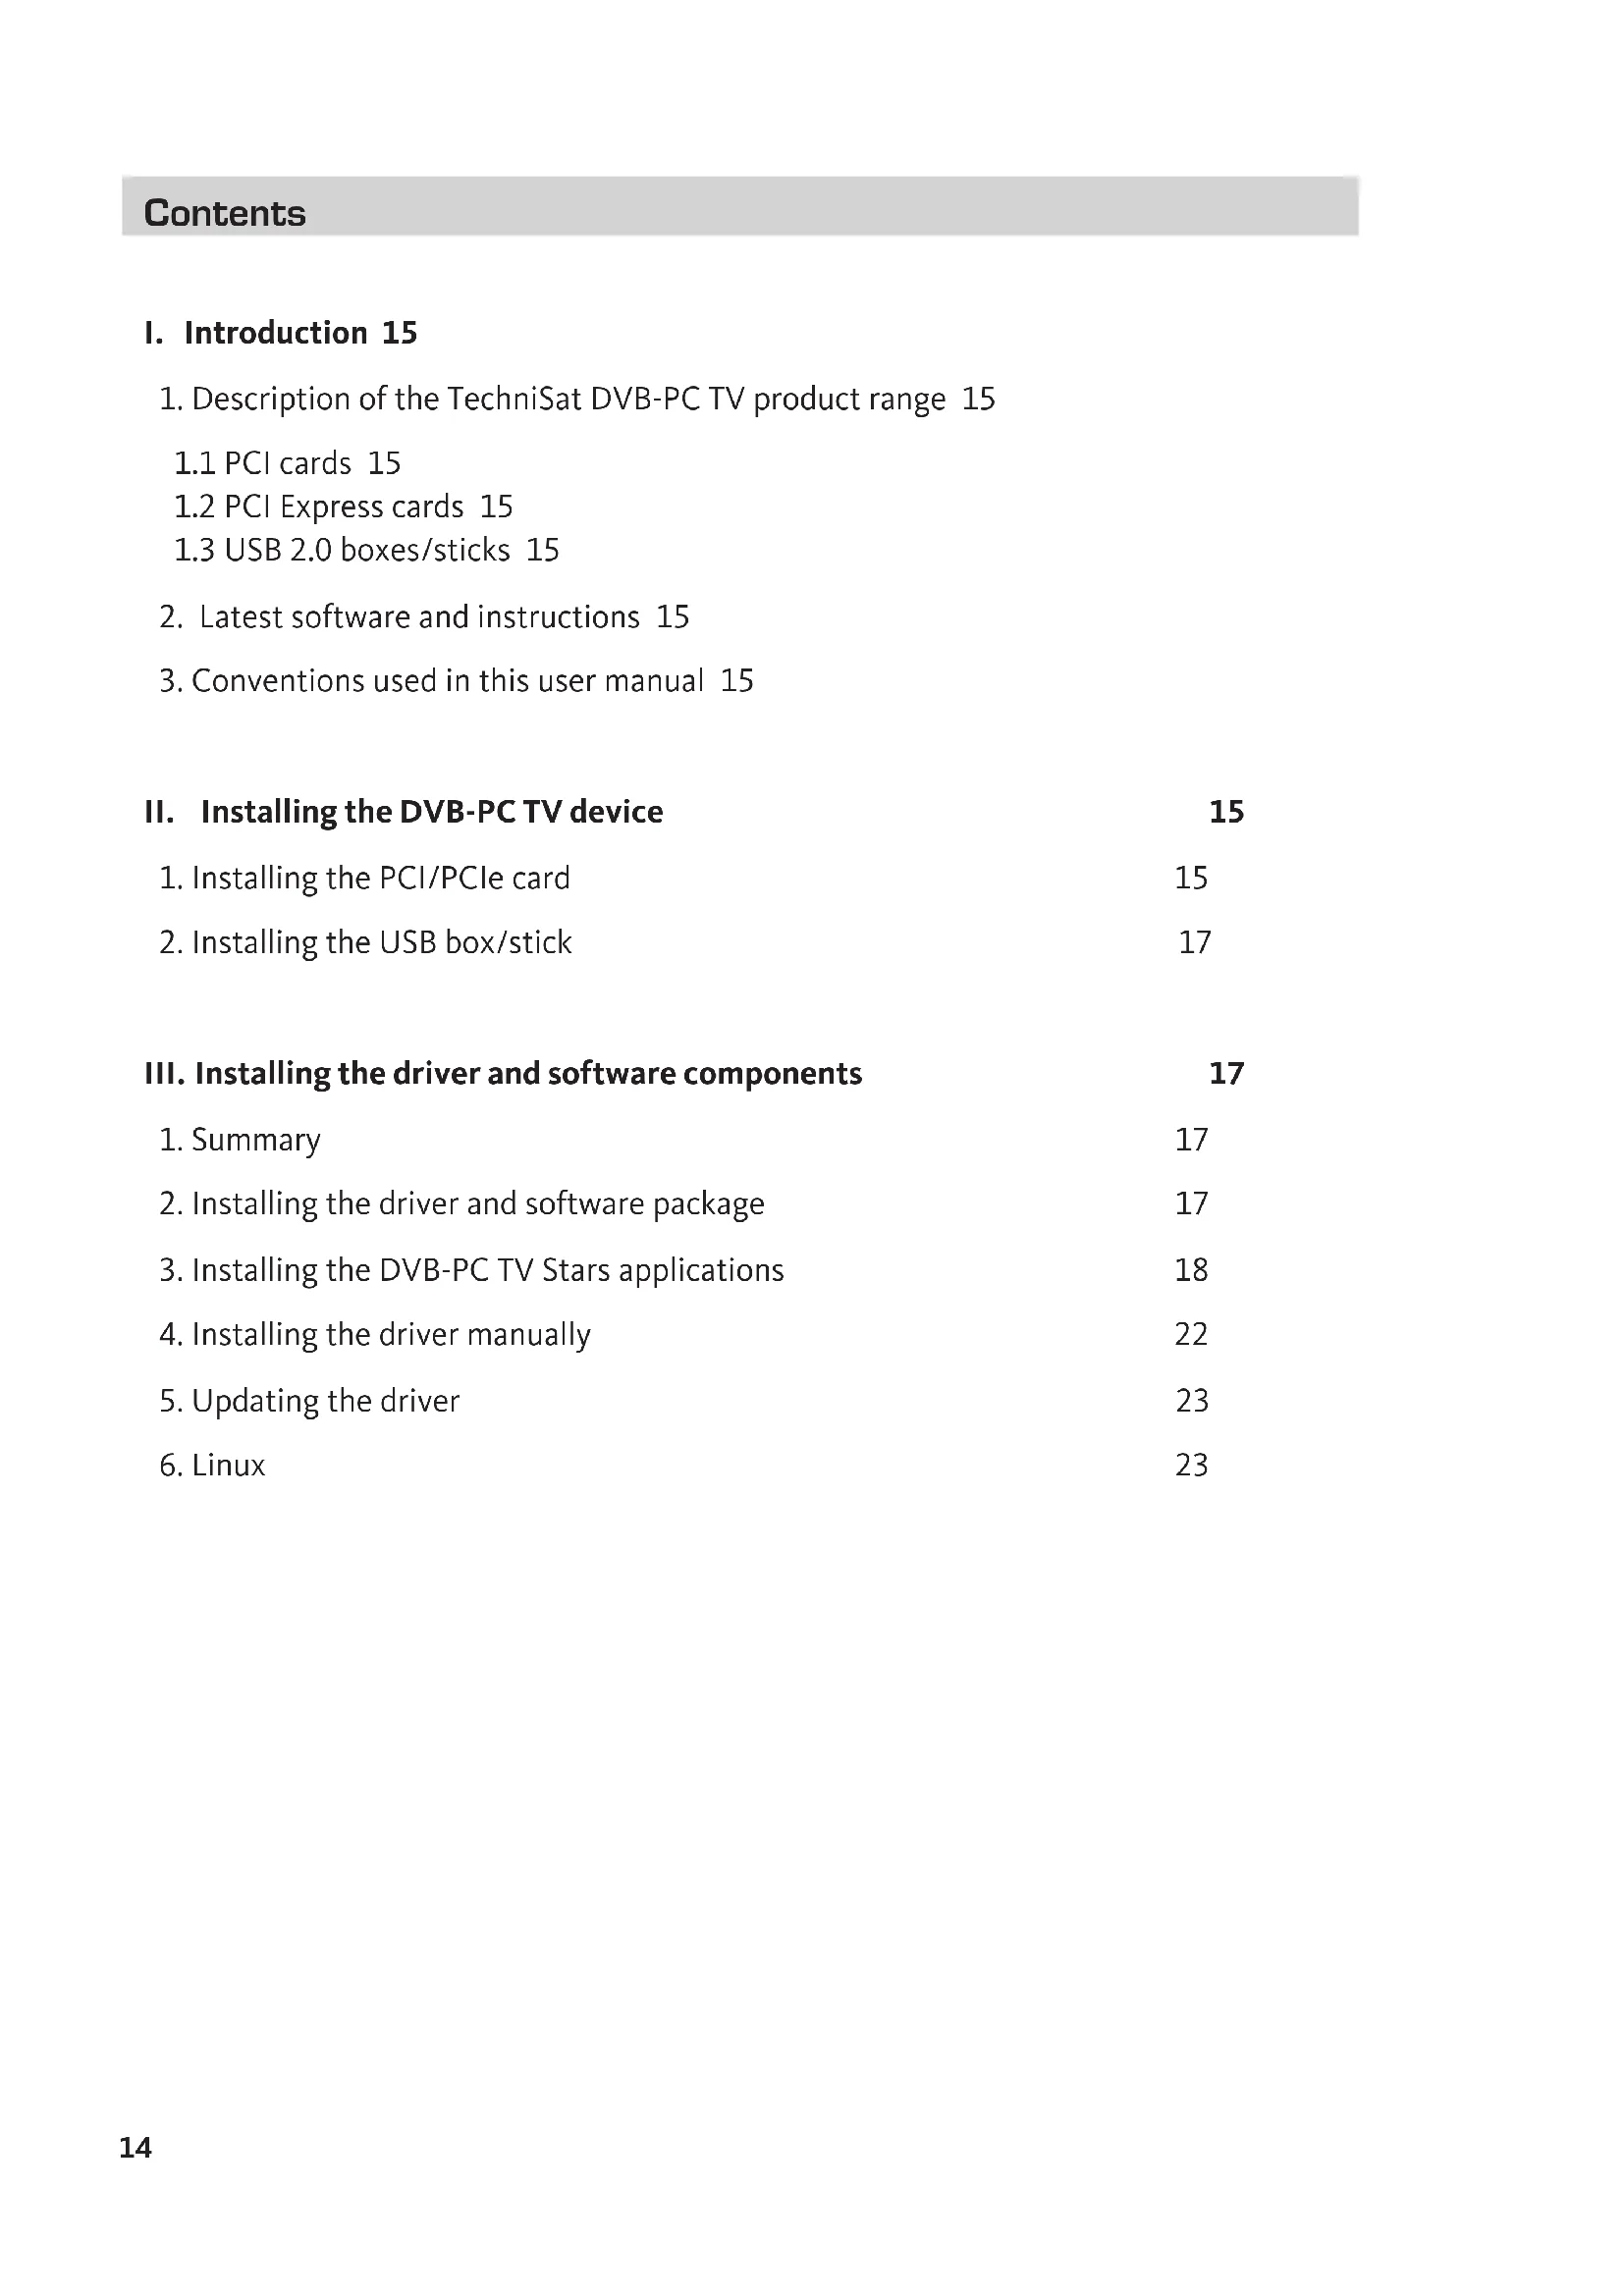
1.3 Before touching the PCI/PCIe card, discharge any static electricity from your body by touching an appropriate earth point. (Fig. 2)
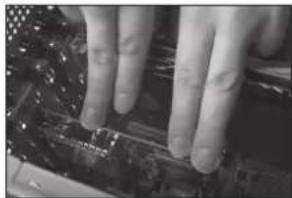
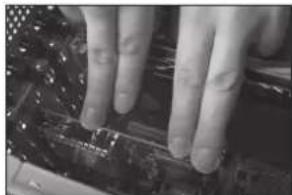
1.4 Only hold the PCI/PCIe card by its outside edges. Insert it firmly but carefully into the slot until it engages in the correct position. TechniSat does not accept any liability for damage caused by incorrect installation. (Fig. 3)
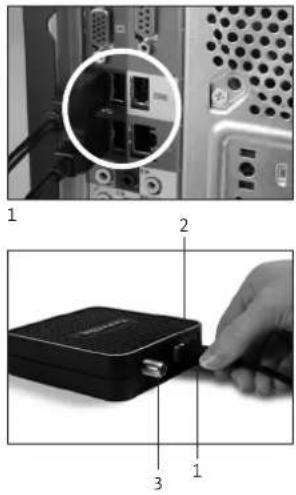
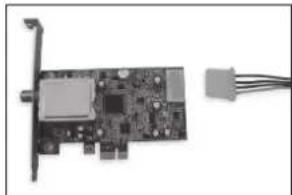
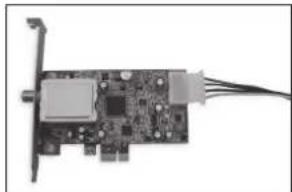
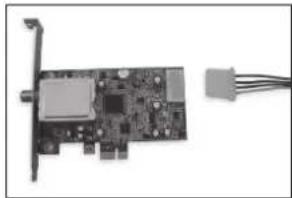
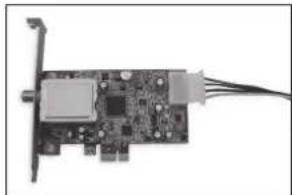
1.5 PCIe card: PCIe card require a separate power source supplied via cable from the PC power supply and fitted to the connector on the PCIe card. If this connection is not made, the operating system will not recognise the card.
Therefore the software and drivers will not be installed. (Fig. 4 and 5)
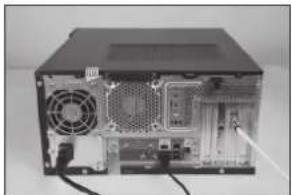
1.6 After you have closed up the computer housing, connect up your TV cable (satellite, cable or aerial), power cable and any other cables that were previously disconnected. (Fig. 6)
1.7 Switch on your computer. Windows will recognise the new hardware and ask for a driver for the PCI/PCIe card. Insert the installation CD provided and start the installation process.
2. Installing the USB box/stick
2.1 a Connect the USB box to your PC using the USB cable.
2.1 b The USB stick should be inserted directly into a USB port on your PC.
2.2 Connect the supplied power supply to the USB box. The USB stick does not require a separate power supply as it is powered via the USB port.
2.3 Connect your TV cable (satellite, cable or aerial) to the USB box or USB stick. Please note that there is a UHF adaptor supplied with the USB stick for connection to a household aerial.
2.4 Windows will recognise the new hardware and ask you for a driver for the PCI/PCIe card. Insert the installation CD that has been provided and start the installation process.
III. Installing the driver and software components
1. Summary
As an example, this chapter describes how to install a SkyStar USB HD on a Windows 7 Ultimate x86 operating system. The installation process is similar for other operating systems supported by this product.
The latest operating manuals in multiple languages can be accessed by clicking "Manuals" in the installation screen.
2. Installing the driver and software package
Insert the installation CD. Autostart should open the installation screen (Fig.1)
If the installation screen does not appear, it can be started manually by using "Start.exe" on the Installation CD.

Figure 1: DVB-PC TV installation screen
3. Installing the DVB-PC TV Stars applications
When you start the setup procedure in Windows Vista or Windows 7, the "User Account Control" window will appear (Fig.2):
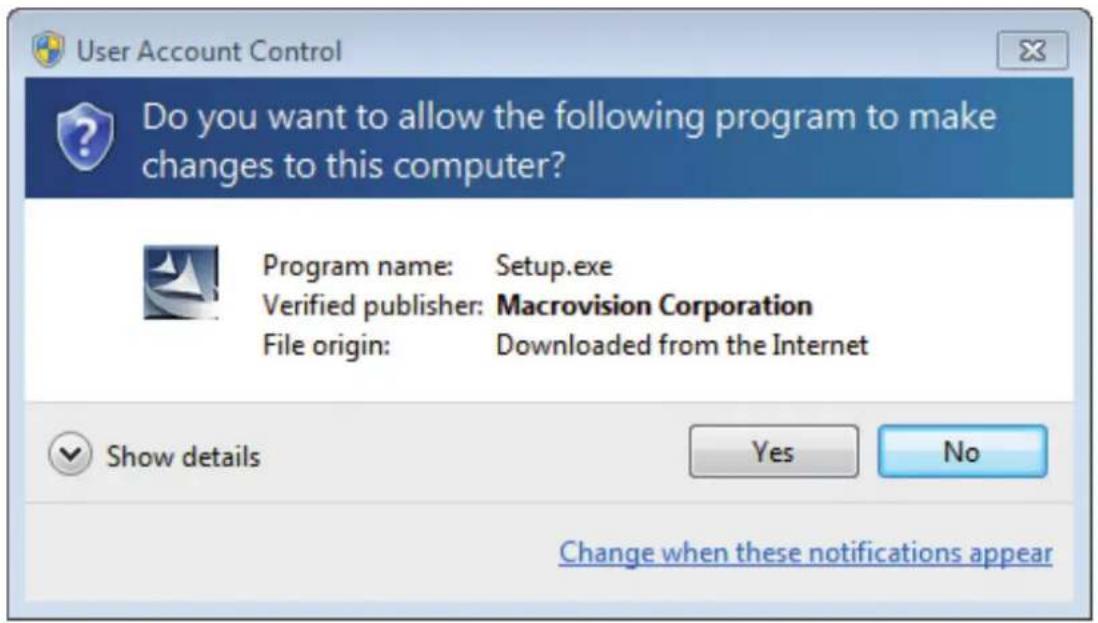
Figure 2: User account control in Windows 7
Confirm this message by clicking on "Yes". The setup process will be halted if you click on "No" and the installation of the drivers and software will be discontinued.
The language menu is displayed first. Select your preferred language (e.g. English) and click "Next" to continue. (Fig. 3)
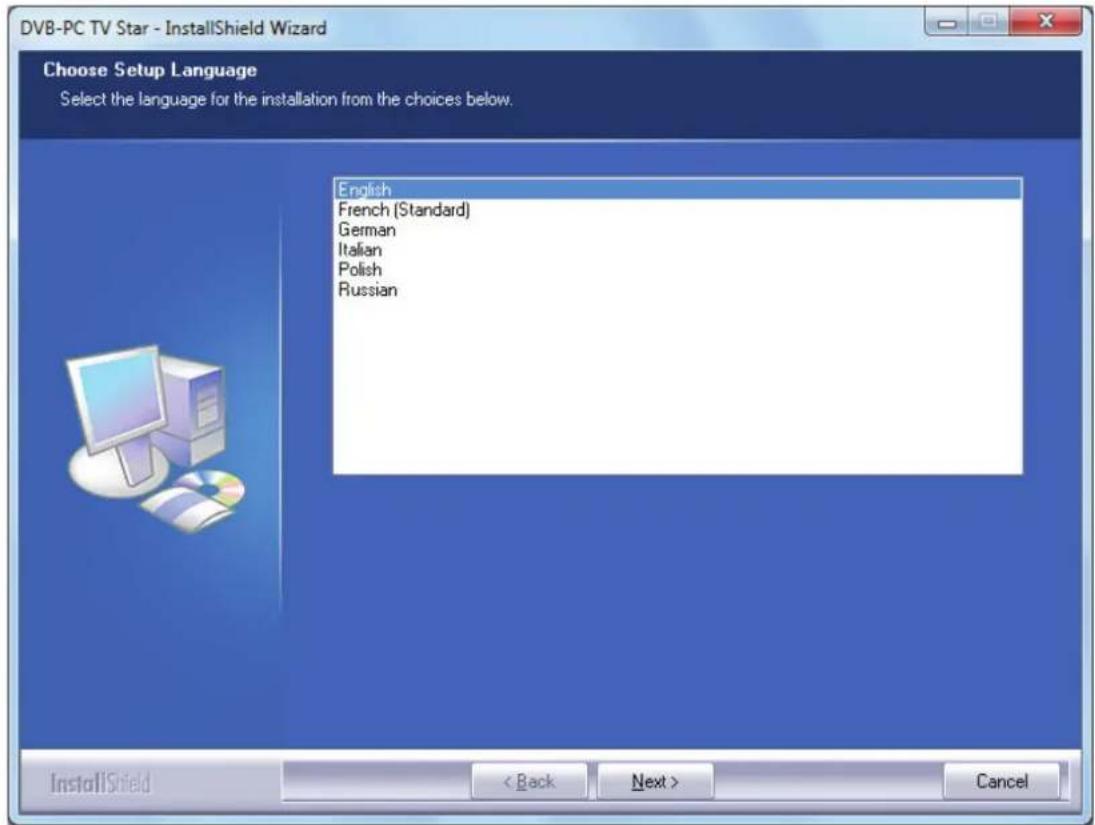
Figure 3: Selecting the setup language
The drivers for your TechniSat DVB-PC TV Star device will now be automatically installed. If you have already installed older versions of the TechniSat DVB-PC TV Star driver and software, setup will deinstall the old driver and software and then reboot. After reboot the installation process of the new driver and software will resume automatically.
During installation of the driver, the "Windows Security" window opens as illustrated below (Fig 4).
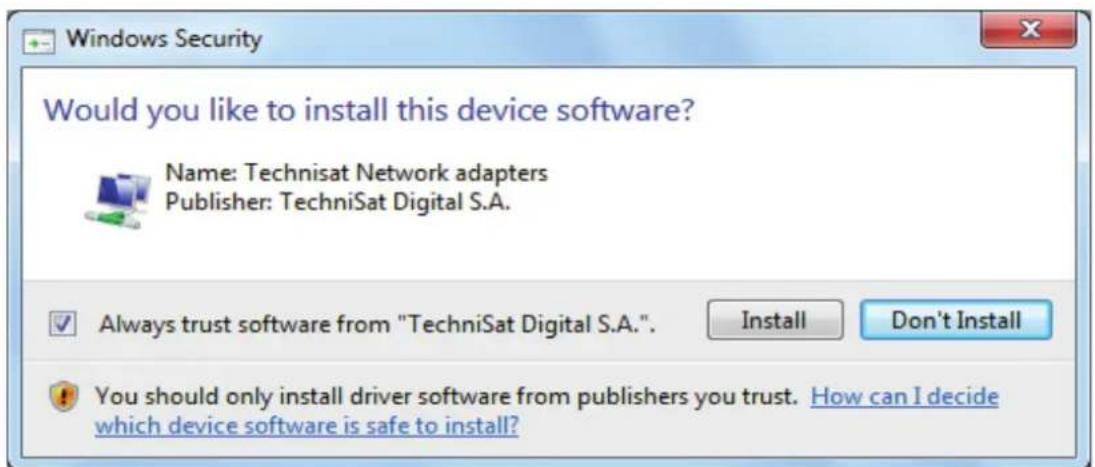
Figure 4: Windows Security
Click on "Install" to run the driver installation.
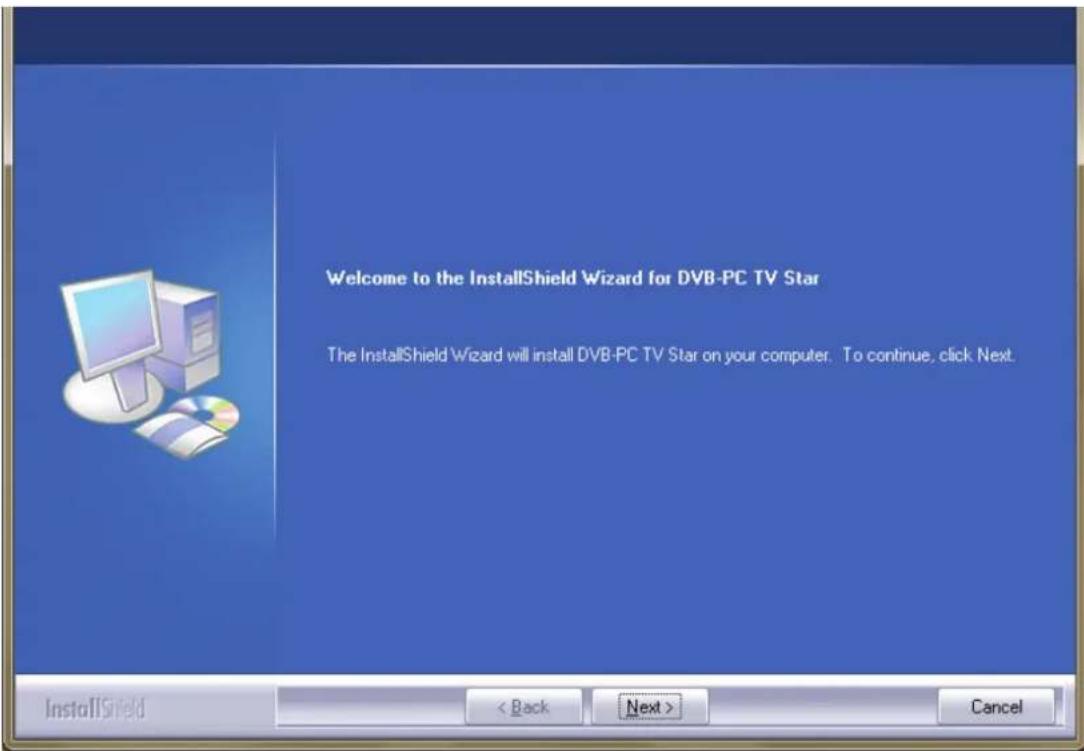
Installation of the software components is now carried out. Click "Next" to continue. (Fig.5)
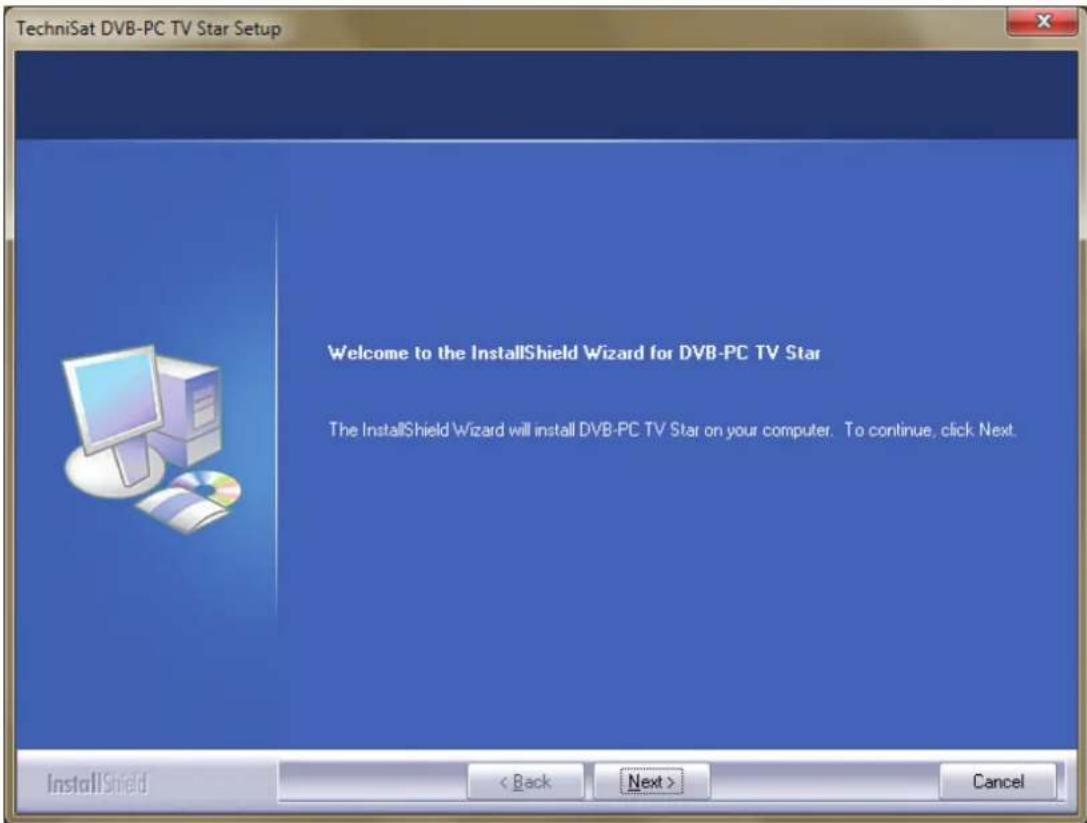
Figure 5: Welcome
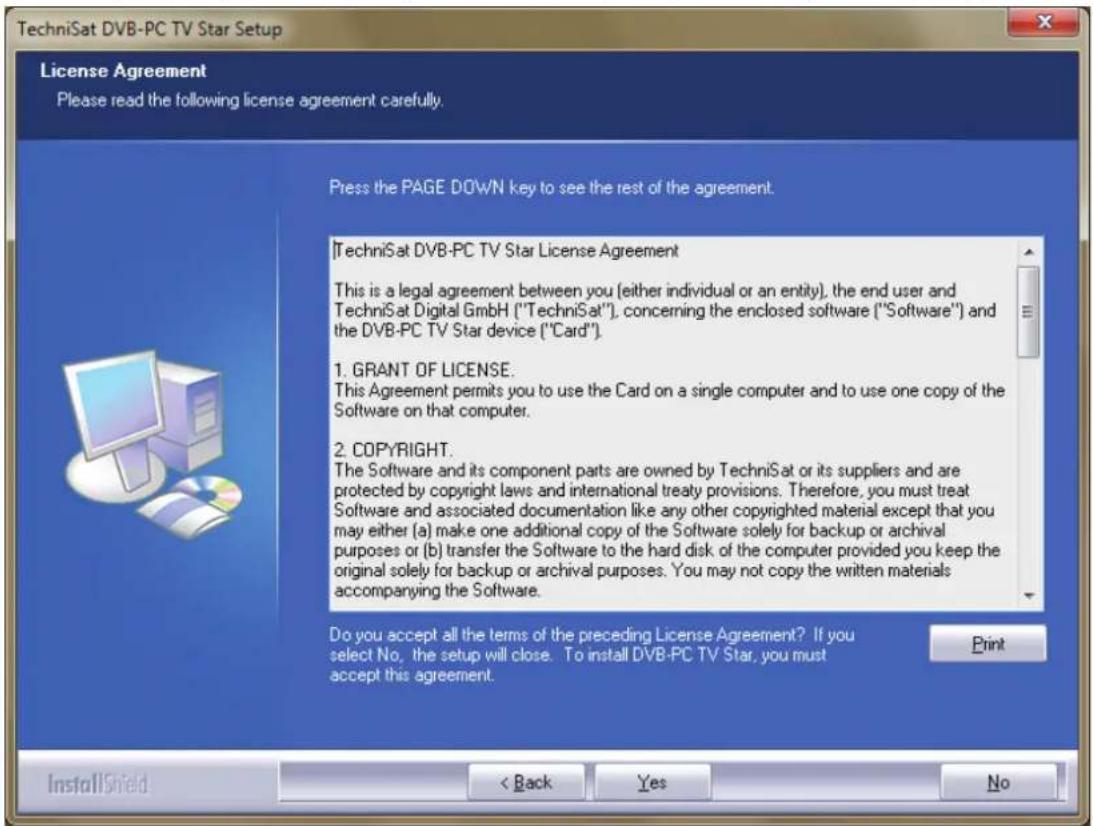
Read the licence agreement for the TechniSat DVB-PC TV Star and click "Yes" to accept. (Fig.6)
Use the pre-defined folder or click on "Browse" to specify a destination location for the software files. Click "Next" to continue. (Fig. 7)

Figure 6: Software Licence Agreement
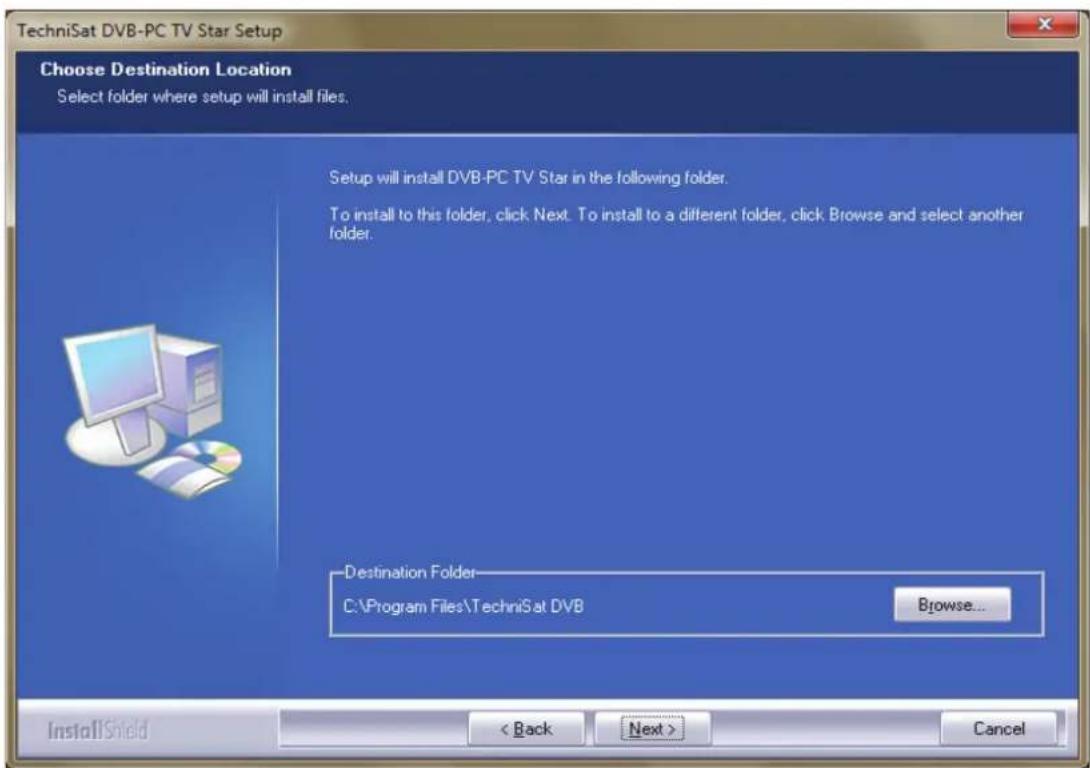
Figure 7: Choosing the target path
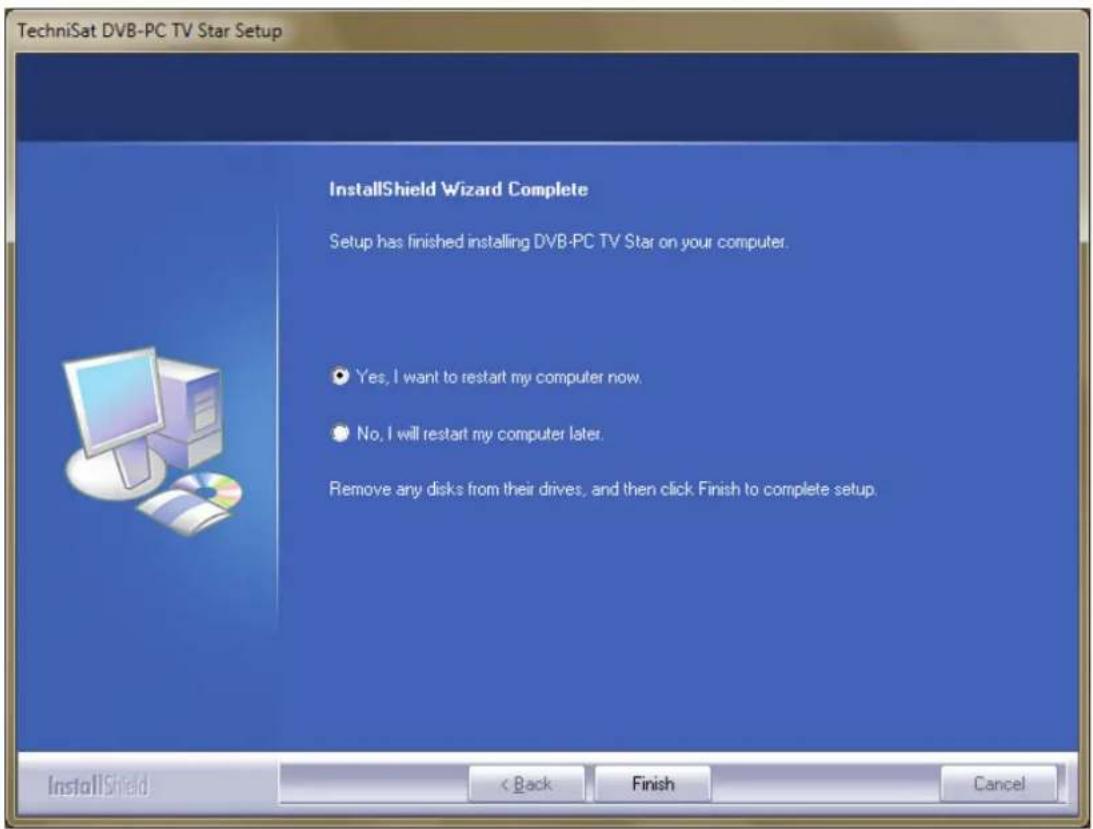
Click "Next" to continue. The setup programme now installs the software. Complete the software and device driver installation by clicking "Finish" and restarting your computer.
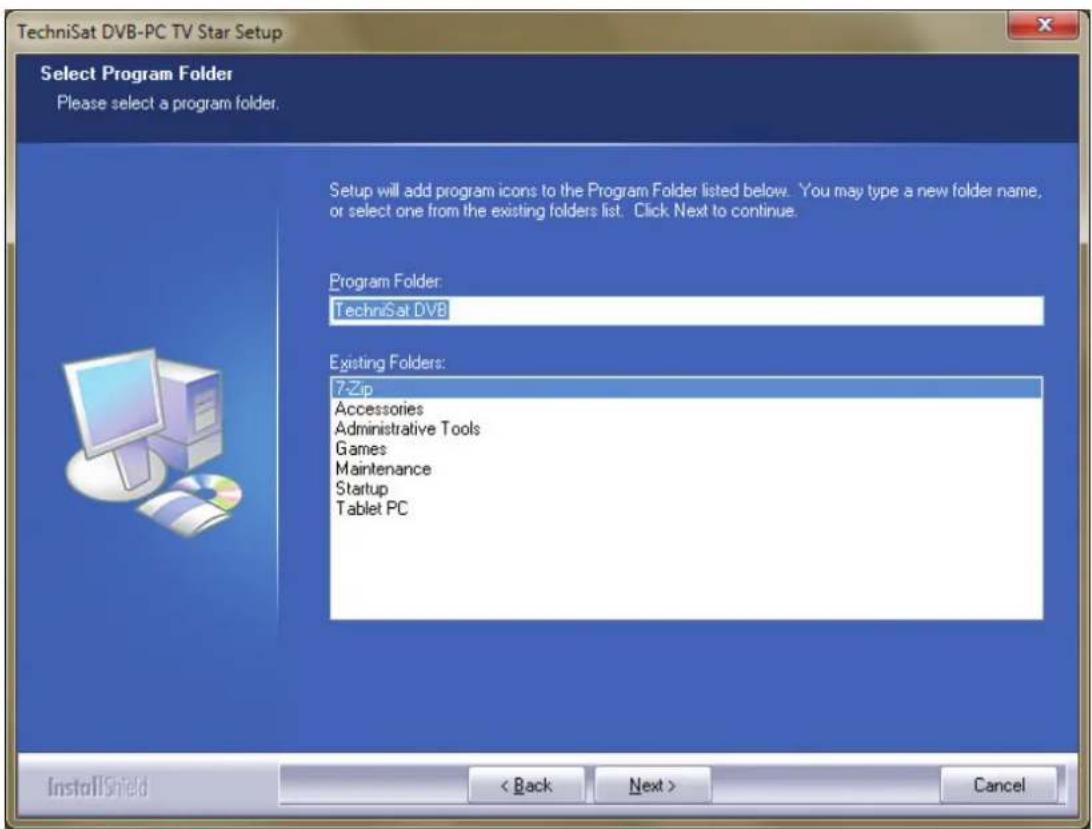
Figure 8: Selecting the program folder

Figure 9: Setup completed
Click on "Install" to run the driver installation.
Installation of the software components is now carried out.
Click on "Next" to continue. (Fig.5)
4. Installing the driver manually
If you have already installed a previous version of the driver or software for your TechniSat DVB-PC TV Stars device, please refer to Section III. 3.
The Hardware Installation wizard will only start-up if Windows recognises a new device for which no driver has yet been installed. If there are multiple DVB-PC TV Stars devices connected to your system, the “Found New Hardware” wizard opens for each device. You will need to install a separate driver for each device. As soon as the last device driver has been installed, you can begin installing the software.

Figure 10: Found New Hardware
You need administrator rights to install the software packages for your products. Check the "User Accounts" to ensure that you have administrator rights.
You can either manually install the device drivers first and then the software or let the drivers be set up automatically by the software installation process. For less experienced users we recommend installing the drivers automatically via the software installation process.
For DVB-PC TV Stars that are Compatible with Windows 7 ^® , the operating system searches online for the correct device driver so it is important to ensure that there is a broadband connection. The drivers are then installed automatically and driver updates are received via Automatic Updates.
If a problem occurs with this process, please refer to the FAQ (frequently asked questions) section on our website.
5. Updating the driver
If you have installed several TechniSat PCI, PCI Express or USB devices, you will need to update the drivers for each device separately.
If you have installed the Server4PC data reception application, you will need to close it after starting the system before you update your software. The Server4PC program icon is located in the Windows task bar.
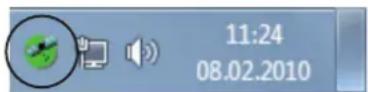
Figure 11: Server4PC on the system display
Now start the software installation. The Software Installation wizard automatically updates the drivers for all installed devices and the software package.
The software installation routine will now execute the next step.
6. Linux
TechniSat supports the efforts of the Linux Developer Community and the majority of our products are supported within the Linux Video-4 framework (www.linuxtv.org).
Please note that TechniSat cannot offer any support or warranty for this software and that you use it at your own risk.
TechniSat
natural_image
Three electronic devices: a SkyStar USB HD server, a green PCI card with network ports, and a black Technist's wireless router (no visible text or symbols on main components)Table des matières
I. Introduction 27
natural_image
Close-up of a computer motherboard with visible circuitry and components (no text or symbols)
natural_image
Close-up of a hand inserting a component into a computer motherboard with visible cables and components (no text or symbols)
natural_image
Close-up of hands pressing down on a circuit board (no visible text or symbols)
natural_image
Electronic circuit board with connector and cable, no visible text or symbols
natural_image
Close-up of a computer motherboard with connectors and a cable (no visible text or symbols)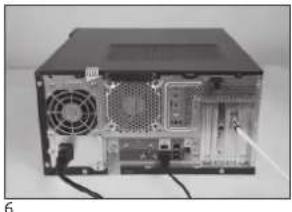
natural_image
Interior view of a computer tower case showing internal components like fan, drive, and cable (no visible text or labels)natural_image
Three electronic devices: a black TechniBatter server, a green PCI card, and a black technical device with a USB port (no visible text or symbols on main components)Sisukord
I. Sissejuhatus 39
natural_image
Close-up of a computer motherboard with a highlighted rectangular area (no visible text or symbols)1
natural_image
Close-up of a hand inserting cables into an electronic device (no visible text or symbols)2
natural_image
Close-up of hands pressing a circuit board on a device (no visible text or symbols)3
natural_image
Electronic circuit board with connector and cable, no visible text or symbols4
natural_image
Close-up of a computer motherboard with visible ports and connectors (no text or symbols)5

natural_image
Back view of a computer tower showing internal components and ventilation fan (no visible text or labels)6
natural_image
Close-up of a server rack with visible ports and a highlighted connection area (no text or symbols)
2. USB-karbi / USB-pulga paigaldamine
Joonis 4. Windowsi turvalisus
Draiveri installimiseks klôpsake nupul „Installi“ (Install).
Järgneb tarkvarakomponentide installimine.
Jätkamiseks klöpsake nupul „Edasi“ (Next). (Joonis 5)
Joonis 8. Programmikausta valimine

natural_image
Three electronic devices: a SkyStar USB HD server, a green PCI card with a network interface, and a black Technipat Carrier HLD device (no visible text or symbols on main components)Vsebina
I. Uvod 51
- Opis linije izdelkov TechniSat DVB-PC TV 51
1.1 Kartice PCI 51
1.2 Kartice PCI Express 51
natural_image
Close-up of a computer motherboard with visible circuitry and components (no text or symbols)
natural_image
Close-up of a hand inserting a component into a computer motherboard with visible cables and components (no text or symbols)
natural_image
Close-up of hands pressing down on a circuit board (no visible text or symbols)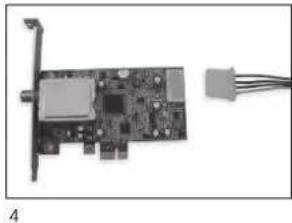
natural_image
Electronic circuit board with connector and cable, no visible text or symbols
natural_image
Close-up of a computer motherboard with a connector and cable (no visible text or symbols)
natural_image
Interior view of a computer tower case showing internal components like fan, drive, and cable (no visible text or labels)natural_image
Close-up of a server rack with visible ports and connectors, no text or symbols present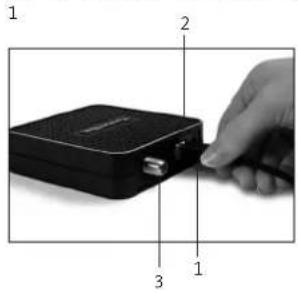
Slika 4: Varnost sistema Windows
Za zagon namestitve gonilnika kliknite gumb "Namesti" (Install).
Slika 5: Dobrodošli
Preberite licenčno pogodbo za TechniSat DVB-PC TV Star in kliknite "Da" (Yes), če se z njo strinjate. (Slika 6)
Uporabite predhodno pripravljeno mapo ali kliknite gumb "Prebrskaj" (Browse) za izbiro iskanega ciljnega naslova programa. Za nadaljevanje kliknite gumb "Naprej" (Next) (Slika 7)
Slika 7: Izbira ciljnega naslova
Za nadaljevanje kliknite gumb "Naprej" (Next). Namestitveni program zdaj namešča programsko opremo. Namestitveni program zaprite s klikom gumba 'Dokončaj" (Finish) in ponovno zaženite računalnik.

Slika 8: Izbira programske mape

natural_image
Three electronic devices: a SkyStar USB HD server, a green PCI card with a network interface, and a black Technipat Control HD device (no visible text or symbols on main components)Cuprins
I. Introducere 63
natural_image
Aerial grayscale image of an urban area with a highlighted oval structure (no visible text or symbols)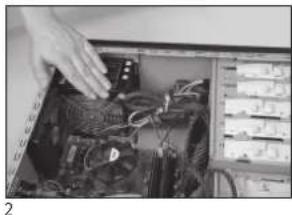
natural_image
Close-up of a computer motherboard with visible circuitry and a hand inserting wires (no text or symbols)
natural_image
Close-up of hands pressing down on a circuit board (no visible text or symbols)
natural_image
Electronic circuit board with connector and cable, no visible text or symbols
natural_image
Close-up of a computer motherboard with visible ports and connectors (no text or symbols)
natural_image
Back view of a computer tower internal structure showing fan, drive, and cable (no visible text or labels)natural_image
Close-up of server rack with connected ports and a highlighted circular area (no visible text or symbols)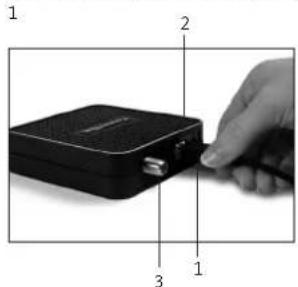
Figura 4: Securitate Windows
Figura 7: Selectarea căii
Figura 10: Hardware nou detectat
natural_image
Three electronic devices: a SkyStar USB HD server, a green PCI card with a network interface, and a black TechniBatter Carrier HD Cl device (no visible text or symbols on main components)I. levads 75
natural_image
Aerial view of a computer motherboard with an oval overlay highlighting a specific area (no visible text or symbols)1

natural_image
Close-up of a hand inserting cables into an electronic device (no visible text or symbols)2

natural_image
Close-up of hands pressing a component on a circuit board (no visible text or symbols)3
natural_image
Electronic circuit board with connector and cable, no visible text or symbols4
natural_image
Close-up of a computer motherboard with a central connector and cable (no visible text or symbols)5

natural_image
Back view of a computer tower showing internal components and ventilation fan (no visible text or labels)6
natural_image
Close-up of a server rack with visible ports and connectors, no text or symbols present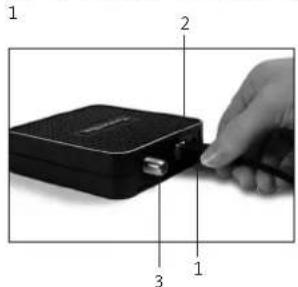
Attêls 8: Programmas mapes izvêle

natural_image
Three technology devices: a black SkyStar USB HD server, a green PCI card with a network interface, and a black Technist's wireless router (no visible text or symbols on the devices themselves)Turinys
I. Ivadas 87
natural_image
Aerial grayscale image of an urban area with a highlighted oval structure (no visible text or symbols)
natural_image
Close-up of a computer motherboard with visible CPU socket and wiring (no text or symbols)
natural_image
Close-up of hands pressing down on a circuit board (no visible text or symbols)
natural_image
Electronic circuit board with connector and cable, no visible text or symbols
natural_image
Close-up of a computer motherboard with visible ports and connectors (no text or symbols)
natural_image
Back view of a computer tower internal structure showing fan, drive, and cable (no visible text or labels)2. USB bloko / USB atmintuko diegimas
2 pav. Vartotojo paskyros valdymas „Windows 7" terpéje
4 pav. „Windows“ sauga
Spustelékite „ldiegti“ (Install), kad jdiegtumète tvarkyklę.
5 pav. Sveiki
8 pav. Programos aplanko pasirinkimas
9 pav. Sąranka baigta
natural_image
Three electronic devices: a SkyStar USB HD server, a green PCI card, and a black TechniBatter Control HD controller with an attached card (no visible text or symbols on main components)Índice
I. Introdução 99
natural_image
Close-up of a computer motherboard with visible circuitry and components (no text or symbols)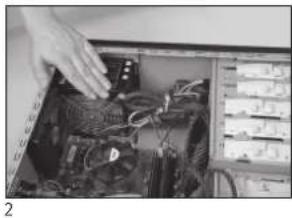
natural_image
Close-up of a hand inserting a component into a computer motherboard with visible cables and components (no text or symbols)
natural_image
Close-up of hands pressing down on a circuit board (no visible text or symbols)
natural_image
Electronic circuit board with connector and cable, no visible text or symbols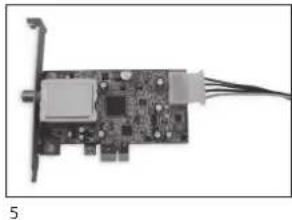
natural_image
Close-up of a computer motherboard with a connector and cable (no visible text or symbols)
natural_image
Interior view of a computer tower case showing internal components like fan, drive, and cable (no visible text or labels)natural_image
Close-up of a server rack with visible ports and a magnified inset showing internal connections (no text or symbols)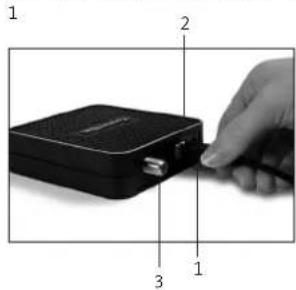
Figura 2: Controlo de conta de utilizador no Windows 7
Figura 5: Bem-vindo
natural_image
Three electronic devices: a SkyStar USB HD server, a green PCI card with a network interface, and a black TechniSat Control HD controller device (no visible text or symbols on main components)I. Введение 111
natural_image
Aerial view of a large electronic circuit board with an integrated circuit (no visible text or symbols)
natural_image
Close-up of a hand inserting a component into a computer motherboard with visible cables and components (no text or symbols)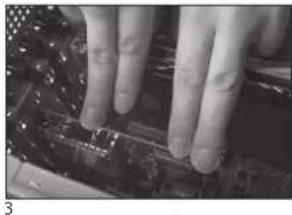
natural_image
Close-up of hands pressing down on a circuit board (no visible text or symbols)
natural_image
Electronic circuit board with connector and cable, no visible text or symbols
natural_image
Close-up of a computer motherboard with a connector and cable (no visible text or symbols)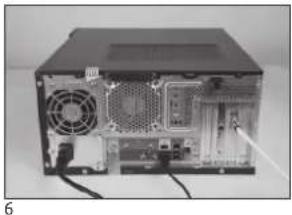
natural_image
Interior view of a computer tower showing drive bays, fan, and ventilation (no visible text or labels)natural_image
Close-up of a server rack with visible ports and connectors, no text or symbols present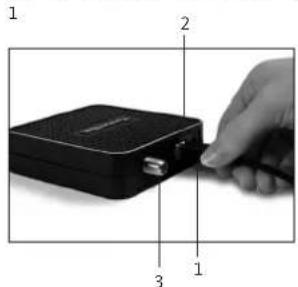
Document Release Date:
Februar 2011
Created by:
- Einleitung 3
- Quick Installation Instructions
- Contents
- Introduction 15
- Installing the DVB-PC TV device 15
- Installing the driver and software components 17
- Introduction
- Description of the TechniSat DVB-PC TV product range
- PCI cards
- PCI Express cards
- USB 2.0 boxes/sticks
- Latest software and instructions
- Conventions used in this manual
- Installing the DVB-PC TV device
- Installing the PCI/PCIe card
- Installing the USB box/stick
- Installing the driver and software components
- Summary
- Installing the driver and software package
- Installing the DVB-PC TV Stars applications
- Installing the driver manually
- Updating the driver
- Linux
- TechniSat
- Table des matières
- Introduction 27
- Sisukord
- Sissejuhatus 39
- USB-karbi / USB-pulga paigaldamine
- Vsebina
- Uvod 51
- Cuprins
- Introducere 63
- levads 75
- Turinys
- Ivadas 87
- USB bloko / USB atmintuko diegimas
- Índice
- Introdução 99
- Введение 111
Brand : TECHNISAT
Model : SkyStar 2 eXpress HD
Category : Electronic board