
Mobitronic RVRMM56 - LCD Screen WAECO - Free user manual and instructions
Find the device manual for free Mobitronic RVRMM56 WAECO in PDF.
| Product type | Foldable 5.6-inch LCD screen for vehicle |
| Brand | Waeco |
| Model | Mobitronic RVRMM56 |
| Dimensions (W x H x D) | 190 x 222 x 34.5 mm |
| Weight | Approximately 1.0 kg |
| Power supply | 12 - 15 V DC |
| Power consumption | 6 W max |
| Resolution | 225,000 pixels |
| Aspect ratio | 4:3 |
| Video format | NTSC / PAL |
| Operating temperature | 0 °C to 60 °C |
| Screen | 5.6-inch LCD, foldable, with infrared remote control |
| Junction box | Integrated, with two video inputs (AV1 and AV2), mono audio output |
| Screen functions | Power, Volume, Menu (Input, Blue Back, Revolve, System), Picture (Contrast, Brightness, Color, Tint) |
| Remote control functions | Selection of image settings (APC: Dynamic, Normal, Mild, User) and access to Picture menu |
| Mounting | By mounting plate on vehicle ceiling, junction box under dashboard |
| Included accessories | Screen, junction box with cables, remote control with battery, mounting plate, screws, manual |
| Safety | Disconnect battery before installation; do not mount near airbags; fasten securely |
| Maintenance | Clean with a soft, dry cloth; do not use abrasive products |
| Disposal | Recycle according to local regulations (electronic device) |
Frequently Asked Questions - Mobitronic RVRMM56 WAECO
User questions about Mobitronic RVRMM56 WAECO
0 question about this device. Answer the ones you know or ask your own.
Ask a new question about this device
Download the instructions for your LCD Screen in PDF format for free! Find your manual Mobitronic RVRMM56 - WAECO and take your electronic device back in hand. On this page are published all the documents necessary for the use of your device. Mobitronic RVRMM56 by WAECO.
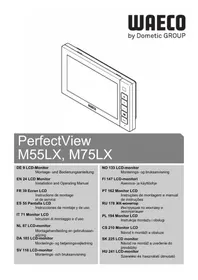
USER MANUAL Mobitronic RVRMM56 WAECO
Symbole
D CD-Monitor
GB LCD-Monitor
E LCD-Monitor
F LCD-Monitor
LCD-Monitor
NL LCD-Monitor
DK LCD-Monitor
S LCD-Monitor
N LCD-Monitor
FIN LCD-Monitor

RV-RMM-56
e1


②
③
B

②


(4)
(6)
7
(8)
10
9

11

(12)
13

14
E
General product description 16
Information on using the installation instructions 16
General safety and installation instructions 17-18
Tools required 19
Scope of delivery 19
Installation of the monitor 20
Installation of the connection box 20-21
Function description of the monitor 21
Function description of the remote control 22
Technical data 22
Disposal instructions 22
General product description
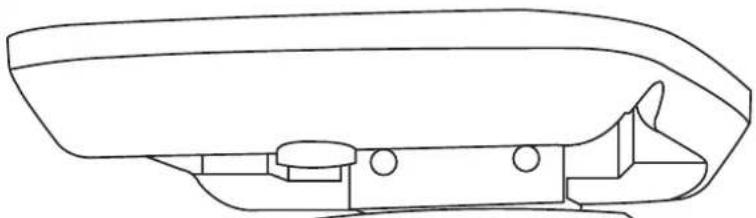
Foldable 5.6" LCD ceiling monitor with remote control for pleasurable entertainment in the vehicle.
Information on using the installation instructions

Warning! Safety instruction:
Failure to observe these warnings may result in injuries to persons or damage to material.
The rhombus indicates installation steps which have to be carried out.
To ensure problem-free fitting, read these installation and operating instructions carefully before starting work. Handover the assembly- and operating instructions when passing on the device to a new proprietor.
If the operating instructions do not answer all your questions or if the assembly steps are not clear, please do not hesitate to contact our customer technical support service.
WAECO UK Ltd.
UK-Broadmayne · Dorset DT2 8LY
Unit G1 · Roman Hill · Business Park
phone: +44-13 05/85 40 00 · fax: +44-13 05/85 42 88
www.waeco.com
Safety and installation instructions

Warning! Inadequate cable connections can lead to short-circuits which cause the following:
- cable fires
- activation of the airbag
- damage to electronic control equipment
- electrical functions (indicator, brake light, horn, ignition, light) fail through being short-circuited

Please note the following: With work on the lines of the vehicle the following terminal designations apply:
30 (input from battery plus direct)
15 (switched plus, behind battery)
31 (return cable from battery, earth)
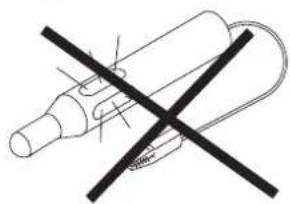
The securest form of connection is obtained by soldering the cable ends and then insulating the connection.
For detachable connections, use only insulated cable brackets, connector plugs, and flat pin bushings. Do not use crimp connections (line connector) or wire connectors.
Use crimp pliers for connecting the cables with cable lugs, plugs, or flat pin bushings.
With cable connections to 31 (earth):

Attach the cable with a bracket and tooth-lock washer to an earthing screw on the vehicle or screw it onto the metalwork of the vehicle using a bracket, metal screw and tooth-lock washer.
Always ensure a good earthing connection!

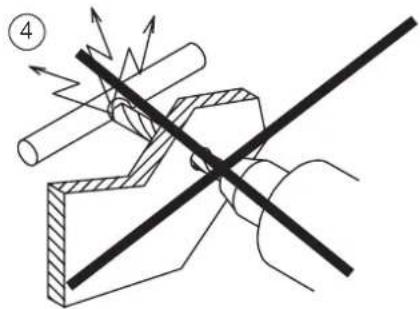
Warning! Due to risk of short-circuiting, always disconnect the negative pole of the battery before starting with work on the electrical equipment of the vehicle.
In the case of vehicles with a supplementary battery, also disconnect this negative pole.
Safety and installation instructions

Caution! On disconnecting the negative pole of the battery, all the volatile memories of the convenience electronics will lose their stored data. Depending on the vehicle's equipment, the following data may need to be reprogrammed: Radio-code · vehicle clock · time switch clock · on-board computer · seat position
Instructions on how to reset these can be found in the relevant operating instructions.

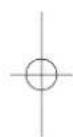
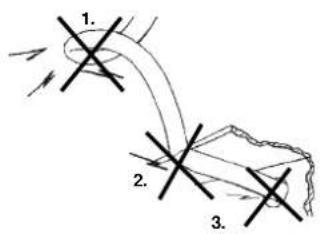
Warning! The components of the device which are inside the vehicle must be securely fixed so that they cannot come loose and injure the vehicle's occupants under any circumstances (sudden braking, traffic accident).

Caution! WAECO International does not accept any liability for damages due to the following:
a) Assembly error
b) Damage to the system by mechanical influences and overvoltages.
c) Modifications at the device without the explicit approval of WAECO International
d) Use for any purposes other than those described in the assembly instructions.
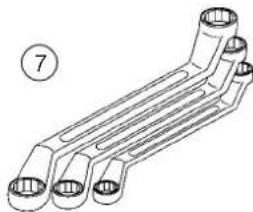
Necessary tool
The following are required for the installation:
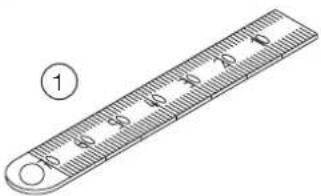
-Scale (ruler) (see B 1)-drilling machine (see B 5)
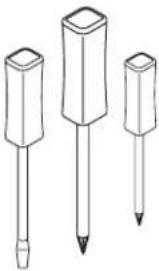
-Prick punch (see B 2) - screwdriver (see B 6)
-Hammer (see B 3)- screwdriver (see B 7)
-Drill (see B 4)
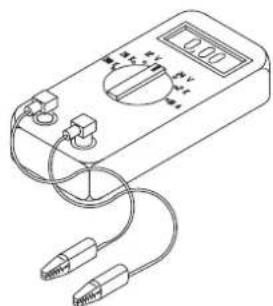
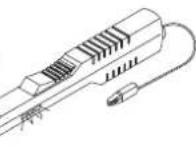
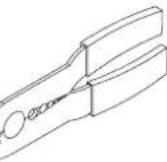
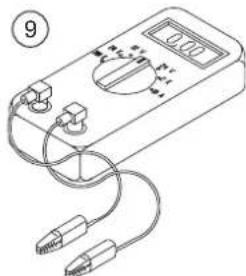
The following are required for the electrical connection and the check:
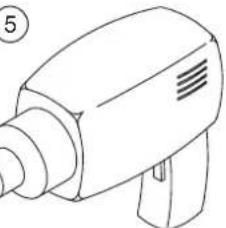
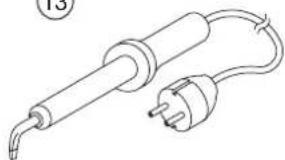
-Diode test lamp (see B 8)-hot-air drier (see B 12) or voltmeter (see B 9)-hatchet iron (see B 13)
-Crimp pliers (see B10) -soldering tin (see B 14)
-insulation tape (see B11)
Due to your individual assembly, perhaps you still need other screws, nuts, washers, metal screws and cable clips than those contained in the scope of supply.
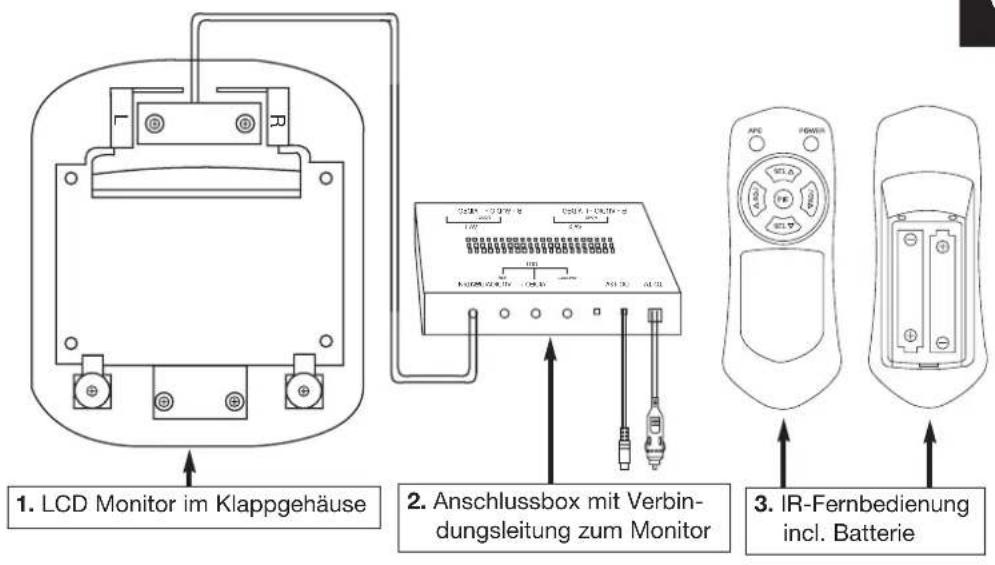
Scope of delivery
| Quantity | Designation |
| 1 | 5.6" LCD monitor in the folding housing (see C 1) |
| 1 | Connection box with connection line to the monitor and connecting lead (voltage supply) (see C 2) |
| 1 | IR remote control incl. battery (see C 3) |
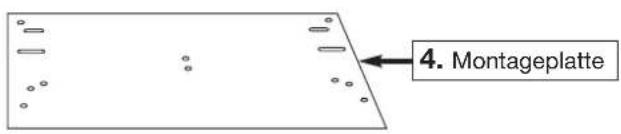
| 1 | Mounting plate (see C) |
| Assembly material | |
| 1 | Installation- / operating instructions |
Installation of the monitor
General installation instructions!
Please observe the following points before attaching the monitor:
- Locate monitor first of all on a trial basis.
The assembly location should be even. - Check before the final assembly whether the necessary free space is available, also below the selected assembly place chosen for the attachment of discs and nuts.
- Consider the weight of the monitor. Are reinforcements (larger washers or plates) necessary?
- Is the installation of the wiring harness and connecting cable to the monitor possible?
- Pay attention when locating the monitor that this is not assembled within the radius of an AIRBAG. Otherwise there is danger of injury when it is activated.
- Check that connecting cable has sufficient length from the place of assembly to the connection box.
Assembly:
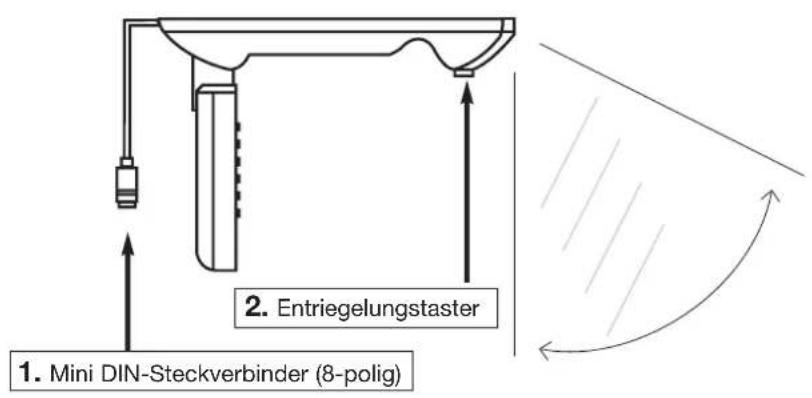
After having checked above mentioned points attach the mounting plate (see I 2) with the supplied sheet metal screws see I 3) to the vehicle sky see I 1). Screw then the monitor with the supplied machine screws to the mounting plate (see I 4)
Carry out a function test before the assembly.
Installation of the connection box
The assembly place must be protected against humidity. An assembly under the dashboard is recommendable due to the compact design. The box can be fastened with the supplied sheet-metal screws or self-adhesive Velcro tape (not included in the scope of delivery).
Please observe the general installation instructions!
The voltage supply should be provided via a switched voltage source e.g. group 15. The system has also a certain power consumption when it is switched off (IRreception active), which can discharge the vehicle battery over a longer period of time.
The connection box provides inputs for 2 video sources. (see H 3). This can be a DVD player (WAECO Art.-No. DVD-PL-10), a camera etc. Plug the RCA cable of the video sources into the sockets VIDEO/AUDIO. The connection box provides a mono-audio signal.
Function description of the monitor
Key POWER (see E 1) The device is switched on.
Depending upon whether a video source (e.g. WAECO DVD player, DVD-PL-10) is connected and in operation, a picture appears on the appropriate channel. Adjust the picture according to your needs. The following functions are available:
Keys ADJ (see E 5)
Setting of the volume during normal operation
Key MENU (see E 3)
Menu Function (see G 1)
Input -> Selection of the video sources AV 1 or AV 2 Blue back -> If no video signal is adjoining, the background appears blue, On/Off
Revolve -> vertical rotation of the picture by 180^ System -> Selection of the video format PAL/ NTSC
Menu Picture (see G 2)
Contrast -> Setting the contrast strength
Bright -> Setting the brightness
Color -> Color strength
Tint -> Color ratio red/ blue (only with NTSC video format)
Keys SEL (E 4)
For the selection of the menu points
Keys ADJ (see E 5)
For the setting within the menu point
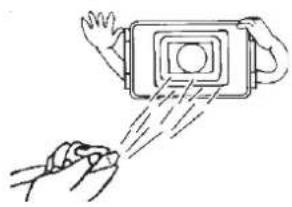
Function description of the remote control
APC (see F 1) Supplies a selection of picture settings
- Dynamic -> high contrast value
normal -> middle contrast value and brightness
- mild -> low contrast value
- user -> uses the settings from the menu Picture
PIC (see F 3) calls up the menu Picture.
All other keys of the remote control are to be found in section monitor.
Technical data
Display: 5,6
Operating voltage: 12 - 15V
Power input: max. 6 watts
Resolution: 225.000
pixels
Picture format: 4 : 3
Video format NTSC/PAL
Operating temperature: 0^ - 60^
Weight: approx 1.0 kg
Size W/H/D: 190 × 222 × 34.5 ~mm
Disposal instruction
Please note that electrical units contain a many recyclable materials as well as environmentally hazardous components.
Please take care in your own interest and for the sake of the environment that such components are only disposed of in a proper and admissible manner.
Indices
Installation of monitoren
Generelle monteringsanvisninger!
phone: +3 58-42/4 59 22 00
fax: +3 58-9/7 59 37 00
www.waeco.com
phone: +43-22 54/72 03 10
fax: +43-22 54/72 03 19
CH
WAECO (Schweiz) AG
CH-8153 Rümlang (Zürich)
Riedackerstrasse 7a
phone: +41-1-8 18 71 71
fax: +41-1-8 18 71 91
DK
WAECO Danmark A/S
phone: +34-93/7 50 22 77
fax:+34-93/7500552
F
WAECO Distribution SARL
F-60230 Chambly (Paris)
phone: +3 58-42/4 59 22 00
fax: +3 58-9/7 59 37 00
1
WAECO Italcold SRL
I-61015 Novafeltria
Zona Industriale Sartiano, 298/9
phone: +39-05 41/92 08 27
fax: +39-05 41/92 02 37
N
WAECO Norge AS
N-3208 Sandefjord · Leif Weldingsvej 16
phone: +47-33 42 84 50
fax: +47-33 42 84 59
NL
WAECO Benelux B.V.
NL-4700 BL Roosendaal
Postbus 1461 · Ettenseweg 60
phone: +31-1 65/58 67 00
fax: +31-1 65/55 55 62
s
WAECO Svenska AB
phone: +46-31/7 34 11 00
fax: +46-31/7 34 11 01
UK
WAECO UK Ltd.
UK-Broadmayne · Dorset DT2 8LY
Unit G1 · Roman Hill · Business Park
phone: +44-13 05/85 40 00
fax: +44-13 05/85 42 88

- B
- E
- General product description
- Information on using the installation instructions
- Warning! Safety instruction:
- WAECO UK Ltd.
- Safety and installation instructions
- Necessary tool
- The following are required for the installation:
- The following are required for the electrical connection and the check:
- Scope of delivery
- Installation of the monitor
- General installation instructions!
- Assembly:
- Installation of the connection box
- Please observe the general installation instructions!
- Function description of the monitor
- Function description of the remote control
- Technical data
- Disposal instruction
- Indices
- Installation of monitoren
- Generelle monteringsanvisninger!
- CH
- WAECO (Schweiz) AG
- DK
- WAECO Danmark A/S
- F
- WAECO Distribution SARL
- 1
- WAECO Italcold SRL
- N
- WAECO Norge AS
- NL
- WAECO Benelux B.V.
- s
- WAECO Svenska AB
- UK
Brand : WAECO
Model : Mobitronic RVRMM56
Category : LCD Screen