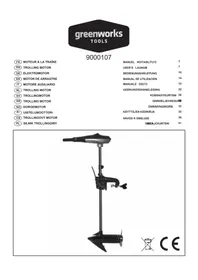
9000107 - Outboard motor GREENWORKS - Free user manual and instructions
Find the device manual for free 9000107 GREENWORKS in PDF.


| Product type | Electric outboard motor |
| Brand | Greenworks |
| Model | 9000107 |
| Power supply | 12 V DC (deep-cycle marine battery not included) |
| Maximum thrust | 55 lbs (approx. 25 kg) |
| Propeller speeds | 240 - 1820 rpm |
| Forward speeds | 5 speeds |
| Reverse speeds | 3 speeds |
| Propeller | Weedless propeller |
| Recommended battery type | 12 V deep-cycle marine battery, minimum 105 Ah capacity |
| Battery level indicator | 4 LED indicators (full charge, adequate, low, need recharge) |
| Tilt rotating bar | Yes, with 5 positions: lowered 45°, horizontal, raised 15°, 30°, 45° |
| Tilt lock lever | Yes |
| Adjustable depth | Yes, via depth collar knob; immerse motor at least 30 cm |
| Adjustable steering tension | Yes, via steering tension knob |
| Shaft material | Adjustable steel |
| Maintenance | Rinse with fresh water after use, remove weeds and fishing line, check propeller nut every 20 h |
| Safety | Do not use out of water, keep fingers away from moving parts, disconnect battery before repair |
| Spare parts | Propeller, propeller nut, washer, drive pin |
| Warranty | 24 months (private use only) |
| Manufacturer | Globe Tools Europe (Cologne, Germany) |
Frequently Asked Questions - 9000107 GREENWORKS
User questions about 9000107 GREENWORKS
0 question about this device. Answer the ones you know or ask your own.
Ask a new question about this device
Download the instructions for your Outboard motor in PDF format for free! Find your manual 9000107 - GREENWORKS and take your electronic device back in hand. On this page are published all the documents necessary for the use of your device. 9000107 by GREENWORKS.
USER MANUAL 9000107 GREENWORKS
English (Original Instructions)
Your product has been engineered and manufactured to Greenworks tools' high standard for dependability, ease of operation, and operator safety. When properly cared for, it will give you years of rugged, trouble-free performance.
Thank you for buying a Greenworks tools product.
Save this manual for future reference

WARNING
Read these instructions carefully, be familiar with the controls and the proper use of the machine. Please keep the instructions safe for later use!
DESCRIPTION
See figure 1.
- Tilt twist tiller handle (controls on/off, speed, steering, forward, reverse)
- Battery meter
- Tilt lock lever
- Depth collar knob
- Boat mounting bracket
- Clamp screws
- Adjustable shaft
- Propeller
- 12 V DC Motor
- Weedless propeller
- Slot end
- Prop nut
- Washer
- Drive pin
- Steering tension knob
- Release button
SPECIFICATIONS
| Trolling motor 9000107 | |
| Motor 12 V | |
| Thrust 55 lbs | |
| Prop speeds 240-1820 RPM | |
| Forward speed 5 speeds | |
| Reverse speed 3 speeds | |
ASSEMBLY
MOUNTING THE MOTOR
See figure 2.
Install the motor on the transom of the boat. Be sure to tighten the clamp knob (4) by turning clockwise securely.
To loosen the clamp knob (4) by turning counterclockwise.

WARNING
When tilting motor, keep fingers clear of all hinge and pivot points and all moving parts.

CAUTION
Over-tightening the clamp screws can damage the bracket.
BRACKET ADJUSTMENT
See figure 3.
You can lock your motor in a vertical position, angle it for shallow water or tilt it completely out of the water.
Firmly grasp the control head or steel shaft.
Depress and hold the tilt lock lever (3).
Tilt to any of the positions on the mounting bracket.
Release the lever (3).
DEPTH ADJUSTMENT
Firmly grasp the shaft and hold it steady.
- Loosen the steering tension knob (3) and depth collar knob (4) until the tube slides freely.
- Raise or lower the motor (8) to the desired depth.
- Tighten depth collar knob (4) to secure the motor in place.

IMPORTANT
When setting the depth, be sure the top of the motor is submerged at least 12 (30 cm) to avoid churning or agitation of surface water. The propeller must be completely submerged.
STEERING ADJUSTMENT
See figure 4.
Adjust the steering tension knob (15) to provide enough tension to allow the motor to turn freely, yet remain in position without being held or; Tighten the knob and lock the motor in a preset position to leave your hands free for fishing.
OPERATION
TILT TWIST TILLER
See figure 5-6.
These motors offer a choice of five forward and three
English (Original Instructions)
reverse speeds. The speed control may be operated in either direction, forward or reverse.
Turn the tilt twist tiller handle (1) counterclockwise from O (off) to increase reverse speed.
Turn the tilt twist tiller handle (1) clockwise from O (off) to increase forward speed.
Thrust decreases as you approach O from either direction. The numbers printed on the twist grip handle represent a percentage of maximum thrust.
The twist grip tiller handle is shipped in the down position. Firmly pull the handle up to the horizontal position. The handle has five available positions: 45° down, horizontal, 15° , 30° and 45° tilted up. The handle locks in the horizontal position, but can be tilted down by pushing the release button (16) located on the left underside of the handle pivot.

CAUTION
Never operate your motor when it is out of the water.
BATTERY
12 V BATTERY INFORMATION
NOTE: Battery sold seperately.
The motors will operate with any deep cycle marine 12 V battery.
For best results it is recommended to use a deep cycle marine battery with a minimum of 105 ampere hour rating. As a general on the water estimate, your 12V motor will draw one ampere per hour for each pound of thrust produced when the motor is running on high. The actual ampere draw is subject to your particular environmental conditions and operation requirements.
Always store battery at full charge when not in use. Battery life will be extended by charging each time battery is used and every two weeks when not in use. (Use a lamp timer and charge each day for 1 hour even if battery is not use as this will help maintain a full battery level.)
NOTE: Only trickle charge your battery to full power, do not speed/rapid charge the battery as this will shorten its life.
If you are using a crank battery to start a gasoline outboard it is strongly recommended to use a separate battery for trolling motor to ensure of enough start up power for the gasoline motor.
BATTERY METER
See figure 7.
The LED provides an accurate display of the remaining
charge in the battery. The LED's only illuminate when the motor in the ON position. The gauge reads as follows:
Four lights indicate full charge.
Three lights indicate good charge.
Two lights indicate low charge.
One light indicates recharge.
BATTERY CONNECTION
12 V Systems
- Connect the positive (+) red lead to the positive (+) battery terminal.
- Connect the negative (-) blade lead to the negative (-) battery terminal.
NOTE: If installing a leadwire plug, observe proper polarity and follow instructions in your boat owner's manual.

ARNING
- Before connecting battery, make sure the tiller twist handle is in the off position.
- Use only 6 gauge wire to extend power lead.
- Improper wiring of 12V system could cause battery explosion!
- Keep leadwire wing nut connection tight and solid to the battery terminals.
- Locate battery in a ventilated compartment.
IMPORTANT
This is supplied as a quick reference guide however battery types, brands and sizes may vary in performance and abilities. Always read your battery manufacturers manual for specific battery requirements or contact the manufacturer for best practices and/or advice.
PROPELLER REPLACEMENT
PROPELLER REPLACEMENT
See figure 8.
Hold the propeller (10) and loosen the prop nut (12) with a pliers or a wrench.
Remove prop nut (12) and washer (13).
NOTE: If the drive pin is sheared/broken, you will need to hold the shaft steady with a screwdriver blade pressed into the slot on the end of the shaft.
- Turn the old prop to horizontal (as illustrated) and pull it straight off. If the drive pin falls out, push it back in.
Align new propeller with drive pin.
English (Original Instructions)
Install prop washer and prop nut.
- Tighten prop nut 1/4 turn past snub. (25-35 inch lbs.)
IMPORTANT
If the prop nut is overtightened it may cause damage to the prop or cause too much pressure/strain on the motor which may cause overheating or premature battery drain.
CAUTION
Disconnect the motor from the battery before beginning any prop work or maintenance.
MAINTENANCE
After use, these units should be rinsed with fresh water, then wiped down with a cloth dampened with an aqueous based silicone spray.
The propeller must be cleaned of weeds and fishing line. The line can get behind the prop, wear away the seals and allow water to enter the motor. Check this after every 20 hours of operation.
Before each use, check to see that the prop nut is secure.
- To prevent accidental damage during trailering or storage, disconnect the battery whenever the motor is off of the water. For prolonged storage, lightly coat all metal parts with an aqueous based silicone spray.
For maximum performance, restore battery to full charge before each use.
- Keep battery terminals clean with fine sandpaper or emery cloth.
The weedless wedge propeller is designed to provide absolute weed free operation with very high efficiency. To maintain this top performance, the leading edge of the blades must be kept smooth. If they are rough or nicked from use, restore to smooth by sanding with fine sandpaper.
NOTE: Replace propeller if unable to repair.
TROUBLESHOOTING
| Problem | Solution |
| Motor fails to run or lacks power | Check motor for obstructions. The motor may have gone into current limit. To reset: return to off position, remove obstruction and resume operation. |
| Check battery connections for proper polarity. | |
| Make sure terminals are clean and corrosion free. Use fine sandpaper or emery cloth to clean terminals. | |
| Check battery water level. Add water if needed. | |
| Motor looses power after a short running time | Check battery charge, if low, restore to full charge. |
| Motor is hard to steer | Loosen the steering tension knob on the back of bracket. |
| Lubricate the composite shaft. | |
| Your experience prop vibration during normal operation | Remove and rotate the prop 180°. See removal instructions in prop section. |
If these solutions do not solve the problem contact your authorised service dealer.
Globe Tools warrants this outdoor product to be free of defects in material and workmanship for 24 months from the date of purchase by the original purchaser, subject to the limitations below. Please keep your invoice as proof of date of purchase.
This warranty is only applicable where the product is used for personal and non-commercial purposes. This warranty does not cover damage or liability caused by / due to misuse, abuse, accidental or intentional acts by user, improper handling, unreasonable use, negligence, failure by end user to follow operating procedures outlined in the user's manual, attempted repair by non-qualified professional, unauthorized repair, modification, or use of accessories and/or attachments not specifically recommended by authorized party. Please see your local dealer for list of authorized service centers in your area.
This warranty does not cover belts, brushes, bags, bulbs or any part which ordinary wear and tear results in required replacement during warranty period. This warranty does not cover transportation cost or consumable items such as fuses and batteries.
This limited warranty is void if the product's original identification (trade mark, serial number, etc.) markings have been defaced, altered or removed or if product is not purchased from an authorized reseller or if product is sold AS IS and / or WITH ALL FAULTS.
Where permitted, the provisions of this limited warranty are in lieu of any other written warranty, whether express or implied, written or oral, including any warranty of MERCHANTABILITY OR FITNESS FOR A PARTICULAR PURPOSE. IN NO EVENT SHALL WE BE LIABLE FOR SPECIAL, INCIDENTAL, CONSEQUENTIAL OR INCIDENTAL DAMAGES. OUR MAXIMUM LIABILITY SHALL NOT EXCEED THE ACTUAL PURCHASE PRICE PAID BY YOU FOR THE PRODUCT.
This warranty is valid only in the European Union, Australia and New Zealand. Outside these areas, please contact your authorized Green -works tools ealer to determine if another warranty applies.

EINGESCHRANKTE GARANTIE
Vice President of Engineering
Changzhou, 30/12/2013

NL
EC CONFORMITEITSVERKLARING
Fabrikant: Changzhou Globe Co., Ltd.
Adres: No.65 Xinggang Road Zhonglou Zone Changzhou, Jiangsu 213000 P.R.China
Vice President Ontwerp
Changzhou, 30/12/2013
DA
EC OVERENSSTEMMELSESERKLÄERING
Fabrikant: Changzhou Globe Co., Ltd.
Adresse: No.65 Xinggang Road Zhonglou Zone Changzhou, Jiangsu 213000 P.R.China
Vice President of Engineering
Changzhou, 30/12/2013

EN EC DECLARATION OF CONFORMITY
Manufacturer: Changzhou Globe Co., Ltd.
Address: No.65 Xinggang Road Zhonglou Zone Changzhou, Jiangsu 213000 P.R.China
Name and address of the person authorised to compile the technical file:
Dennis Jacobson (Director of Outdoor Power Equipment)
GLOBETOOLS EUROPE.
1 Etage
Schillingsrottnerstr. 38
50996 Cologne
Germany
Herewith we declare that the product
Category: TROLLING MOTOR
Model: 9000107
Serial number: See product rating label
Year of Construction: See product rating label
is in conformity with the relevant provisions of the Machinery Directive 2004/108
/EC
And furthermore, we declare that
the following (parts/clauses of) European harmonised standards have
been used
EN55012: 2007+A1
EN61000-6-1:2007
TüvRheinland (Shanghai) Co., Ltd.
Dennis Jacobson (BEng, CEng, MIET)
Vice President of Engineering
Changzhou, 30/12/2013
CS PROHLASENI O SHODE EC
Vyrobce: Changzhou Globe Co., Ltd.
Adresa: No.65 Xinggang Road Zhonglou Zone Changzhou, Jiangsu 213000 P.R.China Jméno areshasta osoby pavéféne fidit technikkou dokumentaci:
Dennis Jacobson (Reditel pro elektrique nastroje pro venkovnif pouzivani)
GLOBE TOOLS EUROPE
1 Etage
Schillingsrotterstr. 38
50996 Cologne
Germany
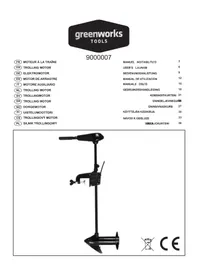


- ENGLISH (ORIGINAL INSTRUCTIONS)
- WARNING
- DESCRIPTION
- ASSEMBLY
- MOUNTING THE MOTOR
- CAUTION
- BRACKET ADJUSTMENT
- DEPTH ADJUSTMENT
- IMPORTANT
- STEERING ADJUSTMENT
- OPERATION
- TILT TWIST TILLER
- BATTERY
- 12 V BATTERY INFORMATION
- BATTERY METER
- BATTERY CONNECTION
- ARNING
- PROPELLER REPLACEMENT
- MAINTENANCE
- EINGESCHRANKTE GARANTIE
- NL
- EC CONFORMITEITSVERKLARING
- DA
- EC OVERENSSTEMMELSESERKLÄERING
- EN EC DECLARATION OF CONFORMITY
- CS PROHLASENI O SHODE EC
Brand : GREENWORKS
Model : 9000107
Category : Outboard motor