
OM 3528 D - Weather Station Trevi - Free user manual and instructions
Find the device manual for free OM 3528 D Trevi in PDF.
| Product type | Weather station with display of time, date and indoor/outdoor temperatures |
| Brand | Trevi |
| Model | OM 3528 D |
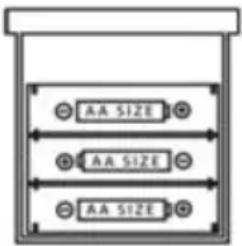
| Main unit power supply | 3 AA batteries (1.5 V) |
| External sensor power supply | 2 AAA batteries (1.5 V) |
| Max number of external sensors | 3 (1 included) |
| Indoor temperature range | 0 °C to +50 °C (32 °F to 122 °F) |
| Outdoor temperature range | -20 °C to +70 °C (-4 °F to 158 °F) |
| Transmission frequency | 433 MHz RF |
| Max transmission range | 30 meters outdoors |
| Radio-controlled time reception | DCF (Germany, 1500 km range) |
| Adjustable time zone | Yes, manual adjustment |
| Time display | 12 h / 24 h |
| Alarms | 2 independent alarms with snooze (adjustable 1-59 min) |
| Snooze function | Yes, via SNOOZE button |
| Weekday languages | 8 languages: English, German, French, Italian, Dutch, Spanish, Danish, Russian |
| Temperature display | °C or °F selectable |
| Wall mounting | Yes, holes at the back |
| Main unit dimensions | Approximately 20 x 12 x 4 cm (estimated) |
| Main unit weight | Approximately 250 g (estimated) |
| Maintenance and cleaning | Clean with a soft dry cloth. Avoid water and solvents. |
| Safety | Respect battery polarities. Do not expose to moisture or shocks. |
| Spare parts and repairability | Trevi after-sales service. 24-month warranty. |
Frequently Asked Questions - OM 3528 D Trevi
User questions about OM 3528 D Trevi
0 question about this device. Answer the ones you know or ask your own.
Ask a new question about this device
Download the instructions for your Weather Station in PDF format for free! Find your manual OM 3528 D - Trevi and take your electronic device back in hand. On this page are published all the documents necessary for the use of your device. OM 3528 D by Trevi.
USER MANUAL OM 3528 D Trevi
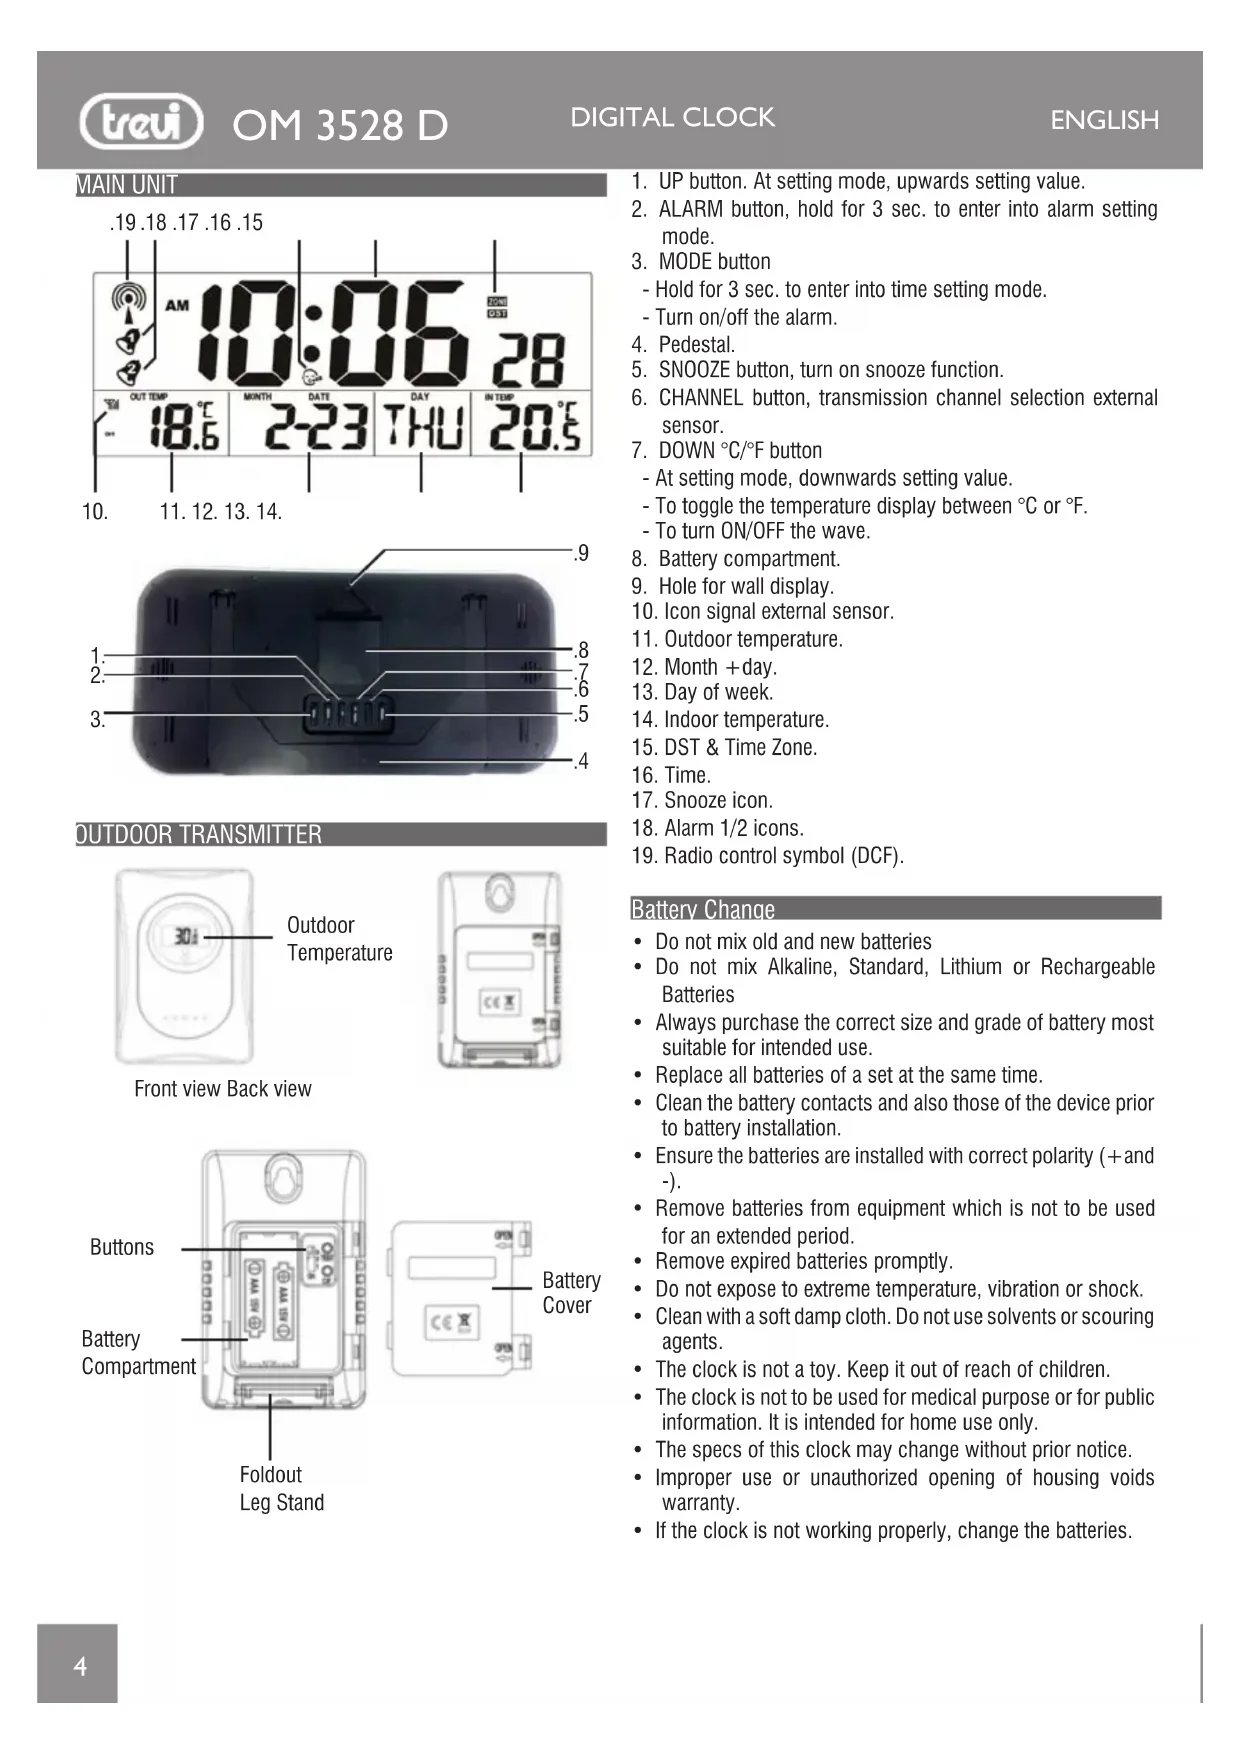
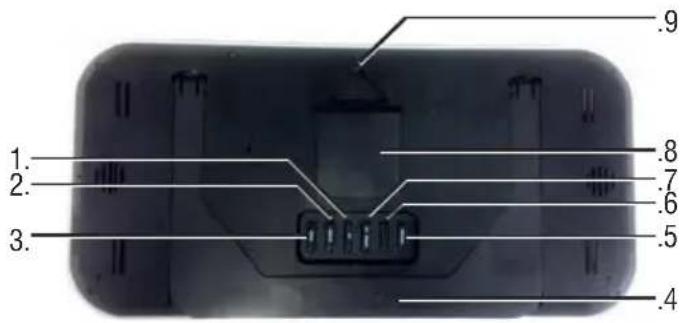
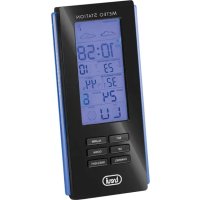
- UP button. At setting mode, upwards setting value.
- ALARM button, hold for 3 sec. to enter into alarm setting mode.
-
MODE button
-
Hold for 3 sec. to enter into time setting mode.
- Turn on/off the alarm.
- Pedestal.
- SNOOZE button, turn on snooze function.
- CHANNEL button, transmission channel selection external sensor.
-
DOWN ^ C / ^ F button
-
At setting mode, downwards setting value.
- To toggle the temperature display between ^ C or ^ F .
-
To turn ON/OFF the wave.
-
Battery compartment.
- Hole for wall display.
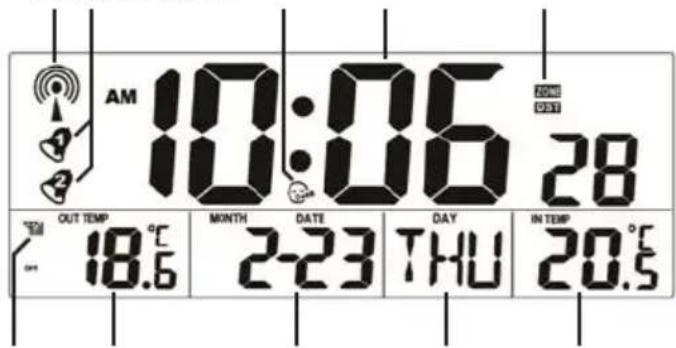
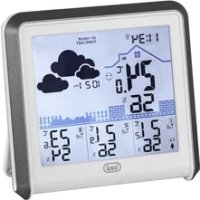
- Icon signal external sensor.
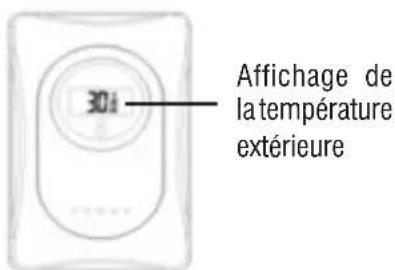
- Outdoor temperature.
- Month +day.
- Day of week.
- Indoor temperature.
- DST & Time Zone.
- Time.
- Snooze icon.
- Alarm 1/2 icons.
- Radio control symbol (DCF).
Battery Change
- Do not mix old and new batteries
- Do not mix Alkaline, Standard, Lithium or Rechargeable Batteries
- Always purchase the correct size and grade of battery most suitable for intended use.
- Replace all batteries of a set at the same time.
- Clean the battery contacts and also those of the device prior to battery installation.
- Ensure the batteries are installed with correct polarity (+ and -).
- Remove batteries from equipment which is not to be used for an extended period.
- Remove expired batteries promptly.
- Do not expose to extreme temperature, vibration or shock.
- Clean with a soft damp cloth. Do not use solvents or scouring agents.
The clock is not a toy. Keep it out of reach of children.
The clock is not to be used for medical purpose or for public information. It is intended for home use only. - The specs of this clock may change without prior notice.
- Improper use or unauthorized opening of housing voids warranty.
- If the clock is not working properly, change the batteries.
GET STARTED
SETTING UP:
Step 1: insert the batteries into the Temperature Station first (see "How to install and replace batteries in the Temperature Station" below).
Once the batteries are in place, all segments of the LCD will light up briefly and a short signal tone will sound. Then the indoor temperature, the time as 0:00 and the date as 1.1. will be displayed. If the indoor temperature is not displayed after a few seconds, remove the batteries and wait for at least 10 seconds before reinserting them. Once the indoor data is displayed proceed to step 2.
HOW TO INSTALL AND REPLACE BATTERIES IN THE TEMPERATURE STATION
First, please open the Battery Compartment to check which kind of battery the product use. Observe the correct polarity.
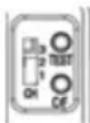
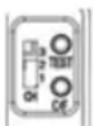
Step 2: In 3 minutes of activating the clock, to insert 2 new AAA battery (not included) into the transmitter. Observe the correct polarity. And made sure the CH is at channel 1.
Remark:
1) After inserting the batteries, the clock indicates default data, the default RF channel is channel 1. Indoor temperature is correctly indicated.
If the indoor temperature is not displayed after a few seconds, remove the batteries and wait for at least 10 seconds before reinserting them. Once the indoor data is displayed proceed to step 2.
2) After inserting the batteries into the transmitter, the Temperature Station (clock) will start receiving transmissions from the transmitter. Automatically received from RF for 3 minutes, whilst the Antenna symbol is flashing
per 1HZ. When connecting to the RF signal, the Antenna symbol is flashing.
The outdoor temperature should then be displayed on the clock. If this does not happen within 15 minutes, the batteries will need to be removed from both units and reset from step 1.
Also press the transmitter's button 'test' under the battery cover.
3) The Temperature Station (clock) will receive the outdoor temperature automatically from channel 1 to channel 3.
4) Once the remote temperature has been received and is displayed on the clock, the DCF-77 time code reception is automatically started. This takes typically between 3-5

minutes in good conditions. This time period is an excellent opportunity to locate the transmitter(s) in suitable location(s) outdoors. In order to ensure sufficient 433 MHz transmission, however, this should under good conditions be no more than 30 meters from where the clock will be finally positioned
5) If after 10 minutes the DCF time has not been received, use the MODE key (3) to manually enter a time initially. The clock will automatically attempt each hour to receive the DCF time. When this is successful, the received time will override the manually set time. The date is also updated with the received time (Please refer also to notes on "Radio controlled time" and "Manual time setting")
DCF RADIO-CONTROLLED (ATOMIC) TIME SEARCH
- Press the DOWN button to start or stop a manual signal search. DCF Icon will flash when searching.
The time is coded and transmitted from Main flinger near Frankfurt via frequency signal DCF-77 (77.5 kHz) and has a transmitting range of approximately

1,500km. Your radio-controlled Temperature Station receives this signal and converts it to show the precise time in summer or wintertime. The quality of the reception depends greatly on the geographic location. In normal cases, there should be no reception problems within a 1500km radius of Frankfurt.
Once the outdoor temperature is displayed on the Temperature Station, the DCF tower icon in the clock display will start flashing in the upper left corner. This indicates that the clock has detected that there is a radio signal present and is trying to receive it. When the time code is received, the DCF tower becomes permanently lit and the time will be displayed. If the tower icon flashes, but does not set the time or the DCF tower does not appear at all, then please take note of the following:
- Recommended distance to any interfering sources like computer monitors or TV sets is a minimum of 1.5 - 2 meters.
- Within ferro-concrete rooms (basements, superstructures), the received signal is naturally weakened. In extreme cases, please place the unit close to a window and/ or point its front or back towards the Frankfurt transmitter.
- During nighttime, the atmospheric disturbances are usually less severe - the reception is possible in most cases. A single daily reception is adequate to keep the accuracy deviation below 1 second.
REMARK: These three steps begin after power on. And they have their own signals receiving time, will not interfere each other.
1) Receiving RF signal:
From 00:01:01 to 00:03:20, start to receive the RF signal from the sensor. (No problem in this step.)
2) Receiving RCC signal:
From 00:03:21 to 00:10:00, start to receive RCC signal.
3) Every day at AM 2:03, 3:03,4:03, 5:03 the receiver would received the signal automatically. But in any of these 4 time, if it received one time, then in this day it would no received any again.
TIME ZONE
The time is transmitted from the central Germany, so if we are in a country with different time than the Germany is necessary to set the time zone.
- When you hang time signal, press and hold for a few seconds the MODE button (3) to enter the manual clock setting. It will adjust the time format "24h" or "12h".
- Press the MODE button (3) again, the display will show "00" with the words "Zone" flashing on the time zone.
- Set the time zone of your region through the UP (1) or DOWN ^ C / ^ (7).
Notes:
Place the weather station away from equipment that generates magnetic fields such as mobile phones, televisions etc.... It not in all areas of Europe may be able to receive the signal of the radio control. In this case you must set the time manually.
MANUAL SET TIME, DATE AND TEMPERATURE
- Hold the MODE key (3) steadily for around 3 seconds, the "12hr" or "24hr" would flash in 1HZ. Press UP key (1) or DOWN key (7) to adjust.
- Press MODE key (3) again, then enter into time setting mode and use UP key (1) or DOWN key (7) to choose the value. The time set order is hour, minute, year, month, date and day of week then display language.(see below message).
- The week will be automatically set.
- Press the MODE button (3) to exit, or wait 20 seconds without pressing buttons to return to the normal time display.
Note: 8 languages of weekday: English > German > French > Italian > Dutch > Spanish > Danish > Russian.
FAHRENHEIT/CELSIUS
Press the DOWN ^ C / ^ button (7) to select Fahrenheit or Celsius temperature readings
SET TIME ALARM
Press the ALARM button (2) once to enter Alarm 1 Mode. The letters AL1 will show in the right corner display.
- Hold the ALARM button (2) for 3 seconds to enter alarm time set mode.
- Press the UP (1) or DOWN ^ C / ^ (7) buttons to adjust values.
- Press the ALARM button to confirm and move to the next item.
Alarm Time setting order: 1. Hours, 2. Minutes 3. Snooze time (1-59 min).
4. ALARM 2 setting is same as alarm 1.
5. When alarm on, if you don't press any key to stop the alarm, it lasts for 1 minute. Or you can press any key to stop the alarm.
ACTIVATE/DEACTIVATE TIME ALARM
- At normal mode, press MODE key (3) one time to turn On/
Off the alarm 1, the icon would appear or disappear.
- At normal mode, press MODE key (3) two time to turn On/Off the alarm 2. Press the MODE key (3) three times the icon and are all disappear. All the alarms are off.
SNOOZE (SILENCES ALARM TEMPORARILY)
- You can set the snooze from 1-59 minutes.
-
When alarm on, the icon or would flashing, press SNOOZE (5) to go into the snooze mode. Icon would appear in the display.
-
When snooze on, icon would flashing.
- In snooze mode, press any button to stop alarm for one day. Note: The alarm will sound for 2 minutes and then shut off completely.
LOW BATTERY ICONS
When the icon is displayed, replace batteries in the clock.
TECHNICAL SPECIFICATION
Power Supply: 3x"AA" size batteries, 1.5V Main unit 2x"AAA" size batteries, 1.5V External sensor Indoor temperature Range: 0^ +50^ (32°F~122°F) Outdoor temperature Range: -20°C ~ +70°C (-4°F~158°F) Channels max: 3 remote sensors Transmission range: up to 30 m outdoors, RF 433 MHz Dimensions: 420 x 200 x 30mm

USERS INFORMATION pursuant to Legislative Decree No. 13 March 14, 2014
"Implementation of Directive 2012/19/EU on Waste Electrical and Electronic Equipment (WEEE)"
This wheeled bin symbol on the product indicates that at the end of its life must be collected separately from other waste. The user must, therefore, take the remote control integrates the essential components that got to its life to the appropriate differentiated collection centers for electronic and electro-technical waste, or return it to the dealer when purchasing a new appliance of equivalent type, in terms of one to one, or one to zero for equipment having longer side of less than 25~cm . Appropriate separate collection for the decommissioned equipment for recycling, processing and environmentally compatible disposal helps prevent negative impact on the environment and human health and promotes recycling of the materials making up the product. Illegal dumping of the product by the user entails the application of administrative sanctions stated in Legislative Decree n. Legislative Decree No. 49 of March 14, 2014.
UNITE PRINCIPALE
.19.18.17.16.15
-
-
-
- 14.
-
-
CAPTEUR EXTERNE

CONFIGURATION ALARMES
Dimensions: 420 x 200 x 30mm
EMΦANISH QPAZ M'ESΩ THAEEKATEYO'YNSEI
Autn n ouokun evai eonlioevn e eva ektn Tou evai thon va lauapei to anua tou xpovou tou To Physikalisch Technische Bundesanstalt Braunschweig (KevT Eepavia) npapodektn kata eva 1500km.
Otav Tnv TOTIOETNON TWV MTATAPIWv 0a ONGA TOBDOTNOEi autouata Tnv UTOBOXn,TO OuMuOeEyxou paiooWv (19)0a avaoBnvei KAI EVTOC 24 wpvWv 0a AβETo Xpov μe To ONa Tou OToixeiou eEyxou paiooWv KAI WAVE OK (9) 0a EivaTnv oovn.
TnV TepiTTwON Tns XpeiaCovTai EtnaveKKivnon Anynn OnatWv, PntneDOWN ^o C / ^o F (7).
ZQNH QPAZ
H wpa eTaIbEtaI aTTO Nv KevTpIKn Epuaia, OTOTE a Eiuaote oE mia xwpa e diaopetiko XpOvo aTIOo, Tn H Epuaia evai attapaitto va opiaeTe tn Zwn wpa.
- This unit is guaranteed for a period of 24 months from the date of production printed on the product itself or on label on product.
- The warranty is valid only if the unit has not been tampered with. The warranty is valid only at authorized TREVI assistance centres, that will repair manufacturing defects, excluded replacement of labels and removable parts.
- TREVI is not liable for damage to people or things caused by the use of this unit or by the interruption in the use of this unit.
F GARANTIE
Simplified EU Declaration Of Conformity
Hereby TREVI S.p.a declares that equipment type
"Digital Clock" model OM 3528 D
is in compliance with Directive 2014/53/EU.
The full text of the EU declaration of conformity is available at the following internet address www.trevi.it


- Battery Change
- GET STARTED
- SETTING UP:
- HOW TO INSTALL AND REPLACE BATTERIES IN THE TEMPERATURE STATION
- Remark:
- DCF RADIO-CONTROLLED (ATOMIC) TIME SEARCH
- TIME ZONE
- Notes:
- MANUAL SET TIME, DATE AND TEMPERATURE
- FAHRENHEIT/CELSIUS
- SET TIME ALARM
- ACTIVATE/DEACTIVATE TIME ALARM
- SNOOZE (SILENCES ALARM TEMPORARILY)
- LOW BATTERY ICONS
- TECHNICAL SPECIFICATION
- UNITE PRINCIPALE
- CAPTEUR EXTERNE
- CONFIGURATION ALARMES
- EMΦANISH QPAZ M'ESΩ THAEEKATEYO'YNSEI
- ZQNH QPAZ
- F GARANTIE
- Simplified EU Declaration Of Conformity
Brand : Trevi
Model : OM 3528 D
Category : Weather Station