
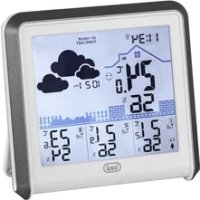
DME 3228 - Weather Station Trevi - Free user manual and instructions
Find the device manual for free DME 3228 Trevi in PDF.


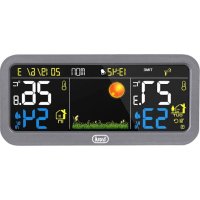
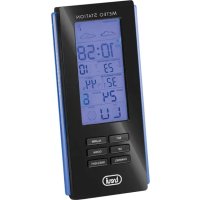
| Product type | Weather station |
| Brand | Trevi |
| Model | DME 3228 |
| Dimensions (approx.) | 150 x 100 x 25 mm |
| Weight (without batteries) | 180 g |
| Power supply | 2 AAA batteries (1.5 V) |
| Outdoor sensor (included) | Wireless sensor with battery life |
| Indoor temperature | Range: -10°C to +50°C |
| Outdoor temperature | Range: -20°C to +60°C |
| Indoor humidity | 20% to 95% |
| Outdoor humidity | 20% to 95% |
| Atmospheric pressure | Display in hPa (accuracy ±1 hPa) |
| Weather forecast | Icons: sunny, cloudy, rainy, etc. |
| Clock | 12/24h display with alarm |
| Calendar | Day, month, date |
| Backlight | Yes, LIGHT button |
| Outdoor sensor range | Up to 30 m in open field |
| Radio frequency | 433 MHz |
| Sensor power supply | 2 AAA batteries (not included) |
| Station batteries | Not included |
| Maintenance | Clean with a dry, soft cloth; avoid solvents |
| Safety | Keep batteries out of reach of children |
| Spare parts / repairability | Outdoor sensor available; repair possible by a technician |
| General information | Trevi DME 3228 table weather station, ideal for daily monitoring |
Frequently Asked Questions - DME 3228 Trevi
User questions about DME 3228 Trevi
0 question about this device. Answer the ones you know or ask your own.
Ask a new question about this device
Download the instructions for your Weather Station in PDF format for free! Find your manual DME 3228 - Trevi and take your electronic device back in hand. On this page are published all the documents necessary for the use of your device. DME 3228 by Trevi.
USER MANUAL DME 3228 Trevi
Thank you for purchasing the new generation color weather station. Designed and engineered with the state-of-art technology and components, this instrument will provide accurate and reliable measurement of barometric pressure, weather forecast, in/out humidity, temperature, heat index, dew point as well as alarm clock. Read this manual carefully to fully explore the features and functions of the new product.
natural_image
Simple line drawing of a microwave oven with no text or symbols




Name and Functions of Buttons: Press Functions Hold 3 seconds
CLOCK Read time, calendar and day-of-week Set Clock & Calendar
ALARM Read alarm time; enable/disable alarm Alarm time setting
▲ UP 1 step forward in setting Fast advance
▼ Down 1 step backward in setting Fast backward
CHANNEL/ SEARCH Select indoor, Channel 1,2,3, auto scroll Search for remote sensor
MEMORY Read max/min temperatures & humidity Clear memory record
HEAT INDEX/ Read Heat Index & Dew Point
DEW POINT
PRESSURE Toggle pressure unit hPa, inHg & mb
SNOOZE/LIGHT Trigger snooze alarm & extend backlight
ZONE Toggle Home time & Zone time
C/F Toggle degree
Altitude setting
Zone time setting
C & F unit
Slide Switch
Display brightness setting
BACKLIGHT (AUTO/ HIGH / LOW / OFF)
(** AUTO mode is recommended to adjust the brightness automatically)
P_10P_10
ENGLISHENC

DME 3228DMFEBQ28ATION
METEO STATIONBATTERY & ADAPTEBATTERY & ADAPTER INSTALLATION
Home Receiver Unit:
Main Power Source: Plug in the 6.0V adapter into the adapter socket at the back for basic operation and continuous backlight. Backup Power: Lift off the battery cover, install 3 pieces of AAA backup batteries according to the polarity indicated, close the battery cover.
Remote Sensor:
Loosen the screws on the battery door with a small screwdriver, insert 2 pieces of AAA batteries according to the polarity indicated. Replace the cover and tighten the screws.
ALTITUDE SETTING
After inserting batteries or adapter, the main unit will enter altitude setting mode directly. Press "▲" or "▼" to select pressure unit in
hPa, mb or inHg. Press "PRESSURE" to confirm. Then press "or "to enter your current altitude in meter or feet. Press "PRESSURE" to confirm and exit the setting. This allows the unit to provide a more accurate barometric pressure & weather forecast reading. (For more information, see "WEATHER FORECAST & BAROMETRIC PRESSURE" section)
SETTING UP THE WIRELESS THERMO-HYGROMETER:
- For the first installation, always turn on the home unit and then the remote sensor. Set Channel 1 for the first remote sensor. Set channel 2 and channel 3 for the 2nd and 3rd sensor.
- Press and hold CHANNEL/SEARCH button on main unit until a beep is sound to search for remote sensor.
- Press the Tx button on the back of remote sensor to transmit RF signal.
- When RF connection is established, the respective temperature & humidity of the selected channel will appear on the main unit.
WEATHER FORECAST & BAROMETRIC PRESSURE
The unit predicts weather condition of the next 12 – 24 hours based on the change of atmospheric pressure. The coverage area is around 30 – 50 km. The weather forecast is based on atmospheric pressure change and is about 70-75% correct. As weather conditions cannot be 100% correctly forecasted, we cannot be responsible for any loss caused by an incorrect forecast.

DME 3228DMEE322STATION

SUNNY
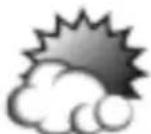
PARTLY CLOUDY

CLOUDY

RAINY

STORMY
The current weather forecast is the one highlighted by a black-outlined square box.
To obtain an accurate weather forecast & barometric pressure reading, you need to input your current altitude. After the reset of the unit, it will enter altitude setting mode. Press "▲" or "▼" to set the pressure unit in hPa, mb or inHg. Press "PRESSURE" to confirm.
Then enter your current altitude in meter or feet. Press "PRESSURE" to confirm and exit the setting.
You can also hold "PRESSURE" button to enter altitude setting mode during normal use.
Press PRESSURE button to select pressure unit between hPa, inHg & mb.
IN/OUT TEMPERATURE & HUMIDITY
Temperature reading is located on the upper left of the display and humidity is on the right of the temperature. Press "C/F" button to select temperature unit C/F.
Press CHANNEL/SEARCH button to select indoor, Ch1, Ch2, Ch3 and auto-channel scrolling display modes.
IN/OUT HEAT INDEX
Heat Index combines the effects of heat and humidity. It is the apparent temperature of how hot the heat-humidity combination makes it feels.
Press "Heat Index/Dew Point" button once to show the respective indoor or outdoor heat index on the upper left display. "HEAT INDEX" icon will appear.
HEAT INDEX ALERT INDICATOR
During conditions indicating a high heat index, a Heat Index Alert Indicator will appear on screen.
Caution Exercise more fatiguing than usual
Extreme caution Heat cramps, exhaustion possible
P_12P_12
ENGLISHENC

DME 3228DMFEB22STATION
Danger Heat exhaustion likely
Extreme danger Heat stroke imminent
IN/OUT DEW POINT
Dew point is the saturation point of the air, or the temperature to which the air has to be cooled in order to get condensation.
In normal mode, press HEAT INDEX / DEW POINT button twice to show the respective indoor or outdoor dew point reading on the upper left display. "DEW POINT" icon will appear.
IN/OUT COMFORT LEVEL
In/Out Comfort indicator combines the effect of temperature & humidity and displays in 3 levels:
COMF : Comfortable level, ideal range for both temperature & humidity
WET : Contain excess moisture
DRY : Contain inadequate moisture
ANIMATED COLOR GRAPHS
The circular color graphs are designed as an intuitive way to gauge the weather at a glance.
The left color graph represents the respective In/Out temperature, heat index or dew point of the current display mode. The right graph represents the respective In/Out humidity.
The higher the temperature & humidity, the more color portion of the color graph appears.
Lower temperature & humidity show less color portion of the color graph.
MAXIMUM / MINIMUM MEMORY
Press MEMORY button repeatedly to view the maximum & minimum values of temperature, humidity, heat index or dew point readings. To clear the memory record, hold MEMORY button while the respective values are displaying on screen.
TEMPERATURE & HUMIDITY TREND INDICATOR
The icons will indicate Rising, Steady, Falling if the temperature or humidity change is more than 1 degree C (or 2 degree F) within an hour.
CLOCK & CALENDAR
Press "CLOCK" to toggle display between time, calendar and day of the week.
ENGLISHENGLISH
P_13P_1

DME 3228DMEE3228TATION
Hold "CLOCK" button to enter clock setting mode. Using "▲" or "▼" to adjust and "CLOCK" to confirm, the following values can be set in sequence: 12/24hr format > Hr > Min > Yr > D/M or M/D format > Month > Date > EXIT
Hold "ZONE" to enter world (zone) time setting mode. Press "▲" or "▼" to enter the desired hour offset value from -12 to +12 hours. Press "ZONE" to confirm each setting.
Press "ZONE" button to toggle between home time and world (zone) time. "ZONE" icon appears when world (zone) time is selected. When zone time is not used, set zone time to "0".
ALARM SETTING
Press "ALARM" to show alarm time and "AL." icon will appear. Press again to enable or disable the alarm. Bell icon "▲" appears when alarm is enabled.
Hold "ALARM" to enter alarm time setting mode. Press "or" to enter the desired Hr/Min values and press "ALARM" to confirm setting.
SNOOZE & BACKLIGHT
When alarm is going off, press SNOOZE/ LIGHT to trigger snooze alarm and "Zz" icon will appear. To stop alarm for one day, press "ALARM" key. Press SNOOZE/LIGHT for an extended backlight if adapter is not connected.
DISPLAY BRIGHTNESS CONTROL
Select display brightness mode with the slide switch on the back casing.
- AUTO:
Display brightness is adjusted automatically according to the surrounding brightness detected by the light sensor located on the left of the Snooze/Light button. In a bright environment, display brightness will increase. As the environment turns dark, display brightness will reduce.
(Note: Auto mode is recommended for power saving, display lifetime and convenient purpose)
(Important: Avoid having obstacle above the light sensor window for an accurate light sensing result. Otherwise the display will turn dim even in bright environment)
P_14P_14
ENGLISHENC

DME 3228DMFEB22STATION
-High: Turn to high brightness mode
- Low: Turn to low brightness mode
- Off Turn off display backlight
LOW BATTERY INDICATION
Low battery indication is available for the home unit itself and all of the 3 remote channels.
Replace the batteries and follow the setup procedure in this instruction manual.
BATTERY DISPOSAL
Replace only with the same or equivalent type recommended by the manufacturer.
Please disposal of old, defective batteries in an environmentally friendly manner in accordance with the relevant legislation.
SPECIFICATIONS
Indoor Temperature: 0 C to +50 C (+32 F to +122 F)
In/Out Humidity: 20% - 99% RH
Remote sensor: -20 C to +60 C (-4 F to +140 F)
Channel: max.3 remote sensors
Transmission: up to 75M (246 ft.) in open area, RF434 MHz
Resolution: 0.1 degree C for temperature, 1% for humidity
Power: 6.0V adapter & AAA x 3 pcs for main unit
AAA x 2 pcs for remote sensor

DME 3228DMEE322STATION
natural_image
Pure technical line drawing of a device outline and side view without any text, numbers, or symbols

natural_image
Five technical line drawings of electronic devices and components, no visible text or symbolsnatural_image
Five technical line drawings of electronic devices or modules, including front, side, top, and bottom views (no text or symbols visible)natural_image
Line drawings of electronic devices including a front panel, internal components, and a display case (no text or symbols)natural_image
Line drawings of various electronic devices including a front panel, display case, and control panel (no text or symbols visible)
- Name and Functions of Buttons: Press Functions Hold 3 seconds
- Slide Switch
- METEO STATIONBATTERY & ADAPTEBATTERY & ADAPTER INSTALLATION
- Home Receiver Unit:
- Remote Sensor:
- ALTITUDE SETTING
- SETTING UP THE WIRELESS THERMO-HYGROMETER:
- WEATHER FORECAST & BAROMETRIC PRESSURE
- IN/OUT TEMPERATURE & HUMIDITY
- IN/OUT HEAT INDEX
- HEAT INDEX ALERT INDICATOR
- IN/OUT DEW POINT
- IN/OUT COMFORT LEVEL
- ANIMATED COLOR GRAPHS
- MAXIMUM / MINIMUM MEMORY
- TEMPERATURE & HUMIDITY TREND INDICATOR
- CLOCK & CALENDAR
- ALARM SETTING
- SNOOZE & BACKLIGHT
- DISPLAY BRIGHTNESS CONTROL
- LOW BATTERY INDICATION
- BATTERY DISPOSAL
- SPECIFICATIONS
Brand : Trevi
Model : DME 3228
Category : Weather Station