SLSN 3 B2 - Electric razor SILVERCREST - Free user manual and instructions
Find the device manual for free SLSN 3 B2 SILVERCREST in PDF.
Frequently Asked Questions - SLSN 3 B2 SILVERCREST
User questions about SLSN 3 B2 SILVERCREST
0 question about this device. Answer the ones you know or ask your own.
Ask a new question about this device
Download the instructions for your Electric razor in PDF format for free! Find your manual SLSN 3 B2 - SILVERCREST and take your electronic device back in hand. On this page are published all the documents necessary for the use of your device. SLSN 3 B2 by SILVERCREST.
USER MANUAL SLSN 3 B2 SILVERCREST
WET & DRY LADYSHAVER
Operating instructions and safety instructions
NL BE
LADYSHAVE
https://www.targa.gmbh/downloads/conformity/354155_2010.pdf
7.1 Inserting/changing the batteries 31
- Initial use 32
8.1 Travel safety lock 32
8.2 Shaving with the shaving foil (2) 32
8.3 Shaving with the trimmer (3) 33
8.4Cutter attachment (12) 34
8.5 Shaving your legs with the exfoliation attachment (11) 34
8.6 Shaving your legs with the glide cap (10) 35
8.7 After shaving 36
- Cleaning/maintenance 36
9.1 Cleaning 36
9.2 Maintenance 37
9.2.1 Changing the shaver head 38
9.3 Storing the device when not in use 38
10.Troubleshooting 38
- Environmental and waste disposal information 39
- Marks of conformity 40
- Notes on guarantee and service 40
Congratulations!
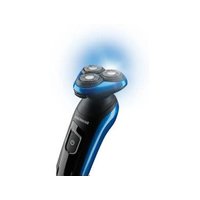
By purchasing the SilverCrest lady shaver SLSN 3 B2, you have opted for a high-quality product.
Familiarise yourself with the lady shaver before using it for the first time and read these operating instructions carefully. Observe the safety instructions and only use the lady shaver in the manner described in these operating instructions and for the indicated fields of application.
Keep these operating instructions in a safe place. Hand over all documents in the event that you pass on the lady shaver to a third party.
1. Intended use
The lady shaver may only be used for private purposes and is not for industrial or commercial use. In addition, the lady shaver must not be used outside of closed rooms.
The lady shaver is only intended for shaving and trimming human hair. It is suitable for armpits, legs and the bikini line area. The shaver can be used both dry and in the shower.
Any use other than that described in these operating instructions is deemed improper and can lead to injury as well as damage to property.
This lady shaver meets the requirements of all relevant standards related to CE conformity. Compliance with these standards is no longer guaranteed if a change is made to the lady shaver without the authorisation of the manufacturer. The manufacturer shall not be liable for any damages or faults arising as a result.
Please observe the national regulations and/or laws of the country in which the device is used.
2. Package contents
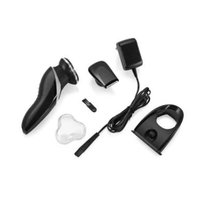
Unpack the lady shaver and all of the accessories. Remove all packaging materials and check all of the parts for completeness and signs of damage. If any parts are missing or damaged, please contact the manufacturer.
- Lady shaver
- Two batteries
- Protective cover
- Glide cap
- Exfoliation attachment
- Cutter attachment
Storage bag - Cleaning brush
- Blade oil
These operating instructions
3. Device description
These operating instructions also have a cover that can be unfolded. The inside of the cover provides a schematic of the lady shaver and a number legend. The numbers identify the following parts/functions:
1 Protective cover
2 Shaving foil
3 Trimmer
4 Trimmer locking mechanism
5 Unlock button
6 Shaver head
7 ON/OFF switch (I = ON,0 = OFF)
8 Travel safety lock
9 Battery compartment cover
10 Glide cap
11 Exfoliation attachment
12 Cutter attachment
13 Batteries
14 Cleaning brush
15 Blade oil
16 Storage bag
4. Technical data
| Model SilverCrest SLSN 3 B2 | |
| Power supply | 2 x 1.5 V, LR6/Mignon/AA |
| Protection class IPX6 (protection against strong jets of water) | |
| Operating time | approx. 120 minutes (with two new batteries) |
| Operating temperature 0°C | to 35°C |
| Storage temperature, atmospheric humidity | -10°C to +45°C; max. 85% relative humidity |
| Dimensions approx. 143 x 58 x 42 mm | |
| Weight (excluding accessories) | Approx. 115 g |
The specifications and design are subject to change without notice.
5. Safety instructions
Before using the lady shaver for the first time, read the following instructions carefully and observe all warnings, even if you are familiar with using electronic devices. Keep these operating instructions in a safe place for future reference.

DANGER! This symbol, in conjunction with the word 'Danger', indicates an impending dangerous situation which, if not prevented, may lead to serious injuries or even death.
WARNING! This icon, in conjunction with the word 'Warning', indicates important information for the safe operation of the lady shaver and user safety.
This symbol indicates that the lady shaver is suitable for use in a bath or shower.

This icon indicates that further information on the topic is available.

DC voltage
Operating environment
The lady shaver is designed for operation in rooms with high humidity (for example, bathroom) but not in rooms with excessive dust.

DANGER! The lady shaver is only intended for trimming human hair. Take care when shaving areas of the body with thinner skin (for example, armpits or pubic area). There is a risk of injury.

DANGER! This lady shaver can be used by children aged eight and over, as well as by people with reduced physical sensory or mental abilities or who lack experience
and/or knowledge, providing they are supervised or have been instructed in the safe use of the device and understand the resulting dangers. Children must not play with the lady shaver. Cleaning and user maintenance may not be performed by children, unless they are supervised. Small parts can be lethal if swallowed. Also keep the packaging film away from children. There is a risk of suffocation.

DANGER! If you notice any smoke, unusual noises or smells, immediately switch off the lady shaver and remove the batteries. If this happens, you must stop using the lady shaver until it has been checked by a technician. Do not inhale smoke possibly caused by a burning device. If you have inhaled smoke, consult a physician. Inhaling smoke can be harmful to your health.

DANGER! Make sure there are no naked flames (for example, burning candles) placed on or near the lady shaver. There is a risk of fire!

DANGER! Never operate the lady shaver near highly flammable materials, such as curtains or explosive and/or flammable gases or liquids. There is a risk of fire.

WARNING! In order to avoid hazards, the lady shaver must not become damaged.

WARNING! The lady shaver must not be exposed to direct sources of heat (for example, heaters), direct sunlight or strong artificial light. Also avoid contact with aggressive liquids. Also make sure that the device is not exposed to excessive shocks and vibrations. Furthermore, no foreign bodies should penetrate into the device.
This could damage the lady shaver.

WARNING! Only allow the manufacturer's service department or an authorised specialist to carry out repairs on the lady shaver. Improper repairs may lead to injury! This will also void your guarantee.

WARNING! Never use the lady shaver if the shaving foil (2) or trimmer (3) is damaged. There is a risk of injury!
WARNING! Never use the lady shaver if an attachment (10, 11, 12) is faulty or broken. There is a risk of injury!

DANGER! Batteries
Always insert batteries with the correct polarity. When doing so, observe the label in the battery compartment. Do not try to recharge the batteries and never throw them onto a fire. Do not use different batteries (old and new, alkaline and carbon etc.) at the same time. Remove the batteries if you intend not to use the device for a longer period of time. There is a risk of explosion and leakage if the device is not used properly. Batteries are not a toy. In the event that the batteries are swallowed, seek immediate medical attention. Batteries must not be opened or deformed in any way because leaking chemicals can cause injury. If it comes into contact with the skin or eyes, rinse/wash the area with plenty of water and seek medical attention. Remove dead
batteries (13) from the device and properly dispose of them. Make sure to never short-circuit the lugs.
6. Copyright
All contents of these operating instructions are subject to copyright law and are provided to the user solely as a source of information. Any form of copying or reproduction of data and information without the express written permission of the author is prohibited. This also concerns commercial use of the content and data. The text and illustrations correspond to the technical standards at the time of printing. Subject to alterations.
7. Before initial use
7.1 Inserting/changing the batteries
- Switch the lady shaver off using the ON/OFF switch (7).
- Open the battery compartment by pulling the battery compartment cover (9) downwards.
- Where necessary, remove any batteries that are already inserted.
- Insert two new LR6/Mignon/AA batteries. Please note the labels on the batteries and in the battery compartment.
- Place the battery compartment cover (9) back onto the battery compartment and push upwards as far as it will go.
The lady shaver is now ready for use.

Use 1.5 V LR6/Mignon/AA batteries only.
Always change both batteries at the same time.
Ensure the correct polarity when inserting the batteries. When doing so, observe the labels on the batteries and in the battery compartment.
8. Initial use
When shaving sensitive areas of the body such as your bikini line or arm pits, the skin must always be taut in order to avoid injury.

If you have sensitive skin or are prone to allergic reactions on your skin, we recommend performing a patch test on a small, hidden section of the skin first.

Please do not use shaving gel or shaving foam.
8.1 Travel safety lock

The travel safety lock (8) prevents the lady shaver from accidentally switching on.
To switch on the lady shaver, slide the ON/OFF switch (7) towards the shaving foil (2) while pressing the travel safety lock (8). The lady shaver will now start.
8.2 Shaving with the shaving foil (2)

Before a dry shave, ensure that the skin is clean, dry, and clear of any cream.
- Pull the protective cover (1) upwards.
- Generally, no attachment (10, 11, 12) is used when in normal shave mode. However, using an attachment may be useful in certain situations. Please see Sections 8.4 to 8.6 for more detailed instructions on using the attachments supplied (10, 11, 12).
- Slide the ON/OFF switch (7) towards the shaving foil (2) while pressing the travel safety lock (8). The lady shaver will now start.
- Hold the lady shaver at a right angle to your skin and, in straight lines, run the shaving foil (2) against the direction of hair growth.
-
Once you have finished shaving, push the ON/OFF switch (7) back into its original position. The lady shaver will now stop.
-
We recommend cleaning the lady shaver with the cleaning brush (14) after every shave. For details on how to clean the lady shaver more thoroughly, please refer to section '9. Cleaning/maintenance'.

The lady shaver is also suitable for use in the shower, but do not immerse the device under water, as this may result in irreparable damage.
8.3 Shaving with the trimmer (3)
If you haven't shaved in a while and the hair is slightly longer, e.g., on your legs, use the trimmer (3). Then shave the corresponding areas of the skin as described in section '8.2 Shaving with the shaving foil (2)'. To use the trimmer (3), proceed as follows:
Pull the protective cover (1) upwards.
-
No attachment (10, 11, 12) is used when in trimmer mode.
-
Push the trimmer locking mechanism (4) towards the shaving foil (2). The trimmer (3) is now secure . This position is recommended if precise lines or contours are to be shaved, e.g., to style the bikini line are. Always ensure that the skin is taut in order to avoid injury.
-
Slide the ON/OFF switch (7) towards the shaving foil (2) while pressing the travel safety lock (8). The lady shaver will
-
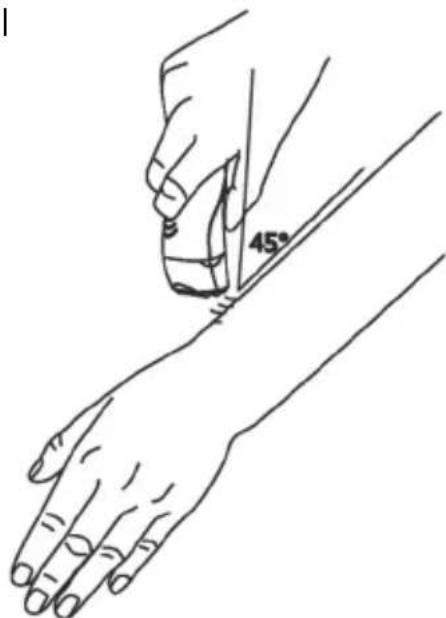
Hold the lady shaver so that the trimmer (3) is facing the skin and is angled at approximately 45^ . Now run the trimmer (3) along the area of skin you are trimming. Ideally, it is best to trim against the direction of hair growth.
- Once you have finished trimming the desired area of skin, push the ON/OFF switch (7) back into its original position. The lady shaver will now stop.
- We recommend cleaning the lady shaver with the cleaning brush (14) after every shave. For details on how to clean the lady shaver more thoroughly, please refer to section '9. Cleaning/maintenance'.
8.4 Cutter attachment (12)
The cutter attachment (12) should be used if you just want to shorten hair or trim the bikini line.
- Pull the protective cover (1) upwards.
- Place the cutter attachment (12) onto the lady shaver from the top and push it downwards until you hear it click into place. When putting on the attachment, ensure that the recess for the trimmer locking mechanism (4) is on the right-hand side.
- Slide the ON/OFF switch (7) towards the shaving foil (2) while pressing the travel safety lock (8). The lady shaver will now start.
- Run the lady shaver in straight lines over the area of the hair you wish to trim. Keep repositioning the lady shaver, moving it slowly against the direction of hair growth.
- Once you have finished on the desired area of skin, push the ON/OFF switch (7) back into its original position. The lady shaver will now stop.
- We recommend using the cleaning brush (14) to clean the lady shaver and attachment (12) after every shave. For details on how to clean the lady shaver more thoroughly, please refer to section '9. Cleaning/maintenance'.
8.5 Shaving your legs with the exfoliation attachment (11)
Shaving with the exfoliation attachment (11) improves the appearance of your skin at the same time. During the shave, the exfoliation attachment (11) removes dead skin cells and revitalises the surface, leaving you with glowing skin.
- Pull the protective cover (1) upwards.
- Place the exfoliation attachment (11) onto the lady shaver from the top and push it downwards until you hear it click into place. When putting on the attachment, ensure that the recess for the trimmer locking mechanism (4) is on the right-hand side.
- Slide the ON/OFF switch (7) towards the shaving foil (2) while pressing the travel safety lock (8). The lady shaver will now start.
- Hold the lady shaver at a right angle to your skin and, in straight lines, run the shaving foil (2) against the direction of hair growth. Please make sure that the exfoliation attachment (11) and shaving foil (2) are touching the skin at the same time.
- Once you have finished shaving, push the ON/OFF switch (7) back into its original position. The lady shaver will now stop.
- We recommend using the cleaning brush (14) to clean the lady shaver and attachment (11) after every shave. For details on how to clean the lady shaver more thoroughly, please refer to section '9. Cleaning/maintenance'.
8.6 Shaving your legs with the glide cap (10)
The glide cap (10) gives you a particularly gentle, close shave on your legs. It enables the shaving foil (2) and trimmer (3) to glide over the skin more easily, thus reducing skin irritation.
- Pull the protective cover (1) upwards.
- Place the glide cap (10) onto the lady shaver from the top and push it downwards until you hear it click into place. When putting on the attachment, ensure that the recess for the trimmer locking mechanism (4) is on the right-hand side.
- Push the trimmer locking mechanism (4) towards the ON/OFF switch (7). In this position , the trimmer (3) will move with the glide cap (10) during the shave.
-
Slide the ON/OFF switch (7) towards the shaving foil (2) while pressing the travel safety lock (8). The lady shaver will now start.
-
Hold the lady shaver at a right angle to your skin and, in straight lines, run it against the direction of hair growth.
- Once you have finished shaving, push the ON/OFF switch (7) back into its original position. The lady shaver will now stop.
- We recommend using the cleaning brush (14) to clean the lady shaver and attachment (10) after every shave. For details on how to clean the lady shaver more thoroughly, please refer to section '9. Cleaning/maintenance'.
8.7 After shaving

Immediately after shaving, avoid using substances that can cause skin irritation, e.g., deodorants containing alcohol.
However, it is perfectly fine to apply a little cream or body lotion.
9. Cleaning/maintenance
9.1 Cleaning
- Remove the protective cover (1) or attachment (10, 11, 12), if fitted. The protective cover (1) and attachments (10, 11, 12) can be cleaned using soapy water. Then dry it well.
- The housing of the lady shaver can be wiped using a slightly damp cloth; never use any aggressive cleaning agents.
- Remove any remaining hair from the shaver head (6) using the cleaning brush.
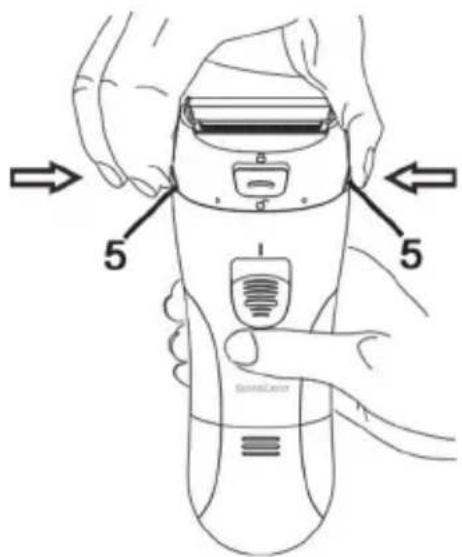
- For a more intensive clean, you can remove the shaver head (6) from the lady shaver. Using your thumb and forefinger, press the unlock buttons (5) on both sides of the shaver head (6), pulling it upwards to remove.
The head part of the lady shaver and the removed shaver head (6) can be rinsed off under running water. Then dry the parts thoroughly. Do so carefully to prevent damaging the shaving foil (2). - Then place the shaver head (6) back on in reverse; the trimmer locking mechanism (4) must be positioned above the ON/OFF switch (7) when doing so. Slide the shaver head (6) downwards until you hear it click into place.

After cleaning, add a few drops of blade oil (15) to the trimmer (3) and the shaving foil (2) every so often. Leave the lady shaver running for a few seconds without using it to allow the blade oil (15) to spread out evenly. Then, wipe off any excess blade oil (15) with a soft cloth.
9.2 Maintenance
The shaver head (6) of the lady shaver is subject to constant wear resulting from use.

DANGER! Stop using the lady shaver if you notice that the shaver head (6) and/or shaving foil (2) has become damaged. Risk of injury!
The shaver head (6) must be replaced if...
- you see any damage
- you notice slight pulling when shaving or the shave is not as thorough as usual
- it has become worn through use, usually after a year at the latest
The shaver head (6) is subject to wear and is not covered by the guarantee.

A new shaver head (6) can be ordered online from the following website:
shop.targa.de
9.2.1 Changing the shaver head
- To unlock the shaver head, press both unlock buttons (5) at the same time; these are located on the side of the shaver head.
- Keep the unlock buttons (5) pressed and lift the shaver head upwards to remove.
- Now attach the new shaver head onto the top of the lady shaver with the trimmer locking mechanism (4) facing the front.
- Press the shaver head downwards evenly until you hear it click into place.
9.3 Storing the device when not in use
If the lady shaver is not going to be used for a long period of time...

- clean it as described in section '9. Cleaning/maintenance'.
- Remove the batteries from the battery compartment.
- Keep it in a cool, dry, clean place.
We recommend using the storage bag (15) when storing the device.
10. Troubleshooting
The lady shaver will not switch on.
- Check whether the batteries are empty. If necessary, insert two new LR6/Mignon/AA batteries.
11. Environmental and waste disposal information
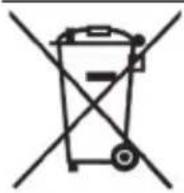
Devices marked with this symbol are subject to the European Directive 2012/19/EU. Electrical and electronic devices may not be put in the household waste, but must be disposed of via designated public disposal centres. By properly disposing of the old device, you can avoid environmental damage and health hazards. Further information regarding proper disposal of the old device can be obtained from your local authority or the shop where you purchased the device.
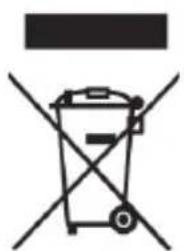
Think about environmental protection. Used batteries do not belong in normal domestic waste. You must dispose of them at a collection point for old batteries.

Make sure the packaging is disposed of in an environmentally friendly manner. Cardboard packaging can be put out for waste-paper collection or taken to public collection points for recycling. The plastic packaging used for your device is collected by your local waste management company and disposed of in an environmentally-friendly manner.


Please pay attention to the labels on packaging materials when you separate waste; these are marked with abbreviations (a) and numbers (b) that mean the following:
1-7: Plastics/20-22: Paper and cardboard/80-98: Composite materials.

The product can be recycled, is subject to an extended producer responsibility and is collected separately.
12. Marks of conformity

This product fulfils the requirements specified in the applicable European and national policies. This product's conformity has been verified. The declarations and documents are stored with the manufacturer.

This product fulfils the requirements specified in the applicable national policies for the Republic of Serbia.
H005 21

This product fulfils the requirements specified in the applicable national policies for the United Kingdom.
You can download the full EU declaration of conformity at the following link: https://www.targa.gmbh/downloads/conformity/354155_2010.pdf
13. Notes on guarantee and service
Warranty of TARGA GmbH
Dear Customer,
This device is sold with three years warranty from the date of purchase. In the event of product defects, you have legal rights towards the seller. These statutory rights are not restricted by our warranty as described below.
Warranty conditions
The warranty period commences upon the date of purchase. Please keep the original receipt in a safe place as it is required as proof of purchase. If any material or manufacturing faults occur within three years of purchase of this product, we will repair or replace the product free of charge as we deem appropriate.
Warranty period and legal warranty rights
The warranty period is not extended in the event of a warranty claim. This also applies to replaced and repaired parts. Any damage or defects discovered
upon purchase must be reported immediately when the product has been unpacked. Any repairs required after the warranty period will be subject to charge.
Scope of warranty
The device was carefully manufactured in compliance with stringent quality guidelines and subjected to thorough testing before it left the works. The warranty applies to material and manufacturing faults. This warranty does not cover product components which are subject to normal wear and which can therefore be regarded as wearing parts, or damage to fragile components such as switches, rechargeable batteries or components made of glass. This warranty is void if the product is damaged, incorrectly used or serviced. To ensure correct use of the product, always comply fully with all instructions contained in the user manual. The warnings and recommendations in the user manual regarding correct and incorrect use and handling of the product must always be observed and complied with. The product is solely designed for private use and is not suitable for commercial applications. The warranty is rendered void in the event of incorrect handling and misuse, if it is subjected to force, and also if any person other than our authorised service technicians interfere with the device. No new warranty period commences if the product is repaired or replaced.
Submitting warranty claims
To ensure speedy handling of your complaint, please note the following:
Before using your product for the first time, please read the enclosed documentation carefully. Should any problems arise which cannot be solved in this way, please call our hotline.
- Always have your receipt, the product article number as well as the serial number (if available) to hand as proof of purchase.
- If it is not possible to solve the problem on the phone, our hotline support staff will initiate further servicing procedures depending on the fault.

Service

Phone: 0800 404 7657
E-Mail: targa@lidl.co.uk

Phone: 1890 930 034
E-Mail: targa@lidl.ie

Phone: 800
62230
E-Mail: targa@lidl.com.mt

Phone: 8009
4409
E-Mail: targa@lidl.com.cy
IAN: 354155_2010

Manufacturer
Please note that the following address is not a service address. First contact the service point stated above.
TARGA
GmbH
Coesterweg 45
59494 Soest
GERMANY
Contenu
https://www.targa.gmbh/downloads/conformity/354155_2010.pdf
Cher client, chere clientele,
Cher client, chere clientele,
https://www.targa.gmbh/downloads/conformity/354155_2010.pdf
https://www.targa.gmbh/downloads/conformity/354155_2010.pdf
https://www.targa.gmbh/downloads/conformity/354155_2010.pdf
8.7 After barberingen