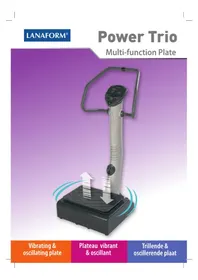
Club Up & Down - Vibratory plate LANAFORM - Free user manual and instructions
Find the device manual for free Club Up & Down LANAFORM in PDF.

Frequently Asked Questions - Club Up & Down LANAFORM
User questions about Club Up & Down LANAFORM
0 question about this device. Answer the ones you know or ask your own.
Ask a new question about this device
Download the instructions for your Vibratory plate in PDF format for free! Find your manual Club Up & Down - LANAFORM and take your electronic device back in hand. On this page are published all the documents necessary for the use of your device. Club Up & Down by LANAFORM.
USER MANUAL Club Up & Down LANAFORM
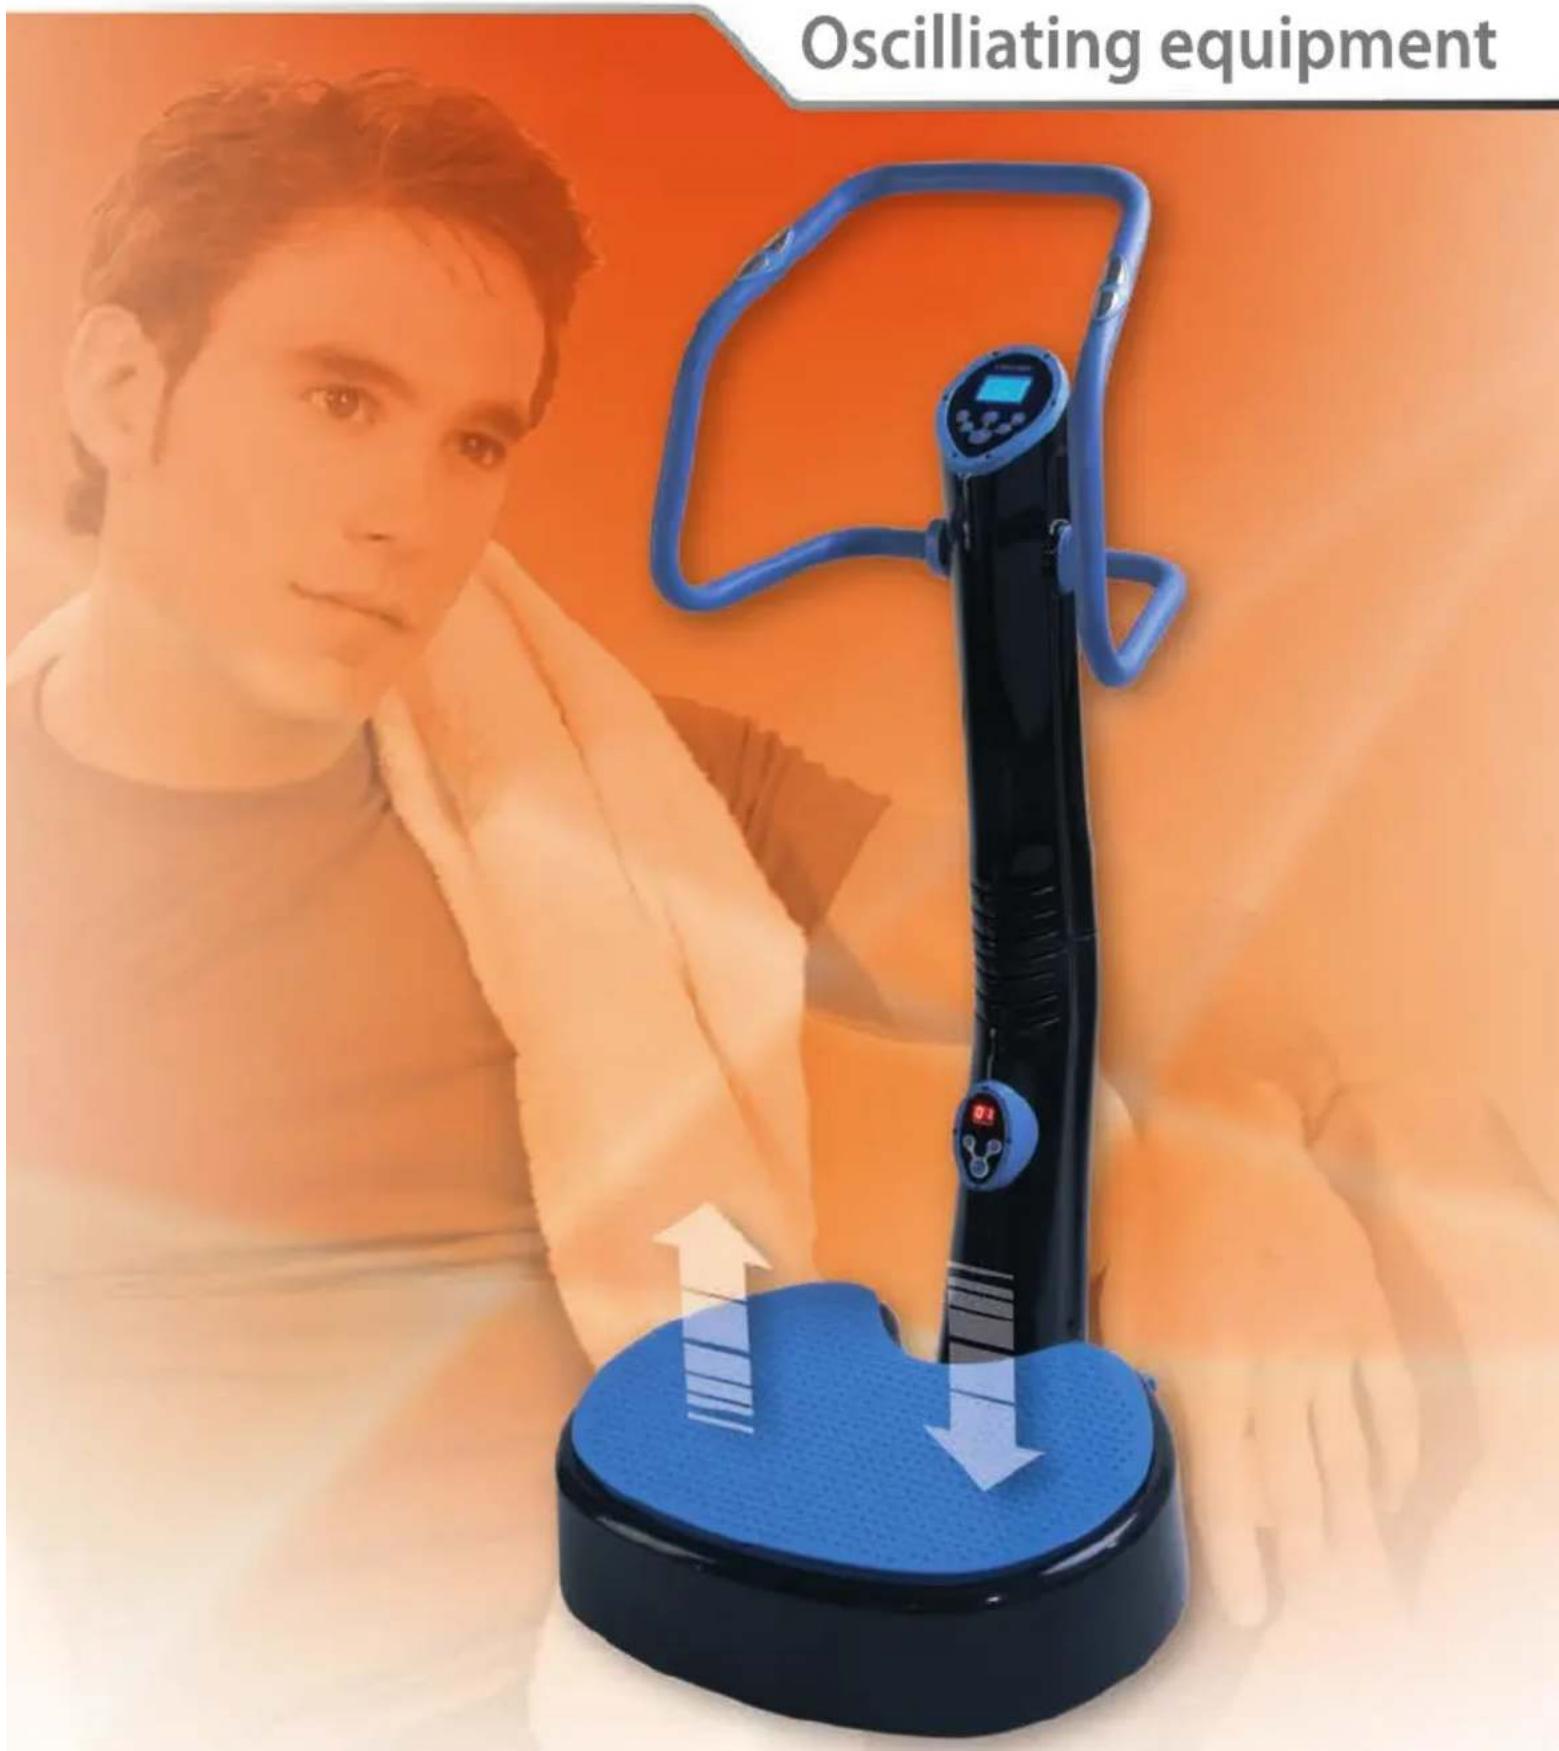
Oscilliating equipment
text_image
Oscilliating equipmentUser's Manual
Dear Customer,
We would like to thank you for the confidence you have shown towards LANAFORM and our CLUB UP AND DOWN. Please read this manual carefully before using the unit, in particular the safety advice, to ensure that you use the unit correctly. Please keep this manual in a safe place, in case you need to refer to it in the future.
GENERAL SAFETY ADVICE
- Keep all packaging material out of the reach of children. Plastic bags may cause suffocation.
- Make sure that the unit is kept in good condition, and, before first using it, check that it is not damaged in any way. If this is the case, do not use it. Take the unit back to your reseller.
- This unit is not for use in a commercial environment.
- The reseller is not responsible for any damage caused by inappropriate use, nor for any intentional damage.
- Never disconnect the unit by pulling on the cable.
- This massage equipment is NOT suitable for use by children.
- Do not jump on the platform, as this may damage the unit.
- f there is any visible damage, do not use the unit. Disconnect it and contact a technician. The unit may be liable to cause electrocution.
- Never try to repair the unit yourself. Contact the reseller or Customer Service.
- Switch off and disconnect the unit after each use.
- Switch off and disconnect the unit before cleaning it.
- if you use the unit on a carpeted floor, check that the air vents are not obstructed.
- Do not use the unit on a vinyl-covered surface.
- It is recommended that you perform some warm-up exercises before using the unit.
- The speed and length of exercises should be increased progressively.
- The unit must only be used by one person at a time.
- Women who are pregnant or are fitted with an IUD (Intra Uterine Device) must NOT use the unit.
- If you feel unwell, or if you feel dizzy, stop using the unit immediately. Consult your doctor without delay if you feel ill, if you have any pain in your joints or elsewhere, if your heart rate increases abnormally or if you have any other abnormal symptoms.
- If you have not done any sport for a long time or if you have a heart, circulatory or orthopaedic condition, check with your doctor before using the unit.
- Keep the unit in a dry place, away from any source of water, and check that the electrical components are not damp.
- Clean the unit using a damp cloth and non-chemical detergent.
- This unit must not be used by children, nor by persons with reduced physical, sensorial or mental capacities, or by persons lacking experience or knowledge unless they have been provided, by a person in charge of safety, with supervision or prior instructions concerning the use of the unit.
- Do not allow children to play with the unit.
- If the electrical power cable is damaged, it must be replaced by the manufacturer, its technical service or any suitably qualified person, to avoid any risk.
WARNING!
- It is dangerous to dismantle the unit yourself.
- It is dangerous to put your hand in the gap below the platform.
• To avoid either damaging the unit or making it noisy, do not move your centre of gravity to the edge of the platform.
RESTRICTIONS ON USE
1) Do not use the unit if you suffer from mental illness.
2) Do not use the unit if you are ill.
3) Children must not use the unit.
4) Women must not use the unit if they are pregnant or menstruating.
OPERATING PRINCIPLES
The technology used in the CLUB UP AND DOWN is based upon innovative technology: it reproduces an oscillating movement. The base plate moves in two dimensions: Up-Down. This works out the muscles exactly as if they were in action during physical or muscle-building activity, but much more effectively. In fact, the energy is expended in depth and not just at the surface. Save time and increase results during a traditional exercise session, in a much shorter time than with traditional activities, while avoiding any risk of injury to your body.
The different mode settings and variable intensity drive the motor according to a pre-determined protocol selected to satisfy the objectives of everybody (massage, physiotherapy, fitness training, fat burn-off, drainage, muscular tone, etc.).
EFFECTS ON THE ORGANISM
- Slimming and lipolysis effects
- Muscular micro-contractions promote heat production by your organism. You can thus use up calories and burn of fat.
- Stimulation by oscillation activates the blood circulation and increases oxygen exchange at muscular tissue level. It improves the elimination of toxins.
- Micro-contractions also create a taughtening effect on the superficial layers of the epidermis that improves skin quality.
- Improvement of blood circulation.
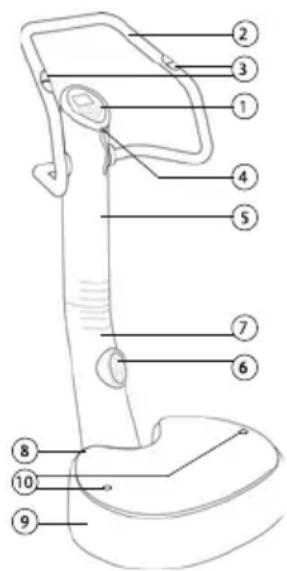
DESCRIPTION OF THE UNIT
1) Main control panel
2) Support bar
3) Heart rate sensor
4) Safety and emergency stop key
5) Upper column
6) Secondary control panel
7) Lower column
8) Platform
9) Base
10) Hook attachment point
text_image
Labeled diagram of a medical device with numbered parts for identificationThe safety and emergency stop key: This key allows the unit to operate. In the event that an emergency shutdown of the unit is required, you can remove the key by pulling the cord. You may also remove this key and leave it in a secure place, so that children do not play with the unit.
EN
ACCESSORIES

6 M8.1

2 M6×12
text_image
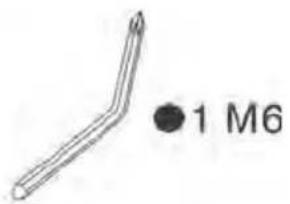
● 1 M6
6 M8.2
6 M8×35

1 M6

4 M6
5 M6x20
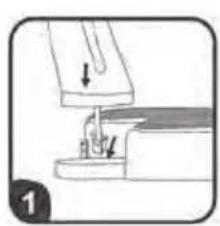
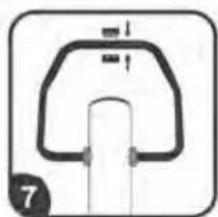
ASSEMBLY INSTRUCTIONS
When unpacking your CLUB UP AND DOWN, check that none of the parts is missing. Also check that the unit has not been damaged in transport.
1) Take the lower column and place it near to the base, connect the electrical plug to the base. Insert the end of the column into the base of the unit so that the screw holes are correctly aligned.
2) Once the components are assembled, tip the unit on its side and use six M8x35 bolts to assemble the base to the column. For each bolt use one M8.1 washer and one M8.2 locknut.
3) Align the upper column with the lower column. Place the two items face to face and connect the two electrical lugs. Push the two columns together and secure in position using an M6x20 bolt.
4) Take the two components of the support bar and connect the electrical cables as shown in the diagram. Use two M6x20 bolts to assemble the lower part of the support bar to the column. With each bolt use an M6 washer.
5) Repeat this step for the opposite side, taking care to plug together correctly the two upper parts of the support bar.
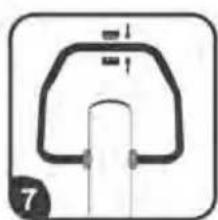
6) Assemble the two upper parts of the support bar. Use M6 x 12 bolts.
7) Place and clip into position the trim above the junction between the two components of the support bar.
natural_image
Mechanical sewing process diagram showing needle insertion and cutting (no text or symbols)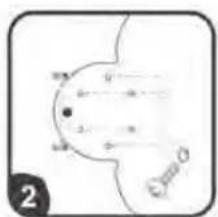
text_image
2 C=O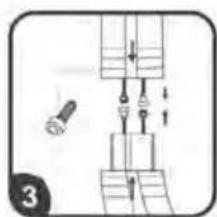
text_image
Diagram showing mechanical assembly with labeled parts and directional arrows, likely illustrating a lifting or lifting process.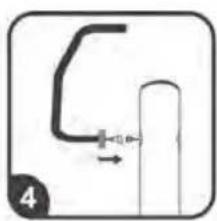
natural_image
Simple line drawing of a pipe fitting with a valve and directional arrow (no text or symbols)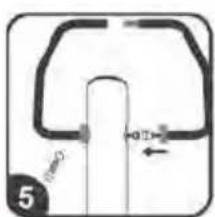
natural_image
Pure mechanical diagram showing a pipe or tube with arrows indicating direction, no text or symbols present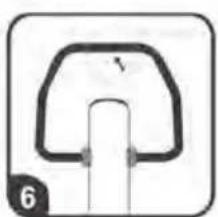
natural_image
Simple line drawing of a mechanical component or tool with no text or symbols
natural_image
Simple line drawing of a mechanical component or tool (no text or symbols)Your unit is ready for use.
CONTROLS
Main control panel
1) Digital display
2) Time adjusting button
3) Button to increase intensity of oscillatory movement
4) On/Off button
5) Start button for "Cardiac rate" feature
6) Mode selection button
7) Button to decrease intensity of oscillatory movement
Secondary control panel
8) Digital display
9) Button to increase intensity of oscillatory movement
10) On/Off button
11) Button to decrease intensity of oscillatory movement

text_image
LANAFORM* ① ② ③ ④ ⑤ ⑥ ⑦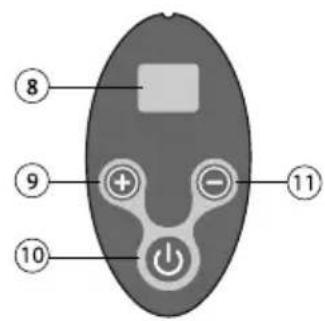
text_image
8 9 10 11OPERATING INSTRUCTIONS
1) Connect the unit and switch it on using the switch at the back of the base. The unit is now in standby mode. Press the On/Off button. The unit will start to operate. If you press the button a second time, the unit will return to the standby mode.
2) Please read the "Controls" chapter for full details of the various functions available.
3) If you want to use the unit in the "upright" position, stand on the unit before switching it on.
4) If you prefer another position, it is better to ask another person to help you operate the controls, or to start "upright" and then change position.
5) For both your health and your safety, do not use the unit for more than 20 minutes per séance to avoid stressing your body.
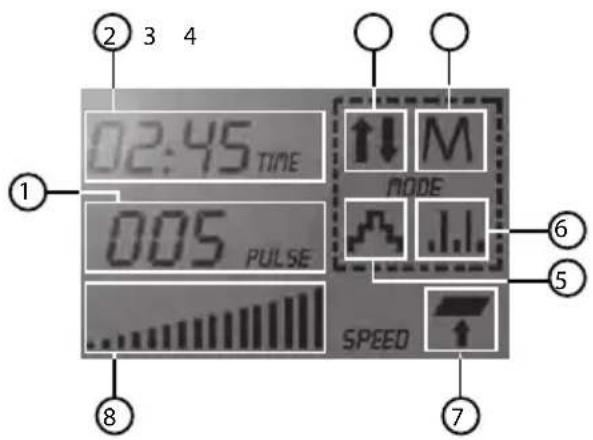
DISPLAYS
1) Heart rate display
2) Operating time display
3) Manual mode display
4) Mode 1 display
5) Mode 2 display
6) Mode 3 display
7) Safety key warning symbol
8) Intensity level on a scale of 1 to 16
text_image
02:45 TIME 005 PULSE MODE SPEED ① ② 3 4 ⑥ ⑤ ⑦ ⑧MODES
Manual mode
In this mode, you can adjust the intensity of the oscillatory movement yourself. There are 16 intensity levels.
M1 Mode 1
The speed increases progressively (step by step) starting at level 1 and finishing at level 16. It then decreases progressively from level 1 to level 16.
M2 Mode 2
The speed increases two levels at a time (1, 3, 5, 7 ..... 15) and then decreases by two levels at a time (15, 13, 11 ..... 1).
P3 Programme 3
The speed changes from intensity level 2 to 16 and then from 16 to 2 at intervals of 5 seconds.
TECHNICAL DATA
- CLUB UP AND DOWN Model
• Reference: 57690
• Power supply: 230V – 50Hz
• Maximum permitted load: 200kg
MAINTENANCE
Take care to switch off the unit before performing daily maintenance.
Never use formaldehyde or any other organic cleaner to clean the unit.
Use a soft, dry cloth rather than a damp cloth to clean the electrical switch and the base surround.
The unit may be damaged if any cleaning product seeps inside.
If the power supply cable is damaged, it must be replaced by a special cable or a complete electrical assembly available from the manufacturer or Customer Service.
LANAFORM ^® guarantees that this product is free of all manufacturing and material defects for a period of two years from the date of purchase, except under the following circumstances: the guarantee for this LANAFORM ^® product does not cover damage resulting from incorrect or improper use, accidental damage, the addition of an unapproved accessory, any modification to the product or any other situation outside the control of LANAFORM ^® .
LANAFORM ^® is not liable for any consequential or special damage.
All implicit guarantees covering product suitability are limited to a period of two years from the date of initial purchase.
On reception, LANAFORM ^® will, as it deems fit, repair or replace your product. In the event that this unit is repaired by any person other than the LANAFORM ^® Service Centre, the guarantee is null and void.
CLUB UP AND DOWN
text_image
Labeled diagram of a medical device with numbered parts for identificationnatural_image
Diagram of a mechanical assembly with a lever and base, no visible text or symbols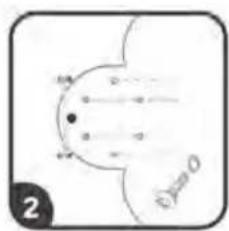
text_image
2 DmaxO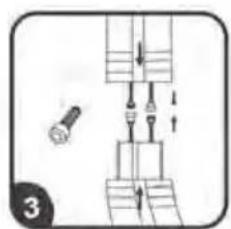
text_image
Diagram showing mechanical assembly with labeled parts and directional arrows, likely illustrating a lifting or lifting process.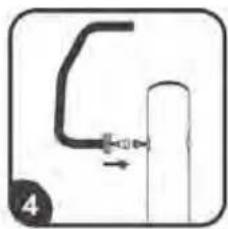
natural_image
Simple line drawing of a pipe fitting with a valve and directional arrow (no text or symbols)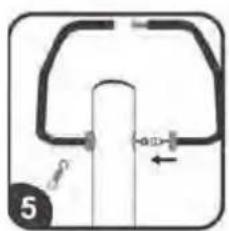
natural_image
Pure mechanical diagram showing a pipe with a valve and directional arrows, no text or symbols present.
natural_image
Simple line drawing of a mechanical component or tool (no text or symbols)
natural_image
Pure mechanical diagram showing a U-shaped component with arrows indicating direction (no text or symbols)PRINCIPE EN WERKING:
text_image
Labeled diagram of a medical device with numbered parts for identificationnatural_image
Mechanical assembly diagram showing a sewing machine with a base and clamped parts (no text or symbols)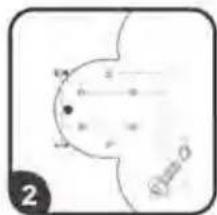
text_image
2 Φ=0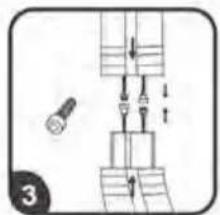
text_image
Diagram showing mechanical assembly with labeled parts and directional arrows, including a bulb and a numbered label '3'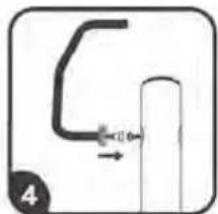
text_image
C10 4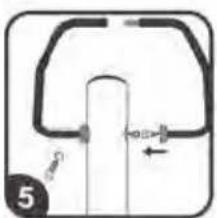
natural_image
Pure diagram of a mechanical or electrical component with no text, numbers, or symbols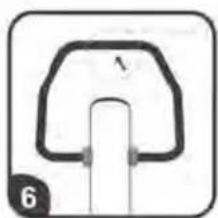
natural_image
Simple line drawing of a handle with a circular base and a vertical shaft (no text or symbols)
natural_image
Simple line drawing of a mechanical component or bracket (no text or symbols)text_image
Labeled diagram of a handheld device with numbered parts for identificationtext_image
Diagram illustrating seven different mechanical or electrical component assembly steps, labeled 1 through 7.text_image
Labeled diagram of a medical device with numbered parts for identificationnatural_image
Diagram of a sewing machine needle insertion into a base, showing mechanical components and a downward arrow (no text or symbols)
text_image
60mm 2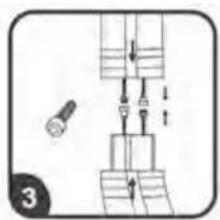
text_image
Diagram showing mechanical assembly with labeled parts and directional arrows, likely illustrating a lifting or lifting process.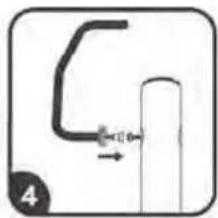
text_image
4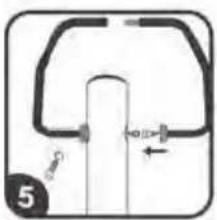
natural_image
Pure mechanical diagram showing a U-shaped component with arrows indicating direction (no text or symbols)
natural_image
Simple line drawing of a mechanical component or tool (no text or symbols)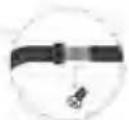
natural_image
Simple line drawing of a mechanical component or bracket (no text or symbols)text_image
Labeled diagram of a medical or laboratory device with numbered parts for identificationtext_image
Diagram illustrating seven steps of a mechanical or electrical component assembly, labeled 1 through 7.text_image
Labeled diagram of a medical device with numbered parts for identificationtext_image
Diagram illustrating seven steps of a mechanical or electrical component assembly, labeled 1 through 7.Oscilliating equipment

Exercices
Before you use this machine, we propose that you do warm-up exercises first, this procedure will prevent in jury and maximize performance.
The following steps are proposed for warm-up exercise.

Exercices
natural_image
Blue and black weight balance device with digital display and control buttons, shown against an orange background (no text or symbols visible)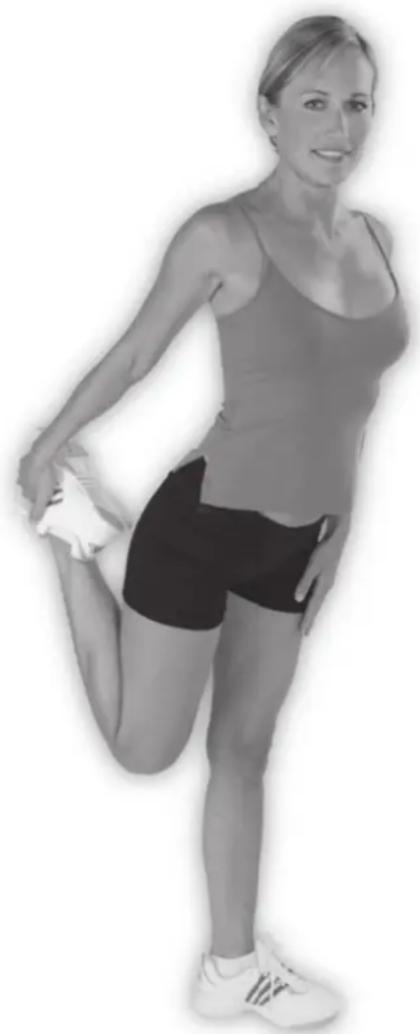
natural_image
Woman performing a leg lift exercise in athletic wear (no text or symbols visible)EN - QUADRICEPS STRETCH
Stand close to a wall, chair or other solid object. Use one hand to assist your balance. Bend the opposite knee and lift your heel towards your buttocks. Reach back and grasp the top of your foot with the same side hand. Keeping your inner thighs close together, slowly pull your foot towards your buttocks until you feel a gentle stretch in the front of your thigh. You do not have to touch your buttocks with your heel. Stop pulling when you feel the stretch. Keep your kneecap pointing straight down and keep your knees close together. (Do not let the lifted knee swing outward.)
Hold the stretch for 20 to 30 seconds. Repeat for the other leg.
FR - ETIREMENT DU QUADRICEPS
Stand approximately one arms length away from a wall or chair with your feet hip-width apart. Keeping your toes pointed forward, move one leg in close to the chair while extending the other leg behind you. Bending the leg closest to the chair and keeping the other leg straight, place your hands on the chair. Keep the heel of the back leg on the ground and move your hips forward. Slowly lean forward from the ankle, keeping your back leg straight until you feel a stretch in your calf muscles. Hold for 20 to 30 seconds. Repeat for the opposite leg.
FR - ETIREMENT DU MOLLET ET DU TENDON D'ACHILLE
Sit on the floor and bend you legs so that the soles of your feet are together. Place your hands on your ankles. Lean forward from the waist and press down lightly on the inside of your knees. You should feel a stretch in the muscles of your inside thigh.
FR - ETIREMENT DE L'INTÉRIEUR DES CUISSES
natural_image
Black-and-white photo of a woman kneeling with hands on her lap, wearing a sports top (no text or symbols visible)EN - BUTTOCKS, HIPS AND ABDOMINAL STRETCH
Lay fl at on your back with your hips relaxed against the floor. Bend one leg at the knee. Keeping both shoulders fl at on the floor, gently grasp the bent knee with your hands and pull it over your body and towards the ground. You should feel a stretch in your hips, abdominals and lower back. Hold for 20 to 30 seconds and release. Repeat for the opposite leg.
FR - ETIREMENT DES FESSIERS, DES HANCHES ET DES ABDOMINAUX
natural_image
Woman performing a leg raise exercise on her back, wearing athletic wear (no text or symbols visible)EN - STANDING HAMSTRINGS STRETCH
Stand with your legs hip width apart. Extend one leg out in front of you and keep that foot fl at against the ground. With your hands resting lightly on your thighs, bend your back leg and lean forward slightly from your hips until you feel a stretch in the back of your thigh. Be sure to lean forward from the hip joint rather than bending at your waist. Hold for 20 to 30 seconds. Repeat for the opposite leg.
FR - ETIREMENT DE L'ISCHIO-JAMBIER
natural_image
Black-and-white photo of a woman in athletic attire performing a stretching exercise (no text or symbols visible)Stand with your feet shoulder width apart and your knees slightly bent. Lift one arm overhead and bend your elbow, reaching down behind your head with your hand toward the opposite shoulder blade. Walk your fingertips down your back as far as you can. Hold this position. Reach up with your opposite hand and grasp your fl exed elbow. Gently assist the stretch by pulling on the elbow. Hold for 20 to 30 seconds. Repeat for the opposite arm.
FR - ETIREMENT DU TRICEPS
natural_image
Woman standing on a fitness scale using an exercise machine (no text or symbols visible)
natural_image
Illustration of human arm muscles showing two different postures (no text or labels)EN - SQUAT
- Stand on the CLUB UP & DOWN® with your feet slightly apart.
- You should then feel tension in your quadriceps, buttocks and back.
FR - SQUAT
natural_image
Woman performing a fitness exercise using an outdoor resistance stand (no text or symbols visible)
natural_image
Illustration of human body muscles showing front and side views (no text or labels)EN - SQUAT 2
- Stand on the CLUB UP & DOWN ^TM with your feet slightly apart.
- Keep your back straight, knees slightly bent and gently tense your leg muscles.
- You should then feel tension in your quadriceps, buttocks and back.
FR - SQUAT 2
natural_image
Woman exercising on a stationary exercise machine (no text or symbols visible)
natural_image
Illustration of human arm muscles showing front and side views (no text or labels)EN - CALVES
- Stand on tiptoe in the center of the CLUB UP & DOWN».
- Keep your back straight, your abdominal muscles tight and you will feel tension in your calf muscles.
• To vary this exercise, you may also bend your knees to 90 degrees.
FR - MOLLETS
natural_image
Person performing a leg exercise using a resistance band machine, accompanied by an anatomical illustration of human musculature (no text or symbols present)EN - PELVIS BRIDGE
- Lie down with your shoulders on the floor and your feet flat on the CLUB UP & DOWN®.
- Raise your buttocks with your knees slightly bent.
• Gently pull your heels towards your upper body by tensing the thigh and buttock muscles.
FR - EXTENSION DU BASSIN
natural_image
Person performing a fitness exercise using a leg presser machine, with an inset showing a female figure in the upper right view (no text or symbols on the diagram itself)EN - SHOULDER & NECK RELAXATION
- Kneel down in front of the CLUB UP & DOWN® and place your hands on the platform with your arms outstretched.
- Keep your back and neck straight.
- Swing you upper body backwards while resting your arms on the platform.
- This exercise helps to relax muscles of your neck and shoulders.
FR - RELAXATION DES ÉPAULES ET DE LA NUQUE
natural_image
Woman performing a push-up exercise using a fitness machine, accompanied by an anatomical illustration of human body silhouette (no text or symbols)EN - PUSH UP
- Kneel down in front of the CLUB UP & DOWN*.
- Place your hands on the platform shoulder-width apart, fingers to fingers.
- With your back straight and abdominal muscles tight, push your chest up from the platform.
- This exercise aims to strengthen your chest, shoulder muscles an triceps.
- You may also perform the same exercise with your legs stretched