
MovePower MVP360 - Battery charger DOMETIC - Free user manual and instructions
Find the device manual for free MovePower MVP360 DOMETIC in PDF.

| Product type | Portable battery charger |
| Brand | Dometic |
| Model | MovePower MVP360 |
| Rated voltage | 12 V DC |
| Capacity | 36 Ah |
| Dimensions (with charger) | 330 x 232 x 260 mm |
| Dimensions (without charger) | 270 x 232 x 260 mm |
| Weight (with charger) | 13.7 kg |
| Weight (without charger) | 12.9 kg |
| Operating temperature range | -20°C to +60°C |
| Power supply | 230 V AC via the automatic charger IU0U PerfectCharge IU812 |
| Main functions | Powering caravan maneuvering radar and other 12 V devices (built-in socket) |
| Display | LED LOW (red), LED FULL (green) and charge status display |
| Maintenance and cleaning | Clean with a damp cloth; do not use detergents or hard objects |
| Safety | Do not use as a starter; ensure sufficient ventilation; safety distance 20 cm |
| Delivery contents | AGM battery, PerfectCharge IU812 charger, mounting frame, fixing strap, 2 quick connectors, screws, manual |
| Warranty | Legal |
| Certifications | CE |
| Manufacturer | Dometic France, ZA du Pré de la Dame Jeanne, F-60128 Plailly |
Frequently Asked Questions - MovePower MVP360 DOMETIC
User questions about MovePower MVP360 DOMETIC
0 question about this device. Answer the ones you know or ask your own.
Ask a new question about this device
Download the instructions for your Battery charger in PDF format for free! Find your manual MovePower MVP360 - DOMETIC and take your electronic device back in hand. On this page are published all the documents necessary for the use of your device. MovePower MVP360 by DOMETIC.
USER MANUAL MovePower MVP360 DOMETIC
3

4
natural_image
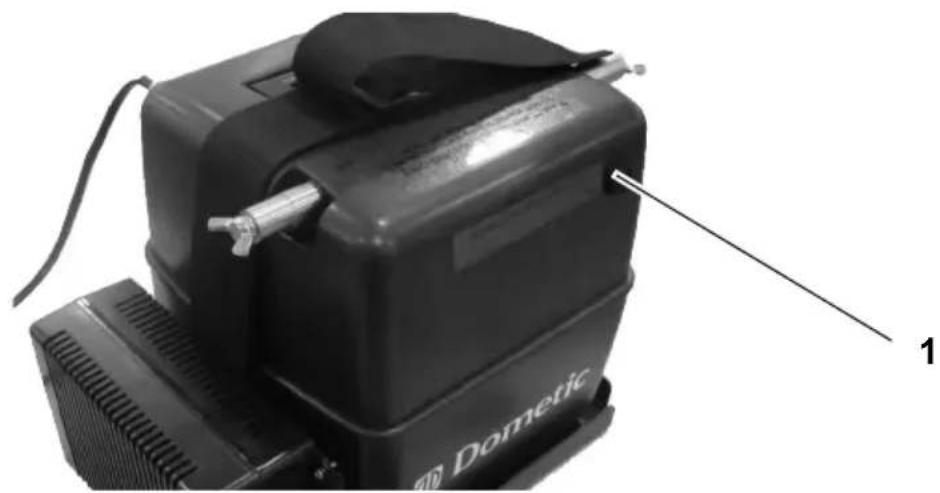
Close-up of a black Domestic portable printer with visible ports and a label pointing to its base (no text or symbols on the device itself)5
natural_image
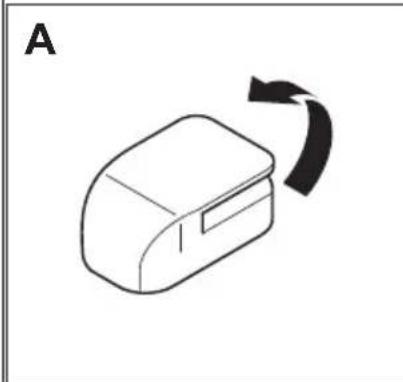
Simple line drawing of a computer mouse with a curved arrow indicating rotation (no text or symbols)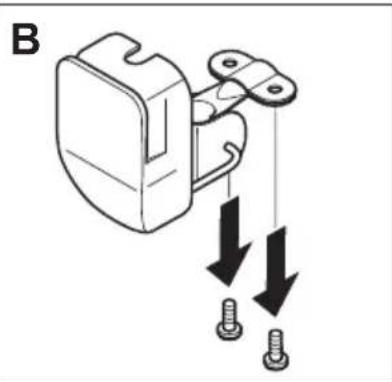
natural_image
Mechanical component diagram showing a bracket with two screws and downward force arrows (no text or symbols)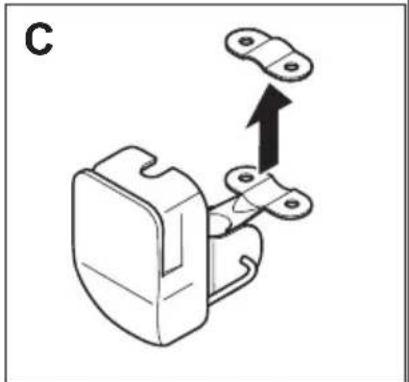
natural_image
Mechanical component diagram showing a bracket with mounting holes and an arrow indicating direction (no text or symbols)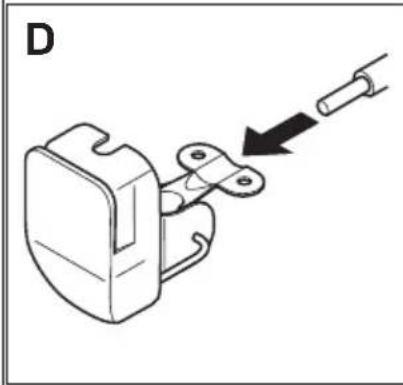
natural_image
Mechanical assembly diagram showing a bracket with a pin and arrow indicating direction (no text or symbols)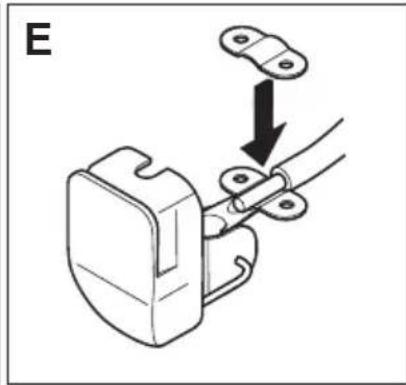
natural_image
Mechanical assembly diagram showing a bracket with a pull arrow and mounting bracket (no text or symbols)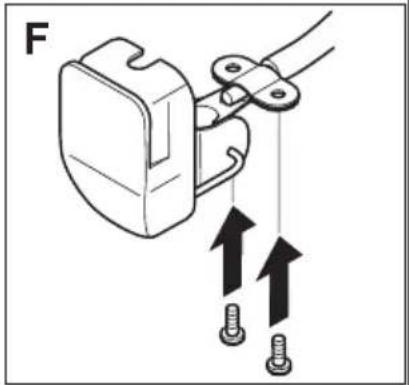
natural_image
Diagram of a mechanical component with two screws and two upward arrows indicating movement or assembly (no text or symbols)6
natural_image
Line drawing of a device with an attached plug and cable, labeled 'A' (no text or symbols on the diagram itself)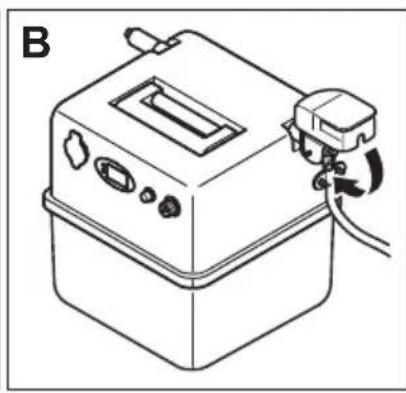
natural_image
Line drawing of a device with a control panel and wiring, labeled 'B' (no text or symbols on the device itself)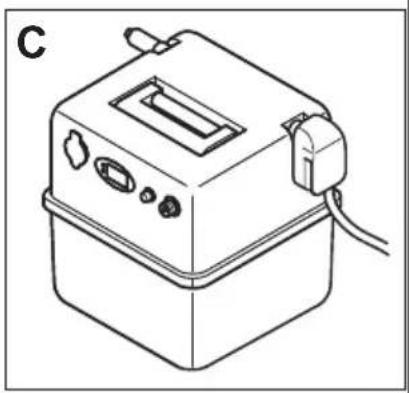
natural_image
Line drawing of a rectangular electronic device with ports and a cable, labeled 'C' in the top-left corner (no text or symbols on the device itself)Please read this manual carefully before installing and using the device, and keep it in a safe place. If you sell the device, pass on this instruction manual to the buyer.
Table of contents
1 Explanation of symbols 17
2 Safety instructions....17
3 Scope of delivery 19
4 Intended use 19
5 Technical description 20
6 Installing MovePower....21
7 Before initial use 21
8 Using MovePower 22
9 Cleaning MovePower....24
10 Troubleshooting 25
11 Warranty 25
12 Disposal 25
13 Technical data 26
1 Explanation of symbols

CAUTION!
Safety instruction: Failure to observe this instruction can lead to injury.

NOTICE!
Failure to observe this instruction can cause material damage and impair the function of the product.

NOTE
Supplementary information for operating the product.
▶ Action: This symbol indicates that action is required on your part. The required action is described step-by-step.
√This symbol describes the result of an action.
fig. 1 5, page 3: This refers to an element in an illustration. In this case, item 5 in figure 1 on page 3.
2 Safety instructions
The manufacturer accepts no liability for damage in the following cases:
● Faulty assembly or connection
● Damage to the product resulting from mechanical influences and excess voltage
- Alterations to the product without express permission from the manufacturer
● Use for purposes other than those described in the operating manual
Note the following basic safety information when using electrical devices to protect against:
- Electric shock
- Fire hazards
- Injury
2.1 General safety
● Electrical devices are not toys.
Keep electrical devices out of reach of children or infirm persons. Do not let them use electrical devices without supervision. Supervise children to ensure they do not play with the device.
- Persons (including children) whose physical, sensory or mental capabilities or lack of experience and knowledge prevent them from using this device safely must not use this device without supervision or instruction by a responsible person.
- Only use the device as intended.
- Do not make any alterations or conversions to the device.
● Maintenance and repairing of the device may only be carried out by qualified personnel who are familiar with the risks involved and the relevant regulations. Inadequate repairs may cause serious hazards. For repair service, please contact the service centre in your country (addresses on the back page).
2.2 Operating the device safely
- Operate the device only if you are certain that the housing and the cables are undamaged.
- When working on the device always disconnect the power supply by removing the fuse (fig. 4 1, page 3).
- Pay attention to the build up of heat in the device and keep a safe distance of 20 cms away from the device.
- Set up the device in a dry location where it is protected against splashing water.
- Protect the device against corrosive fumes and salty or moist air.
● Protect it from rain and moisture. - Ensure good ventilation.
- Only use the battery quick connections provided to connect the caravan parking assistance to MovePower.
2.3 Transporting the device safely
- Secure the device during transport on the mounting frame using the harness. The mounting frame must be fixed to the floor with screws.
3 Scope of delivery
| No. in fig. 1, Description Item number page 2 |
| 1 Rechargeable battery |
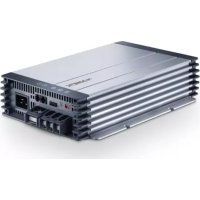
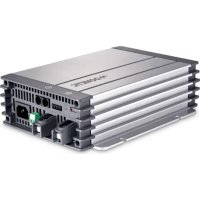
| 2 IU0U automatic charger PerfectCharge IU812 808-012/1 |
| 3 Charging cable |
| 4 Mounting frame |
| 5 Harness |
| 6 2 battery connectors |
| – Fastening screws |
| – Operating manual |
4 Intended use
MVP360 MovePower (item no. 9102500025) is used as a power source for caravan parking assistance.
Other consumer units can also be connected with a voltage of 12 V=, for example refrigerators.
MovePower may not be used as a jump start for vehicles.
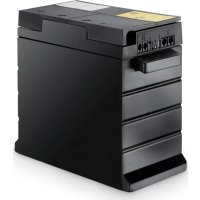
5 Technical description
MovePower is a powerful maintenance-free rechargeable battery (AGM battery) for supplying the caravan parking assistance with voltage. The parking assistance is connected directly to the terminals on the battery using the battery quick connections provided.
Using an integrated 12-V socket, other 12-V consumer units can also be supplied with voltage.
MovePower is charged using the IU812 charging unit supplied. Other charging units should not be used to charge the battery due to their different charging characteristics.
The mounting frame and the harness ensure that it is well secured in the caravan.
To increase the capacity, several devices can be switched at the same time.
The device can be easily carried with the handle.
Operating and display elements (fig. 2, page 2)
Item Description Explanation
1 LED LOW After pressing the test switch, lights up red if battery is discharged.
2 LED FULL After pressing the test switch, lights up green when battery is fully charged.
3 Display After pressing the test switch, displays the charging status of the device for connected consumer units, see “Checking the charging status” on page 23.
4 Test switch Tests the charging status.
Connections (fig. 3, page 3)
Item Description Explanation
1 Positive terminal (+) Parking assistance connection
2 Negative terminal (−) Parking assistance connection
3 "CHARGE" charging socket Connection for IU0U automatic charger PerfectCharge IU812
4 12-V socket 12-V consumer unit connection
6 Installing MovePower
When selecting the installation location, observe the following instructions:
● The mounting frame must be installed horizontally.
● The installation location must be protected from moisture.
- The installation location may not be in an environment with flammable materials.
● The installation location may not be dusty.
- The installation location must be well ventilated. A ventilation system must be available for installations in small, enclosed spaces. The clearance around the device must be at least 25 cm.
● The device must be installed on a level and sufficiently sturdy surface.

NOTICE!
Before drilling any holes, make sure that no electrical cables or other parts of the vehicle can be damaged by drilling, sawing and filing.
▶ Secure the IU0U automatic charger PerfectCharge IU812 on the mounting frame using the fastening screws supplied.
▶ Select a suitable installation location in the caravan, such as a storage box. Observe the information above.
▶Secure the mounting frame with the fastening screws supplied.
7 Before initial use

NOTE
Only use the battery quick connections (fig. 1 6, page 2) provided to connect the parking assistance to MovePower.
▶Attach the battery quick connection to the connection cable for the parking assistance (fig. 5, page 4).
√ The connection cable for the parking assistance is ready for use.
8 Using MovePower

NOTE
Observe the following information to achieve an optimum service life of the battery.
● Never discharge the battery fully.
● The battery should be discharged and charged regularly.
8.1 Charging the battery

NOTICE! Beware of damage
Only charge the battery using the IU0U automatic charger PerfectCharge IU812 supplied. A device with the incorrect charging characteristics will damage the battery.

NOTE
Observe the operating manual of the IU0U automatic PerfectCharge IU812.
▶Insert the two-pin plug on the charging cable into the “Charge” socket.
▶Secure the plug by tightening the union nut.
▶Connect the charging unit to a mains voltage of 230 V.
√The battery is charged.
A discharged battery is completely charged in roughly 5 hours.
8.2 Connecting the consumer unit

NOTICE! Beware of damage
Only connect consumer units which require a supply voltage of 12 V==.
Connecting the parking assistance

NOTICE! Beware of damage
Before connecting to MovePower, the parking assistance must be protected by an appropriate fuse.
Observe the information in the manufacturer's instructions for the parking assistance.
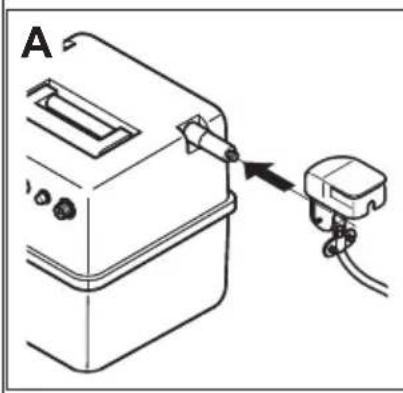
▶Remove the safety caps on the positive terminal (+) and the negative terminal (−).

NOTICE! Beware of damage
Make sure the polarity is correct when connecting the parking assistance to the battery.
▶ Connect the connection cable for the parking assistance to the positive terminal (+) and the negative terminal (−) of the battery using the battery quick connection as an aid (fig. 6, page 4).
√ The parking assistance is supplied with voltage and can be used. Observe the information in the operating manual for the parking assistance.
Connecting other consumer units
▶Connect other consumer units, such as coolers, to the 12-V socket on the device.
8.3 Checking the charging status
Without any connected consumer units (quick test)
▶Ensure that the battery is not being charged.
▶Press the test switch.
√The LEDs show the charging status:
Status LED Voltage Charging status
| LED FULL lights up green >12.8 V The battery is fully charged. | ||
| Both LEDs are off 11.4 V – 12.7 V The battery is partially charged. | ||
| LED LOW lights up red | <11.3 V | The battery is discharged. |
With connected consumer units
▶Ensure that the battery is not being charged.
▶Connect a consumer unit to the battery.
▶Ensure that the consumer unit is switched on.
▶Press the test switch.
√The available voltage of the battery is shown in the display. The remaining capacity depends on various factors, such as the ambient temperature. Refer to the values in the following table as a reference:
Voltage Remaining capacity
| 12.8 V or higher 80% – 100% |
| 12.3 V – 12.7 V 40% – 80% |
| 11.3 V – 12.2 V 20% – 40% |
8.4 Replacing the fuse
The 12-V socket is protected with its own fuse (fig. 4 1, page 3).
▶ Unscrew the fuse insert (fig. 4 1, page 3).
▶Replace the defective fuse with one of the same rating (16 A).
▶Screw the fuse insert back in.
8.5 Storing MovePower
▶Store the battery at room temperature if possible.
▶ Charge the battery regularly every 8 weeks if you do not use it for longer periods.
9 Cleaning MovePower

NOTICE!
Do not use sharp or hard objects or cleaning agents for cleaning as these may damage the product.
▶Occasionally clean the product with a damp cloth.
10 Troubleshooting
Problem Cause Remedy
| Connected device is not supplied with voltage | Battery is not charged Charge the battery | |
| The fuse in the 12-V socket has blown | Replace the fuse | |
| Contact problems on the terminals | Clean the terminals | |
| Defective fuse This can only be repaired by an authorised repair centre. | ||
11 Warranty
The statutory warranty period applies. If the product is defective, please contact your retailer or the manufacturer's branch in your country (see the back of the instruction manual for the addresses).
For repair and guarantee processing, please include the following documents when you send in the device:
● A copy of the receipt with purchasing date
● A reason for the claim or description of the fault
12 Disposal
▶Place the packaging material in the appropriate recycling waste bins wherever possible.
If you wish to finally dispose of the product, ask your local recycling centre or specialist dealer for details about how to do this in accordance with the applicable disposal regulations.

Protect the environment!
Do not dispose of any batteries with general household waste. Return defective or used batteries to your retailer or dispose of them at collection points.
13 Technical data
| MVP360 MovePower | |
| Item no.: 9102500025 | |
| Voltage: | 12 |
| Operating temperature range: -20 °C to +60 °C | |
| Capacity: 36 Ah | |
| Dimensions L x W x H (mm): 330 x | 232 x 260 (with IU0U automatic charger)270 x 232 x 260 (without IU0U automatic charger) |
| Weight: 13.7 kg (with IU0U automatic charger)12.9 kg (without IU0U automatic charger) | |
| Inspection/certification: | |
5 Description technique
Dometic Australia Pty. Ltd.
1 John Duncan Court
Varsity Lakes QLD 4227
+61 7 55076000
+61 7 55076001
Mail: sales@dometic-waeco.com.au
AUSTRIA
Dometic Austria GmbH
The Gateway · 25 Canton Road,
Tsim Sha Tsui · Kowloon
Hong Kong
+852 24611386
+852 24665553
Mail: info@dometic-waeco.com.hk
ITALY
Dometic Italy S.r.l.
Via Virgilio, 3
I-47100 Forli
+39 0543 754901
昌 +39 0543 756631
Mail: info@dometic.it
NORWAY
Dometic Norway AS
Skolmar 24
N-3232 Sandefjord
+47 33428450
+47 33428459
Mail: firmapost@waeco.no
POLAND
Dometic Poland Sp. z o.o.
Ul. Puławska 435A
02-801 Warszawa
Poland
+48 22 414 32 00
+48 22 414 32 01
Mail: info@dometic.pl
RUSSIA
Dometic RUS LLC
Komsomolskaya square 6-1
107140 Moscow
Russia
+7 495 780 79 39
+7 495 916 56 53
Mail: info@dometic.ru
SLOVAKIA
Dometic Slovakia s.r.o.
Tehelná 8
SK-98601 Fil'akovo
+421 47 4319 107
+421 47 4319 166
Mail: info@dometic.sk
SPAIN
Dometic Spain S.L.
Avda. Sierra del Guadarrama, 16
E-28691 Villanueva de la Cañada
Madrid
+34 902 111 042
+34 900 100 245
Mail: info@dometic.es
SWEDEN
Dometic Scandinavia AB
Gustaf Melins gata 7
Dometic Switzerland AG
Riedackerstrasse 7a
CH-8153 Rümlang (Zürich)
+41 44 8187171
吕 +41 44 8187191
Mail: info@dometic-waeco.ch
TAIWAN
WAECO Impex Ltd.
Taipei Office
2 FL-3 · No. 56 Tunhua South Rd, Sec 2
Taipei 106, Taiwan
+886 2 27014090
+886 2 27060119
Mail: marketing@dometic-waeco.com.tw
UNITED KINGDOM
Dometic UK Ltd.
Dometic House · The Brewery
Blandford St. Mary
Dorset DT11 9LS
+44 844 626 0133
吕 +44 844 626 0143
Mail: sales@dometic.co.uk
UNITED ARAB STATES
Dometic AB
Regional Office Middle East
P O Box 74775
Dubai, United Arab Emirates
+971 4 321 2160
昌 +971 4 321 2170
Mail: info@dometic.ae
UNITED STATES OF AMERICA
Dometic Marine Division
2000 N. Andrews Ave. Extension
Pompano Beach, FL 33069 USA
+1 954 973 2477
+1 954 979 4414
Mail: marinesales@dometicusa.com


- Table of contents
- Explanation of symbols
- CAUTION!
- NOTICE!
- NOTE
- Safety instructions
- General safety
- Operating the device safely
- Transporting the device safely
- Scope of delivery
- Intended use
- Technical description
- Operating and display elements (fig. 2, page 2)
- Item Description Explanation
- Connections (fig. 3, page 3)
- Installing MovePower
- Before initial use
- Using MovePower
- Charging the battery
- NOTICE! Beware of damage
- Connecting the consumer unit
- Connecting the parking assistance
- Connecting other consumer units
- Checking the charging status
- Without any connected consumer units (quick test)
- With connected consumer units
- Replacing the fuse
- Storing MovePower
- Cleaning MovePower
- Troubleshooting
- Warranty
- Disposal
- Protect the environment!
- Technical data
- Description technique
- Dometic Australia Pty. Ltd.
- AUSTRIA
- Dometic Austria GmbH
- ITALY
- Dometic Italy S.r.l.
- NORWAY
- Dometic Norway AS
- POLAND
- Dometic Poland Sp. z o.o.
- RUSSIA
- Dometic RUS LLC
- SLOVAKIA
- Dometic Slovakia s.r.o.
- SPAIN
- Dometic Spain S.L.
- SWEDEN
- Dometic Scandinavia AB
- Dometic Switzerland AG
- TAIWAN
- WAECO Impex Ltd.
- UNITED KINGDOM
- Dometic UK Ltd.
- UNITED ARAB STATES
- Dometic AB
- UNITED STATES OF AMERICA
- Dometic Marine Division
Brand : DOMETIC
Model : MovePower MVP360
Category : Battery charger