
PBC110 - Battery charger DOMETIC - Free user manual and instructions
Find the device manual for free PBC110 DOMETIC in PDF.

| Product Type | Smart & Automatic Battery Charger |
| Model | PBC110 |
| Brand | Dometic |
| Input Voltage | 220-240 VAC, 50/60 Hz |
| Output Voltage | 12 V |
| Output Current | 2 / 5 / 10 A selectable |
| Battery Types | Lead acid (WET, GEL, AGM), LiFePO4 |
| Battery Capacity Range | 6 Ah to 200 Ah (maintenance up to 240 Ah) |
| Charging Stages | 7 stages (soft start, bulk, absorption, analysis, recondition, float, maintenance pulse) |
| Protection Systems | Reverse polarity, short circuit, overheat, timer |
| Dimensions (L x W x H) | 205 x 90 x 52 mm |
| Net Weight | 1 kg |
| AC Power Cord Length | 1800 mm |
| Output Lead Length | 1800 mm with battery clamps |
| Operating Temperature Range | 0 °C to 40 °C |
| Storage Temperature Range | -10 °C to 80 °C |
| Operating Humidity | 90% RH max |
| Certifications | RCM, CE, FCC |
| Mounting | Floor standing or wall mountable (with screws) |
| Cooling | Passive (no fan, noise-free) |
| Warranty | 1 year |
| ECO Mode | Automatic when no battery connected |
| Temperature Compensation | -24 mV/°C |
| Minimum Start Voltage | >6.0 V |
| Intended Use | Indoor use only, for charging and maintaining 12V batteries |
Frequently Asked Questions - PBC110 DOMETIC
User questions about PBC110 DOMETIC
0 question about this device. Answer the ones you know or ask your own.
Ask a new question about this device
Download the instructions for your Battery charger in PDF format for free! Find your manual PBC110 - DOMETIC and take your electronic device back in hand. On this page are published all the documents necessary for the use of your device. PBC110 by DOMETIC.
USER MANUAL PBC110 DOMETIC
Please read this instruction manual carefully before installation and first use, and store it in a safe place. If you pass on the product to another person, hand over this instruction manual along with it.
Table of contents
1 Explanation of symbols....2
2 General safety instructions ....3
3 Intended use....6
4 Scope of delivery 7
5 Technical description ....7
6 Settings 11
7 Charging....12
8 Maintaining and cleaning 14
9 Trouble shooting....15
10 Warranty ....16
11 Disposal....16
12 Technical data....17
13 Copyright 18
1 Explanation of symbols

DANGER!
Safety instruction: Failure to observe this instruction will cause fatal or serious injury

WARNING!
Safety instruction: Failure to observe this instruction will cause fatal or serious injury

CAUTION!
Safety instruction: Failure to observe this instruction can lead to injury.

NOTICE!
Failure to observe this instruction can cause material damage and impair the function of the product.

NOTE
Supplementary information for operating the product.
2 General safety instructions
The manufacturer accepts no liability for damage in the following cases:
- Faulty assembly or connection
- Damage to the product resulting from mechanical influences and incorrect connection voltage
• Alterations to the product without express permission from the manufacturer - Use for purposes other than those described in the operating manual

WARNING!
Note the following basic safety information when using electrical devices to protect against:
• Electric shock
- Fire hazards
- Injury
2.1 General safety

DANGER!
In the event of fire, use a fire extinguisher which is suitable for electrical devices.

WARNING!
Only use the device as intended.
- Disconnect the device from the mains:
– Before cleaning and maintenance - After use
- The device should not be used if the device itself or the connection cable are visibly damaged.
- If the supply cord is damaged, it must be replaced by the manufacturer, its service agent or similarly qualified persons in order to avoid a hazard.
- This device may only be repaired by qualified personnel. Inadequate repairs may cause serious hazards.

NOTICE!
- Before start-up, check that the voltage specification on the type plate is the same as that of the power supply.
- Ensure that other objects cannot cause a short circuit at the contacts of the device.
- Never pull the plug out of the socket by the connection cable.
- Store the device in a dry and cool place.
2.2 Safety when installing the device

DANGER!
Never mount the device anywhere where there is a risk of gas or dust explosion.

CAUTION!
- Ensure that the device is stable.
- The device must be set up in such a way that it cannot tip over or fall down.
- Never place the charger on the battery while charging.

NOTICE!
- Do not expose the battery charger to an external heat source (such as direct sunlight) to avoid overheating.
- Set up the device in a dry location where it is protected against splashing water.
2.3 Operating the device safely

DANGER! Danger of electrocution
- Do not touch exposed cables with your bare hands. This applies especially when operating the device from the AC mains.
- To be able to disconnect the device quickly from the mains, the socket must be close to the device and be easily accessible.

WARNING!
- Only use the device indoor. Do not expose battery charger to rain, snow or other liquids.
- Explosive gases may escape from the battery during charging. Provide good ventilation to prevent flames and sparks.
- Always use sockets which are grounded and secured by residual current circuit breakers.

CAUTION!
- Do not operate the device in salty, wet or damp environments.
- Do not operate the device in the vicinity of corrosive fumes or combustible materials.
- Do not operate the device in areas where there is a danger of explosions.
- Before starting the device, ensure that the power supply line and the plug are dry.
• Always disconnect the power supply when working on the device.

NOTICE!
- Make sure the air inlets and outlets of the device are not covered.
- Ensure good ventilation.
2.4 Safety precautions when handling batteries

WARNING!
- Batteries contain aggressive and caustic acids. Avoid battery fluid coming into contact with your body. If your skin or eyes do come into contact with battery fluid, wash the part of your body in question thoroughly with water.
- If you sustain any injuries from acids, contact a doctor immediately.

CAUTION!
- When working on the batteries, do not wear any metal objects such as watches or rings. Short circuited batteries can cause serious injuries.
- Prevent any metal parts from falling on the battery. This can cause sparks or shortcircuit the battery and other electrical parts.
• Danger of explosions!
Never attempt to charge a frozen or defective battery. Place the battery in a frost-free area and wait until the battery has acclimatized to the ambient temperature. Then start the charging process.
- Wear goggles and protective clothing when you work on batteries. Do not touch your eyes when you are working on the battery.
- Do not smoke and ensure that no sparks can arise in the vicinity of the engine or battery.

NOTICE!
- Follow the instructions of the battery manufacturer and those of the manufacturer of the system or vehicle in which the battery is used.
- If you need to remove the battery, first disconnect the earth connection. Disconnect all connections and all consumers from the battery before removing it.
3 Intended use
The battery charger PBC110 is designed to charge, desulfate and maintain 12V lead acid (GEL, WET, AGM) and LiFePO4 batteries with a capacity of 6 Ah to 200 Ah (maintenance up to 240 Ah). It must not be used on other battery types.
The battery charger is designed for indoor use only. Good ventilation must be ensured.

WARNING!
- Do not charge other batteries than 12 V lead acid and LiFePO4.
- Check the battery manufacturer specifications before using the charger.
- Do not charge batteries with a cell short circuit. The oxyhydrogen they produce can cause explosions.
- Do not charge non-rechargeable batteries.
- Do not use the device in unventilated rooms. Charging lead batteries produces oxyhydrogen which can cause explosions.
- This device is not intended for use by persons (including children) with reduced physical, sensory or mental capabilities, or lack of experience and knowledge, unless they have been given supervision or instruction concerning use of the device by a person responsible for their safety.
- Children should be supervised to ensure that they do not play with the device.
4 S c o p e o f d
Quantity Description Quantity
1 Battery charger PBC110 1
1 Operation Manual 1
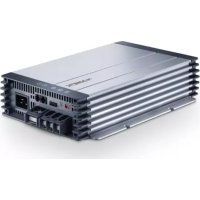
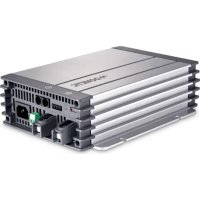
5 Technical description
The battery charger may be placed on the ground or be mounted with four screws to the wall. It is equipped with heavy-duty cables, corrosion-resistant output connectors and spark-free contacts. It is passively cooled to allow for noise-free operation.
5.1 Protection systems
For safe operation the battery charger is equipped with the following protection systems:
- Reverse polarity protection: If the battery charger detects reverse polarity, it will stop delivering output current. The red LED will be turned on.
- Short circuit protection: If the charger detects an output short circuit, it will stop delivering output current. The red LED will be turned on.
- Internal overheat protection: The battery charger is equipped with a temperature sensor. When the temperature becomes too high, the charging current is automatically decreased.
- Timer protection: The battery charger limits the maximum charging time for each charging stage. Once the battery charger has timed out, it stops charging the battery. The red LED will flash slowly.
5.2 Charging process
The battery charger provides a seven stage charging process for charging, desulfating and maintaining 12 V lead acid and LiFePO4 batteries. Different battery types and charging rates are selectable. The charging process is controlled by a microprocessor.
When the battery is connected and AC power is on, the charger will automatically diagnose the battery condition and determine if the battery should engage soft start charging or go directly into bulk charging.
| Stage | Charging rate indicator | Description |
| Soft start charging | 20 % | The battery voltage will increase slowly. When it reaches 10.5 V, the charger goes into bulk charging.If the battery voltage cannot reach 10.5 V within two hours, a battery fault is signalled. |
| Bulk charging 80 % The battery will be charged up to about 80 %.The charger delivers an almost constant current of 2 A/5 A/10 A until the battery voltage reaches the set value. | ||
| Absorption charging | 80 % The battery will be charged up to about 95 %.The charging current tapers and the charging voltage are kept constant at the set value. | |
| Battery analysis | 100 % flashing | The charging is interrupted for a short period to measure battery voltage.If the battery voltage falls too quickly, the battery is probably faulty. |
| Recondition charging | 100 % flashing Recondition charging balances the batteries cells.It is used for older batteries or if low voltage is detected. | |
| Float charging 100 % The float mode allows the charger to effectivelybe left connected to the battery; it safely keeps the battery fully charged, ready for use. | ||
| Maintenance pulse charging | 100 % This program engages a special charging waveform and monitors the battery voltage. If the battery voltage drops, a special pulse will keep the battery in the optimal state. If the battery voltage drops significantly, the battery charger will switch to bulk charging.The maintenance mode allows the charger to stay connected to the battery long term. To ensure optimal battery performance please check the electrolyte level regularly. | |
5.3 ECO mode
If AC power is connected when no battery is connected, the battery charger goes automatically into ECO mode to minimize power consumption.
5.4 Parts and connections

No. in
fig. 1
Description
1 Output lead with clips
2 Battery charger PBC110
3 AC Power cord
4 Temperature sensor
5.5 Controls
2
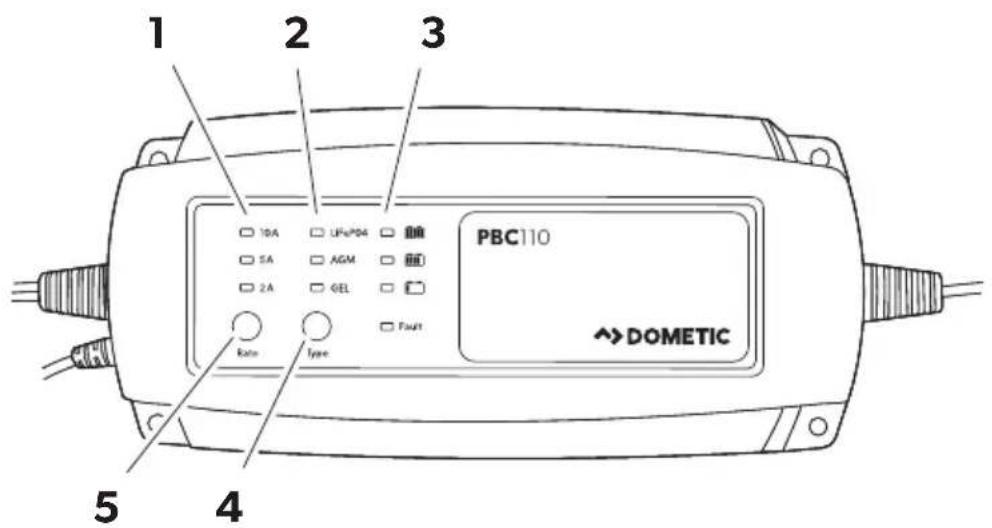
No. in fig. 2
Explanation/function
1 Charging rate indicator (2 A/5 A/10 A)
2 Battery type indicator (LiFePO4/AGM/GEL)
3 Battery status of charge indicator
4 Battery type selector
5 Charging rate selector
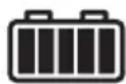
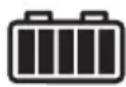
5.6 LED status indicator
LED Status Color Explanation
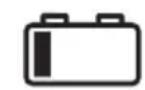


ON green Battery up to 20 % charged
ON green Battery between 20 and 80 % charged
Flash green Analysis stage or recondition charging
ON green Fully charged, maintaining the battery
Fault ON red Output shortcircuit or battery connected with reverse polarity
Fault Flash red Battery is faulty, charging timed-out
ON green
Both LEDs lighting together indicates the battery is over voltage
Fault Flash red
6 S e t t i n g s
6.1 Battery type
| Setting Function | Absorption voltage (at 25 °C) | Float voltage (at 25 °C) | |
| GEL | Charging for lead acid GEL battery | 14.1 V | 13.4 V |
| AGM | Charging for lead acid AGM or WET battery | 14.4 V | 13.6 V |
| LiFePO4 | Charging for LiFePO4 battery | 14.6 V | 13.8V |
6.2 Charge rate
The following maximum capacities are to be used as a general guide:
| Setting | Battery capacity/Charging | Battery capacity/Maintaining |
| 2 A 6 – 20 Ah | 6 – 20 Ah | |
| 5 A 21 – 50 Ah | 21 – 60 Ah | |
| 10 A | 51 – 200 Ah | 61 – 240 Ah |
6.3 Settings
▶ Using the battery type selector (4) choose the battery type to be used, see fig. 2, page 10.
▶ Using the charge rate selector (5) choose the charge rate to be used, see fig. 2, page 10.
7 C h a r g i n g
7.1 Electrolyte level check and precharge check
▶ Only for Flooded or WET battery: Check the battery electrolyte level. If necessary, remove the vent caps and add distilled water so the levels are half-way between the upper and lower fill lines.
▶ Check the battery label for battery type and capacity. Only charge 12 V lead acid (GEL, WET, AGM) or LiFePO4 batteries.
▶ Ensure that the battery charger is not connected to mains power.
7.2 Connect the battery charger to the battery

WARNING!
- Only use the device indoor. Do not expose the battery charger to rain, snow and liquids.
- Explosive gases may escape from the battery during charging. Provide good ventilation to prevent flames and sparks.
- When connecting to the battery, the battery charger must not be connected to mains power.
Battery outside the vehicle
▶ Connect the red clip of the battery charger to the positive battery terminal (+).
▶ Connect the black clip of the battery charger to the negative battery terminal (-).
Battery in the vehicle
▶ Determine if the vehicle is positively or negatively earthed.
If negatively earthed (most common):
▶ First connect the red clip of the battery charger to the positive battery terminal (+).
Then connect the black clip of the battery charger to the vehicle's chassis and away from the fuel line.
If positively earthed:
▶ First connect the black clip of the battery charger to the negative battery terminal (-).
Then connect the red clip of the battery charger to the vehicle's chassis and far away from the fuel line.
7.3 Connect the battery charger to mains power
▶ Connect the battery charger to AC mains powered socket.
The battery charger will automatically start when AC power is connected and switched on.
▶ Check the settings of the device (battery type and charge rate). If necessary, adjust them.

NOTICE!
If the Fault Indicator LED illuminates red, please check your connections as it's likely that the positive and negative leads are reversed.
7.4 Disconnect the battery charger
Battery outside the vehicle
▶ Switch OFF and remove the AC power socket from the outlet.
▶ First remove the black clip.
▶ Then remove the red clip.
▶ Check electrolyte levels if required by your battery type.
If necessary, remove the vent caps and add distilled water so the levels are half-way between the upper and lower fill lines.
Battery in the vehicle
▶ Switch OFF and remove the AC power socket from the outlet.
▶ First remove the clip from the vehicle chassis.
▶ Then remove the clip from the battery.
▶ Check electrolyte levels if possible.
If necessary, remove the vent caps and add distilled water so the levels are half-way between the upper and lower fill lines.
8 Maintaining and cleaning

NOTICE!
Do not use any sharp or hard objects for cleaning since they may damage the device.
▶ Disconnect the device from mains power.
▶ Disconnect the device from the battery.
▶ Occasionally clean the device with a damp cloth.
▶ Regularly clean the vents.
▶ Regularly check the connection cables.

WARNING!
- The device may not be used if the device itself or the connection cable are visibly damaged.
- If the supply cord is damaged, it must be replaced by the manufacturer, its service agent or similarly qualified persons in order to avoid a hazard.
- This device may only be repaired by qualified personnel. Inadequate repairs may cause serious hazards.
9 T r o u b l e s h
Indication Possible causes Remedy
| • Charger does not work• No LED are ON | • No AC power • Check AC connec-tions and make sure mains socket is switched ON. | |
| • Charge output• Fault LED lights red | • Output is short ciiD C cuited• Reverse polarity con- nection to battery | • Check D C co between charger and battery and make sure they are not short cir-cuiting.• Check that the croco-dile clips / ring termi-nals are connected to the correct polarity. If not, remake the con- nection to the battery properly. |
| • No charging current• Fault LED is flashing | • Battery is severely sulfated• Overheat protection mode | • Move battery and charger to cooler envi-ronment. |
| • No charging current• Full and Fault LEDs are flashing | • Battery voltage is high-er than charger rate voltage | • Check the battery con-dition, battery may need replacement. |
| • Long charging time• Full LED does not light• Fault LED is flashing | • Battery capacity too large• Battery is defective | • Check if the charger specification matches the battery capacity.• Battery cannot be charged and must be replaced. |
10 Warranty
If the product does not work as it should, please contact your retailer or the manufacturer's branch in your country (see dometic.com/dealer). The warranty applicable to your product is 1 year(s).
For repair and warranty processing, please include the following documents when you send in the device:
• A copy of the receipt with purchasing date
- A reason for the claim or description of the fault
Australia only
Our goods come with guarantees that cannot be excluded under the Australian Consumer Law. You are entitled to a replacement or refund for a major failure and for compensation for any other reasonably foreseeable loss or damage. You are also entitled to have the goods repaired or replaced if the goods fail to be of acceptable quality and the failure does not amount to a major failure.
New Zealand only
This warranty policy is subject to the conditions and guarantees which are mandatory as implied by the consumer guarantees act 1993 (NZ).
11 Disposal
Place the packaging material in the appropriate recycling waste bins wherever possible.
If you wish to finally dispose of the product, ask your local recycling centre or specialist dealer for details about how to do this in accordance with the applicable disposal regulations.

Protect the environment!
Do not dispose of any batteries with general household waste.
Return defective or used batteries to your retailer or dispose of them at collection points.
12 Technical data
12.1 General technical data
| Model PBC110 | |
| Type Smart & Automatic | |
| Battery type: Lead acid (WET, GEL, AGM), LiFePO4 | |
| Charging process 7 stages | |
| Input 220-240 VAC | 50/60 Hz |
| Output voltage 12 V | |
| Output current 2 / 5 / 10 A | |
| Output voltage at no load < 0.5 V | |
| Minimum start voltage | >6.0 V |
| Temperature compensated | -24 mV/°C |
| Size (L*W*H) | 205*90*52 (mm) |
| Net weight | 1 kg |
| AC Power cord | 1800 mm |
| Output lead | 1800 mm, with battery clamps |
| Certification | RCM, CE, FCC |
12.2 Environmental characteristics
| Operating temperature range | 0 to 40 °C |
| Storing temperature range | -10 to 80 °C |
| Operating humidity range | 90 % RH Max |
13 Copyright
© 2020 Dometic Group. The visual appearance of the contents of this manual is protected by copyright and design law. The underlying technical design and the products contained herein may be protected by design, patent or be patent pending. The trademarks mentioned in this manual belong to Dometic Sweden AB. All rights are reserved.
dometic.com
YOUR LOCAL DEALER
dometic.com/dealer
YOUR LOCAL SUPPORT
dometic.com/contact
dometic.com/sales-offices

- Table of contents
- Explanation of symbols
- DANGER!
- WARNING!
- CAUTION!
- NOTICE!
- NOTE
- General safety instructions
- General safety
- Safety when installing the device
- Operating the device safely
- DANGER! Danger of electrocution
- Safety precautions when handling batteries
- • Danger of explosions!
- Intended use
- S c o p e o f d
- Quantity Description Quantity
- Technical description
- Protection systems
- Charging process
- ECO mode
- Parts and connections
- Controls
- Explanation/function
- LED status indicator
- S e t t i n g s
- Battery type
- Charge rate
- Settings
- Electrolyte level check and precharge check
- Connect the battery charger to the battery
- Battery outside the vehicle
- Battery in the vehicle
- If negatively earthed (most common):
- If positively earthed:
- Connect the battery charger to mains power
- Disconnect the battery charger
- Maintaining and cleaning
- T r o u b l e s h
- Warranty
- Australia only
- New Zealand only
- Disposal
- Protect the environment!
- Technical data
- General technical data
- Environmental characteristics
- Copyright
Brand : DOMETIC
Model : PBC110
Category : Battery charger