
ES 1906 CB - Coffee machine BOMANN - Free user manual and instructions
Find the device manual for free ES 1906 CB BOMANN in PDF.
| Product type | Pump espresso machine |
| Brand | Bomann |
| Model | ES 1906 CB |
| Power supply voltage | 230 V, 50 Hz |
| Main functions | Espresso and cappuccino preparation, steam production, cup warming plate |
| Number of simultaneous cups | 1 or 2 |
| Coffee type | Ground coffee |
| Included filters | Large filter (2 cups), small filter (1 cup), adapter |
| Steam nozzle | Adjustable, removable for cleaning |
| Water level indicator | MIN and MAX marks in the tank |
| Anti-overflow safety | Red level float in the drip tray |
| Cleaning | Removable parts hand washable, not dishwasher safe |
| Descaling | Recommended regularly with suitable descaler |
| Included accessories | Tamper, filters, adapter |
| Warranty | 24 months |
| Cup warming plate | Yes, located on top of the appliance |
| Water tank | Removable with handle |
| Preheating | Approx. 2 minutes; recommended 10 minutes for better coffee |
| Stop | Function selector in O position |
Frequently Asked Questions - ES 1906 CB BOMANN
User questions about ES 1906 CB BOMANN
0 question about this device. Answer the ones you know or ask your own.
Ask a new question about this device
Download the instructions for your Coffee machine in PDF format for free! Find your manual ES 1906 CB - BOMANN and take your electronic device back in hand. On this page are published all the documents necessary for the use of your device. ES 1906 CB by BOMANN.
USER MANUAL ES 1906 CB BOMANN
natural_image
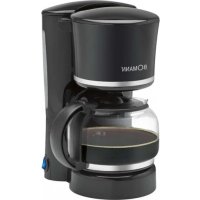
Exterior view of a BOMANN coffee machine with visible branding and control panel (no text or symbols on the device itself)ES 1906 CB

DEUTSCH
Inhalt
Overview of the Components ...... Page 3
Instruction Manual...... Page 38
Technical Data Page 41
Guarantee Page
FRANÇAIS
Sommaire
ABB. A ABB. B

natural_image
Technical illustration of a mechanical component with a cylindrical housing and a lever mechanism, showing assembly steps (no text or symbols)Consommation: 1150 W
Classe de protection: I
Pression: 15 bar
General Safety Instructions
Read the operating instructions carefully before putting the appliance into operation and keep the instructions including the warranty, the receipt and, if possible, the box with the internal packing.
- The appliance is designed exclusively for private use and for the envisaged purpose. This appliance is not fit for commercial use. Do not use it outdoors (except if it is designed to be used outdoors). Keep it away from sources of heat, direct sunlight, humidity (never dip it into any liquid) and sharp edges. Do not use the appliance with wet hands. If the appliance is humid or wet, unplug it immediately. Do not put it in water.
- When cleaning or putting it away, switch off the appliance and always pull out the plug from the socket (pull on the plug, not the cable) if the appliance is not being used and remove the attached accessories.
- Do not operate the machine without supervision. If you should leave the workplace, always switch the machine off or remove the plug from the socket (pull the plug itself, not the lead).
- Check the appliance and the cable for damage on a regular basis. Do not use the appliance if it is damaged.
- Do not try to repair the appliance on your own. Always contact an authorized technician. To avoid the exposure to danger, always have a faulty cable be replaced only by the manufacturer, by our customer service or by a qualified person and with a cable of the same type.
- Use only original spare parts.
- Pay careful attention to the following "Special Safety Instructions".
Children
- In order to ensure your children's safety, please keep all packaging (plastic bags, boxes, polystyrene etc.) out of their reach.
Caution! Do not allow small children to play with the foil as there is a danger of suffocation!
- To protect children from the dangers posed by electrical appliances, make sure that the cable is hanging low and that children do not have access to the appliance.
Special Safety Instructions
- The metallic parts become extremely hot. Touch only the handle. Danger of Burns!
- Place the machine on a heat-resistant, smooth, flat and non-slip surface.
- In order to avoid overheating, do not place the machine inside or under a cabinet. Make sure that enough space is left around the machine.
- Never use the machine without water in it.
-
In order to ensure that there is no residual steam pressure from the previous time coffee was made, leave the machine to cool down for a few minutes and then turn the filter holder (11) slowly in the direction of 📄.
-
Ensure that during operation the filter holder (11) is correctly closed and secured, as the machine works under pressure.
- The machine must not be used outside.
- During operation the mains lead must not be wound round the machine. The mains lead must not come into contact with hot surfaces.
- Do not move the machine when it is in operation.
- Do not place the device immediately next to a gas or electric cooker or any other source of heat.
- The machine, mains lead and mains plug must never be touched with wet/damp hands, as there is a danger of an electric shock.
- Caution! Do not allow any moisture to penetrate the housing. Otherwise there is a danger of an electric shock.
- Danger of Burns: Never point the steam jet at yourself or others. Please place a vessel under the steam nozzle (10).
- The water tank (2) should only be filled with cold drinking water. By no means must water containing carbon dioxide be used (sparkling water).
Symbols in these Instructions for Use
Important information for your safety is specially marked. It is essential to comply with these instructions in order to avoid accidents and prevent damage to the machine:
CAUTION:
This refers to possible hazards to the machine or other objects.
i NOTE: This highlights tips and information.
Overview of the Components
1 Water tank lid
| 2 | Water | tank |
| 3 | Steam | regulator |
| 4 | Control | panel |
| a | Control light „” | |
| b | Off setting „O“ | |
| c | Control light „” | |
| d | Control light „”/OK“ |
| 5 | Function | selector |
| 6 | Drip | grid |
| 7 | Drip | tray |
| 8 | Float | |
| 9 | Hotplate/Cup | shelf |
10 Steam nozzle
11 Filter holder
12 Filter retaining device
13 Large filter (2 cups)
14 Small filter (1 cup)
15 Adapter / small fi Iter
16 Pressure compensation lever
17 Sealing ring
18 Tamper
Initial Use / Air Removal
CAUTION:
Particularly before initial use and if you have not used the machine for a long time, air has to be removed from it. During this procedure you should not use any espresso powder!
- Unpack the espresso machine carefully. Take out all the accessories and the packing material. Wash the accessories in a sink.
- Place the machine on a solid fl at surface that is resistant to heat.
- In order to fill the water tank (2), open the lid (1) and pull the water tank out by the handle.
- Fill the water tank up to the MAX. mark. Reinsert the water tank if necessary.
- Ensure that the function selection switch (5) is turned to the O position.
- Connect the machine to a correctly installed 230 V, 50 Hertz safety socket.
- Release the filter holder (11) by pressing the pressure compensation lever (16) and turning it to the left (☐) at the same time.
- Now turn the steam quantity control (3) in an anticlockwise direction as far as it will go.
- Place a suitable vessel (heat-resistant/approx. 500 ml) under the steam nozzle (10).
- Turn the function selector switch (5) to the symbol "The machine now begins to pump."
- Close the steam quantity control (3) when an even jet comes out of the steam nozzle (10). Then turn the function selector switch (5) back to the „O“ position.
- Empty the vessel and place it under the brewing head.
- Turn the function selector switch (5) back to the symbol.
- When the water tank (2) is completely empty, turn the function selector switch back to the „O“ position.
Cleaning
The air has now been removed from the machine. Now please repeat steps 8 to 14 twice in order to clean the machine. The machine is then ready for operation.
Making a Espresso
- Connect the machine to a correctly installed 230 V, 50 Hz safety socket.
- Ensure that the function selection switch (5) is turned to the O position.
- Place the drip grid (6) on the recess of the drip tray (7).
- Open the lid (1) and pull the water tank (2) out by the handle if necessary.
-
Fill the required amount of fresh clear water into the tank. The water level must be between the MIN.- and MAX. mark. Reinsert the water tank if necessary.
-
Release the filter holder (11) by pressing the pressure compensation lever (16) and turning it to the left (☐) at the same time.
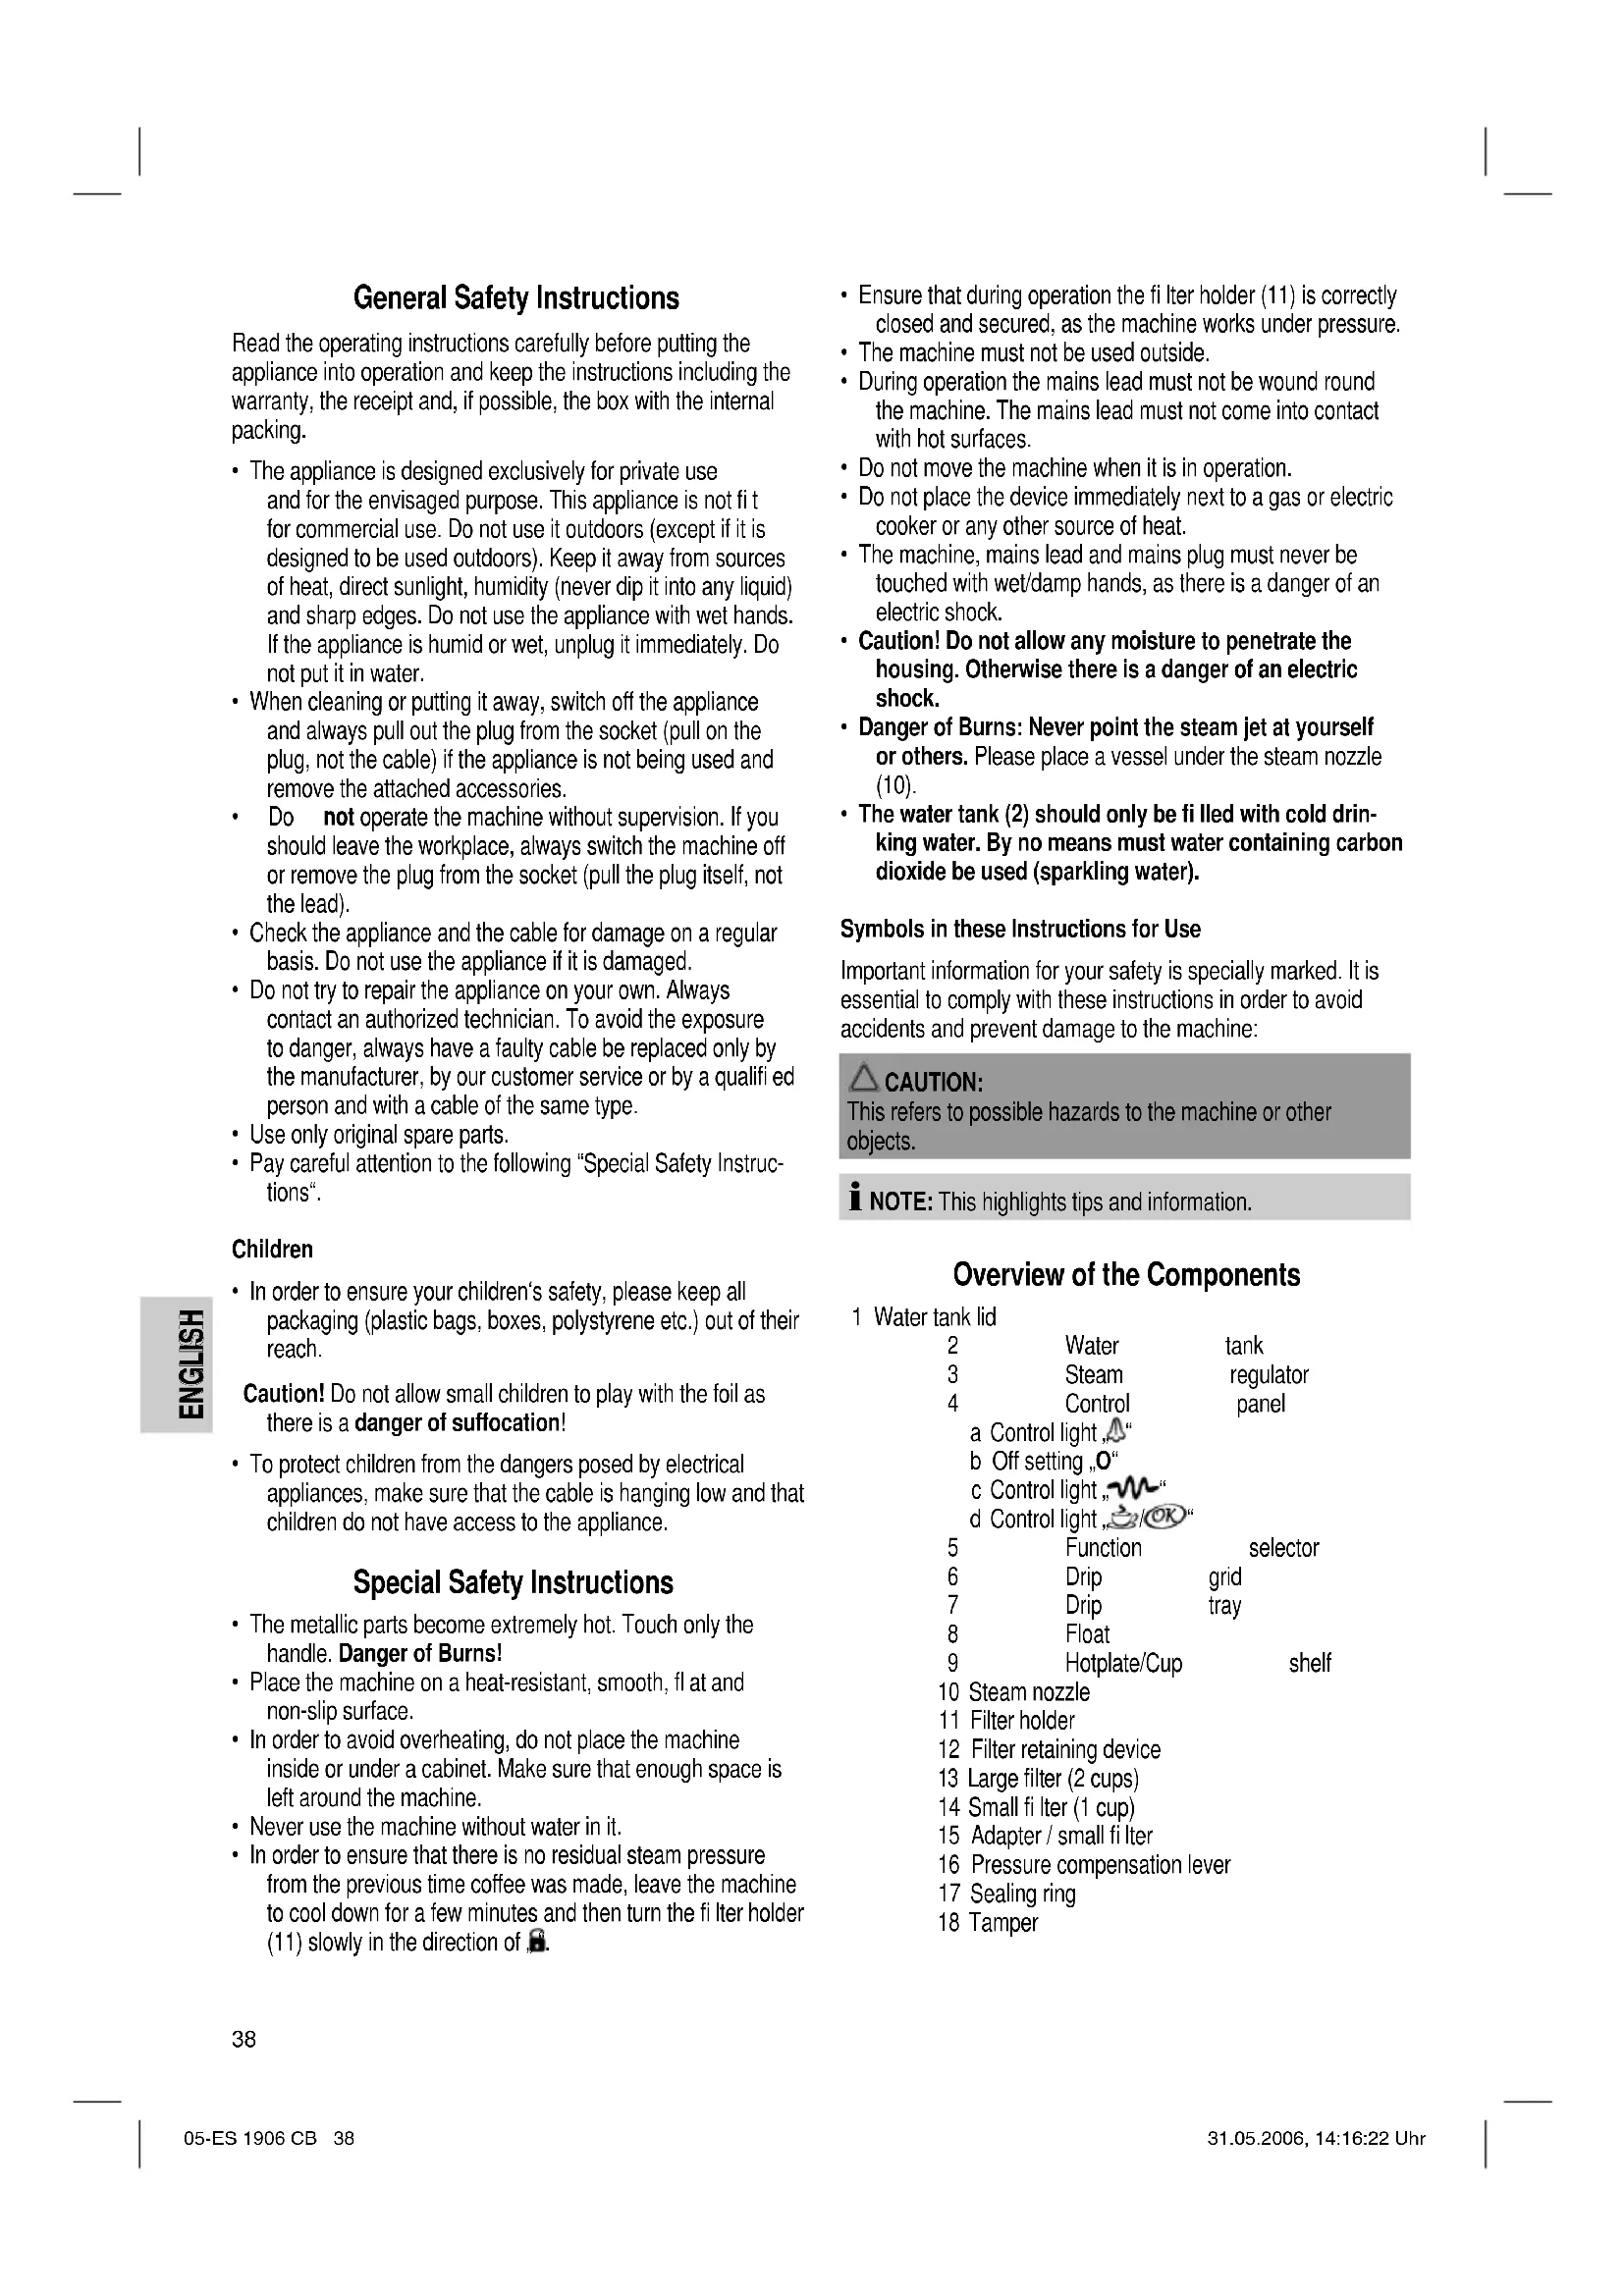
- Insert the second sealing ring (17) into the fi liter holder with the bulge facing upwards. When you would like to prepare a cup of coffee, always place the adapter (15) in the fi liter holder, taking note of the indentations in the fi liter holder, and then the small fi liter (14). Please proceed in the order shown in ABB. A. If you would like to prepare two cups, proceed as shown in ABB. B. Now add one to two level measuring spoons of coffee. Distribute the coffee evenly and press the coffee powder lightly with a measuring spoon or other spoon. The aim of pressing the coffee powder with the spoon is to distribute it evenly in the coffee bowl rather than compressing it. We recommend that you use the tamper supplied (18). Carefully remove any excess espresso coffee from the edge of the fi liter.
- Place the fi lter holder on the brewing head and turn it tight in the direction of "☐". Ensure that the fi lter holder is firmly secured in the brewing head.
- Turn the device to the „” position with the function selector switch.
- Pre-heating: The machine is ready for operation when after approx. 2 minutes the „(4d) control lamp lights up. For the best coffee taste we recommend that the machine be pre-heated for 10 minutes.
- In order to preheat your espresso cups, place them on the warming plate (9) above the percolating head. The hotplate is only in operation when the function selector switch is in the positions „(4a) or „”(4c).
- Remove the espresso cup(s) from the warming plate (9) and place them under the percolating head.
- Turn the function selector switch (5) to the symbol OK
- The espresso is now ready and is poured into the cup(s).
i NOTE:
If the control lamp „” goes off again before percolation has fi nished, the water temperature is no longer high enough. Turn the function selector switch (5) to „” (4c) and wait until the lamp goes on again. You can now continue preparing the espresso.
-
When percolation is fi nished, turn the function switch (5) back to the O position. The device is now switched off.
-
Press the pressure compensation lever (16) on the fi liter holder (11) before you remove the fi liter holder. The steam escapes below the fi liter holder. Turn the handle of the fi liter holder in the direction, In order to empty the fi liter holder hold the fi liter in its position using the fi liter retaining device (12) on the handle. Turn the fi liter holder (11) and knock out the used coffee. Remove the fi liter holder after making an espresso. By doing so, you will extend the service life of the rubber seal in the brewing head. To make other espressos, fi ll the coffee bowl (13 or 14) with coffee powder again and carry out the brewing procedure as described above.
Making a Cappuccino
To make a cappuccino, you must first make an espresso. Proceed as described under "Making an Espresso" from steps 1 to 15. To froth the milk, proceed as follows:
- Make sure that the function selector (5) is in O position.
- Swing the steam nozzle (10) out so that you can position the container (please use a heat-resistant container) comfortably under the nozzle.
- Fill the container up to a 1/3 with fresh cold milk (warm, hot or stale milk does not froth). You will produce more stable foam if you use low-fat milk.
- Turn the function selector switch to "A". The "and "m" control lamps light up. Wait until the "OK" control lamp lights up. The device is now ready for foaming.
- Immerse the steam nozzle into the vessel just under the surface of the milk.
- Now set the desired steam quantity by carefully turning the steam regulator (3) and moving the collection vessel gently up and down. Once the milk reaches the desired volume, you can warm the milk more by lowering the steam nozzle (10) to the bottom of the container. Do not make the milk boil or the froth will be ruined.
- Turn the function selector switch (5) back to the O position; the device is now switched off.
- Scoop out the froth into the espresso. Add liquid milk. A cappuccino is usually composed of 1/3 coffee, 1/3 hot milk and 1/3 frothed milk.
Your cappuccino is now ready. Improve the flavor by adding some cinnamon or chocolate powder.
Cleaning
- Before cleaning the device please turn the function selector switch to „O“ and remove the mains plug from the socket.
- Before cleaning the machine please wait until it has cooled down.
- The water tank, the drip tray, the drip tray cover of the fil iters and the fil iter holder can be cleaned by hand in warm soapy water. Do not use abrasive detergents. Rinse the parts regularly.
- If the filter's holes are clogged, clean it with a fine brush.
- Never immerse the device in water or other liquids.
- Never wash the parts or accessories in a dishwasher. The drip tray has an overflow protection. A red-marked "float" (8) is found in the tray. The more water the drip tray contains, the higher the float rises. To empty the tray you can remove the drip tray completely and lift the grid.
• After frothing milk, the steam nozzle is to be immediately cleaned from all milk residues.
- If the milk dries, it becomes diffi cult to remove. To do so, dismantle the steam nozzle. Turn the joint above the steam nozzle through a quarter turn to the left and remove the upper section and the internal pipe (see device overview). Soak the steam tube in a container with water over night so that the milk residue softens. Place a heat-resistant container full of water under the nozzle so that the nozzle is dipped in the water. Then turn the function selector switch to the position and produce some steam, as described under "Preparing Cappuccino". Then turn the function selector switch back to O. Wipe the steam nozzle with a moist cloth to remove the milk residue before it hardens.
Descaling
- This appliance should be de-scaled on a regular basis, depending on the frequency of use and the quality of your water (i.e. hardness, mineral contents).
Please note: Use solemnly products recommended for household percolators. Please use the product according to its description.
- Use the appliance as described under "making espresso" until the tank is empty. Allow half of the solution to run through the brew head (without coffee and filter) and the remaining half trough the steam valve.
- Rinse the tank refi ll it and let 2 – 3 tanks of fresh cold water run through the system until you all odours of the de-scaling product have vanished.
Troubleshooting
| Malfunction | Possible Causes | Remedy |
| When the function selector switch is operated the device does not switch on. | The device has no power supply. | Check the socket with another device and insert the mains plug correctly. |
| Coffee stops fl owing. | The water tank is empty. | Switch off the device and fi ll up the water tank. |
| The tank is not correctly inserted, the valve is not open. | Press the tank down slightly so that the valve opens. | |
| The holes in the fi liter holder and the outlet on the brewing head are blocked. | Clean the fi liter holder, the fi liter and the outlet on the brewing head. | |
| Air has entered the „heating element“. | Produce some steam (see the section „Preparing Cappuccino“) and turn the steam regulator to the highest level. | |
| Coffee is too fi ne or pressed too firm. | Loosen the coffee powder. | |
| Scale has accumulated in the espresso machine. | The appliance needs de-scaling. | |
| The pump makes loud noises. | Water tank is empty. | Switch off the device and fi ll up the container. |
| There is air in the water system. | Fill the water tank and remove air from the machine (see the section „Initial Use/Air Removal“). | |
| The tank is not inserted correctly, the valve is not open. | Press the tank down lightly so that the valve opens. | |
| The espresso comes out of the edge of the fi liter holder. | The Filter is in the wrong position or is not closed fi rm enough. | Remove the fi liter than refi t or switch off the machine and tighten the filter. |
| Coffee is on the rubber gasket. | Please wipe off. | |
| Too much coffee in the filter. | Remove any excess coffee powder. |
| Malfunction | Possible Causes | Remedy |
| The espresso coffee is too cold. | The cups were not warmed beforehand. | Rinse out the cups with hot water. |
| The heating up phase had not been completed. | Please wait for the heating up phase to fi nish. | |
| During preparation of the coffee the / clamp has not yet gone on. | Please wait until the control lamp lights up. | |
| The coffee has a slightly acidic taste. | The espresso was not fresh. | |
| The coffee foam is slightly discoloured (the coffee fl ows out quickly). | Coffee too coarse or not pressed fi rm enough. | Use the tamper. |
| There is not enough coffee in the filter. | Fill in more coffee powder. | |
| The coffee foam is a dark colour (the coffee only fl ows out slowly). | Coffee too fi ne or pressed to firm. | Loosen the coffee powder. |
| Too much coffee in the filter. | Remove any excess coffee powder. | |
| The coffee is not creamy enough. | The adapter is not correctly inserted. | Insert the adapter correctly. |
| The second sealing ring in the fi lter holder is not correctly inserted. | Insert the ring correctly. | |
| Wrong coffee was used. | Change the brand if necessary. | |
| The milk is not foamed up. | The milk used is not suitable. | Check the fat content. Use low-fat milk. |
| The milk is not cold enough. | Use cooled milk. | |
| The steam nozzle is dirty. | Clean the steam nozzle. |
HS175N3
Technical Data
Model: ES 1906 CB
Power supply: 230 V, 50 Hz
Power consumption: 1150 W
Protection class:....I
Pressure: 15 bar
This device has been tested according to all relevant current CE guidelines, such as electromagnetic compatibility and low voltage directives, and has been constructed in accordance with the latest safety regulations.
Subject to technical changes without prior notice!
Guarantee
The device supplied by our Company is covered by a 24 month guarantee starting on the date of purchase (receipt).
During the life of the guarantee any fault of the device or its accessories ascribable to material or manufacturing defects will be eliminated free of charge by repairing or, at our discretion, by replacing it. The guarantee services do not entail an extension of the life of the guarantee nor do they give rise to any right to a new guarantee!
Proof of the guarantee is provided by the proof of purchase. Without proof of purchase no free replacement or repair will be carried out.
If you wish to make a claim under the guarantee please return the entire machine in the original packaging to your dealer together with the receipt.
Defects to consumables or parts subject to wearing as well as cleaning, maintenance or the replacement of said parts are not covered by the guarantee and hence are to be paid!
The guarantee lapses in case of unauthorized tampering.
After the expiry of the guarantee
After the expiry of the guarantee repairs can be carried by the competent dealer or repair service against the payment of the ensuing costs.
Meaning of the "Dustbin" Symbol
Protect our environment: do not dispose of electrical equipment in the domestic waste.
Please return any electrical equipment that you will no longer use to the collection points provided for their disposal.
This helps avoid the potential effects of incorrect disposal on the environment and human health.
This will contribute to the recycling and other forms of reutilisation of electrical and electronic equipment.
Information concerning where the equipment can be disposed of can be obtained from your local authority.


- DEUTSCH
- Inhalt
- FRANÇAIS
- Sommaire
- General Safety Instructions
- Children
- Special Safety Instructions
- Symbols in these Instructions for Use
- CAUTION:
- Overview of the Components
- Initial Use / Air Removal
- Cleaning
- Making a Espresso
- i NOTE:
- Making a Cappuccino
- Descaling
- Technical Data
- Guarantee
- After the expiry of the guarantee
- Meaning of the "Dustbin" Symbol
Brand : BOMANN
Model : ES 1906 CB
Category : Coffee machine