DB22 - Iron Soba - Free user manual and instructions
Find the device manual for free DB22 Soba in PDF.
Frequently Asked Questions - DB22 Soba
User questions about DB22 Soba
0 question about this device. Answer the ones you know or ask your own.
Ask a new question about this device
Download the instructions for your Iron in PDF format for free! Find your manual DB22 - Soba and take your electronic device back in hand. On this page are published all the documents necessary for the use of your device. DB22 by Soba.
USER MANUAL DB22 Soba
natural_image
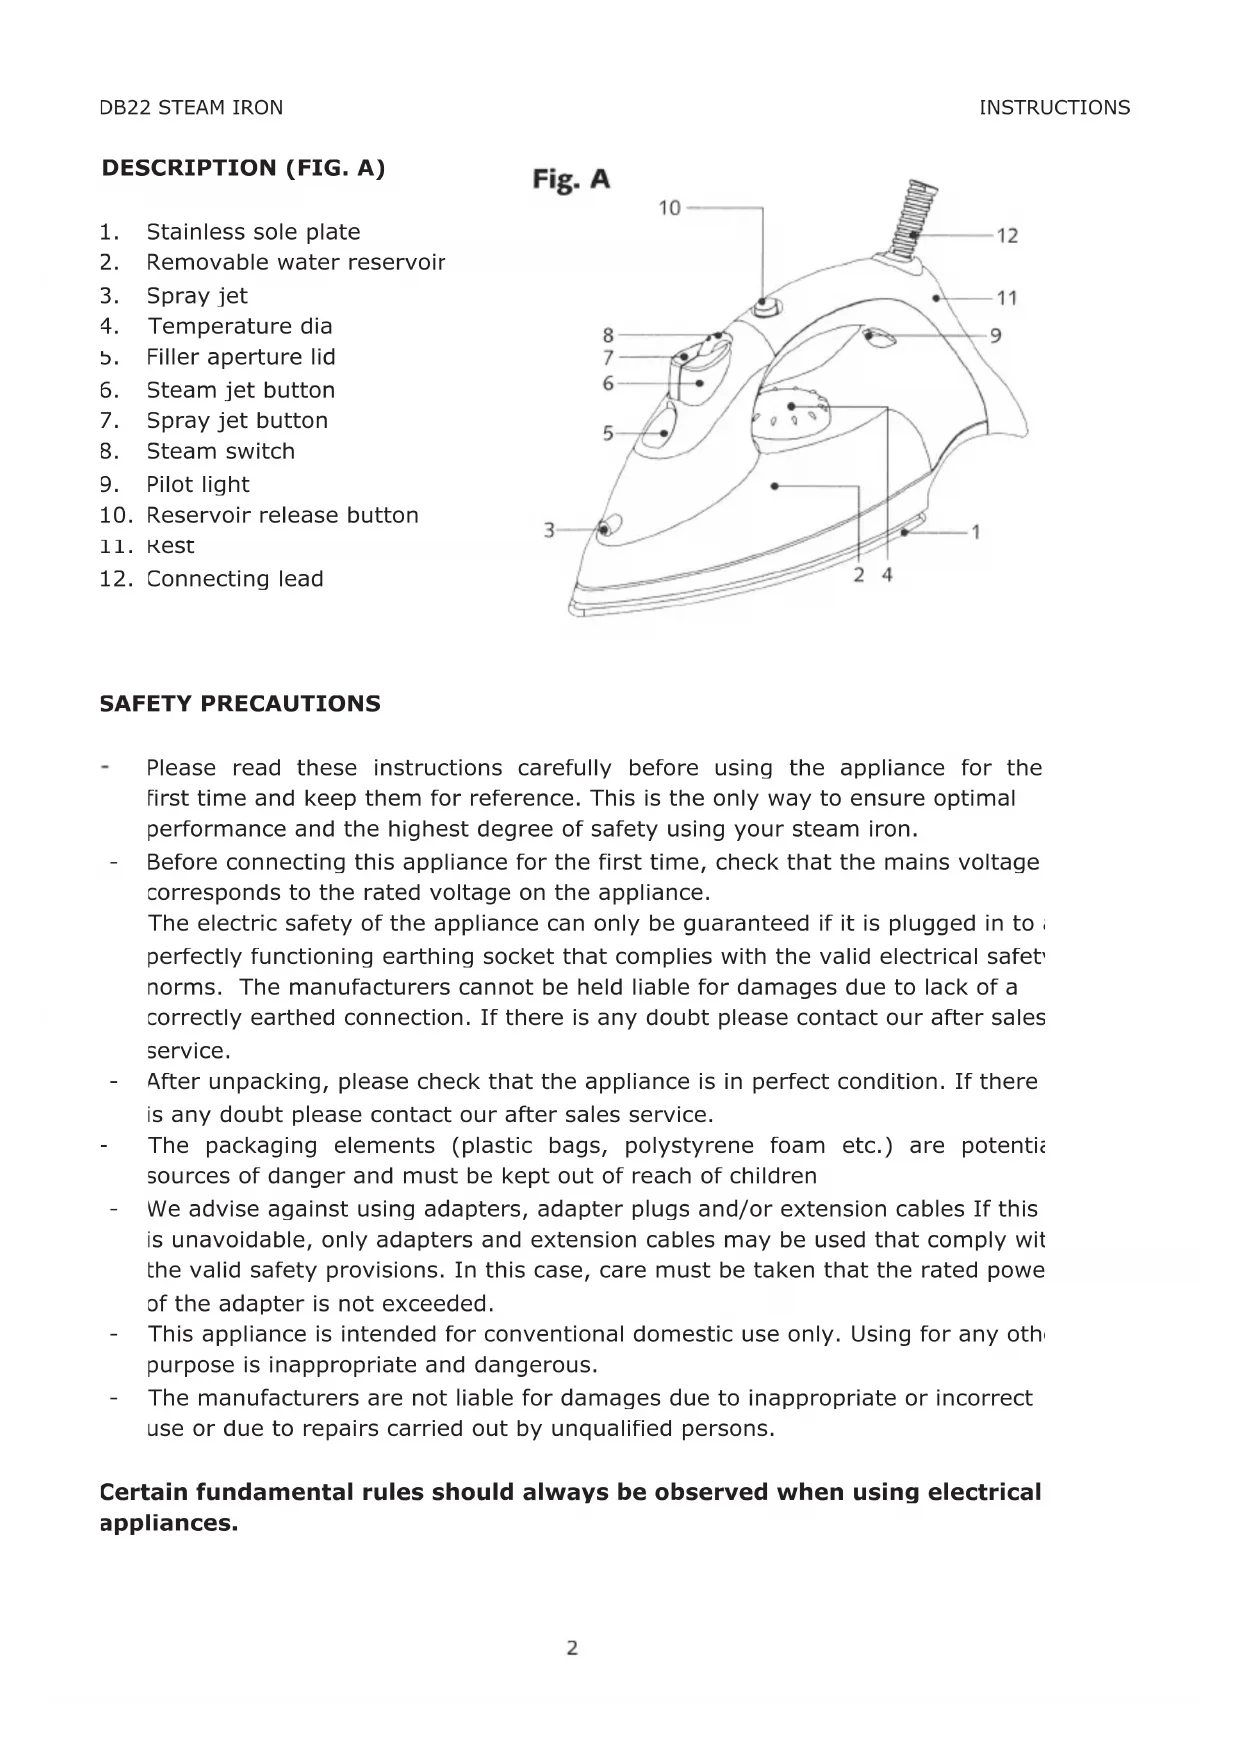
Blue and white SOBA iron iron with a coiled cord, no visible text or symbols on the device itself.DESCRIPTION (FIG. A)
- Stainless sole plate
- Removable water reservoir
- Spray jet
- Temperature dia
- Filler aperture lid
- Steam jet button
- Spray jet button
- Steam switch
- Pilot light
- Reservoir release button
- Rest
- Connecting lead
text_image
Fig. A 10 12 11 9 8 7 6 5 3 1 2 4SAFETY PRECAUTIONS
- Please read these instructions carefully before using the appliance for the first time and keep them for reference. This is the only way to ensure optimal performance and the highest degree of safety using your steam iron.
- Before connecting this appliance for the first time, check that the mains voltage corresponds to the rated voltage on the appliance.
The electric safety of the appliance can only be guaranteed if it is plugged in to perfectly functioning earthing socket that complies with the valid electrical safety norms. The manufacturers cannot be held liable for damages due to lack of a correctly earthed connection. If there is any doubt please contact our after sales service. - After unpacking, please check that the appliance is in perfect condition. If there is any doubt please contact our after sales service.
- The packaging elements (plastic bags, polystyrene foam etc.) are potential sources of danger and must be kept out of reach of children
- We advise against using adapters, adapter plugs and/or extension cables If this is unavoidable, only adapters and extension cables may be used that comply with the valid safety provisions. In this case, care must be taken that the rated power of the adapter is not exceeded.
- This appliance is intended for conventional domestic use only. Using for any other purpose is inappropriate and dangerous.
- The manufacturers are not liable for damages due to inappropriate or incorrect use or due to repairs carried out by unqualified persons.
Certain fundamental rules should always be observed when using electrical appliances.
In particular:
- Never touch the appliance with damp or wet hands or feet. Never immerse the iron in liquids.
- The appliance must not be used in damp rooms or rooms used as bathrooms.
- The appliance should not be used by children.
- When the appliance is switched on it must not be left unattended as it represents a source of danger in this state.
- Never pull the plug out of the socket by the cable.
- Always disconnect before cleaning the appliance or before any maintenance measures.
- In the event of any damage and/or malfunctioning, switch the appliance off and do not try to repair it yourself. If any repairs should be necessary, please contact the after sales service. Insist that only original parts are used. The safety of the appliance cannot be guaranteed if this directive is not followed.
- The lead must not be changed by the user. Always contact the after sales service if the lead is damaged or if it is necessary to change it.
- Never hold the appliance under the tap when filling with water.
- Make sure that the lead does not come into contact with the hot parts of the iron.
- The iron gets very hot when in use. Consequently, there is a danger of burns. Always grasp the iron by the handle and avoid any contact with the metal parts or steam.
- Never point the burst of steam towards anyone.
- Do not use the iron on very moist fabrics.
Do not stand the iron on the sole plate when it is hot. Wait until it has cooled down. - Do not apply stain removers or similar products to fabrics before ironing. Disconnect from the mains when you are not using the iron. Do not leave the iron plugged in when it is not absolutely necessary.
- This appliance has a safety mechanism. The iron is switched off when this is triggered. Contact the after sales service to restore the iron to the original condition.
OPERATING INSTRUCTIONS
Ironing without steam
- Place the iron on a steady, heat resistant surface.
- Set the temperature dial (4) to the MIN position (Fig. B).
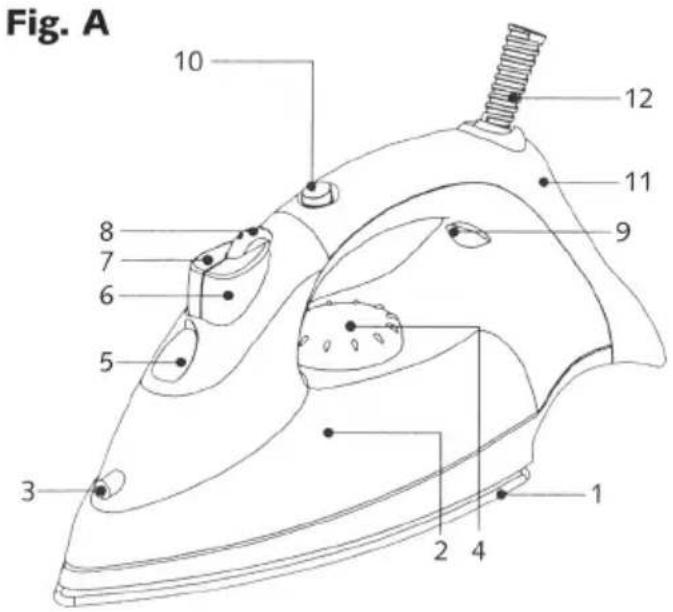
- Turn the steam setting switch (8) to the 0 position (Fig. C).
- Stand the iron vertically on its rest base (11).
- Plug the iron in and set the ironing temperature on the temperature dial. The pilot light (9) lights up.
- As soon as this light goes out the iron is at the set temperature. This pilot light switches on and off at regular intervals while you are ironing indicating the thermostat cycles. When you switch to a lower temperature make sure that
Fig. B
text_image
Fig. Cthe pilot light (9) remains off until the sole (1) has cooled to the new temperatu. When this is reached it will light up again.
- After finishing ironing turn the temperature dial to the MIN position and disconnect from the mains. Let the iron cool down before cleaning the exterior and putting it away. You can use the spray function while ironing without steam on condition that there is water in the reservoir (cf. the "Spray" and "Filling the Reservoir with Water" sections).
Filling the reservoir with water
Place the iron on a flat surface but do not connect it.
- Turn the steam setting switch (8) to the ironing without steam position (Fig. C).
- Press the reservoir release button (10) so you can remove it.
- Open the lid (5) that covers the filler aperture.
- Pour the water slowly into the opening (Fig. G) using the measuring beaker. Never pour cleaning agents or solvents into the water reservoir.
- Make sure that the water does not rise above the maximum marking and close the filling aperture.
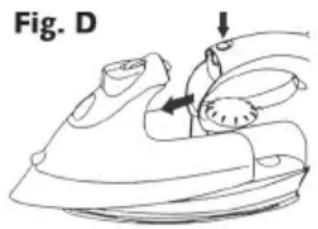
text_image
Fig. DFig. G
Note: If the water in your area is very hard, it is advisable to use distilled water or treat the tap water with the kalkex12 Rapid Water Softener, available from the after sales service. This ensures fully decalcified water rapidly. It also simply and effectively prevents harmful deposits forming in your iron. Never use battery water or water containing additives like starch, perfume, rinsing agents etc.
Steam ironing
Before ironing with steam always check that the fabric is suitable. The iron functions with plain tap water. But if the water supply has a high calcium content (hard water) we recommend using distilled water without any additives.
- Place the unconnected iron on a steady, heat resistant surface.
- Fill the water reservoir with water (cf. "Filling the reservoir with water").
- Set the temperature dial (4) to the MIN position.
-
Stand the iron up vertically on its rest base.
-
Plug the iron in and turn the temperature dial to a position in the steam range. The pilot light (9) lights up. As soon as this light goes out the iron is at the set temperature. This pilot light switches on and off at regular intervals while you are ironing, indicating the thermostat cycles. When you switch to a lower temperature the pilot light (9) remains off until the sole has reached the new temperature. When this is reached it will light up again.
-
Turn the steam setting switch (8) (Fig. E) and hold the iron horizontal; steam starts to come out of the holes. If the iron does not emit any steam tap the sole lightly against the ironing surface. When the iron is put down in a vertical position the emission of steam is interrupted N.B. Never touch the steam and never direct it at anyone.
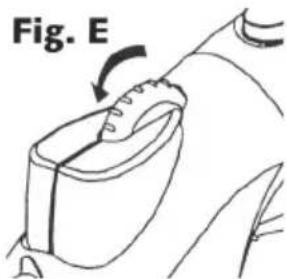
text_image
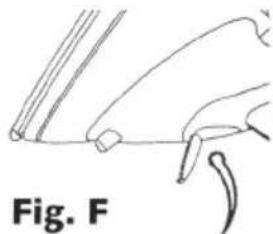
Fig. E- After finishing ironing, turn the temperature dial to the MIN position, disconnect from the mains and empty the reservoir. The water reservoir must be emptied every time after using the iron. To do this proceed as follows:
Set the steam setting switch to the ironing without steam position 0, open the lid (5) and empty the reservoir (Fig. F). Stand the iron on its rest until it has cooled down.
Note: If it should be necessary to top up the water reservoir during ironing, disconnect from the mains before removing the reservoir to refill it.
natural_image
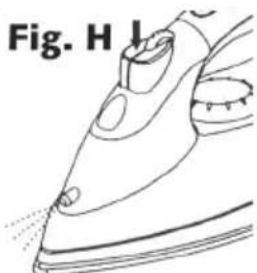
Line drawing of a hand holding a tool, labeled 'Fig. F' (no other text or symbols)Spraying (Fig. H)
There must be water in the reservoir if this function is to be used. Press the spray jet button ⚙ (7) (Fig. H) when you need spray water to moisten dry and difficult to iron fabrics e.g. linen, cotton or wool or to make it easier to iron out stubborn creases. The spray function can be used in the same way to moisten any creases made unintentionally. The spray water emerges from the spray jet (3). Note When using the iron for the first time you may have to press the spray jet button several times before the spray water emerges.
natural_image
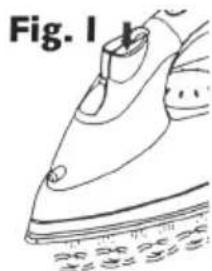
Line drawing of an iron (£) with label 'Fig. H I' (no other text or symbols)Extra Steam (Fig. I)
Make sure that the temperature dial is positioned within the steam range and that there is water in the water reservoir if you want to use this function. When the temperature dial is set to the MAX position the steam volume is higher. When the iron has reached the set temperature, press firmly on the burst of steam button (6) 📋 (Fig. I) to iron more quickly or to smooth out stubborn creases. Always wait at least 5 seconds before using the extra steam button again so the iron can heat up again to attain the maximum volume of extra steam.
natural_image
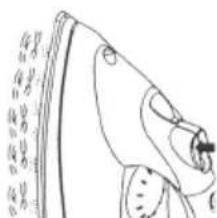
Line drawing of a steam iron with label 'Fig. I' (no other text or symbols)Vertical steaming: The extra steam function is also effective when the iron is in the vertical position. To use this function, hold the iron vertically at a distance of some 5 to 15 ~cm from the fabric and press the steam jet button (Fig. J).
Fig. J
N.B. Never touch the steam and never direct it at anyone.
natural_image
Line drawing of an insect head and neck (no text or symbols)Cleaning and maintenance
Disconnect from the mains and wait until the iron has cooled down before starting to clean it. Wipe the exterior and the sole of the iron with a damp cloth. Never use any cleaners or abrasive products.
The surface of the sole (1) must always be kept clean. Wiping the cold surface with damp cloth is sufficient to keep it clean.
If any starch or other material sticks to the sole, wait until the iron has cooled down and clean the sole with a damp cloth that has been dipped in diluted vinegar.
To prevent scratching the sole avoid ironing over hooks, zips, metal buttons etc. The iron must not be put down on metal or rough surfaces.
After using always empty the water reservoir and allow the iron to cool down before putting it away.
Tips for good ironing
Set the temperature according to the instructions on the label of the garment you want to iron. If there is no label set the temperature according to the following table.
TEMPERATURE TABLE
| Fabric | I emperature | |
| Synthetic fibres | • |  |
| Silk | • |  |
| Wool | ••• |  |
| Cotton | •••• |  |
| Liner | •••• |  |
If there should be any doubt about the type of fabric of a garment, test this by ironi a concealed part at low temperature and then raising the temperature gradually unt the creases can be ironed out without damaging the fabric.
- Textiles like velvet, wool etc. as well as gloves and bags can be freshened up by passing the iron over them at a short distance with the steam function switched on.
- Carpets look like new and the pressure marks from furniture disappear when steam is allowed to penetrate the crush marks before brushing the carpc carefully.
Before ironing sort the garments according to their ironing temperature. Start with the fabrics requiring the lowest temperature. - Iron silks on the wrong side.
- To avoid shiny patches, woollens, cotton and fine linen fabrics should be ironed on the wrong side or cover with a thin cloth before ironing over it on the right side. Starched fabrics require more moisture. White and light fabrics are ironed on the right side, dark ones on the wrong side. Embroidery is also ironed on the wrong side to prevent the work being flattened.
- Linen fabrics can be steam ironed. Use sufficient steam; dark fabrics should be ironed on the wrong side to avoid shiny patches. To emphasise turn ups, iron them on the right side.
natural_image
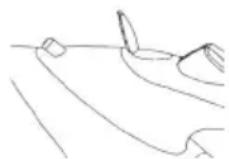
Simple line drawing of a mechanical component labeled Fig. C (no text or symbols on the diagram itself)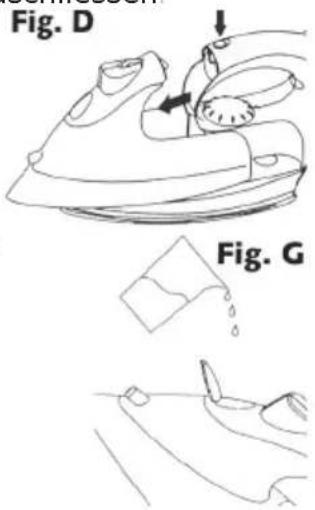
text_image
Fig. D Fig. Gnatural_image
Line drawing of a hand holding a tool, labeled 'Fig. F' (no other text or symbols)Sprühen (Fig. H)
natural_image
Line drawing of an iron iron (no text or symbols)natural_image
Line drawing of a steam iron with visible iron and cooling effect (no text or symbols)natural_image
Line drawing of a fish head and neck (no text or symbols)natural_image
Line drawing of a mechanical component labeled Fig. C, showing a curved surface with a handle and a circular feature (no text or symbols beyond label)natural_image
Line drawing of a hand holding a tool, labeled Fig. F (no text or symbols on the diagram itself)Spray (fig. H)
natural_image
Line drawing of an iron (£) with steam rising, labeled 'Fig. H I' (no other text or symbols)natural_image
Line drawing of a steam iron with visible iron and base plate (no text or symbols)natural_image
Line drawing of a fish head and neck with no text or symbolstext_image
MILN LAMPION VOUT VOUT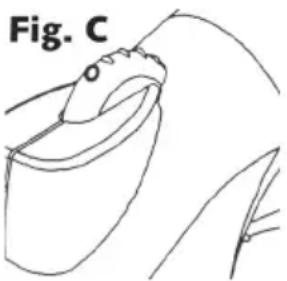
natural_image
Line drawing of a mechanical component labeled Fig. C, showing a curved handle and flange (no text or symbols on the diagram itself)natural_image
Line drawing of a hand holding a tool, labeled 'Fig. F' (no other text or symbols)Spruzzare (Fig. H)
natural_image
Line drawing of an iron (£) showing steam ironing (no text or symbols)natural_image
Line drawing of an iron (£) with a textured surface and measurement markings (no text or symbols)natural_image
Line drawing of an insect head and neck (no text or symbols)natural_image
Line drawing of an insect head with labeled Fig. C (no text or symbols on the diagram itself)natural_image
Line drawing of a hand holding a tool, labeled Fig. F (no text or symbols on the diagram itself)natural_image
Line drawing of an iron iron (no text or symbols)natural_image
Line drawing of an iron (£) with a textured surface and measurement markings (no text or symbols)natural_image
Line drawing of a bird's head and neck (no text or symbols)natural_image
Line drawing of a biological structure labeled Fig. C, showing a curved, segmented form (no text or symbols beyond label)natural_image
Line drawing of a hand using an iron on a machine, showing the press and adjustment mechanism (no text or symbols)Fig. G
natural_image
Line drawing of a hand holding a tool, labeled 'Fig. F' (no other text or symbols)natural_image
Line drawing of an iron (£) with steam rising (no text or symbols)natural_image
Line drawing of a steam iron with label 'Fig. I' (no other text or symbols)natural_image
Line drawing of a bird's head and neck (no text or symbols)CONDITIONS OF GUARANTEE
The guarantee is valid for 2 years from date of supply to the end user. In order to claim under the guarantee the faulty appliance must be taken to the official after-sales service agent together with proof of purchase (copy of the invoice or receipt). The guarantee covers the costs for work and material.
The guarantee shall be invalid or prematurely discontinued if damages are due to any of the following causes: utilisation of the appliance in the commercial sector, exterior influences, non-professional installation, non-observance of the instructions for use or operating instructions, force majeure, inappropriate use, intervention by non-authorised persons as well as normal wear and tear. Also excluded are damage due to dropping or falling, water or operating with incorrect electrical power.
CONDITIONS DE GARANTIE
National representatives / After-sales service addresses: see last page
Contact us for Customer Service addresses in other countries.
Information from SOBA International AG
Headquarters SOBA International Trading AG