
MGR 1 - Food Processor TEAM - Free user manual and instructions
Find the device manual for free MGR 1 TEAM in PDF.
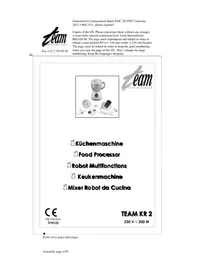
| Product type | Food processor meat grinder |
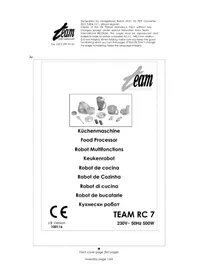
| Brand | Team |
| Model | MGR 1 |
| Main use | Grinding meat, making sausages and kibbeh |
| Grinding capacity | Up to 5 kg of raw meat in 10 minutes |
| Included accessories | 3 grinding discs, knife, auger, tightening ring, tightening key, filling tray, pusher with storage, sausage attachment, kibbeh attachment |
| Safety | On/Off switch, reverse button, power indicator, unlock button |
| Cleaning | Accessories washable with warm soapy water, do not immerse the motor block, do not put in dishwasher |
| Maximum continuous operating time | Indicated on the rating plate (KB xx min) |
| Recommended break | At least 10 minutes after each cycle |
| Storage | Pusher with integrated compartment for accessories |
| Power cord | Do not wrap around the appliance |
| Environmental protection | Do not dispose of with household waste (WEEE compliant) |
| Materials | Plastic for the housing, stainless steel for the knife and discs |
| Power supply | Mains (check voltage on rating plate) |
Frequently Asked Questions - MGR 1 TEAM
User questions about MGR 1 TEAM
0 question about this device. Answer the ones you know or ask your own.
Ask a new question about this device
Download the instructions for your Food Processor in PDF format for free! Find your manual MGR 1 - TEAM and take your electronic device back in hand. On this page are published all the documents necessary for the use of your device. MGR 1 by TEAM.
USER MANUAL MGR 1 TEAM
1 Sealing ring
2 Perforated discs
3 Blade
4 Worm
5 Pusher with storage facility
6 Filling tray
7 Blade casing
8 Release button
9 Motor bloc
10 ON/OFF switch
11 Reverse switch
12 Pilot light
13 Wrench
14 Kebbe attachment
15 Sausage filling funnel
F
Please read these instructions carefully before using the appliance and check that your mains voltage corresponds to that stated on the appliance.
From time to time check the appliance for damages. Never use the appliance if it shows any signs of damage, but have it checked by a competent qualified electrician (^*) . Should the cord be damaged, it must be replaced by a competent qualified electrician ^() .
Never leave the appliance unsupervised when in use. Keep out of reach of children or incompetent persons.
Only use the appliance for domestic purposes and in the way indicated in these instructions. Most of all, follow the instructions concerning the assembly of the accessories before starting the appliance.
Switch off the meat grinder and unplug it when not using it or during assembly and disassembly, respectively.
Never touch the worm or the blade without having removed the cord from the power outlet beforehand.
Do not use meat grinder near sources of heat (cooking tops, grill, oven).
Never immerse the appliance in water or any other liquid for any reason whatsoever.
Never use the appliance outside and always place it in a dry environment.
Never move the appliance by pulling the cord and never hang it by the cord. Make sure the cord cannot get caught in any way. Do not wind the cord around the appliance and do not bend it.
Stand the appliance on a stable surface so that it cannot fall over.
This kind of appliance cannot function continuously; it is not a professional type of appliance. It is necessary to make temporary stops. Check the section « Important information » in the instruction manual.
To push the meat to the worm, always make use of the pusher only. Never use your fingers or other accessories.
You must keep this appliance clean, as it is in direct contact with food.
Competent qualified electrician: after sales department of the producer or importer or any person who is qualified, approved and competent to perform this kind of repairs in order to avoid all danger. In any case you should return the appliance to this electrician.
Keep these instructions in a safe place.
IMPORTANT INFORMATION
This appliance is not for professional use. You should follow the requested breaks. Failure to follow this instruction carefully may result in damage to the motor. Please refer to the rating label for the maximum continuous usage time (KB xx min where xx is the maximum usage time). The breaks should last at least 10 minutes.
BEFORE FIRST USE
It is necessary to clean all accessories (see paragraph "cleaning and care") and to dry them. You can remove the lid of the pusher in order to store the plastic parts in it (fig.1).
ASSEMBLY OF THE ACCESSORIES AND OPERATION
Make sure the power cord is unplugged and the blue pilot light is out before assembling the accessories. This instruction should be observed each time you assemble or replace accessories.
Remove the blade casing by unscrewing it clockwise and pressing the release button simultaneously (fig. 2).
Insert the worm in the blade casing (fig. 3).
A. Discs (fig. 4)
These accessories allow mincing meat. According to the disc you choose, you can obtain more or less finely minced meat.
- Place the blade upon the worm with its rounded side facing the worm.
- Assemble one of the 3 discs upon the blade, making sure that its arresting pin locks precisely into the corresponding recess on the edge of the blade casing.
- Firmly screw on the sealing ring by turning it clockwise to tighten the worm, blade and disc together. If necessary, use the wrench supplied.
- Attach the blade casing onto the motor block by slanting it 45^ and rotating it anticlockwise until you hear a click (fig. 5). Check if the casing is tight.
- Put the filling tray on the filling neck (fig.6).
Cut the meat into pieces of approximately 30 to 40 mm and put these pieces on the filling tray. - Plug in the appliance and switch it on with the ON/OFF switch.
Put a tray or a plate under the filling neck to collect the minced meat. - Drop the pieces of meat in the filling neck and press with the pusher (fig. 7). Do not press too strongly, as you might block the appliance. If this happens, do not try to use any accessory to release the blocking pieces but stop the appliance by pressing the on/off switch and press the reverse switch on invert the rotating direction of the worm. Then proceed in the correct direction again. If the problem persists, unplug the appliance and disassemble the part leading to the blocked pieces.
The pusher allows you to press the pieces of meat towards the worm in order to lead them to the blade. Note: during use, tighten the sealing ring regularly if necessary.
Depending on the kind of meat, we advise you to insert a break of approximately 30 minutes after each continuous operation of 15 minutes. The meat grinder minces 5kg of raw meat within a maximum of 10 minutes.
B. Sausage filling funnel (fig. 8)
Caution: in order to make sausages, you first have to mince the meat with one of the discs (see "Discs" section above).
- Assemble the two parts of the sausage filling funnel as described on fig. 8 and insert the pats in the blade casing making sure that the arresting pin of the filling funnel locks precisely into the corresponding recess on the edge of the blade casing so that the attachment cannot move during operation.
- Firmly screw on the sealing ring by turning it clockwise. If necessary, use the wrench supplied.
- Attach the blade casing onto the motor block by slanting it 45^ and rotating it anticlockwise until you hear a click (fig. 5). Check if the casing is tight.
- Put the filling tray on the filling neck (fig.6).
Steep the sausage skin in lukewarm water for 30 minutes to make it smooth. - Then slip the sausage skin over the sausage-filling funnel.
The pusher will allow you to push the sausage preparation towards the worm. (fig. 7)
C. "Kebbe" attachment (fig. 9)
- Place the "Kebbe" attachment, which you will have assembled beforehand, on the shaft of the worm (fig. 9) and insert the arresting pin precisely into the corresponding recess on the edge of the filling neck.
Screw on the sealing ring by turning it clockwise in order to block the unit formed by the worm and the "Kebbe" attachment. We advise you to press the rounded part of the "Kebbe" attachment to make sure that its arresting pins stay in the right position. - Attach the blade casing onto the motor block by slanting it 45^ and rotating it anticlockwise until you hear a click (fig. 5). Check if the casing is tight.
- Put the filling tray on the filling neck (fig.6).
- Place the filling tray on the filling neck.
The pusher will allow you to push the sausage preparation towards the worm. (fig. 7)
"Kebbe" recipes
Wrap for "Kebbe"
450 g lean mutton, veal or beef *
150-200 g flour
1 teaspoon allspice
1 teaspoon nutmeg
1 pinch chili powder
1 pinch pepper
- Using more meat and less flour for the wrap improves the consistency and taste of the wrap.
Broil the meat and then mince it three successive times in the meat grinder: first using the medium, then the finely perforated disc and once again with the finely perforated disc after mixing with the other ingredients. Then use the "Kebbe" accessory to shape the wraps that you will cut to the desired length.
Meat filling
100 g mutton
1 1/2 soupspoon olive oil
1½ soupspoon fine chopped onion
1/3 teaspoon allspice
1/2 teaspoon salt
1 ½ soupspoon flour
Fry the onions and mix all other ingredients with the minced mutton. Fill the "Kebbe" wraps with this mixture and fry the whole. Serve hot.
Vegetable or rice filling
250 g stewed broccoli-or 250 g stewedzucchini-or
250 g boiled rice
Fill "Kebbe" wraps and fry them.
IN CASE THE MOTOR IS BLOCKED
In case the motor slows down or stops it is possible that the meat blocks the grinder. In this case, use the reverse switch. To do so, first switch off the meat grinder by pressing the on/off switch, then press the reverse switch. The worm will start rotating in the other direction and the meat will move in the other direction as well in order to release the funnel. To stop the reverse function, simply release the reverse switch. You can now press the on/off switch again. Be very careful when handling the blade, as it is very sharp. Should the motor still be blocked, unplug the appliance and disassemble its attachments.
CLEANING AND CARE
Always switch off the appliance and let it cool down before cleaning it.
- Clean the plastic parts of the appliance with a soft cloth.
- Never use abrasive products.
- Never immerse the motor block into water or any other liquid.
Clean the accessories with lukewarm water and some mild detergent, rinse and dry.
- Never put any part of your appliance in the dishwasher.
PROTECTION OF THE ENVIRONMENT-DIRECTIVE 2002/96/EC
In order to preserve our environment and protect human health, the waste electrical and electronic equipment should be disposed of in accordance with specific rules with the
implication of both suppliers and users. For this reason, as indicated by the symbol on the rating label or on the packaging, your appliance should not be disposed of as unsorted municipal waste. The user has the right to bring it to a municipal collection point performing waste recovery by means of reuse, recycling or use for other applications in accordance with the directive.

MODE D'EMPLOI
POUR VOTRE SECURITE


- F
- IMPORTANT INFORMATION
- BEFORE FIRST USE
- ASSEMBLY OF THE ACCESSORIES AND OPERATION
- Discs (fig. 4)
- Sausage filling funnel (fig. 8)
- "Kebbe" attachment (fig. 9)
- "Kebbe" recipes
- Wrap for "Kebbe"
- Meat filling
- Vegetable or rice filling
- IN CASE THE MOTOR IS BLOCKED
- CLEANING AND CARE
- PROTECTION OF THE ENVIRONMENT-DIRECTIVE 2002/96/EC
- MODE D'EMPLOI
- POUR VOTRE SECURITE
Brand : TEAM
Model : MGR 1
Category : Food Processor