
PCKM 1004 - Food Processor PROFICOOK - Free user manual and instructions
Find the device manual for free PCKM 1004 PROFICOOK in PDF.
| Product type | Food processor |
| Brand | ProfiCook |
| Model | PCKM 1004 |
| Power supply | 220-240 V~, 50/60 Hz |
| Rated power | 1200 W |
| Maximum power | 1400 W |
| Net weight (unit with bowl and hook) | Approx. 9.20 kg |
| Mixing bowl capacity (dough) | 3 kg max. |
| Mixing bowl capacity (liquid) | 1.5 L max. |
| Main functions | Dough hook, mixer, meat grinder |
| Included accessories | Dough hook, whisk, egg whisk, meat grinder with 3 plates, sausage attachment, kebbe, cookie, 4 pasta shapes, tamper, splash guard, mixing bowl, safety lid |
| Automatic programs | MIXING, EGG/MILK, FRUIT JUICE, GRINDING |
| Speed control | Variable via control knob; programs with preset speeds |
| Continuous use time | 10 minutes max., then 10 minutes cooling |
| Safety | Safety switches on the swivel arm, bowl and mixing drive cover; overload protection |
| Cleaning the motor housing | Damp cloth with a drop of dish soap |
| Cleaning accessories | By hand, not dishwasher safe |
| Materials | Plastic motor housing, stainless steel bowl, glass mixing container |
| Sound pressure level | 84 dB(A) |
| Protection class | Protection class I (earthing) |
Frequently Asked Questions - PCKM 1004 PROFICOOK
User questions about PCKM 1004 PROFICOOK
0 question about this device. Answer the ones you know or ask your own.
Ask a new question about this device
Download the instructions for your Food Processor in PDF format for free! Find your manual PCKM 1004 - PROFICOOK and take your electronic device back in hand. On this page are published all the documents necessary for the use of your device. PCKM 1004 by PROFICOOK.
USER MANUAL PCKM 1004 PROFICOOK
WAARSCHUWING: Risico op letsell!
WAARSCHUWING: Risico op letsell
WAARSCHUWING: Risico op letsell!
ATTENTION: Risque de surcharge!
Location of Controls 3
Illustration Assembly Mixing Container 4
General Safety Instructions 72
Symbols in these Instructions for Use 73
Children and Frail Individuals 73
Special Safety Precautions
for this Device 73
Intended Use 73
Description of the Parts /
Supplied parts. 74
Unpacking the appliance 74
General Use Instructions 74
Electrical Connection 74
Functionality 74
On/Off 75
The kneading machine 75
Kneading Machine Assembly And
Operation 75
Table Dough Types and Tools 76
Pulse operation 77
End Operation and Remove Bowl 77
The mincer 77
MeatGrinderUse Instructions. 77
Preparation 77
MeatGrinderAssembly 78
Assembling the sausage attachment 78
Assembling the attachment for oriental
dough pouches 78
Cookie Attachment Assembly 78
Pasta Attachment Assembly 78
MeatGrinderOperation 79
Stop Operation 79
The Blender 79
Blender Use Instructions 79
Mixing Container Assembly. 80
Preparation 80
Blender Assembly And Operation 80
Refill Ingredients 80
Stop Operation 80
Cleaning 80
Motor Housing 81
Kneading Machine And Meat
Grinder Accessories 81
Blender Accessories 81
Storage. 81
Troubleshooting 81
Recommended Recipes 82
Noise Emission. 83
Technical Specifications 83
Disposal -
Meaning of the "Wheelie Bin" Symbol 83
Illustrations Assembly Meat Grindera 150
General Safety Instructions
Read the operating instructions carefully before putting the appliance into operation and keep the instructions including the warranty, the receipt and, if possible, the box with the internal packing. If you give this device to other people, please also pass on the operating instructions.
- The appliance is designed exclusively for private use and for the envisaged purpose. This appliance is not fit for commercial use.
Do not use it outdoors. Keep it away from sources of heat, direct sunlight, humidity (never dip it into any liquid) and sharp edges. Do not use the appliance with wet hands. If the appliance is humid or wet, unplug it immediately. - When cleaning or putting it away, switch off the appliance and always pull out the plug from the socket (pull the plug itself, not the lead) if the appliance is not being used and remove the attached accessories.
- Do not operate the machine without supervision. If you leave the room you should always turn the device off. Remove the plug from the socket.
- The device and the mains lead have to be checked regularly for signs of damage. If damage is found the device must not be used.
- Do not try to repair the appliance on your own. Always contact an authorized technician. To avoid the exposure to danger, always have faulty cable be replaced only by the manufacturer, by our customer service or by qualified person and with a cable of the same type.
- Use only original spare parts.
- Pay careful attention to the following "Special Safety Instructions".
Symbols in these Instructions for Use
Important information for your safety is specially marked. It is essential to comply with these instructions in order to avoid accidents and prevent damage to the machine:
WARNING:
This warns you of dangers to your health and indicates possible injury risks.
CAUTION:
This refers to possible hazards to the machine or other objects.
NOTE:
This highlights tips and information.
Children and Frail Individuals
- In order to ensure your children's safety, please keep all packaging (plastic bags, boxes, polystyrene etc.) out of their reach.
WARNING!
Don't let small children play with foils for danger of suffocation!
- This device is not intended to be used by individuals (including children) who have restricted physical, sensory or mental abilities and/or insufficient knowledge and/or experience, unless they are supervised by an individual who is responsible for their safety or have received instructions on how to use the device.
Children should be supervised at all times in order to ensure that they do not play with the device.
Special Safety Precautions for this Device
WARNING: Risk of injury!
- Switch off the appliance and disconnect from mains power supply before changing accessories or attachments, which are moving during operation.
- Before switching the appliance on ensure that the attachment is properly attached.
WARNING: Risk of injury!
- The drive shaft of the kneading machine starts turning, when the appliance is switched on. Do not touch the rotating drive shaft during operation! For your own safety always attach the mixing bowl, even if you use the appliance as a blender or meat grinder.
- Whilst in use, there must be no objects, e.g. spoons or dough scrapers, in the bowl.
- Do not tamper with the safety switches.
CAUTION: Risk of overload!
Use the appliance either as a kneading machine or as a meat grinder or as a blender. Never use more than one function at the same time.
- Place the device on a flat, level and sturdy surface.
- Only process foodstuffs with this device.
- Do not move the appliance during operation; always turn it off first and disconnect from mains power supply. Always carry the appliance with both hands!
Intended Use
This appliance is intended as a
- kneading / mixing machine for preparing dough, crèmes, cream, whipped egg white;
- blender to puree, whip or mix;
- meat grinder for mincing foodstuffs. You can form paste or dough with different attachments.
It is designed exclusively for this purpose and may only be used therefor.
It may only be used in the manner described in this instruction manual.
The appliance may not be used for commercial purposes.
Any other use is considered not as intended and may lead to damage to property or even personal injury.
The manufacturer assumes no liability for damage resulting from use other than the intended purpose.
Description of the Parts / Supplied parts
Overview controls on page 3:
1 Mixing container
2 Swivelling arm
3 Lever to lift / lower the arm
4 MIXING button
5 EGG/MILK button
6 FRUIT JUICE button
7 GRINDING button
8 Control knob
9 Motor cas
10 Mixing bowl
11 Splashguard
12 Connector ring
13 Lock ring
14 Worm casing filler
15Filler tray
16 Tamper
17 Cover for worm casing connector
18 Safety cover for blender drive
19 Removal / attachment button for safety cover
20 3 Protective discs
21 Mixing hook
22 Eggbeater
23 Kneading hook
Illustration Assembly Mixing Container on page 4:
1 Mixing container
1a Stopper
1b Lid
1c Safety ring
1d Sealing ring
1e Knife assembly
1f Threaded coupling
Illustrations A - E on last page:
24 Worm
25 Knife
26 3 sieves (fine, medium, coarse)
27 Sausage attachment
28 2-piece "kebbe" attachment
29 Adaptor
30 Cookie attachment
31Cookie rail
32 4 pasta attachments (different pasta shapes)
Unpacking the appliance
- Remove the packaging of the appliance.
-
Remove all packaging material such as plastic film, filler material, cable ties and box packaging.
-
Check that all parts are in the box.
NOTE:
Dust or production residues may still be found on the appliance. We recommend that you clean the appliance as described under "Cleaning".
General Use Instructions
Electrical Connection
Ensure that your mains power corresponds with the specifications on the type label.
Functionality
-
The appliance is equipped with safety switches. Operation is only possible
-
with safety cover (18) attached or
- with attached mixing container and
-
if the swivelling arm is audibly locked down in place.
-
The appliance is operated either with the continuously variable control knob or with the standard programme buttons.
- With the control knob you can set the speed continuously variable. Always start with a low speed. Increase the speed slowly. The control knob is without function when using a standard programme.
- The standard programmes have a preset speed setting. The standard programmes are without function when you started the appliance with the control knob. As long as one standard programme is active no further standard programme can be selected.
Use the function buttons for the following standard programmes:
| Buttons Kneading | Meat Grinder | Blender | ||
| 4 | MIXING | Kneading / mixing | ||
| 5 | EGG/ MILK | Mixing / beating | ||
| 6 | FRUIT JUICE | Chopping / mixing / puree | ||
| 7 | GRIND-ING | Grinding meat / forming dough | ||
- The electronic speed control prevents motor overload. The rpm are automatically reduced in case of overload.
CAUTION:
Do not use the appliance longer than 10 minutes continuously. Let it first cool down for 10 minutes.
On/Off
With the control knob
- On: Turn the control knob clockwise to the desired speed setting. The indicator lamp next to ON lights up.
- Off: Turn the control knob counter-clockwise to OFF position. The indicator lamp turns off.
With the function buttons
- On: Press the respective button once. The indicator next to the selected button lights up.
- Off: Press the button again. The indicator lamp turns off.
NOTE:
- The motor is equipped with a safety switch. It switches the motor off if the arm (2) is swivelled up. The respective indicator lamp shows that the appliance is still ready to use.
- Lower the arm again; while the indicator lamp is still lit the appliance continues the selected function. The motor automatically starts briefly up at a high speed setting.
NOTE:
- Do not leave the arm more than 15 seconds in upright position; otherwise the indicator lamp turns off. After lowering the arm the appliance stays in off mode. Switch the appliance on at the control knob or press a function button to continue operation.
The kneading machine
Kneading Machine Assembly And Operation
CAUTION:
- Never operate the lever (3) if the mixing container is attached! The mixing container will tip over.
- Never use the kneading machine with attached mixing container!
-
Fill the mixing bowl max. 3 / 4 with ingredients.
-
Cover the drive shaft of the mixing drive with the safety cover (18):
-
Insert the two hooks of the safety cover in the recesses on the appliance.
- Press button (19) in the direction of the arrow and press the safety cover down at the same time.
-
Release the button. The safety cover is tightly attached to the appliance.
-
Cover the worm casing connector with cover (17):
-
Set the connector ring (12) to OPEN position.
- Attach the cover to the connector ring.
-
Turn the connector ring with the cover towards LOCK position.
-
Press the lever (3) with your right hand in the direction of the arrow. The swivelling arm moves up. Move the swivelling arm with your left hand at the same time to the limit stop. The swivelling arm must audibly lock in place. The lever moves back to its initial position.
-
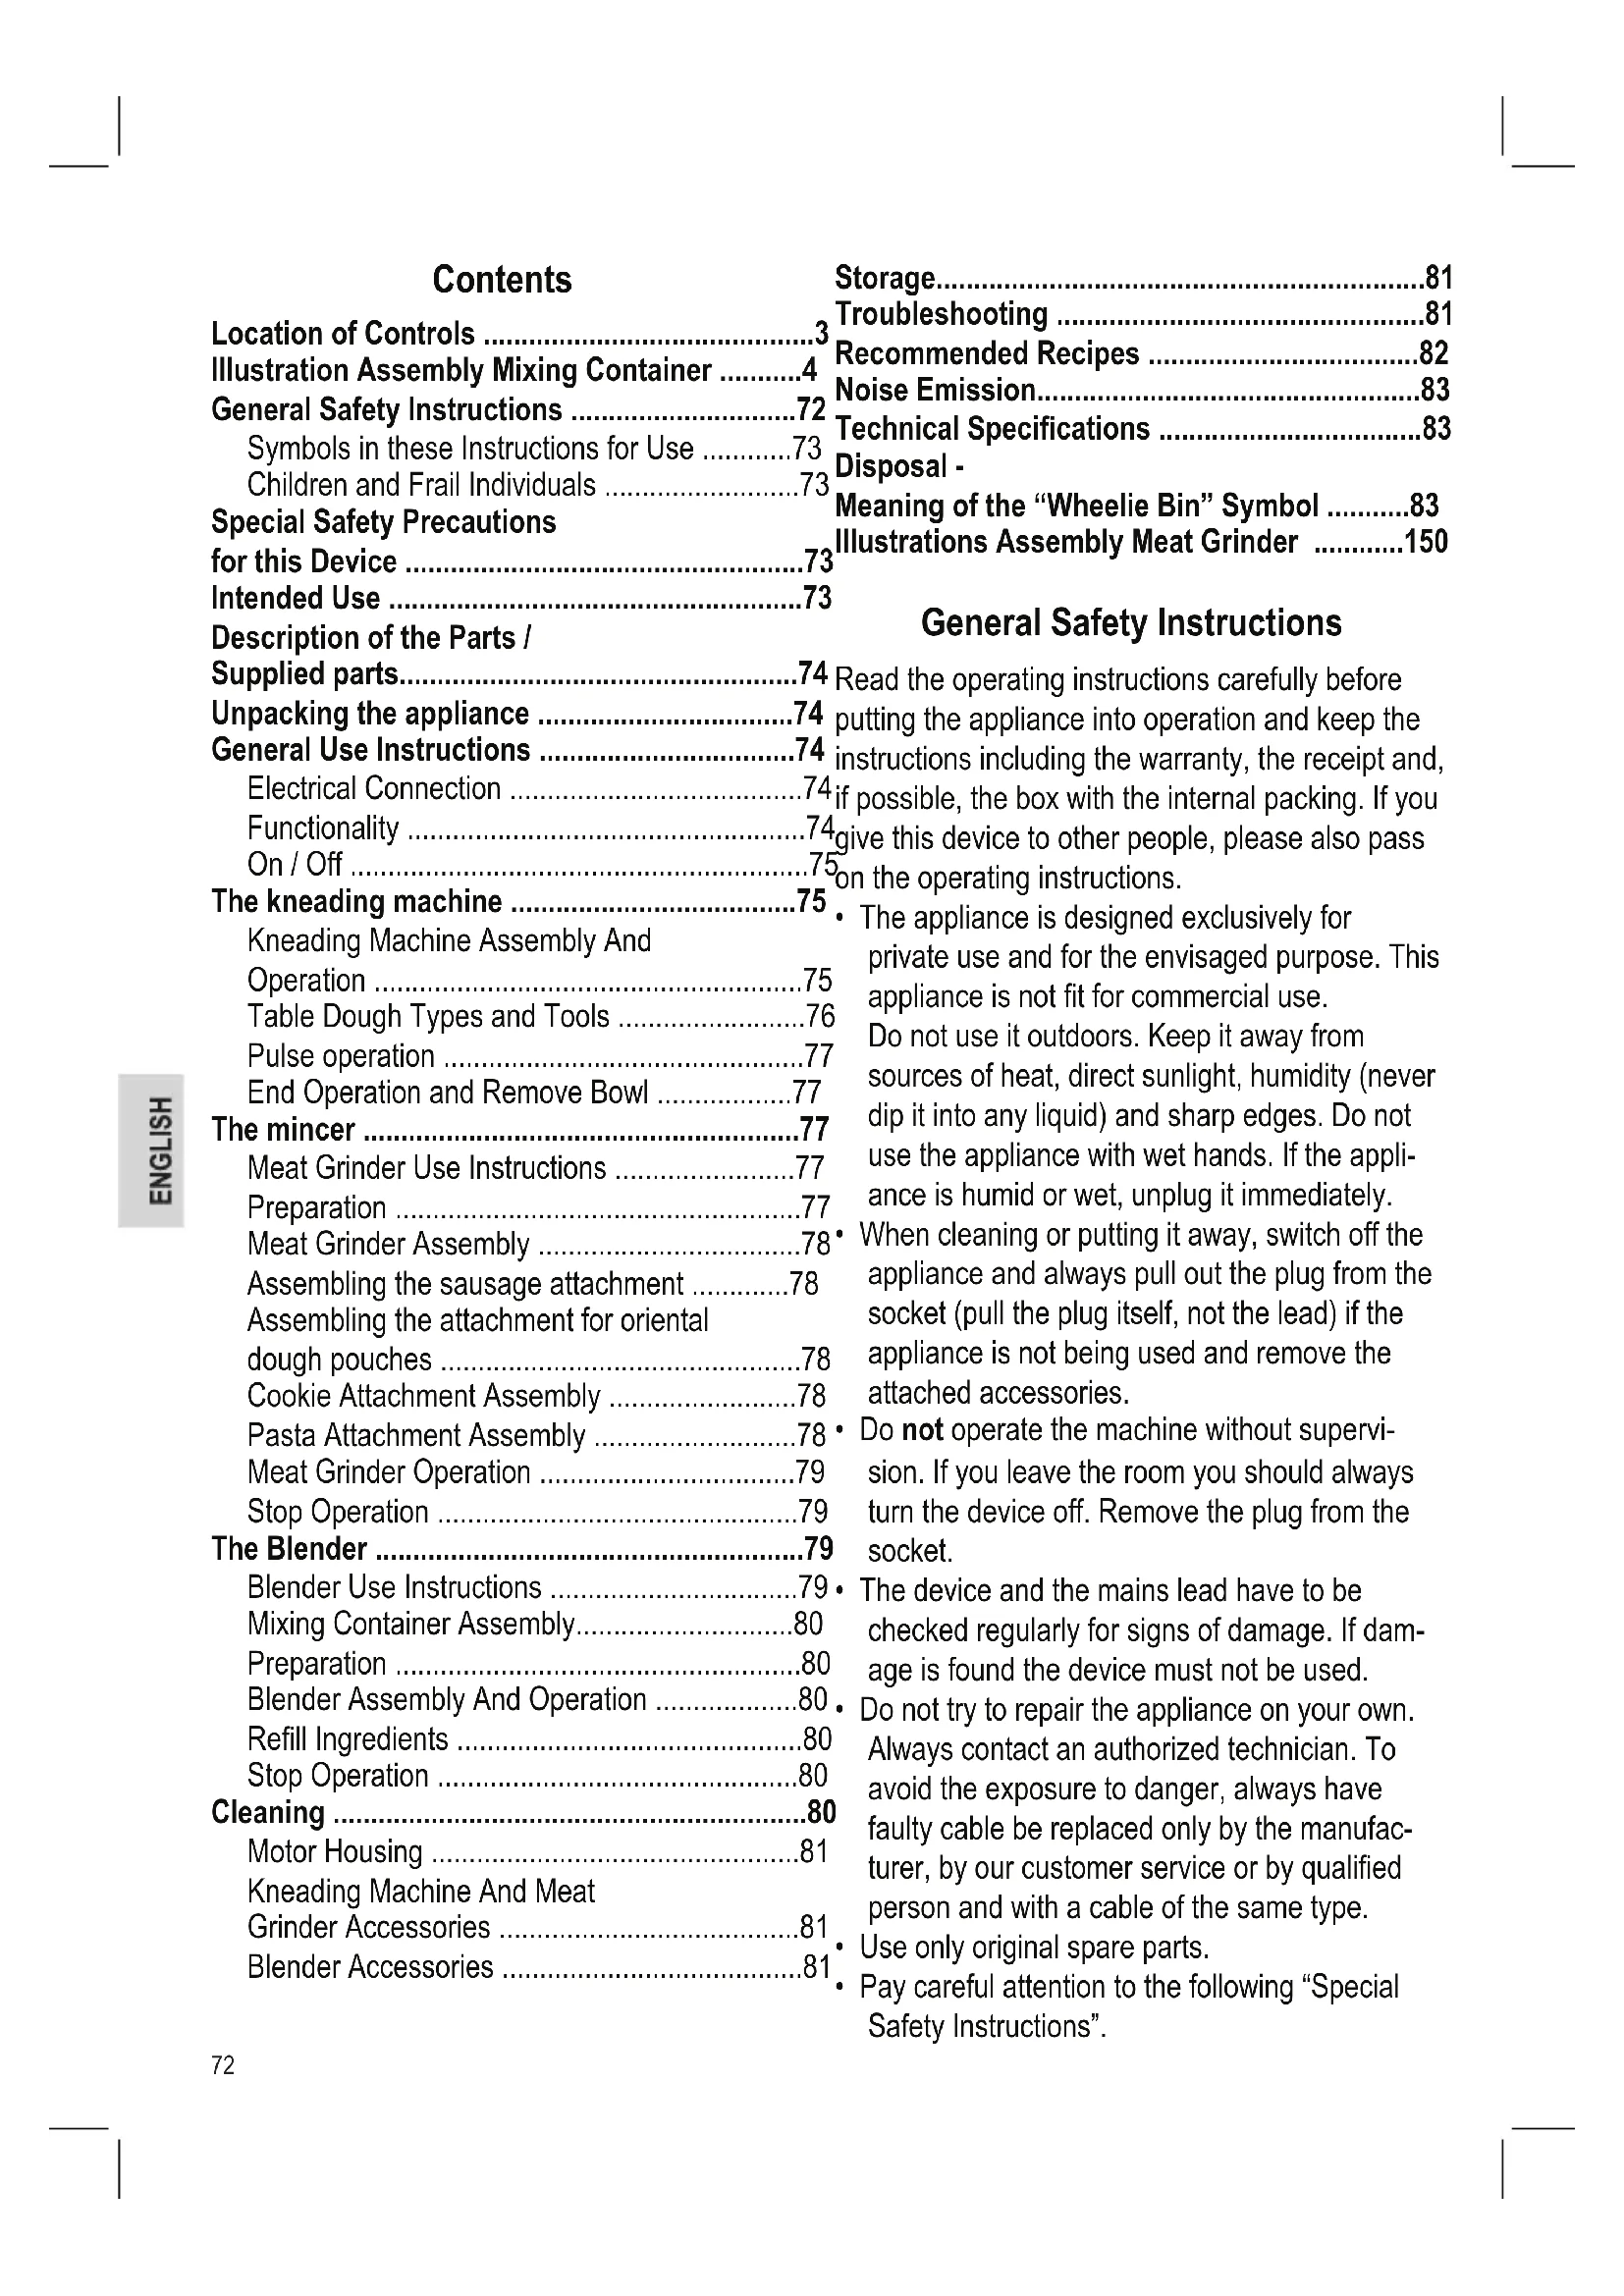
Place the mixing bowl in such way in its support that the handle stands above the arrow . Turn the mixing bowl at the handle in the direction of the arrow to the limit stop (LOCK).
-
When using the eggbeater (22) or the mixing hook (21) first attach the splashguard (11): Hold the splashguard with the collar up.
NOTE:
- You can see two recesses left and right at the bottom of the arm.
- The splashguard is marked with the words OPEN and LOCK.
Attach the splashguard in such way to the arm
that the OPEN marking is under the arrow (see illustration).Move the splashguard with its guide tabs into the recesses and lock toward
- Attach the protective disc (20) to the tool to be used. The protective disc prevents contamination of the drive shaft with dough.
NOTE:
The two guide tabs of the protective disc must sit in the tool's recesses.
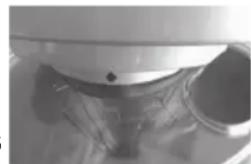
- Assemble the tool as follows: Move the quick
release chuck up. Place the square end of the tool all the way to the limit stop in the drive shaft. Turn the quick release chuck c thread.
- Now fill your ingredients into the mixing bowl.
CAUTION:
Do not overfill the appliance; the max. amount of ingredients is 3kg and 1.5 litre respectively for liquids.
- Press the lever (3) in the direction of the arrow and move the swivelling arm with your other hand slowly down. The swivelling arm must audibly lock in place.
-
Connect the mains cable to a properly installed and earthed 220 - 240V 50 / 60Hz wall outlet.
-
Turn the appliance on, either with one of the standard programme buttons or with the control knob. Use the following table. The respective indicator lamp lights up.
Table Dough Types and Tools
| Dough Types | Tool Button Or Control Knob | Amount | |
| Heavy dough (e.g. bread, short crust or pasta dough) | Knead- ing hook | MIXING button / control knob | max. 3 kg |
| Medium to heavy dough (e.g. cake mixture) | Mixing hook | MIXING button / EGG/MILK button / control knob | max. 3 kg |
| Light dough (e.g. crépes dough, cus-tard) | Mixing hook / egg-beater | EGG/MILK button / control knob | min. 200 m max. 3 l |
| Cream | Egg-beater | EGG/MILK button / control knob | min. 200 m max. 1.5 l |
| Egg white | Egg-beater | EGG/MILK button / control knob | min. 4 eggs max. 20 eggs |
NOTE:
- Do not immediately fill all ingredients into the mixing bowl when kneading heavy dough. Start kneading only with flour, sugar and eggs. Add the liquid ingredients slowly during kneading.
- The standard programmes MIXING and EGG/ MILK end automatically after approx. 5 minutes.
Pulse operation
WARNING: Risk of injury!
Always turn the appliance off, even for briefly interrupting kneading / mixing. The indicator lamp turns off.
- Wait for the attachment to come to a complete stop!
- If you activate the lever (3) during operation to raise the arm, a safety switch deactivates the motor. The attachment will continue to rotate for a short period.
End Operation and Remove Bowl
- Turn the appliance off. The indicator lamp turns off.
- Disconnect from mains power supply.
- Press the lever (3) down; the arm lifts up.
- Remove the tool. Loosen the quick release chuck counter-clockwise.
- Turn the mixing bowl clockwise and remove it.
- Loosen the dough with a spatula and remove it from the mixing bowl.
- Clean all used components as instructed under "Cleaning".
The mincer
Meat Grinding Use Instructions
WARNING:
The knife of the meat grinder (25) is sharp! Handle the meat grinder knife during assembly and cleaning with great care! Risk of injury!
- Do not grind hard parts such as bones or shells.
- Cut the meat into pieces of approx. 2.5cm . Ensure that no bones or tendons are in the meat.
- Select a finer or coarser sieve (26) according to the desired fineness.
- Brush the sieves with some vegetable oil or fat.
- If grinding meat place a container under the outlet.
- Use the "kebbe" attachment (28) for meat or dough paste tubes.
- Prepare an area to spread the pasta afterwards if using the meat grinder as a pasta maker.
Making sausages
- You can use natural as well as artificial sausage skins.
- If you decide to use natural sausage skins, first soften them in water for a while.
- Knot one end of the sausage skin.
- Push the sausage skin over the sausage attachment.
- The sausage meat is pushed through the sausage attachment and the sausage skin is filled.
- Make sure that the sausage skin is filled with slack, since the sausage expands during boiling or frying and the skin may rupture.
- If the first sausage reaches the required length, press the sausage together at the end of the sausage attachment with your fingers.
- Rotate the sausage once or twice.
- Until you have developed a routine, you can turn the appliance off after each sausage length.
Shaping cookies
- Prepare an area to spread the cookies afterwards.
- Use the rail (31) to form your prepared cookie dough into different shapes.
- Slide the rail into the cookie attachment after attaching the worm casing with cookie attachment (30) on the appliance.
- Set it to the desired cookie shape.
- Hold the dough strand with one hand at the outlet and cut it to the desired length.
Preparation
Please also refer to our overviews on page 3 and 150.
- Attach the mixing bowl without tool.
-
Cover the drive shaft of the mixing drive with the safety cover (18):
-
Insert the two hooks of the safety cover in the recesses on the appliance.
-
Press button (19) in the direction of the arrow and press the safety cover down at the same time.
-
Release the button. The safety cover is tightly attached to the appliance.
-
The worm casing connector on the appliance is protected by cover (17). Turn the cover towards OPEN and remove it. The connector ring (12) is carried along and must stay in position. Attach the worm casing (14) with filler at the top in the worm drive and turn the connector ring towards LOCK.
- Place the filler tray (15) in such way on the filler that the tray connector is above the motor casing.
- Slide the worm (24) into the horizontal part of the worm casing until the shaft mechanically locks in place.
The assembly of accessories is described in the following chapters. Prepare the meat grinder according to the desired deployment.
Meat Grinding Assembly (see Fig. A)
Follow the steps in chapter "Preparation".
- Place the knife (25) on the worm shaft with the sharp edges outwards.
- Select a sieve (26). Observe the recesses on the worm casing while attaching the sieve.
- Turn the lock ring (13) clockwise onto the worm casing.
Read more under "Meat Grinding Operation".
Assembling the sausage attachment (see Fig. B)
Follow the steps in chapter "Preparation".
-
Follow the steps below if you are using a ready-made sausage mixture:
-
First place the adaptor (29) on the worm shaft. Observe the recesses on the worm casing.
- Insert the sausage attachment (27) in the lock ring (13).
-
Turn the lock ring with the sausage attachment clockwise onto the worm casing.
-
Assemble first a knife and a sieve as described under points 6 and 7 under "Meat Grinding Assembly" if you want to grind meat and produce sausages in a single operation. Finally insert the sausage attachment in the lock ring.
- Turn the lock ring with the sausage attachment clockwise onto the worm casing.
Read more under "Meat Grinding Operation".
Assembling the attachment for oriental dough pouches (see Fig. C)
Follow the steps in chapter "Preparation".
- Place the "kebbe" attachment (28a) on the worm shaft. Observe the recesses on the worm casing.
- Insert the "kebbe" attachment (28b) in the lock ring (13).
- Turn the lock ring with the "kebbe" attachment clockwise onto the worm casing.
Read more under "Meat Grinding Operation".
Cookie Attachment Assembly (see Fig. D)
Follow the steps in chapter "Preparation".
- First place the adaptor (29) on the worm shaft. Observe the recesses on the worm casing.
- Place the cookie attachment (30) on the adaptor. Observe the recesses on the cookie attachment.
- Turn the lock ring (13) clockwise onto the worm casing.
Read more under "Meat Grinding Operation".
Pasta Attachment Assembly (see Fig. E)
Follow the steps in chapter "Preparation".
- Select a pasta attachment (32).
- Place the attachment on the worm shaft. Observe the recesses on the worm casing.
- Turn the lock ring (13) clockwise onto the worm casing.
Read more under "Meat Grinding Operation".
MeatGrinderOperation
WARNING: Risk of injury!
- The drive shaft of the kneading machine starts turning, when the appliance is switched on. Do not touch the rotating drive shaft during operation!
- For your own safety always attach the mixing bowl.
Always use the supplied tamper (16). Never insert your fingers or tools in the filler!
CAUTION:
-
Never use the kneading machine with attached mixing container! Cover the drive shaft of the mixing drive with the safety cover (18).
-
Place the pieces of meat (meat paste/ sausage mixture or dough) on the filler tray and in the filler.
- Connect the mains cable to a properly installed and earthed 220 - 240V 50 / 60Hz wall outlet.
- Turn the appliance on, either with the standard programme button GRINDING or with the control knob. The respective indicator lamp lights up.
- If necessary, push down the meat or dough with the tamper (16).
Stop Operation
- Switch the appliance off. The indicator lamp turns off.
- Disconnect from mains power supply.
- Disassemble all parts of the meat grinder.
- Clean all used parts as described under "Cleaning".
- Cover the worm casing connector with cover (17): Turn the connector ring with the cover towards LOCK.
The Blender
Blender Use Instructions
WARNING:
The knife (1e) in the blender is sharp!
- Never reach with your hands into the assembled mixing container!
- Handle the blender knife with great care! Risk of injury, especially when removing the knife from the mixing container, emptying and cleaning the mixing container!
- Do not pour liquid ingredients hotter than 60^ into the mixing container! Danger of burns!
WARNING: Risk of injury!
- The drive shaft of the kneading machine starts turning, when the appliance is switched on. Do not touch the rotating drive shaft during operation!
- For your own safety always attach the mixing bowl.
CAUTION:
- Never operate the lever (3) if the mixing container is attached! The mixing container will tip over.
- Do not place hard ingredients such as nuts or coffee beans in the mixing container.
- The knife in the mixing container is not suitable for crushing ice cubes only.
RECOMMENDATION:
-
When preparing drinks with crushed ice only add the ice cubes during mixing. The ice cubes will be crushed during mixing.
-
Do not use the blender without ingredients!
- Place the mixing container on a stable and solid surface during filling. In this way it is easier to attach the lid.
- Do not exceed the maximum capacity (1500 ml) as indicated on the mixing container!
- Attach the lid in such way that the round tab seals the spout of the mixing container.
-
Only take the appliance into operation after attaching lid and fastening the stopper!
-
Do not remove the lid during operation!
- The standard programme FRUIT JUICE ends automatically after approx. 2 minutes.
Mixing Container Assembly
Please see illustration on page 4.
Check the pre-assembly! Safety ring (1c), sealing ring (1d), knife assembly (1e) and threaded coupling (1f) must be assembled in correct order.
CAUTION:
- Never forget to place the sealing ring on the knife assembly; otherwise the mixing container will leak.
- Do not attach the threaded coupling askew.
- The open side of the safety ring is level with the threaded coupling.
Preparation
- Attach the mixing bowl without tool.
-
Cover the worm casing connector with cover (17):
-
Set the connector ring (12) to OPEN position.
- Attach the cover to the connector ring.
-
Turn the connector ring with the cover towards LOCK position.
-
Remove the safety cover (18) from the mixing drive shaft: Press button (19) in the direction of the arrow and lift the safety cover at the same time.
- Cut all ingredients in small pieces.
- Fill the ingredients into the mixing container. Observe the maximum capacity.
- Press the lid (1b) down on the mixing container. The mixing container must be perfectly sealed.
- Close the lid with the stopper (1a). Observe the recesses on the inner side of the lid. Turn the stopper clockwise to tighten.
Blender Assembly And Operation
- Place the mixing container on the mixing drive shaft.
NOTE:
When connecting the mixing container the pre-assembled safety ring presses down the safety switch of the motor. Incorrect assembly will prevent blender operation.
- Connect the mains cable to a properly installed and earthed 220 - 240V 50 / 60Hz wall outlet.
- Turn the appliance on, either with the standard programme button MIXING or with the control knob. The respective indicator lamp lights up.
Refill Ingredients
- Switch the appliance off.
- Fill in ingredients or spices through the stopper opening.
- Close lid and stopper opening again.
- Continue operation.
Stop Operation
- Switch the appliance off. The indicator lamp turns off.
- Disconnect from mains power supply.
- Remove the mixing container.
- Remove the lid before pouring out the contents.
- Clean all used parts as described under "Cleaning".
- Cover the mixing drive shaft with the safety cover (18).
IMPORTANT NOTE:
Do not store citrus juices or acidic foodstuffs in metal containers.
Cleaning
WARNING:
- Disconnect from mains power supply before cleaning.
- Do not submerge the appliance into water. This may lead to electric shock or fire.

CAUTION:
- Do not use a wire brush or other abrasive utensils for cleaning.
- Do not use aggressive or abrasive cleaning agents.
Motor Housing
- Clean the housing only with a damp cloth and a squirt of washing-up liquid. Dry with a cloth.
Kneading Machine And Meat Grinding Accessories

CAUTION:
The attachments are not suitable for dishwasher. Heat and aggressive cleaning agents may warp or discolour the attachments.
- Parts which have come into contact with food can be rinsed out with water.
- Rinse with clean water and dry thoroughly.
- Brush some vegetable oil on the meat grinder sieves after drying.
Blender Accessories
Pre-Cleaning
Fill the mixing container half with water and run the appliance for approx. 10 seconds. Dispose of the liquid.
- Remove the mixing container for thorough cleaning.

WARNING: Risk of injury!
Knife and knife assembly are sharp. Handle with great care during disassembly, cleaning and assembly.
- Always disassemble the mixing container after use.
- Unscrew the threaded coupling from the mixing container.
- Remove knife assembly and sealing ring from the threaded coupling.
- Remove the safety ring from the mixing container. Use the thread on the mixing container.
Mixing Container
- The glass jar of the mixing container can be washed in warm sudsy water. Rinse with clean water and dry thoroughly.
Safety Ring, Sealing Ring, Knife Assembly And Threaded Coupling
- Rinse these components only briefly in hot water.
- Assemble your mixing container in reverse order after cleaning and drying. Observe illustration on page 4.
Storage
- Clean the appliance as instructed. Ensue that all accessories are completely dry.
We recommend that you keep the appliance in the original packaging if it will not be used for long periods. - Always store the appliance out of the reach of children in a dry, well ventilated place.
Troubleshooting
The appliance does not function
Possible cause:
The appliance has no power supply.
Remedy:
- Check the socket with another appliance.
- Plug in the mains plug correctly.
- Check the main circuit breaker.
Possible cause:
The appliance is faulty.
Remedy:
- Contact our service center or a specialist.
Further possible causes:
Your appliance is equipped with safety switches. They prevent accidental motor start.
Remedy:
-
Check correct position of
-
swivelling arm (2)
- mixing container (1) or
- safety cover (18).
Recommended Recipes
Sponge Mixture (Basic Recipe)
Ingredients:
250 g soft butter or margarine, 250 g sugar, 1 sachet vanilla sugar or 1 sachet Citro-Back, 1 pinch of salt, 4 eggs, 500 g wheat flour, 1 sachet baking powder, approx. 1/8-litre milk.
Preparation:
Place the wheat flour with the other ingredients in the mixing bowl; mix with the mixing hook for 30 seconds at a low speed setting, then approx. 3 minutes at a high speed setting. Grease baking tin or lay out with baking paper, fill in dough and bake. Before the cake is removed from the oven, test to see if it is done. With a sharp wooden stick pierce the centre of the cake. If no mixture sticks to it, the cake is cooked. Turn the cake on to a cake grid and allow to cool.
Conventional Oven:
Slide: 2
Heat: Electric oven: top and bottom heat 175 - 200^ gas oven: setting 2-3
Baking time: 50-60 minutes
You can modify this recipe according to your taste, e.g. with 100 g raisins or 100 g nuts or 100 g grated chocolate. Nothing limits your imagination.
Linseed Rolls
Ingredients:
500-550 g wheat flour, 50 g linseed, 3/8-litre water, 1 cube yeast (40 g), 100 g low-fat curd, well drained, 1 teaspoon salt.
For brushing: 2 tablespoons water
Preparation:
Soak linseed in 1/8 l lukewarm water. Pour the rest of the lukewarm water (1/4 l) into the mixing bowl, crumble the yeast into it, add the curd cheese and mix well with the kneading hook with high speed setting (or programme MIXING). The yeast must be completely dissolved. Give the flour with the soaked linseed and salt into the mixing bowl.
Knead with the control knob at low speed setting and increase the speed slowly for another 3-5 minutes. Cover dough and prove in a warm place for 45-60 minutes. Knead again, take out of mixing bowl and shape 16 bread rolls from it. Cover baking tray with wet baking paper. Place rolls on it, prove for 15 minutes, brush with lukewarm water and bake.
Conventional Oven:
Slide: 2
Heat: Electric oven: top and bottom heat 200 - 220^ (preheat for 5 minutes), Gas oven: setting 2-3
Baking time: 30-40 minutes
Chocolate Crème
Ingredients:
200 ml cream, 150 g semi-sweet chocolate coating, 3 eggs, 50-60 g sugar, 1 pinch of salt, 1 sachet vanilla sugar, 1 lbs brandy or rum, chocolate chips.
Preparation:
In the mixing bowl whisk the cream stiff with the eggbeater, remove from the bowl and place in a cold place.
Melt the chocolate coating according to the instructions on the packaging. In the meantime beat eggs, sugar, vanilla sugar, brandy or rum and salt with the eggbeater on the highest speed setting (or programme EGG/MILK) in the mixing bowl until foamy. Add the molten chocolate coating and stir in at the highest speed setting. Leave some of the whipped cream for decoration. Give the rest of the cream to the creamy paste and briefly stir in at a low speed setting (or programme MIXING). Decorate the chocolate cream and serve well chilled.
Basic Recipe Pasta Dough
Ingredients:
600 g flour, 400 g semolina, 6 eggs, 10 g salt, 2 cl oil (olive oil)
Preparation:
Mix flour und semolina. Crack the eggs and place them with the olive oil and salt in the mixing bowl. Start the machine with the kneading hook at a low speed setting (or programme MIXING) and add the flour/semolina mixture. Knead the dough at low speed with the control knob. Slowly increase the speed for another 3-5 minutes until the dough is smooth and shiny. At the beginning it seems as if the semolina will not dissolve. Reduce the speed when the dough gets smoother. The dough is not to be too dry in the beginning. Add a drop of oil or water at a time if it is too solid. Add some semolina if it is too soft. Shape the dough into a ball and leave at least for 20 minutes covered with a towel. In the meantime assemble the meat grinder with a pasta attachment. Divide the dough into 2 - 3 portions. Take one portion for processing and leave the rest covered under the towel so it does not dry out. Place the dough, which is sprinkled with some flour, into the pasta maker. Select a low speed setting with the control knob until you have the necessary routine. Later you can increase the speed a bit. For best results use the pasta immediately, cook "al dente" in plenty of bubbling boiling salt water. Please note that fresh pasta has a significantly shorter cooking time:
1 - 3 minutes, depending on size and thickness. Slightly dry pasta needs about 1 minute more, dried pasta another 5 minutes.
Noise Emission
The sound pressure level was measured at the ear of a user (LpA) in compliance with DIN EN ISO 3744.
Technical Specifications
Model: PC-KM 1004
Power supply: 220-240 V~, 50/60 Hz
Rated power consumption: 1200 W
Max. power consumption: 1400 W
Sound pressure level: 84 dB(A)
Protection class:
Net weight (basic appliance with mixing bowl and kneading tool): ....approx. 9.20 kg
Subject to change without prior notice!
This device complies with all current CE directives, such as electromagnetic compatibility and low voltage directive and is manufactured according to the latest safety regulations.
Disposal - Meaning of the "Wheelie Bin" Symbol
Take care of our environment, do not dispose of electrical appliances via the household waste.
Dispose of obsolete or defective electrical appliances via municipal collection points.
Please help to avoid potential environmental and health impacts through improper waste disposal.
You contribute to recycling and other forms of utilization of old electric and electronic appliances.
Your municipality provides you with information about collecting points.
Spis tresci
UcyHeHH HeCnpaBHOCTeI 122
PeKoMeHDoBaHipeuentn 122
Texhiyhi xapaKtepncnkn 124
MaIIOHKn cKnaaHaN Ma'ocpy6kn. 150
3araJIbHI Bka3iBKn ⅢOdo 6e3neKn
Ipepe npinHrTm B ekcnnyataciio zboRo npnnaD yJke yBaXHo uTaIte IHCTpyKciIO 3 ekcnnyatai Ta 36epiraTe ii pa3OM 3 rapaHTiHMM TaHOH, KACOBIM YekOM Ta, NO mipi MOxJIINBOCTI, 3 KapTOHHO KOPO6KOIO i BHyTpiiHbOIO yNaKOBKOIO. U pa3i, 0o npnna6 Byde nepedaHO TpeTIM Ocobam, cnid nepeDaBAtN Ioro pa3OM 3 ciEIO IHCTpyKciIO 3 ekcnnyataci.
BnKOpncTaIe npuad BnKIOUHO B npuBaTHnx 1Jx Ta 3a nepe6bueHm np3HaueHHam. Pnpua He np3HaueHo dIy npomucNoBoro BnKOpncTaHHa.
He BnKOpncTObyIte Ioro Ha ByNiCi.
ObepiraTe Ioro BiI cneKn, npMOrO coHnHO OnpomInIOBaHHa, BOJOn (B KODHomy pa3i He onyckaTe y pINHy) Ta roctpnx KyTib. He KopucTeYTEcA npUaDM 3 BONOM pyKaMn. KaIO npUaAD 3BOLOXKbC8 a6o 3MOkpIB, HeBiIDKnaDHO BVITb WTeNCeJIbHy BNkCy.
Bumkhitb npinad ta oob'3KOBO BHTB Bnky 3 wTeNceIbHOi po3ETKn (TraHtB 3a WTekep, He 3a Ka6eNb), KOJI He KOpNCyTeCb npinadom, a6o MOHTye KOMJIeKTyOHi deTani, a6o Ni d Yac YnueHna 6o npn DepeKTax.
HeeknyaTyIe npnad 6e3 orny. Oobra3KOBO BmKHiTb npnad, kOnn BN nOKndaTe npmiiHEnHa. BuTarHiB uTeNCelbHy Bnky 3 wTeNCelbHoI po3etKn.
- Ppuiad ta Ka6eIb XnBHeHn CnI d peryIaRHO 06TeXHTn Ha O3HaKn NOnKoDKeHb. Ppi BnAByHnHi NoKoDKeHb PpuiaOM 3a6OpOHeNo KOpNCtYBaTncb.
He pemontynte npina cami, ane 3BepHtbcra do abtopn3oBaHoro faxibua. IJra 3anobirHHa 3arpo3i noKoJKeHn Ka6eIb KINBHeHHA
CπiD 3aMiHHTn Ha eKBiBaJIeHTHn BNUKJIIOUHO Bnpo6HnKOM, a6o Hauo CepBicHO Cnyx6o1o a6o IHou KbaIipikOBaHOOC6O1O.
KopnctyntecBnKlIOuHO opriHaNbHnMn KOMJIeKTyBaIbHnMn DeTaIaMn.
3BepHbIy bary Ha hAcTynHi "CneuiabHi Bka3IBKn 0do 6e3nekn".
CnmboN B ciin Hctpykii 3 ekcnnyatai
Baxnbi Bka3iBkn Dny BaWo'i 6e3neKn CneuiabHo BiMiuheHi. Iy 3anobirahnHa HeaacnX BnnaKIB Ta noWKoJKeHb npuJaIy o6OB'3KOBO npITpIMyTEcB cix Bka3iBOK.
IONEPEIXEHHRA.
PonepeJxye npo 3arpo3n dna BaUoro 3dopoB' Ta Bka3yE Ha MOXJIbI pN3IKn TpaBM.
△YBAGA.
Bka3ye Ha moKnBi 3arpo3n Ira npuAdy a6o iHux npedMeTIB.
IINPIMITKA.
Budijne nikkaek Ta iHopmaio DnBac.
DITNaHemiuHiOCo6N
ДябзneкncBcOixDiTeHHe3aIIuAte Te DOCTynHMn NaKyBaIbHi MaTepiAn (nlaCTNKOBi NaKeTn, KapToHHi Kopo6Kn, NeHONpact TOno).
PONEPEJXEHHRA!
He 03B0JNe MaIIM dITaTm rpaTncb i3 nnBkoIO. IChyec 3arpo3a 3aDuxn!
- LcE npnna He npn3haeHn dnn BnKOpNCTaHHЯ IIOdbMn (BKnIOuHaIOUH n DiTeH) 3 O6mExKeHmN φi3nHmN, yUttEBmN a6o pO3ymOBmN 3dIbHOCTaMn, HeoCTaTHIM DOCBIOM Ta/a60 3HaHHaMn - Kpim BnPaIKiB, KOIN 3a HmN DOgIJaAcB iDnOBiDaIbHa 3a ix 6e3neky ocoba a6o BOHn OTPmAn BkaiBKN ⅢOIO BnKOpNCTaHHra npnaday.
-ДITЯМ He ДОЗВОЛЕН ГраТиСь 3 УМ ппладOM. ПOTриБен Доглад 3а НИМ.
CneuaJIbHi 3axoIи 6e3neKn IJy zuBoI npIcTpoI
△NONEPEDXEHHA.
IcHye He6e3neKa TpaBMyBaHH!
-Першнix3mHIOBATn npuIaIaIaIa6O yactHn,якpyxaIbCЯId yac po6OTN,BUMKHiTb npicTpI Ta BiIeHaIte NOro BiD MepeXi.
- Persh Hix BMnkaTn npucTpim, npeBipTe, nn npnaadHaJeXHo npnkpiIneHo.
-ПисяувIMКнEHЯ npICrpoIO BeDyHn BAN npIcTPOO dIa 3amIyBaHHra TicTa noUHe o6eptatncb. He TopkaIteCra Bany, aKni o6eptaetbc! 3aIra BaIoI 6e3neKn 3aBxDN npIKpIInHOte EMHICTb dIra 3MiUyBaHHra, HABITb JAKIIO npICrpii BnKOpNCTOByETbc RA K 6JIeHep a6o M'acopy6ka.
-Перед ВИКОРИСТАнгЯМ ВИМаNTe yci пedingmetи (noxkn, noNatkn) 3 emHOCTi.
He 6abTecra i3 3an06iXHHMn nepemKauam.
YBAGA.Pn3nk nepeHaBaHTaXeHHra!
BnKopncToByte npncpti Tilbkn k npncpti nn 3amiyBaHH Ta, a6o K M'acopy6ky u6bnep. HikOn He BnKopncToByte odHocHo 6iNbwe odHiei cyHKui.
BctaHOBJIIOHe npncptiHa nIpaCKy pIBHy i CTiIKy IOBepxHIO.
- Lcienpncpi npn3naeHn TiNbKn dny npnroTyBaHHX xpOvBnx npoDyKTIB.
He nepemiuye npucpii niacno ro pobot; 3abxdi cnoatky Bmkaite no i BiD'EnHyTe BiMepexi KMBeHHra.3aBxdn nepehoCbTe npucpi, Tpmaoun noo Dbompa ykami!
BnKOpncTaHnHa 3a npn3HaueHHaM
Cey npicpti ciD BnKOpncTOByBaTn dny TaKnx Cinei
3akinueHHPO6OTiBnMaHHcMHOCTi
- BumKhit npucTpi. IHdNkaTOp BUMKHeTbcra.
- Bi'edha Te npucTpii Bi Mepeki.
- Hatachitb Baxilb (3)doHn3y, 06 nIDHrnpuyky.
- 3HIMITb HacaIky. NOBepHIb 3aTnCKaY npOTn roINHHNKOBoi cTpiIKN.
5.Поверніть emhictь дя 3miшувань 3a roDNHHNKOBIO CTpiNKOIO i 3HIMiTb ii. - Pɔ3pyxaɪte ticTo 3a οɒnOMOtro IonoTkn i BnIMiMb NOrO 3 EMHOCti DπI 3MiUyBaHnI.
7.Почntыte yci chaTин,якВИКОРИСТОВУBA-лись,як ONИСАно В роздіп "ЧИSEнн".
M'acopy6ka
Ihctpykui 3 KopnctyBaHH M'rcopy6ko
PONEPEJXEHHH. HIX M'acopy6kn (25)
BybTe Dyke oBepexHi 3 HOxem NiD Yac CKnaDaHHaYi uHHeHHaM'Acopy6Kn! Pn3NK TpaBMvBaHHa!
He nopi6HIOte TBepi iHRpeIeHTn, HapnKnaI KICTKN YN MyuJi.
- IopixTe M'aco Ha UImatKn npu6n. 2,5 cm. YneBHiTbcra, uO y M'aci Hemaek KICTOK uN cyxoKJb.
Bn6epitb npi6he nn rpy6e cnto (26) BiinobiHNO do notpe6.
3MaXTe CnTo pocnnHHoOJIeIO YI KINpOM.
-Подрибиюч m'ясо,пocтавт ecMHICTb пд ВИ xiДнИ OTBIP.
MoHTyBaHHa HacaKn IJIa KOB6acOK (dNBIbCra Man. B)
IotpmytecKa KpokIB, BnKnaeHnx y po3di "Pi- roTOBka".
- RaKIO BnKOpNCToBvTe roTOBy cyMiU dIy KO6aocK, DOTpIMyIte Bka3iBOK HxJyHe.
-
Cnepuy BCTaHOBITb aanTep (29) Ha uHeK. 3BaKaITe Ha BuIMKn Ha Kopnyci uHeKa.
-
BCTaBTe hacaiky IJRA KOb6acok (27) y 6no-KyBaJIbHe KInIbe (13).
8.Поверніть 6лokувалькільце 3 Ha-cадкою Дпя кOBбocK 3a ГДИHHNKOBОЮ ctrpінkoю Ha kOpnyci shHeka. -
RaKuo noTpip6HNO noDpi6HHTM M'aco i npnroTyBaTNI KOB6ackN 3a OndHy onepaizIO, cnepSy BCTaHOBITb HIX i CNTO, kK ONncAHO y KpOKax 6i7 po3diny "MoHTyBaHHN M'acopy6Kn". HapeuTI BCTaBTe HacaIky dIy KOB6acok y 6blokyBaJIbHe KINbc.
-
Повернitsь блOKуВальб He Кльцe 3 Ha-cадкою Дпя кOBбСОЗ 3a ГДИННКОBOOCTpɪнкою Ha KOPnyci Унeca.
He 36eipraTe cik i3 uTpycoBux u npOdyKtn, kkiMiCTaTB KNCLOTy, y MeTaneBux EMHOCTx.
YnueHHa
NONEPEDXEHHA.
- Ipeed TmI k YnCTnTn npncTpi, BiD'eHaHTe Noro BiMpekXJNVBneHHa.
He 3aHpyIte npucptpi y Body. Lc moKe npn3BecTu do ypaXeHH eJeKtpuHm cTpyMOM a6o noxekj.
yBAGA.
He BnKOpncToBvIte DpoTMy 10ky a6o abpa3nBHi 3acobn Inyu nueHH.
He BnKOpncToBvIte arpeCnBHi a6o abpa3nBHi 3acob n Iy quHenn.
Kopnyc DvBryHa
- YnCTbTe KOpNc JnIe BONoroIO raHuyipKOIO, DoaBUn TPOxu MNoUO 3acO6y. BuTpiTb cyXoIO raHuyipKOIO.
PpnaAaIyI npncptpoI dny 3amiyBaHHra ticta i M'acopy6kn
△YBAGA.
HacaKHe MoXHa MNTu B NocydomnHiMaunHi. Taepayi aRpeCnBhi 3ac06n DnyuueHHa MoKyTB DeOpMyBaTu a6o3He6apBHTn HacaKn.
-Детаи,як KOHTaKTyHb3 iKeH,MOxHa MNTN BOdoIO.
CnoonochiTb uHCTOIO BOHO i peTeIbHo BucywiTb.
- 3maXTe cnta M'acopy6kn pocnHHoIO oJIeIO, nonpeHbO BnCyuBwn ix.
PpIaIaIgIgIgIgIgIgIgIgIgIgIgIgIgIgIgIgIgIgIgIgIgIgIgIgIgIgIgIgIgIgIgIgIgIgIgIgIgIgIgIgIgIgIgIgIgIgIgIgIgIgI
PonepeHc uueeHHa
HanoBHITbIeK IJRA 3MiUyBaHHra HANOOBHy BOIOHOYBIMKHITb Pnucpii Pn6n3Ho Ha 10 cekynd. BnInTe Boy.
- PteBHO 3HIMITb Iek 3MiUyBaHH.
IONEPEIXEHHa. Pn3nk TpaBmyBaHna!
Блok i hoaksi roctpi.Будte duxe obepexhi niДчac demoHTyBaHHa, uHsEHHa IMoHTyBaHHa.
3aBXn 3HimaTe rIeK dny 3MiuYBaHHn icnBnKOpNCtAHn.
BukpytMyfTy 3 pi3b6oIO i3 rneKa dny 3MiUyBaHHa.
3HIMITb 6Iok i3 HOXEM i yuINbHIOUOe KINbue 3 MyoTn.
3HIMITb 3anobixhe KINbue 3 rneka dny 3MiUyBaHH. BnKOpncTObyTe pi36y Ha rKeOBi DnA 3MiUyBaHH.
Tnek 3miuyeaHn
- Ckny yauy rke da 3miuBaHHa MoKa HMa MNTu y TeJIi MuIbHi Bodi. CnOncHtB Bnpi6 YNCTOIO BOIOI peTeJIbHO BNCuWitb.
3anobixkHe kInbue, yuinbHIOUe KInbue, 6nok i3 Hoxem imyma 3 p3b6oio
3nerka cnoIocHITb ci KOMNoHEHTn y rapaui BODi.
3MOHTyIe rIek dIa 3MiUyBaHHy y 3BOpOTHomy NopAky, nonepedHbO NOuNCTNBsNi BucyWBn Ioro. DnBiTbcMaJIOnHKn Ha cTOp.4.
36epirannn
- POnuHCTbTe Bnpi6, RaONcaHo. YneBnItbcra, UO yce npuaanr nobHicTc cyxe.
- YKIO npucptiH He BnKOpNCTOByBaTmEtbcBbnpoDBK TpNBaIoro yacy, 36epiraTe Ioro BVopriHaNbHi ynaKobci.
3aBXn 36epiraTe npncpti no3a 30HOIO DOcXHocTi diTeB cyxomy,do6pe npoBIPTIOBAHOMyMICU.
YcyHeHH HeCnpaBHOcte
PnnctriHne npauoc
Moxnuea npuuna.
Pnucpii He nid'edHaHO Do MepeXj XNBHeHra.
Aii.
- Ipepeipte po3etky 3a donomoroio iHworo npucptoio.
- NaidiHo niD'edHaIte Ka6eIb JxNBHeHnA.
-Перевпес abTomatнчни вимкay кИВЛeHHЯ.
Moxnuba npuuna.
PnucpiHecpabHn.
3BepHitbcB cepbichn cehtp a6o do cneuiiicta.
Ihui MoKnuei Hecnpaehocmi.
Pnncpii 6bnaHaHo 3a06xHmM
BIMMkaaMn.
BoHn daIOb 3MOry 3aNO6irTN BUNaIKOBOMy 3aNyCKy DBNrHa.
YcyHHeHH HecnpaBHoCmi.
-
IpepebiTe npaBnJIbHe nIOJIOKeHHr
-
noBopOThoI pyKn (2)
- rπeKa dπa 3MiUyBaHnHa (1) a6o
- 3axnchoi Kpnu (18).
PekomeHdoBaHipeCNTn
POpncTa cymi (6a3OBn pecenT)
IhrpeieHTN.
250 r m'kaKoro macna abo MaprapnHy, 250 r cykpy, 1 naKeT BaHilbHorO cykpy abo 1 naKeT lmMOHHoro nopoWky, 1 nyka coJI, 4 myz, 500 r nWeHNuHOi Mykn, 1 naKeT codn dnn BnIcKn, np6Jn3Ho 1/8 nITpa MONoka.
PnroToyBaHHa.
BcHnTe nWeHuNy Myky pa30m 3 iHsUIMiHrpeiEHTAMN B EMHicTb dJa 3MiUyBaHHra; po3MiUyIte3a DOnOMoTO raUka dJa 3MiUyBaHH np6n3HO 30 cekHyd 3a Hn3bKOi WbNdkOci, Todi 3a BnCOKoi WbNdkOci - np6Ln3HO 3xBuINHN. 3MaXTe NocdyH y dJa BUniHKn a6o po3KnadITb nanip dJa BnIkAHn, BkNaAdITb ticTo i BnneCyITb. Cnp6oyTe npir, nepeD TIm JaK BuHnAe Tn CTpaby 3 DuxOBKn. PpOKoJIb npir no ceHTpy KIncem DepeB'hoi naunkn. Jkuo TICTo He npnstae Do naunkn, npir roTobn. PepeBepHiB npir Ha ciTKy dJa BnIKAHH i daTe Iomy OxJIOHYt.
Bmormn do duyxobkn.
PBeHb: 2
HarpiBaHHa: eNeKtpoDyXOBka: TemnepaTypa 3Bepxiy 3Hn3y 175-200°, ra3Oba DxyOBka: HanaTsyBaHHa 2-3
Yac BnikahH: 50-60 XbuiHH
Ley peeent MoXHa 3MiHHTn, BHXOJaYn 3 BlaC-Horo DocBiy, HanpKJaad doatn 100 r po3nHOK a6o 100 r ropixiB Yn 100 r Teptoro wokona.
Hemae o6mexeHbIy BaWoi fpaHTa3i.
TexhiHi xaapKtepncTKMoKyTb 6ytN 3MiHeHi!
Yka3bBaet Ha BO3MOxHyo ONaCHOCTb IJIa N3-DeJnI IN Dpynx OKpykaOuixn PpeMeTOB.
I IPIMMEUHNA:
JaetcoBtbiHdopMaunIO.
IeTN IINuHa HyKdaiOuHneC B nPiNCMOtpe
- Ⅰ3 coo6paXeHn 6e30nacHOCTn dIpy DeTeH He OCTaBnIte JIeKAtb yNakOBky (IINaCTIKOBbie MeuKN, KapToH, NeHOpJnact n T.D.) 6e3 npncMoTpa.
PENEYNPEXKDEHNE!
He no3BOJnTe DeTAM nIgpaTb c noJIuNTnJIe-HOBoN pJIeHKOJ. OnaChocTb ydu7b!
3TOT np60p He npedHa3Hauen IIN NOb3OBAHnIuamn (BkNooaJeTei) C OrpaHueHHbIMn 4n3HueCKMn, CeHCOPHBIMn IIN yMCTBeHHbIMn CnOCo6HOCTaMn INI NuaMn, HE IMeIOUIMN ONbITa N/INN Heo6XoDmblx 3HaHn. NckIoUeHne CoCTabJIOT clyuan, KOrda OHn HaxOJaTc POnPncMOTpOM Iua,
OTBETCTBEHHORO 3a INX 6e30nacHOCTb, INI KOrda OT 3TOrO IInuca NOnyuYeHbI yKa3aHnI NO NOnb3OBaHnIO npNOpOM.
Heo6xOIMO npncMaTpNaTb 3a DeTbMn, TTo6bI y6eINTbcra B TOM, YTO OHn He nIgpaHc T npnbopom.
Oco6bIe Mepbl 6e3oNaChOCTn IJra DaHHoro yctpOiCTBa
IPEyPExKDEHNE:
Onachocb noJyueHn TpaBmbl!
- Bыкючite yctpoicTBO n otcoeHnIte ero OT cETN 3neKtpoNTaHnI nepeI TEM, KaK MeHЯТь akceccyapbl nII n HacaIKN, KOtOpbIe DBHXyTcB BO Bpem pa6Otbl yctpoiCTBa.
- IpepeTEm, KaK BkIIOuHaTb yCTpoiCTBO, y6eDInTEcB, YTO HacaIka yCTaHOBJIeHa DoJXHBIM 6pa30m.
-ПривКлioчени устpoиства Начиhaet Врашать сппвODнов вал тectOMeшалк. He ппкаситсь K пИВODHOMу BAry BO Bpeмя paботы устpoиства! Дя ваше собстен.Hо 6e3oNacHOCTN BCERda npICoeINHЯTe EMKOCt b Дя CMEshINBaHЯ,Даже ecnI ystpoистBO ИСПОЛБ3уETС К Ak 6JIeHДер Или МясCopy6ka.
BoBpemIcNoIb3OBaHnIyCTpoIcTBA,BeMKoCTnHe DoJIxHO 6blb HnKaKnx IpeMToB, TaKx KaKIOxKn Nnn CKe6Kn DnT Tecta.
He BmeuBaIeTcB pa6Oty BbIKnUoateJeN 6e3OnaCHOCTN.
BHIMAHHE:Onachoctb neperpy3kn!
IcnoJIb3yIte yCTpoIcTBO IIO KaK TeCTOME-
WAnKy, IIO KaK MAcopy6Ky IIO Bo KaK 6IeHep.
HnkOrda He IcNoJIb3yIte 6OJe e OHOH oYHK-
Znn OJHOBpeMeHHo.
- YcTaHOBuTe yCtpoiCTBO Ha POBHOI rOpN3OH-TaJIbHOI INPOUHOI NOBepXHOCTN.
C NOMOu yctpoiCTBa rOtOBbTe TOnbKO npoDyKTbl NtTaHn.
He DnraTe yctpoCTBO BO Bpem ero pa60 Tbl; Bcerda ChauJa BbIKNoaute ero n3
ceTn. Bcerda nepeHocHTe yCTpoIcTBO DBympykam!
PpeHa3NaueHne
DaHHoe yctpoiCTBO npedHa3NaueHo dna pa6oTbI B KaueCTBe
- yctpoiCTBaIINB36uBaHnI / nepMeuBaHnI Tecta, KpeMa, CInBOK, AnuHbIX BeIKOB;
- 6JIeHepa IJI npiroTOBHeHnI nHOpe, B36uBaHnI nn CMeUINBaHnI;
MRCOPY6KINJN3MeJIbYeHnI\PuIeBbIX npOdykTOB.MoXHOΦOpMnPoBaTbMaKApOhbl INI TECTO C NOMOUBIO pa3NJUHbIX HacaDOK.
YcTpoIcTBo npEiHa3HaueHo ToIbKO dIa 3TuX ceIe, I TOIbKO TaK erO MOxHO ICNoIb3OBaTb.
YCTPOINCTBO MOXHO NcNoIb3OBaTb TOJIbKO CnOCo6OM, ONiCaHHbIM B DaHHOM pyKOBODCTBe.
YCTPOINCTBO HeIb3a NcNoIb3OBaTb B KOMMepuecknx ueJx.
IIO6oe npyroe npimHeHne daHHoro yctpoiCTBa CHTaETcNcNoJIb3OBAHNem He nHa3NaYeHIO mOKeT npBecTN K NOBpeJdeHIO yCTpoiCTBa IIN DaKe K TpaBMe.
Ipn3BODntelb He 6epet Ha ce6a OTBeTCTBeHHOCTn 3a yuep6, npuHHeHHbI B pe3yIbTaTe nCNoJIb3OBaHnYcTpoiCTBa He no Ha3HaueHnIO.
3NeKtpnueckne coeHHeHHa
PpOBepbTe, YTO6bl 3JIeKTPoNTaHne OT CETN COOTBeTCTBOBaIOn CNeUΦnKaζm nacnOpTHOIT Ta6JIuKn.
Функцюнальноctь
-
YcTpoIcTBo O6OpUdOBAHO aBapnHbIMN BblKlIOuATEJIaMn. Ero pa6Ota Bo3MOxHo ToJbKO
-
C npncOeDnHeHHO 3aUHTHO KpbIkoi (18) IIN
-
C ПпсоeДинEHн eMkoCTbIO ДЯ CMeUINBaHnI N
-ecnIOBOpOTbI KPOHHTeH 3aUeJIKNHyIcHa CBOeM MeTe C xapaKTePHBIM 3BYKOM. -
YcTpoIcTBO ynpaBJIeTcra Jn6o C NOMOuBopeyIInpyUoSe pyuKu nnC NOMOuBo KHOJOKCTaHdapTHbIX nporpaMM.
CnomoBIO peryInpyUOeI pyKIMoXHO nIaBHO MeHrTb CKOpocTb.Bcerda HauHnAte C MaJIeHbKOI CKOpocTb.YBeINuBaIte CKOpocTb nIaBHO.PeryInpyUOaI pyKa He cyHKUO-HnpyeT,ecNI NCNoJIb3yOTcraHdApTHbIe nporpaMMbl. - CtaHdapTHbIe nporpMMbl IMeIoT ppeDyuctaHOBJIeHHbIe HAcTPOIKn CKOpOCTn. CtaHdapTHbIe nporpMMbl He yHKUHOHPuyOT, ecnn ycTPOINCTBO BKJIIOyeHO C NOMOoiBo perynipuOSeI pyuKn. KaK TOnbKO BbIbpaHa oHa cTaHdapTHa nporpAMMa, dpyrne CtaHdapTHbIe nporpMMbl BbIbpaTb HeNb3ra.
NcnoIb3yIe cyHKUHOHaJIbHbIe KHOKN IJIcNeDyUOxN CTaHApTHbIX nporpAMM:
He nepenonHnIte yCTpOncTBO; MaKcImaJIbHOe KOJIInueCTBO INHpeDneHTOB - 3 Kr IJN1,5 NITpa dIra XnIDKOcTe COOTBeTCTBeHNO.
- ПовернitepbuaKOK(3)Внанравлени CTpeIKN,ИMeДЛeHHO CmecTnteДpyroи руКОП NOBOPOTHBI KPOHHTeIN BHN3.ПOBOPOTbI KPOHSTeIHdoJIKeH 3aUeJIKHyTbcSЯ cBOeM MecTe C xapaKTePbIM 3ByKOM.
- BCTaBbTe ⅢTencelb ⅦHypa 3JIeKTpOnnTaHnB INcnpaBHyIO 3a3eMJIeHHyIO po3eTKy220-240B\~50/60T.
- Bключnte yctpoиCTBO, Испоьзуя Лбо Ondу n3 KнОнok CTaHдapTHbIX ПрограмM, Лбо Perулmpуюшую ручky. ИспоьзуITE спeдуюшую таблицy. 3aropntcra coOTbETCTByuши nHHДИКaTOP.
Ta6JIuca TINOB TeCTa N HnCTpyMeHTOB
HanoHnTe eMKoCTb HrpeJeHTaM
- BbIKIOUHTe yCTPOITcBO.
-
HanonHnTe emKoCTb HrpeDneHTamn nn CneuMn yepe3 OTBepCTne dIy np6Kn.
-
Choba 3akpoTe KpbIuKy N ee OTBepCTne npo6koi.
- Праздоглжктурабту.
OcTaHOBka pa6oTbI
- BbIKIIOUHTe yCTpOiCTBO. IaMNoUka INdNkA-Topa norachet.
- OToCoeHInHe yCtpoIcTBo OT cTeN 3NeKtpo-nITaHn.
- CHIMMITE EMKOCTBДЯ CMEUBAHNA.
- CnIMnTe c emKoCTn KpbIuKy nped Tem, KaB BblNTb ee copejxHMOe.
5.ПочNTIte BCE nCNoIb3OBAWuece YacTn, KaK ONcAHO B pa3dJe "YncTkA". - 3aKpoIe npINBOHOB BaI 3aUNTHOH KpbIiKoI (18).
BAXHHOEPINPMECHAHA:
He xpaHnte cokn cntpycobbix nnn Kncblix npoDyKTOB NHTAHN B MetaJIINueCKNX EMKOCTX.
UncTka
PENEYNPEXKDEHNE:
- OtcoeHnHTe yCTPOINCTBO OT cETN NITaHnI nepei OYNCTKoI.
He norpykaTe yctpoicBO B BODY.3To MoJxET npBecTn K nopaxKeHIO 3JIeKtpueckm TOKOM INI NOXapy.
BHIMAHNE:
He nObn3yIte MeTaIIHueckyIO ueKU nn HbIe a6pa3nBhIE KxOHhIE npHaadJeXHOCTN dJIa OYNCTK.
He nCnoJb3yIte arpeccnBhIe nn a6pa3NB HbIe YNCTaUne CpeDcTba.
Kopnyc dBnraTeJia
KoJyxCnEduETuCTNbTOIbKOcNOMOuBIO BnaXHOITKaHIN,doabuHBHeMHoro XnIKOCTn DnA MbITbIocybl.BbITpTe hacyxo BeTo- ShbIO.
AkecccyapbI TeCTomeaJKN macopy6kn

BHIMAHNE:
HacaKn HeJIb3a MbITb B NocydomoeyHoM MaunHe. HarpeB n arpeccnBhIe YnCTaIne cpeDCTBa MOrYT DeΦopMnPoBaTb IIN oBeCuBETNb HacaKn.
-ДетаиустpoиCTBa,COPNKacABwneCЯПИцEBbIMn pOdyKTamN,MOXHO pPONONOCKaTbBOdOJ.
- Прплочи чьтб Вдои И пнocьвБысшп.
-
- Послесушки hahecnTe hemhoro pactnteIbHoro Macna Ha cTuO mAcopy6kn.
AkecccyapbI 6neHepa
PpeBapumenbHaOuucmka
HaonHHTeEMKocTbIJa CMeuBaHnB ODoH HnoOBHy ee oBeMa n BkIOUHTe yCTpoiCTBO npImepHo Ha 10 cekyH. BblneHTe Body.
- CHIMITE éMKOCTb ДЯ CMEUINBAHNA, YTO6bl NOYICTb ee 60Jee OCHOBATEJIbHO.

PENDyPEXKDEHNE:
Onachoctb TpaBMnpoBaHna!
Hoxn6IokHOxKeOueHbOcTpbie.
O6paauTeCb C HmN OueHb OCTopoXHO BO
Bpemc6OpKn,pa36opKn uNCTKN.
Bcerda pa3bpaTe emKoCTb dIa CMeuBaHnI nocJe IcNoJIb3OBAHnI.
OTBnHTte pe3b6oBoe coeHHeHne oT eMKOCTn DnA CMeuBaHnA.
- CHIMITE 6IOK HOKei n yIIOTHNTeJIbHoe KOJIbUO C pe3b6oBOrO coeINHeHn.
- CHIMITE 3aUHTHOe KOJIbO C eMKoCTn
ДЯ CMeUWBAH.N.ИспОьЗУTe pe3b6y Ha
eMKoCTN ДЯ CMeUWBAH.N.
EmkocmbdramcmeuuaHua
CTeKJIaHHyUaIyEMKOCTnIJa CMeuBaHna MOxHO NOMbITb B TeNIObMbIbHOB ODe. Iocne 3tOrO npOnoIoUte ee uHcToB BoOu INONHOCTbO BbICyUITE.
3aumhoe konbuo, ynnomhumelbhoe konbuo, 6nok HOKe u pe3b6ooe coeduneHue
ToIbKO KpaTkoBpeMeHNO npoNoIoUte 3TN KOMHOENTbl B TOpAye BOe.
Cobepnte emKocTb dIy CMeuBaHnB o6paTHOM nopAKe nOcIe YnCTKN I cyuKn. CmOpTe nnIOCTpaUHO na cTpaHnCe 4.
XpaHeHne
-Почистуе устюг STBO KAK NOKA3aHOp nucyKe. Y6eintecb,чTO BCE akceccyapbl NnHOCTbIO cyxne.
- PekomeHnyeTcXpaHnTB yCTpoiCTBO B erO opuHaJIbHOYnAkoBKe,ecNn OHO He nCNoJIb3yETcIaNTeJIbHoe Bpem.
Bcerda xpaHnTe yCTpoNCTBO B cyXOM, xopoIo BOHTUNIPyEMOM MeCTe, HeIOCTyINHom IJIa DeTei.
YcTpaHHe HEnCnPaBHOCTeI
YcTpoCTBO He pa6oTaET
Bo3MoXnHa npuUna:
Het 3JnKtponntaHna.
Deucmeue:
- Поберп Te роэтку с помоью другого устpoиCTBa.
- PpaBnIbHO BCTaBBte WTeNceJIb B PO3eTKy.
- PpOBepbTe BbIKIOuOaTeJIb.
Bo3MOxHa npuUHa:
YcTPOIcTBo HEnCnPaBHO.
Deucmeue:
- 06paTntecb B haW cepBnchbI ueHtp nIN K cneuaJIncTy.
Ipyue 03MOXHbI npUuHbI:
YcTpoIcTBO o6OpyIOBaHO aBapnHbIMN
BbIKIOyateJIaMn.
OHHnpedotBpaaOTcnyaHbI3anyck DBnraTeJI.
Deucmeua:
-
PpOBepbTe, npaBnIbHO JIn yCTaHOBJIeHbI
-
NOBOPOTbI KPOHHTeIH (2)
-EMKOCbIy CMEUWBAHN(1)n - 3aunTHna KpbIwka (18).
PekomeHdyembIe peuentbI
Cmecb dIy 6nCKBnTOB (OCHOBHO peCNT)
HrpeJeHtbl:
BnyoouKc cemeHaMn IbHa
HrpeJeNtbl:
500-550 r nIeHnHou Myn, 50 r cemH JbHa, 3/8 IITpa BOdbI, 1 Ky6NK dpoxxKei (40 r), 100 r HeKnpHOcBlyxHNO3aKBaCKN, XOPOo npocuHnHO, 1 qaiHra loXka coII. Dna CmaUBaHn: 2 cToIOBbIE loXKn BOdbI
PnroToBneHne:
3amoute IbHnoe cemB 1/8 nItpa TeIIOB OdbI. HaneiTe ocTalbHyIO TeNpyIO BODy (1/4JI) B EMKoCTb dIra CMEUBAHnA, HAKPOuNTe B Hee DpOxKn, DoabBte TBOPOR, IN XopoIo Nepemeuaite KpOKOM dIra CMEUBAHnA Ha BbICOKOI CKOPoCTN (UNI NCNOJIb3yIte nporpaMMy MIXING).DpOxKn DOJXHbI 6blb IOJHOCTbIO pactBOpeHbI. DObabBte B EMKOCTb IINr CMEUBAHnA MyKy C 3AmOueHHbIM IbHryHBIM CeMeHem I COJIb. 3ameCITE 3Ty Maccy C NOMOsbIO peryInpuyOSeI pyCKn Ha Hn3KoN CKOPoCTN, IN NOCTeNEHHO YBeJInuBaIte CKOPOCTB TceHne 3-5 MNHT. HAKPOITe TECTO IN NOMEcTlTe erO B TeIIOe MeTo Ha 45-60 MNHT. Choba 3ameCITE, BbIHbTe n3 DeKn I CdJaAIte n3 Tecta 16 ByNoeyk. HAKPOITe IpOTNbEhB BlaXHoH 6ymarO nnPpOTNBHr. PomeCTtHe Ha Hee 6ByNoch, IpoBeiTe pacCToKy B TeueHne 15 MNHT, CMOHTe TEIIOB BOoN I 3aneKaIte.
CTaHdapThaDyXOBka:
YctaHObKa:2
HarpeB: 3neKtpnuecka dYXOBka:
BepxHn HnKHN
HarpeB 200-220°
N3MeHeHnMOryT BHOcHTbcra 6e3
npedbarntelbHoro yBeDOMJIeHnIa!
Данhoe yctpoIcTBO COOTBETCTBYET BcEM
TeKyuIm DnapeKTHBaM CE, TaKIM KaK
3JIeKTPOMaHHTHAR COBMECTMIOCTb HN3KOe
HapjKeHHe; OHO npOn3BeDeHO B COOTBeTCTBnC
HOBeiIIMMn Ipa-BINaMn TexHnKn 6e3OnaCHOCTN.
aolai aolai cai
j 1
121g 1
iie. ailll aigll iie. gii yill gaiiall jai
Laij pao?b! 2y jai jai jai Jia
Jusitill laljle
#
3
4 1
139
139 1
140
1.40.
140
140 1
141
141
- j141jia 50
141
141
142
142
143
143
143
143
143
144
144
144 1
144 ....aalllnss
144
145
145
145
145
145
146. Bill 15 e.g. us
146
146
146
146 1
146
146
146
147 12xil
147
147
147
149 1
150
1
yLs 1
gaaal
b1 = 23,b2 = - 43,b3 = 58,b4 = 79
lik, lai jlg jol Jai. aai jll aal ball 1
1
| • ### | • ### | • ### | • ### | • ### | • ### |
| • ### | • ### | • ### | • ### | • ### | • ### |
| • ### | • ### | • ### | • ### | • ### | • ### |
| • ### | • ### | • ### | • ### | • ### | • ### |
| • ### | • ### | • ### | • ### | • ### | • ### |
| • ### | • ### | • ### | • ### | • ### | • ### |
= 1.211
Laa jililil gilg cie jioe eep
.(J) LOCK (C) OPEN
i0x j 1j
OPEN
()
中
4.23 jall 4.23 gill
Aa
. LOCK
i. 20) .6
Jg 2001
:abla
i j 1
0123456789
a 7
S OBC = S BOC + S_ BOC
169 = 218 + 107 + ·s + 107 + 107 + 107 + 107 + 107 + 107 + 107 + 107 + 107 + ·s + 107 + 107 + 107 + 107 + ·s + 107 + 107 + ·s + 107 + 107 + ·s + 107 + 107 + ·s + 107 + 107 + ·s + 10( 7 - 4) 9
a. 与 g 的二, 2g = 1 - 12
a
jldieol
.15u 15u 15u
.8
4
4.4.5.4.5.6.7.8.9.10.11.12.13.14.15.16.17.18.19.20.21.22.23.24.25.26.27.28.29.30.31.32.33.34.35.36.37.38.39.40.41.42.43.44.45.46.47.48.49.50.51.52.53.54.55.56.57.58.59.60.61.62.63.64.65.66.67.68.69.70.71.72.73.74.75.76.77.78.79.80.81.82.83.84.85.86.87.88.89.90.91.92.93.94.95.96.97.98.99.
15 jll 1,5 3
.
(3)a1b2.9
i.
AilSo jolgljll Cgaleaw
yS J 10
240-220 1
a111 1
. ŵdol ŵdol dall ŵ ŵdol ŵdol: ŵdol
(1)
:
S OBC = S BOC + S BOC - S BOC
S OBC = S COD + S_ BOC
aall g i jgai jgai (2) 1j
alisiWJjgljla jilj
aaii iii. 1111 1111 aie gll eil jgl 1
a aaii iie 1
15 15
Jaaa aagaae aagaae
j 1
aie bceiai jckill jaiy jie
j
#
Jzaii
4 = 2
(3)
blisll clg glaen
a
11110g
3/4 ≤ b_0 < 2
S OBC = S BOC + S_ CEA
(18)
b 分子为
jglall 1
biul 19j
jgl jgl jgl jgl jgl jgl jgl
aalldl 1slyblllc g no jnall jy .6
paas 21s gAs Las CllgSall .7
BAC = 90^ ADC = 105^
a
pailia jao alsdicu caij
(25) 4
aJooKoo Jolalilie jlll jll
120
2.5 2
(26)
i
a
aill jie jie jiaall Jaiie cgs
Jolal Jolal (28) "A"Jolal aoll o1
ii.
giall alal gale alal gialll
0121 0g g jiaai
25 6
i 1
elte 1e ciaaii b2. (26) jai iai jai .7
aill aebu uJui clll uolll
13.8
1
"pailia jao jia jiai" piaai jai jai jai jai
(B)
"Jnnnll Jn 1 1 1 1 1 1 1 1
joljilai bili jdi ciis olilolgail
yill 2gac (29) Jgall .6
"pallia jia jia jia jia jia jia jia jia jia
jill) aallll lss
C
"Jillll"
28 128) "sll" Jaaalall oJy jin .6
1
420 (28) "A" 100
.(13)
Jac oIyil "aill" Joc olj Jaall aol .8
"palliaia jia jia jia jia jia jia jia jia
(D)
"Jnnnll Jaa a 2aag
2015.2.28 29) 2015.2.28
glfall gfall
- jgjilai
polly 1
S木弟形 COBD = S COD + S_ BDO
aill g jao 1 a 1 1 1 1 1 1 1 1 1
gbiol
slaal yililil sylgic
·
- 2jie-1i
jiaill jiaiul 5 no oaiy
1
S11 31)
aikis 1
.
jgl30) jae lgl
b1 = 32,b2 = 50 - 12
S BCD = S COD + S_ BDO
.150,3 3
jIiJIiJIiJIeJIeJI.1
18 2
b 分子
jglallae gglgllgjj
biol 19) jil biol
aai jai jai ai bai
iio gil 15jbjizjc
P( x,y) . P( -14y,0) .
J (17) 3
Lilalit ygill gac gliy glll
aJaa Jaa aaiia aaiia aaiia
a. yIboll 1
(A)
"Jnnnll Jaa 8a aal gai jil
(17) cIbIyI yIyI yIyI IyI yIyI .5
LOCK aIaII oJIyI cIbIyI yIyI aIy
by
bI 1
12 10
12 10
12 10
12 10
12 10
Aa: j 1
4.117
aegaa aagaaeaaee
blclc 100
ailll ai jll gioi y
ai jll 2n nn nnnn aiee eae
A
山
.1
:17) 2
. OPEN 12
Jolli ( 2 ) ( a + b) ( b - c) = 0
.LOCK 1uill uoll
j 18)
a11 (19) jll bc bally:bl
a
. 4
.5
Jalil 1b
a1 = 23,a2 = - 43,b1 = 58,b2 = - 34
1a 7
yly yolall ylll
Lgalic
4.2.2.3. g 且 x 1 ( )
blil ygi 2gac lcbill cgl gao .8
:
jolill aila bina billl cgc jgsic
j_L = 21, ,z = 4, ,z = 4, ,z = 4,
( 1) ( 2)
jla jge plsiuily uai all Jocoo
m = 311
a 1
:Jai2011
j_L = D( -2,0)
a + b = 2
JyLi yolalil ayall jyaie Jaiil
.
iIlaiaal 15j11
jai jao jao jao
aall
:
jux 1
(2)
3^j( 1) b^j - 1( 1)
(18) ( x) = ( x) ( 1 - 1x)
a jao ciaag
()
:
250 jj j 250
jua 1i i jai 1s s Ssu
500 4
1/8 18
a jial baa jaiw clally ciSall aibil
.
Sall jilly alalll bllle 5
g a gill jil 1jil.
4.4 a.u.
#
i j 15
Lolai aIgla Iaiaoll
aIg bI jai I aia iuiy paia 12
jka jlaa Jglaae
Loll oiiiy jgj
a
:
150 200
S.LalJL 60-50.3
i 1
A 一定小于 B
:
jie jil jiu wuiu yin po di xiyu uai jial
2.1J 1
iill i g aill g aill wll y
gaa: gaaal aagaaa oaaa


- WAARSCHUWING: Risico op letsell!
- WAARSCHUWING: Risico op letsell
- ATTENTION: Risque de surcharge!
- General Safety Instructions
- Symbols in these Instructions for Use
- WARNING:
- CAUTION:
- NOTE:
- Children and Frail Individuals
- WARNING!
- Special Safety Precautions for this Device
- WARNING: Risk of injury!
- CAUTION: Risk of overload!
- Intended Use
- Description of the Parts / Supplied parts
- Overview controls on page 3:
- Illustration Assembly Mixing Container on page 4:
- Illustrations A - E on last page:
- Unpacking the appliance
- General Use Instructions
- Electrical Connection
- Functionality
- On/Off
- With the control knob
- With the function buttons
- The kneading machine
- Kneading Machine Assembly And Operation
- Pulse operation
- End Operation and Remove Bowl
- The mincer
- Meat Grinding Use Instructions
- WARNING:
- Making sausages
- Shaping cookies
- Preparation
- Meat Grinding Assembly (see Fig. A)
- Assembling the sausage attachment (see Fig. B)
- Assembling the attachment for oriental dough pouches (see Fig. C)
- Cookie Attachment Assembly (see Fig. D)
- Pasta Attachment Assembly (see Fig. E)
- MeatGrinderOperation
- Stop Operation
- The Blender
- Blender Use Instructions
- The knife (1e) in the blender is sharp!
- RECOMMENDATION:
- Mixing Container Assembly
- Blender Assembly And Operation
- Refill Ingredients
- IMPORTANT NOTE:
- Cleaning
- Motor Housing
- Kneading Machine And Meat Grinding Accessories
- Blender Accessories
- Pre-Cleaning
- Mixing Container
- Safety Ring, Sealing Ring, Knife Assembly And Threaded Coupling
- Storage
- Troubleshooting
- The appliance does not function
- Remedy:
- Further possible causes:
- Recommended Recipes
- Sponge Mixture (Basic Recipe)
- Ingredients:
- Preparation:
- Conventional Oven:
- Linseed Rolls
- Chocolate Crème
- Basic Recipe Pasta Dough
- Noise Emission
- Technical Specifications
- Disposal - Meaning of the "Wheelie Bin" Symbol
- Spis tresci
- 3araJIbHI Bka3iBKn ⅢOdo 6e3neKn
- CnmboN B ciin Hctpykii 3 ekcnnyatai
- IONEPEIXEHHRA.
- △YBAGA.
- IINPIMITKA.
- DITNaHemiuHiOCo6N
- PONEPEJXEHHRA!
- CneuaJIbHi 3axoIи 6e3neKn IJy zuBoI npIcTpoI
- △NONEPEDXEHHA.
- IcHye He6e3neKa TpaBMyBaHH!
- YBAGA.Pn3nk nepeHaBaHTaXeHHra!
- BnKOpncTaHnHa 3a npn3HaueHHaM
- 3akinueHHPO6OTiBnMaHHcMHOCTi
- M'acopy6ka
- Ihctpykui 3 KopnctyBaHH M'rcopy6ko
- PONEPEJXEHHH. HIX M'acopy6kn (25)
- MoHTyBaHHa HacaKn IJIa KOB6acOK (dNBIbCra Man. B)
- YnueHHa
- NONEPEDXEHHA.
- yBAGA.
- Kopnyc DvBryHa
- PpnaAaIyI npncptpoI dny 3amiyBaHHra ticta i M'acopy6kn
- PpIaIaIgIgIgIgIgIgIgIgIgIgIgIgIgIgIgIgIgIgIgIgIgIgIgIgIgIgIgIgIgIgIgIgIgIgIgIgIgIgIgIgIgIgIgIgIgIgIgIgIgIgI
- PonepeHc uueeHHa
- IONEPEIXEHHa. Pn3nk TpaBmyBaHna!
- Tnek 3miuyeaHn
- 3anobixkHe kInbue, yuinbHIOUe KInbue, 6nok i3 Hoxem imyma 3 p3b6oio
- 36epirannn
- YcyHeHH HeCnpaBHOcte
- PnnctriHne npauoc
- PekomeHdoBaHipeCNTn
- POpncTa cymi (6a3OBn pecenT)
- IhrpeieHTN.
- PnroToyBaHHa.
- Bmormn do duyxobkn.
- I IPIMMEUHNA:
- IeTN IINuHa HyKdaiOuHneC B nPiNCMOtpe
- PENEYNPEXKDEHNE!
- Oco6bIe Mepbl 6e3oNaChOCTn IJra DaHHoro yctpOiCTBa
- IPEyPExKDEHNE:
- Onachocb noJyueHn TpaBmbl!
- BHIMAHHE:Onachoctb neperpy3kn!
- PpeHa3NaueHne
- 3NeKtpnueckne coeHHeHHa
- Функцюнальноctь
- HanoHnTe eMKoCTb HrpeJeHTaM
- OcTaHOBka pa6oTbI
- BAXHHOEPINPMECHAHA:
- UncTka
- PENEYNPEXKDEHNE:
- BHIMAHNE:
- Kopnyc dBnraTeJia
- AkecccyapbI TeCTomeaJKN macopy6kn
- AkecccyapbI 6neHepa
- PpeBapumenbHaOuucmka
- PENDyPEXKDEHNE:
- Onachoctb TpaBMnpoBaHna!
- EmkocmbdramcmeuuaHua
- 3aumhoe konbuo, ynnomhumelbhoe konbuo, 6nok HOKe u pe3b6ooe coeduneHue
- XpaHeHne
- YcTpaHHe HEnCnPaBHOCTeI
- YcTpoCTBO He pa6oTaET
- Deucmeue:
- Ipyue 03MOXHbI npUuHbI:
- YcTpoIcTBO o6OpyIOBaHO aBapnHbIMN
- BbIKIOyateJIaMn.
- Deucmeua:
- PekomeHdyembIe peuentbI
- Cmecb dIy 6nCKBnTOB (OCHOBHO peCNT)
- HrpeJeHtbl:
- BnyoouKc cemeHaMn IbHa
- HrpeJeNtbl:
- PnroToBneHne:
- CTaHdapThaDyXOBka:
- aolai aolai cai
- #
- 1
- OPEN
- :abla
- 4
- :
- = 2
- by
- a jao ciaag
- ()
Brand : PROFICOOK
Model : PCKM 1004
Category : Food Processor