FGGA0401WWE - Surveillance Camera FRIEDLAND - Free user manual and instructions
Find the device manual for free FGGA0401WWE FRIEDLAND in PDF.
| Product Type | Solar surveillance siren (compatible with 868 MHz alarm system) |
| Brand | Friedland |
| Model | FGGA0401WWE |
| Main power supply | High-capacity NiMH 6 V rechargeable battery + integrated solar panel |
| Startup power supply | 9 V alkaline battery (6LR61/PP3) |
| Battery life | Daily recharge via solar panel; lifespan 3 to 4 years |
| Radio frequency | 868 MHz |
| Communication range | Up to 30 m in open field (estimated) |
| Maximum number of remote controls/keypads | 6 |
| Maximum number of security detectors | 12 |
| Main functions | Powerful audible alarm, tamper detection (anti-removal switch), anti-jamming, instant and delayed activation modes, panic function, maintenance and operating modes |
| Adjustable alarm duration | 1 min or 3 min (without control panel); 3 min or 10 min (with panel) |
| Visual indicators | Front LED (flashes) and learning LED |
| DIP switch settings | 5 switches: alarm duration, anti-jamming, alarm sound, confirmation beep, siren/control panel mode |
| Mounting | Wall-mounted, with mounting plate and template; requires drilling (5/6 mm drill bit) |
| Maintenance | Clean the solar panel every 6 months with a soft damp cloth; do not use abrasive products |
| Safety | Integrated tamper switch; anti-jamming detection; protected battery cover |
| Spare parts | Main rechargeable NiMH 6 V battery, 9 V alkaline battery, mounting kit |
| Warranty | 2 years (parts and labor), subject to proper installation and use |
| Customer service (France) | 0810596063, Mon-Fri 9am-5pm |
Frequently Asked Questions - FGGA0401WWE FRIEDLAND
User questions about FGGA0401WWE FRIEDLAND
0 question about this device. Answer the ones you know or ask your own.
Ask a new question about this device
Download the instructions for your Surveillance Camera in PDF format for free! Find your manual FGGA0401WWE - FRIEDLAND and take your electronic device back in hand. On this page are published all the documents necessary for the use of your device. FGGA0401WWE by FRIEDLAND.
USER MANUAL FGGA0401WWE FRIEDLAND
Solar Siren | FGGA0401WWE / FGGA04* Series
CE
ENGLISH Installaon and Operaon Manual 2
1 Intended use 3
2 Safety 3
2.1 Product 3
2.2 Installaon 3
3 Descripon 3
3.1 Package contents 3
3.2 Required tools 4
4 Overview 4
5 Installaon 5
5.1 Conguring the siren 5
5.2 Powering up the siren 5
5.3 Adding a new remote control or remote keypad to the siren.. 6
5.4 Mounng the siren to the wall 7
5.5 Adding a new security detector to the siren 8
5.6 Deleng all devices from the siren 8
5.7 Service mode / Operang mode 8
6 Operaon 9
6.1 Arming the system 9
6.1.1 Instant-arm mode 9
6.1.2 Delay-arm mode 9
6.2 Disarming the system 9
6.3 Personal aack facility 9
6.4 Device tamper 9
6.5 Low-baery condition 10
7 Maintenance 10
8 Disposal and recycling 10
9 EC declaraon of conformity. 10
10 Guarantee 10
11 Customer support 11
1 Intended use
The FGGA0401WWE / FGGA04* Series solar siren is suitable for use with Friedland wireless alarm systems operang at 868 MHz only.
The siren uses a high-capacity, rechargeable main baery (NiMH). The solar panel on top of the housing charges the baery during daylight hours. During darkness, only a small amount of energy is required to operate the siren. The siren is supplied with an inial power-up baery (alkaline) to boost the inial power to the siren when the system is rst acvated unl the solar panel charges the rechargeable main baery.
The tamper switch will immediately trigger an alarm if any unauthorised aempt is made to interfere with and remove the siren cover. An an-jamming defecon system will generate an alarm if any aempt is made to connuously jam the radio channel used for the system.
2 Safety
2.1 Product
- Keep all safety warnings and instrucons for future reference.
- Obey the local regulaons applicable to the installment of the product.
- Do not aempt to open the devices.
2.2 Installaon
- Wear safety gloves when drilling into walls.
- Wear safety glasses when drilling into walls.
Make sure that there are no electrical wires and water pipes when drilling into walls. - Posion ladders onto a level and stable surface and at a safe angle.
3 Descripon
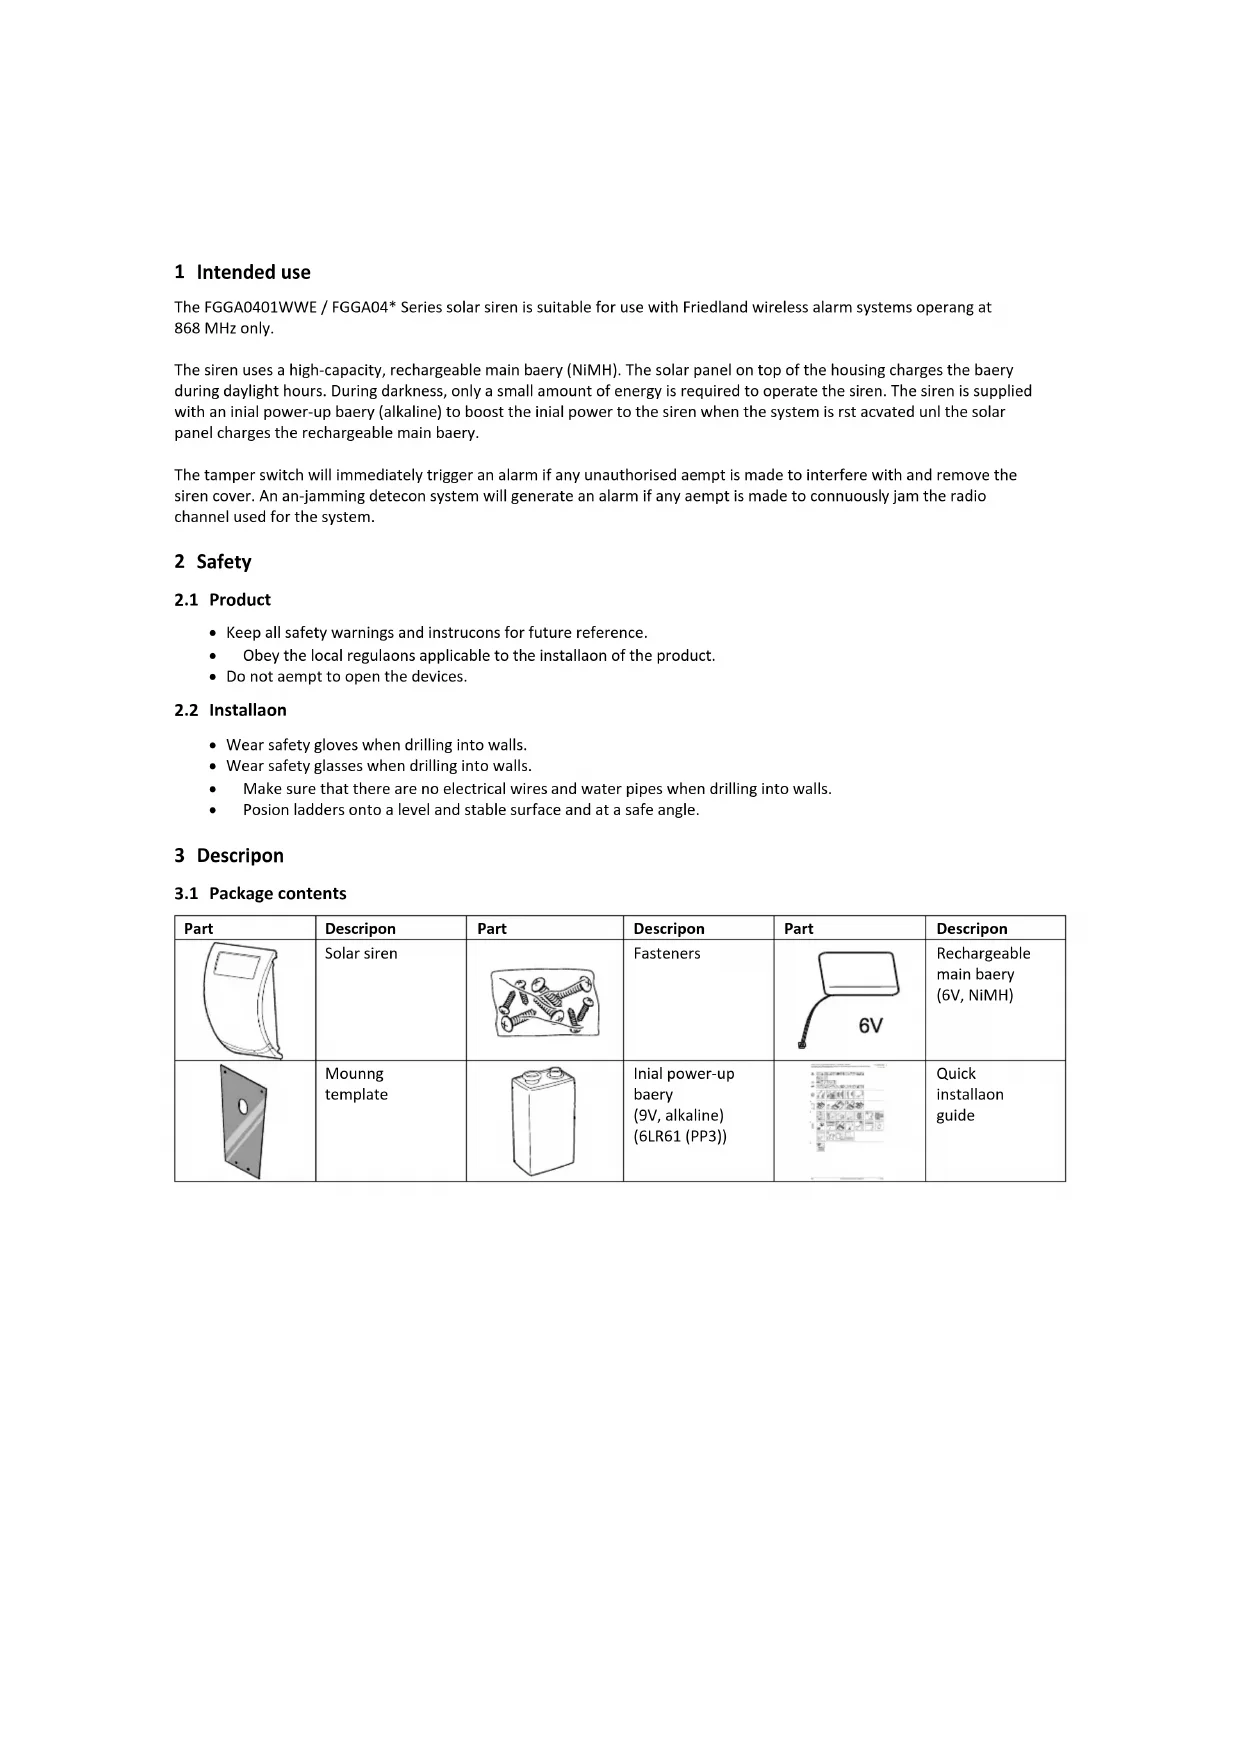
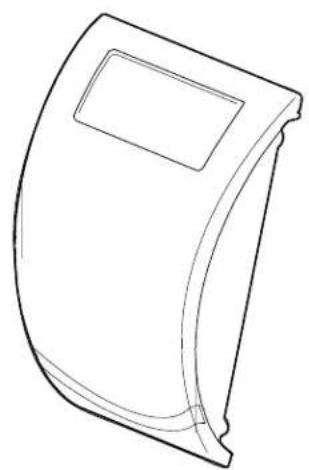
3.1 Package contents
| Part | Descripon | Part | Descripon | Part | Descripon |
| Solar siren | Fasteners | Rechargeable main baery (6V, NiMH) | |||
| Mounng template | Initial power-up baery (9V, alkaline) (6LR61 (PP3)) | Quick installaon guide |
3.2 Required tools
| Tool | Descripon | Tool | Descripon |
| Ear defenders | Bradawl | ||
| Safety gloves | Phillips screwdriver (#0/#1/#2) | ||
| Electric drill | Spirit level | ||
| Masonry drill bit (5 mm/6 mm) | Pencil |
4 Overview
| Solar siren 1. Siren 2. Tamper switch 3. Learn buoy 4. Learn indicator 5. DIP switches 6. Initial power-up baery (9V, alkaline) 7. Rechargeable main baery (6V, NiMH) 8. Power adaptor connecn (12V) 9. Baery cover 10. Mounng plate 11. Mounng holes | |
| ON 1 2 3 4 5 | DIP switch 1. Alarm me 2. An-jamming detecon 3. Alarm sound 4. Beep sound 5. Siren / Control panel |
5 Installaon
5.1 Conguring the siren
| 1. Remove the screws. 2. Remove the baery cover. | ||
| 3. Set switch 5 to the required posion. | ||
| Without control panel (single zone) | ON (siren) | |
| With separate control panel | OFF (control panel) | |
| 4. Set switch 1 to limit the maximum period for which the external siren will sound. | ||
| Without control panel (single zone) | ON (3 min) / OFF (1 min) | |
| With separate control panel | ON (10 min) / OFF (3 min) | |
| 5. Set switch 2 to enable or disable the an-jamming defecon when using the siren without control panel. | ||
| ON | enabled | |
| OFF | disabled | |
| 6. Set switch 3 to enable or disable the siren during an alarm. | ||
| ON | enabled | |
| OFF | disabled | |
| 7. Set switch 4 to enable or disable the beeps when the siren receives signals from the remote control or the remote keypad. | ||
| ON | enabled | |
| OFF | disabled | |
5.2 Powering up the siren

Note: If you install the siren for the rst me, it will automatcally power up in service mode. You cannot switch the siren out of service mode and into operang mode unl at least one remote control or remote keypad is linked to it.
| 1. Connect the initial power-up baery to the conneccon terminal. 2. Connect the rechargeable main baery to the conneccon terminal. | |
| 3. Press the tamper switch. The indicators in the front lens ash several mes and then connue to ash alternately every 5 seconds to indicate that the siren is operational. | |
| 4. Remove the protecve lm from the solar panel. Cauon: • Make sure that the solar panel receives sucient light to maintain the baery charge. | |
| 5. a) If switch 5 is set to ON (siren), the siren will operate without control panel (single zone). b) If switch 5 is set to OFF (control panel), the siren will operate with control panel. For linking the siren to the control panel, refer to the Installaon and Operaon Manual for the alarm system and to the Quick Installaon Guide for the siren. |
5.3 Adding a new remote control or remote keypad to the siren
If you set up the siren without separate control panel (single zone) for the rst me, you must link the siren to a remote keypad or a remote control before adding other devices. The ID code of the remote control or the remote keypad must be learned by the siren. The siren can learn up to 6 remote controls or remote keypads.
During setup, the siren will power up in service mode, ready to learn a new remote control or remote keypad. If the siren is in operang mode, refer to the secon "Service mode / Operang mode" to switch to service mode.
| Remote control | Remote keypad | |
| 1 | Press and hold the learn buoyon on the siren for 5 seconds to enter learn mode. The siren emits one short beep. The indicators in the front lens and the learn indicator ash slowly. | |
| 2 | Program the ID code: | |
| Press the button. | Enter the 4-digit ID code. Press the button. | |
| The siren emits two short beeps. The indicators in the front lens and the learn indicator ash quickly. | ||
| Note: | If the remote control or the remote keypad has already been linked or if the maximum number of 6 remote controls or remote keypads are linked, the siren will emit one short beep and exit learn mode. The indicators in the front lens and the learn indicator will go o. | |
| 3 | Conrm the ID code: | |
| Press the button within 15 seconds. | Enter the 4-digit ID code and press the button within 15 seconds. | |
| The siren emits three short beeps. The indicators in the front lens and the learn indicator come on for 3 seconds and go o. The siren returns to service mode. | ||
| Note: | If the conrmaon signal is not received within 15 seconds, the siren will emit one short beep and exit learn mode. The indicators in the front lens and the learn indicator will go o. | |

5.4 Mounng the siren to the wall
| * =Metal =Metall =Metaal =Metral =Metallo =Metal | ||||
| 1. Hold the mounng template in posion and mark the posions of the mounng holes. If necessary, use a spirit level. 2. Drill mounng holes (6 mm) into the wall according to the marked posions. 3. Insert a supplied wall plug into each mounng hole. | ||||
| 4. Install the screws (30 mm) into the top mounng holes, leaving approximately 9 mm of the screw protruding. | ||||
| 5. Install the mounng plate. Make sure that the holes in the mounng plate align with the boom mounng holes. 6. Install the screws (25 mm). | ||||
| 7. Mount the siren to the wall. | ||||
| CAUTION: Make sure that the tamper switch is closed when you mount the siren to the wall. If the tamper switch does not close, the siren will not operate correctly. If necessary, remove the siren again and insert a spacer between the tamper switch plunger and the wall to make sure that the switch closes when you mount the siren to the wall. | ||||
| CAUTION: Before tesng or operang the siren, leave it in posion for at least 24 hours in order to fully charge the baery. | ||||
5.5 Adding a new security detector to the siren
In order to communicate with the siren, the ID code of the security detector must be learned by the siren. The siren can learn up to 12 security detectors (door/ window contact detectors or PIR movement detectors).
During setup, the siren will automatically power up in service mode, ready to learn a new security detector. If the siren is in operang mode, refer to the secon "Service mode / Operang mode" to switch to service mode.
| Remote control | Remote keypad | |
| 1 | Press and hold the button for 5 seconds. | Enter the 4-digit ID code. Press and hold the button for 5 seconds. |
| The siren emits one short beep. The indicators in the front lens and the learn indicator ash slowly. The siren remains in learn mode for 30 seconds. | ||
| 2 | Program the ID code: | |
| Press the tamper switch on the security detector. | ||
| The siren emits two short beeps. The indicators in the front lens and the learn indicator ash quickly. | ||
| Note: | If the conrmaon signal is not received within 30 seconds, the siren will exit learn mode. The siren will remain in service mode. | |
| Note: | If the security detector has already been linked or if the maximum number of 12 security detectors are linked, the siren will emit one short beep and exit learn mode. The indicators in the front lens and the learn indicator will go o. | |
| 3 | Conrm the ID code: | |
| Press the tamper switch on the security detector again within 15 seconds to conrm the ID code. | ||
| The siren emits three short beeps. The indicators in the front lens and the learn indicator come on for 3 seconds and go o. The siren returns to service mode. | ||
| Note: | If the conrmaon signal is not received within 15 seconds, the siren will emit one short beep and exit learn mode. The indicators in the front lens and the learn indicator will go o. | |
5.6 Deleng all devices from the siren
- Switch the siren into service mode using the remote control or the remote keypad.
- Remove the siren from the wall.
- Press and hold the learn buon for 10 seconds unl the siren emits two long beeps and the learn indicator ashes 5 mes. The ID codes of all linked devices are erased from memory. The siren remains in service mode.
5.7 Service mode / Operang mode
If you install the siren for the rst me, it will automatically power up in service mode. Before tesng or operang the siren, it must be switched into operang mode.
If you use the siren with a control panel, refer to the Installaon and OperaoN Manual for the alarm system.
If you use the siren without a control panel, use the remote control or the remote keypad:
| Remote control | Remote keypad | |
| 1 | Press and hold the buon for 5 seconds. | Enter the 4-digit ID code. Press and hold the buon for 5 seconds. |
| To switch from operang mode into service mode: | ||
| If you press the buon (remote control) or the buon (remote keypad), the device will transmit the disarm signal and the siren will emit two normal beeps. The system is disarmed. If you press and hold the buon (remote control) or the buon (remote keypad) for 5 seconds, the siren will emit two short beeps followed by one long beep. The indicators in the front lens and the learn indicator will ash together with the beeps. The system will return to service mode. | ||
| Switching from service mode into operang mode: | ||
| If you press the buon (remote control) or the buon (remote keypad), the device will transmit the disarm signal. The siren will not respond to the disarm signal, as it is sill in service mode. If you press and hold press the buon (remote control) or the buon (remote keypad) for 5 seconds, the siren will emit one long beep followed by two short beeps. The indicators in the front lens and the learn indicator will ash together with the beeps. The siren will return to operang mode in a disarmed condition. | ||
6 Operaon
This secon only describes the operaon of the siren when operang without control panel (single zone).
6.1 Arming the system
When leaving the premises, the system must be armed. Make sure that the siren is in operang mode. Before arming the system, make sure that all doors and windows are closed and that the available PIR movement detectors are not obstructed. Make sure that animals are restricted to areas not protected by PIR movement detectors.
6.1.1 Instant-arm mode
The instant-arm mode will immediately arm the system. If the system is armed, acvang any security detector will immediately trigger an alarm. When entering the premises, disarm the system before opening any door or window protected by a door/window contact detector or entering an area protected by a PIR movement detector. In the instant-arm mode, arm and disarm the system from outside the premises using the remote control or the remote keypad.
| Remote control | Remote keypad | |
| 1 | Press the button. | Enter the 4-digit ID code. Press the button. |
| The siren emits one beep. The indicators in the front lens and the learn indicator ash once. | ||
6.1.2 Delay-arm mode
The delay-arm mode will arm the system with a 15-second entry/exit delay. The siren will emit one beep and another beep aer the 15-second delay has expired to allow me to leave the premises before the system is fully armed. When entering the premises by opening any door or window protected by a door-window contact detector or entering an area protected by a PIR movement detector, the system will be triggered and the siren will emit one long beep. However, the alarm will not sound until the 15-second delay has expired. Disarm the system using the remote control or the remote keypad during the 15-second delay. If an alarm occurs, the siren will sound connuously until the set alarm duraon me expires. The alarm will stop and the system will re-arm. The alarm lockout feature will prevent the system from re-arming aer repeang the process three mes.
| Remote control | Remote keypad | |
| 1 | Press the button. | Enter the 4-digit ID code. Press the button or the button. |
| Aer the 15-second delay has expired, the siren emits one beep. The indicators in the front lens and the learn indicator ash once to indicate the system is fully armed. | ||
6.2 Disarming the system
| Remote control | Remote keypad | |
| 1 | Press the luon. | Enter the 4-digit ID code. Press the luon. |
| The siren emits two beeps. | ||
| Note: | If the system is disarmed and the siren emits ten quick beeps, an alarm has been triggered while the system was armed. | |
6.3 Personal aack facility
The user can trigger an alarm at any me in the event of threat or danger by acvang the personal aack facility.
| Remote control | Remote keypad | |
| 1 | Press and hold the buon for 3 seconds. Note: On earlier remote control models, slide the personal aach switch. | Press and hold the buon or the buon for 3 seconds. |
| The alarm is triggered. The siren will sound. | ||
6.4 Device tamper
If the baery cover of any device (except remote controls) is removed or if the siren or the remote keypad is removed from the wall, an alarm will occur immediately even if the system is disarmed (unless the siren is in service mode). The alarm will sound until the set alarm me expires or the system is disarmed from the remote control or the remote keypad.
6.5 Low-baery condition
If you press the buon on the remote control or the remote keypad when the siren is at low-baery condion, the siren will emit three short beeps. If a low-baery indicator is avated, the device will connue to operate for up to 2 weeks. Replace the baery as soon as possible. Before replacing the baery, switch the system into service mode. Aer replacing the baery, switch the system back into operang mode.
7 Maintenance
The alarm system requires life maintenance. If you must power down the system completely, switch the system into service mode before removing the siren cover and disconnecting the rechargeable main baery and the initial power-up baery. Make sure that the solar panel is covered with a lightproof material to prevent the solar panel from powering the siren.
- Clean the solar panel using a so, damp cloth every 6 months, preferably in spring and autumn. Do not use abrasive, solvent-based or aerosol cleaners. Do not clean the inside of the siren or allow water to enter the siren to make sure that the solar panel keeps receiving all the available light.
- Do not leave the siren for long periods with the baeries connected, unless the siren is able to receive sucient light to maintain the baery charge. If the baery charge is not maintained, the rechargeable main baery will run unacceptably low and the siren must be recharged from a 12Vdc/1000mA power supply. Install a new initial power-up baery (9V alkaline, PP3) to make sure that the siren receives sucent power until the solar panel can recharge the main baery.
- Do not leave the rechargeable main baery in a discharged state for long periods. The rechargeable main baery has a typical life of 3-4 years and does not require any maintenance.
8 Disposal and recycling


The product is classified by the Waste Electrical or Electronic Equipment (WEEE) directive. The product and the baeries of the monitor should not be disposed of with other household or other commercial waste. At the end of its useful life, the packaging and the product should be disposed of via a suitable recycling centre. For informaon on available facilities, please contact your local authority or retailer from where the product was purchased.
9 EC declaraon of conformity
Novar ED&S hereby declares that the product is in compliance with the essenai requirements and other relevant provisions of the Radio and Telecommuncaons Terminal Equipment (R&TTE) direcve (1995/5/EC).
10 Guarantee
Novar ED&S undertakes to replace or repair at its discreet goods, should they become defective within 2 year solely as a result of faulty materials and workmanship.
Understandably, if the product has not been installed, operated or maintained in accordance with the instrucons, if the product has not been used appropriately or if any aempt has been made to recfy, dismantle or alter the product in any way, the guarantee will be invalidated.
The guarantee states Novar ED&S enre liability. The guarantee does not extend to cover consequential loss or damage or installaon costs arising from the defeve product. The guarantee does not in any way aect the statutory or other rights of a consumer and applies to products installed within the EU only. If an item develops a fault, the product must be returned to the point of sale with:
- Proof of purchase.
- Full descripion of the fault.
- All relevant baeries (disconnected).
11 Customer support
For further product informaon and full installaon manuals where applicable go to www.friedlandproducts.com
Service Helpline UK & Northern Ireland
0844 736 9149
Monday to Friday 9:00 am - 5:00 pm
The phone calls are charged at the naonal rate of the service providers.