MX4153 - Mixer TRISTAR - Free user manual and instructions
Find the device manual for free MX4153 TRISTAR in PDF.
| Brand | TriStar |
| Model | MX4153 |
| Product type | Stand mixer |
| Rated voltage | AC 220-240 V, 50 Hz |
| Power | Not specified, estimated 400-500 W |
| Number of speeds | 6 speeds + pulse (P) |
| Included accessories | Dough hook, whisk (balloon whisk), flat beater, lid |
| Maximum dough capacity | Dough: 2.0 kg; batter: 2.5 kg; cake mix: 2.7 kg |
| Dimensions (L x D x H) | Approx. 30 x 20 x 30 cm (estimated) |
| Weight | Approx. 4.5 kg (estimated) |
| Bowl material | Stainless steel or plastic (not specified) |
| Accessories material | Stainless steel and/or plastic |
| Main functions | Mix, beat, knead, whisk |
| Safety timer | Automatic shut-off after 10 minutes of continuous operation |
| Care and cleaning | Clean bowl and accessories by hand; do not immerse base |
| Dishwasher safe | No, parts are not dishwasher safe |
| Warranty | 24 months |
| Safety | Overheat protection; unplug before cleaning; do not immerse |
| Spare parts and repairability | Interchangeable accessories; contact after-sales service for repair |
| General information | For household use only; stable, flat surface |
Frequently Asked Questions - MX4153 TRISTAR
User questions about MX4153 TRISTAR
0 question about this device. Answer the ones you know or ask your own.
Ask a new question about this device
Download the instructions for your Mixer in PDF format for free! Find your manual MX4153 - TRISTAR and take your electronic device back in hand. On this page are published all the documents necessary for the use of your device. MX4153 by TRISTAR.
USER MANUAL MX4153 TRISTAR
natural_image
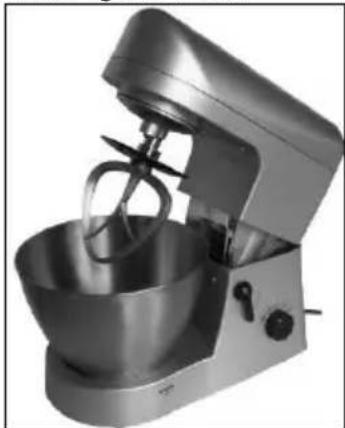
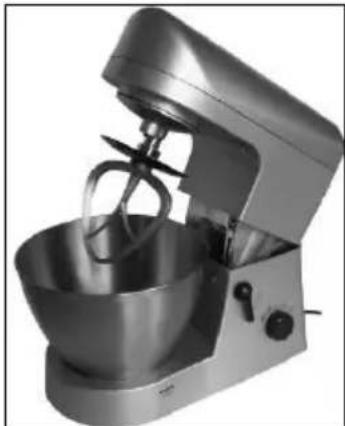
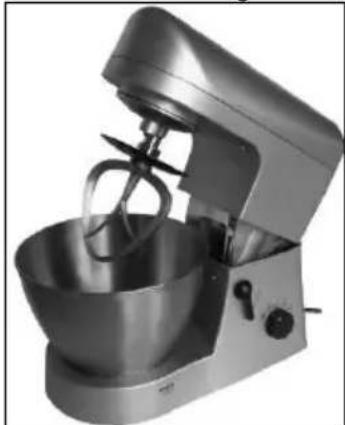
Two modern kitchen appliances: a stand mixer and a standard stand mixer, both with no visible text or symbols.Dough hook Mixing bowl Swiveling arm
natural_image
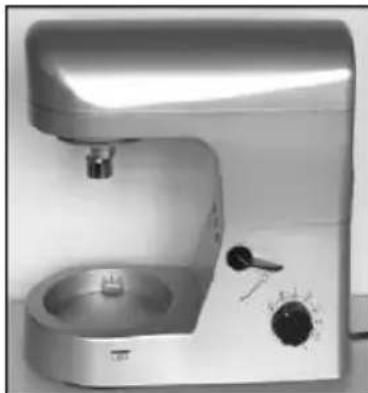
Exterior view of a modern stainless steel coffee maker with control knobs (no visible text or symbols)
natural_image
Close-up of a stainless steel kitchen brush head with a circular base and handle (no visible text or symbols)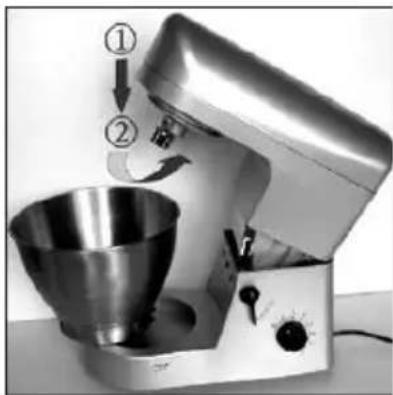
natural_image
Close-up of a kitchen mixer with a bowl and control knob (no visible text or symbols)natural_image
Close-up of a kitchen mixer with a hand operating the mixing bowl (no visible text or symbols)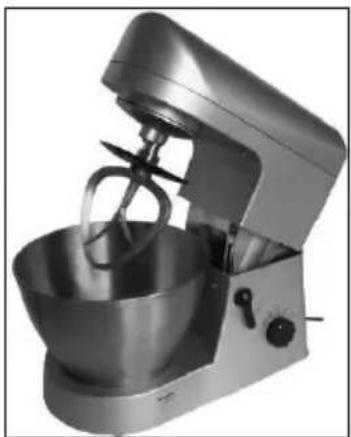
natural_image
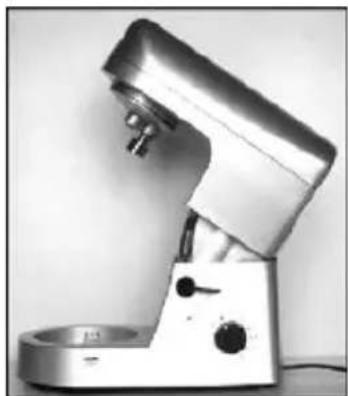
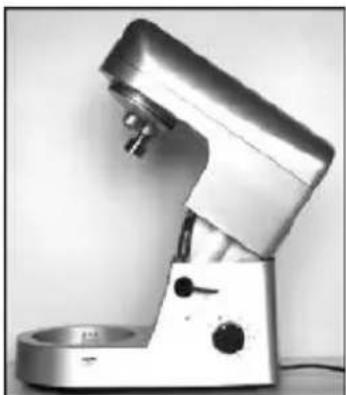
Modern kitchen mixer with handle and control knob (no visible text or symbols)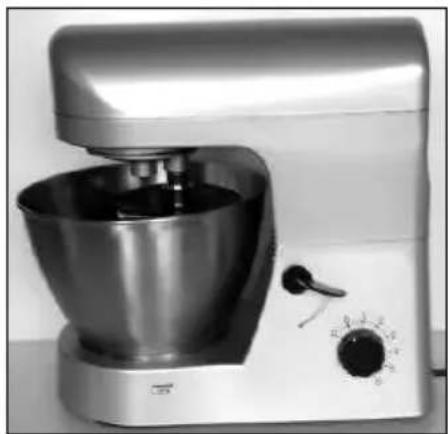
natural_image
Modern kitchen mixer with a bowl and control knob (no visible text or symbols)10 gram verse gist of 4 gram gedroogde gist
15 gram verse gist of 6 gram gedroogde gist
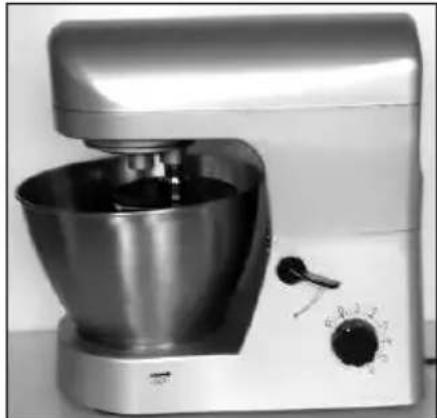
Operation and maintenance
UK
Remove all packaging of the device.
Check if the voltage of the appliance corresponds to the main voltage of your home.
Rated voltage : AC220-240V 50Hz.
Always place the unit on a flat stable surface and ensure at least 10 cm. free space around the unit. This device is not suitable for outdoor installation or use.
Before First use
Wash before using the device for the first time the mixing bowl (no. 3), the mixer (no. 8), the beater (no. 9) the dough hook (no. 2) and the splash cover (no. 11) in a warm soapy water.
Rinse and dry thoroughly. These parts are not dishwasher proof.
Caution! Never immerse the base (no. 10) in water or other liquid.
Run the mixer no longer than 10 minutes continuous, after that always cool the mixer for 15 minutes.
Using the mix-accessories
Mixer (no. 8) The mixer is ideal for beating eggs, cream and fittings. The balloon shape adds more air to the mixture which creates a light airy mass. Never use the mixer for heavy mixtures, for example a mixture of egg, fat and sugar, as this may damage the mixer.
Beater (no. 9) The beater is designed for better mixing result in a short time. The beater is especially suitable for mixing, blending and pureeing.
Dough hook (no. 2) All types of dough will be quickly mixed and kneaded with no effort.
The correct speed settings to mix-accessories
Mixer (no. 8) Start at position 1 and very gradually increase the maximum speed to position 6.
Beater (no. 9) Cake batter, start at position 1 and very gradually increase the maximum speed to position 6. Flour, fruit, etc. anywhere through creation; Only position 1. Butter by mixing flour, beginning at position 1, maximum increase to position 2.
Dough hook (no. 2) Start at position 1, maximum increase to position 2.
Important for making heavy dough. Never exceed the maximum amounts as shown below, because the device could be overloaded. If you hear the device has trouble with mixing, switch it off and take half the dough out. Mix the dough in 2 times. Firstly place the liquid ingredients into the bowl, it is easier to mix.
Maximum quantities
Crumble dough and yeast dough firmly: 2.0 kg.
Soft yeast dough: 2,5 kg.
Cake mix: 2.7 kg.
Use
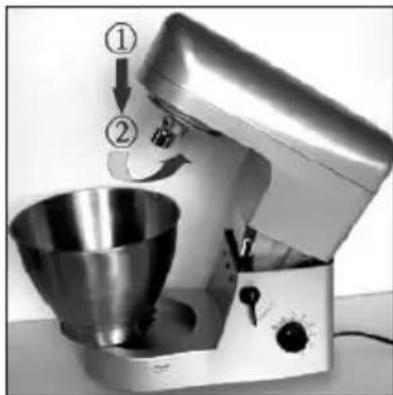
Turn the unlock button (no. 5) down and the swivel arm (no. 4) goes up.
See Figure 1 & 2. Place the mix bowl (no. 2) on the plateau and turn it counter clockwise down as shown in Figure 3.
natural_image
Exterior view of a modern stainless steel coffee maker with dual sinks and control knobs (no visible text or symbols)Figure 1 Figure 2

natural_image
Close-up of a stainless steel coffee maker with a handle and spout (no visible text or symbols)Figure 3

natural_image
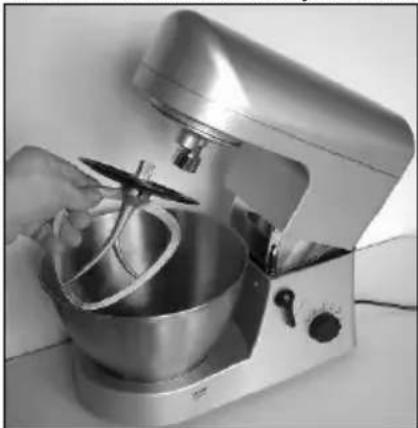
Close-up of a kitchen mixer with a bowl and stand, no visible text or symbolsPlace the splash cover (no. 11) on the dough hook, the mixer or beater, whichever attachment you want to use. Place the required piece in the connector (no. 1) and tighten the connection clockwise until securely fastened. See Figure 4 & 5.
natural_image
Close-up of a kitchen mixer with hand operating the bowl (no visible text or symbols)Figure 4 Figure 5 Figure 6
natural_image
Exterior view of a modern kitchen stand mixer (no text or symbols visible)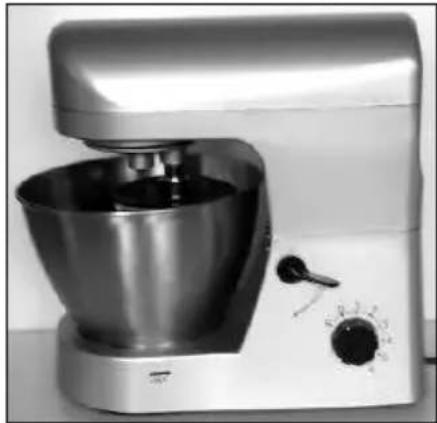
natural_image
Modern kitchen mixer with a bowl and control knob (no visible text or symbols)Turn the unlock button (no. 5) and press down with the other hand the swivel arm (no. 4) downwards. See Figure 6. The device is ready for use.
Make sure the speed selector (no. 7) to 0 before you plug in into the wall outlet.
Place the desired ingredients in the mixing bowl.
The speed of 1 to 6 can be selected. 1 is the lowest speed and 6 is the highest speed setting.
Using the speed selector (no. 7) for the desired speed.
Select a speed appropriate to the ingredients you use. Add ingredients gradually increasing.
For a short fast operation, select the Pulse mode (P) by the speed selector switch (no. 7) to the left, you should switch insisting in this position, using up about 1 minutes possible overheating of the engine. Select the speed selector to 0 when you finish mixing and remove the plug from the socket.
Cleaning and maintenance
Always remove the plug from the outlet before storage or cleaning the device
Clean the outside of the device with a clean soft, damp cloth. Never immerse the device in water or any other liquid.
Wash the mixing bowl (no. 3), the mixer (no. 8), the beater (no. 9), the dough hook (no. 2) and the splash cover (no. 11) in a warm soapy water. Rinse and dry thoroughly.
These parts are not dishwasher proof.
Recipes
600 grams of white bread dough, bread medium
Ingredients:
350 grams white flour
210 ml. water
5 grams of butter or oil
5 grams sugar
5 grams salt
10 grams fresh yeast or 4 grams of dried yeast
Place the dough hook (no. 2) in the device. Add the ingredients in the bowl, start at position 1, maximum increase to position 2.
900 grams of white bread dough, big bread
Ingredients:
500 grams white flour
300 ml. water
10 grams of butter or oil
10 grams sugar
10 grams salt
15 grams fresh yeast or 6 grams of dried yeast
Place the dough hook (no. 2) in the device. Add the ingredients in the bowl, start at position 1, maximum increase to position 2.
Cake batter for fine cake
Ingredients:
200 grams soft butter
200 grams white caster sugar
1 sachet vanilla sugar
4 eggs
200 gram white flour
Place the beater (No. 9) in the device. Add the ingredients in the bowl and start at position 1 and very gradually increase the maximum speed to position 6
IMPORTANT SAFEGUARDS

- Read all instructions before use.
- Do not touch hot surfaces. Use handles or knobs.
- To protect against electric shock, do not immerse cord, plug or appliance in water or any other liquid.
- Unplug from outlet when not in use and before cleaning. Allow the device to cool before putting on or taking off parts. Do not operate any appliance with a damaged cord or plug or after the appliance malfunctions, or has been damaged in any manner.
- The use of accessory attachments not recommended by the appliance manufacturer may cause injuries and invalidate any warranty you may have.
- Do not use outdoors, or on or near direct heat sources
- Do not let cord hang over edge of table or counter, or touch hot surfaces or come into contact with the hot parts or allow the product to be situated underneath or close to curtains, window coverings etc.
• This appliance is for household use only and only for the purpose it is made for.
- The appliance must be placed on a stable, level surface.
- This appliance is an attended appliance, and as such should never be left ON or whilst hot without adult supervision.
- This appliance is not intended for use by persons (including children) with reduced physical, sensory or mental capabilities, or lack of experience and knowledge, unless they have been given supervision or instruction concerning use of the appliance by a person responsible for their safety.
• Children should be supervised to ensure that they do not play with the appliance.
SAVE THESE INSTRUCTIONS FOR FUTURE REFERENCE
Guarantee
- The device supplied by our Company is covered by 24 month guarantee starting on the date of purchase (receipt).
- During the life of the guarantee any fault of the device or its accessories to material or manufacturing defects will be eliminated free of charge by repairing or, at our discretion, by replacing it. The guarantee services do not entail an extension of the life of the guarantee nor do they give rise to any right to a new guarantee!
- Proof of the guarantee is provided by the proof of purchase. Without proof of purchase no free replacement or repair will be carried out.
- If you wish to make a claim under the guarantee please return the entire machine in the original packaging to your dealer together with the receipt.
- Damage to accessories does not mean automatic free replacement of the whole machine. In such cases please contact our hotline. Broken glass or breakage of plastic parts are always subject to a charge.
- Defects to consumables or parts subject to wearing, as well as cleaning, maintenance or the replacement of said parts are not covered by the guarantee and hence are to be paid!
• The guarantee lapses in case of unauthorized tampering.
- After the expiry of the guarantee repairs can be carried by the competent dealer or repair service against the payment of the ensuing costs.
Guidelines for protection of the environment
natural_image
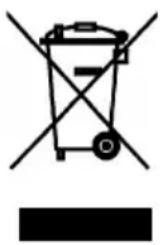
Symbol of a trash bin with crossed lines indicating no waste or discharge, and a solid black rectangle below (no text or labels)This appliance should not be put into the domestic garbage at the end of its useful life, but must be disposed of at a central point for recycling of electric and electronic domestic appliances. This symbol on appliance, instruction manual and packaging puts your attention to this important issue. The materials used in this appliance can be recycled. By recycling used domestic appliances you contribute an important push to the protection of our environment. Ask your local authorities for information regarding the point of recollection
Packaging
The packaging is 100% recyclable, return the packaging separated.
Product
This device is equipped with a mark according to European Directive 2002/96/EC on Waste Electrical and Electronic Equipment (WEEE). By ensuring that the product correctly as waste is processed, it helps you may have adverse consequences for the environment and human health.
EC declaration of conformity
This device is designed, manufactured and marketed in accordance with the safety objectives of the Low Voltage Directive "No 2006/95/EC, the protection requirements of the EMC Directive 2004/108/EC "Electromagnetic Compatibility" and the requirement of Directive 93/68/EEC.
natural_image
Exterior view of a modern stainless steel coffee maker with control knobs (no visible text or symbols)Figure 1 Figure 2

natural_image
Close-up of a stainless steel kitchen brush head with a small base and handle (no visible text or symbols)Figure 3
natural_image
Close-up of a kitchen mixer with a bowl and control panel (no visible text or symbols)
natural_image
Close-up of a kitchen mixer with a bowl and control panel (no visible text or symbols)natural_image
Close-up of a kitchen mixer with a hand operating the bowl (no visible text or symbols)Figure 4 Figure 5 Figure 6
natural_image
Modern kitchen mixer with handle and control panel (no visible text or symbols)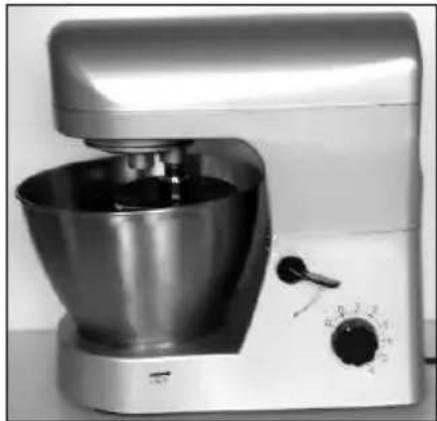
natural_image
Modern kitchen mixer with a bowl and control knob (no visible text or symbols)natural_image
Exterior view of a modern stainless steel coffee maker with control knobs (no visible text or symbols)natural_image
Close-up of a metallic kitchen brush head with a small base and handle (no visible text or symbols)Abbildung 3

natural_image
Close-up of a kitchen mixer with a bowl and control panel (no visible text or symbols)natural_image
Close-up of a kitchen mixer with a hand operating the bowl (no visible text or symbols)natural_image
Modern kitchen mixer with handle and control panel (no visible text or symbols)Abbildung 6

natural_image
Modern kitchen mixer with stainless steel bowl and control knob (no visible text or symbols)[Non-Text]
natural_image
Exterior view of a modern stainless steel coffee maker with control knobs (no visible text or symbols)Figura 1 Figura 2
natural_image
Close-up of a stainless steel kitchen brush head with control knob (no visible text or symbols)Figura 3

natural_image
Close-up of a kitchen mixer with a bowl and control panel (no visible text or symbols)natural_image
Close-up of a kitchen mixer with a hand operating the bowl (no visible text or symbols)Figura 4 Figura 5 Figura 6

natural_image
Modern kitchen mixer with handle and control panel (no visible text or symbols)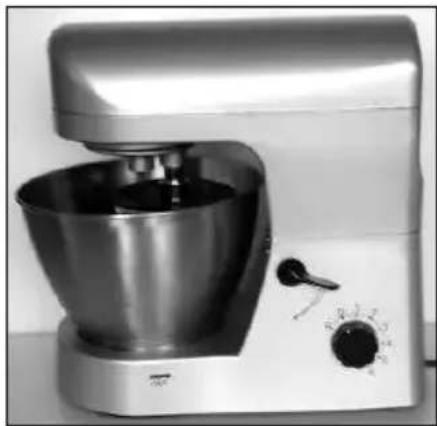
natural_image
Modern kitchen mixer with a bowl and control knob (no visible text or symbols)natural_image
Exterior view of a modern stainless steel coffee maker with control knobs (no visible text or symbols)Figura 1 Figura 2

natural_image
Close-up of a stainless steel coffee maker with a handle and spout (no visible text or symbols)Figura 3

natural_image
Close-up of a stainless steel kitchen mixer with a bowl and control knob (no visible text or symbols)natural_image
Close-up of a kitchen mixer with a hand operating the bowl (no visible text or symbols)Figura 4 Figura 5 Figura 6

natural_image
Modern kitchen mixer with handle and control panel (no visible text or symbols)
natural_image
Modern kitchen mixer with a metallic bowl and control knob (no visible text or symbols)natural_image
Exterior view of a modern stainless steel coffee maker with control knobs (no visible text or symbols)Figura 1 Figura 2

natural_image
Close-up of a stainless steel coffee maker with a handle and spout (no visible text or symbols)Figura 3

natural_image
Close-up of a stainless steel kitchen mixer with a bowl and control knob (no visible text or symbols)natural_image
Close-up of a kitchen mixer with a hand operating the bowl (no visible text or symbols)Figura 4 Figura 5 Figura 6
natural_image
Modern kitchen mixer with handle and control panel (no visible text or symbols)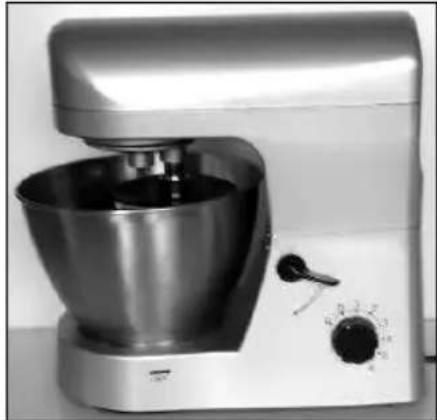
natural_image
Modern kitchen mixer with a metallic bowl and control knob (no visible text or symbols)natural_image
Exterior view of a modern stainless steel coffee maker with control knobs (no visible text or symbols)Bild 1
Bild 2
natural_image
Close-up of a stainless steel kitchen brush head with control knob (no visible text or symbols)Bild 3

natural_image
Close-up of a kitchen mixer with a bowl and stand, showing control knob and handle (no text or symbols visible)natural_image
Close-up of a kitchen mixer with a hand operating the bowl (no visible text or symbols)natural_image
Modern kitchen mixer with handle and control panel (no visible text or symbols)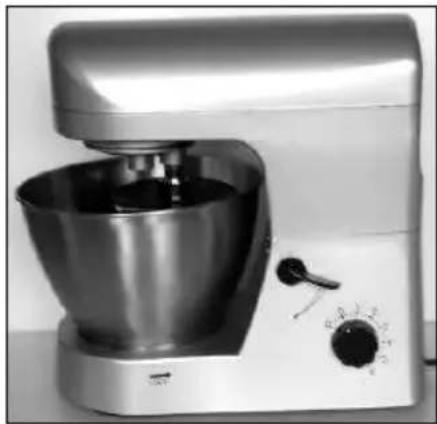
natural_image
Modern kitchen mixer with a bowl and control knob (no visible text or symbols)natural_image
Exterior view of a modern stainless steel coffee maker with dual sinks and control knobs (no visible text or symbols)natural_image
Black-and-white photo of a stainless steel kitchen brush head with control knob (no visible text or symbols)Rysunek 3

natural_image
Close-up of a stainless steel kitchen mixer with a bowl and control panel (no visible text or symbols)natural_image
Close-up of a kitchen mixer with a hand operating the bowl (no visible text or symbols)natural_image
Modern kitchen mixer with handle and control panel (no visible text or symbols)Rysunek 6