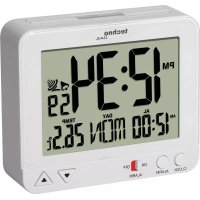
WT 182 - Alarm bell TECHNOLINE - Free user manual and instructions
Find the device manual for free WT 182 TECHNOLINE in PDF.
| Product type | Radio-controlled alarm clock with projection |
| Brand | TECHNOLINE |
| Model | WT 182 |
| Power supply | 2 AA batteries (not included) |
| Display | LCD with icons |
| Radio receiver | DCF 77.5 kHz |
| Main functions | Radio-controlled clock, alarm with snooze, time projection, indoor thermometer (°C/°F), date and day display (7 languages), backlight, 12/24h setting |
| Projection | Integrated |
| Snooze | 8 minutes |
| Temperature | Display in °C or °F (range not specified) |
| Day languages | German, English, Danish, Dutch, French, Italian, Spanish |
| Dimensions (estimated) | Approximately 10 x 10 x 5 cm |
| Weight (estimated) | Approximately 150 g |
| Material | Plastic |
| Maintenance and cleaning | Clean with a soft, dry cloth. Do not use abrasive products. |
| Safety | Use only indoors. Do not expose to moisture, heat or sunlight. Do not open the housing. |
| Spare parts and repairability | No replaceable parts available. In case of malfunction, contact customer service. |
| General information | Compliant with EU directives 2014/53/EU and ROHS 2011/65/EC. Declaration of conformity at www.technoline.de/doc/4029665001821 |
| Package contents | Alarm clock, user manual |
Frequently Asked Questions - WT 182 TECHNOLINE
User questions about WT 182 TECHNOLINE
0 question about this device. Answer the ones you know or ask your own.
Ask a new question about this device
Download the instructions for your Alarm bell in PDF format for free! Find your manual WT 182 - TECHNOLINE and take your electronic device back in hand. On this page are published all the documents necessary for the use of your device. WT 182 by TECHNOLINE.
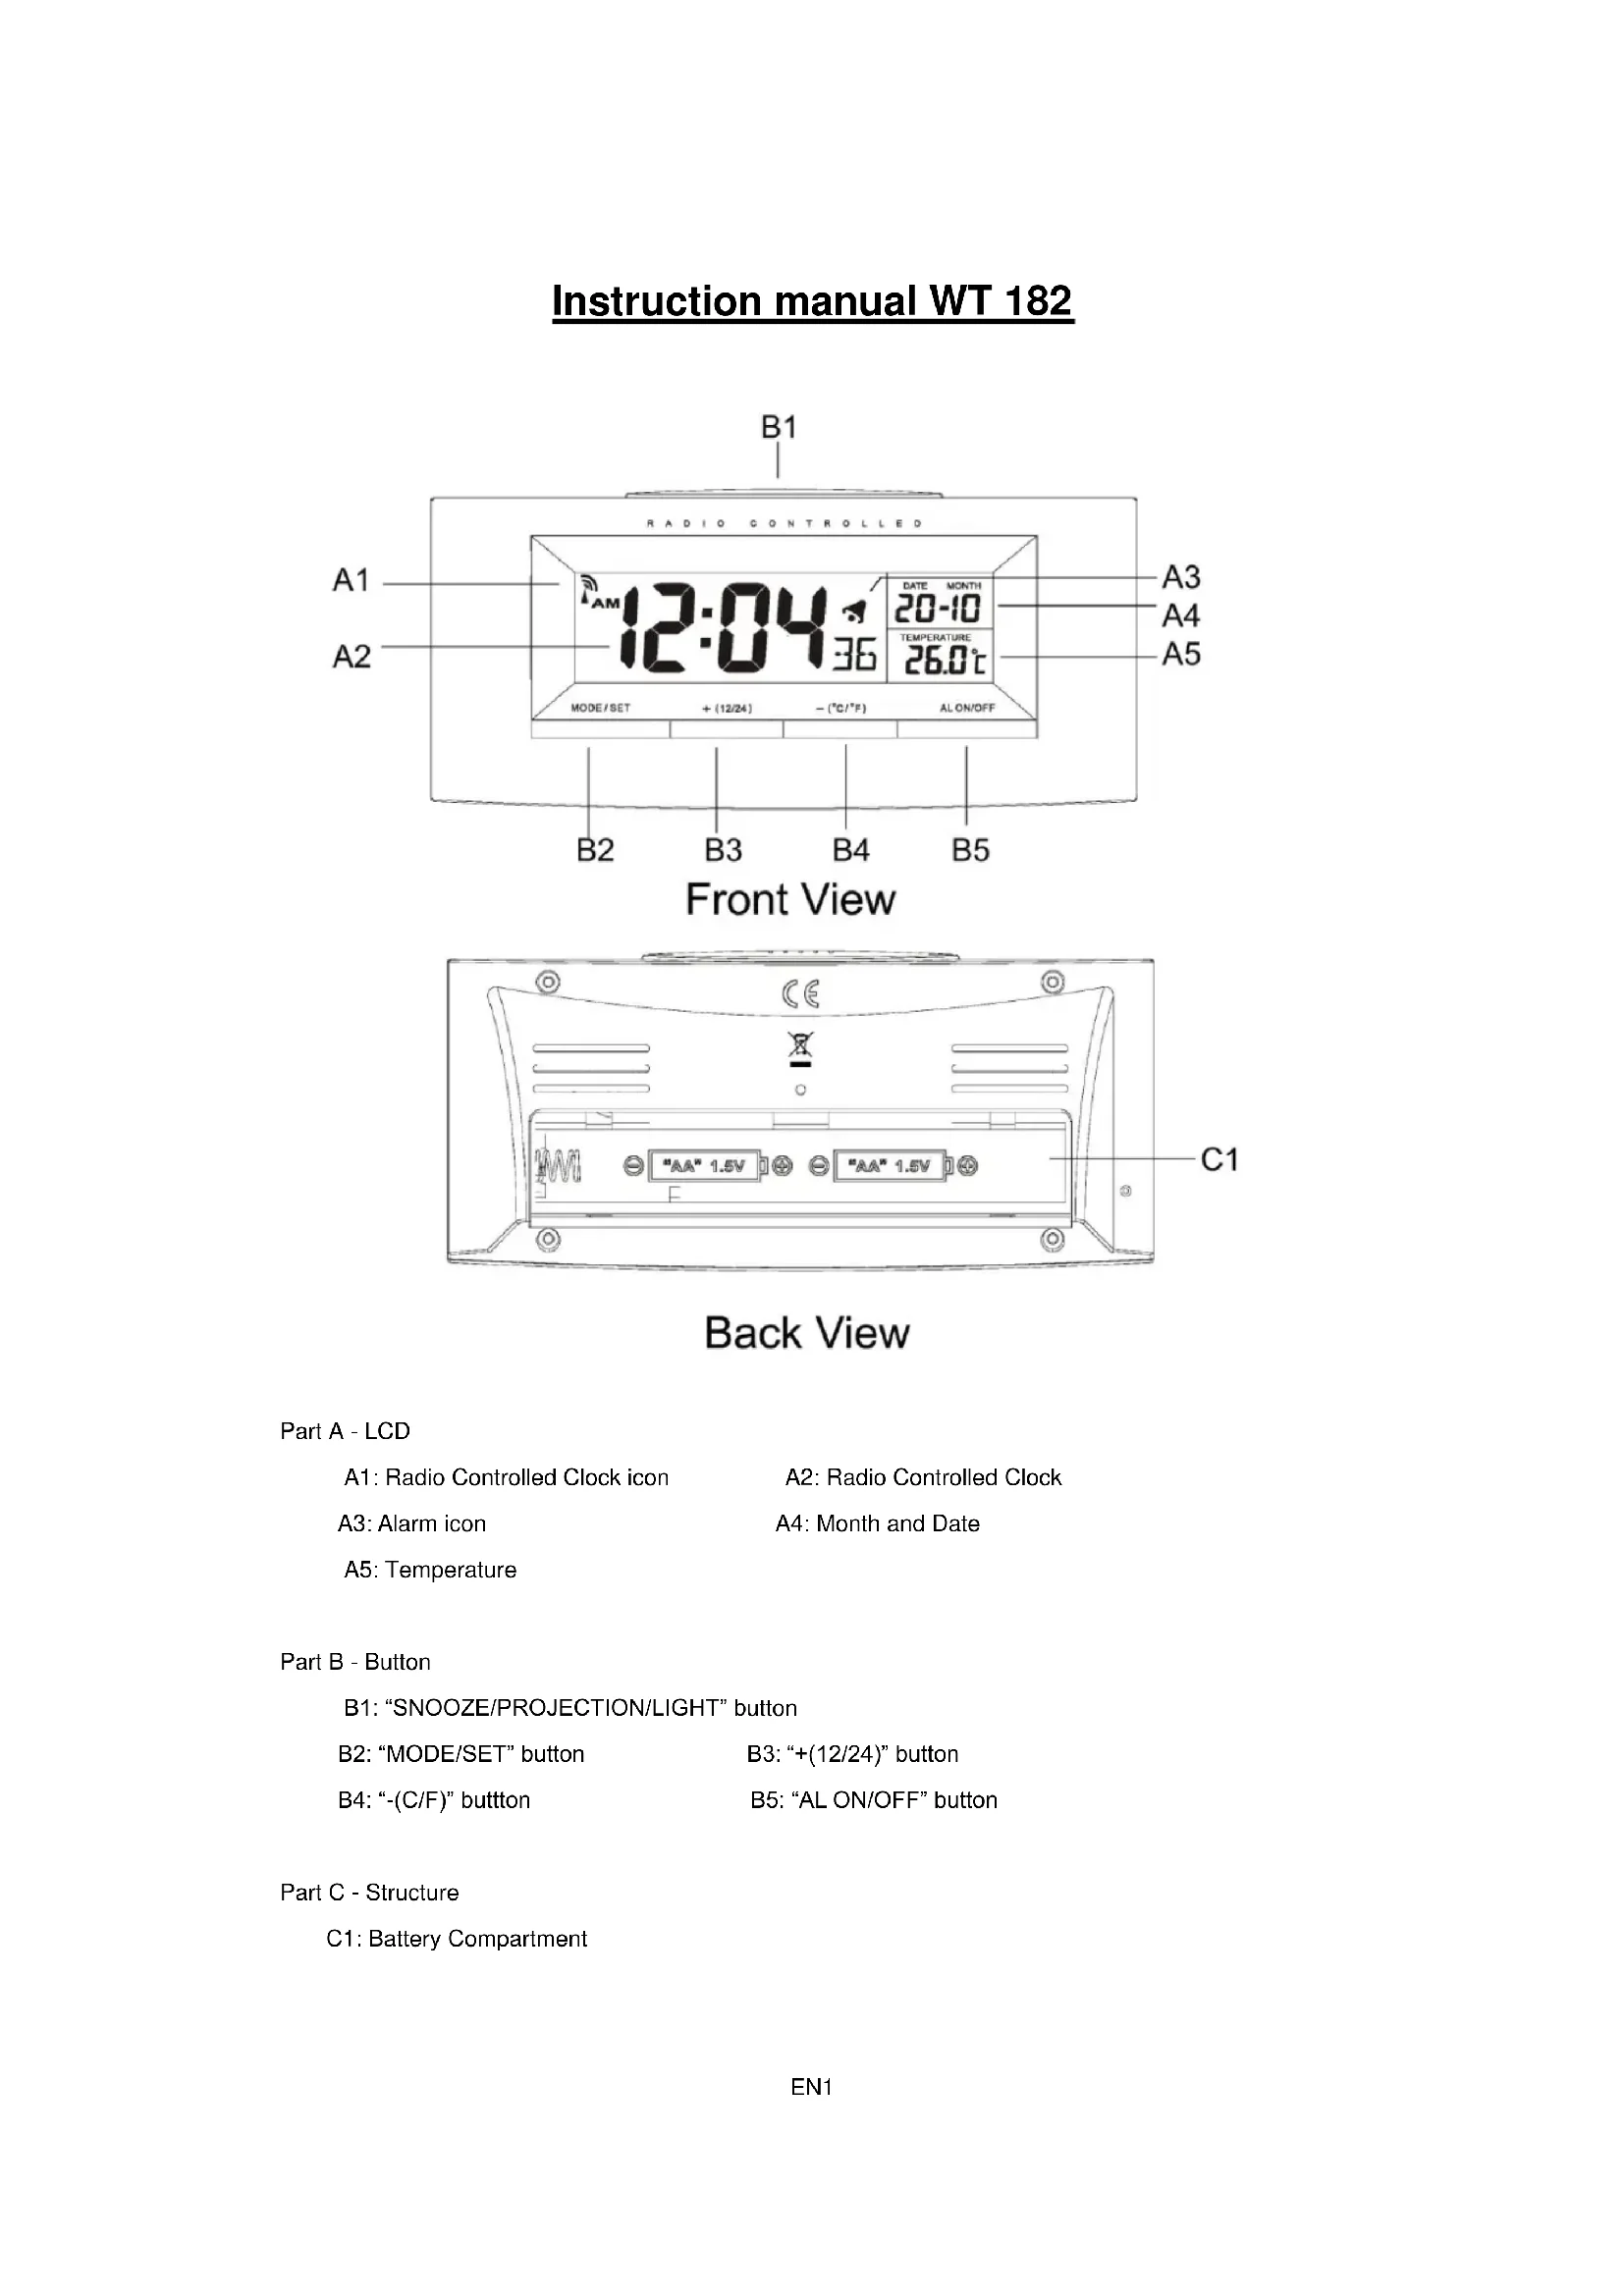
USER MANUAL WT 182 TECHNOLINE
B5: "AL ON/OFF" Taste
A1: Radio Controlled Clock icon
A2: Radio Controlled Clock
A3: Alarm icon
A4: Month and Date
A5: Temperature
Part B-Button
B1: "SNOOZE/PROJECTION/LIGHT" button
B2:"MODE/SET" button
B3:“+(12/24)”button
B4:“-(C/F)”button
B5: "AL ON/OFF" button
Part C - Structure
C1: Battery Compartment
Initial Operation
- Open the battery cover and insert the batteries with the correct polarity.
- Then remove the batteries for about 10 seconds and insert the batteries again.
This operation is necessary only at the very first start-up, to enable the search for radio controlled time
Radio Controlled Time:
The clock automatically starts scanning the DCF time signal ( flashes on the LCD)
- The clock automatically scans the time signal at 3:00a.m. everyday to maintain accurate timing. For failed reception, scanning stops ( on LCD disappear) and repeats again at 4:00a.m, 5:00a.m, and 6:00a.m.
The clock manually scans the time signal by holding buttons ^ 十 + ^ 一 ( B 3 ) & -^*(B4) for 3 seconds.
- Stop scanning by holding "+"B3) & "-"B4)buttons for 3 seconds again.
- For failed reception, scanning stops ( on LCD disappears) and repeats again in the next 4 hours (4 times) until received.
- flashes indicate now is receiving the DCF signal
- turns on indicate signal received successfully
- "DST" show on the LCD if it is in Daylight Saving Time Mode.
Display Modes
- Press "MODE" button (B2) to change the display content: Radio Controlled Time Time + week Alarm Time
Manual Time Setting:
- When the time is displayed on LCD, hold "MODE" button for 2 seconds to enter time setting mode.
- When the hour digit flashes press "+" (B3) or -" (B4) to adjust the hour
- Press "MODE" button (B2) to confirm the setting
- Repeat this procedure for the other settings
The settings have the following order: hours, minutes, time zone (for UK time set -1), language for weekday, year, month, day
The TIME SETTING mode will automatically exit in 8 sec without any adjustment.
7 languages can be selected in Day-of-week, they are: German, English, Denmark, Dutch, French,
Italian and Spanish. The languages and their selected abbreviations for each day of the week are shown in the following table.
| Language | Sunday | Monday | Tuesday | Wednesday | Thursday | Friday | Saturday |
| German, GE | SO | MO | DI | MI | DO | FR | SA |
| English, EN | SU | MO | TU | WE | TH | FR | SA |
| French, FR | DI | LU | MA | ME | JE | VE | SA |
| Italian, IT | DO | LU | MA | ME | GI | VE | SA |
| Spanish, ES | DO | LU | MA | MI | JU | VI | SA |
| Dutch, NE | ZO | MA | DI | WO | DO | VR | ZA |
| Denmark, DA | SO | MA | TI | ON | TO | FR | LO |
- When the local time is different to Central European Time (CET) by one hour or several hours, the time zone corresponding to the deviation has to be set. For UK (CET-1), this means, for example, Timezone -1.
Alarm Setting:
- Press the "MODE" button (B2) so often until "AL" is displayed.
- Hold down the "MODE" button (B2) button for 2 seconds, the hour digits flash. Press "+" (B3) or "-" (B4) to set the hour. Press MODE to confirm the setting.
- Then set the minutes and confirm again with the MODE button.
Activate or Deactivate Alarm Function
- Press the "SNOOZE / LIGHT" button (B1) when the alarm sounds. The alarm will sound again after 8 minutes. While SNOOZE is active, the alarm symbol flashes.
-
Press another button to stop the alarm without SNOOZE.
-
Press "AL ON/OFF" button (B5) to switch the alarm on. " " appears on the LCD.
- Press "AL ON/OFF" button (B5) to switch off the alarm. ("A" disappear)
Thermometer:
Press ^ C / ^ button (B4) to select thermometer in Celsius/Fahrenheit mode
12/24 Hr Mode
- Press "12/24" button (B3) to select 12 or 24 hours mode.
Back Light:
Press "SNOOZE/ LIGHT" button (B1), back light states for 5 seconds
Hereby, Technotrade declares that this product WT 182 is in compliance with the essential requirements and other relevant provisions of Directive 2014/53/EU and ROHS 2011/65/EC. The original EU declaration of conformity may be found at: www.technoline.de/doc/4029665001821
Environmental reception effects
The clock obtains the accurate time with wireless technology. Same as all wireless devices, the reception is maybe affected by the following circumstances:
- long transmitting distance
- nearby mountains and valleys
- near freeway, railway, airports, high voltage cable etc.
- near construction site
among tall buildings - inside concrete buildings
- near electrical appliances (computers, TV's, etc) and metallic structures
- inside moving vehicles
Place the clock at a location with optimal signal, i.e. close to a window and away from metal surfaces or electrical appliances.
Precautions
- This main unit is intended to be used only indoors.
- Do not subject the unit to excessive force or shock.
- Do not expose the unit to extreme temperatures, direct sunlight, dust or humidity.
- Do not immerse in water.
- Avoid contact with any corrosive materials.
- Do not dispose this unit in a fire as it may explode.
- Do not open the inner back case or tamper with any components of this unit.
Batteries safety warnings
- Use only alkaline batteries, not rechargeable batteries.
Install batteries correctly by matching the polarities (+ / - ) - Always replace a complete set of batteries.
- Never mix used and new batteries.
- Remove exhausted batteries immediately.
- Remove batteries when not in use.
- Do not recharge and do not dispose of batteries in fire as the batteries may explode.
- Ensure batteries are stored away from metal objects as contact may cause a short circuit.
- Avoid exposing batteries to extreme temperature or humidity or direct sunlight.
- Keep all batteries out of reach from children. They are a choking hazard.
Use the product only for its intended purpose!
Consideration of duty according to the battery law

Old batteries do not belong to domestic waste because they could cause damages of health and environment. You can return used batteries free of charge to your dealer and collection points. As end-user you are committed by law to bring back needed batteries to distributors and other
collecting points!
Consideration of duty according to the law of electrical devices
This symbol means that you must dispose of electrical devices separated from the General household waste when it reaches the end of its useful life. Take your unit to your local waste collection point or recycling centre. This applies to all countries of the European Union, and to other European countries with a separate waste collection system.