YDS11 - Speakers YAMAHA - Free user manual and instructions
Find the device manual for free YDS11 YAMAHA in PDF.
| Brand | YAMAHA |
| Model | YDS11 |
| Product type | Universal iPod dock station |
| Dimensions (W x H x D) | 80 x 33 x 70 mm |
| Weight | 135 g |
| Power | Via dock cable (from compatible device) |
| iPod compatibility | iPod (Click Wheel, classic), iPod nano, iPod mini, iPod touch |
| Connectivity | iPod connector dock terminal, dock cable terminal |
| Main functions | Connection of an iPod to a compatible audio system; playback of music, videos, and photos; recharging the iPod (if supported by the host device) |
| Box contents | YDS-11 (main unit), dock cable (2 m), iPod dock adapters (A, B, C) |
| Care and cleaning | Use a clean, dry cloth. Do not use chemical solvents. |
| Safety | Do not expose to rain or moisture. Do not modify or repair yourself. Contact a qualified Yamaha service technician. |
| Certification | Compliant with FCC regulations (Class B). "Made for iPod." |
| General information | Dock designed to work with Yamaha compatible devices. Requires an iPod and a host device (not included). |
Frequently Asked Questions - YDS11 YAMAHA
User questions about YDS11 YAMAHA
0 question about this device. Answer the ones you know or ask your own.
Ask a new question about this device
Download the instructions for your Speakers in PDF format for free! Find your manual YDS11 - YAMAHA and take your electronic device back in hand. On this page are published all the documents necessary for the use of your device. YDS11 by YAMAHA.
USER MANUAL YDS11 YAMAHA
FCC INFORMATION (for US customers only)
1. IMPORTANT NOTICE : DO NOT MODIFY THIS UNIT!
This product, when installed as indicated in the instructions contained in this manual, meets FCC requirements. Modifications not expressly approved by Yamaha may void your authority, granted by the FCC, to use the product.
-
IMPORTANT : When connecting this product to accessories and/or another product use only high quality shielded cables. Cable/s supplied with this product MUST be used. Follow all installation instructions. Failure to follow instructions could void your FCC authorization to use this product in the USA.
-
NOTE : This product has been tested and found to comply with the requirements listed in FCC Regulations, Part 15 for Class “B” digital devices. Compliance with these requirements provides a reasonable level of assurance that your use of this product in a residential environment will not result in harmful interference with other electronic devices.
This equipment generates/uses radio frequencies and, if not installed and used according to the instructions found in the users manual, may cause interference harmful to the operation of other electronic devices.
Compliance with FCC regulations does not guarantee that interference will not occur in all installations. If this product is found to be the source of interference, which can be determined by turning the unit “OFF” and “ON”, please try to eliminate the problem by using one of the following measures:
Relocate either this product or the device that is being affected by the interference.
Utilize power outlets that are on different branch (circuit breaker or fuse) circuits or install AC line filter/s.
In the case of radio or TV interference, relocate/reorient the antenna. If the antenna lead-in is 300 ohm ribbon lead, change the lead-in to coaxial type cable.
If these corrective measures do not produce satisfactory results, please contact the local retailer authorized to distribute this type of product. If you can not locate the appropriate retailer, please contact Yamaha Electronics Corp., U.S.A. 6660 Orangethorpe Ave, Buena Park, CA 90620.
The above statements apply ONLY to those products distributed by Yamaha Corporation of America or its subsidiaries.
COMPLIANCE INFORMATION STATEMENT
This device complies with Part 15 of the FCC Rules. Operation is subject to the following conditions:
1) This device may not cause harmful interface, and
2) This device must accept any interference received including interference that may cause undesired operation of this device.
See user manual instructions if interference to radio reception is suspected.
Read this before using this unit.
- To assure the finest performance, please read this manual carefully. Keep it in a safe place for future reference.
- Install this unit in a cool, dry, clean place away from windows, heat sources, and sources of excessive vibration, dust, moisture and cold. Avoid sources of humming (transformers, motors, etc.). To prevent fire or electrical shock, do not expose this unit to rain or water.
- To prevent the enclosure from warping or discoloring, do not place this unit where it will be exposed to direct sunlight or excessive humidity.
- Do not place this unit where foreign objects such as water drips may fall. It may cause a fire, or damage to this unit.
- Do not attempt to clean this unit with chemical solvents as this may damage the finish. Use a clean, dry cloth.
- Do not attempt to modify or fix this unit. Contact qualified Yamaha service personnel when any service is needed. The cabinet should never be opened for any reasons.
Secure placement or installation is the owner's responsibility.
Yamaha shall not be liable for any accident caused by improper placement or installation of this unit.
“Made for iPod” means that an electronic accessory has been designed to connect specifically to iPod and has been certified by the developer to meet Apple performance standards.
Apple is not responsible for the operation of this device or its compliance with safety and regulatory standards.
■ Introduction
This product enables you to connect an iPod with Yamaha dock-compatible device and play the files recorded on the device. The method of operating the iPod using this product as well as the usable functions depends on the dock-compatible device or iPod you are using. For details, refer to the operating instructions of the dock-compatible device or iPod. (Dock-compatible device: Device to which the YDS-11 is connected.)
The types of iPods compatible with this product are listed below. (As of March 2008)
- i Pod (Click Wheel, including iPod classic)
- iPod nano
- iPod mini
- iPod touch
iPod™
“iPod” is a trademark of Apple Inc., registered in the U.S. and other countries.
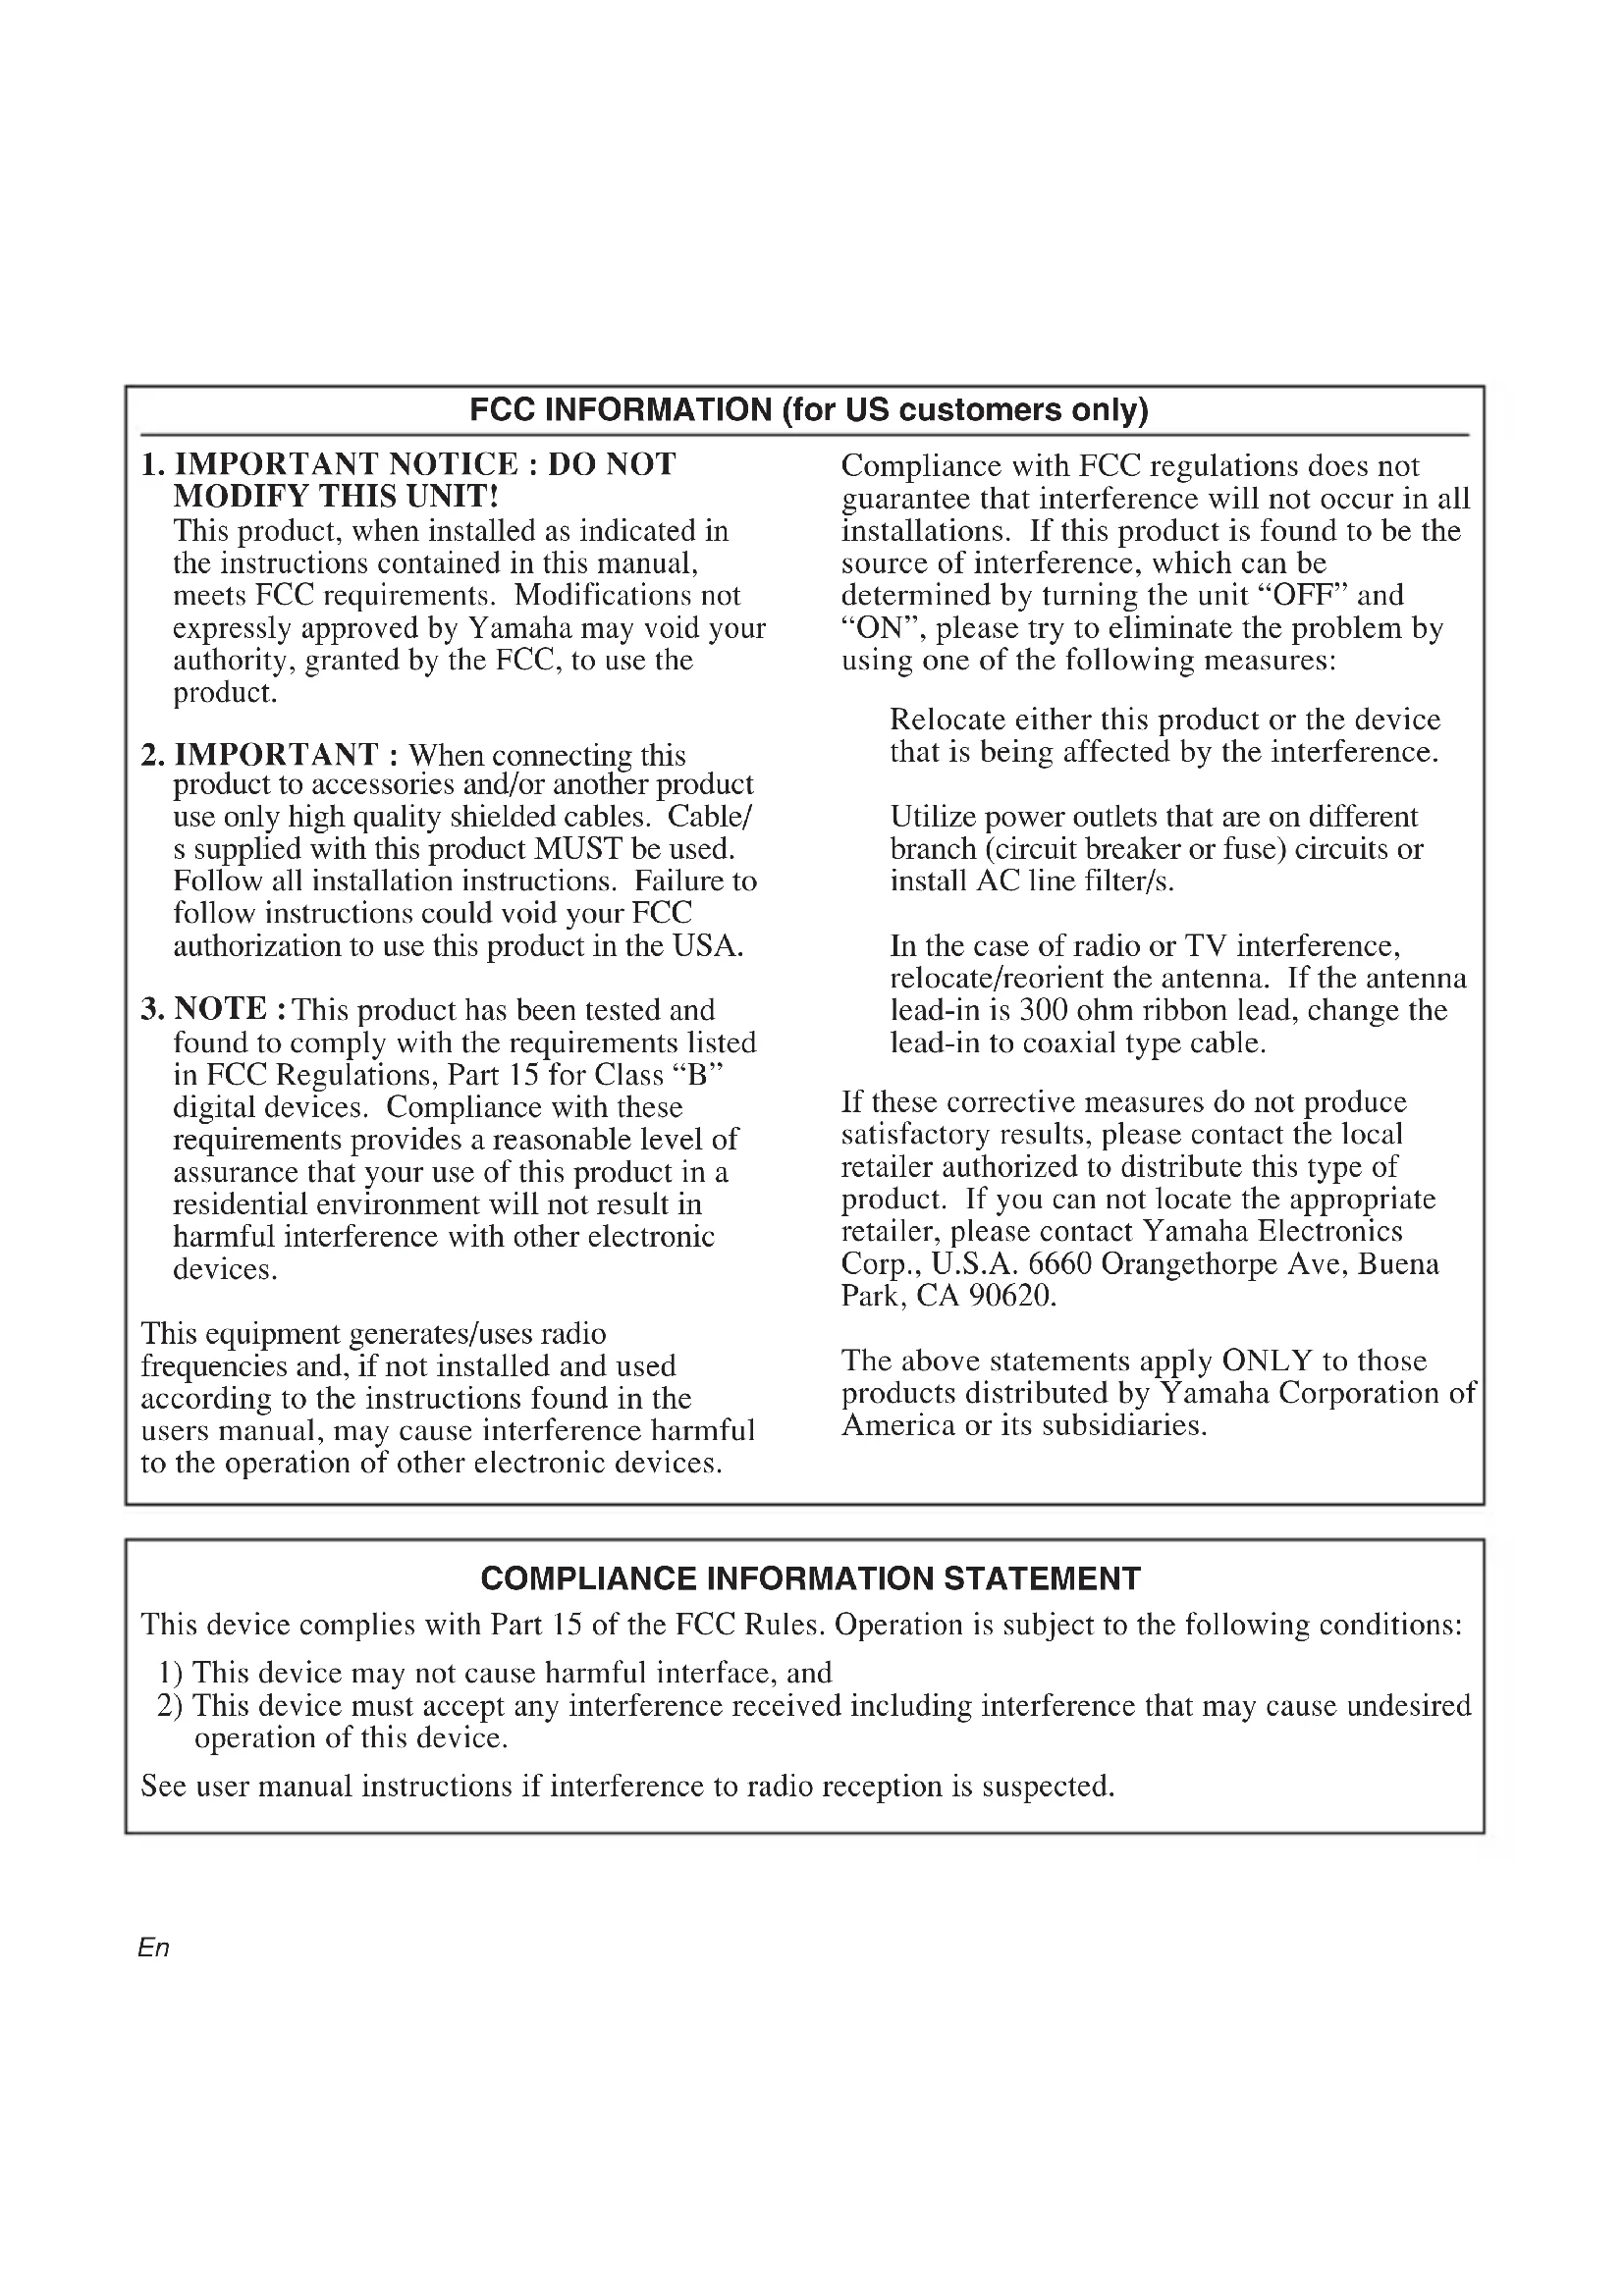
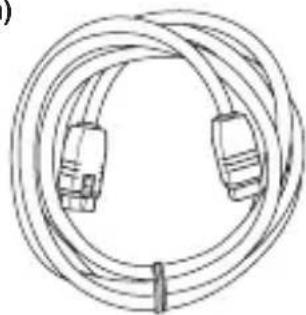
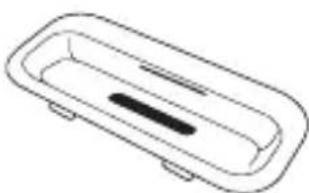
■ Checking the package contents
Check that the following items are included in the package. (iPod is not included.)
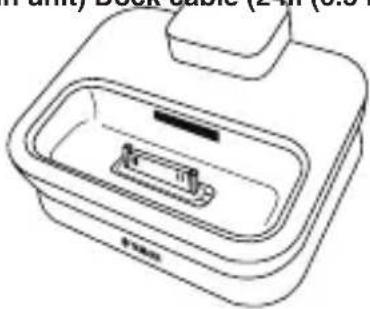
YDS-11 (Main unit) Dock cable (2 m (6.5 ft))
natural_image
Line drawing of a portable washing machine with a tray and front panel (no text or symbols)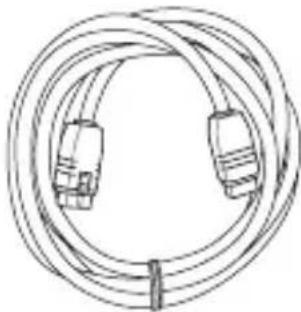
natural_image
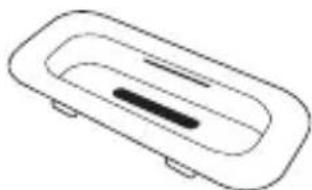
Line drawing of a multi-core cable with two connectors (no text or symbols)iPod dock adapters (A, B, C)
natural_image
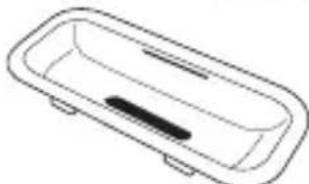
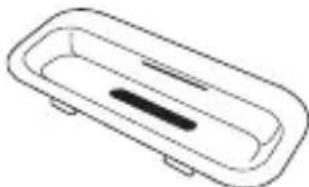
Simple line drawing of a rectangular basin with a central slot and side supports (no text or symbols)A iPod with color display (20 GB or 30 GB) or U2 Special Edition
natural_image
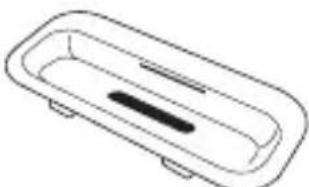
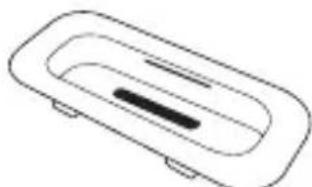
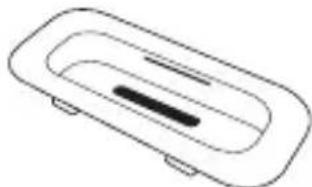
Simple line drawing of a rectangular basin with a central slot and side supports (no text or symbols)B iPod with color display (40 GB or 60 GB) or iPod (40 GB)
natural_image
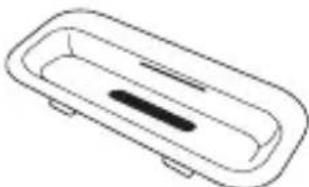
Simple line drawing of a rectangular object with a central slot and two side supports (no text or symbols)* The iPod Dock adapter is an adapter for use with iPods with which no adapter is included.
* W hen using an iPod that comes with an adapter, use the adapter included with the iPod.
* The mark (A, B, or C) is shown on the back of each iPod dock adapter.
■ Controls and functions
text_image
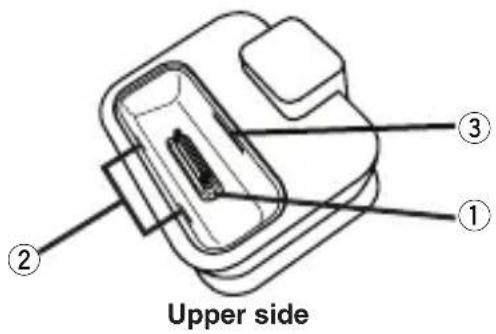
Upper side ① ② ③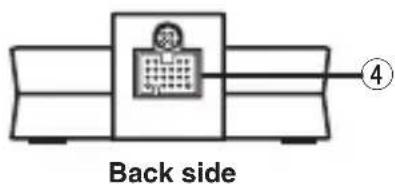
text_image
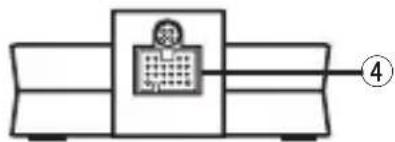
Back side① iPod connector terminal Connects your iPod.
② Slits
Hold an iPod dock adapter.
③ Adapter holder Holds an iPod dock adapter.
④ Dock cable terminal Connects the supplied dock cable.
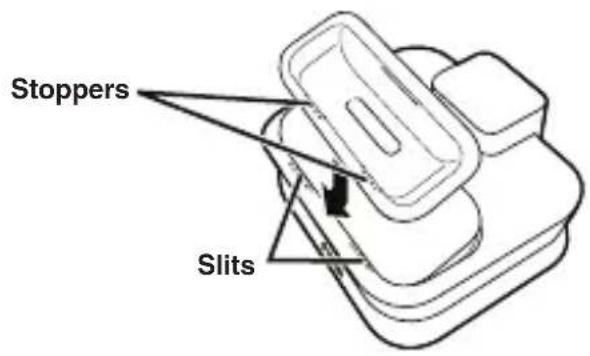
■ Inserting an iPod dock adapter
Insert the iPod dock adapter supplied with your iPod into the slot of the main unit. Depending on the type of your iPod, you may need to insert one of the iPod dock adapters supplied with this unit. See page 1 for details about the iPod dock adapter.
- Insert the stoppers of the iPod dock adapter into the slits on the slot of this unit.
text_image
Stoppers Slits- Insert the iPod dock adapter until it snaps into the slot of this unit.
natural_image
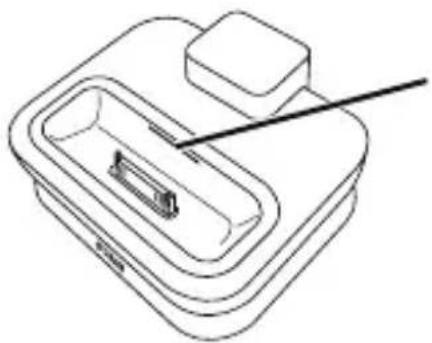
Line drawing of a mechanical device with a handle and internal components (no text or symbols)Slit
When you remove the iPod dock adapter from this unit, insert one of your finger nails into the slit on the iPod dock adapter and pull it up.
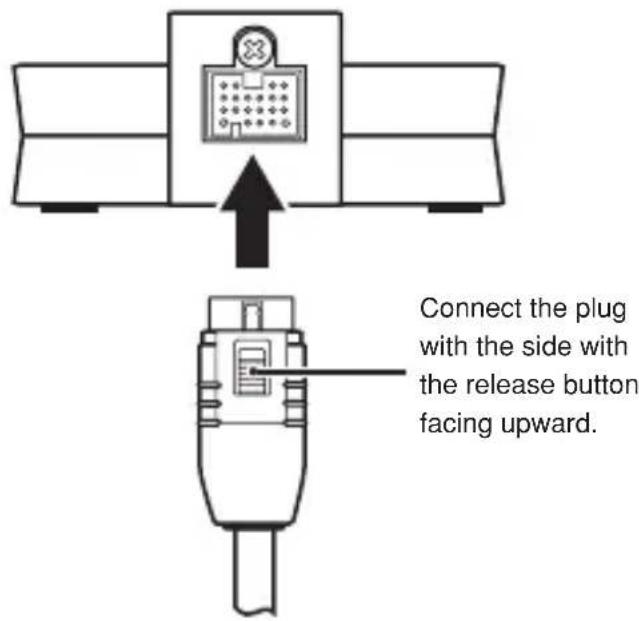
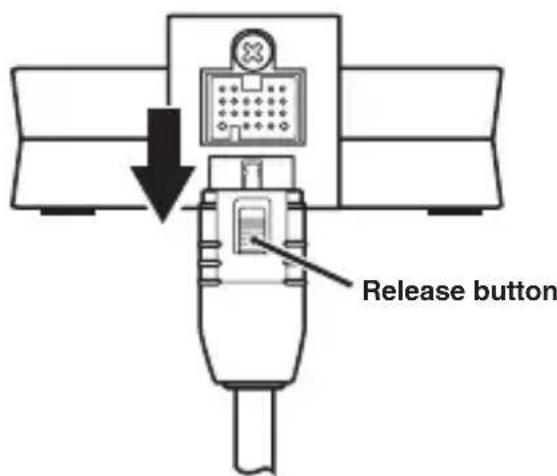
■ Connecting the dock cable
- Connect one of the plugs of the dock cable to the dock cable terminal of this unit firmly.
text_image
Connect the plug with the side with the release button facing upward.- Make sure the power of the universal dock compatible component is turned off.
Note
Connecting the dock connection cable while the dock-compatible device's power is on could result in damage.
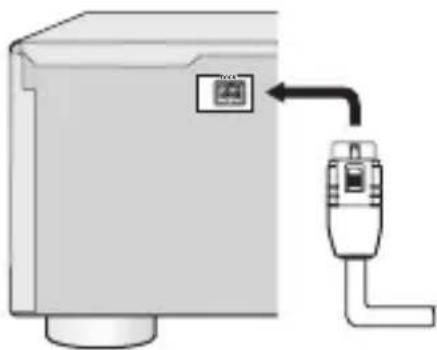
- Connect the other plug of the dock cable to the DOCK terminal of the universal dock compatible component.
natural_image
Diagram of a device with a mounted sensor or connector, showing no text or symbolsNote
Be sure to connect the plugs of the dock cable firmly to both the dock cable terminal of this unit and the DOCK terminal of the universal dock compatible component. When the connection is loose, this unit may output some unwanted noise.
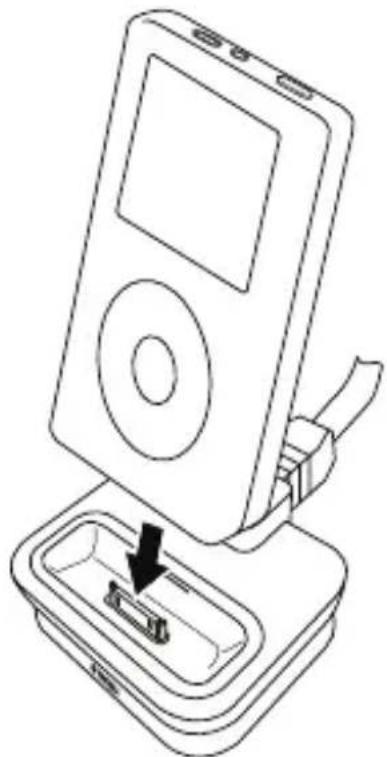
■ Connecting your iPod
Insert the dock connector port of your iPod into the iPod connector terminal of this unit firmly.
natural_image
Line drawing of an iPod device with a black arrow pointing to its internal component (no text or symbols)Notes
• Make sure that the output level of the universal dock compatible component is set to minimum.
- To protect the dock connector from damage, do not twist or sway back and forth your iPod when inserting or taking it off from this unit, and be careful not to knock over this unit when your iPod is inserted.
- Use this unit with the iPod dock adapter (supplied with your iPod or with this unit) appropriate for your iPod. If you use this unit without using an appropriate iPod dock adapter, loose connection may result.
- Do not take off your iPod from this unit when you play back the music, photo, or movie stored on your iPod with the universal dock compatible component.
- Connect your iPod without any other iPod accessories (such as headphones, a wired remote control, an FM transmitter etc.) connected.
- It is recommended that you update your iPod software before using it with this unit. The updater for the iPod software is available at the Apple website.
■ Disconnecting the dock cable
-
Make sure the power of the universal dock compatible component is turned off.
-
Press and hold the release button and then pull off the plug of the dock cable.
text_image
Release buttonNote
Disconnecting the dock connection cable while the dock-compatible device's power is on could result in damage.
Troubleshooting
Refer to the items listed below when this unit does not function properly.
- Connect your iPod to this unit firmly.
- Connect the dock cable to the universal dock compatible component firmly.
- Connect the dock cable to this unit firmly.
- Update the software of your iPod to the latest version.
If the instructions above do not help, refer to the instructions of your iPod or universal dock compatible component.
■ Specifications
Dimensions (W x H x D) ..... 80 x 33 x 70 mm (3.1 x 1.3 x 2.8 in)
Weight 135 g (4.8 oz)
* Specifications are subject to change without notice.
■ Precautions
natural_image
Line drawing of a rectangular appliance with internal compartments and a lid (no text or symbols)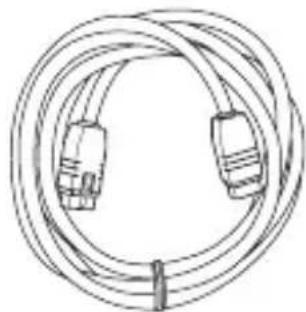
natural_image
Line drawing of a multi-core cable with two connectors (no text or symbols)natural_image
Simple line drawing of a rectangular basin with a central slot and side supports (no text or symbols)natural_image
Simple line drawing of a rectangular basin or container with a central slot (no text or symbols)natural_image
Simple line drawing of a rectangular object with a central slot and side supports (no text or symbols)text_image
Technical diagram of a mechanical component with numbered parts labeled ①, ②, and ③Face supérieure

natural_image
Simple line drawing of a device with a grid and labeled pin (no text or symbols)Face arrière
natural_image
Line drawing of a mechanical device with a handle and internal components (no text or symbols)Fente
Pour retirer
natural_image
Diagram of a computer monitor with an attached USB port, showing no text or symbolsRemarque
natural_image
Line drawing of an iPod device with a black arrow pointing to its internal component (no text or symbols)Remarques
natural_image
Line drawing of a device with a lid and internal components (no text or symbols)Dock-Kabel (2 m)
natural_image
Line drawing of a coiled network cable with two connectors (no text or symbols)iPod Dock-Adapter (A, D, C)
natural_image
Simple line drawing of a rectangular tray or container with a central slot (no text or symbols)natural_image
Simple line drawing of a rectangular basin with a central slot and side supports (no text or symbols)natural_image
Simple line drawing of a rectangular object with a central slot and two side supports (no text or symbols)natural_image
Line drawing of a mechanical device with a handle and internal components (no text or symbols)Schlitz
natural_image
Simple line drawing of a device with an upward arrow, no text or symbols present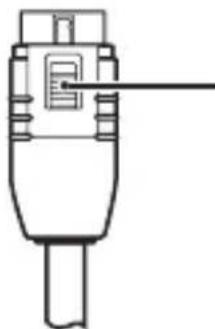
natural_image
Pure technical line drawing of a mechanical component without any text or symbolsnatural_image
Diagram of a computer monitor with an attached USB port, showing no text or symbolsHinweis
natural_image
Line drawing of an iPod device with a black arrow pointing to its internal component (no text or symbols)Hinweise
natural_image
Line drawing of a rectangular appliance with a central sink and top handle (no text or symbols)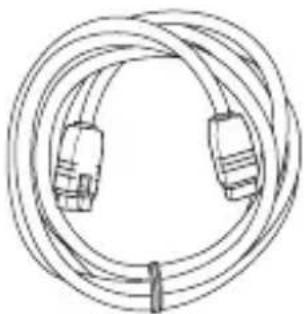
natural_image
Line drawing of a coiled network cable with two connectors (no text or symbols)natural_image
Simple line drawing of a rectangular tray or basin with a central slot and side connectors (no text or symbols)natural_image
Simple line drawing of a rectangular basin or container with a central slot (no text or symbols)natural_image
Simple line drawing of a rectangular object with a central slot and side supports (no text or symbols)natural_image
Line drawing of a mechanical device with a handle and internal components (no text or symbols)Skåra
natural_image
Simple line drawing of a computer monitor with an icon and an upward arrow, no text or symbols present.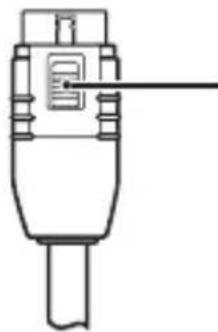
natural_image
Line drawing of a mechanical component with no visible text or symbolsnatural_image
Diagram of a device with an attached connector and a small inset image, showing no text or symbols.Anmarkning
natural_image
Line drawing of an iPod device with a cable connector inserted into a tray (no text or symbols)Anmarkningar
natural_image
Line drawing of a rectangular appliance with internal compartments and a lid (no text or symbols)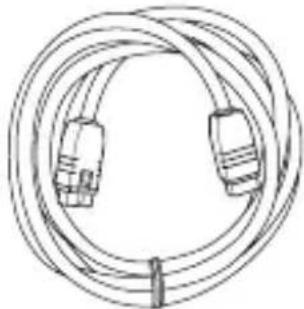
natural_image
Line drawing of a multi-core cable with two connectors (no text or symbols)natural_image
Simple line drawing of a rectangular basin with a central slot and side supports (no text or symbols)iPod con display a colori da 20 GB o 30 GB o U2 Special Edition

natural_image
Simple line drawing of a rectangular basin with a central slot and side supports (no text or symbols)iPod con display a colori da 40 GB o 60 GB o iPod normale da 40 GB
natural_image
Simple line drawing of a rectangular container with a slot and side supports (no text or symbols)natural_image
Line drawing of a mechanical device with a handle and internal component (no text or symbols)Fessura
natural_image
Diagram of a device with a labeled component and an attached connector (no text or symbols present)Nota
natural_image
Line drawing of an iPod device with a black arrow pointing to its internal component (no text or symbols present)Note
natural_image
Line drawing of a rectangular appliance with a lid and internal compartments (no text or symbols)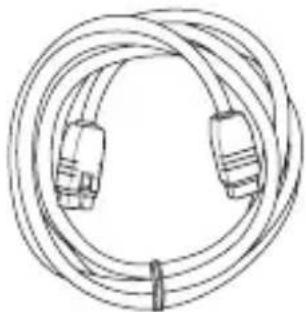
natural_image
Line drawing of a coiled network cable with two connectors (no text or symbols)natural_image
Simple line drawing of a rectangular basin with a central slot and side supports (no text or symbols)natural_image
Simple line drawing of a rectangular basin with a central slot and side supports (no text or symbols)natural_image
Simple line drawing of a rectangular basin with a central slot and two side supports (no text or symbols)text_image
Technical diagram of a mechanical component with numbered parts labeled ①, ②, and ③Lado superior

natural_image
Simple line drawing of a device with a grid and labeled pin (no text or symbols)Lado posterior
natural_image
Line drawing of a mechanical device with a handle and internal components (no text or symbols)Hendidura
natural_image
Simple line drawing of a hospital bed with a medical cross symbol and an upward arrow (no text or labels)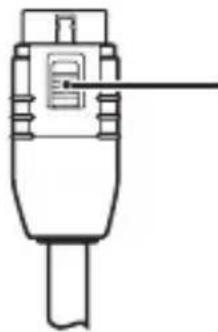
natural_image
Line drawing of a mechanical component with no visible text or symbolsnatural_image
Diagram of a device with a switch and a small inset panel, no text or symbols presentNota
natural_image
Line drawing of an iPod device with a black arrow pointing to its internal component (no text or symbols)Notas
natural_image
Line drawing of a rectangular appliance with a lid and internal compartments (no text or symbols)
natural_image
Line drawing of a multi-core cable with two connectors (no text or symbols)iPod Dock-adapters (A, B, C)
natural_image
Simple line drawing of a rectangular basin with a central slot and side supports (no text or symbols)natural_image
Simple line drawing of a rectangular basin with a central slot and side supports (no text or symbols)B iPod met kleurendisplay (40 GB of 60 GB) of iPod (40 GB)
natural_image
Simple line drawing of a rectangular tray or container with a central slot and side supports (no text or symbols)natural_image
Line drawing of a mechanical device with a handle and internal components (no text or symbols)Sleuf
natural_image
Diagram of a computer monitor with an attached USB port, showing no text or symbolsOpmerking
natural_image
Line drawing of an iPod device with a cable being inserted into a tray (no text or symbols)Opmerkingen
natural_image
Line drawing of a rectangular appliance with a lid and internal compartments (no text or symbols)
natural_image
Line drawing of a multi-core cable with two connectors (no text or symbols)natural_image
Simple line drawing of a rectangular tray or container with a central slot (no text or symbols)natural_image
Simple line drawing of a rectangular basin with a central slot and side supports (no text or symbols)natural_image
Simple line drawing of a rectangular object with a central slot and two side supports (no text or symbols)iPod mini (4 ГБ или 6 ГБ)
text_image
Technical diagram of a mechanical component with numbered parts labeled ①, ②, and ③.Верхняя сторона

natural_image
Simple line drawing of a device with a grid and labeled pin (no text or symbols)Тыловая сторона
natural_image
Line drawing of a mechanical device with a handle and internal components (no text or symbols)Отверстие
natural_image
Simple line drawing of a device with an upward arrow, no text or symbols presentnatural_image
Pure technical line drawing of a mechanical component without any text, numbers, or symbolsnatural_image
Diagram of a device with a switch and connector, no text or symbols presentПримечание
natural_image
Line drawing of an iPod device with a black arrow pointing to its internal component (no text or symbols)Примечания
natural_image
Line drawing of a rectangular appliance with internal compartments and a lid (no text or symbols)iPod 基座适配器(A)

natural_image
Line drawing of a multi-core cable with two connectors (no text or symbols)
natural_image
Simple line drawing of a rectangular basin with a central slot and side supports (no text or symbols)natural_image
Simple line drawing of a rectangular basin with a central slot and two side supports (no text or symbols)natural_image
Simple line drawing of a rectangular object with a central slot and two side supports (no text or symbols)natural_image
Line drawing of a mechanical device with a handle and internal components (no text or symbols)狭缝
natural_image
Diagram of a computer monitor with an attached device showing a display and arrow (no text or symbols)注
natural_image
Line drawing of an iPod device with a black arrow pointing to its internal component (no text or symbols)注
natural_image
Line drawing of a rectangular appliance with internal compartments and a lid (no text or symbols)
natural_image
Line drawing of a coiled cable with two connectors (no text or symbols)iPod 도크 어댑터(A,B)
natural_image
Simple line drawing of a rectangular basin with a central slot and side supports (no text or symbols)natural_image
Simple line drawing of a rectangular basin with a central slot and side supports (no text or symbols)natural_image
Simple line drawing of a rectangular object with a central slot and side connectors (no text or symbols)iPod mini (4 GB 또는 6 GB)
text_image
Technical diagram of a mechanical component with numbered parts labeled ①, ②, and ③위쪽
natural_image
Simple line drawing of a device with a grid and labeled pin (no text or symbols)뒤쪽
① iPod 커넥터 터미널
iPod 를 연결합니다.
② 듣새
iPod 도크 어댑터를 고정합니다.
③ 어댑터 홀더
iPod 도크 어댑터를 고정합니다.
④ 도크 케이블 터미널
제공된 도크 케이블을 연결합니다.
■ iPod 도크 어댑터 삽입
natural_image
Line drawing of a mechanical device with a handle and internal components (no text or symbols)틈새
본 유니트에서
iPod 도크 어 dém
터튼 제거할 때는
손톱을 iPod 도
크 어댑터의 틈새
에 집어넣고 위로
잡아당きます.
■ 도크 케이블 연결
natural_image
Diagram of a device with a control panel and connected tubing (no text or symbols)참고
natural_image
Line drawing of an iPod device with a cable inserted into a case, showing the battery and switch (no text or symbols)참고
natural_image
Line drawing of a rectangular appliance with a recessed sink and top handle (no text or symbols)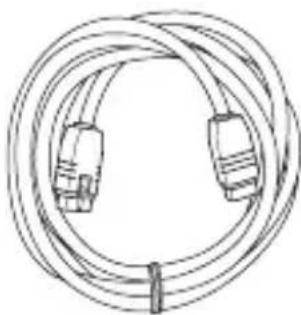
natural_image
Line drawing of a coiled cable with two connectors (no text or symbols)natural_image
Simple line drawing of a rectangular tray or container with a central slot (no text or symbols)natural_image
Simple line drawing of a rectangular basin with a central slot and side supports (no text or symbols)natural_image
Simple line drawing of a rectangular object with a central slot and side connectors (no text or symbols)iPod mini (4GBおよび6GB)
text_image
Technical diagram of a mechanical component with numbered parts labeled ①, ②, and ③上面
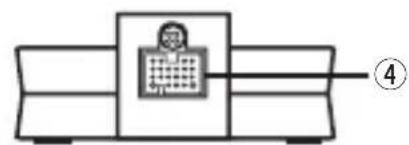
text_image
Diagram showing a person inside a device with labeled part 4背面
① iPodコネクター端子
iPodを接続します。
② スリット
natural_image
Line drawing of a mechanical device with a handle and internal component (no text or symbols)スリット
natural_image
Diagram of a computer monitor with an attached device showing a logo and arrow (no text or symbols present)ご注意
natural_image
Line drawing of an iPod device with a black arrow pointing to its internal component (no text or symbols)ご注意
©2008 All rights reserved.
YAMAHA CORPORATION
Printed in China WP03260-2