PDR220 - Radio PEAQ - Free user manual and instructions
Find the device manual for free PDR220 PEAQ in PDF.

| Product type | Internet radio, FM, USB player, AUX |
| Brand | PEAQ |
| Model | PDR220 |
| Dimensions (W x H x D) | Approx. 246 x 128 x 160 mm |
| Weight | Approx. 1.46 kg |
| Power supply | AC adapter: input 100-240 V~, 50/60 Hz, 0.5 A; output 6 V |
| Power consumption | 12 W |
| Remote control battery | 1 x CR2025 (3 V) |
| FM tuner | Range 87.5 - 108 MHz; step 0.05 MHz |
| Speaker | RMS power: 2 x 2 W; stereo |
| Connectivity | Wi-Fi, LAN (Ethernet), USB, AUX IN, headphone jack |
| Supported audio formats | MP3, WMA, AAC |
| USB port | Charging output 5 V / 1000 mA; compatible USB 1.1/2.0 up to 32 GB, FAT16/FAT32 |
| Main functions | Internet radio, FM, music player (UPnP/DLNA), USB playback, AUX, alarm, sleep timer, equalizer |
| Number of FM presets | 10 |
| Care and cleaning | Unplug before cleaning; use a damp cloth, no abrasive products |
| Safety | Do not expose to moisture; do not open; use the supplied adapter; keep out of reach of children |
| Operating temperature | 5 °C to 35 °C |
| Operating humidity | 5% to 90% |
| Included accessories | AC adapter, remote control, user manual |
Frequently Asked Questions - PDR220 PEAQ
User questions about PDR220 PEAQ
0 question about this device. Answer the ones you know or ask your own.
Ask a new question about this device
Download the instructions for your Radio in PDF format for free! Find your manual PDR220 - PEAQ and take your electronic device back in hand. On this page are published all the documents necessary for the use of your device. PDR220 by PEAQ.
USER MANUAL PDR220 PEAQ
IMPO23016000A04HR002305111AM
Sicherheitshinweise
DEN ALARM AUSSCHALTEN
Flat, Classic, Rock, Pop, Jazz
Important Safety Instructions. Please read the instructions carefully and keep them for later use.
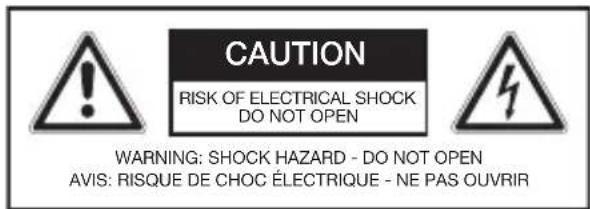
The lightning flash with arrow head within an equilateral triangle is intended to alert the user to the presence of uninsulated "dangerousvoltage" within the product's enclosure that may be of sufficient magnitude to constitute a risk of electric shock to persons and animals.
The exclamation point within an equilateral triangle is intended to alert the user to the presence of important operating and maintenance instructions in the literature accompanying the device.
For safety reasons, this class II product is provided with double or reinforced insulation as indicated by this symbol.
Danger! Excessive sound pressure from earphones and headphones can cause hearing loss. If you listen to loud music for a long time, your hearing may be impaired. Set to a moderate volume.
- This product is only intended for audio entertainment. Do not use the product for any other purpose than described in this manual in order to avoid any hazardous situation. Improper use is dangerous and will void any warranty claim.
- For household use only. Do not use outdoors.
- Danger of suffocation! Keep all packaging material away from children.
- Only use under normal room temperature and humidity conditions.
The product is only suitable for use at moderate degrees of latitude. Do not use in the tropics or in particularly humid climates. - Do not move the product from cold into warm places and vice versa. Condensation can cause damage to the product and electrical parts.
- Do not use attachments or accessories other than recommended by the manufacturer or sold with this product. Install in accordance with this user manual.
- When installing the product, leave sufficient space for ventilation (minimum 10 cm around the product). Do not install in bookcases, built-in cabinets or the like.
- Do not impede ventilation by covering the ventilation openings with items, such as newspapers, table-cloths, curtains, etc. Do not insert any objects.
- Do not install near any heat sources such as radiators, heat registers, stoves or other products (including amplifiers) that produce heat.
- Do not shift or move the product when powered on.
- Do not touch, push or rub the surface of the product with any sharp or hard objects.
ENGLISH
- Danger! To reduce the risk of fire or electric shock, do not expose this product to rain or moisture.
- The product shall not be exposed to dripping or splashing and no objects filled with liquids, such as vases, shall be placed on the product.
- Care should be taken so that no objects or liquids enter the enclosure through openings.
- No naked flame sources, such as lighted candles, should be placed on the product.
- Refer all servicing to authorised service agent. Do not attempt to repair the product yourself. Servicing is required when the product has been damaged in any way, such as the supply cord or plug are damaged, liquid has been spilled, objects have fallen into the product, the enclosure is damaged, the product has been exposed to rain or moisture, does not operate normally, or has been dropped.
- Before connecting the product to a socket outlet, make sure the voltage indicated on the product corresponds to your local mains.
- Only use the provided adaptor.
- Only use the adapter that matches the technical data.
- The adaptor power plug is used as the disconnect device; the disconnect device shall remain readily operable. To completely disconnect the power input, disconnect the adaptor power plug.
-
The product may not function properly or not react to the operation of any control due to electrostatic discharge. Switch off and disconnect the appliance; reconnect after a few seconds.
-
Protect the supply cord from being walked on or pinched particularly at the plug, convenience receptacles and the point where it exits from the product.
- Disconnect the adaptor power plug in case of faults during use, during lightening storms, before cleaning and when not using the product for a longer period of time.
- Danger! Before cleaning, switch the product off and disconnect the adaptor power plug from the socket.
- When the product has reached the end of its service life, make it defective by disconnecting the adaptor power plug from the socket and cutting the cord in two.
- Caution! There is danger of explosion from improper replacement of the batteries. Replace batteries only with the same or equivalent type of battery.
- Always change the entire battery pack. Do not mix old and new batteries, or batteries with different charge state.
- Make sure the batteries are correctly inserted. Observe the polarity (+) plus / (-) negative on the battery and the housing. Improperly inserted batteries can lead to leakage or, in extreme cases, a fire or an explosion.
- Never expose batteries to excessive heat (e.g. bright sun, fire), and never throw them into fire. The batteries could explode.
- Remove used batteries. Remove the batteries if you know that the product will not be used for a longer period of time. Otherwise, the batteries could leak and cause damage.
- Keep batteries out of reach of small children. If batteries have been swallowed, seek immediate medical attention.
-
Non-rechargeable batteries must not be recharged.
-
If the batteries leak, remove them with a cloth and dispose of them accordingly. Prevent battery acid from coming into contact with skin and eyes. If you do get battery acid in your eyes, flush them thoroughly with lots of water and consult a physician immediately. If battery acid comes into contact with your skin, wash the affected area with lots of water and soap.
- Warning! Do not ingest the battery, Chemical Burn Hazard.
- This product (remote control) contains a coin/button cell battery. If the coin/button cell battery is swallowed, it can cause severe internal burns in just 2 hours and can lead to death.
- Keep new and used batteries away from children.
- If the battery compartment does not close securely, stop using the product and keep it away from children.
- If you think batteries might have been swallowed or placed inside any part of the body, seek immediate medical attention.
Partlist
A. Display
B. Speaker
C. On/Off switch
D. MODE button
E. Infrared sensor
F. Play button INFO
G. Volume control / SELECT / SNOOZE
H. ATUNING forward
I. BACK button
J. MENU button
K. MEMORY button
L. X TUNING back
M. LAN jack
N. Headphone jack
O. AUX IN jack
P. USB port
Q. DC IN jack
R. Antenna
Accessories
1 x AC/DC Adaptor
1 x Remote control
1 x User manual
Remote control
- On/Off button
- INFO button
- MENU button
- Arrow key,
- Arrow key, left
- SELECT button
- Volume button VOL-
- Arrow key, Down
- TUNING button, down
- Skip- / search, back
- Skip- / search, forward
- MONO / ST. button
- SLEEP button
- MODE selection button
- MEMORY button
- BACK button
- Arrow key, right
- Volume control VOL+
- TUNING button, up
- Play button
- MUTE button
- Equalizer button EQ
- SNOOZE button
- ALARM button
Note
The keys on the remote control function the same way as the keys on the device. All main functions can be accessed with the remote control. If the remote control does not work, please check the followings:
- If there any object between the product and remote control causing obstruction.
- Try to darken the room or to reduce the distance between device and remote control.
- Is the battery installed with correct polarity (+ to +,- to -)?
- Try with a brand new battery.
Connections
POWER SUPPLY (Q)
Connect the DC connector of the adaptor to the DC IN-jack. Plug the adaptor to a power socket.
AUX-IN (O)
You can also listen to external audio devices by connecting the cable (not included) to the AUX-IN jack at the back of the product.
USB CONNECTION (P)
Playback of music files
You can playback music files which are saved on an USB stick by plug in the USB stick.
Charging external devices
External devices can be charged via USB with this speaker. Connect the device to the USB port (output: 5 V/ 1000 mA)
LAN CONNECTION (M)
Socket of LAN / Ethernet cable connection for the cable connection of the device with the cable-connected home network.
HEADPHONE CONNECTION (N)
Connect the headphones to the Headphone jack of the device.
Attention
Danger! Excessive sound pressure levels from ear buds and headphones can cause hearing damage. Listening to loud music for extended periods of time may lead to hearing impairment. Keep the volume at reasonable levels.
INSERTING BATTERY
Slide the battery compartment cover in the direction of the arrow and pull it out. Insert the new battery (CR2025, 3 V), paying attention to correct polarity. Slide the battery compartment cover back on and let it snap into place.
Note
The battery is already inserted. Remove the battery protection strip before first use.
Operation
TURNING THE UNIT ON
Press the button to switch on the unit.
For optimal reception, extend the antenna, move to fully extend and adjust it.
ADJUSTING THE VOLUME
The volume can be adjusted during playback with the volume control.
Internet-Radio Configuration
There are two ways to connect the radio to the internet using an access point:
- Wireless in WLAN-Mode
The WiFi-antenna of the radio receives your DSL router signals.
- With cable using the radio's LAN connection in LAN-Mode
provided an ethernet network is available.
WLAN-MODE CONFIGURATION
If you have a wireless network, the WLAN mode is the direct way to connect your radio to the Internet:
- Simply switch the radio on and, as a cable-free network client, it automatically searches all available APs (Access Points).
- When switching on for the first time, you must confirm the AP and perhaps enter the key. For doing so please follow instructions of below chapters. After that, the radio will always access this AP. If the AP can no longer be found, it will be registered accordingly.
LAN CONFIGURATION
If you do not have a wireless network but do have a cabled network, you can connect the Internet radio with a network.
- Switch the radio off.
- Connect an Ethernet cable to the LAN socket. Once switched on and choose wired. The radio will automatically be recognized as a cable client.
Select the WLAN-Region in which you are located. The device then looks for available wireless networks. If a wireless network is not found, the device shows the notifications
Note
Make sure that the DHCP-server of your router (Access Point) is activated. Otherwise, the WLAN connection must be configured manually. The WLAN should send out the SSID. If the SSID is not sent out, you must configure the WLAN manually.
- Select the network from which you want to operate Internet radio.
PUBLIC NETWORK CONNECTION
Select the appropriate WLAN-network by clicking on the entry of the network's name. The connection procedure takes place automatically.
Note
In the Systems settings > Setup wizard, you can manually configure the network.
PRIVATE NETWORK CONNECTION
Select WPS connection type
If a network is protected by a WEP or WPA encryption, the query for constructing a connection over WPS (Wi-Fi Protected Setup) appears. If the router of your wireless network has a WPS function, select whether the WPS connection should be established by entering a PIN code over the WPS key on the router.
WPS connection using PIN entry
A WPS-PIN appears in the Internet radio display. Enter this PIN and confirm the Internet radio with OK. The WPS connection will then be established.
Connection using WPS key
Press the WPS key on the router and then confirm the display on Internet radio with SELECT. The WPS connection is then established.
CONNECTION USING THE DIRECT ENTRY OF THE NETWORK KEY
If you do not want to establish any connection using the WPS, select the entry, No WPS and then enter the network key in the following dialogue. Confirm the entry with SELECT.
COMPLETING THE WLAN CONNECTION
- The connection begins. The device should now establish a connection with the WLAN. Once the connection has been established, the notification
appears. Confirm the display with SELECT. - If the WLAN cannot be accessed (e.g. locked for new WLAN devices) the failure notification "Connection not successful" appears.
- In this case, check the setting of your WLAN-router.
Note
The entered password (WEP/WPA key) will be saved and will not need to be entered again.
Mode
Press MODE to select between:
Internet-Radio
Music Player
FM Radio
-AUX in
To choose the desired mode you also can call up the main menu:
- Press MENU in any mode setting
- Select Main menu
Internet Radio
Press MENU in any mode setting or directly press MODE to call up Internet radio.
LAST LISTENED
- STATION LIST
By choosing Station list you can access all worldwide available stations.
Local stations (region)
Here all stations from the selected region are listed according to genre.
Stations (selecting station)
You can see all available stations by country (Location), popularity (Popular stations) or timeliness list (New stations).
- Select Stations
- Now you can select your station under the specified options.
Sender selection via podcast
Here you can list all Podcasts according to genre and country.
- Select Podcast and press SELECT, in order to confirm the selection
- Select a desired subfolder.
My favourites
To store a playing station as a favourite:
- Press and hold "SELECT" until the display shows 'Favourite added'.
- The station appears in the default favourites list Stations.
To select a favourite
- Select "MENU" and choose "Station list".
- Choose "My Favourites" to get the favourites list.
- Select a station from the favourites list.
Note
You can register for free via the website http://www.wifiradio-frontier.com. This is where you can register your Internet radio using the access code. You receive the access code in the following menu point "HELP". Via this website, you can create groupings for favourites lists, add new Internet radio stations for your Internet radio and synchronise your station lists with other internet radios.
MY ADDED STATIONS
If you have saved Podcasts via the website http://www.wifiradio-frontier.com, you can call them up here.
HELP
Select this entry to receive the access code for your Internet radio with which you can register yourself on the website http:// www.wifiradio-frontier.com.
Music Player
Your Internet radio supports the UPnP-Protocol "Universal Plug-and-Play" and DLNA (Digital Living Network Alliance). You can transfer audio files to your PC wirelessly to your Internet radio if a UPnP software is installed. Using the UPnP / DLNA protocol, the Internet radio can be used as Digital Media Renderer (DMR). So you can play music files from UPnP / DLNA compliant devices on the Internet and radio, and, for example, adjust the volume from the computer.
CONNECTING MEDIA PLAYER
Connection Between Internet radio and a Media Server (NAS-Server, UPnP/DLNA Compatible Server)
- Open the main menu and select Music Player.
- Select from there the entry Shared media, in order to find available media servers.
- The radio starts the initialisation process.
- After a few seconds, the media server name is inserted provided it has been found: "PC_Name: Media Server-Name"
- If you want to connect the media server with the radio, click on the entry of the server.
Note
You might need to confirm and allow the connection on your PC.
PLAYING AUDIO FILES
- In order to listen to audio files from the network select the function Music Player in the main menu or press MODE on remote control.
- Select Shared media to start the music selection.
Setting FM radio stations
- Press MODE to select FM radio stations.
- The radio changes to the last selected station.
FREQUENCY SETTINGS
Set an FM radio station.
Manual frequency setting
Push the button TUNING / V to change the frequency in 0.05 MHz steps.
SAVING FM RADIO STATIONS
You can save a maximum of 10 preset FM radio stations.
- Set the desired FM station.
- Press and hold MEMORY and then chose a memory preset using the arrow keys up/down.
- Press SELECT button to confirm the entry.
- The preset number of the saved station is shown.
FM RADIO STATION SELECTION
- Press MEMORY to call up the pre-set menu.
- Select a preset number with SELECT knob and confirm the selection by pressing the SELECT knob.
SCAN SETTING
- Press MENU and Scan Setting will be displayed.
- Press SELECT knob to confirm the selection.
AUDIO SETTING
Selecting Mono or Stereo mode.
- Press MENU.
- Select the Audio Setting
USBPlayback
- Insert an USB Stick with MP3/WMA/ AAC music files.
- Press MODE and select Music player.
- Select USB playback.
- Playback starts automatically and the first track will be played. If there is no USB device connected, the message NO USB device found will be displayed on the screen.
Note
Connect the USB device directly to the USB port of the unit. Using an extension cable is not recommended and may cause interference and failure of data transfer. This product supports USB 1.1 and 2.0 up to 32GB with file system FAT16 and FAT32.
AUX Mode
- Connect the audio cable (not included) into the AUX IN jack (3.5mm) at the rear side of the device.
- Press MODE to select AUX as a source.
- Start playing from the device.
Attention
Check the safety and user instruction of the external device before connection.
Time and Alarm settings
TIME SETTING
- Press MENU in any mode setting and select System settings.
- Select Time/Date.
- Press SELECT to confirm the selection.
-
Select the desired submenu with the SELECT knob:
-
Set Time/Date:
Manual time and date setting
- Auto update:
Selection between update from FM, Network and No update
- Set format:
Selection between 12/24 hour format
- Set time zone:
Set daylight savings
SETTING ALARM
- Press MENU in any mode setting and select Main menu.
- Select Alarms.
- Select Alarm 1 or 2 in the main menu or press ALARM button on the remote control.
- Select one of the two waking times in order to save it:
Enable
Select how the alarm clock should be switched on:
- Select off to deactivate the alarm.
- Select daily, once, weekend or week days to activate the alarm.
Time
Set the time at which the alarm should be set.
Mode
Select the mode for the alarm clock here:
FM: Wake up with FM-Radio
- Internet Radio: Wake up with Internet radio
- Buzzer: Wake up with alarm tone
Volume (0-32)
Here you can set the volume with which the alarm clock will be switched on.
Save
Save the alarm setting.
Note: During alarm you can change the snooze period by repeatedly pressing on the SNOOZE button on the remote control.
SWITCHING OFF THE ALARM TONE
Once the alarm sounds, press and the alarm is switched off.
SETTING THE SLEEP-TIMERS
Select Sleep in the main menu or press SLEEP button repeatedly on the remote control.
Press SLEEP to select a period of time:
[15 MIN]
[30 MIN]
[45 MIN]
[60 MIN]
- [OFF]
If the sleep timer is not pre-selected, the default setting is OFF.
General Settings
SYSTEM SETTINGS
To enter the System setting press MENU at any mode.
Menu > System settings
- Press MENU and select System settings.
- The submenu will then be displayed.
EQUALISER
Here you can select preset sound formats or create one of your own.
Select a sound format:
Flat, Classic, Rock, Pop, Jazz
The sound setting is accepted right away. Alternative you can adjust the sound setting directly with the button EQ on the remote control.
NETWORK SELECTION
Select this entry to display the list of networks with which the Internet radio can establish an automatic connection or select the entry network assistant to search available networks.
TIME/DATE
Follow the instructions in the section on setting time.
LANGUAGE SELECTION
- Press MENU and enter System settings to select the submenu LANGUAGE.
- Select a language.
FACTORY SETTING
Press MENU and enter System settings to select the submenu FACTORY RESET.
Press SELECT knob to confirm the selection.
UPDATING THE SOFTWARE
You can search software updates with the product. Once you have accepted the conditions for use, the download and installation procedure for the new software updates begins automatically.
Note
Make sure that the product is connected to the Internet.
SETUP WIZARD
Press MENU and enter System settings to select the submenu SETUP WIZARD. You can set up all settings important for bringing radio into operation.
INFO
Here you can find the version number of the currently used software.
Cleaning and Care
- Always pull the power plug from the power outlet before cleaning.
- Caution! Water must not enter the device.
- Clean the housing with a slightly damp cloth.
- Do not use any sharp, abrasive or aggressive cleaning agents.
- Do not use any chemicals (e. g. gas, alcohol) to clean the housing.
Disposal

Do not dispose of this appliance as unsorted municipal waste. Return it to a designated collection point for the recycling of WEEE.
By doing so, you will help to conserve resources and protect the environment. Contact your retailer or local authorities for more information.

Please dispose of batteries in an environmentally friendly manner Do not put batteries into the
household waste. Please use the return and collection systems in your community or contact the dealer where you purchased the product.
Troubleshooting
If there are any problems during operation, please refer to the following table. If problems cannot be solved as indicated under Solution, please contact your manufacturer.
| Problem Possible causes | Solution | |
| Product does not function | Interrupted power supply • Check the power supply | |
| NO Sound • Volume is very low • External device is muted | Adjust the volume Check and turn off mute on the external device. | |
| USB drive can't be read | USB drive defect Data format not support. | Insert a new USB drive Check the data format |
| Poor radio reception quality | Poor radio reception • Place the product to another place and adjust the antenna again. | |
| Remote control does not function | Battery in remote control empty | Replace battery in remote control |
Technical Data
Power supply
AC/DC Adaptor
Input: 100 - 240V , 50 / 60~Hz 0.5 A
Output:6V
Batteries (Remote Control) : 1 x CR2025 (3 V


Main unit
Input : 6 V
Power consumption : 12 W

USB port charging
Output : 5 V

Tuner FM
Tuning Range : 87.5 - 108 MHz
Tuning Grid : 0.05 MHz
Speaker
Output power (RMS) : 2 X 2 W
Sound System : Stereo
Connectivity
USB : YES
AUX:YES
Dimension (L× W× D) :approx. 246× 128× 160mm
Weight : approx. 1.46 kg
: Temperature: 5^ C - 35^ C
: Humidity: 5% - 90%
MIS EMISORAS ANADIDAS
CONNEXION AU RESEAU PUBLIC
CONNEXION AU RESEAU PRIVE
Stations (selection de station)
FEJHALLGATO CSATLAKOZTATASA (N)
Press the WPS key on the router and then confirm the display on Internet radio with SELECT. The WPS connection is then established.
CSATLAKOZÁS A HALOZATI KULCS KOZVETLEN BEÍRÁSÁVAL
ACCENSIONE DELL'UNITA
Connection using WPS key
Normale, Flat, Jazz, Rock, Movie, Classic, Pop, News, Mio EQ