KA 3459 T - Coffee machine CLATRONIC - Free user manual and instructions
Find the device manual for free KA 3459 T CLATRONIC in PDF.

User questions about KA 3459 T CLATRONIC
0 question about this device. Answer the ones you know or ask your own.
Ask a new question about this device
Download the instructions for your Coffee machine in PDF format for free! Find your manual KA 3459 T - CLATRONIC and take your electronic device back in hand. On this page are published all the documents necessary for the use of your device. KA 3459 T by CLATRONIC.
USER MANUAL KA 3459 T CLATRONIC
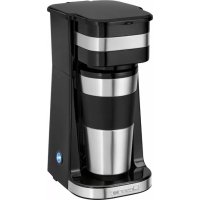
natural_image
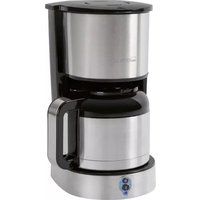
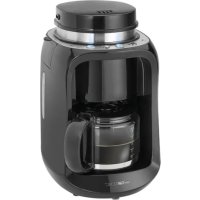
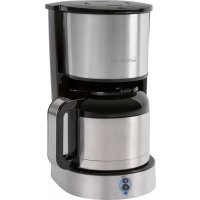
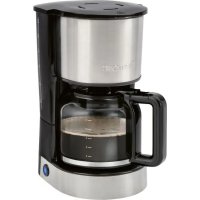
Exterior view of a modern coffee machine (no signage)CE
Kaffee- / Teeautomat
Koffie- / Theezetapparaat • Machine à café / thé • Máquina de café / té • Macchina per la preparazione
Thank you for choosing our product. We hope you will enjoy using the appliance.
Symbols in these Instructions for Use
Important information for your safety is specially marked. It is essential to comply with these instructions in order to avoid accidents and prevent damage to the machine:

WARNING:
This warns you of dangers to your health and indicates possible injury risks.

CAUTION:
This refers to possible hazards to the machine or other objects.

NOTE:
This highlights tips and information.
General Safety Instructions
Read the operating instructions carefully before putting the appliance into operation and keep the instructions including the warranty, the receipt and, if possible, the box with the internal packing. If you give this device to other people, please also pass on the operating instructions.
- The appliance is designed exclusively for private use and for the envisaged purpose. This appliance is not fit for commercial use.
- Do not use it outdoors. Keep it away from sources of heat, direct sunlight, humidity (never dip it into any liquid) and sharp edges. Do not use the appliance with wet hands. If the appliance is humid or wet, unplug it immediately.
- When cleaning or putting it away, switch off the appliance and always pull out the plug from the socket (pull the plug itself, not the lead) if the appliance is not being used and remove the attached accessories.
- Do not operate the machine without supervision. If you leave the room you should always turn the device off. Remove the plug from the socket.
- The device and the mains lead have to be checked regularly for signs of damage. If damage is found the device must not be used.
- Do not try to repair the appliance on your own. Always contact an authorized technician. To avoid the exposure to danger, always have faulty cable be replaced only by the manufacturer, by our customer service or by qualified person and with a cable of the same type.
- Use only original spare parts.
- Pay careful attention to the following "Special Safety Instructions".
Children and Frail Individuals
- In order to ensure your children's safety, please keep all packaging (plastic bags, boxes, polystyrene etc.) out of their reach.

WARNING!
Caution! Do not allow small children to play with the foil as there is a danger of suffocation!
- This device is not intended to be used by individuals (including children) who have restricted physical, sensory or mental abilities and/or insufficient knowledge and/or experience, unless they are supervised by an individual who is responsible for their safety or have received instructions on how to use the device.
• Children should be supervised at all times in order to ensure that they do not play with the device.
Special Safety Instructions for this Device
- Place the coffee machine on a firm and flat surface. Position it so that it cannot tip over.
- Do not place the device directly next to a gas or electric cooker or any other source of heat.
- Do not move the device while it is in operation.
• The water tank must only be filled with cold water!

WARNING: Risk of burns!
Before opening the water tank cover, switch off the appliance and allow it to cool for at least 30 seconds!

NOTE:
During operation steam is emitted from above the filter holder! This may cause condensation to form next to the filter holder. This is normal and does not impair the functioning of the device!
Intended Use
This appliance is designed for
• either brewing ground coffee beans
• or preparing hot water for an infusion.
It is intended for the use in private households and similar applications such as
- in staff kitchens of shops, offices and similar work places;
• for guests in hotels, motels and other residential facilities.
It is not intended for applications in agricultural properties or B & B.
The appliance is only to be used as described in the user manual. Do not use the appliance for any commercial purposes.
Any other use is not intended and can result in damages or personal injuries.
The manufacturer assumes no liability for damages caused by improper use.
Supplied parts
1 Coffee / tea maker
1 Filter holder
1 Permanent filter
1 Cup shelf
1 Drip tray
1 Stainless steel thermo cup
1 Glass cup
Initial Operation of the Device
- Remove all packaging and transportation safety devices from the device that may be present.
- Rub all of the parts with a damp cloth. This will remove any dust that may have accumulated during transport.
- Clean the filter holder, the permanent filter and the cups in a bowl of water.
- Reinsert all of the parts in the reverse order.
NOTE:
Before brewing beverages for the first time, run water through the appliance four times to clean it.
- Pour 300 ml fresh water into the water tank.
- Place the cups on the cup shelf.
- Turn the selector to "COFFEE".
- When the cup is full, turn the selector to "OFF" and pour the water away.
- After filling the water tank twice, turn the selector from "COFFEE" to "HOT WATER".
Electrical Connection
NOTE:
Please ensure that the device is switched off. The switch must be on "OFF".
Insert the mains plug into a properly installed socket with earthing contact. For information please see the type plate on the device.
The red indicator lamp indicates that the power supply is on.
Operation
Preparing coffee or hot water
NOTE:
- The coffee filter is located on the left hand side.
- The hot water spout is on the right hand side.
-
You can pour up to 300 ml of water into the water tank to brew 2 – 3 consecutive cups of coffee or tea.
-
Open the water tank cover.
- Pour cold water into the water tank.
i NOTE:
- To fill the water tank with the correct amount of water, use the cup which you then want to use for brewing the beverage.
i NOTE:
- The coffee powder will absorb water. The amount of coffee is thus somewhat less than the original amount of water.
CAUTION:
Do not overfill the water tank! Do not fill beyond the MAX (300 ml) mark.
- Close the water tank cover.
- To prepare coffee, pull out the filter holder. Pour the coffee into the permanent filter (approx. 6 g for one cup, max. 12 g according to personal taste). Slide the filter holder back under the filter. The holder must audibly click into place. Place a cup onto the cup shelf under the coffee filter.
- To prepare an infusion with hot water, place a cup under the right hand spout.
- Select the type of preparation:
a) For coffee, turn the selector to "COFFEE".
b) For hot water, turn the selector to "HOT WATER".
The brewing process begins. The green indicator lamp lights up.
i NOTE:
The brewing process for one cup of 125 ml lasts around 3½ minutes. It ends when the water in the tank has been used up.
- If you want to cancel or end the brewing process, turn the selector to "OFF". The green indicator lamp goes out.
- After the brewing process, you can remove the cup. Watch out for dripping.
WARNING:
Cold water on the hot heating element may splash and injure you!
Allow the appliance to cool for 3 minutes, before refilling the water tank.
End of use
- Turn the selector to "OFF". The green indicator lamp goes out.
- Disconnect from the mains. The red indicator lamp goes out.
Descaling
It is necessary to descale the coffee machine if the preparation time becomes considerably longer.
- Only a commercially available decalcifier on a citric acid base should be used for descaling.
- Please use the quantities stated on the pack or instruction leaflet. Do not exceed to maximum volume of water!
- Place the cups or another suitable vessel (for around 300 ml) onto the cup shelf.
- Start with the "COFFEE" setting. After around half of the volume of the vessel has been filled, turn the selector to "HOT WATER".

WARNING:
• Afterwards you should boil fresh water in the pot 4-times in order to rinse out residues of the descaling agent.
- After filling up the water tank twice, turn the selector from "COFFEE" to "HOT WATER".
- Do not use any coffee powder!
- Do not use this water for consumption.
Cleaning

WARNING:
- Before cleaning, always remove the mains plug and wait until the device has cooled down.
- Do not immerse the device in water. Otherwise this might result in an electric shock or fire.

CAUTION:
- Do not use a wire brush or any abrasive items.
- Do not use any acidic or abrasive detergents.
- The exterior of the device should be cleaned as necessary with a slightly damp cloth – without any additives.
• Cups, detachable cup shelf, drip tray, permanent filter and filter holder should be cleaned in a bowl of water.
• After cleaning, re-attach the drip tray and the cup shelf correctly.
Technical Data
Model: KA 3459 T
Power supply: 220 - 240 V\~, 50 Hz
Power consumption: 360 - 440 W
Protection class: ....
Filling quantity: ....max. 300 ml
Net weight: .... approx. 0.87 kg
Subject to technical changes without prior notice!
This device has been tested according to all relevant current CE guidelines, such as electromagnetic compatibility and low voltage directives, and has been constructed in accordance with the latest safety regulations.
Disposal
Meaning of the "Wheelie Bin" Symbol
Take care of our environment, do not dispose of electrical appliances via the household waste.
Dispose of obsolete or defective electrical appliances via municipal collection points.
Please help to avoid potential environmental and health impacts through improper waste disposal.
You contribute to recycling and other forms of utilization of old electric and electronic appliances.
Your municipality provides you with information about collecting points.
Instrukcja obsługi
CTC Clatronic Sp. z o.o