
Classic Paddy Master 242110 - Coffee machine PRINCESS - Free user manual and instructions
Find the device manual for free Classic Paddy Master 242110 PRINCESS in PDF.
| Brand | Princess |
| Model | Classic Paddy Master 242110 |
| Category | Coffee machine |
| Coffee type | Flexible filter pods (60 mm) |
| Capacity | 1 or 2 cups |
| Water tank | Removable, max capacity not specified (MAX level) |
| Pressure | Not applicable (filter coffee) |
| Functions | 1 cup and 2 cup buttons, automatic shut-off after 1 hour |
| Power | Approximately 1000-1500 W (estimate) |
| Voltage | 230 V (typical) |
| Frequency | 50 Hz (typical) |
| Weight | Approximately 2 kg (estimate) |
| Dimensions (L x W x H) | Approximately 25 x 15 x 30 cm (estimate) |
| Material | Plastic and metal (metal distribution plate) |
| Color | Black (typical) |
| Cleaning | Clean removable parts with warm water, descaling recommended |
| Safety | Automatic shut-off, overheat protection, lid locking |
| Included accessories | 1 cup pod holder, 2 cup pod holder, drip tray, grid |
| Warranty | 2 years (common estimate) |
| Repairability | Repairs by a qualified technician only |
Frequently Asked Questions - Classic Paddy Master 242110 PRINCESS
User questions about Classic Paddy Master 242110 PRINCESS
0 question about this device. Answer the ones you know or ask your own.
Ask a new question about this device
Download the instructions for your Coffee machine in PDF format for free! Find your manual Classic Paddy Master 242110 - PRINCESS and take your electronic device back in hand. On this page are published all the documents necessary for the use of your device. Classic Paddy Master 242110 by PRINCESS.
USER MANUAL Classic Paddy Master 242110 PRINCESS
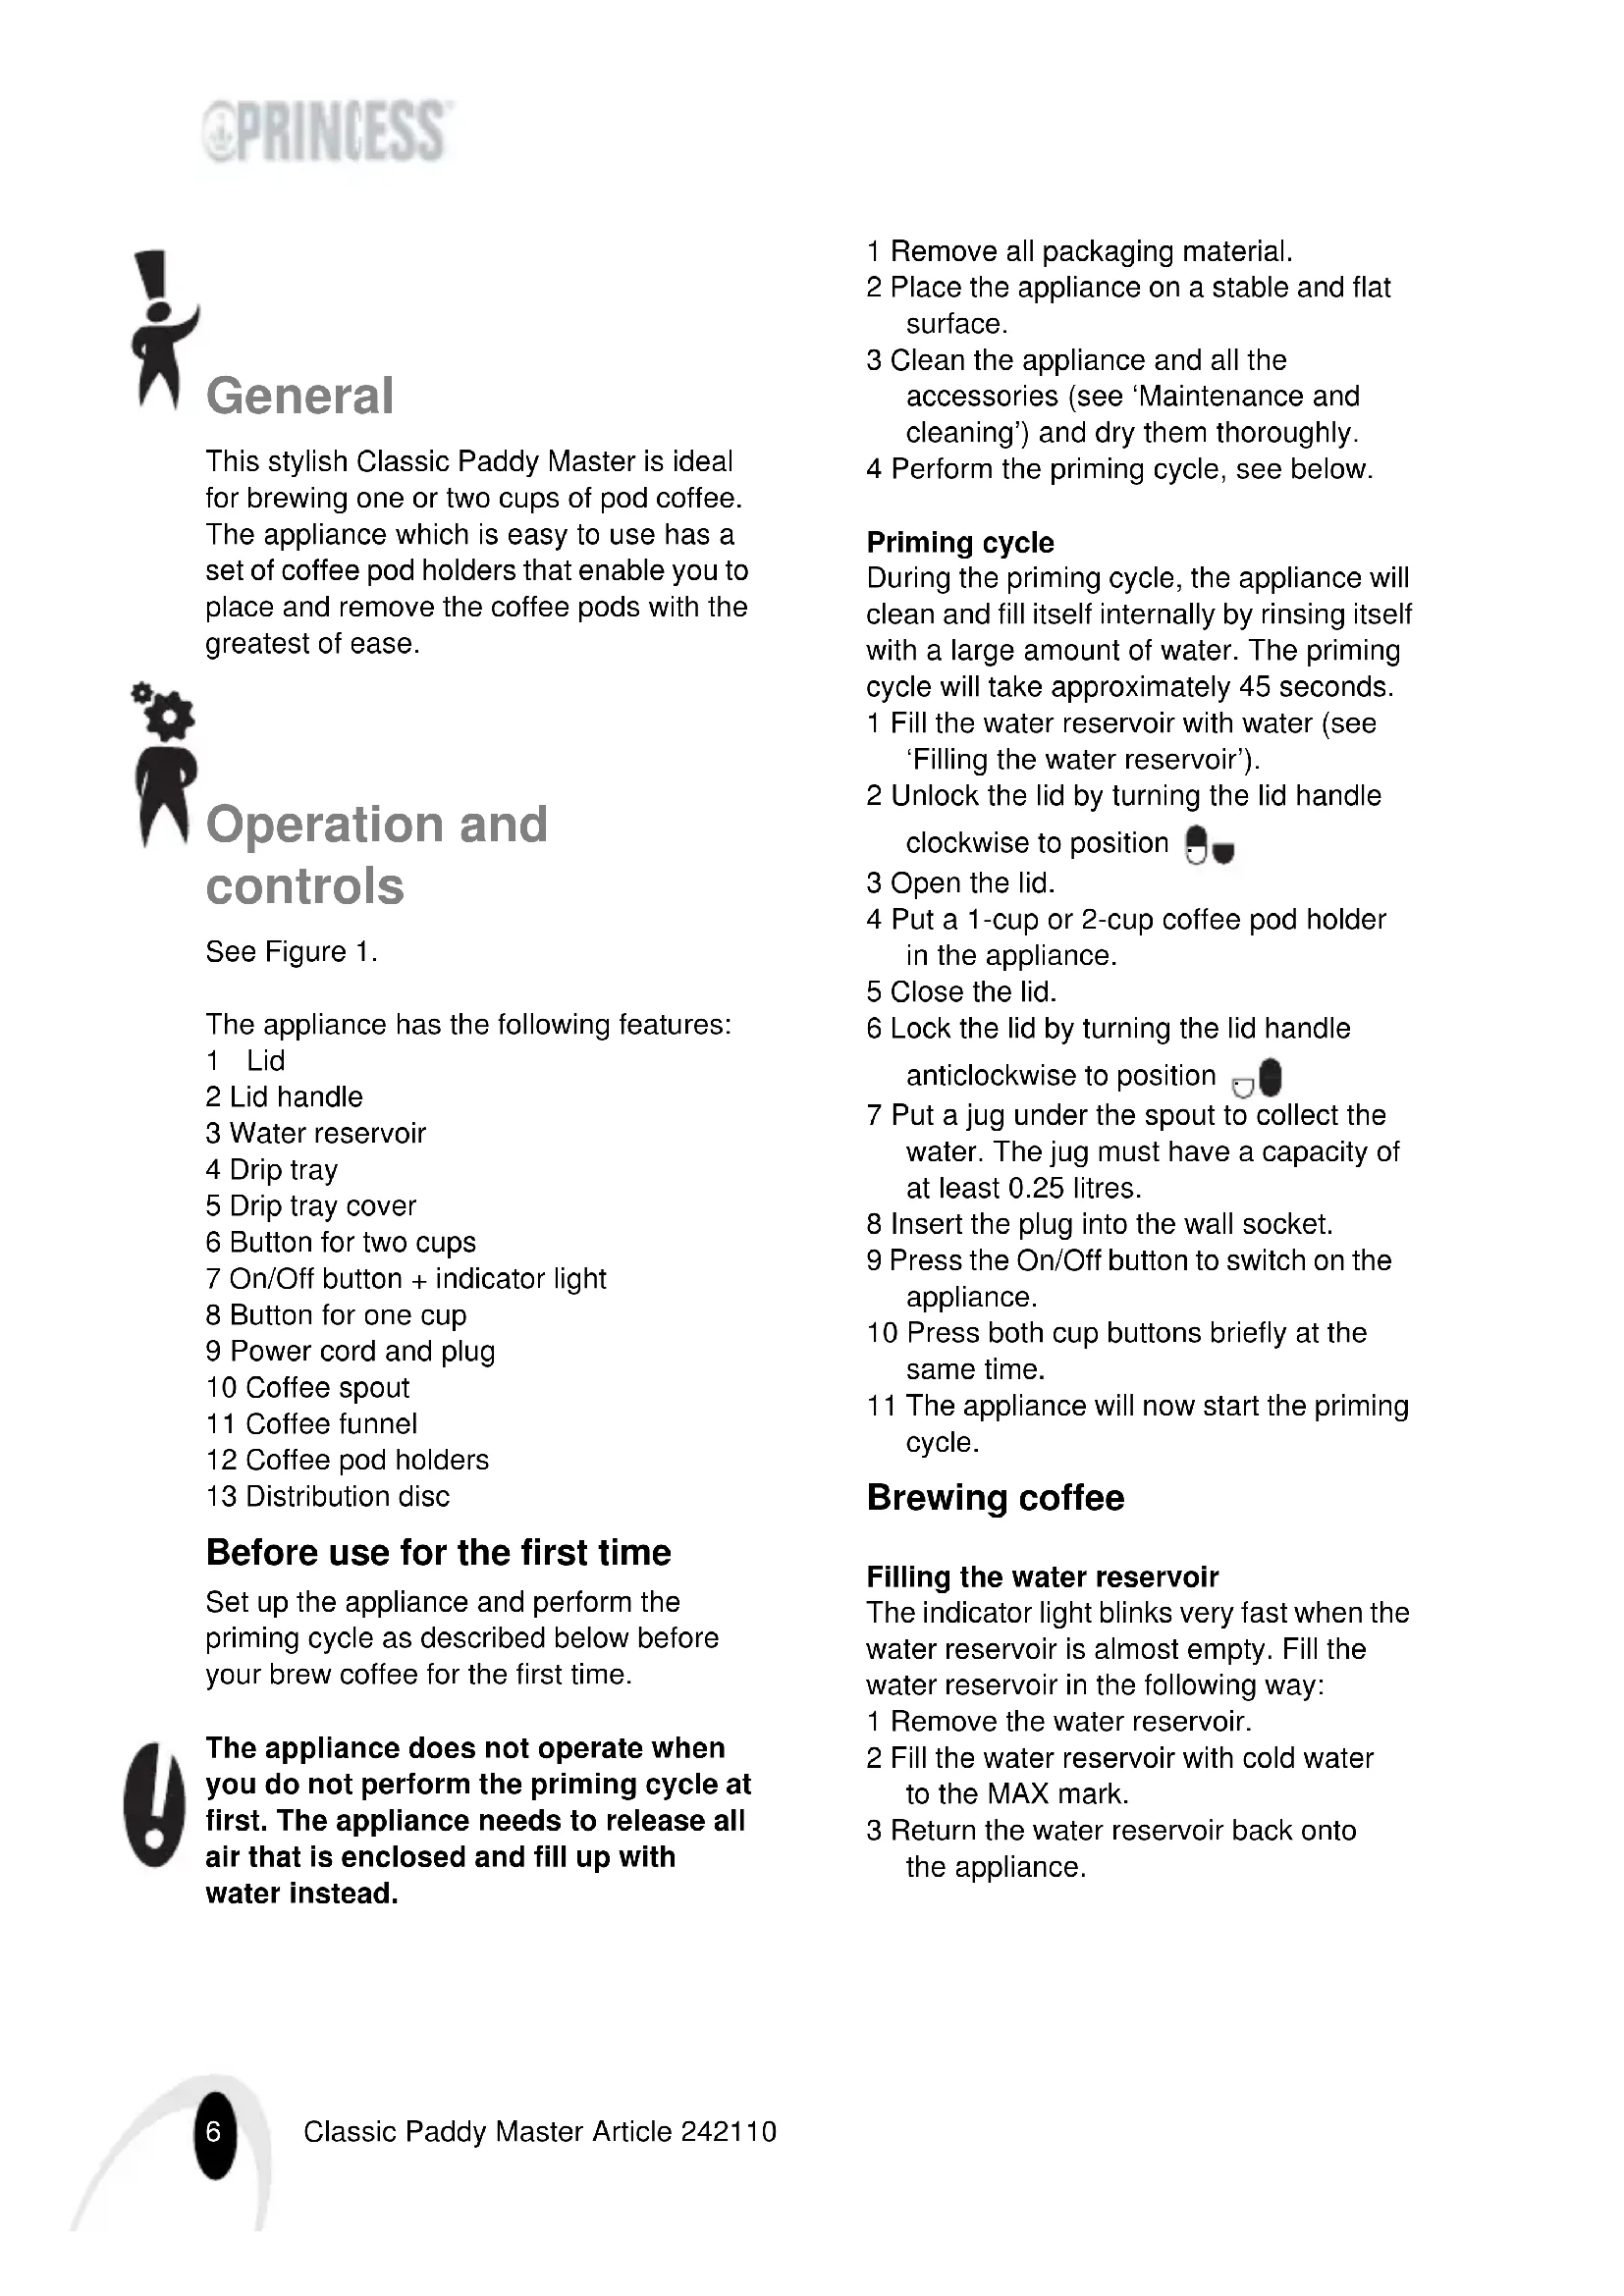
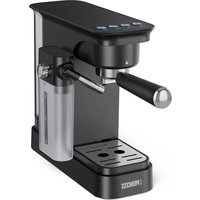
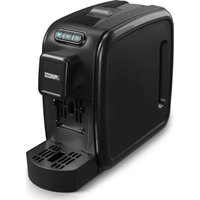
This stylish Classic Paddy Master is ideal for brewing one or two cups of pod coffee. The appliance which is easy to use has a set of coffee pod holders that enable you to place and remove the coffee pods with the greatest of ease.

Operation and controls
See Figure 1.
The appliance has the following features:
1 Lid
2 Lid handle
3 Water reservoir
4 Drip tray
5 Drip tray cover
6 Button for two cups
7 On/Off button + indicator light
8 Button for one cup
9 Power cord and plug
10 Coffee spout
11 Coffee funnel
12 Coffee pod holders
13 Distribution disc
Before use for the first time
Set up the appliance and perform the priming cycle as described below before your brew coffee for the first time.

The appliance does not operate when you do not perform the priming cycle at first. The appliance needs to release all air that is enclosed and fill up with water instead.
1 Remove all packaging material.
2 Place the appliance on a stable and flat surface.
3 Clean the appliance and all the accessories (see 'Maintenance and cleaning') and dry them thoroughly.
4 Perform the priming cycle, see below.
Priming cycle
During the priming cycle, the appliance will clean and fill itself internally by rinsing itself with a large amount of water. The priming cycle will take approximately 45 seconds.
1 Fill the water reservoir with water (see 'Filling the water reservoir').
2 Unlock the lid by turning the lid handle clockwise to position
3 Open the lid.
4 Put a 1-cup or 2-cup coffee pod holder in the appliance.
5 Close the lid.
6 Lock the lid by turning the lid handle anticlockwise to position
7 Put a jug under the spout to collect the water. The jug must have a capacity of at least 0.25 litres.
8 Insert the plug into the wall socket.
9 Press the On/Off button to switch on the appliance.
10 Press both cup buttons briefly at the same time.
11 The appliance will now start the priming cycle.
Brewing coffee
Filling the water reservoir
The indicator light blinks very fast when the water reservoir is almost empty. Fill the water reservoir in the following way:
1 Remove the water reservoir.
2 Fill the water reservoir with cold water to the MAX mark.
3 Return the water reservoir back onto the appliance.

Brewing coffee
- Always use soft coffee pods (60 mm). Hard coffee pods, often used in espresso machines, are not suitable for this appliance.
- Never use damaged coffee pods or ground coffee. These can block the distribution disc and the pod holder.
The number of coffee pods and the type of pod holder you use depend on the amount of coffee you wish to brew:
- for one cup: use one pod and the 1-cup pod holder.
- for two cups or a mug: use two pods and the 2-cup pod holder.
1 Press the On/Off button to switch on the appliance. The indicator light will blink slowly while the water is heating up. The appliance is ready to brew coffee once the indicator light is illuminated continuously.
2 Unlock the lid by turning the lid handle clockwise to position
3 Open the lid.
4 Put the coffee pod holder in the appliance.
5 Put the coffee pod(s) in the centre of the pod holder. The pod(s) must be inserted with the flat side facing upward and the curved side facing downward.
6 Close the lid.
7 Lock the lid by turning the lid handle anticlockwise to position
8 Put the cup(s) or the mug underneath the spout.

- Make sure that the lid is closed properly and locked before you start brewing coffee. If the lid is not closed properly, the indicator light will start blinking rapidly when you activate the appliance by pushing one of the buttons for one or two cups.
- Do not remove the water reservoir during the brewing cycle.
9 Press the button for the amount of coffee you wish to brew:
- the 'one cup' button for one 125 ml cup.
- the 'two cups' button for a mug or two 125 ml cups.
The appliance will now start brewing your coffee and automatically supplies the optimum quantity of water. The brewing cycle can be interrupted by pressing the On/Off button. If you switch the appliance back on then it will NOT complete the brewing cycle.
10 Remove and discard the coffee pod(s) after the brewing cycle. Coffee pods should only be used once.
11 Switch off the appliance after use (press the On/Off button) and remove the plug from the wall socket. If the appliance is not switched off then it will automatically switch off after 1 hour.

Maintenance and cleaning

- Never move the appliance when it is switched on or is still hot. Switch off the appliance, and wait until it has cooled down before you move it.
- Never immerse the appliance in water, or in other liquids. For your safety, do not use the appliance again if it falls into water; dispose of the appliance.
- Never use corrosive or scouring cleaning agents.
1 Make sure that the appliance is switched off (the indicator light is extinguished).
2 Remove the plug from the wall socket and allow the appliance to cool down completely.
3 Disassemble the coffee spout and the coffee funnel and remove them from the appliance.
4 Clean the pod holder, coffee funnel, water reservoir, drip tray, and tray cover with hot water.
5 Clean the exterior of the appliance with a soft, damp cloth.
6 Clean the metal distribution disc carefully with a damp cloth. Make sure you do not damage the rubber sealing ring at the distribution disc.
7 Put the coffee funnel back into the appliance and assemble the coffee spout.
8 Perform the priming cycle, see 'Before use for the first time'.
Dscaling
Limescale can reduce the performance of the appliance. The amount of limescale formed during use depends on the water hardness. We recommend that you use a suitable descending agent to remove limescale. Always follow the instructions enclosed with the descending agent. Less limescale will be formed when you use a water purification unit.

Complaints or problems due to furring or limescale are not covered by the warranty.
1 Fill the water reservoir with a mixture of water and descending agent up to the MAX mark.
2 Press the On/Off button to switch on the appliance. The indicator light flashes while the water heats. The appliance is ready for descaling once the indicator light is illuminated continuously.
3 Open the lid.
4 Put a used coffee pod or a special.
descending pod in the 1-cup pod holder. The pod will collect the limescale particles. You can also use the 2-cup pod holder with 2 used coffee pods.
5 Put the pod holder in the appliance.
6 Close the lid.
7 Put a can under the spout to collect the descending agent. The can must have a capacity of at least 1.5 litres.
8 Press the 'two cups' button.
9 Repeat step 8 until the water reservoir is empty.
10 Clean the appliance by repeating the steps 1 through 9 with fresh water.
11 Remove the pod or pods and clean the appliance (see 'Maintenance and Cleaning').

Safety
General
- Please read these instructions carefully, and retain them for future reference.
- Use this appliance only in accordance with the instructions.
- This appliance is intended solely for domestic use.
- The use of this appliance by children or persons with a physical, sensory, mental or motorial disability, or lack of experience and knowledge can give cause to hazards. Persons responsible for their safety should give explicit instructions or supervise the use of the appliance.
- Children should be supervised to ensure that they do not play with the appliance.
- Have the appliance repaired only by a qualified electrician. Never try to repair the appliance yourself.
- Only use accessories recommended by the supplier. The use of other accessories may result in damage to the appliance, thereby creating hazards for the user.
Electricity and heat
- Verify that the mains voltage is the same as that indicated on the type plate on the appliance before use.
- Connect the appliance to an earthed wall socket.
- Always remove the plug from the wall socket when the appliance is not in use.
- Always remove the plug from the wall socket by pulling on the plug, not the power cord.
- Never pull on the power cord to move the appliance.
- Do not use the appliance any longer if the power cord or the appliance has been damaged. To avoid risks, send the appliance to our service department. A damaged power cord can be replaced solely by our service department, who have the special tools required for the repair.
- Make sure that the appliance and the power cord do not come in contact with sources of heat, such as a hot hob or naked flame.
- Make sure that the cord and the plug do not come in contact with water.
- The appliance needs space to allow heat to escape, thereby preventing the risk of fire. Make sure that the appliance has sufficient space around it, and does not come in contact with flammable material. The appliance must not be covered.
During use
- Never use the appliance outdoors.
- Never use the appliance in humid rooms.
- Place the appliance on a stable and flat surface where it cannot fall over.
-
Do not let the cord hang over the edge of the draining board, worktop or table.
-
Make sure that your hands are dry when you touch the appliance, the power cord or the plug.
- Switch off the appliance and remove the plug from the wall socket in the event of a malfunction during use, and before cleaning the appliance, fitting or removing an accessory, or storing the appliance after use.
- Make sure that small children cannot reach the appliance.
- Do not use the appliance near another heat source. Make sure that the hot parts of the appliance do not come into contact with flammable fabrics, such as tea towels.
- Certain parts of the appliance can become hot. To avoid being scalded, do not touch the hot parts of the appliance.
- Do not switch on the appliance before you have filled the water reservoir. Fill only with cold water.
- Never fill above the maximum water level indicator.
- Make sure that you use soft coffee pods (60 mm). Hard coffee pods, often used in espresso machines, are not suitable for this appliance.
- Never immerse the appliance, the cord or the plug in water or any other liquid.
- Do not pick up the appliance if it falls into water. Remove the plug from the wall socket immediately. Do not use the appliance any more.
- Clean the appliance thoroughly after use (see 'Maintenance and cleaning'). Let the appliance cool down fully before you store it away, maintain and/or clean it.
U.K. WIRING INSTRUCTIONS
The wires in the mains lead are coloured in accordance with the following code:
As the colours of the wire in the mains lead of this appliance may not correspond with the colour markings identifying the terminals on your plug, proceed as follows:
- The wire which is coloured BLUE must be connected to the terminal which is marked with the letter N or coloured black.
- The wire which is coloured BROWN must be connected to the terminal which is marked with the letter L or coloured red.
- The wire which is coloured GREEN/YELLOW must be connected to the terminal which is marked with the letter E or (earth symbol) and is coloured GREEN or GREEN/YELLOW

WARNING: THIS APPLIANCE MUST BE EARTHED

The Environment
Dispose of packaging material, such as plastic and boxes, in the appropriate waste containers.
You should ensure for the reuse of the appliance if you wish to dispose of it whilst it is still in good working order or needs only a minor repair.
When the appliance reaches the end of its useful life it must be disposed of in a responsible manner, thereby ensuring for the reuse of (parts of) the appliance. Do not dispose of the appliance with unsorted refuse; hand it in at the store, or take it to a recognized collection point. Contact your municipality for information about the reception and collection systems in your area.
Applicable European directive:
2002/95/EC
2002/96/EC

Généralités
2002/95/EF
2002/96/EF

Yleistä
a a a a a a a a a a a a a a a a a a a a a a
a
山
sllj slic Lioic aJcJyJ 1
aJLLJI aJLLJI eJI JSLol.
1.1
MAX 4o5eJI JI JI JI JI JI JI JI JI JI JI JI JI JI JI JI JI JI JI JI JI JI JI JI JI JI JI JI JI JI
jLg 1sLg sLL jzgsa
PLC
JLIOI Jg>Joo Classical Paddy Master
gill jgl fll iog. ieai al og gall no yulie
m = 311
51
511 1
ybaill a
j
j
1g j[aij yasiojj
JLJIgJJ11w .9
gagai jin
a5 + a6 + a_7 = 8 13
oggaiieilololol.
g j 1
Jg21 0aL pssw21
gLoJg21 aagai gajll slg jg 5
aogaggall

aagaiyogaiyplaiipacjgljgJaoX Jiaagaii gai! jyJgai
LJ 2ycllllalogj
:LaasgagaaalogaaJaaa aaa Jlae Jlae
10 aew jaejogagall 0g jn
山
j
Logio J51 Jo 190 aew oggell
a051jg j 123
JiJi jinaijI ojoa eblao 5u Jno a wlll
jglj jw woclc! ic.
y
gagall jn 8ogagll oal
Iaee aoegeoogagall
j(c)paxw81e jgJ 1
JaaJIaJIgag(g)JIJIaJI/
aegjai jglalalpcc aJg Jbllu
aCLw e! jLJI

i
LisLJy2Loqglalcetlljg
aai jzjg jzjg jzjg
gjglg jilg w g jglg jz
abgaw alo syl aoy jlgai pssuiy J lo21
gJfI Ic AIO yalSg.ell
oLslgo gJSLs jbsj slgo pssui 8

1
aLzjg jzglzao
jgljooogagallgogogagallgai

a_0 + a = 1
aLci (c1) cLuo ogg aLci 0gs p
CILsLO 05c pssui aSowJ ogzai
jL 1i jaiwio yog. gyy
ogggi aaiyogg aalei alno po suiy
Jolg jgjg jg jg jg jg
a1 = 2,a8 = - 4
gai aal 1 Jolge gig oogall aoie
Lgj
Joo 1g 1e 100
Jie jie Jg aai Jolog gai
LoLg jEeLpssu:Jy g Jus
aolc
j 1 j 1 j 1 j 1
jglf c. sll jsswslj sbclal
jol
y
g slln jao yjol abwgl lsl J 5
GgJl JAcLJI WLa
S OBC = S COD + S_ BOC
jLgfooggJ Lc Joo
aLolal
Lc8 aee 1e eae
Jawg jaiil
S BCD = S COD + S BDO - S BOC
Jsc fIhjI jao 0j1 aHwIg sIJI Jaa .V
GgJJIaCLWJUacol
j1p1p1n1n1n1n1n1n1n1n1
wulpucjolalJlab21c
L4
aag afojfofofofofofofofofofofofofofofofofofofofofofofofofofofofofofofofofofofofofofofofofofo
5.2.10 ayol 100
puiuui 1.3> jbil g aigai jgai I Jao
(20
4y
jLg1sglgmoIcAolwJg0
pss sll aegnai yjy jao 2g
jbo plasimly ggi jni sll jnuu ginnu lc
Laii. aaoill ayai all ai jx
a. a y 1 a y a a l l a Jl j oLo a >j g c o>g>1
aaiJiaao aiaiwo fll aai 0g pui

LgLo 8 aaii aaii j
L
1
MAX a.o.lle)
jIg jIg 1Jg 1Jg 1Jg 1Jg 1Jg 1Jg 1
jgl 1 C. slu y s J Lai jgll C
jL
y
a1 = 2,an + 1 = 2 - anan + 1
j1 j0 11 jg jg jz jz g jz jz jz jz jz jz jz jz jz jz jz jz jz jz jz jz jz jz jz jz jz jz jz jz jz jz jz jz jz jz jz jz jz jz
Jg1 JJIaB2I JGw gAicLsO PAc no 5i
S1 JyJyJyJyJyJyJy
JzJzJzJzJzJzJzJz
1 1 1 1 1 1 1 1 1 1 1 1 1 1 1 1 1 1 1 1 1 1 1 1 1 1 1 1 1 1 1 1 1 1 1
aai 11 gao yao jie 2 aic (1) oog aai aic plai wu 5 L 1sLo aLc pssuiw asawll ogagjI jgai liai aywliyeg "gww
gcll 1 gll 1 1
aaii 10000000000000000000000000000000000000000000000000000000000
aaiii g/ gaii

A
y. 1111111111111111111111
aio 111 151 151 piai i 0o 5i 11

y jy yj yj yj yj yj yj yj yj yj yj yj yj yj yj yj yj yj yj yj yj yj yj yj yj yj yj yj yj yj yj yj yj yj yj yj yj yj yj yj yj yj yj yj yj yj yj yj yj yj yj y
a1b1 = a2b2
a 11 a13 g a y51 241 1g 23
puiwj jq jq1 qc g jl
bldu jaoe jq1 j
88 Lioic 100000000000000000000000000000000000000
J 1
11w no g 13! 120jg1 pssu 120jg1 pssus 8. aai jll jlgglg 11
s 111111111111111111 11111111111111 4
. 1 J Lw0y 2 J I I Cw g jg 1 J b S
. 1 1 1 1 1 1 1 1 1 1 1 1 1 1 1 1 1 1 1 1 1
J 1000000000000000000000000000000000000000000000000000000
p12081sLi
aagai jol0j jlaai
aJ1j10
1 1
g 100
111111111111111 11111111111


- Operation and controls
- Before use for the first time
- Priming cycle
- Brewing coffee
- Filling the water reservoir
- Maintenance and cleaning
- Dscaling
- Complaints or problems due to furring or limescale are not covered by the warranty.
- Safety
- General
- Electricity and heat
- During use
- U.K. WIRING INSTRUCTIONS
- The Environment
- Généralités
- Yleistä
- a
- 山
- PLC
- Jg21 0aL pssw21
- i
- 4y
- LgLo 8 aaii aaii j
Brand : PRINCESS
Model : Classic Paddy Master 242110
Category : Coffee machine