
TX492RDS - Home cinema amp YAMAHA - Free user manual and instructions
Find the device manual for free TX492RDS YAMAHA in PDF.
| Product type | Home theater amplifier (tuner) |
| Brand | YAMAHA |
| Model | TX492RDS |
| Reception bands | FM, AM (MW/LW) |
| Tuning | Automatic and manual |
| Station presetting | Up to 40 stations (5 groups of 8) |
| RDS functions | PS, PTY, RT, CT, EON |
| PTY program types | 15 types (NEWS, SPORT, etc.) |
| Power consumption | 7 W |
| Power supply | 110-120/220-240 V, 50/60 Hz (general model) |
| Audio output | Fixed level: 900 mV (FM) / 150 mV (AM) into 2.2 kΩ |
| Supplied antennas | Indoor FM antenna, AM loop antenna |
| Remote control receiver | Infrared, compatible with YAMAHA amplifiers |
| Display | Frequency, RDS indicators, signal level |
| Cleaning | Clean, dry cloth; do not use solvents |
| Safety | Unplug before cleaning; do not expose to moisture |
| Included accessories | Antennas, instruction manual |
| Grounding | GND terminal for safety |
| Voltage selector | Adjustable (general model) |
Frequently Asked Questions - TX492RDS YAMAHA
User questions about TX492RDS YAMAHA
0 question about this device. Answer the ones you know or ask your own.
Ask a new question about this device
Download the instructions for your Home cinema amp in PDF format for free! Find your manual TX492RDS - YAMAHA and take your electronic device back in hand. On this page are published all the documents necessary for the use of your device. TX492RDS by YAMAHA.
USER MANUAL TX492RDS YAMAHA
Natural Sound AM/FM stereotuner
40 Station Random Access Preset Tuning
Automatic Preset Tuning
Multi-Status Station Memory
- Direct PLL Synthesizer Tuning
- Preset Station Shifting Capability (Preset Editing)
TX-492RDS only
Multi-Functions for RDS Broadcast Reception
CONTENTS
Supplied Accessories. 2
Caution. 3
Connections. 4
Controls and Their Functions. 7
Tuning Operations 9
Preset Tuning. 10
Receiving RDS Stations TX-492RDS only 13
Troubleshooting 18
Specifications. 19
CAUTION: READ THIS BEFORE OPERATING YOUR UNIT.
- This unit is a sophisticated stereo tuner. To assure proper operation and the best possible performance, please read this manual carefully.
- Choose the installation location for the unit carefully. Avoid placing it in direct sunlight or close to a source of heat. Also avoid locations subject to vibration and excessive dust, heat, cold or moisture. Keep it away from such sources of hum as transformers or motors.
- Do not open the cabinet, because this may result in damage to the unit or electrical shock. If a foreign object should get into the unit, contact your local dealer.
- When not planning to use this unit for long periods of time (ie., vacation, etc.), disconnect the AC power plug from the wall outlet.
- To prevent lightning damage, disconnect the AC power plug and disconnect the antenna cable when there is an electrical storm.
- When disconnecting the power plug from the wall outlet, always pull directly on the plug; never pull the cord itself.
- Do not use force when operating switches and other controls.
- When moving the unit, be sure to first disconnect the power plug and disconnect all wires connected from the unit to other equipment.
- Do not attempt to clean this unit with chemical solvents, because this may damage the finish. Use a clean, dry cloth.
- Be sure to read the "TROUBLESHOOTING" section of this manual for advice on common operating errors before concluding that the unit is faulty.
- Keep this manual in a safe place for future reference.
- Voltage Selector (General Model only) The voltage selector on the rear panel of this unit must be set for your local main voltage BEFORE plugging into the AC main supply. Voltages are 110-120/220-240V AC, 50 / 60Hz
FREQUENCY STEP switch (General Model only)
Because the interstation frequency spacing differs in different areas, set the FREQUENCY STEP switch (located at the rear) according to the frequency spacing in your area. Before setting this switch, disconnect the AC power plug of this unit from the AC outlet.
IMPORTANT
Please record the serial number of this unit in the space below.
Serial No.:
The serial number is located on the rear of the unit. Retain this Owner's Manual in a safe place for future reference.
WARNING
TO REDUCE THE RISK OF FIRE OR ELECTRIC SHOCK, DO NOT EXPOSE THIS APPLIANCE TO RAIN OR MOISTURE.
The apparatus is not disconnected from the AC power source as long as it is connected to the wall outlet, even if the apparatus itself is turned off.
For U.K. customers
If the socket outlets in the home are not suitable for the plug supplied with this appliance, it should be cut off and an appropriate 3 pin plug fitted. For details, refer to the instructions described below.
Note: The plug severed from the mains lead must be destroyed, as a plug with bared flexible cord is hazardous if engaged in a live socket outlet.
Special Instructions for U.K. Model
IMPORTANT
THE WIRES IN THE MAINS LEAD ARE COLOURED IN ACCORDANCE WITH THE FOLLOWING CODE:
Blue:NEUTRAL
Brown: LIVE
The colours of the wires in the mains lead of this apparatus may not correspond with the coloured markings identifying the terminals in your plug. Proceed as follows: the wire which is coloured BLUE must be connected to the terminal which is marked with the letter N or coloured BLACK. The wire which is coloured BROWN must be connected to the terminal which is marked with the letter L or coloured RED. Making sure that neither core is connected to the earth terminal of the three pin plug.
CONNECTIONS
Never plug in this unit and other components until all connections are completed.
ANTENNA CONNECTIONS
Each antenna should be connected to the designated terminals correctly, referring to the following figure.
- Both AM and FM indoor antennas are included with this unit. In general, these antennas will probably provide sufficient signal strength. Nevertheless, a properly installed outdoor antenna will give clearer reception than an indoor one. If you experience poor reception quality, an outdoor antenna may result in improvement.
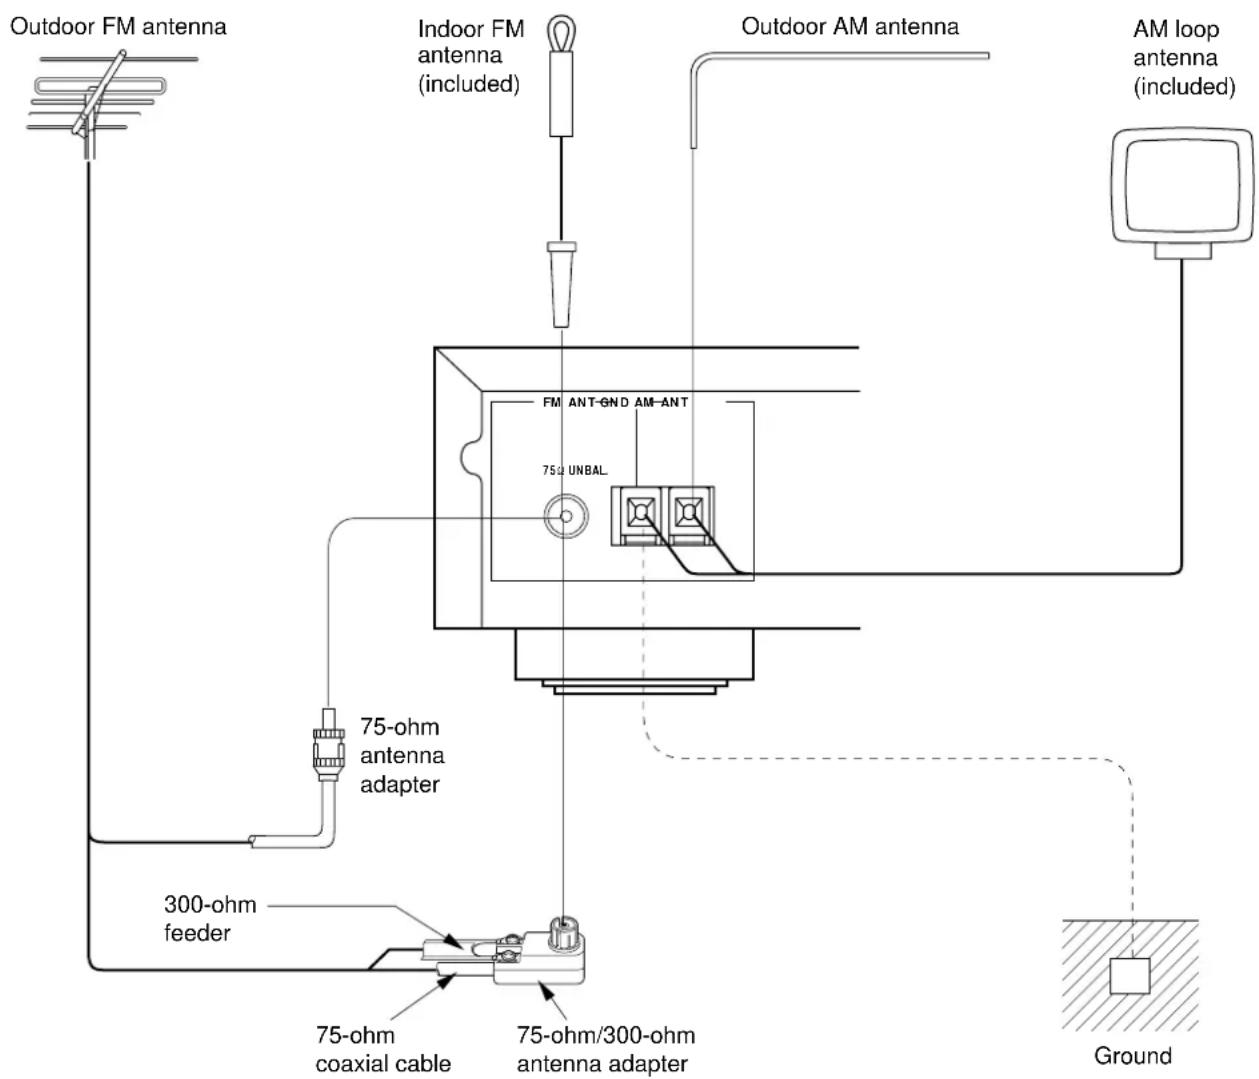
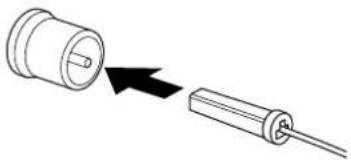
Connecting the indoor FM antenna
Connecting the AM loop antenna
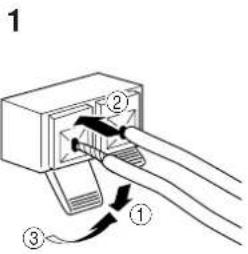
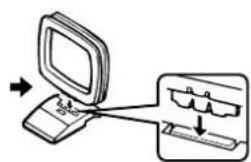
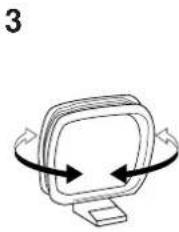
Orient so that the best reception is obtained.
- If you connect an outdoor FM antenna to this unit, do not connect the indoor FM antenna to this unit.
- The AM loop antenna should be placed apart from the main unit. The antenna may be hung on a wall.
- The AM loop antenna should be kept connected, even if an outdoor AM antenna is connected to this unit.
■ Optional outdoor FM antenna
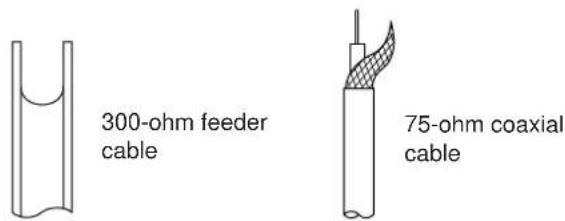
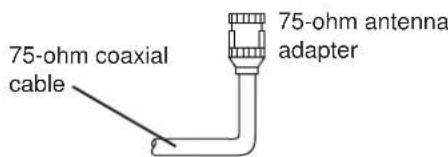
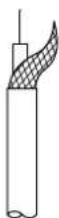
Consult with your dealer or authorized service center about the best method of selecting and erecting an outdoor FM antenna. The choice of the feeder cable is also important. Flat ribbon-shaped twin-lead cable performs well electrically, and is cheaper and somewhat easier to handle when routing it through windows and around rooms. Coaxial cable is more expensive, does a much better job of minimizing interference, is less prone to the effects of weather and close-by metal objects, and is nearly as good a signal conductor as feeder cable, particularly for foam-type coaxial cables. Coaxial cable is somewhat more difficult to install at the point where the cable enters the building. If coaxial cable is selected, make sure the antenna is designed to be used with that type of cable.
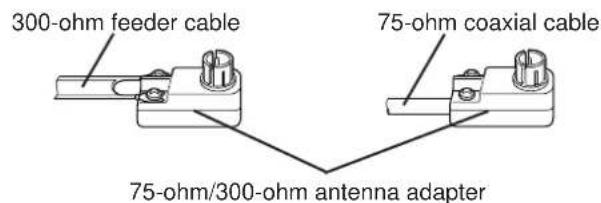
- Use a 75-ohm/300-ohm antenna adapter (not included) or a 75-ohm antenna adapter (not included) for connections.
Notes for FM antenna installation
To minimize automobile ignition noise, locate the antenna as far from heavy traffic as possible.
- Keep the feeder cable or coaxial cable as short as possible. Do not bundle or roll up excess cable.
- The antenna should be at least two meters (6.6 feet) from reinforced concrete walls or metal structures.
■ Optional outdoor AM antenna
In steel buildings or at a great distance from the transmitter, it may be necessary to install an outside long wire antenna.
GND terminal
For maximum safety and minimum interference, connect the GND terminal to a good earth ground. A good earth ground is a metal stake driven into moist earth.
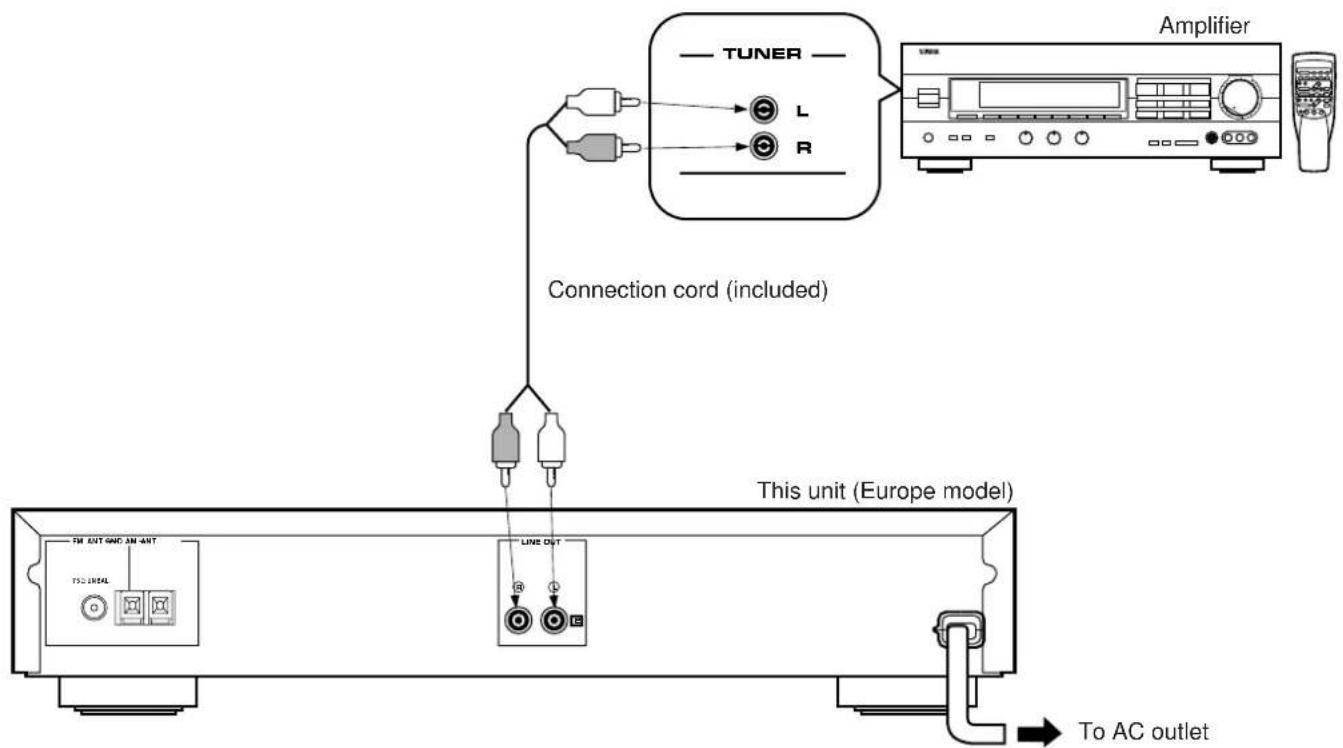
CONNECTIONS TO THE AMPLIFIER
- Before making any connections, switch OFF the power to this unit and the amplifier or other component.
- Be sure that the connections from the left ("L") and right ("R") LINE OUT terminals are connected to the corresponding (left and right) input terminals of the amplifier or other component.
If you have a YAMAHA amplifier whose terminals on the rear panel are numbered as 1, 2, 3, etc., connections can be made easily by making sure to connect the LINE OUT terminals of this unit to the input terminals of the amplifier numbered 2.
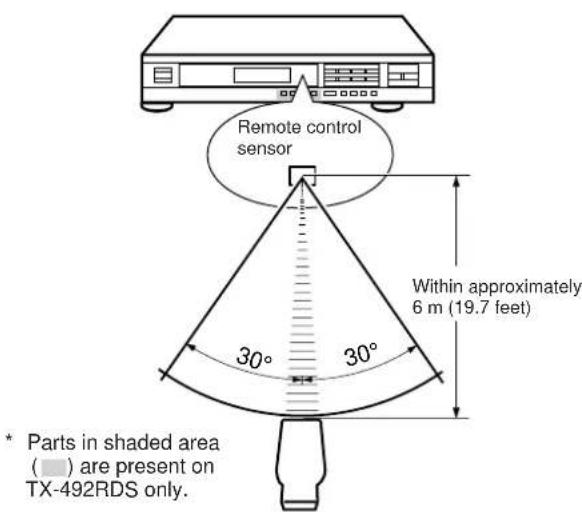
NOTES ABOUT CONTROLLING THIS UNIT WITH THE REMOTE CONTROL TRANSMITTER
This unit has a remote control sensor. It receives signals from a remote control transmitter provided with a YAMAHA amplifier or receiver.
Notes
- There should be no large obstacles between the remote control transmitter and the main unit.
- If the remote control sensor is directly illuminated by strong lighting (especially an inverter type of fluorescent lamp etc.), it might cause the remote control transmitter not to work correctly. In this case, reposition the main unit to avoid direct lighting.
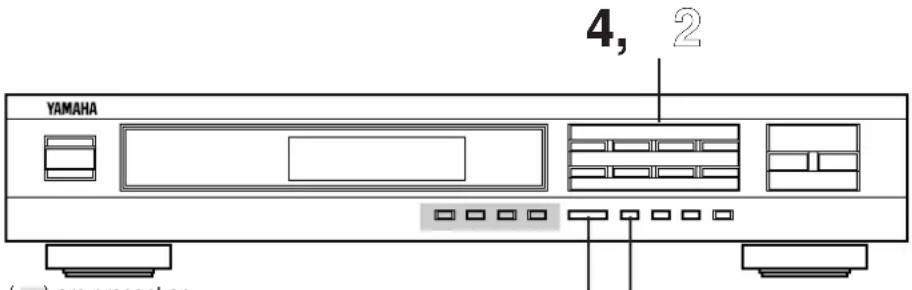
CONTROLS AND THEIR FUNCTIONS
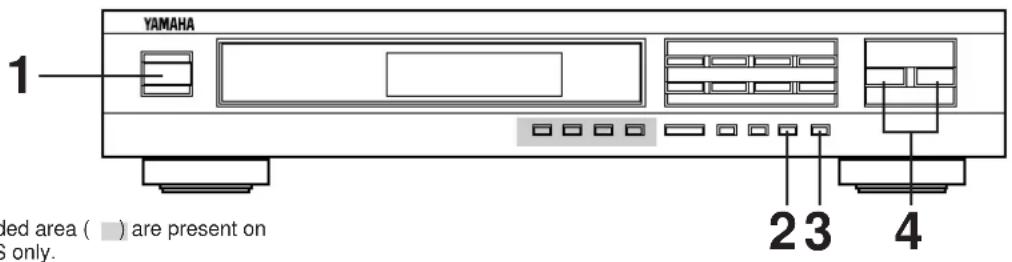
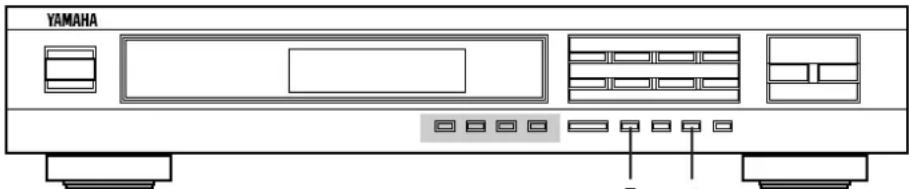
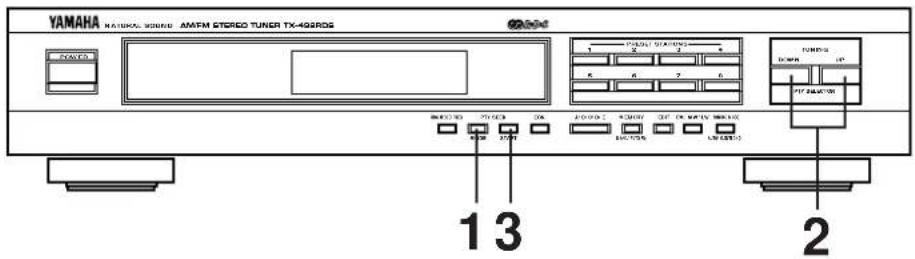
FRONT PANEL
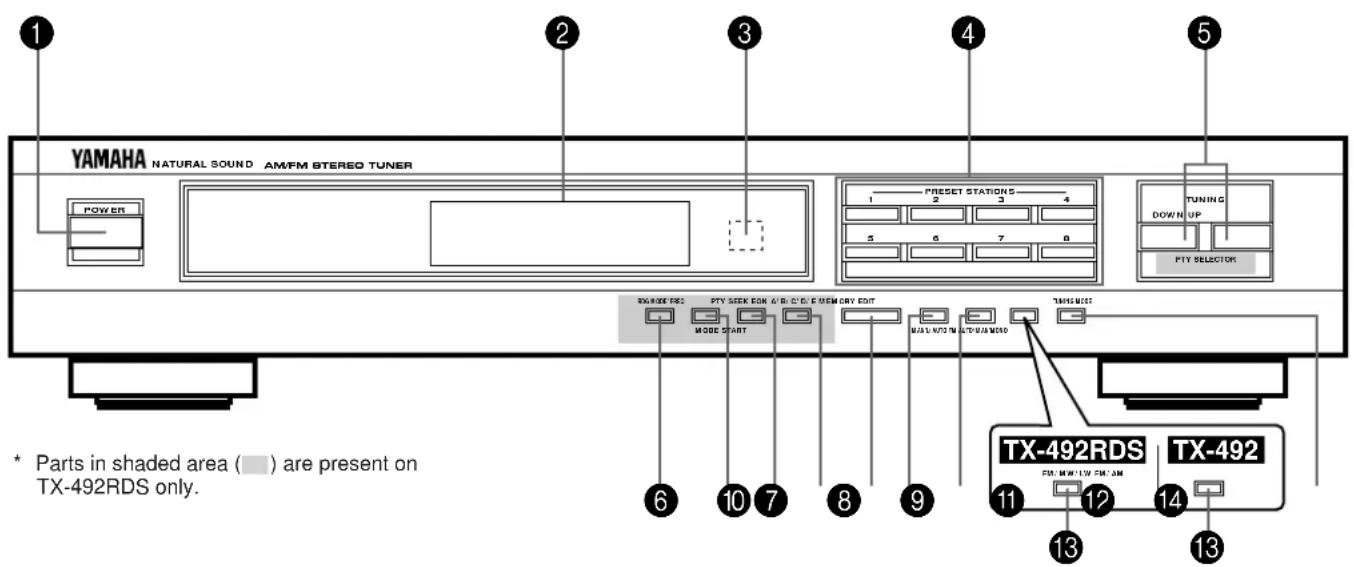
1 POWER switch
Press this switch to switch the power on. Press it again to switch the power off.
Display panel
Shows station frequencies and various information. (Refer to the next page for details.)
Remote control sensor
Receives signals from a remote control transmitter provided with a YAMAHA amplifier or receiver.
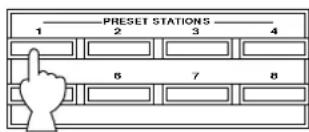
4 PRESET STATIONS buttons
Select a preset station number (1 to 8).
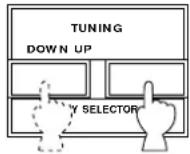
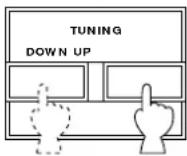
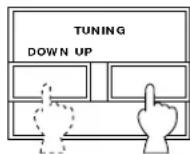
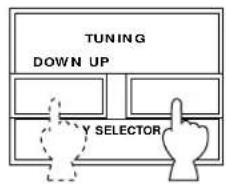
TUNING DOWN and UP buttons
Used for tuning. Press the "UP" button to tune in to higher frequencies, and press the "DOWN" button to tune in to lower frequencies.
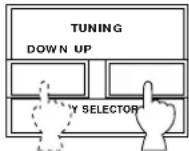
PTY SELECTOR buttons TX-492RDS only
When this unit is in the PTY SEEK mode, pressing these buttons changes the currently selected program type.
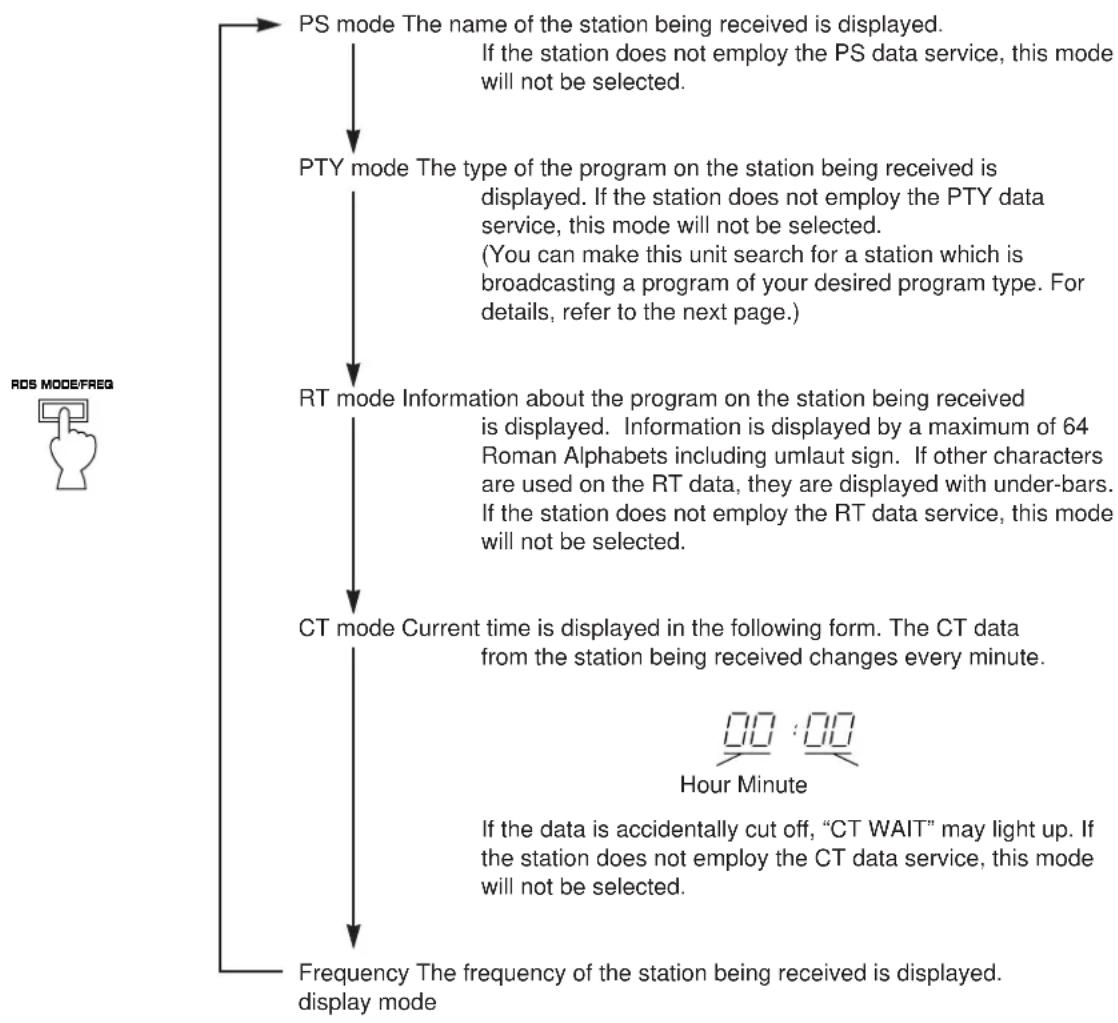
6 RDS MODE/FREQ button TX-492RDS only
When an RDS station is received, pressing this button changes the display mode into the PS mode, PTY mode, RT mode and/or CT mode (if the station employs those RDS data services), and frequency display in turn.
PTY SEEK MODE button TX-492RDS only
When this button is pressed, the unit turns into the PTY SEEK mode.
⑧ PTY SEEK START button TX-492RDS only
Press this button to begin searching for a station after the desired program type is selected in the PTY SEEK mode.
EON button TX-492RDS only
Press this button to select a desired program type (NEWS, INFO, AFFAIRS, SPORT) when you want to call a radio program of that program type automatically.
10 A/B/C/D/E button
Press this button to select a desired group (A-E) of preset stations.
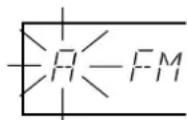
11 MEMORY (MAN'L/AUTO FM) button
When this button is pressed, the MEMO indicator flashes for about 5 seconds. During this period, press the desired PRESET STATIONS button to enter the displayed station into the memory.
When this button is pressed and held for about 3 seconds, the automatic preset tuning begins. (Refer to page 11 for details.)
12 EDIT button
This button is used to exchange the places of two preset stations with each other.
FM/MW/LW button TX-492RDS
Press this button to switch the reception band to FM, MW or LW.
FM/AM button TX-492
Press this button to switch the reception band to FM or AM.
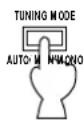
14 TUNING MODE (AUTO/MAN'L MONO) button
Press this button to switch the tuning mode to automatic or manual. To select the automatic tuning mode, press this button so that "AUTO" lights up on the display. To select the manual tuning mode, press this button so that "AUTO" goes off.
DISPLAY PANEL
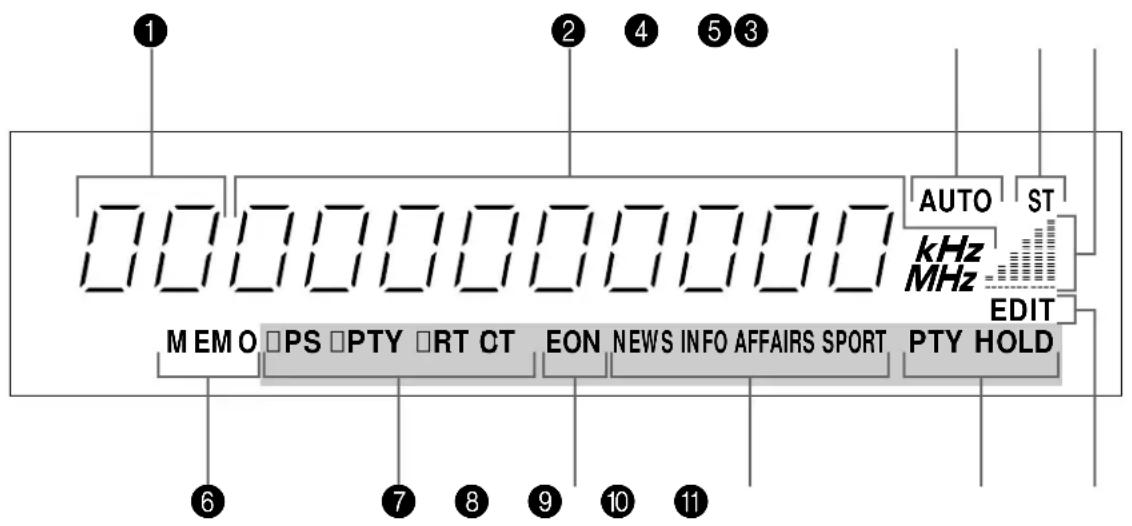
* Parts in shaded area ( ) are present on TX-492RDS only.
1 Preset station indicator
Display the group (A/B/C/D/E) and the number (1 to 8) of a preset station.
2 Station frequency display
Displays the band and frequency or information from the received station.
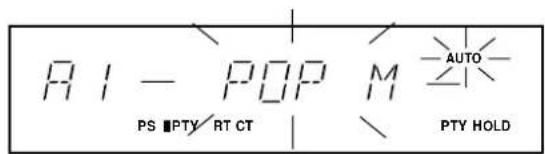
3 AUTOindicator
Lights up when this unit is in the automatic tuning mode.
ST (STEREO) indicator
Lights up when an FM stereo broadcast with sufficient signal strength is received.
5 Signal-level meter
Indicates the signal level of the received station. If multipath interference is detected, the indication decreases.
6 MEMO indicator
When the MEMORY button is pressed, this indicator flashes for about 5 seconds. During this period, the displayed station can be programmed to the memory by using the A/B/C/D/E button and one of the PRESET STATIONS buttons.
7 RDS mode indicator TX-492RDS only
The name(s) of RDS mode(s) employed by the currently received RDS station light(s) up. Illumination of the indicator on the head of a name shows that the corresponding RDS mode is now selected.
EON indicato TX-492RDS only
Lights up when an RDS station that employs the EON-PTY data service is received.
9 Program type name indicator TX-492RDS only
The name selected in the EON mode lights up.
10 PTY HOLD indicatc TX-492RDS only
Lights up while the search is performed in the PTY SEEK mode.
11 EDIT indicator
Flashes by the first press of the EDIT button when you will exchange preset stations, and lights up for a moment by the second press of the EDIT button to show that the exchange has succeeded.
TUNING OPERATIONS
Normally, if station signals are strong and there is no interference, quick automatic-search tuning (AUTOMATIC TUNING) is possible. However, if signals of the station you want to select are weak, you must tune to it manually (MANUAL TUNING).
* Parts in shaded area ( ) are present on TX-492RDS only.
AUTOMATIC TUNING MANUAL TUNING

Turn the power on.


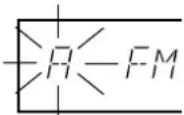
Select the reception band confirming it on the display.

TX-492RDS
FM/MW/LW


TX-492
EM/AM


or


TX-492RDS
TX-492
To tune to a higher frequency, press the UP button.
To tune to a lower frequency, press the DOWN button.
- If the station where tuning search stops is not the desired one, press again.
- If the tuning search does not stop at the desired station (because the signals of the station are weak), change to the MANUAL TUNING method.

Turn the power on.
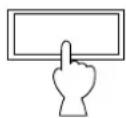
POWER

Select the reception band confirming it on the display.

TX-492RDS
FM/MW/LW


TX-492
FM/AM

or


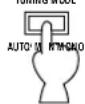
TUNING MODE

Turn "AUTO" off.

Tune to a desired station manually.
TX-492RDS
TX-492
- To continue tuning search, press and hold the button.
Notes
If you tune to an FM station manually, it is received in monaural mode automatically to increase the signal quality.
TX-492RDS only
- When tuned in to a station, the frequency of the received station is shown on the display. If an RDS station that employs PS data service is received, the frequency is then replaced by the station name. Refer to page 15 for details.

PRESET TUNING
MANUAL PRESET TUNING
This unit can store station frequencies selected by tuning operation. With this function, you can recall any desired station by only selecting the preset station number where it is stored. Up to 40 stations (8 stations x 5 groups) can be stored.
2, 3
- Parts in shaded area ( ) are present on TX-492RDS only.
To store stations
1 Tune to a desired station.
(Refer to the previous page for tuning procedure.)
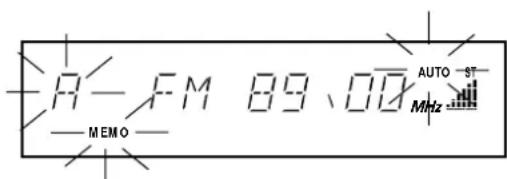
2 Select a desired group (A-E) of preset stations confirming it on the display.


3


Flashes on and off for about 5 seconds.
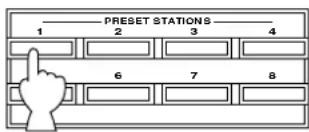
4 Select a preset station number where you want to program the station before "MEMO" goes off from the display.
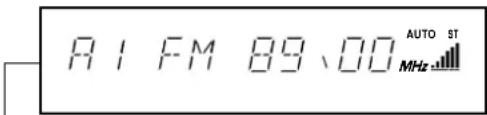
Shows the displayed station has been programmed to A1.
- In the same way, program other stations to A2, A3 ... A8.
- You can program more stations to preset station numbers on other groups in the same way by selecting other groups in step 2.
To recall a preset station
1 Select the group of preset stations.


2 Select the preset station number.
Notes
- A new setting can be programmed in place of the former one.
For presets, the setting of the reception mode (stereo or monaural) is stored along with the station frequency.
Memory back-up
The memory back-up circuit prevents the programmed data from being lost even if the POWER switch is set off or the power plug is disconnected from the AC outlet or the power is cut due to temporary power failure. If, however, the power is cut for more than one week, the memory may be erased. If so, it can be re-programmed by simply following the PRESET TUNING steps.
AUTOMATIC PRESET TUNING
You can also make use of an automatic preset tuning function for FM stations only. By this function, this unit performs automatic tuning and stores FM stations with strong signals sequentially. Up to 40 stations are stored automatically in the same way as in the manual preset tuning method on page 10.
TX-492RDS only
- Only RDS stations can be stored by this function.
-
Refer to page 13-17 for details on RDS stations.
-
Parts in shaded area
() are present on
TX-492RDS only.
21
To store stations

1
TX-492RDS
FM/MW/LW
TX-492

FM/AM
2

Press and hold for about 3 seconds.
Flashes.
The automatic preset tuning begins from the frequency currently displayed. Received stations are programmed to A1, A2 ... A8 sequentially.
* If more than 8 stations are received, they are also programmed to the preset station numbers on other groups (B, C, D and E) in that order.
When the automatic preset tuning is finished
The display shows the frequency of the last preset station. Check the contents and the number of preset stations by following the procedure of the section "To recall a preset station" on page 10.
To recall a preset station
Simply follow the procedure of the section "To recall a preset station" on page 10.
TX-492RDS only
A recalled station is shown by the frequency or station name on the display.
Notes
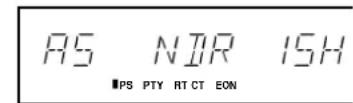
- If no station is received by the automatic preset tuning search, the search finishes after "NOTHING" flashes for about 3 seconds on the display.
TX-492RDS only
- You can replace a preset station by another FM, MW or LW station manually by simply following the procedure of the section "To store stations" on page 10.
- The automatic preset tuning search will be performed through all RDS network frequencies until stations are stored up to E8. If the number of received stations is not enough to be stored up to E8, the search is finished automatically after searching all frequencies.
- With this function, only RDS stations with sufficient signal strength are stored automatically. If the station you want to program is weak in signal strength, tune in to it with the MANUAL TUNING method (in monaural) and program it by following the procedure of the section "To store stations" on page 10.
- There may be a case that this function cannot receive a station which could be received by the automatic tuning method. This is because this function receives a large volume of PI (Program Identification) data along with the station.
TX-492 only
- You can replace a preset station by another FM or AM station manually by simply following the procedure of the section "To store stations" on page 10.
- The automatic preset tuning search will be performed through all FM frequencies until stations are stored up to E8. If the number of received stations is not enough to be stored up to E8, the search is finished automatically after searching all frequencies.
- With this function, only FM stations with sufficient signal strength are stored automatically. If the station you want to program is weak in signal strength, tune in to it with the MANUAL TUNING method (in monaural) and program it by following the procedure of the section "To store stations" on page 10.
EXCHANGING PRESET STATIONS
You can exchange the places of two preset stations with each other as shown below.
* Parts in shaded area ( ) are present on TX-492RDS only.
Example)
If you want to shift the preset station on E1 to A5, and vice versa.
1 Recall the preset station on E1 (by following the method of "To recall a preset station" on page 10).
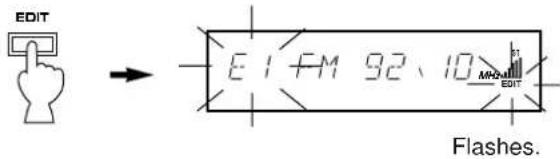
2
3 Next, recall the preset station on A5 by following the same method with step 1.
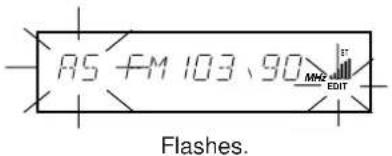

4
↓
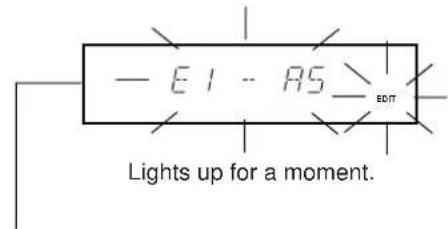
Shows the exchange of stations is completed.
In areas where RDS broadcasts cannot be received, the RDS broadcast functions do not operate. (The procedures from page 13 to page 17 are not necessary.)
RECEIVING RDS STATIONS TX-492RDS only
RDS (Radio Data System) is a data transmission system gradually being introduced by FM stations in many countries. Stations using this system transmit an inaudible stream of data in addition to the normal radio signal.
RDS data contains various information, such as PI (Program Identification), PS (Program Service name), PTY (Program Type), RT (Radio Text), CT (Clock Time), EON (Enhanced Other Networks), etc.
RDS function is carried out among the network stations.
- This unit utilizes PI, PS, PTY, RT, CT and EON to receive RDS broadcast stations.
Displaying RDS data

PS PTY RT CT EON

SPORT
This unit can be turned into the following four modes to display RDS data.
PS (Program Service name) mode:
Displays the name of the RDS station now being received instead of the frequency.
PTY (Program Type) mode:
Displays the type of the program on the RDS station now being received. There are 15 program types to classify RDS stations. Refer to the next page for details.
RT (Radio Text) mode:
Displays information about the program (such as title of the song, name of the singer, etc.) on the RDS station now being received.
CT (Clock Time) mode:
Displays current time. This signal comes from the RDS station now being received.
EON (Enhanced Other Networks) mode:
Automatically receives a program of the designated program type when its broadcast starts, in place of the program now being received. When the broadcast of the called program ends, the previously received program (or another program on the same station) is recalled.
Program types in the PTY mode
NEWS News:
Short accounts of facts, events and publicly expressed views, reportage and actuality.
AFFAIRS Current affairs:
Topical program expanding or enlarging upon the news, generally in different presentation style or concept, including documentary debate, or analysis.
INFO Information:
Program whose purpose is to impart advice in the widest sense, including meteorological reports and forecasts, consumer affairs, medical help, etc.
SPORT Sport:
Program concerned with any aspect of sport.
EDUCATE Education:
Program intended primarily to educate, of which the formal element is fundamental.
Drama: Drama:
CULTURE Culture:
Programs concerned with any aspect of national or regional culture, including religious affairs, philosophy, social science, language, theatre, etc.
SCIENCE Science:
Programs about the natural sciences and technology.
VARIED
Varied:
Used for mainly speech-based programs usually of light-entertainment nature, not covered by above categories. Examples are: quizzes, panel games, personality interviews, comedy and satire.
POP M
Pop:
Commercial music, which would generally be considered to be of current popular appeal, often featuring in current or recent record sales charts.
ROCK M
Rock:
Contemporary modern music, usually written and performed by young musicians.
M.O.R.M
M.O.R.:
(Middle of the Road Music). Common term to describe music considered to be "easy-listening", as opposed to Pop, Rock or Classical. Music in this category is often but not always, vocal, and usually of short duration (<5 min.)
LIGHTM
Light classics:
Classical Musical for general, rather than specialist appreciation. Examples of music in this category are instrumental music, and vocal or choral works.
CLASSICS
Serious classics:
Performances of major orchestral works, symphonies, chamber music etc., and including Grand Opera.
OTHER M
Other music:
Musical styles not fitting into any of the above categories. Particularly used for specialist music, of which Jazz, Rhythm & Blues, Folk, Country, and Reggae are examples.
Changing the RDS modes
When an RDS station is received, "PS", "PTY", "RT" and/or "CT" that correspond to the RDS data services employed by the station light up on the display. By pressing the RDS MODE/FREQ button once or more, you can change the display mode among the RDS modes employed by the received station in the order shown below. (The RDS mode not employed by the station cannot be selected.) Illumination of the indicator on the head of a name of RDS mode shows that the corresponding RDS mode is now selected.
- When an RDS station is received, do not press the RDS MODE/FREQ button until one or some names of RDS modes light up on the display. If the button is pressed before one or some names light up on the display, the mode cannot be changed. This is because the unit has not received all of the RDS data on the station yet.
- If no name of RDS mode lights up on the display, the mode cannot be changed.
Notes
- RDS data service cannot be utilized by this unit if the received signal is not strong enough. Especially, the RT (Radio Text mode) needs much data to be received, so it may occur that RT mode cannot be displayed even if other RDS modes (PS, PTY, etc.) are displayed.
- There may be a case that RDS data reception is not possible due to poor reception conditions. If so, press the TUNING MODE button so that "AUTO" goes off from the display. Though the reception mode is changed to monaural by this operation, when you change the display to an RDS mode, RDS data may be displayed.
- If the signal strength gets weakened by external interference during receiving an RDS station, the RDS data service may be cut off suddenly and "…WAIT" will light up on the display.
Calling a program of your desired program type from among preset RDS stations (PTY SEEK)
By designating a program type, the unit automatically searches all preset stations for an RDS station which broadcasts a program of that program type.
- There are 15 program types to classify RDS stations. For details, refer to page 14.
1 Turn the unit into the PTY SEEK mode.

Flashes.
- The program type of the station now being received or "NEWS" flashes on the display.
2 Select the desired program type.
3 Begin searching all preset RDS stations.

Flashes.
-
"PTY HOLD" lights up on the display.
-
If a station which broadcasts a program of the program type is found, the unit stops at the station and displays the frequency of the station. If the station has PS data, after that, it turns into the PS mode.
- If the called station is not the desired one, press the PTY SEEK START button once more.
The unit begins searching for another station which broadcasts a program of the same program type.
If no station is found, "NOTHING" appears and then returns to frequency display. If the station has PS data, after that, it turns into the PS mode.
- If the PTY SEEK START button is pressed once more during searching, this mode is canceled and turns into the frequency display. If the station has PS data, after that, it turns into the PS mode.
To cancel this function
If the PTY SEEK MODE button is pressed once more, the PTY SEEK mode is canceled and turns into the frequency display. If the station has PS data, after that, it turns into the PS mode.
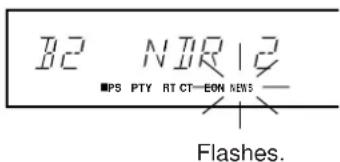
Making this unit call a program of your desired program type automatically when its broadcast starts
This function uses the EON (Enhanced Other Networks) data service on the RDS station network.
By only selecting a desired program type (NEWS, INFO, AFFAIRS or SPORT), this unit automatically searches all preset RDS stations for a station that broadcasts a program of that program type in the background, and, if found, receives a program when its broadcast starts in place of the program now being received.
- This function can be used only when an RDS station that employs the EON-PTY data service is received. (When such a station is received, "EON" lights up on the display.)
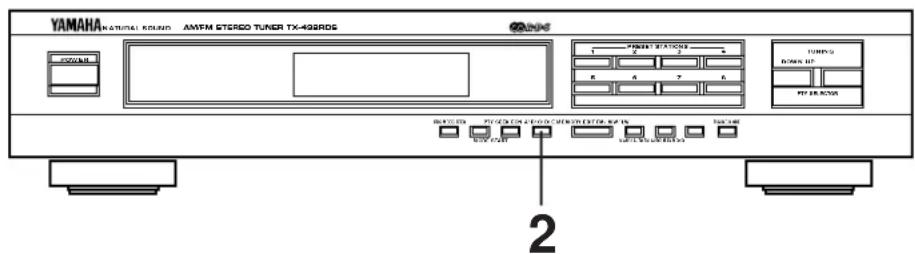
1 Make sure that "EON" is illuminated on the display.
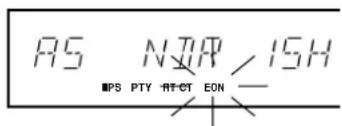
- If "EON" is not illuminated on the display, receive an (or another) RDS station so that "EON" lights up on the display.
2 Select a desired program type, NEWS, INFO, AFFAIRS or SPORT.
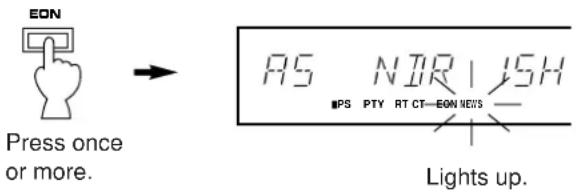
The search is performed among all preset RDS stations in the background. If a program is found, the program is automatically received when its broadcast starts.
3 When the broadcast of the called program ends, the previously received program (or another program on the same station) is recalled.
To cancel this function
Press the EON button once or more, so that no program type name lights up on the display.
TROUBLESHOOTING
If the unit fails to operate normally, check the following points to determine whether the fault can be corrected by the simple measures suggested. If it cannot be corrected, or if the fault is not listed in the SYMPTOM column, disconnect the power cord and contact your authorized YAMAHA dealer or service center for help.
| SYMPTOM | CAUSE | REMEDY | |
| FM | Crackling sounds from time to time (especially in weak signal areas). | Ignition noise from passing vehicles. | The FM antenna should be put up as high as possible, away from the road, and a coaxial cable used. |
| Noise from thermostats or other electrical equipment. | Attach a noise suppressor to the equipment causing the noise. | ||
| FM stereo reception is noisy. | Because of the characteristics of FM stereo broadcasts, this is limited to cases where the transmitter is far away or the antenna input is poor. | Check the antenna connections. Try using a high quality directional FM antenna. Set the TUNING MODE button to the manual tuning mode. | |
| The ST indicator flickers and reception is noisy. | Insufficient antenna input. | Use an antenna appropriate for the reception condition in your area. | |
| Not tuned correctly. | Tune again. | ||
| There is distortion and clear reception cannot be obtained even with a good FM antenna. | There is multipath interference. | Adjust antenna placement to eliminate multi-path interference. | |
| No stereo effect even with a stereo broadcast. | The TUNING MODE button is set to the manual tuning mode. | Set the button so that “AUTO” lights up on the display. | |
| A desired station cannot be tuned in with Automatic tuning. | The station is too weak. | Use the manual tuning mode. Use a high quality directional FM antenna. | |
| Previously preset stations can no longer be tuned in. | The tuner has been unplugged for a long period. | Repeat the presetting procedure. | |
| AM (MW/LW) | Insufficient sensitivity. | Weak signal or loose antenna connections. | Tighten the AM loop antenna connections and rotate it for best reception. |
| A desired station cannot be tuned in with Automatic tuning. | Use the manual tuning mode. | ||
| There are continuous crackling and hissing noises. | These noises result from lightning, fluorescent lamps, motors, thermostats and other electrical equipment. | Use an outdoor antenna and a ground wire. This will help somewhat but it is difficult to eliminate all noises. | |
| There are buzzing and whining noises (especially in the evening). | Another station is interfering with the received station. | This is impossible to remedy. | |
| A television set is being used nearby. | Relocate this unit away from the TV. |
SPECIFICATIONS
FM SECTION
Tuning Range. 87.5 to 108 MHz
50 dB Quieting Sensitivity (IHF) [Singapore and General models only]
75 ohms Mono 1.55 V (15.1 dBf)
75 ohms Stereo 21 V (37.7 dBf)
Usable Sensitivity [U.K. and Europe models only] (DIN) 75 ohms Mono (S/N 26 dB) .0.9 V 75 ohms Stereo (S/N 46 dB). .24 V
Image Response Ratio [General model] .40 dB [U.K., Europe and Singapore models] .80 dB
IF Response Ratio. 70 dB
Spurious Response Ratio [General model] .60 dB [U.K., Europe and Singapore models] .70 dB
Alternate Channel Selectivity [General model only]. 85 dB
Selectivity (two signals, 40kHz Dev., ± 300kHz ) [U.K., Europe and Singapore models only]................................70 dB
Signal-to-Noise Ratio [General model] (IHF) Mono. .82 dB Stereo. 76 dB
[U.K., Europe and Singapore models] (DIN-Weighted)
Mono (40 kHz Dev.) 75 dB
Stereo (40 kHz Dev.) 70 dB
Harmonic Distortion (1 kHz)
[Singapore and General models]
Mono/Stereo. 0.1%/0.2%
[U.K. and Europe models] (40 kHz Dev.)
Mono/Stereo. 0.1%/0.2%
Stereo Separation (1 kHz)
[Singapore and General models] 50 dB
[U.K. and Europe models] 50 dB
Frequency Response 30 Hz to 13 kHz. 0± 0.5 dB
AM (MW) SECTION
Tuning Range [General model] .530 to 1,710 kHz [U.K., Europe and Singapore models] .531 to 1,611 kHz Usable Sensitivity .200 V / m Selectivity .32 dB Signal-to-Noise Ratio .50 dB Image Response Ratio .40 dB Spurious Response Ratio .50 dB Harmonic Distortion; 1 kHz .0.3%
AM (LW) SECTION [U.K. and Europe models only]
Tuning Range 153 to 288 kHz
Usable Sensitivity .400 V/m
Selectivity .32 dB
Signal-to-Noise Ratio .50 dB
Image Response Ratio .40 dB
Spurious Response Ratio .50 dB
Harmonic Distortion; 1 kHz .0.3%
AUDIO SECTION
Output Level/Impedance (Fixed) FM (100%) mod. 1 kHz) [Singapore and General models] .900 mV/2.2 k-ohms [U.K.and Europe models]40 kHz Dev.) .500 mV/2.2 k-ohms AM (30%) mod.1 kHz) [Singapore and General models] .150 mV/2.2 k-ohms [U.K.and Europe models]. .200 mV/2.2 k-ohms
GENERAL
Power Supply [U.K., Europe and Singapore models]. 230V, 50 Hz [General model] 110-120/220-240V, 50/60 Hz
Power Consumption .7W
Dimensions (W x H x D). 435 x 86 x 278 mm (17-1/8" x 3-3/8" x 10-15/16")
Weight 3.2 kg (7 lbs. 1 oz.)
Accessories. Audio connection cord AM loop antenna Indoor FM antenna
- Specifications subject to change without notice.
CHARACTERISTIQUES
Cable coaxial de 75 ohms
Dimensions (L·H·P) 435·86·278 mm
Poids 3,2 kg
Accessoires Cable de connexion audio Cadre-antenne AM Antenne FM interieure
UKW/AM-Taste (FM/AM) TX-492
Mono (40 kHz Hub) 75 dB
Stereo (40 kHz Hub). 70 dB
Klirrfactor (1 kHz)
Knapp for snabbvalssorting (EDIT)
Harmonisk distorsion (1 kHz)
Harmonisk distortion 1 kHz .0.3%
Harmonisk distortion 1 kHz .0.3%
AUDIO-DEL
Utgangsniva/impedans (Fast)
FM (100% mod. 1 kHz)
10 PTY HOLD indicate Alleen TX-492RDS


- TX-492RDS only
- CONTENTS
- CAUTION: READ THIS BEFORE OPERATING YOUR UNIT.
- FREQUENCY STEP switch (General Model only)
- IMPORTANT
- WARNING
- For U.K. customers
- Special Instructions for U.K. Model
- CONNECTIONS
- Never plug in this unit and other components until all connections are completed.
- ANTENNA CONNECTIONS
- Connecting the indoor FM antenna
- Connecting the AM loop antenna
- ■ Optional outdoor FM antenna
- Notes for FM antenna installation
- ■ Optional outdoor AM antenna
- GND terminal
- CONNECTIONS TO THE AMPLIFIER
- NOTES ABOUT CONTROLLING THIS UNIT WITH THE REMOTE CONTROL TRANSMITTER
- Notes
- CONTROLS AND THEIR FUNCTIONS
- FRONT PANEL
- POWER switch
- Display panel
- Remote control sensor
- PRESET STATIONS buttons
- TUNING DOWN and UP buttons
- PTY SELECTOR buttons TX-492RDS only
- RDS MODE/FREQ button TX-492RDS only
- PTY SEEK MODE button TX-492RDS only
- ⑧ PTY SEEK START button TX-492RDS only
- EON button TX-492RDS only
- A/B/C/D/E button
- MEMORY (MAN'L/AUTO FM) button
- EDIT button
- FM/MW/LW button TX-492RDS
- FM/AM button TX-492
- TUNING MODE (AUTO/MAN'L MONO) button
- DISPLAY PANEL
- Preset station indicator
- Station frequency display
- AUTOindicator
- ST (STEREO) indicator
- Signal-level meter
- MEMO indicator
- RDS mode indicator TX-492RDS only
- EON indicato TX-492RDS only
- Program type name indicator TX-492RDS only
- PTY HOLD indicatc TX-492RDS only
- EDIT indicator
- TUNING OPERATIONS
- AUTOMATIC TUNING MANUAL TUNING
- PRESET TUNING
- MANUAL PRESET TUNING
- 2, 3
- To store stations
- To recall a preset station
- Memory back-up
- AUTOMATIC PRESET TUNING
- When the automatic preset tuning is finished
- TX-492 only
- EXCHANGING PRESET STATIONS
- Example)
- RECEIVING RDS STATIONS TX-492RDS only
- Displaying RDS data
- PS (Program Service name) mode:
- PTY (Program Type) mode:
- RT (Radio Text) mode:
- CT (Clock Time) mode:
- EON (Enhanced Other Networks) mode:
- Program types in the PTY mode
- NEWS News:
- AFFAIRS Current affairs:
- INFO Information:
- SPORT Sport:
- EDUCATE Education:
- Drama: Drama:
- CULTURE Culture:
- SCIENCE Science:
- VARIED
- Varied:
- POP M
- Pop:
- ROCK M
- Rock:
- M.O.R.M
- M.O.R.:
- LIGHTM
- Light classics:
- CLASSICS
- Serious classics:
- OTHER M
- Other music:
- Changing the RDS modes
- Calling a program of your desired program type from among preset RDS stations (PTY SEEK)
- To cancel this function
- Making this unit call a program of your desired program type automatically when its broadcast starts
- TROUBLESHOOTING
- SPECIFICATIONS
- FM SECTION
- AM (MW) SECTION
- AM (LW) SECTION [U.K. and Europe models only]
- AUDIO SECTION
- GENERAL
- CHARACTERISTIQUES
- UKW/AM-Taste (FM/AM) TX-492
- Knapp for snabbvalssorting (EDIT)
- AUDIO-DEL
- PTY HOLD indicate Alleen TX-492RDS
Brand : YAMAHA
Model : TX492RDS
Category : Home cinema amp