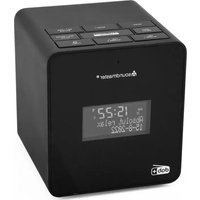
UR 922 - Alarm clock radio Soundmaster - Free user manual and instructions
Find the device manual for free UR 922 Soundmaster in PDF.
Questions des utilisateurs sur UR 922 Soundmaster
0 question sur cet appareil. Repondez a celles que vous connaissez ou posez la votre.
Poser une nouvelle question sur cet appareil
Download the instructions for your Alarm clock radio in PDF format for free! Find your manual UR 922 - Soundmaster and take your electronic device back in hand. On this page are published all the documents necessary for the use of your device. UR 922 by Soundmaster.
USER MANUAL UR 922 Soundmaster
soundmaster® highvie

DEUTSCH
ENGLISH
FRANÇAIS
NEDERLANDS
ROMÁNA
ESPÁNOL
Do not dispose of this product with the normal household waste at the end of its life cycle. Return it to a collection point for the recycling of electrical and electronic devices. This is indicated by the symbol on the product, user manual or packaging.
The materials are reusable according to their markings. By reusing, recycling or other forms of utilization of old devices you make an important contribution to the protection of our environment.
Please contact your local authorities for details about collection points.

WARNING
Risk of electric shock Do not open!

Caution: To reduce the risk of electric shock, do not remove the cover (or back). There are no user serviceable parts inside. Refer servicing to qualified service personnel.

This symbol indicates the presence of dangerous voltage inside the enclosure, sufficient enough to cause electric shock.
This symbol indicates the presence of important operating and maintenance instructions for the device.
Safety, Environmental and Setup Instructions
- Use the device in dry indoor environments only.
- Protect the device from humidity.
- Do not open the device. RISK OF ELECTRIC SHOCK! Refer opening and servicing to qualified personnel.
- Connect this device to a properly installed and earthed wall outlet only. Make sure the mains voltage corresponds with the specifications on the rating plate.
Make sure the mains cable stays dry during operation. Do not pinch or damage the mains cable in any way. - A damaged mains cable or plug must immediately be replaced by an authorized service center.
In case of lightning, immediately disconnect the device from the mains supply.
Children should be supervised by parents when using the device. - Clean the device with a dry cloth only.
Do NOT use CLEANING AGENTS or ABRASIVE CLOTHS!
- Do not expose the device to direct sunlight or other heat sources.
Install the device at a location with sufficient ventilation in order to prevent heat accumulation. - Do not cover the ventilation openings!
- Install the device at a safe and vibration-free location.
- Install the device as far away as possible from computers and microwave units; otherwise radio reception may be disturbed.
- Do not open or repair the enclosure. It is not safe to do so and will void your warranty. Repairs only by authorized service/ customer center.
- Only use mercury and cadmium-free batteries.
- Used batteries are hazardous waste and NOT to be disposed of with the household waste!!
- Return the batteries to your dealer or to collection points in your community.
- Keep batteries away from children. Children might swallow batteries.
Contact a physician immediately if a battery was swallowed.
- Check your batteries regularly to avoid battery leakage.
- Batteries shall not be exposed to excessive heat such as sunshine, fire or the like.
- CAUTION: Danger of explosion if battery is incorrectly replaced
Replace only with the same or equivalent type

Used batteries are hazardous waste and NOT to be disposed of with the household waste! As a consumer you are legally obligated to return all batteries for environmentally responsible recycling - no matter whether or not the batteries contain harmful substances *).
Return batteries free of charge to public collection points in your community or to shops selling batteries of the respective kind
Only return fully discharged batteries.
*) marked Cd = cadmium, Hg = mercury, Pb = lead

ENGLISH


1) SNOOZE / SLEEP BUTTON
2) |<< / MONTH-DAY/°C/°F BUTTON
3) INFRARED SENSOR
4) >>| / YEAR/DST BUTTON
5) ON/OFF BUTTON
6) PROJECTION UNIT
7) AM/FMBAND BUTTON
8) ALARM 1 RADIO / BUZZ BUTTON
9) ALARM 2 RADIO / BUZZ BUTTON
10) ALARM SET BUTTON
11) MODE BUTTON
12) FOCUS ADJUSTMENT FOR PROJECTION
Plug the AC power cord to a household outlet AC source. This unit is equipped with a battery back up system, it requires a 3V CR2032 that lithium battery. Insert the battery in the battery compartment, making certain that the positive and negative (+ and -) battery terminals are attached to the corresponding terminals on the plate in the battery compartment. If an AC power failure occurs; the clock and timer memory continue running. When the AC power resumes, the clock switches back to AC again.
1. TIME AND CALENDAR SETTING
A. Setting Time and Calendar - press mode set button (11) in normal mode and keep depress over 2 seconds to enter time set mode, after enter the setting mode, press mode set button (11) to change the mode cycle as follows:
Normal Year Month Day 12/24 H RTC Hour RTC Min Normal
Action (during data adjustment):
- Press | < < /MONTH - DAY/^ C/^ F| button (2) to adjust data backward.
- Press >>| / YEAR / DST button (4) to adjust data forward
- Keep depress | < < or > > | button for 2 seconds to enable auto forward
B. Setting Alarm 1 and Alarm 2 - press Alarm set button (10) during normal mode and keep depress over 2 seconds to enter alarm set mode, after enter the setting mode, press Alarm set button (10) to change the mode cycle as follows:
Normal AL 1 Hour AL 1 Min AL 1 weekend Alarm AL 2 Hour AL 2 Min AL 2 weekend alarm Normal
ENGLISH
Action (during data adjustment)
- Press | < < /MONTH - DAY/^ C/^ F| button (2) to adjust data backward.
- Press >>| / YEAR / DST button (4) to adjust data forward
- Keep depress | < < or > > | button for 2 seconds to enable auto forward
2. SETTING ALARM OUTPUT AND ALARM ON/OFF
A. Change the alarm output
Press AL 1 (8) / AL 2 (9) button to music position to select wake up by Radio, set to Buzzer position to select wake up by Buzzer, set to Alarm off position to disable all alarm.
Select the Display Auto off / low / high dimmer (17) to the Auto off mode, alarm wake up the display is auto turn on.
3. ALARM DURATION AND SNOOZE FUNCTION
Alarm Duration - Buzzer alarm or Radio alarm will continue output for 30 minutes if no key press, then it will stop automatically and wait for same alarm time on next day.
Action for Snooze:
- During alarming, press Snooze button (1) will enable snooze function, Buzzer alarm or Radio alarm will stop.
- Snooze interval is 9 minute (not incl. second offset)
- Snooze will continue unless press On/off button (5) to alarm off of Buzzer alarm or Radio Alarm stop automatically after 30 minutes.
- Select the display Auto Off / Low / High dimmer (17) to the auto off mode, during alarming display auto turn on, press snooze / sleep button (1) will enable snooze function, butter alarm or radio / display will stop & off.
4. CHANGE DISPLAY CONTENT
A. Press 1 < < / MONTH-DAY / ^o C / ^o F button (2) during normal can switch to display Month-Day after 5 seconds timeout and return back to display time.
B. Press >>| / YEAR / DST button (4) during normal can switch to display Year, after 5 seconds timeout and return back to display time.
5. SLEEP FUNCTION
During radio on mode, press Snooze/Sleep button (1) to turn on Sleep mode, the sleep time will keep flashing by 5 seconds, within 5 seconds and press Sleep button can change the duration from 90 min - 15 min. Press On/Off button (5) to cancel sleep function.
DST - Daylight saving time
Press >>/YEAR / DST button (4) and hold for 3 seconds to toggle on and off DST function.
RADIO OPERATION
- Press the On/Off button (5) to turn radio On.
- Select AM/FM band press the AM/FM band button (7)
- Select the station using the Tuning Knob (15)
- Turn the volume knob (16) to adjust volume as required.
- Press the On/Off button (5) to turn radio off.
Note:
- The AM band use an internal directional aerial, rotate the radio for best reception.
- Ensure that the FM antenna (22) is completely unrolled and extended for best FM reception.
RESET
The reset button (21) is located on the back of unit. Use a ballpoint pent to press it whenever you change the batteries, or unit is not performing as expected. This will return all settings to default value, and you will lose any stored data (alarm and clock settings).
PROJECTION UNIT
- Focus setting: Adjust the projection clock brightness/focus by turning the brightness/focus adjustment wheel (12) until the projected time is clearly shown on the ceiling or wall.
- To flip projected image by 180^ , press 180^ flip button (18)
INFRARED SENSOR FUNCTION
- The radio Off mode, infrared display alarm 1 and alarm 2 time


Hand on top sensor (3) within 1 second to Hand on top sensor (3) within 1 second to show the alarm 1 time show the alarm 2 time
- The radio On mode, use the infrared sensor to turn sleep function on
- Hand on top of sensor (3) with 2 seconds to turn the sleep on, the word "Slp" showing on the LED display. Sleep time from 15-90 minutes. Press (5) to cancel sleep function.
- The alarm On mode, use the infrared sensor to turn snooze function on.
- Hand on top of sensor (3) within 1 second snooze off for 9 minutes.
- The radio On mode, use the infrared display radio frequency
- Hand on top of sensor (3) within 1 second to show the radio frequency.
- The radio Off mode, select the display Auto off / Low / High dimmer (17) to the Auto Off mode, the LCD display will automatically Off in 15 seconds.
- Hand on top of sensor (3) within 1 second to turn the LCD display on.
- Press all key buttons to turn the display on.


SPECIFICATIONS
FM frequency 87,5-108 MHz
AM frequency 525-1620 KHz
Power consumption 5 W
Battery backup 1 x 3V CR2032 flat lithium battery
Power source AC 230V 50Hz
PROTECTION DE L'ENVIRONNEMENT

Frequence FM 87,5-108 MHz
Frequence AM 525-1620 kHz
Consommation 5 W
EasyManual